

Fluent Forms uses two pages to display payment history and payment receipt.
- You need to select the pages and add the instructed shortcodes accordingly.
- The following are the shortcodes :
- Shortcode for the Payment History page is – [fluentform_payments]
- Shortcode for the Payment Receipt page is – [fluentform_payment_view]
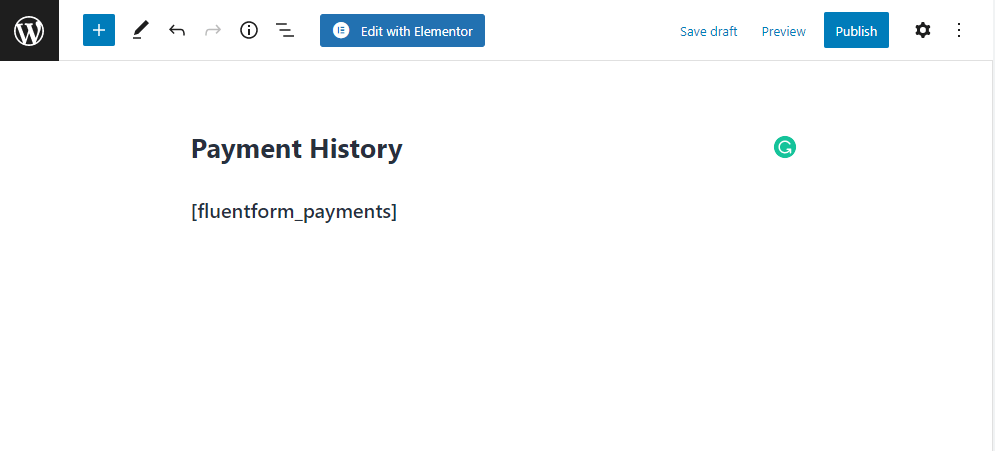
Payment History
- Create a page for payment history first.
- Add the instructed shortcode ( [fluentform_payments] ) accordingly.
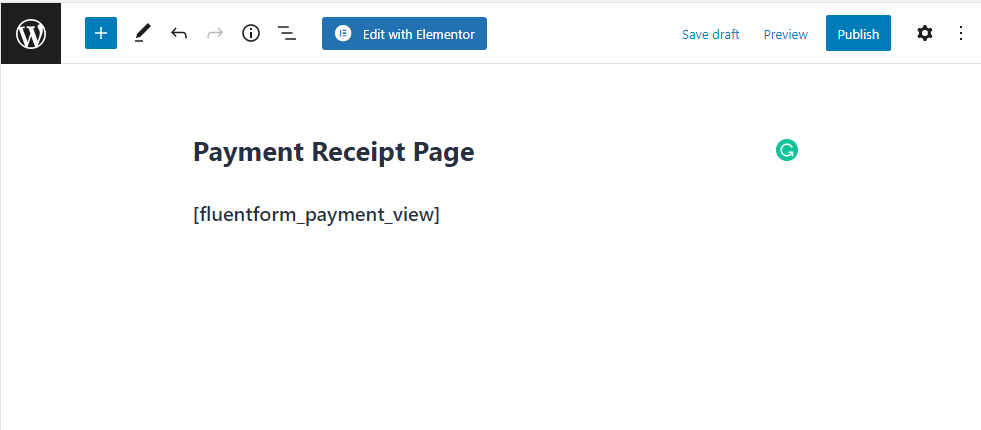
Payment Receipt Page
- Now, create a page for the Payment Receipt page.
- Following the same procedure, add the given shortcode ( [fluentform_payment_view] ) for the Receipt Page also.
Pages & Subscription Management
- Select these pages from the Global Settings → Payment → Settings → Pages & Subscription Management option, as seen in the screenshot below:
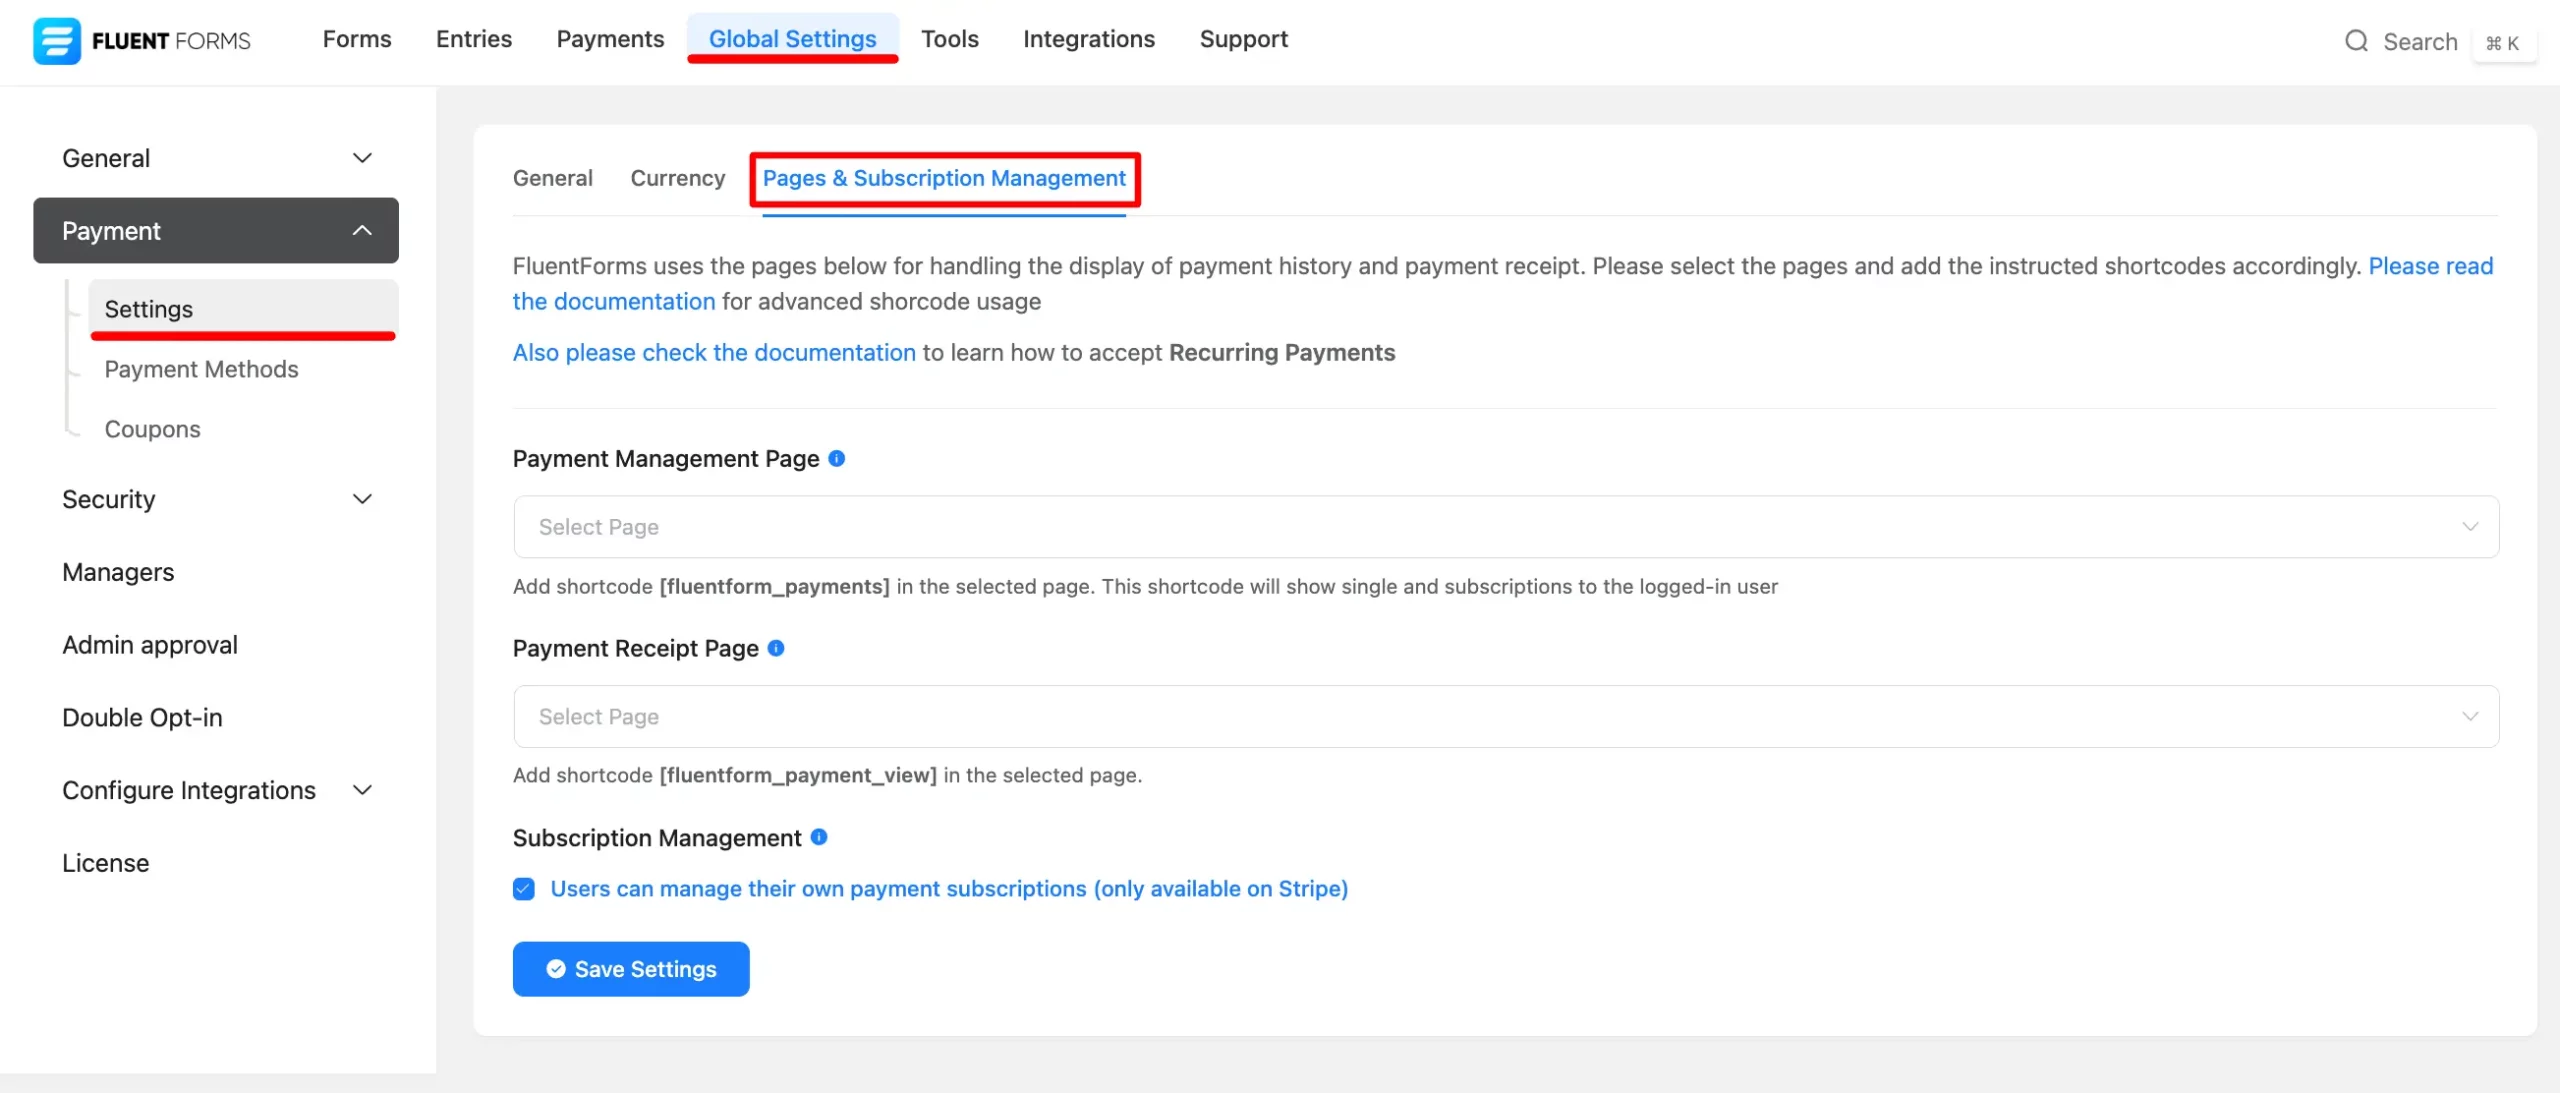
- Additionally, you can enable Subscription Management for Stripe by ticking the last checkbox.
- Now hit the Save Settings button.
Go to the Payment History Page you created a time ago.
This is where you’ll see all of your payment histories. It will only be available to logged-in users.
Payment History Page
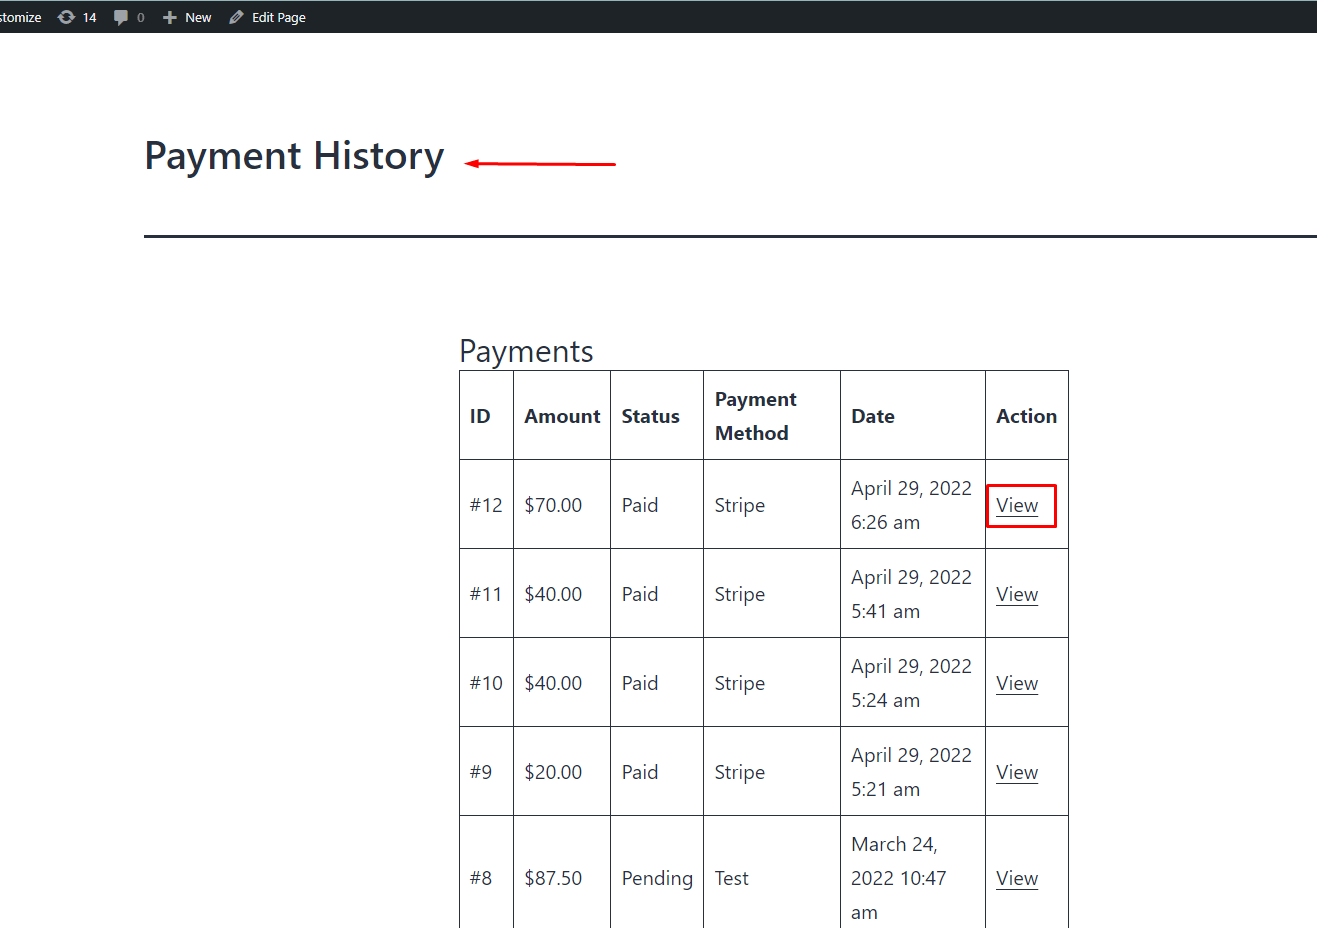
- Selecting View from the Payment History list, you may enter your Payment Receipt Page.
Cancel Subscriptions
- Users can cancel Subscriptions by clicking the Cancel button on the payment management history page, as seen in the screenshot below –

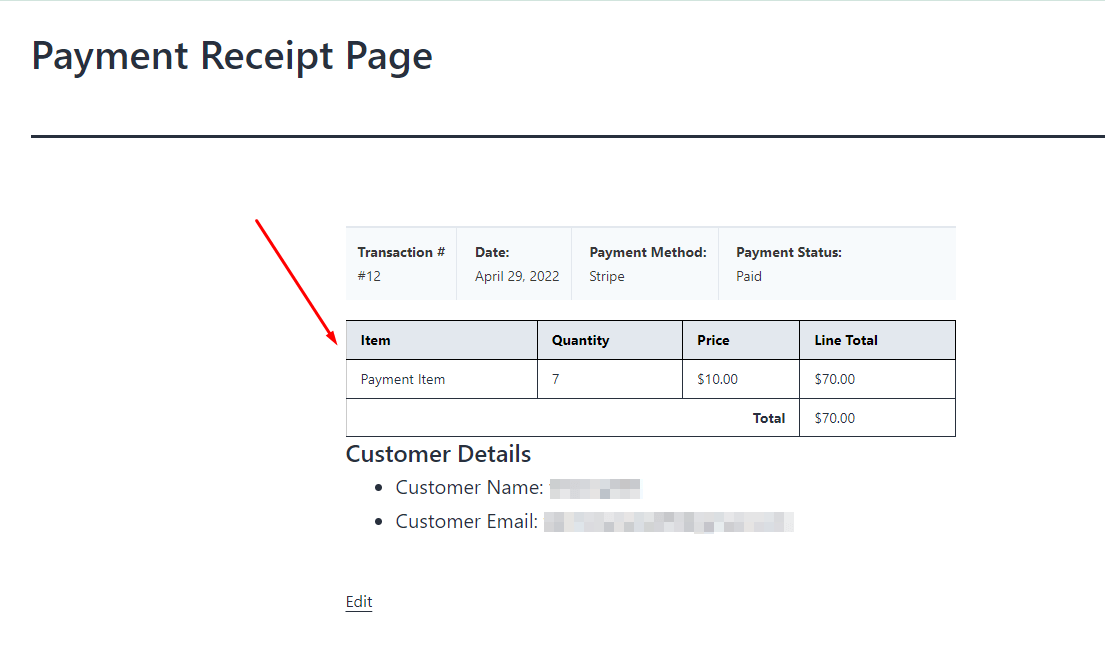
Payment Receipt Page
Here you can see your individual data of specific payment history.
You may simply manage your Payment Management Settings by following these instructions.