
Fluent Forms makes it simple to connect your Salesflare account and send emails to your users. Here is how to integrate your Salesflare account easily with Fluent Forms Pro by following the steps mentioned below –
Steps to integrate Salesflare with Fluent Forms
- Activate the Salesflare Module
- Get your Salesflare API URL & API key
- Use the API key & API URL with the Salesflare module
- Create/Use a Form with Fluent Forms
- Setup the integrations feed & Map the input fields
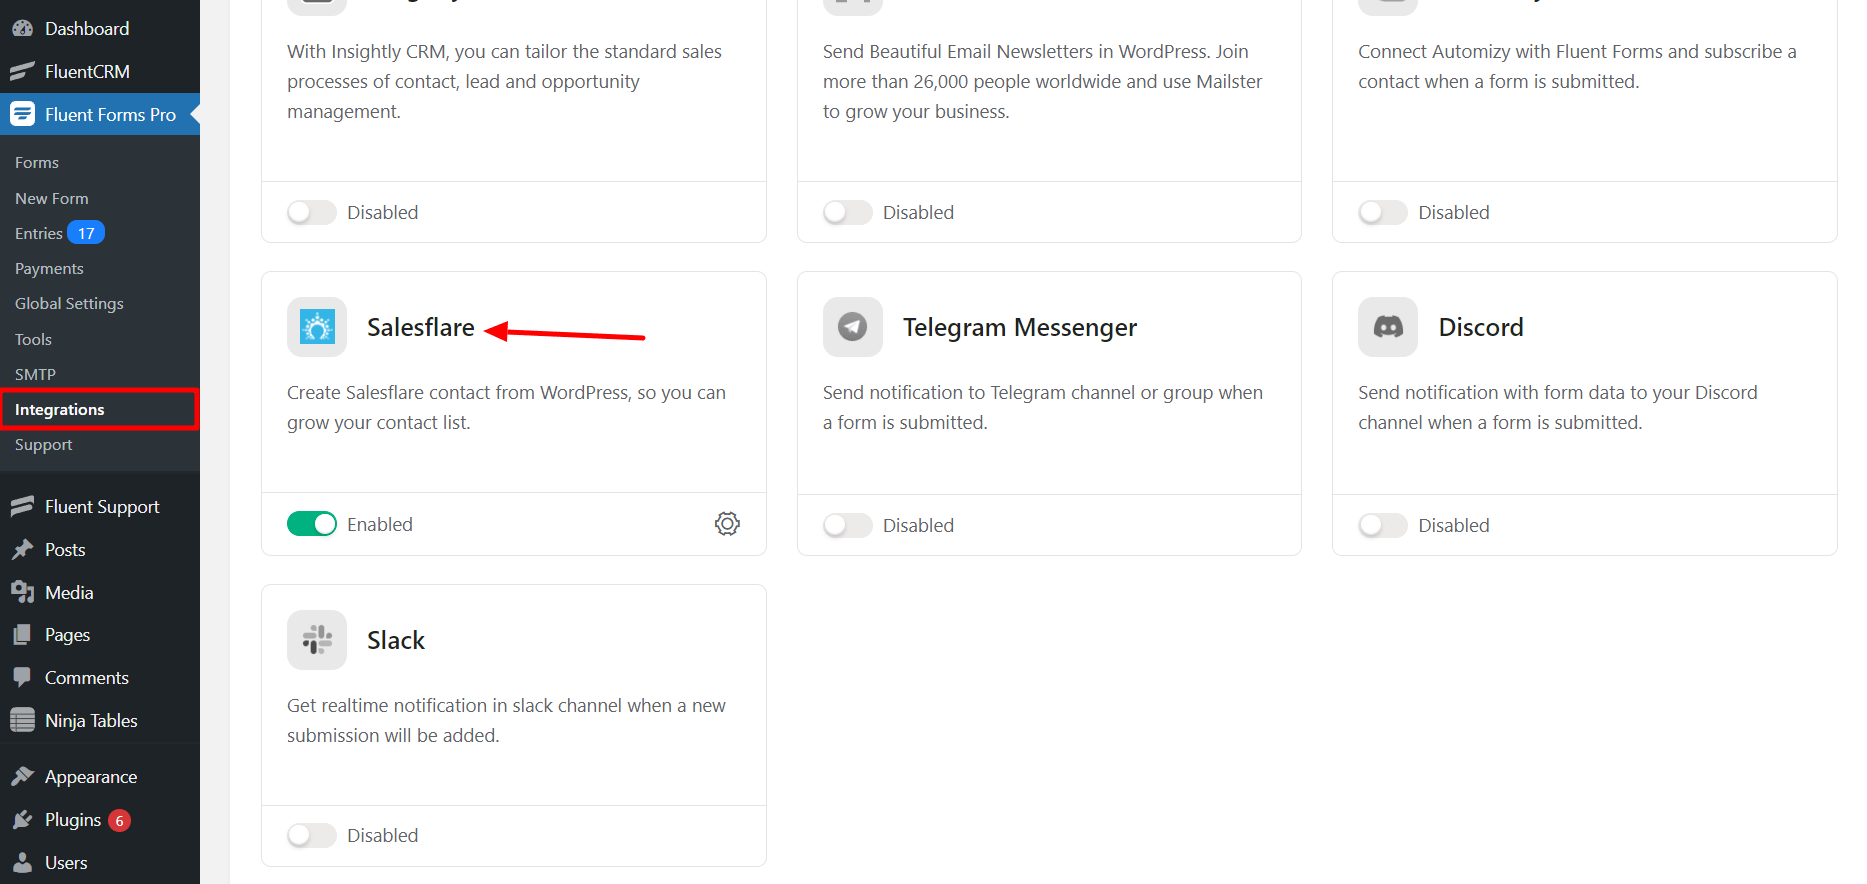
- Go to the Integrations Modules from Fluent Forms (WordPress admin panel sidebar) and turn on the Salesflare Module, as shown in the screenshot below.
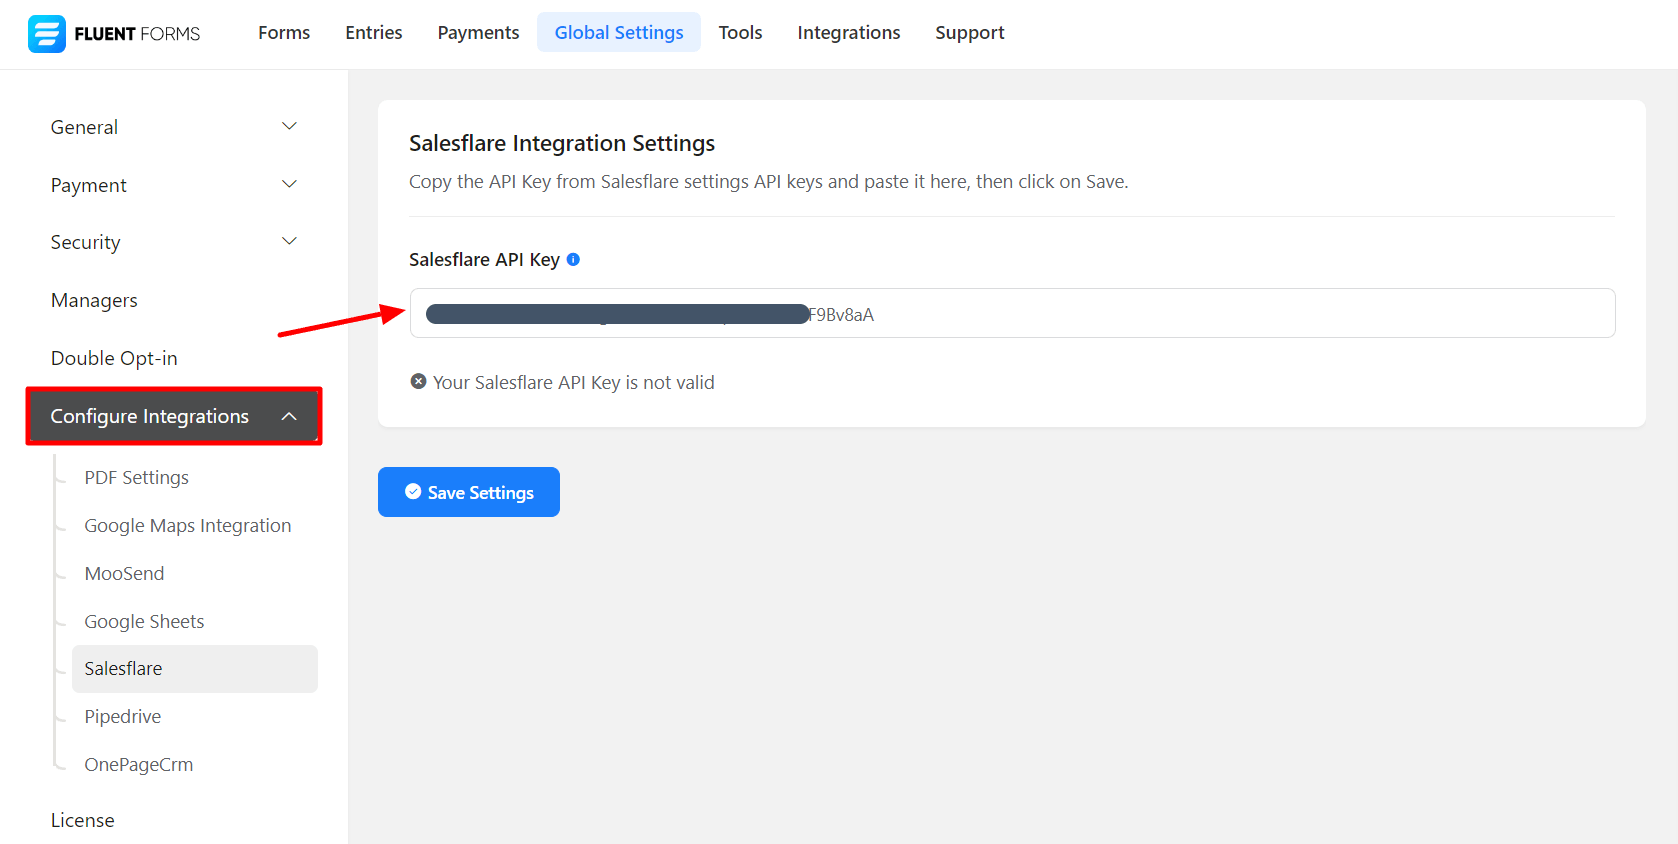
- Hover over Fluent Forms Pro and go to Settings, as shown in the screenshot below. Select Salesflare, and you will be asked for the Salesflare API Key here.
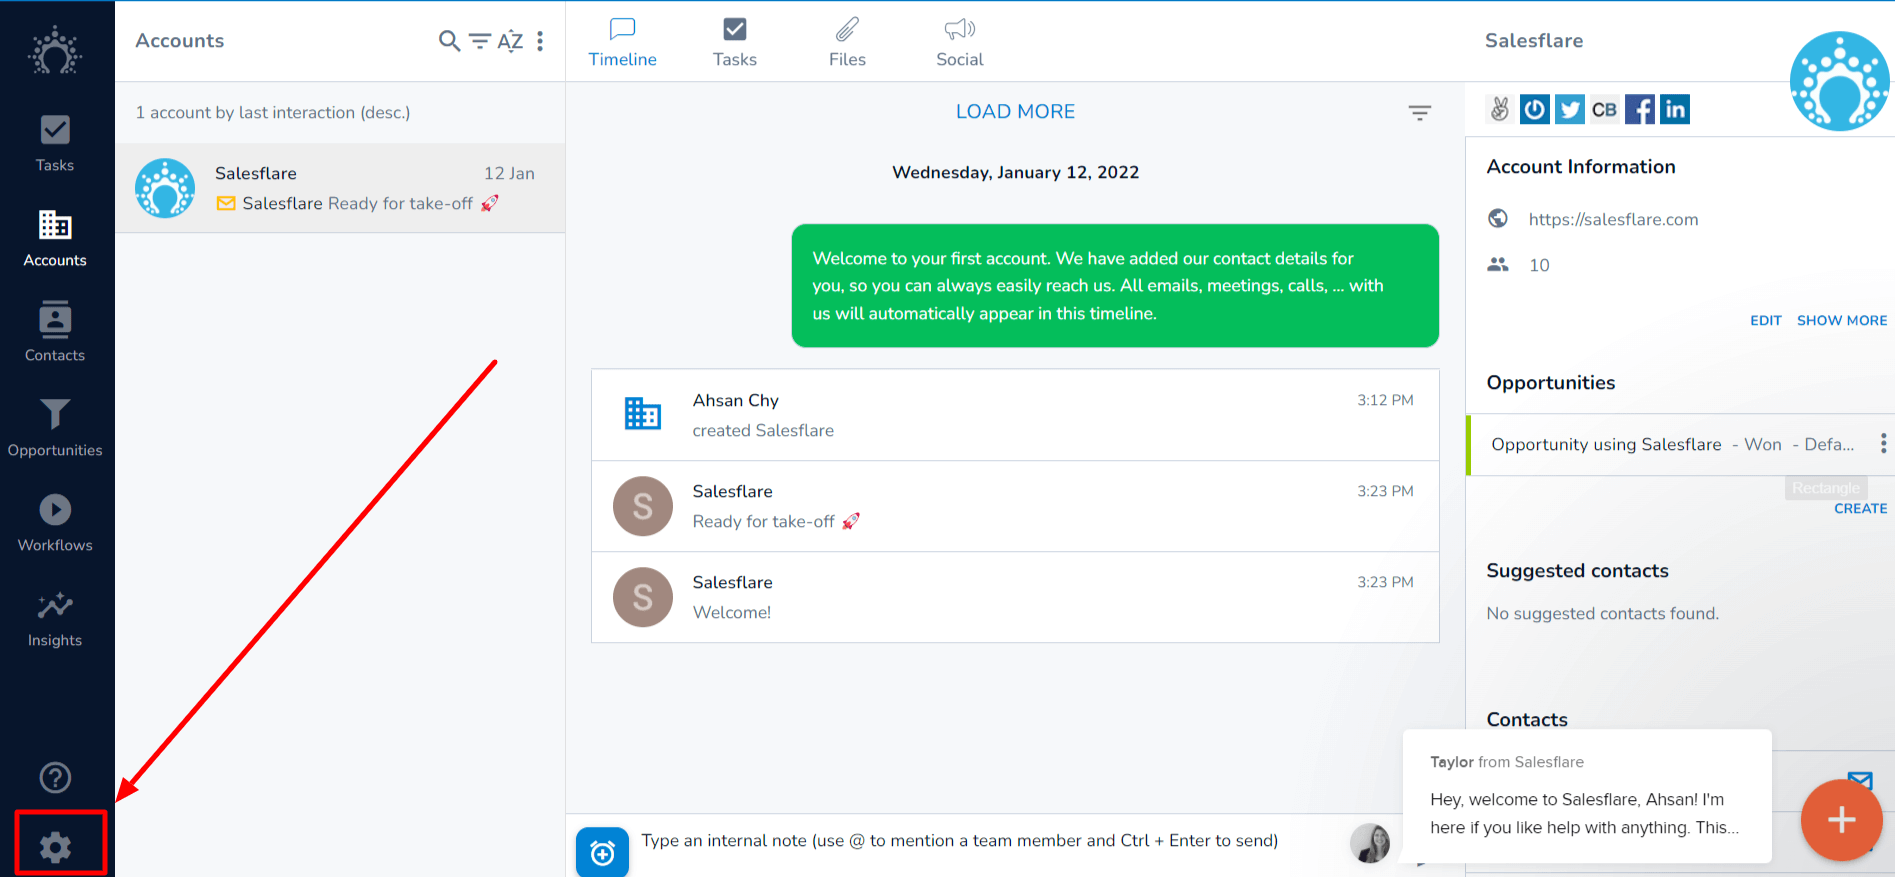
- Sign up or log in to your Salesflare account and navigate to the settings.
- If you don’t have a Salesflare account, you can sign up here.
- Click on the API keys options and create a new API key.
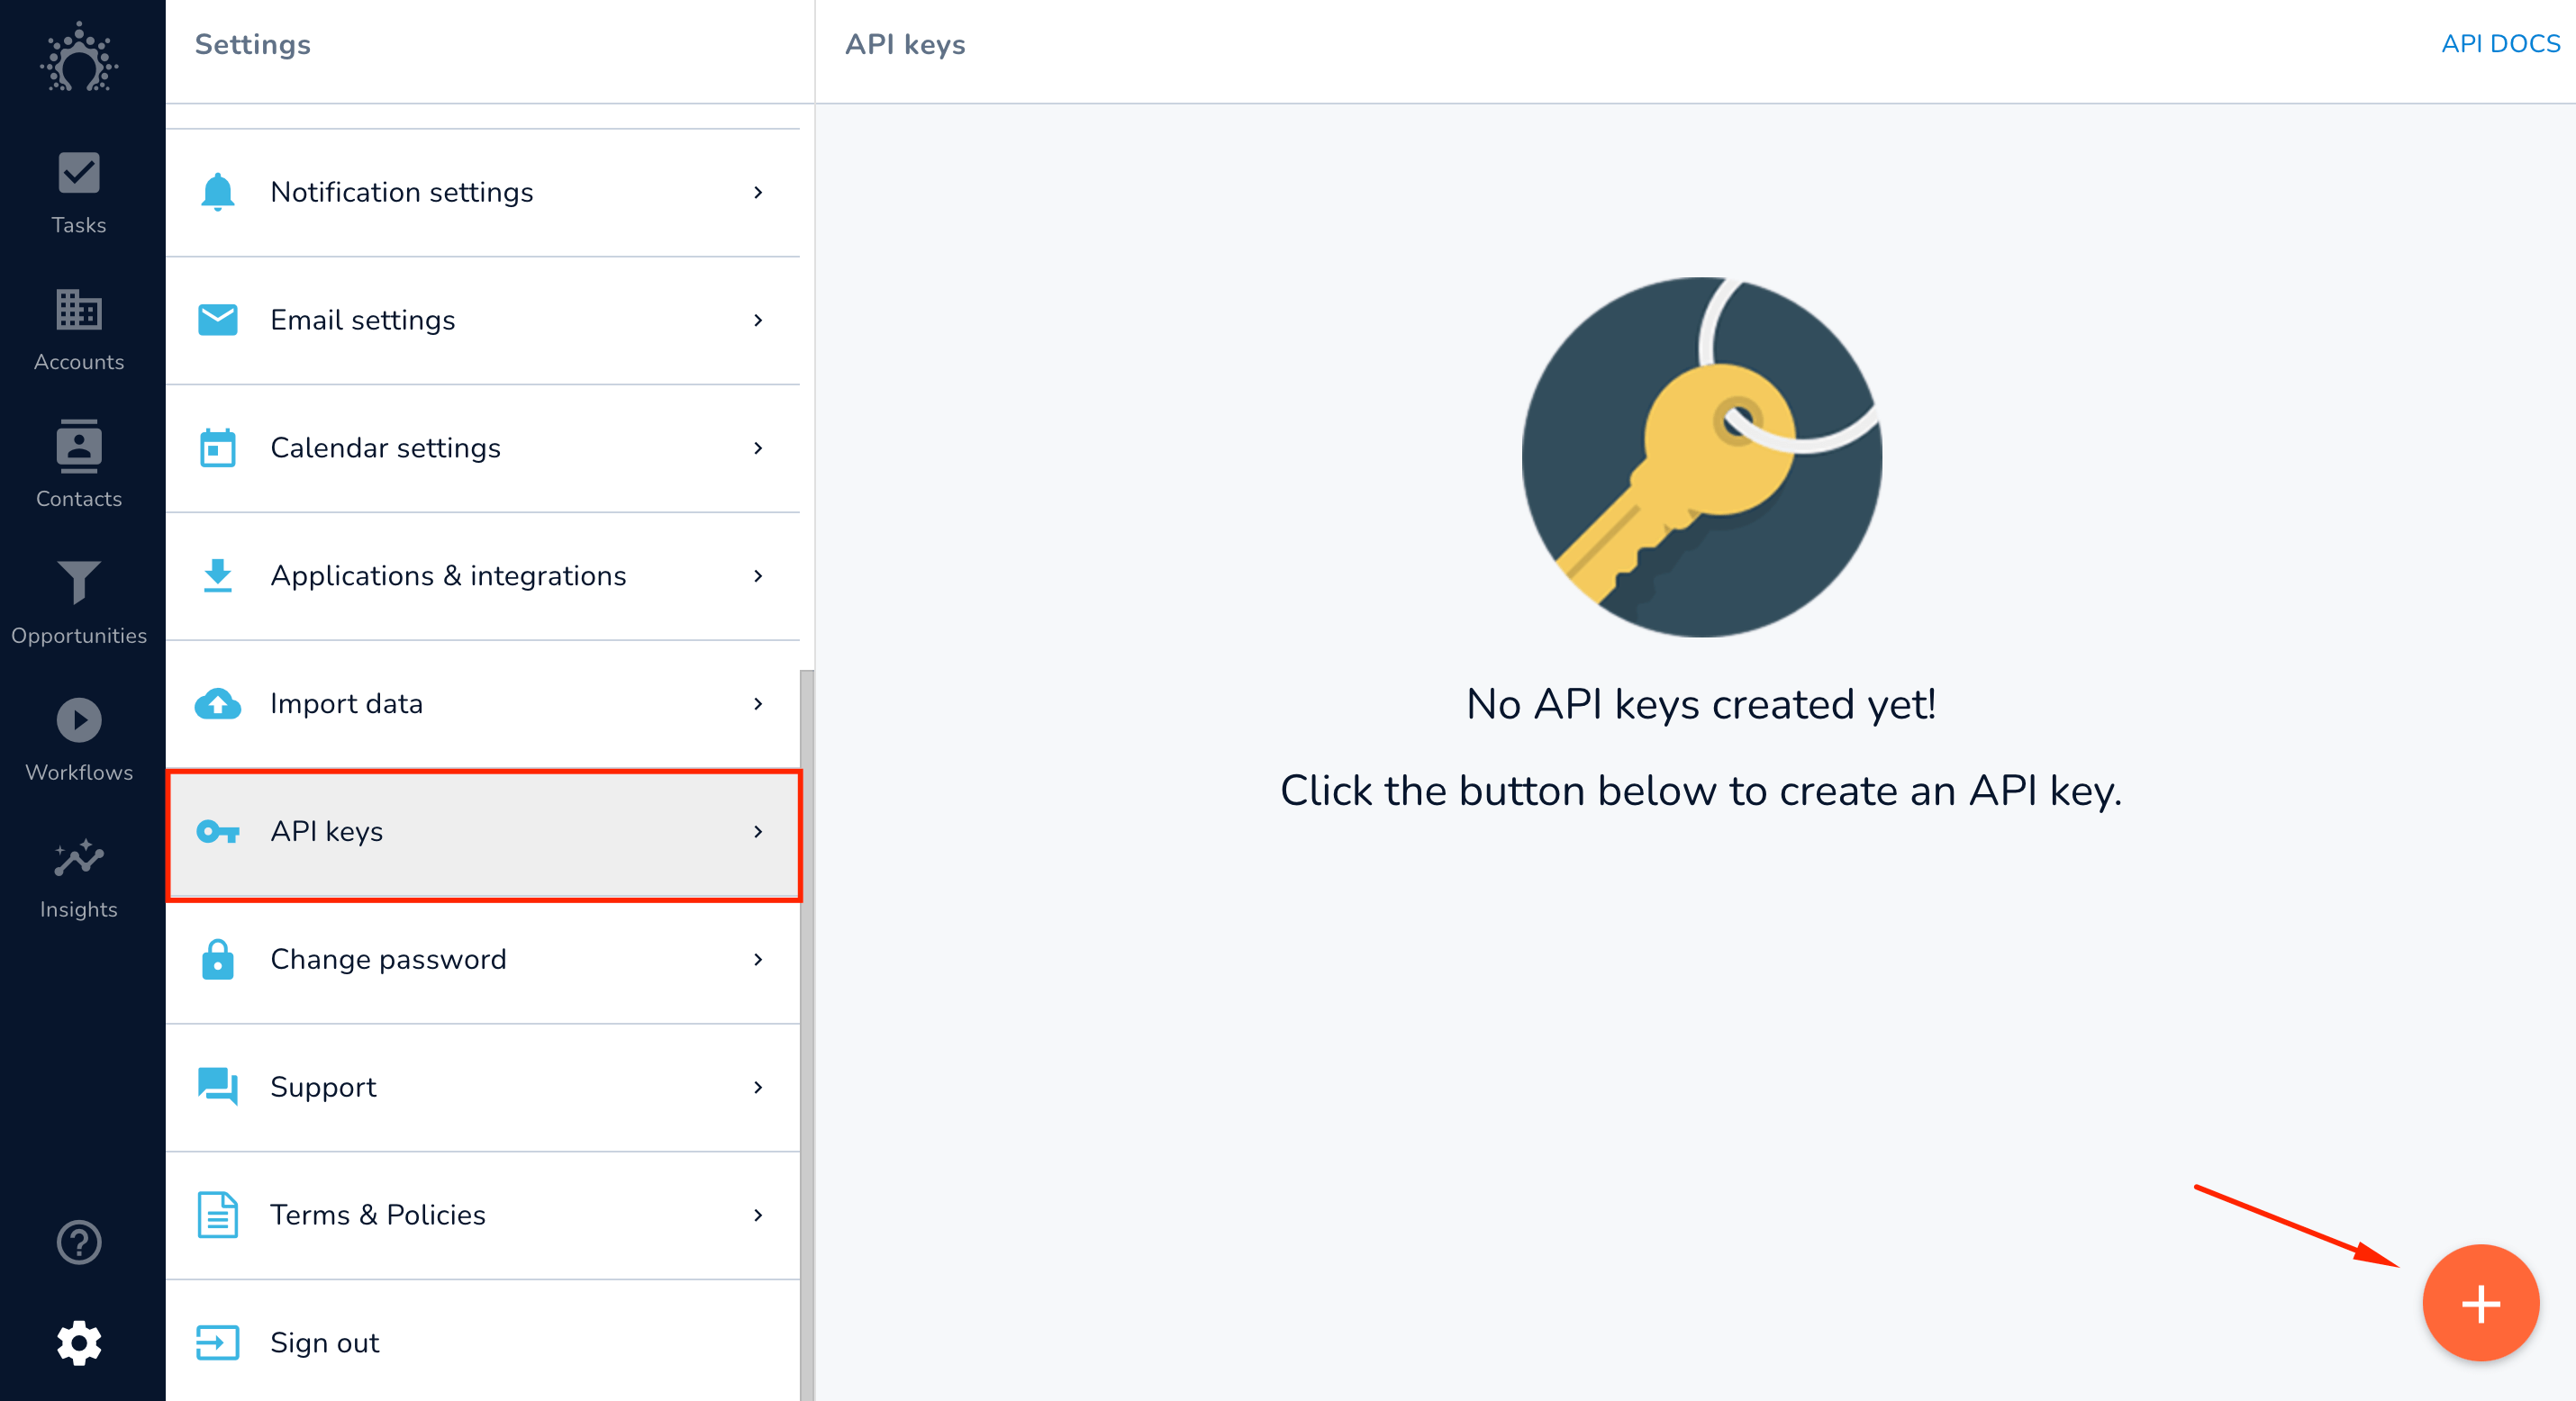
- Give your API key a name, and then copy the API key.
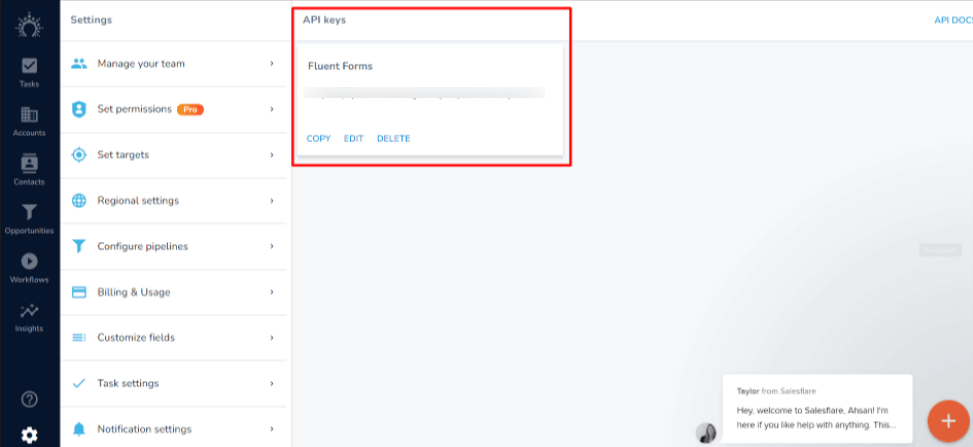
- Paste the API key to the API key field in the Fluent Forms Salesflare settings.
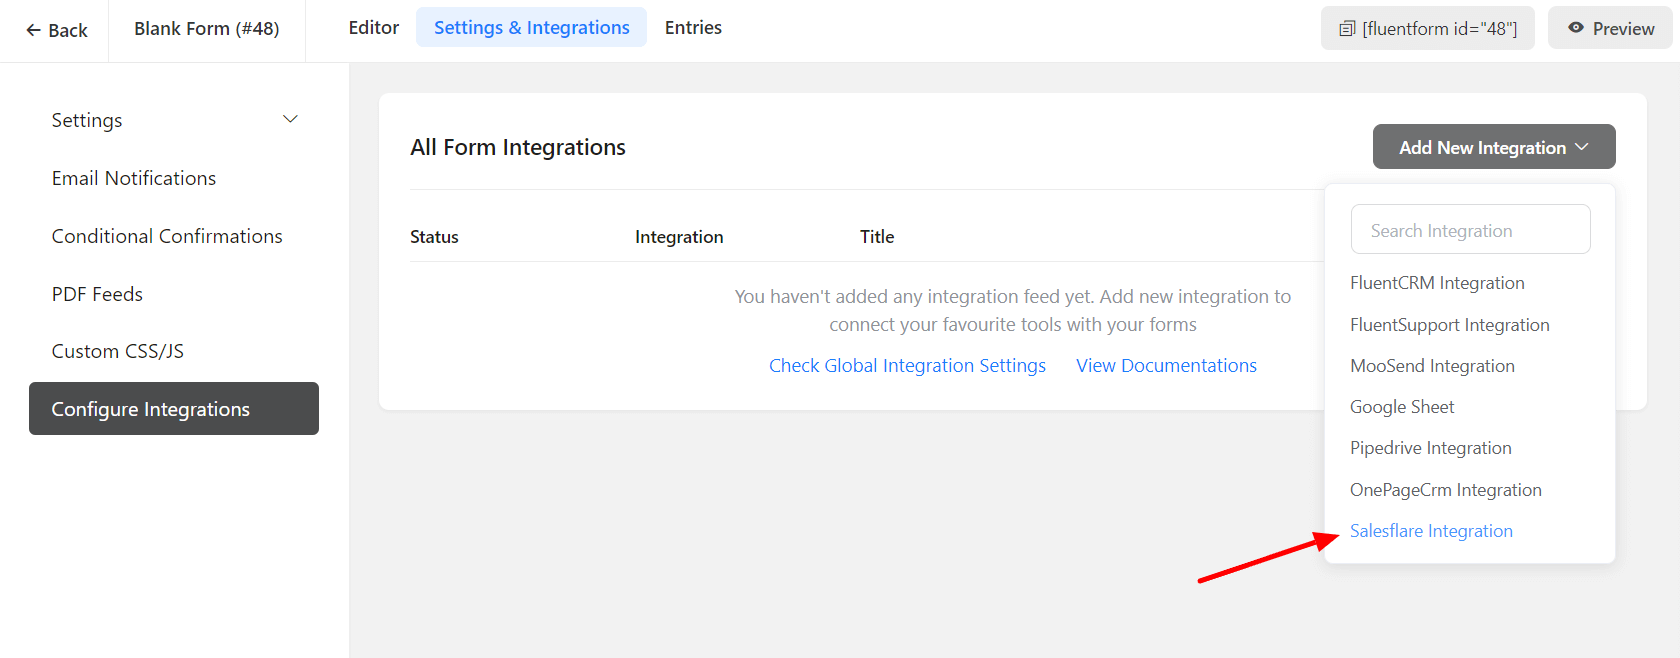
- Now go to the particular form’s settings for the entries you want to be listed in Salesflare. Click on Add New Integration and select Salesflare Integration from the dropdown.
- Provide a Name to your feed and map all form fields with the Salesflare field.
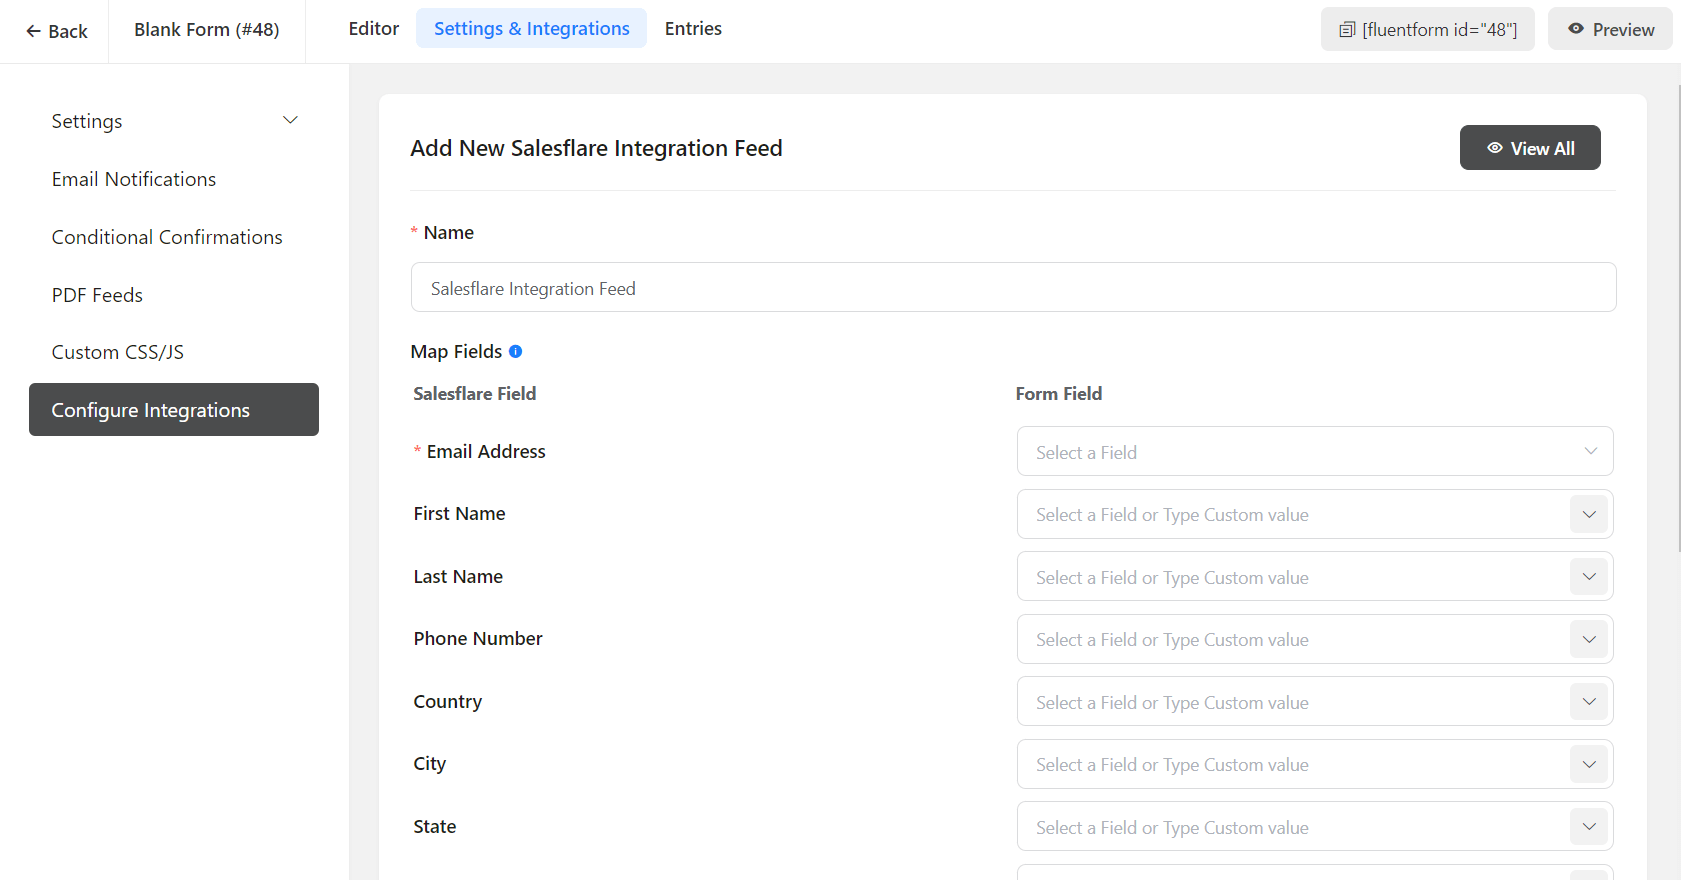
- Enable Conditional Logic if required. Learn more about Fluent Forms Conditional logic here.
- Click on Save Feed when the configuration is done.