
Broadcast your Fluent Forms Submission to any web API endpoint with the powerful webhook module.
Integrate any Webhook with Fluent Forms Pro by following the steps mentioned below –
Steps to integrate Webhook with Fluent Forms
- Activate the Webhooks Module
- Create/Use a Form with Fluent Forms
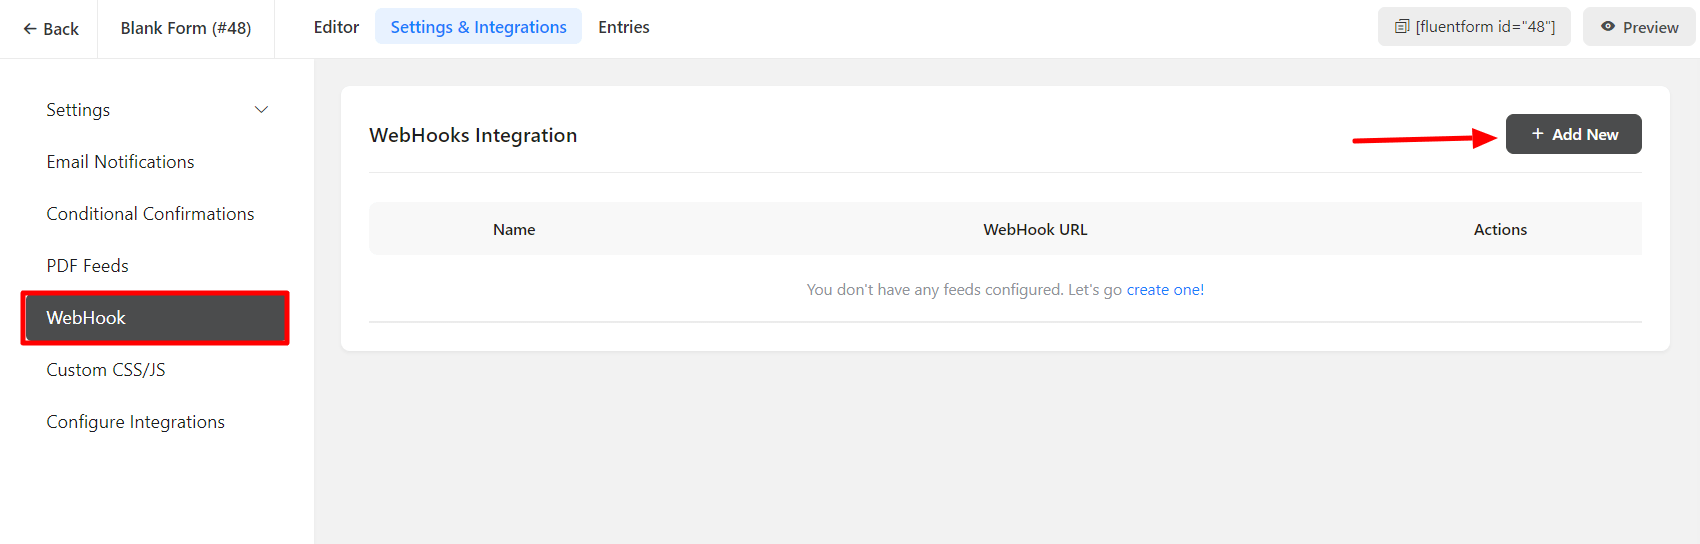
- Create a new Webhook from the Form Settings
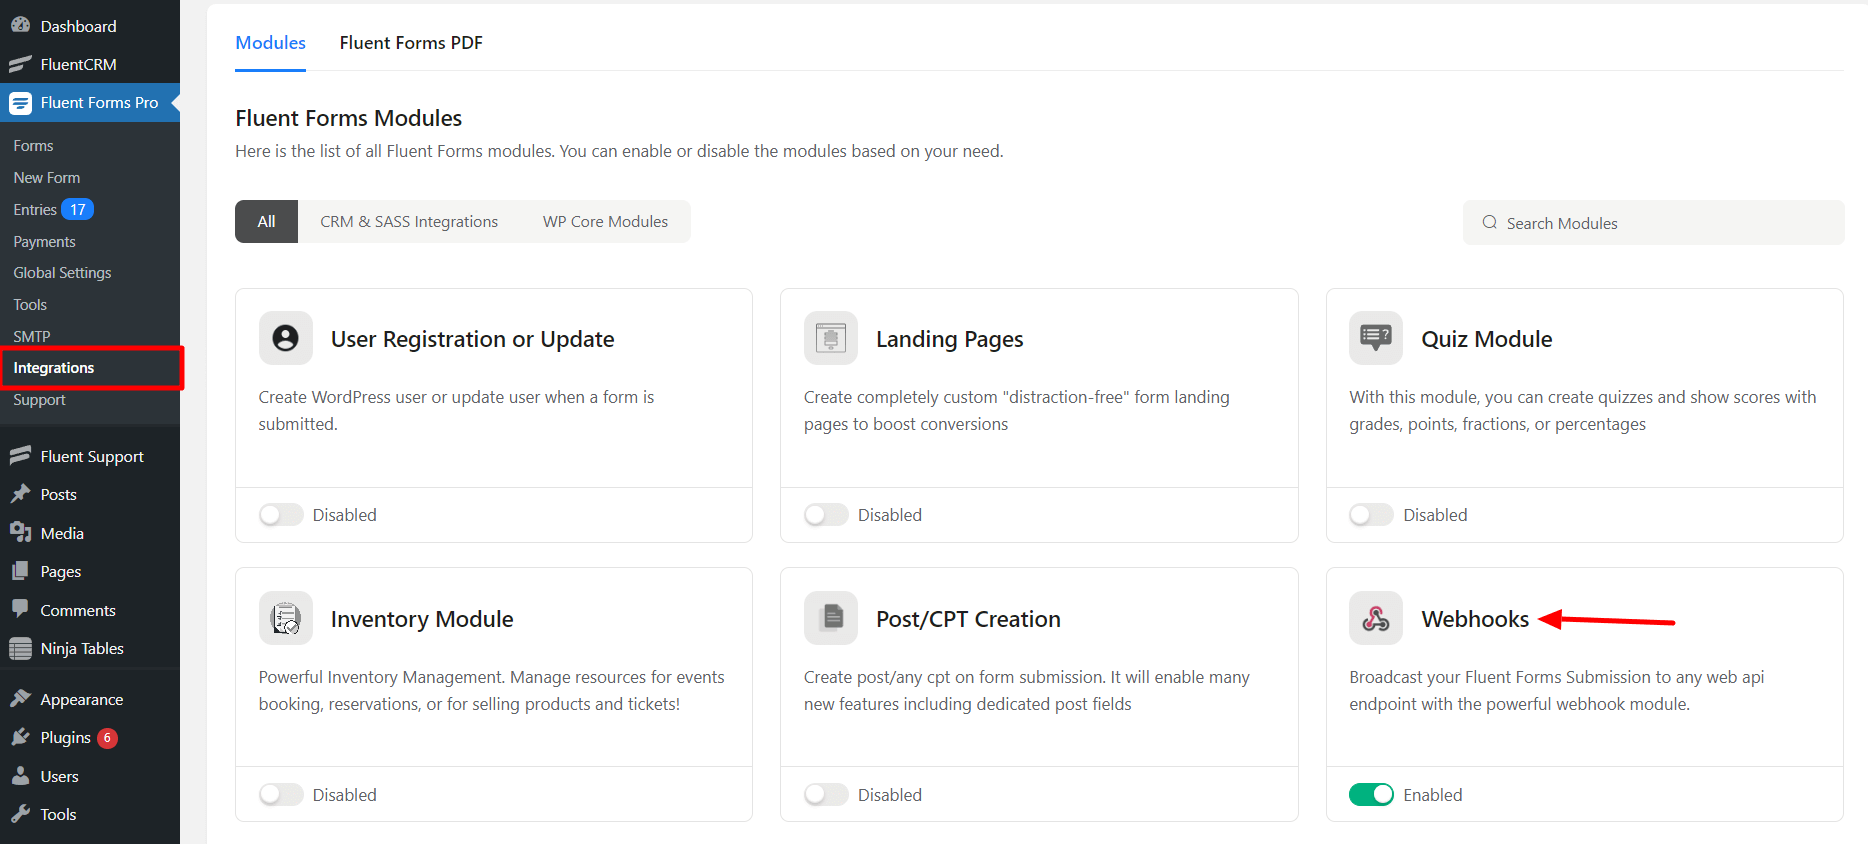
- Go to the Integration Modules from Fluent Forms (WordPress admin panel sidebar) and turn on the Webhooks Module, as shown in the screenshot below-
- Now, go to the settings of the particular form for the entries which you want to be listed in Webhooks. Click on Add New and select Webhooks Integration from the dropdown.
- Configure the Webhook.
- Name: Enter a feed name to identify this setup uniquely.
- Request URL: Enter the URL to be used in the Webhook request (The Webhook recipient provides the URL).
- Request Method: Select the HTTP method used for the webhook request. Choose from GET, POST, PUT, PATCH, or DELETE here.
- Request Format: Select the format for the webhook request. Select between FORM and JSON from the drop-down menu.
- Request Header: Select if any headers should be sent with the webhook request.
- Request Body: Select if all fields or select fields should be sent with the webhook request.
- Request Fields: If Selected Fields have opted into the previous option, this one will appear. Choose from the fields you want to be in the Request Body.
- Conditional Logic: Enable Conditional Logic if required. Learn more about Fluent Forms Conditional logic here.
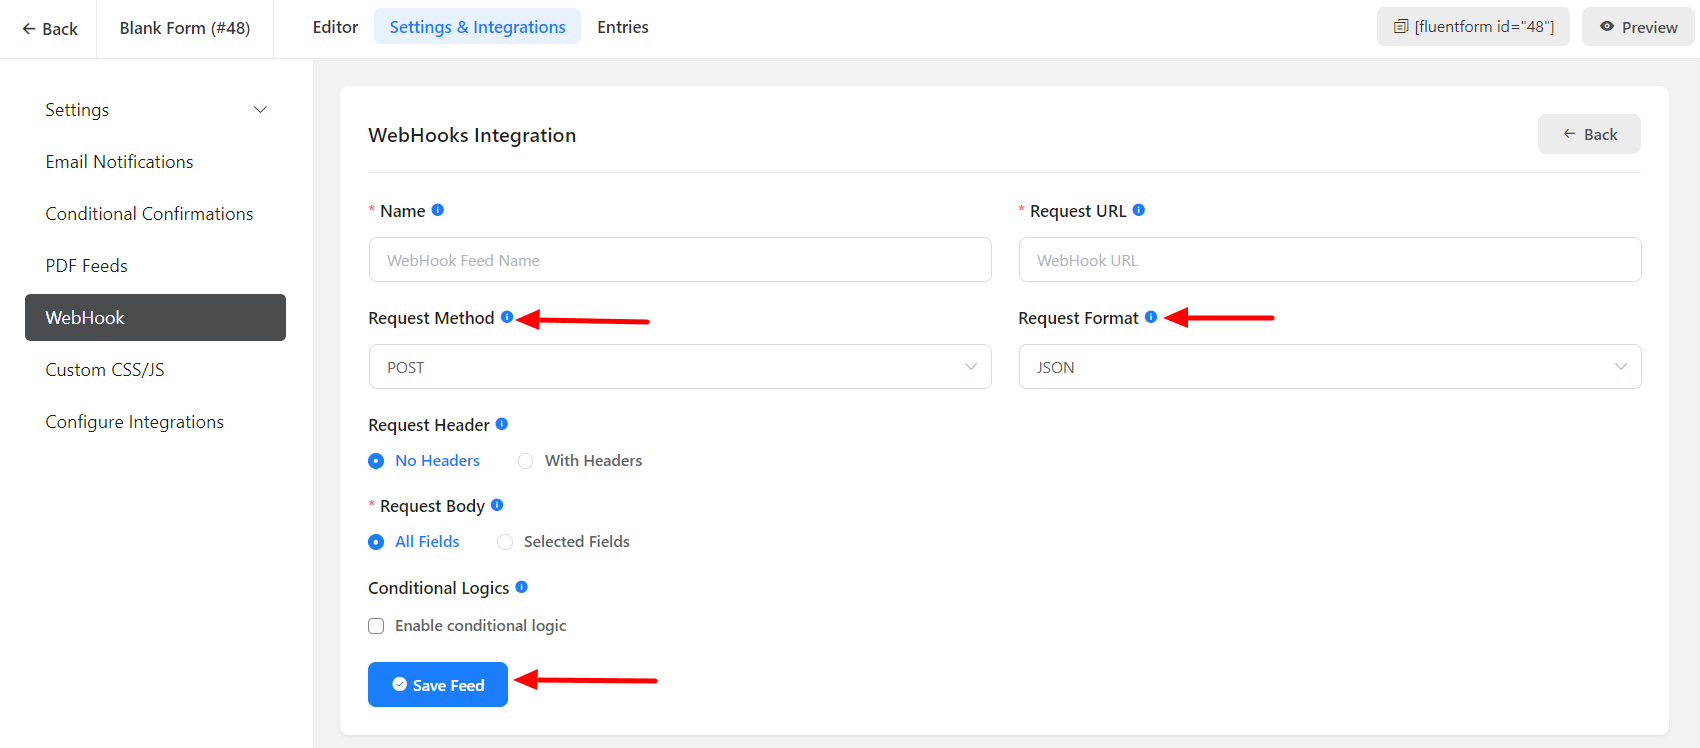
- Click on Save Feed when the configuration is done.