To accept payments with WordPress an entire eCommerce store is not required. With Fluent Forms, you can accept simple payments, sell goods or services and allow users to pay through credit cards or PayPal.
- Fluent Forms is the most advanced WordPress form plugin and includes a drag-and-drop form builder. Once you’ve installed and activated Fluent Forms, creating a payment form takes just a few minutes.
Don’t forget to enable the Payment Module before creating the payment form.
Create a new payment form
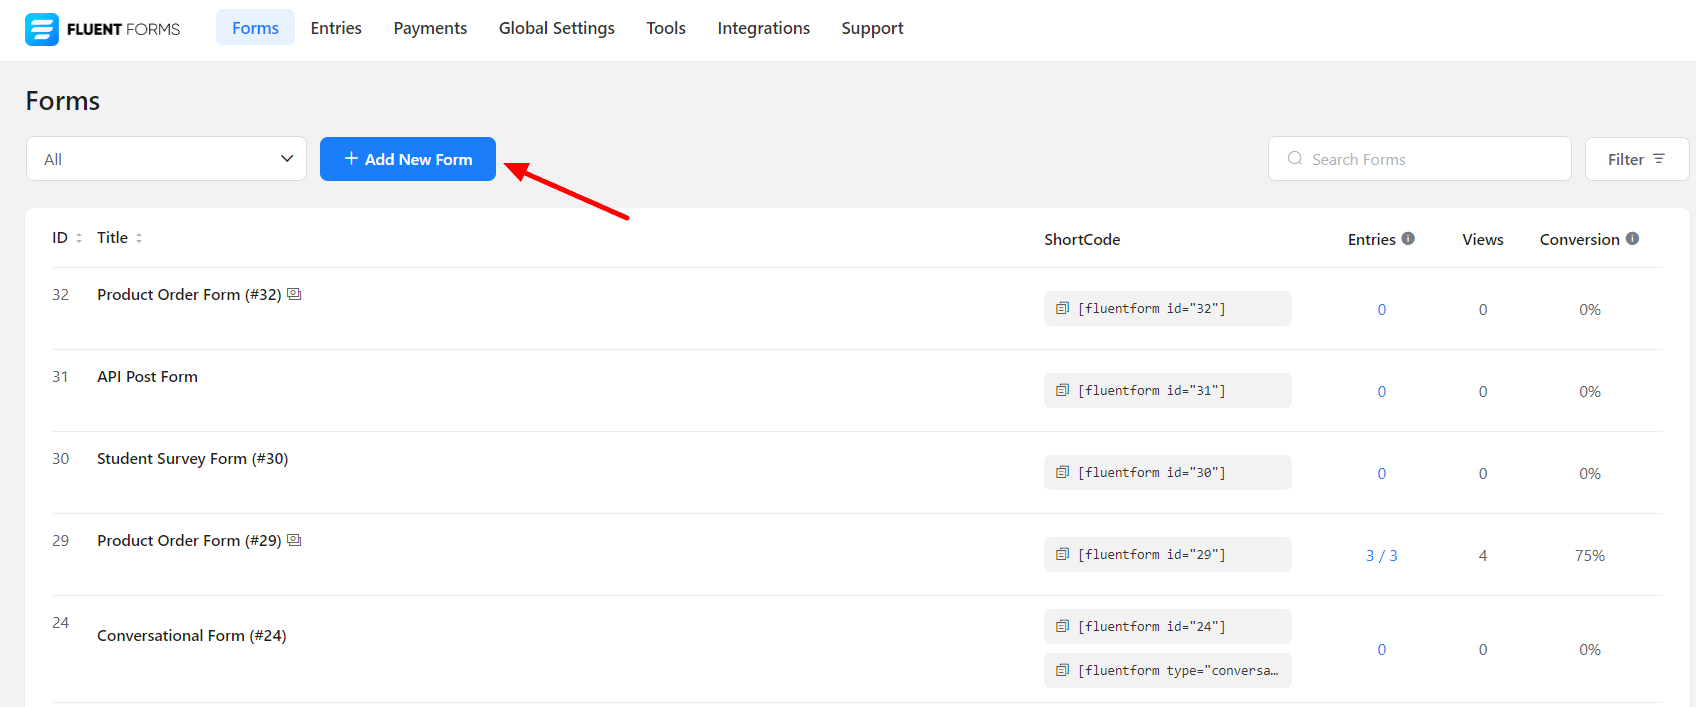
- First, go to the new Fluent Forms menu that appears in your WordPress dashboard’s left sidebar. Once you are there, you will find there are two buttons available to create a new form.
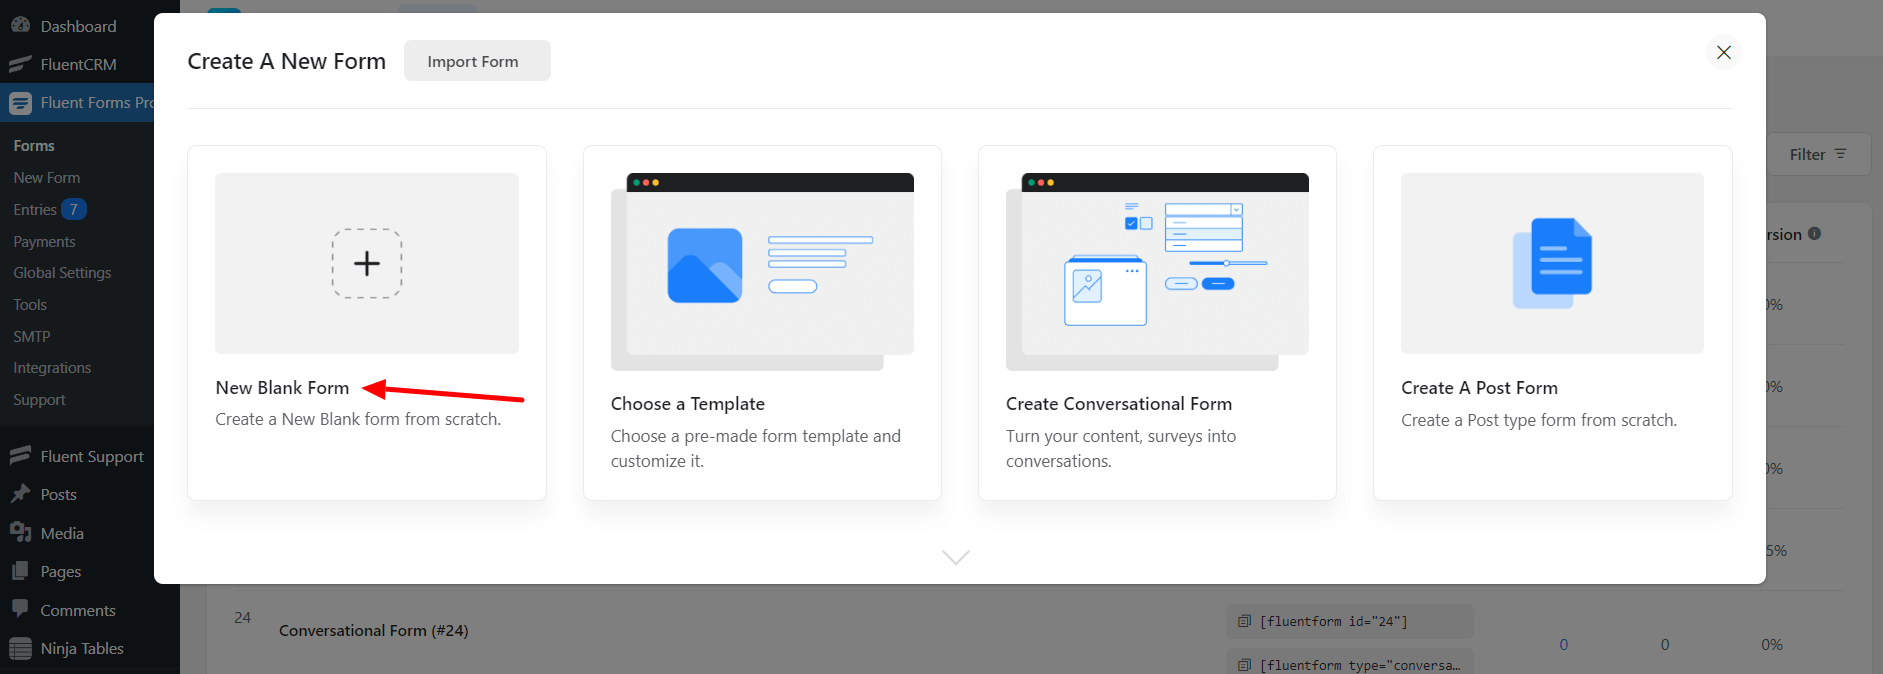
- After clicking the add new form button, a pop-up will come to select any form template already created so that you can get started right away.
- You can choose any form from the templates. For demonstration purposes, I will choose a blank form for this article.
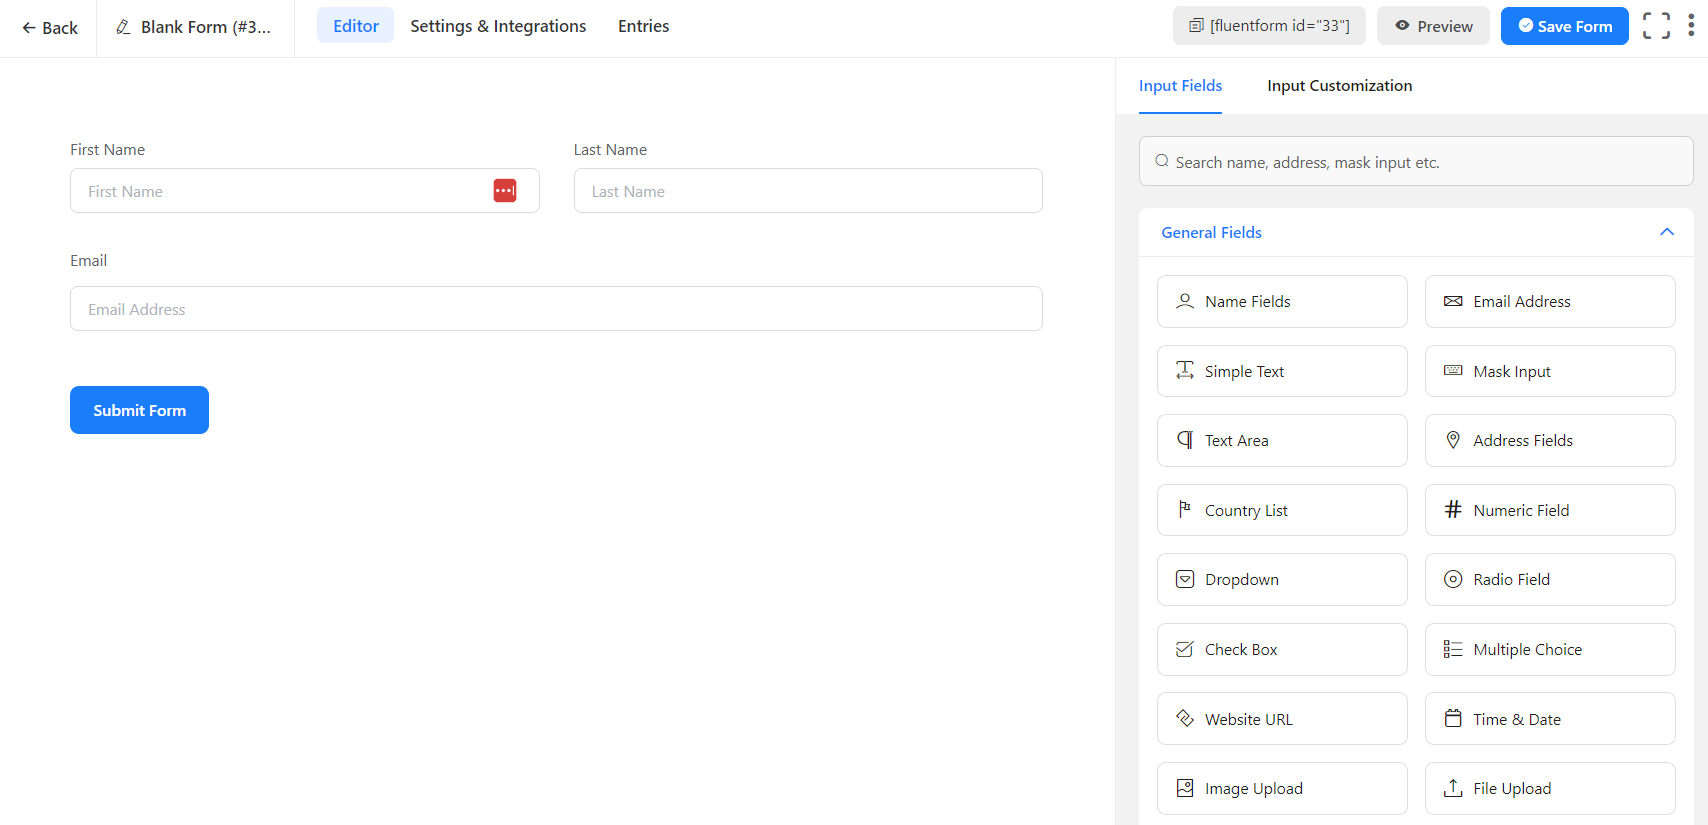
- Quickly add the name and email field into the form, just like creating any other form. You can learn more about how to create a simple contact form with Fluent Forms here.
Add the payment fields to the form
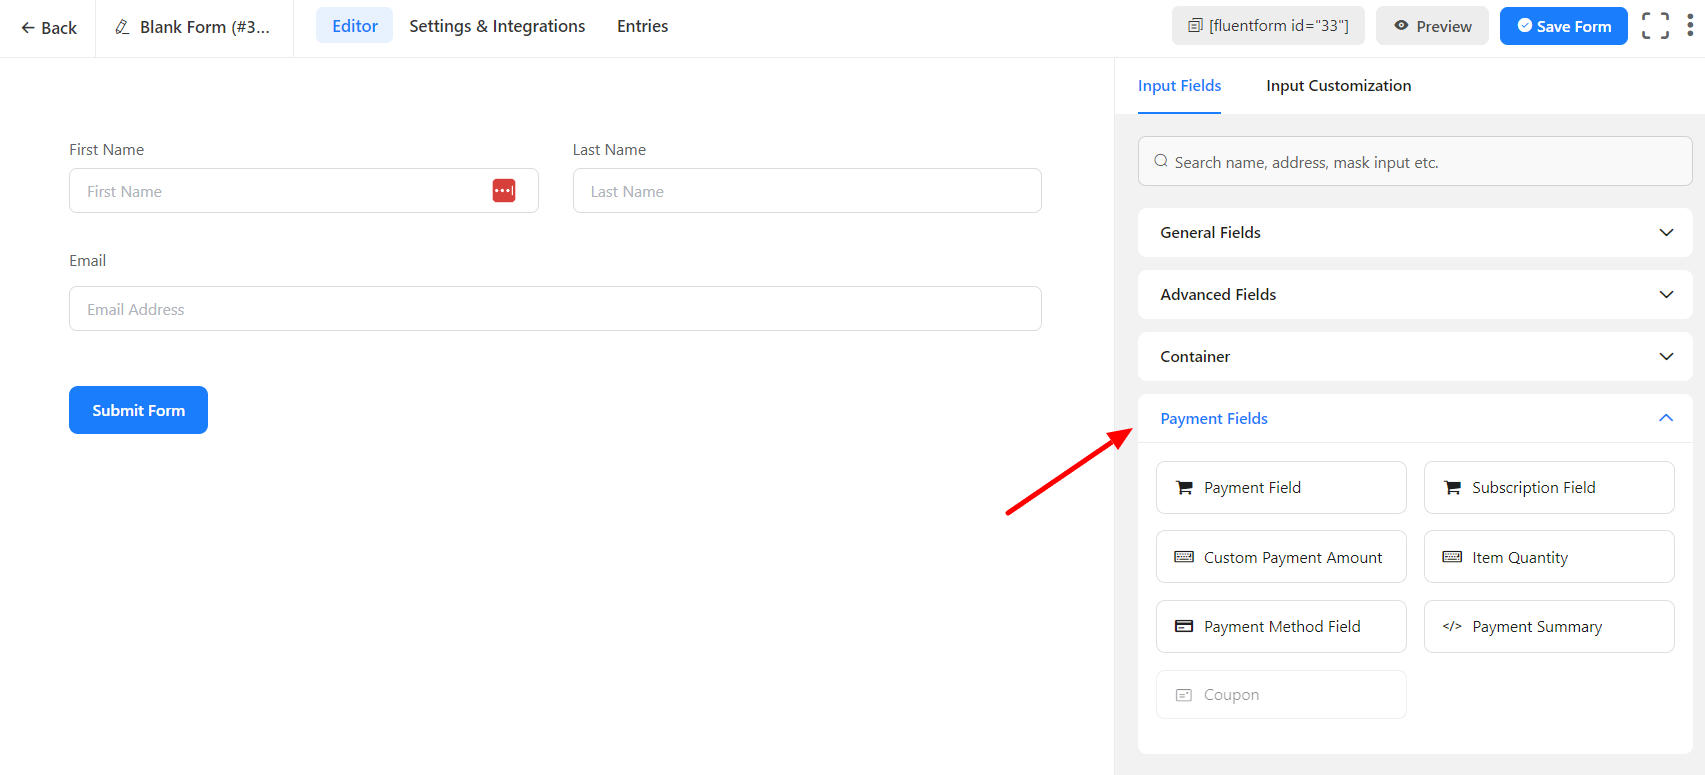
- The payment field is located on the right sidebar of the form consisting of six fields – Payment Field, Custom Payment Amount, Item Quantity, Payment Summary, Coupon, and Payment Method Field.
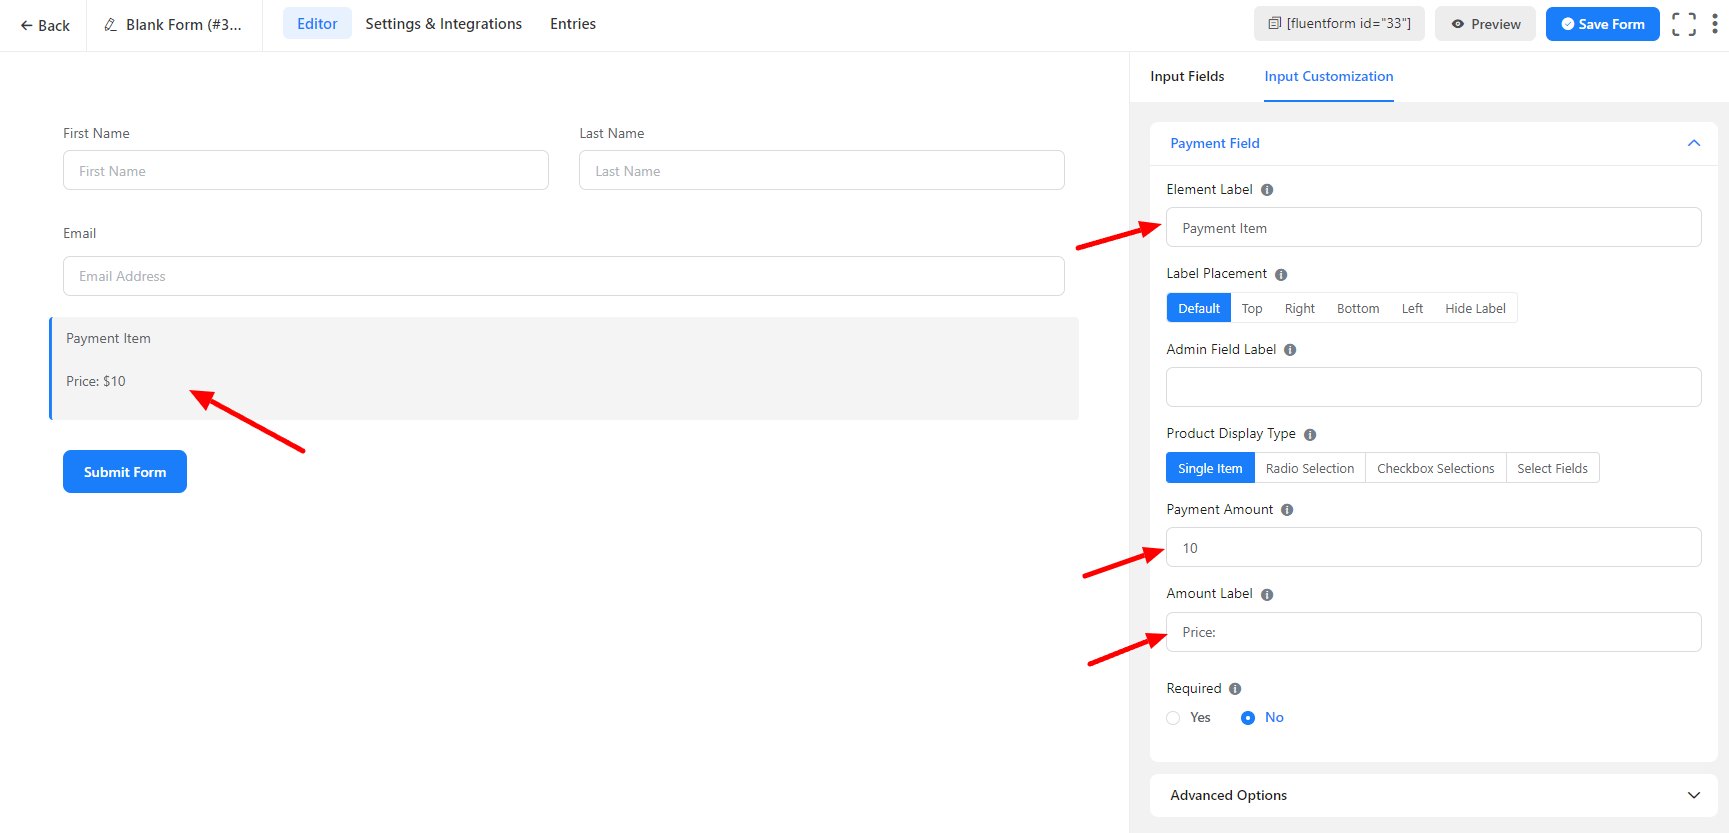
- Now add the Payment Item Field to the form. Give the field a name from Element Lebel on the right sidebar of the field, also give the item price from Payment Amount, and add Amount Label as shown in the screenshot below –
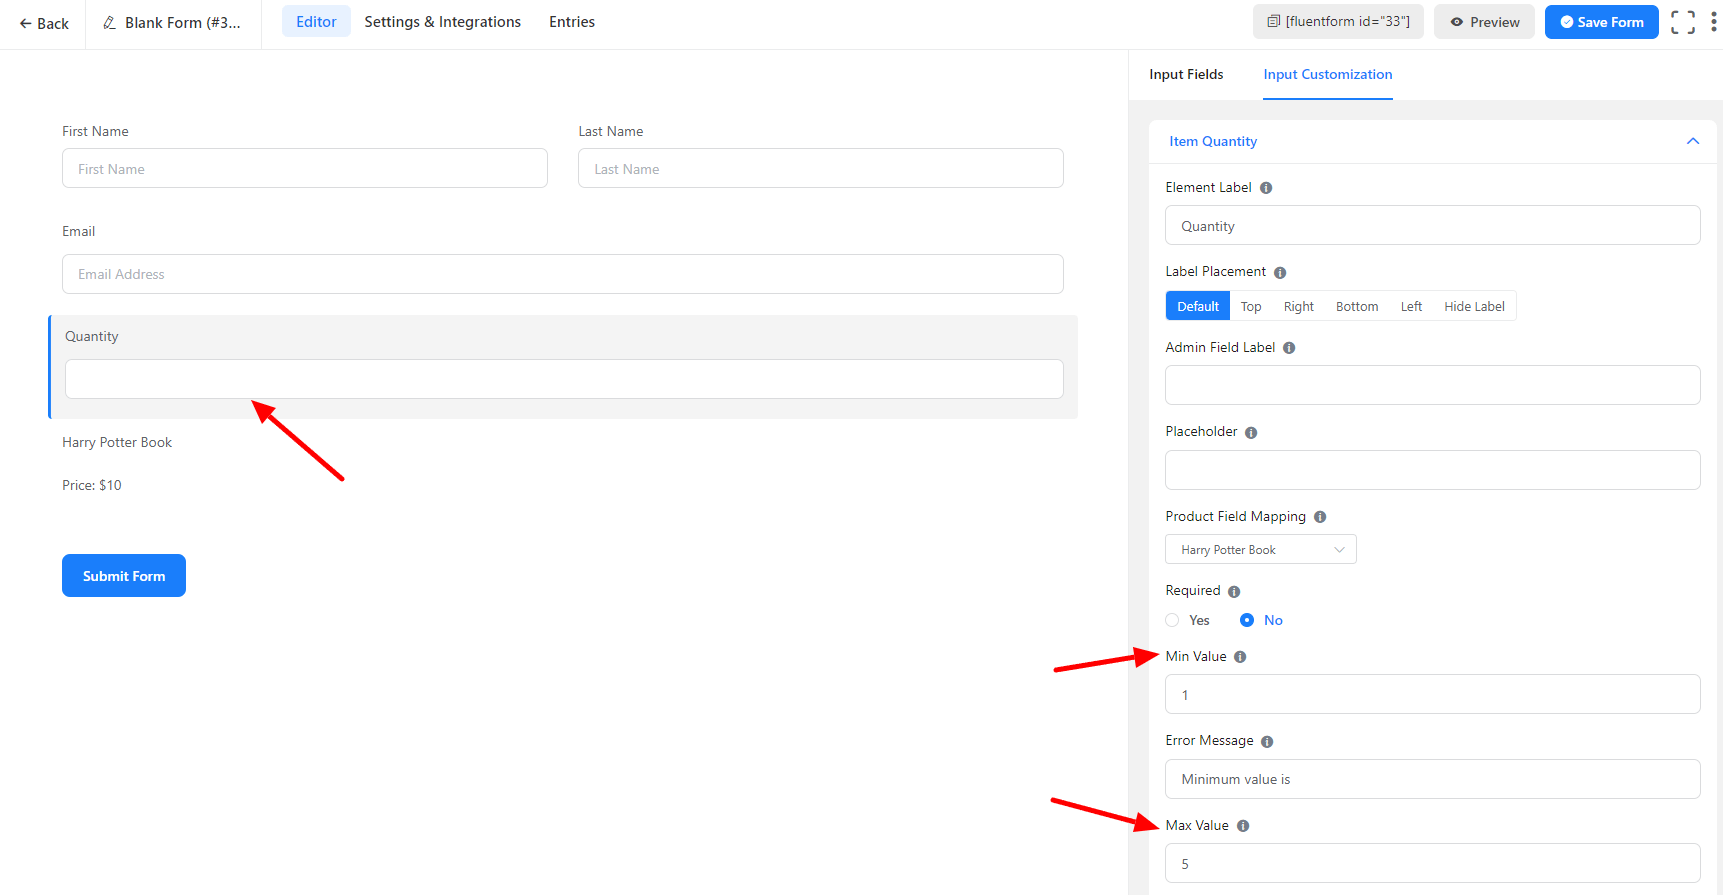
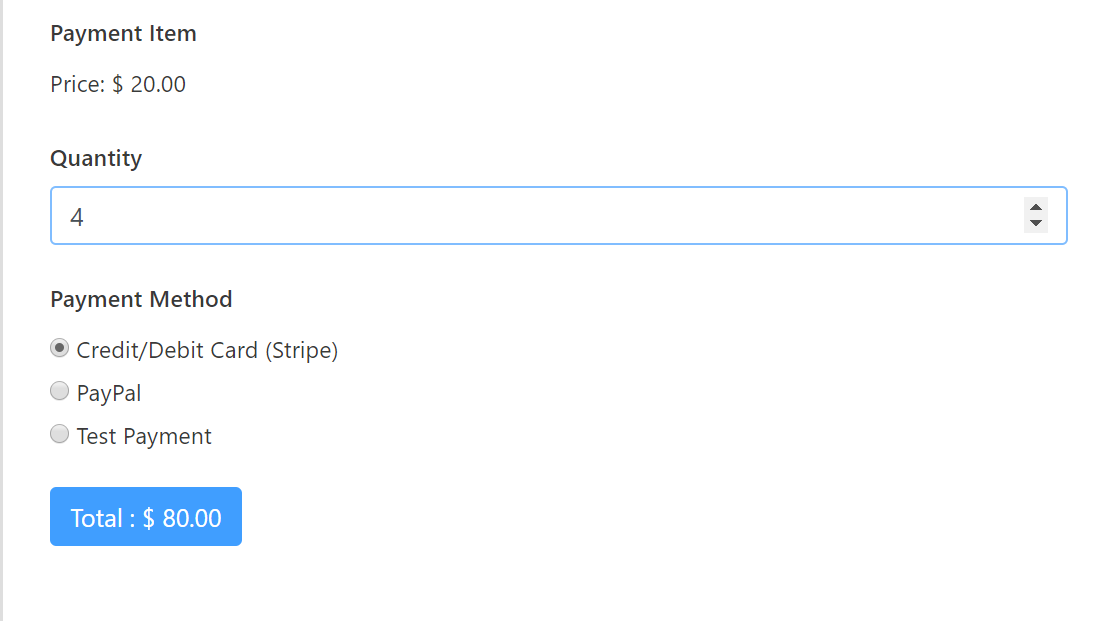
- Add an Item Quantity Field into the form to allow the users to order as many as they want. The product field mapping will automatically select the product for which the quantity is used.
- If you have multiple products, please map the quantity field with the respective product. You can also provide min and max values for the quantity
- Now add the final field into the form, which is the Payment Method Field. You can enable PayPal, Stripe, or both as the Payment Processor.
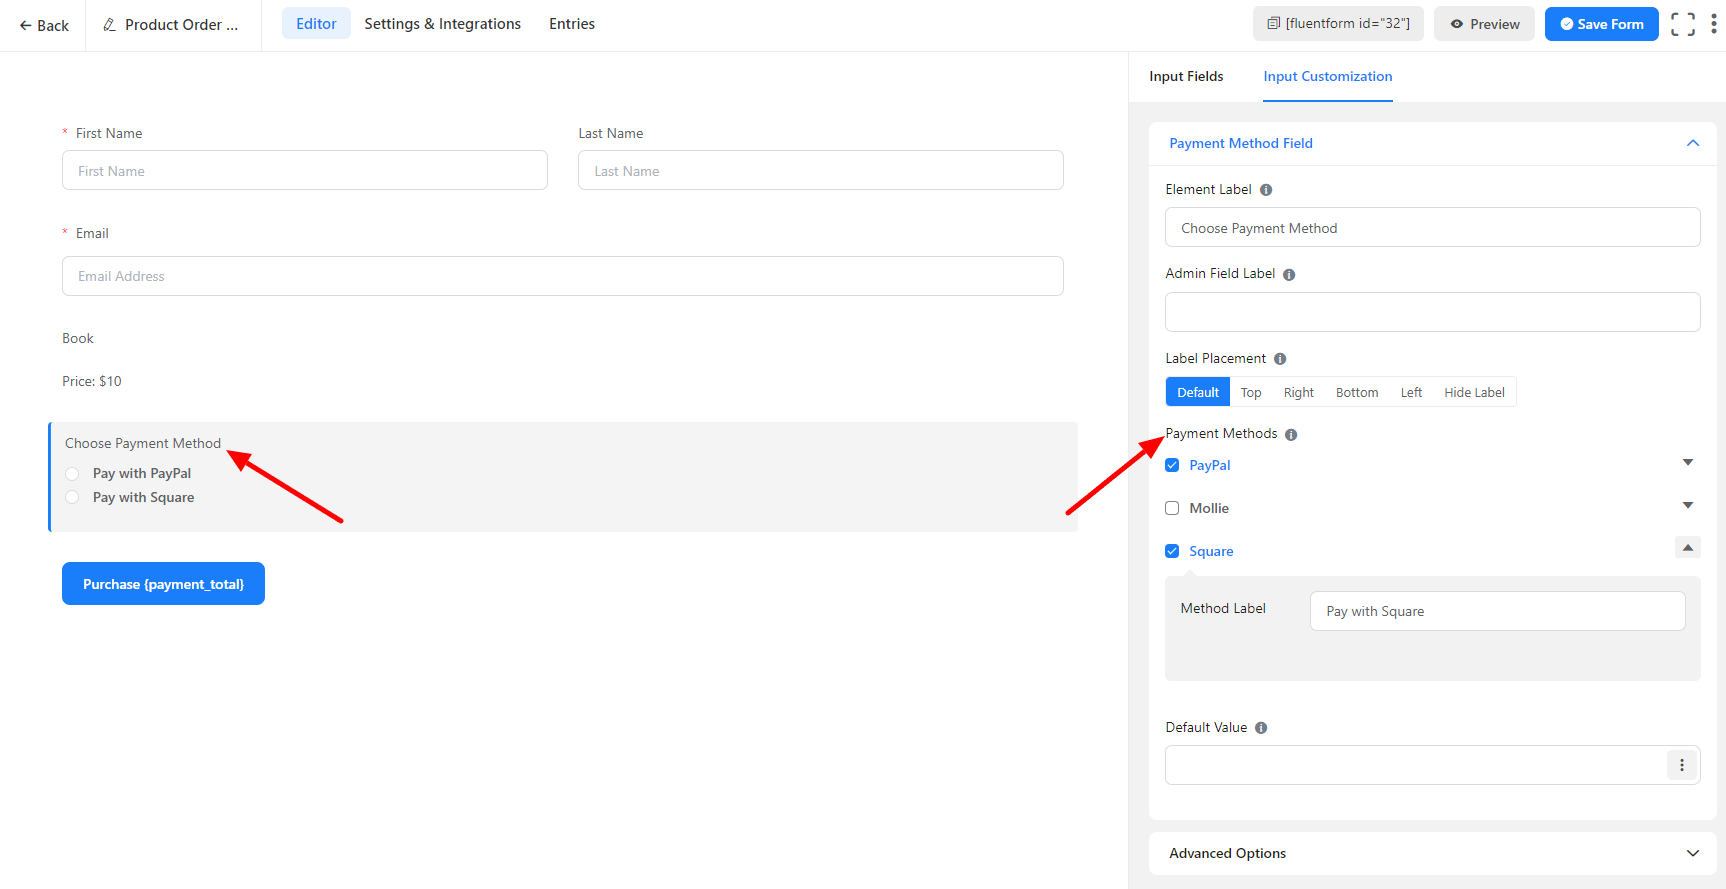
Note that you need to configure PayPal Settings and Stripe Settings before taking the form live.
- To configure PayPal, take a look at the doc How to Integrate PayPal with Fluent Forms
- To configure Stripe Payments, take a look at the doc How to Integrate Stripe with Fluent Forms
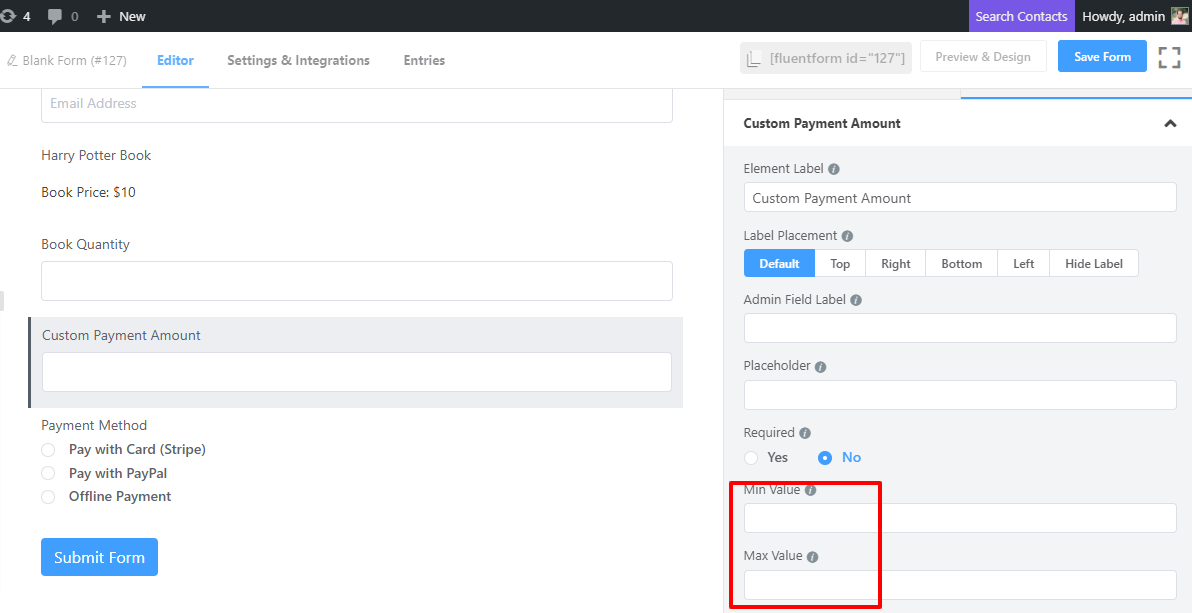
- The Custom Payment Amount field becomes very handy when you are accepting donations. This field enables the end-user to input the amount they want.
- You can also restrict the minimum and maximum amount the users can input and pay. It’s not required for a payment form, but you can use it when needed, and the total payment amount will be calculated accordingly.
Show Total Amount
- You can show the total or total payable amount using the shortcode {payment_total}. For example, in the button text, if you add the shortcode, it will show the total inside the button. You can use the HTML field also to show the total amount.
- Save your form, copy the shortcode and use it on the post or page to accept payments. That’s it.
Show Payment Summary as a dynamic cart
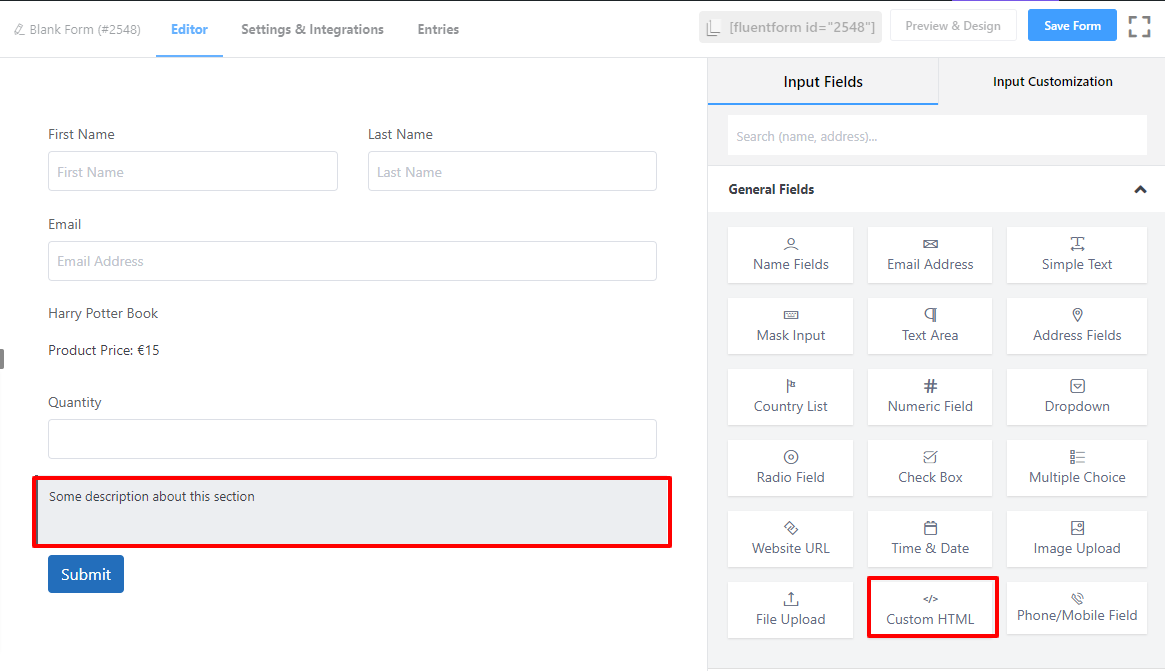
- When creating a multi-step payment form, showing the payment summary is very helpful. Fluent Forms Pro allows you to show a payment summary as a dynamic cart. Although this is very helpful for a multi-step form, you can use the payment summary in single-step forms, also.
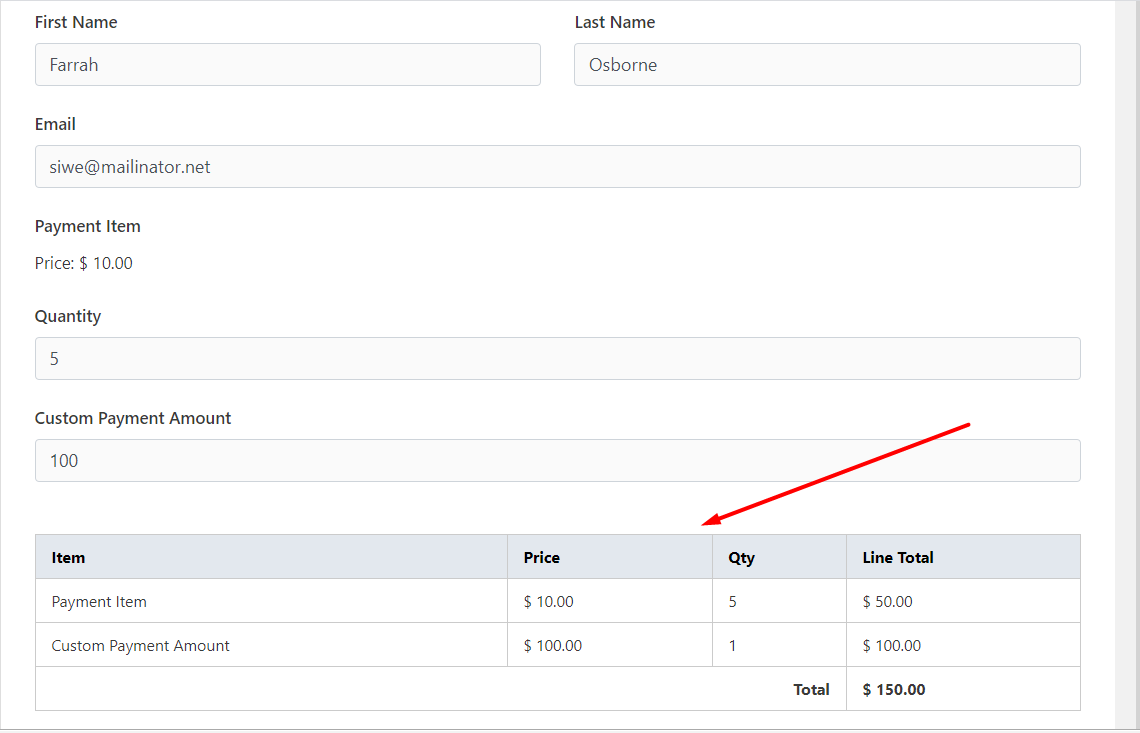
- Take an HTML input field where you want to show the payment summary. After adding the HTML field, save the form and reload it. After reloading the form, the HTML field will look like the below screenshot –
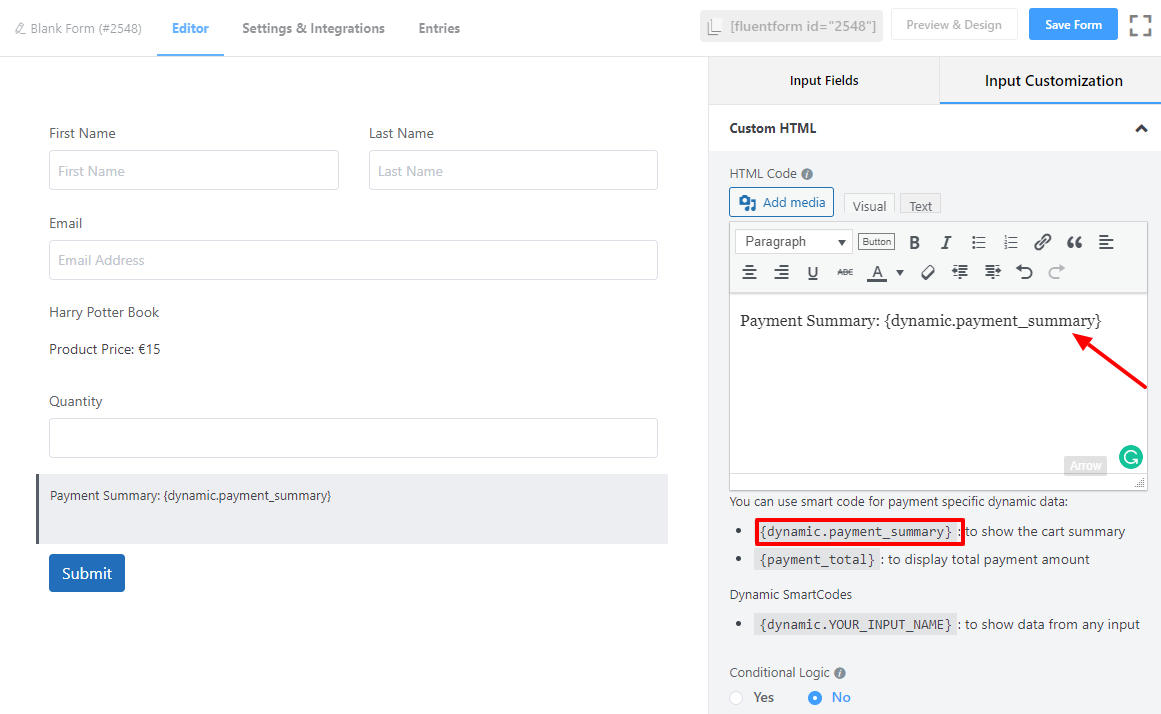
- Three smart codes are available at the bottom right of the HTML input field. The {dynamic.payment_summary} will show the mini cart-like payment summary. Add this to the HTML content box.
- Preview the form after saving it. Fill up the form for testing purposes, and you will get the summary as the screenshot below –