Fluent Forms brings you an awesome feature: Meta Box plugin integration. Metabox is a free Gutenberg and GDPR-compatible WordPress custom fields plugin and framework that quickly customizes a website with meta boxes and custom fields in WordPress.
Simply go through this guide on how to integrate MetaBox with Fluent Forms.
Steps to Integrate Meta Box in Post Creation with Fluent Forms
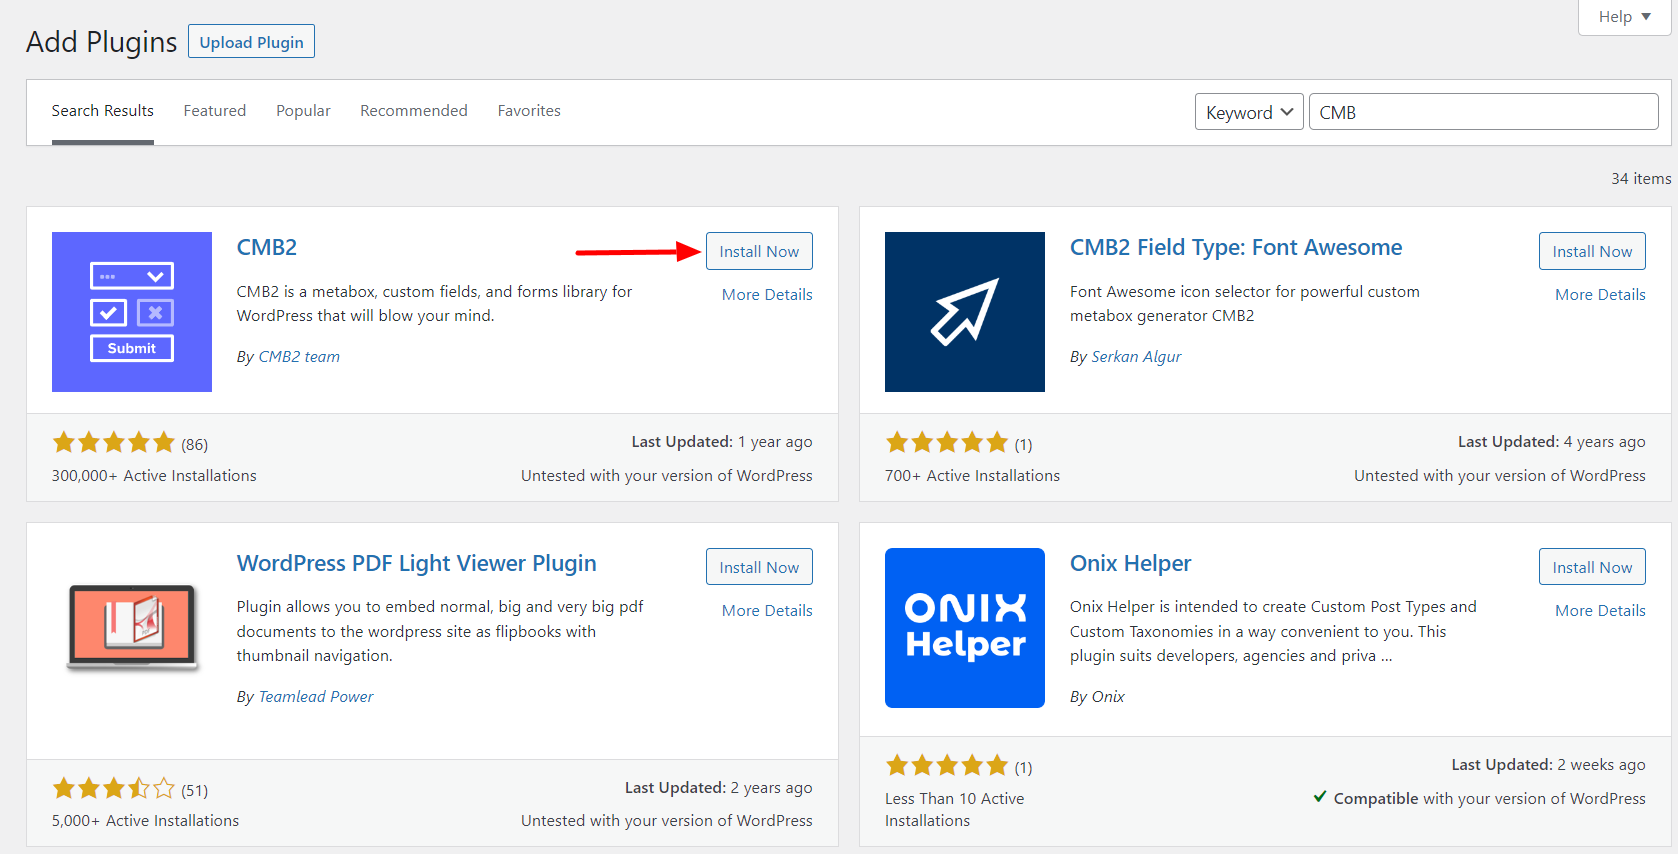
- Install the CMB2 plugin to build Custom Fields
- To build Custom Fields, you must have the Meta Box plugin & Meta Box Builder plugin installed
- Add New Field Groups in the plugin
- Activate the Post/CPT Creation Module
- Create/Use a Post Form with Fluent Forms
- Advanced Custom Fields Mapping
Installation of CMB2
- The first step is to use the CMB2 plugin to build Custom Fields.
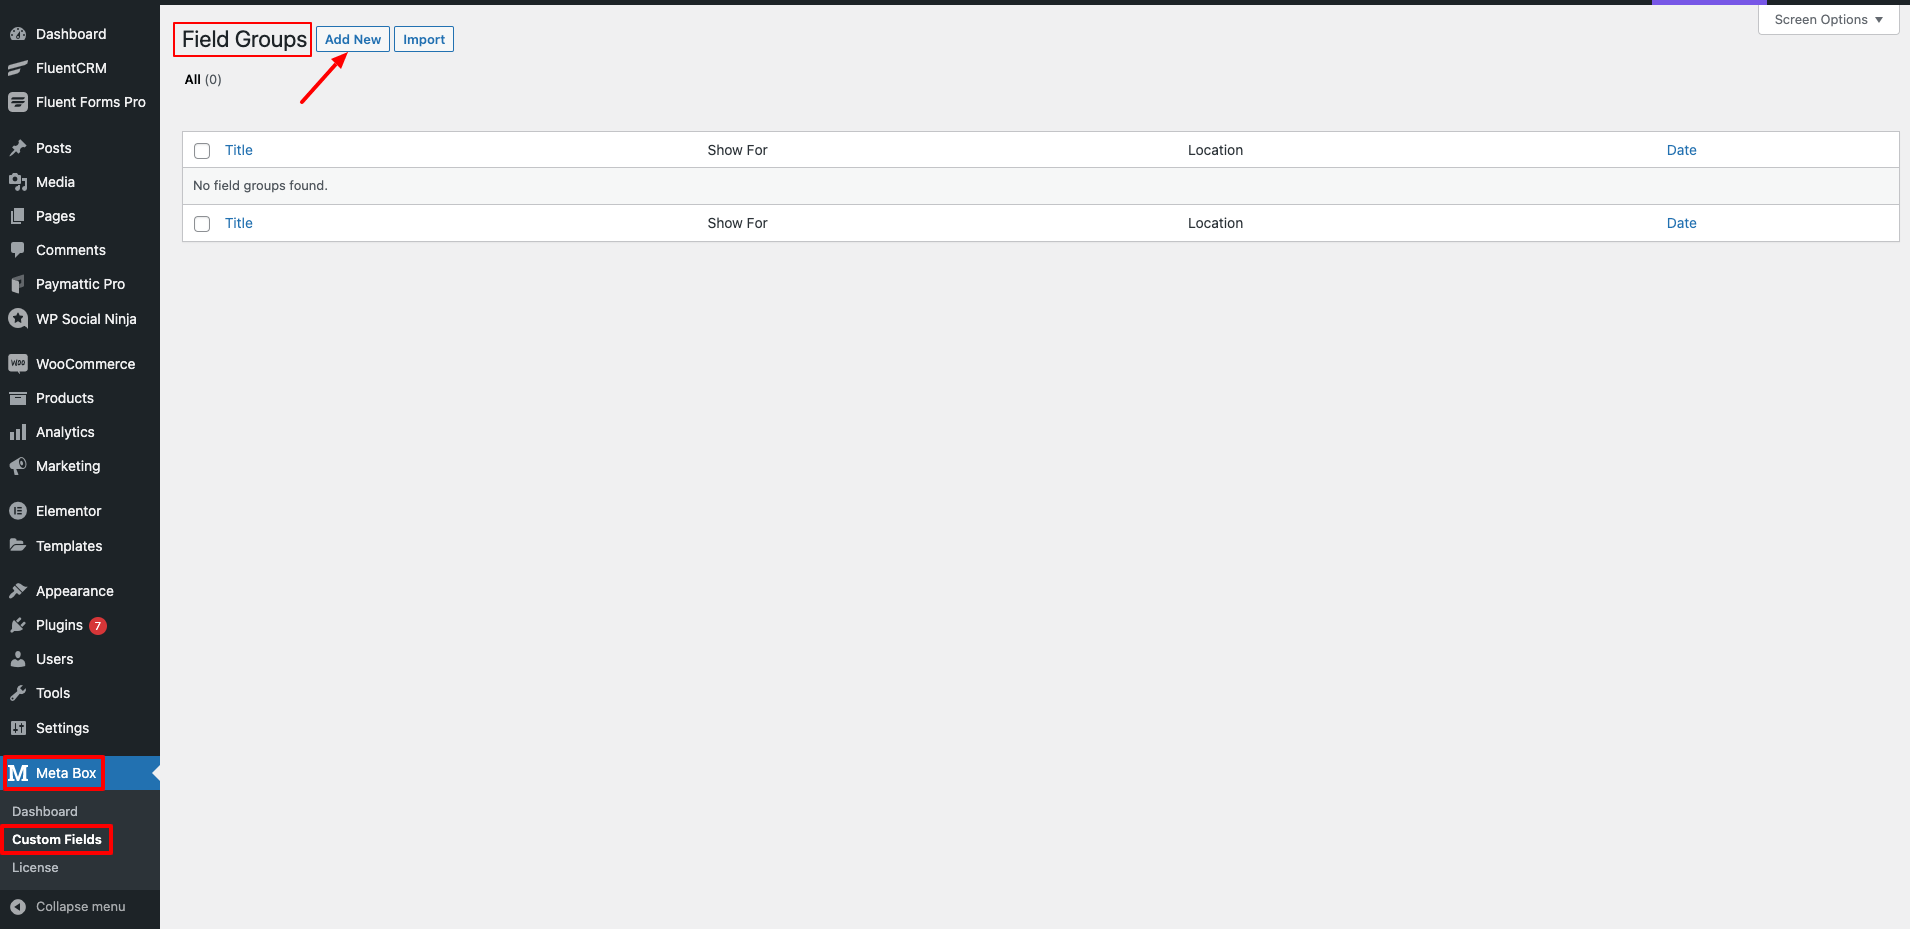
Adding New Field Groups
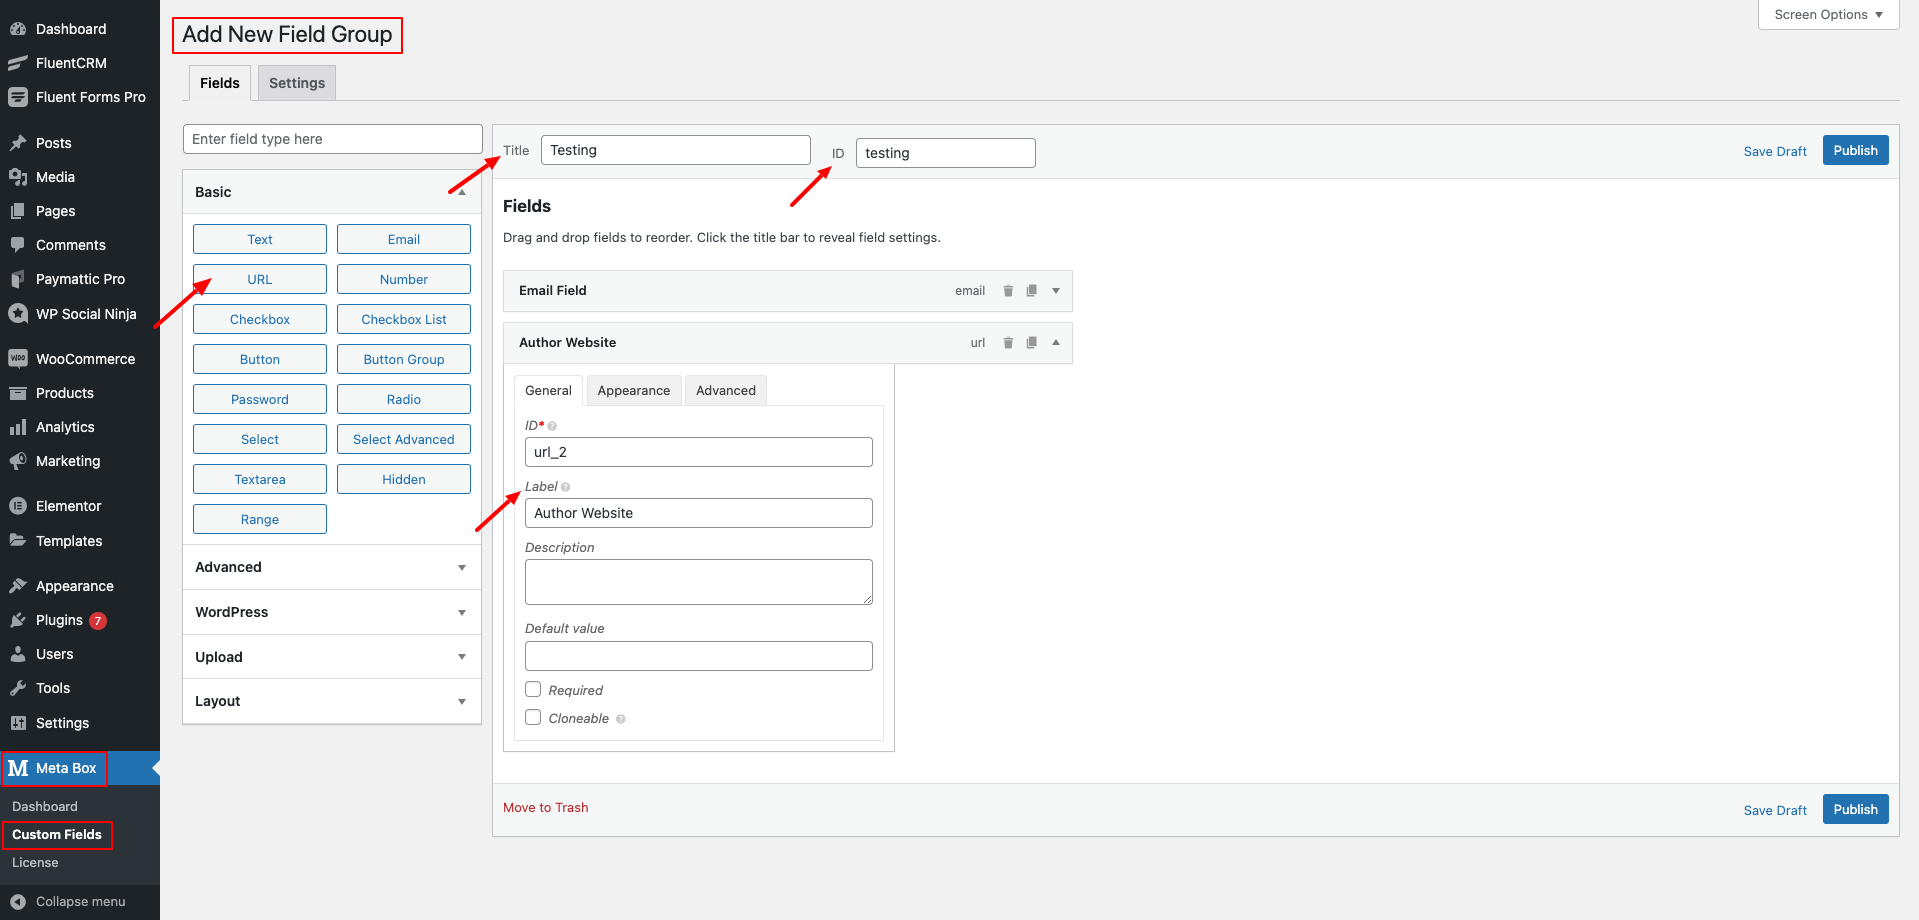
- To create a new Field Group, go to the plugin and click the Add New button.
- Then give your Field Group a suitable Title.
- The Field Group in this example is called Testing.
- URL and Email are two custom fields. These two fields are known as General custom fields.
- After you’ve entered your Field Label and Field Type, click the Add Field button.
- After that, simply click Publish/Update to save the fields.
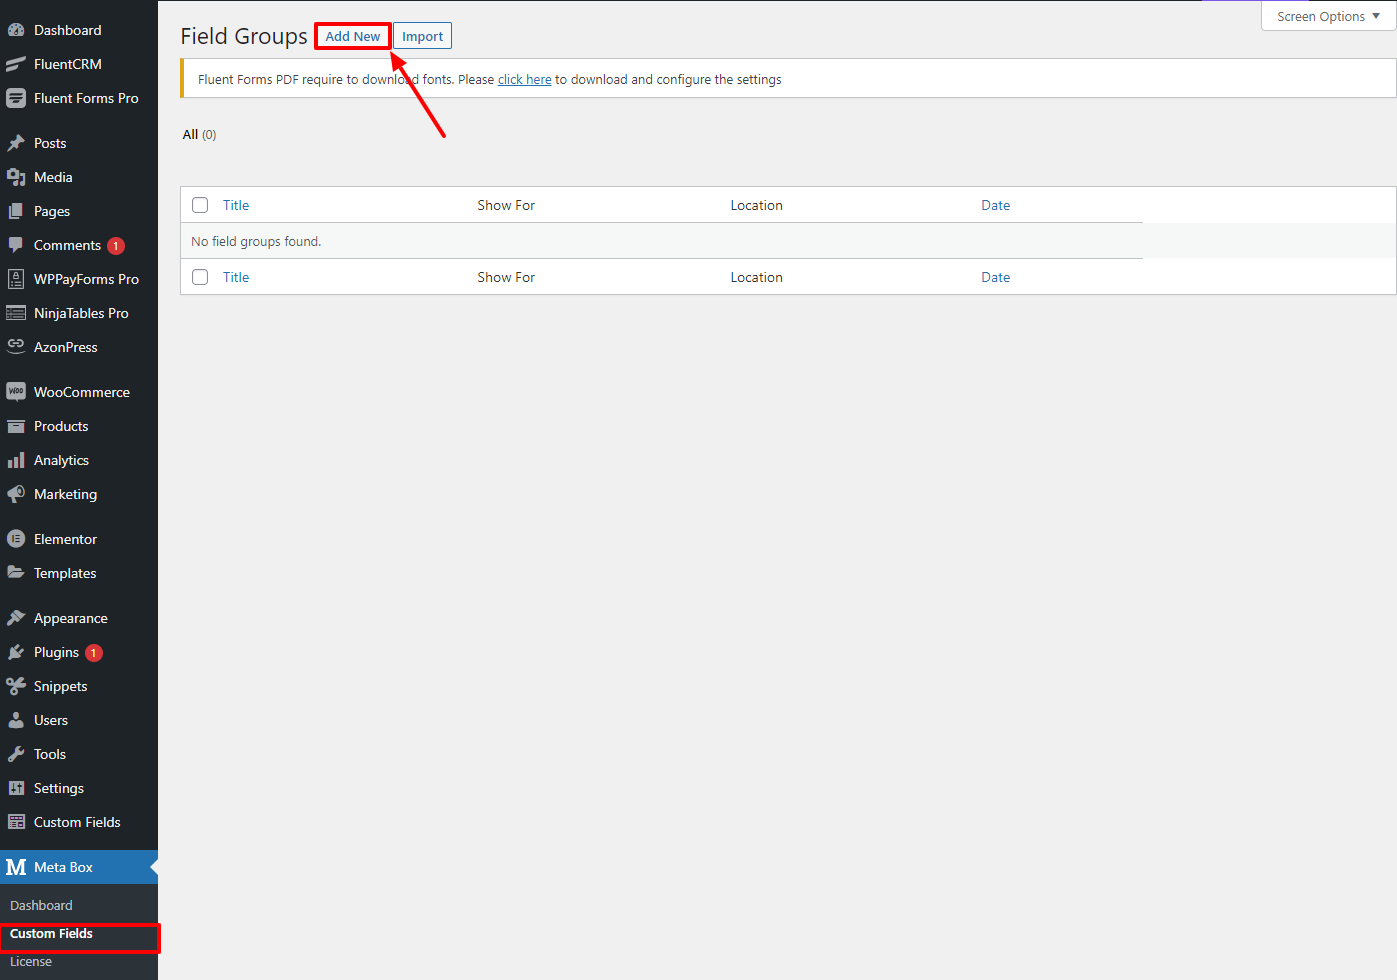
- Navigate to the Metabox dashboard and click on Custom Fields.
- After that, click on the Add New button to add a new Field Group.
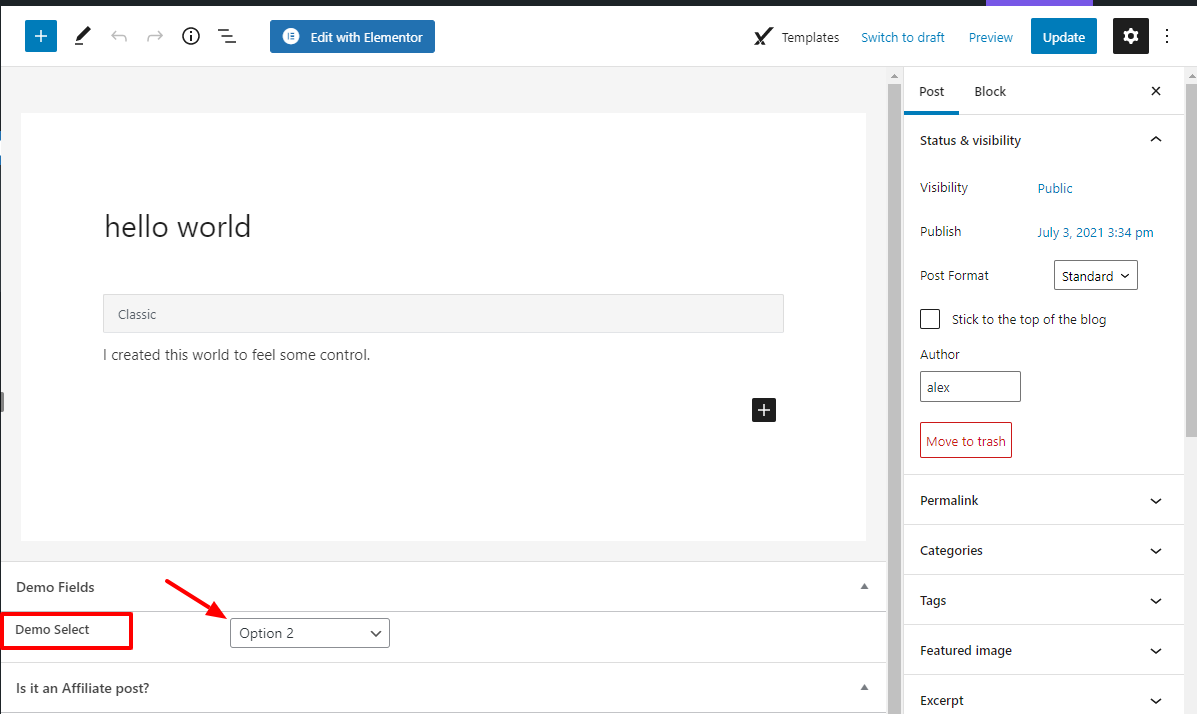
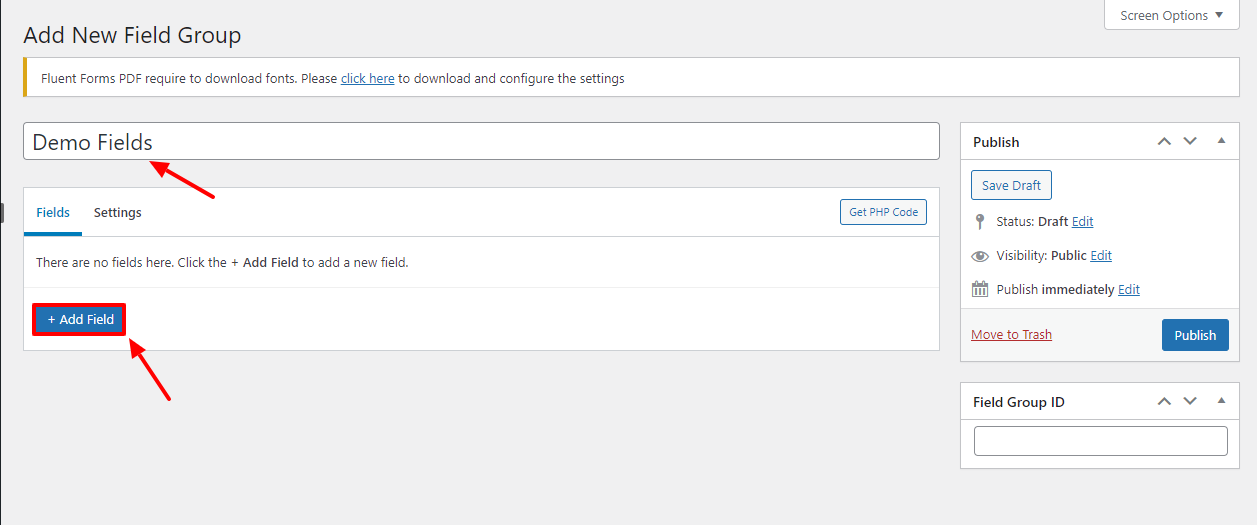
- You can give any name to the field group; in this example, it’s named Demo Fields.
- Then click on the Add Field button to add custom fields.
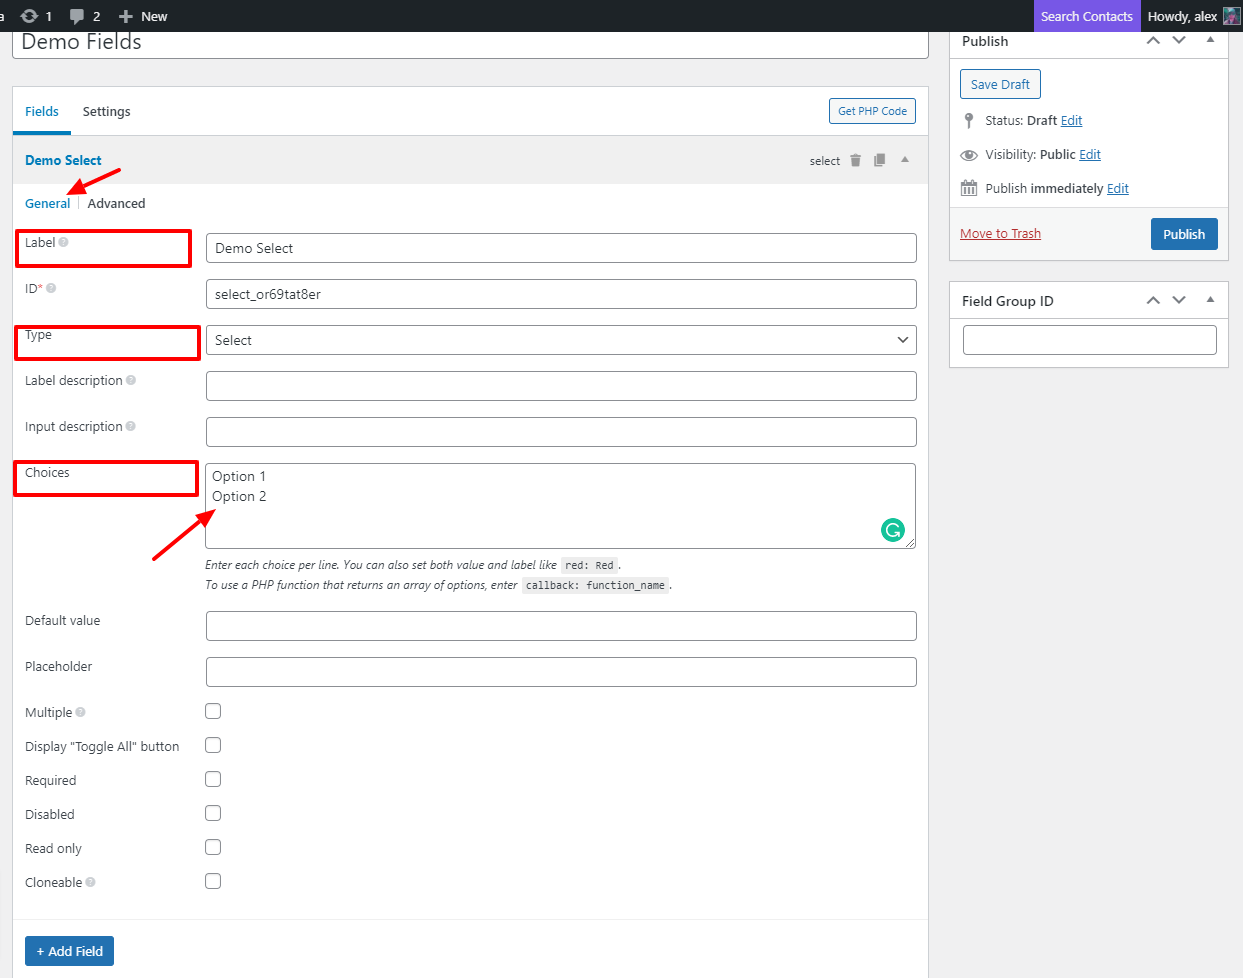
- You will find several field types to choose from when you click on this button.
- For demonstration purposes, the ‘Select’ field has been used.
- Now multiple options will appear to configure the fields. The field label & Choices has been added in the General tab in this example.
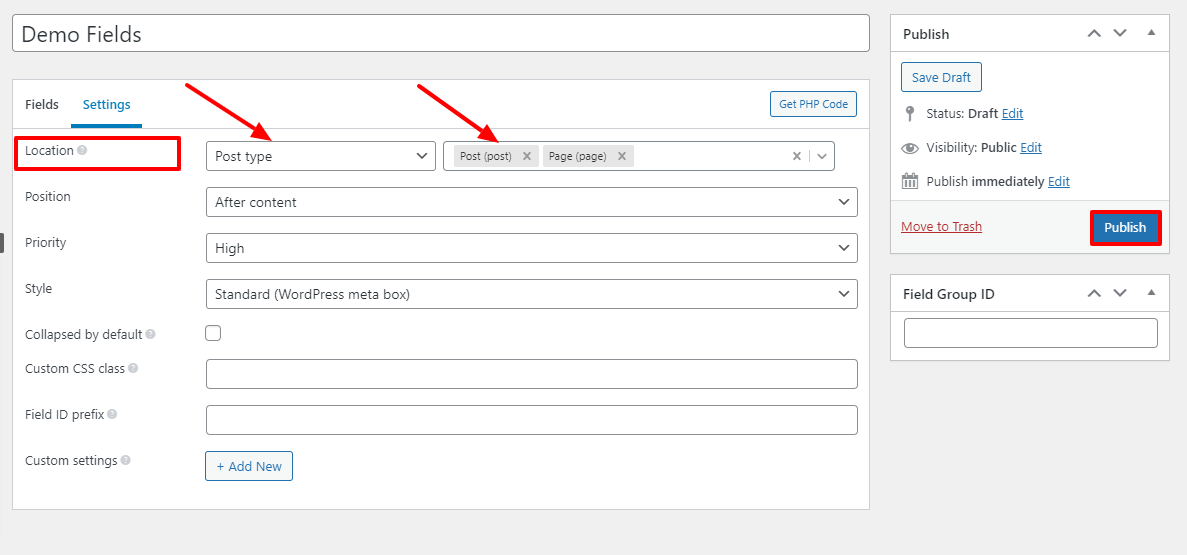
- In the Settings tab, the location has been set to Post Type.
- You can select your preferred location in the same way.
- Lastly, click on Publish to save the settings.
- After the field group is created, go to the Fluent Forms dashboard & select an existing Post Form or create a new one.
- Then go to the Settings & Integrations tab & click the Settings icon on the Post Feed page. Scroll down to the MetaBox Plugin Mapping section to map the custom fields.
- In the Advanced Fields section, select the Metabox field that you created from the dropdown on the left side.
- Then choose the value of Form Field from the dropdown on the right side. And click on Save Feed. To obtain the form value, you must create the same form field type as you did for the custom field.
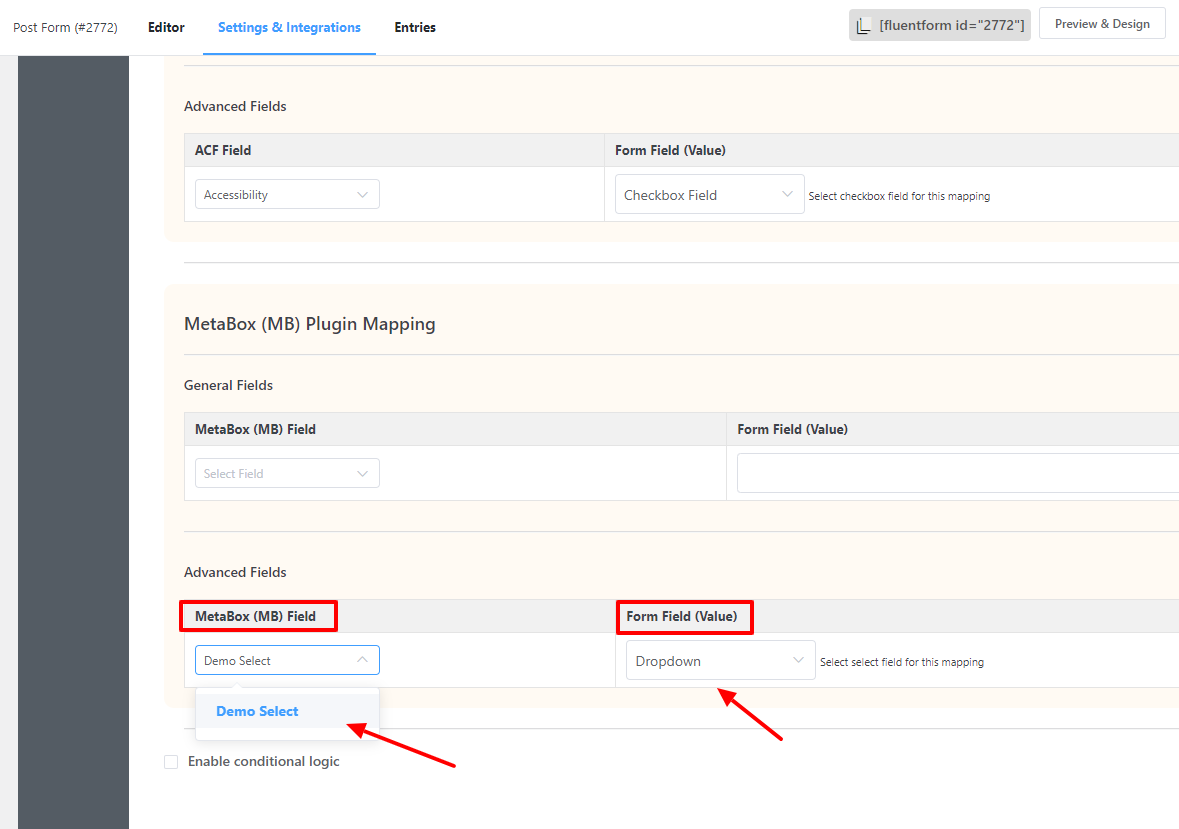
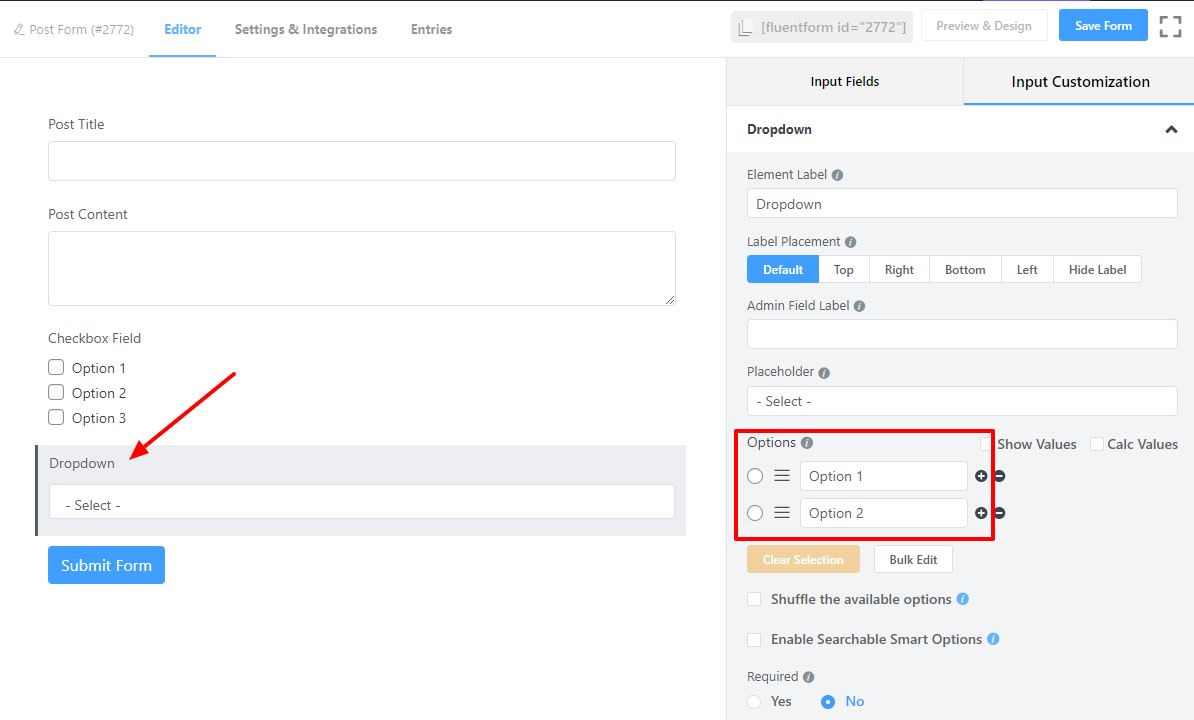
- Make sure you copy the Choices values from the custom fields & paste them into the Options section in the input customization option.
- Then click on the Save Form button.
- Now, let’s go to the Preview Page and add some data to the form. Then submit the form when you’re done.
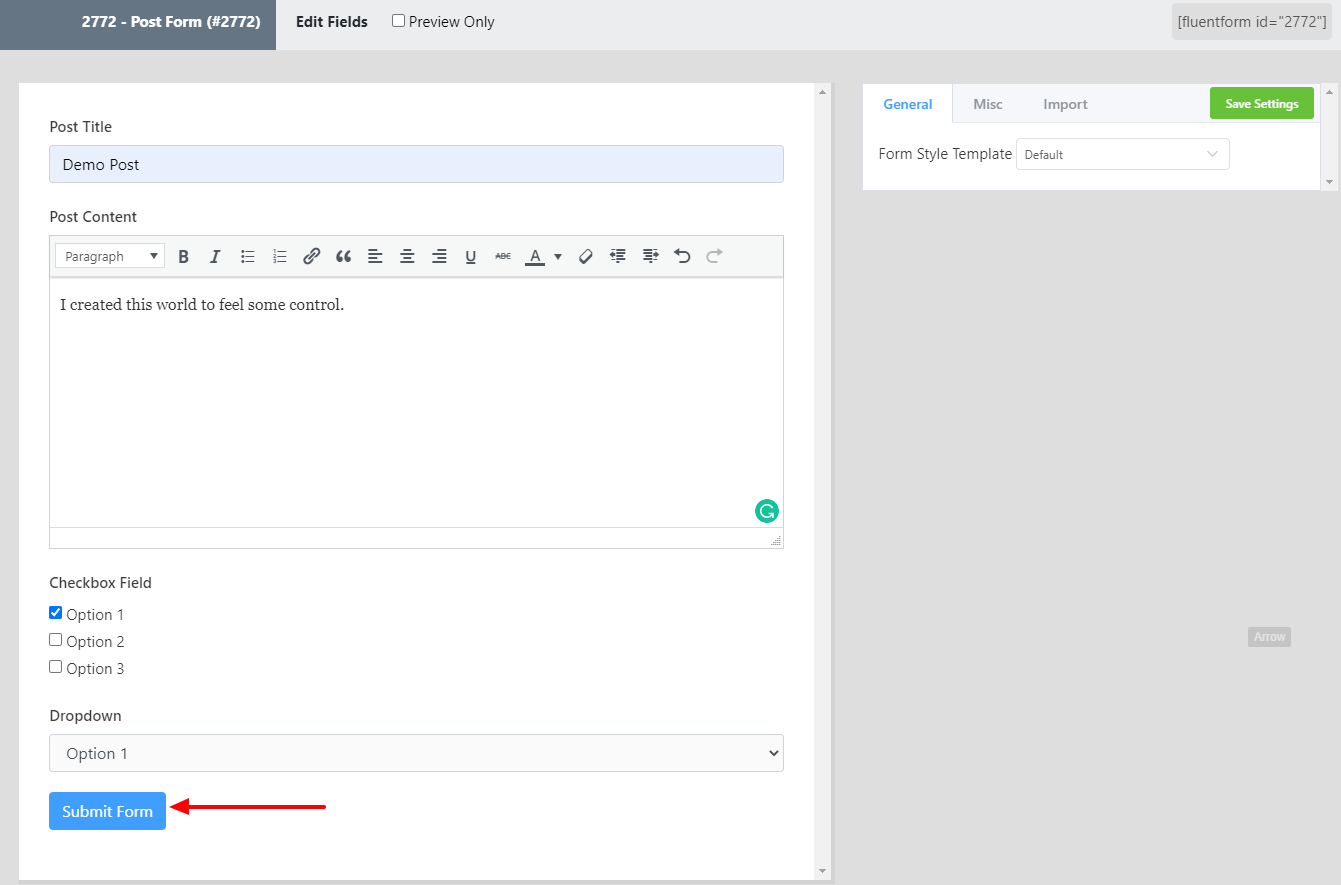
- Next, go to the Posts page to check out your submitted post. Click on the Edit option of your post.
- You’ll notice the Metabox custom field on the Post page and the value at the bottom. This is how you can apply custom fields using Fluent Forms.