

Google Maps is used to auto-complete the address field.
Simply go through this guide to learn how to apply this feature to your form.
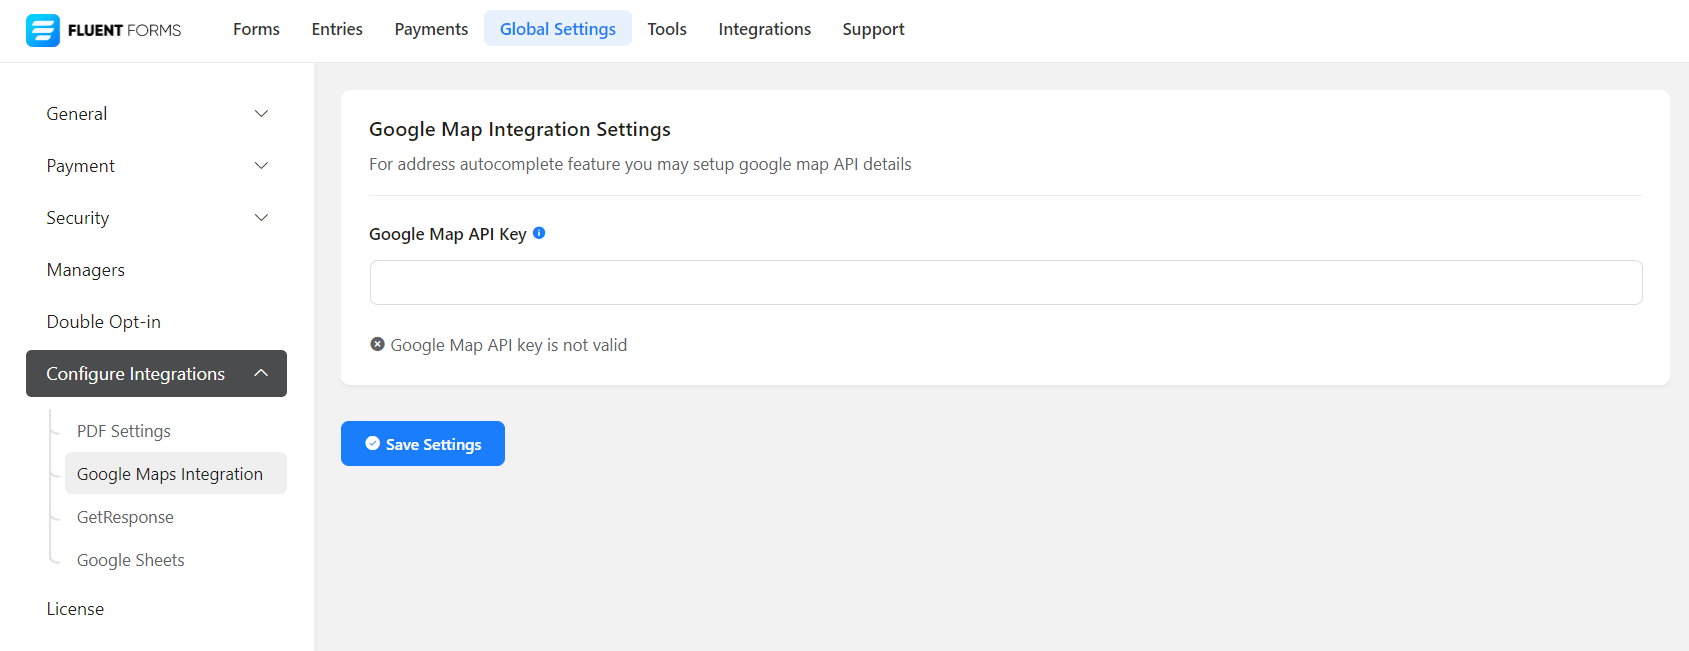
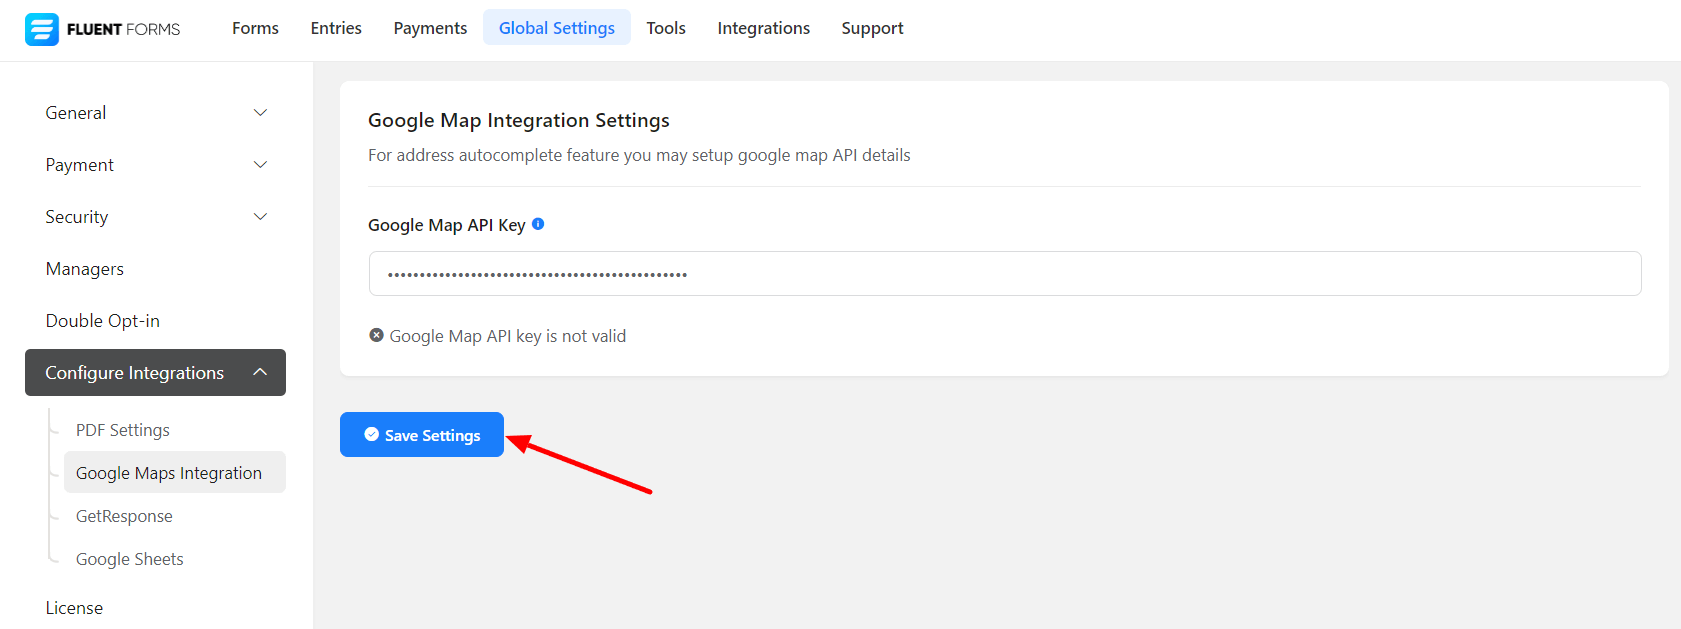
- Go to the Global Settings from Fluent Forms Pro (WordPress admin panel sidebar) and turn on the Google Maps Integration, as shown in the screenshot below.
- Here, you will be asked for the Google Map API Key to integrate it.
- To get the API key, you have to go here.
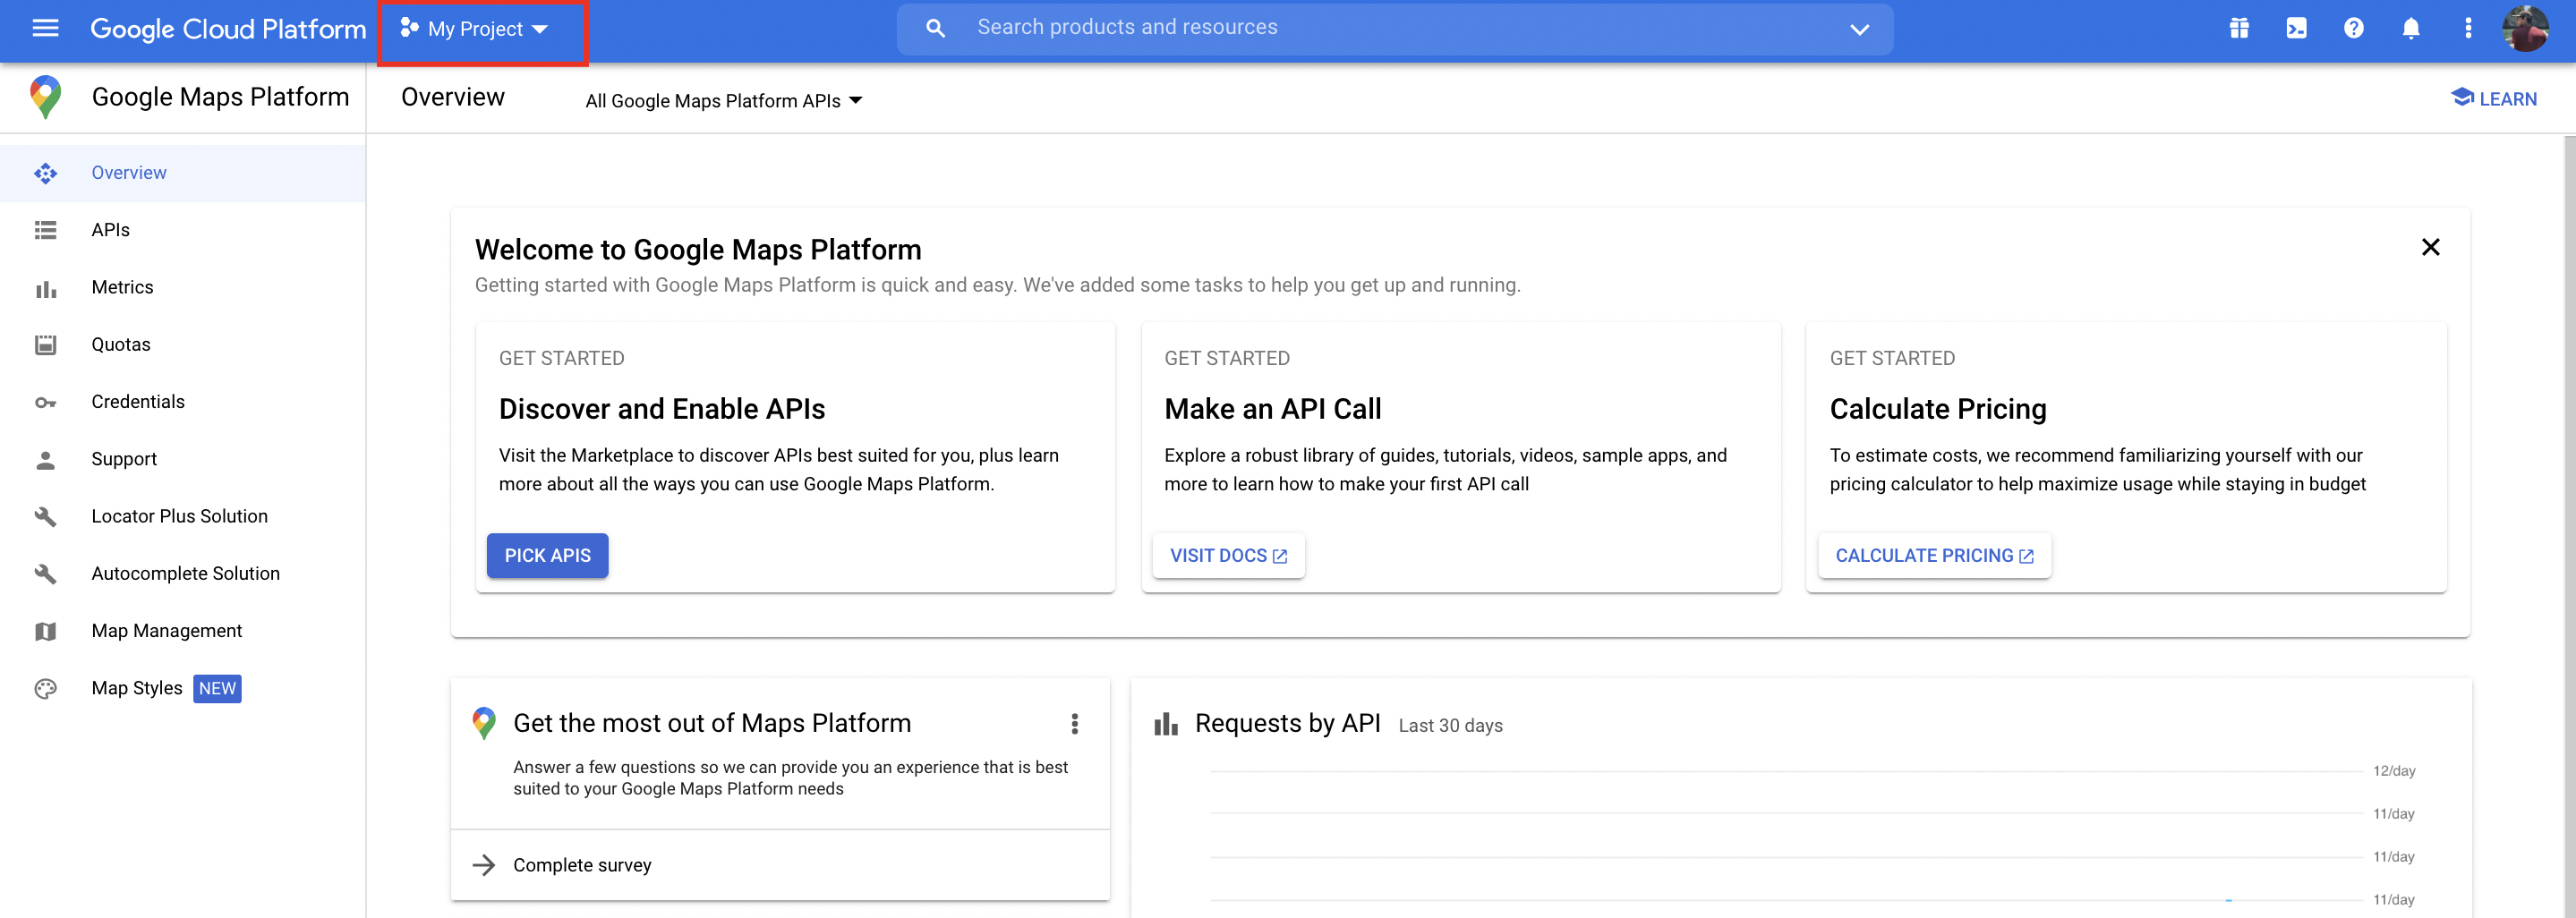
- Then click on the Get Started button on the top right corner of the page. You will notice a dashboard page where you need to click on your existing project option. Or create a new project by clicking on that option like the one given below –
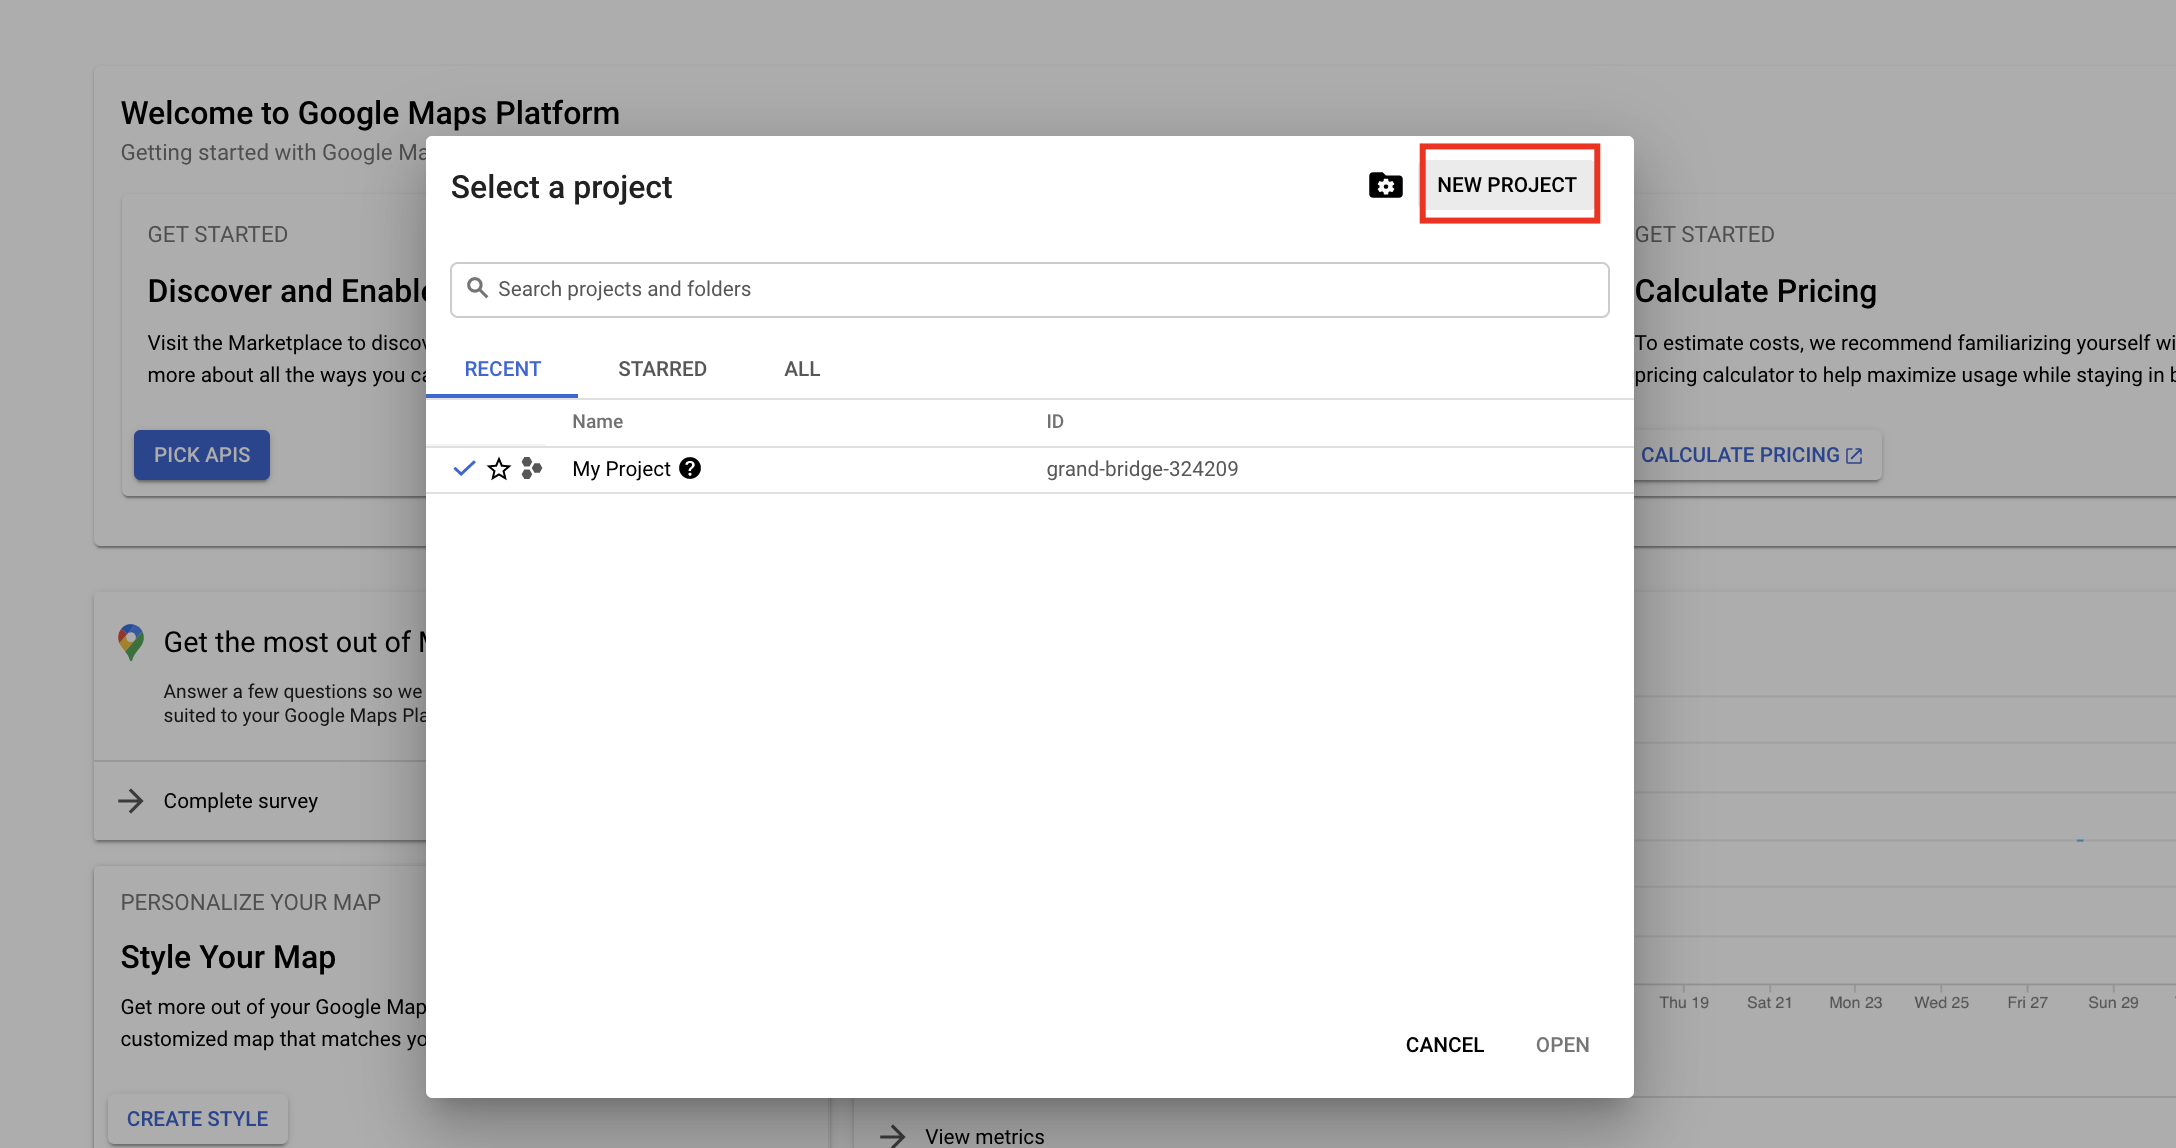
- A pop-up box will appear where you have to click on NEW PROJECT to create a new project.
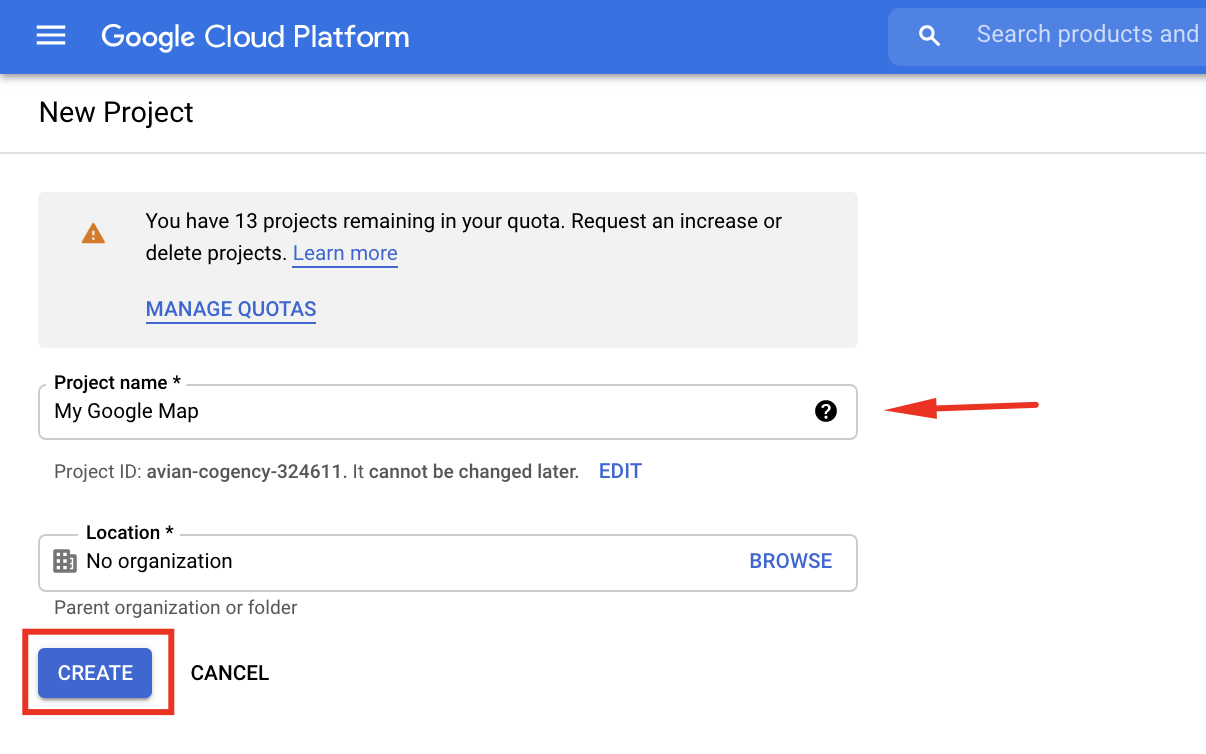
- To create a new project, you need to add a Project Name. Then click on the Create button.
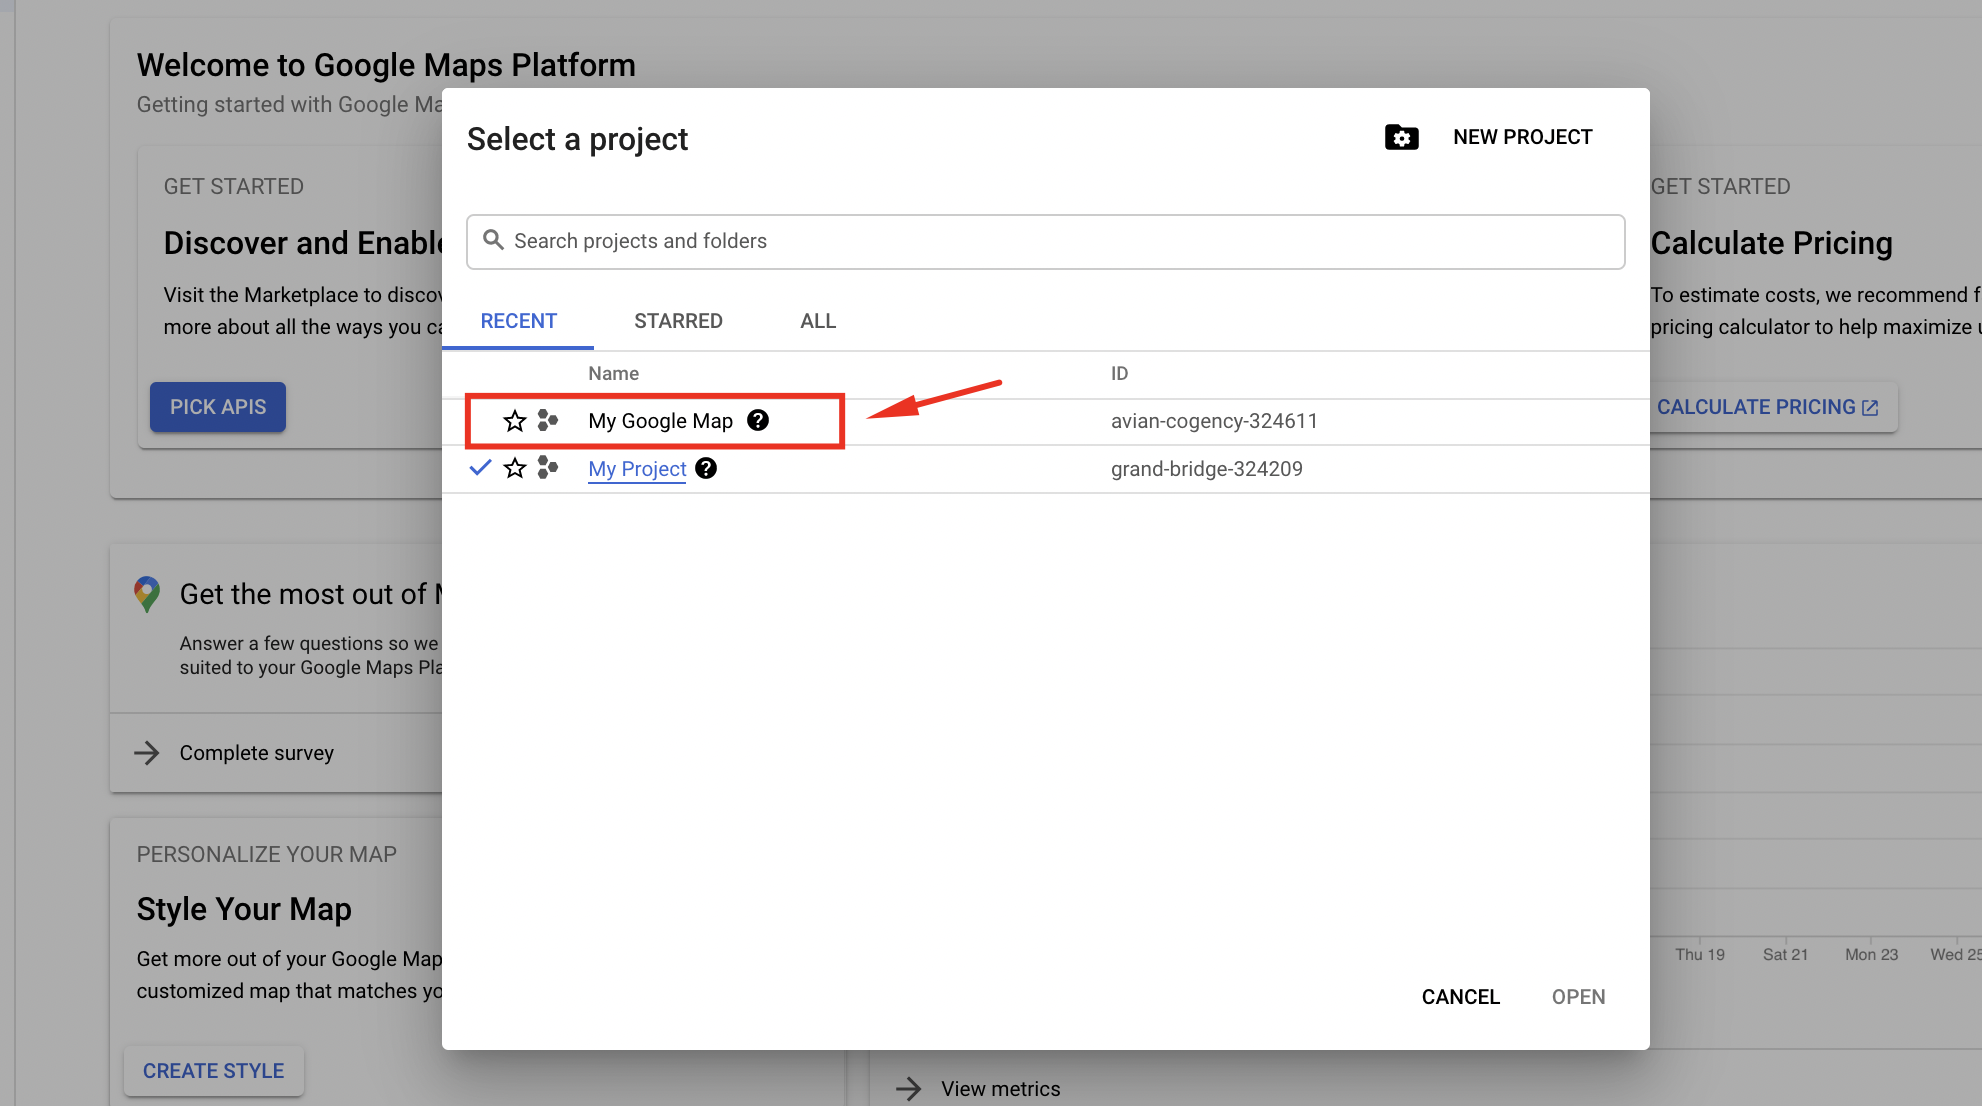
- This will take to you back to the dashboard page, where you click on your Project option to open the list of projects.

- A pop-up box will appear showing the list of projects, here click on the My Google Map project that was created previously.
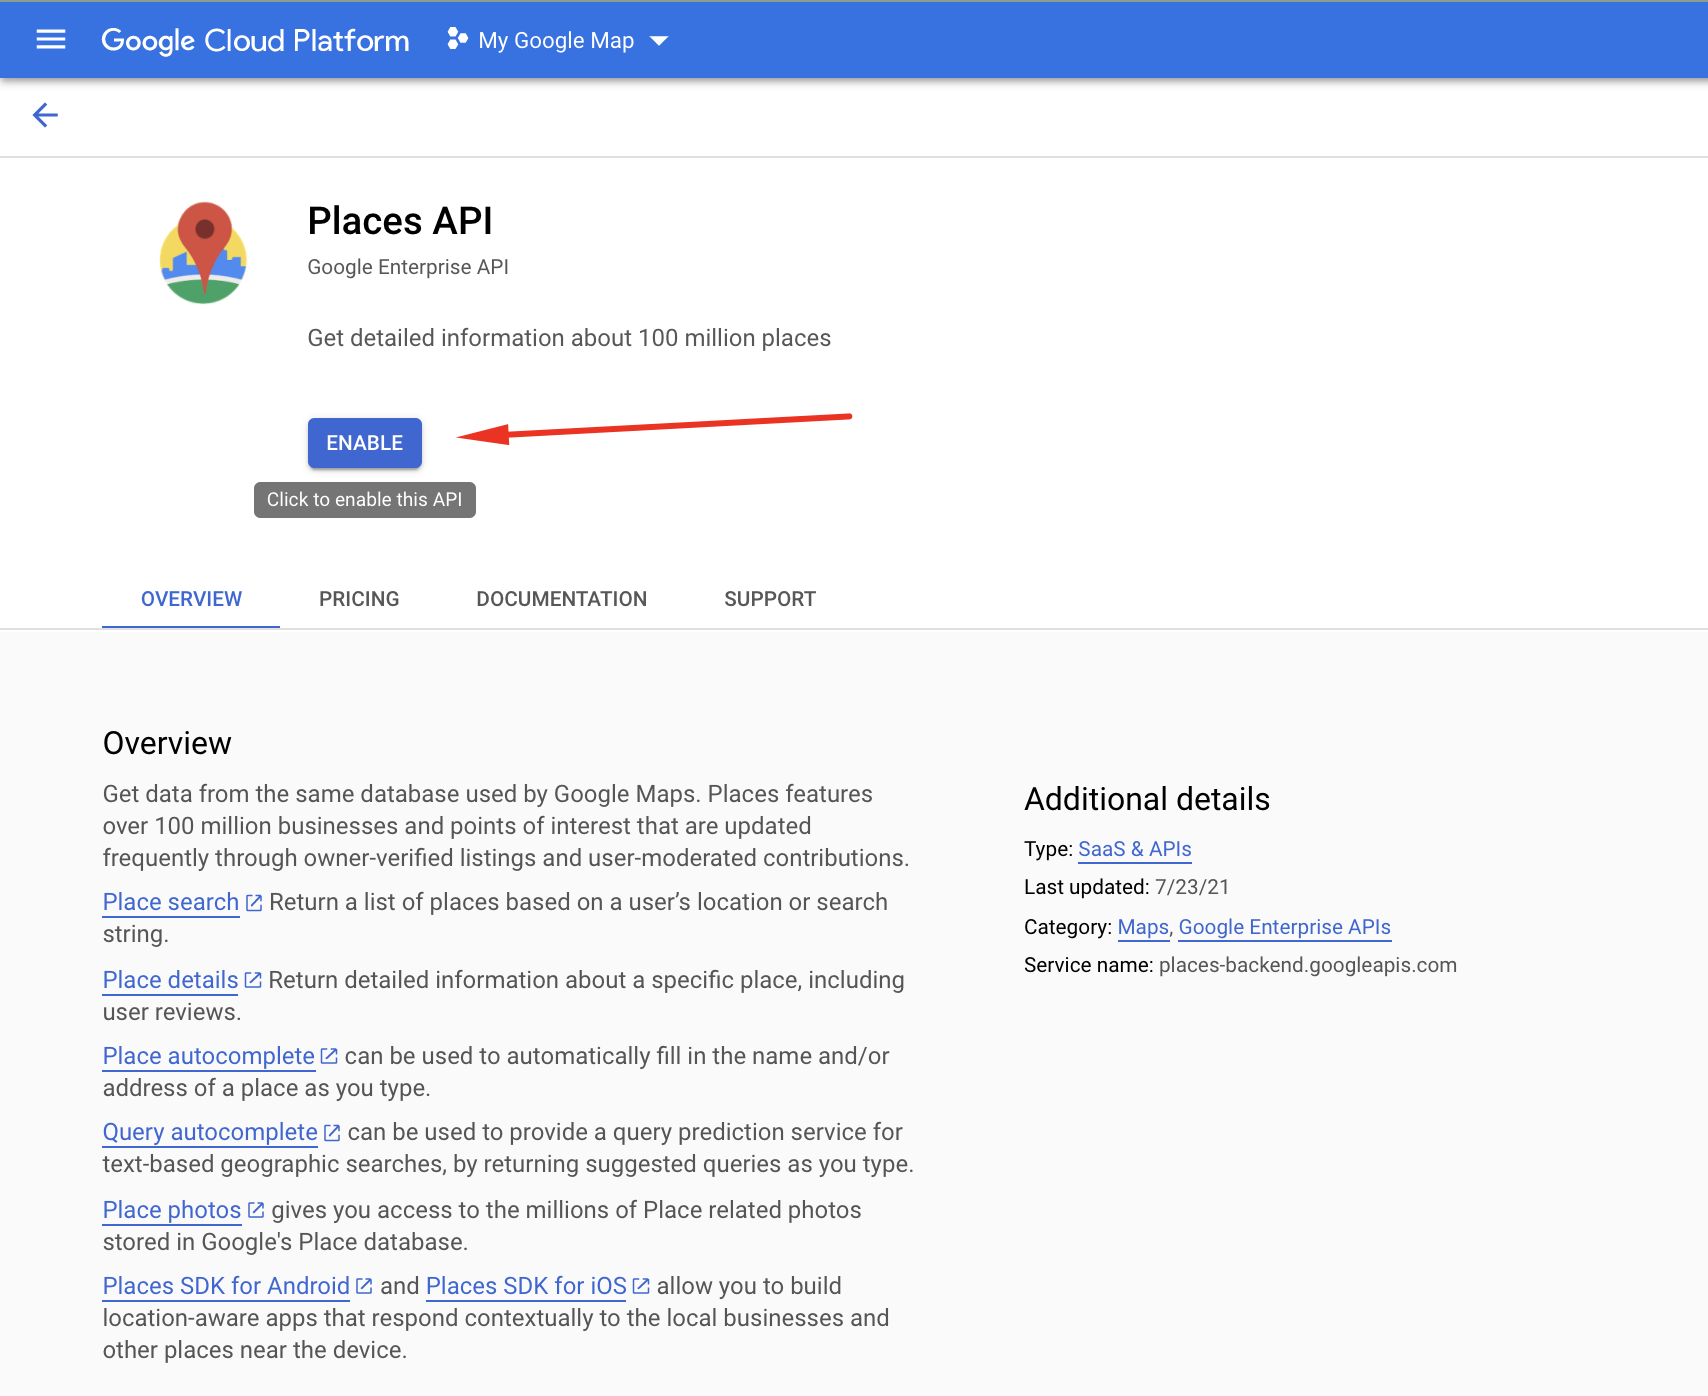
- Now, you have to select the Places API & Maps Javascript API options, respectively.

- When you click on the Places API, make sure to click on the Enable button to enable the API.
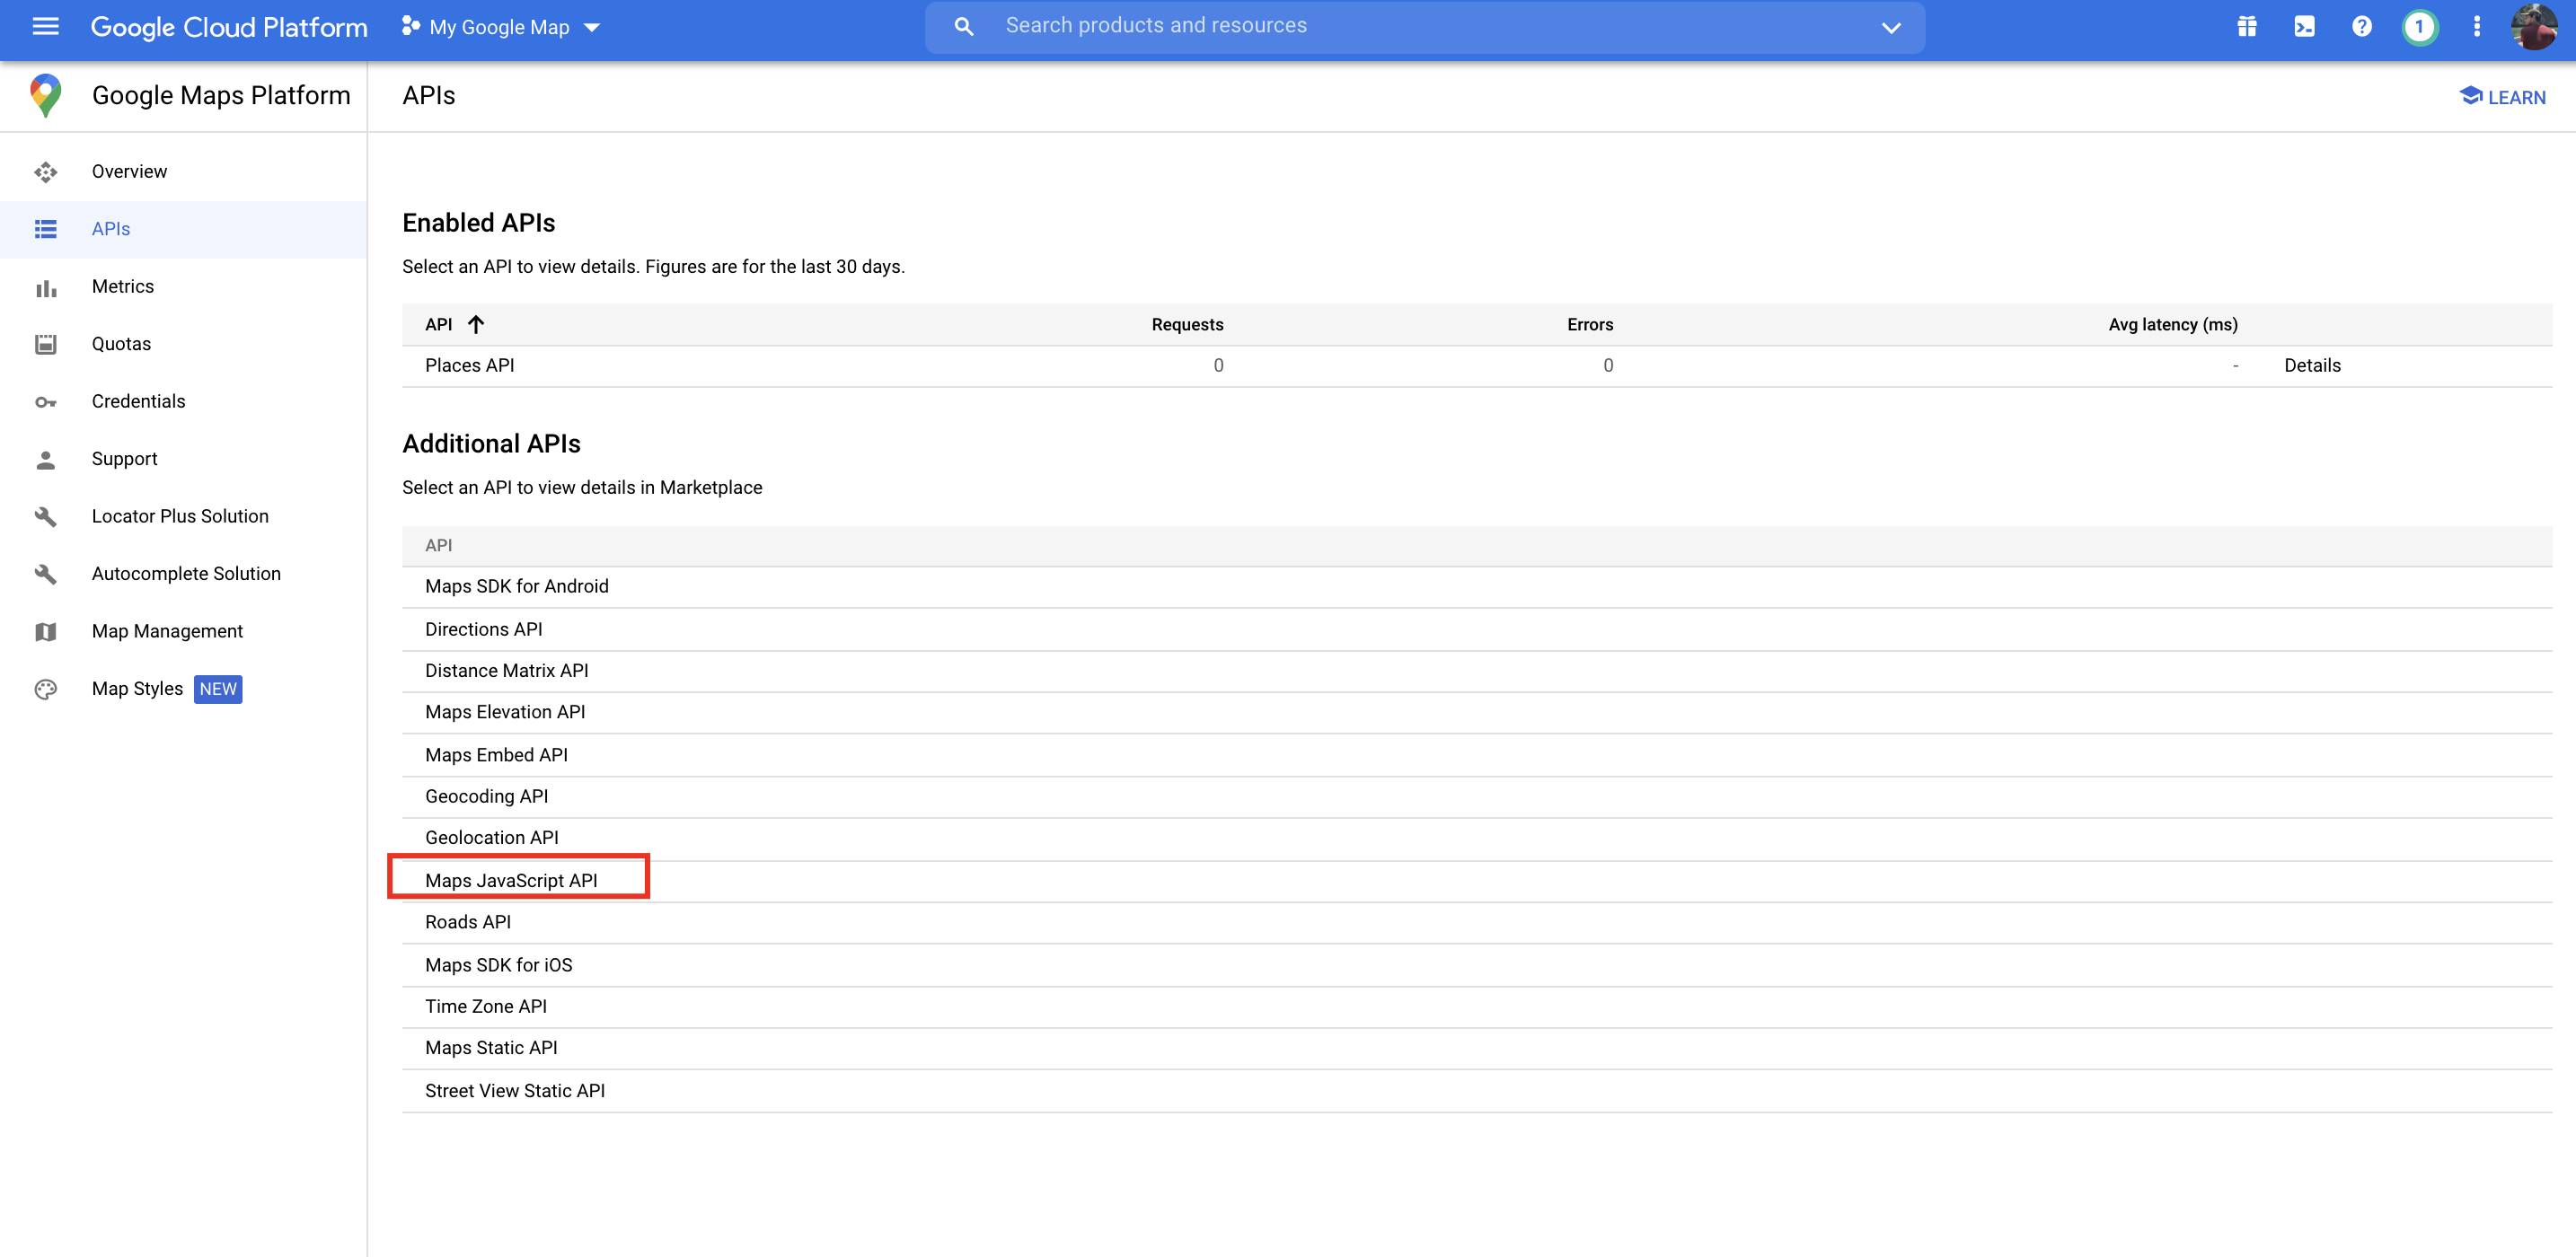
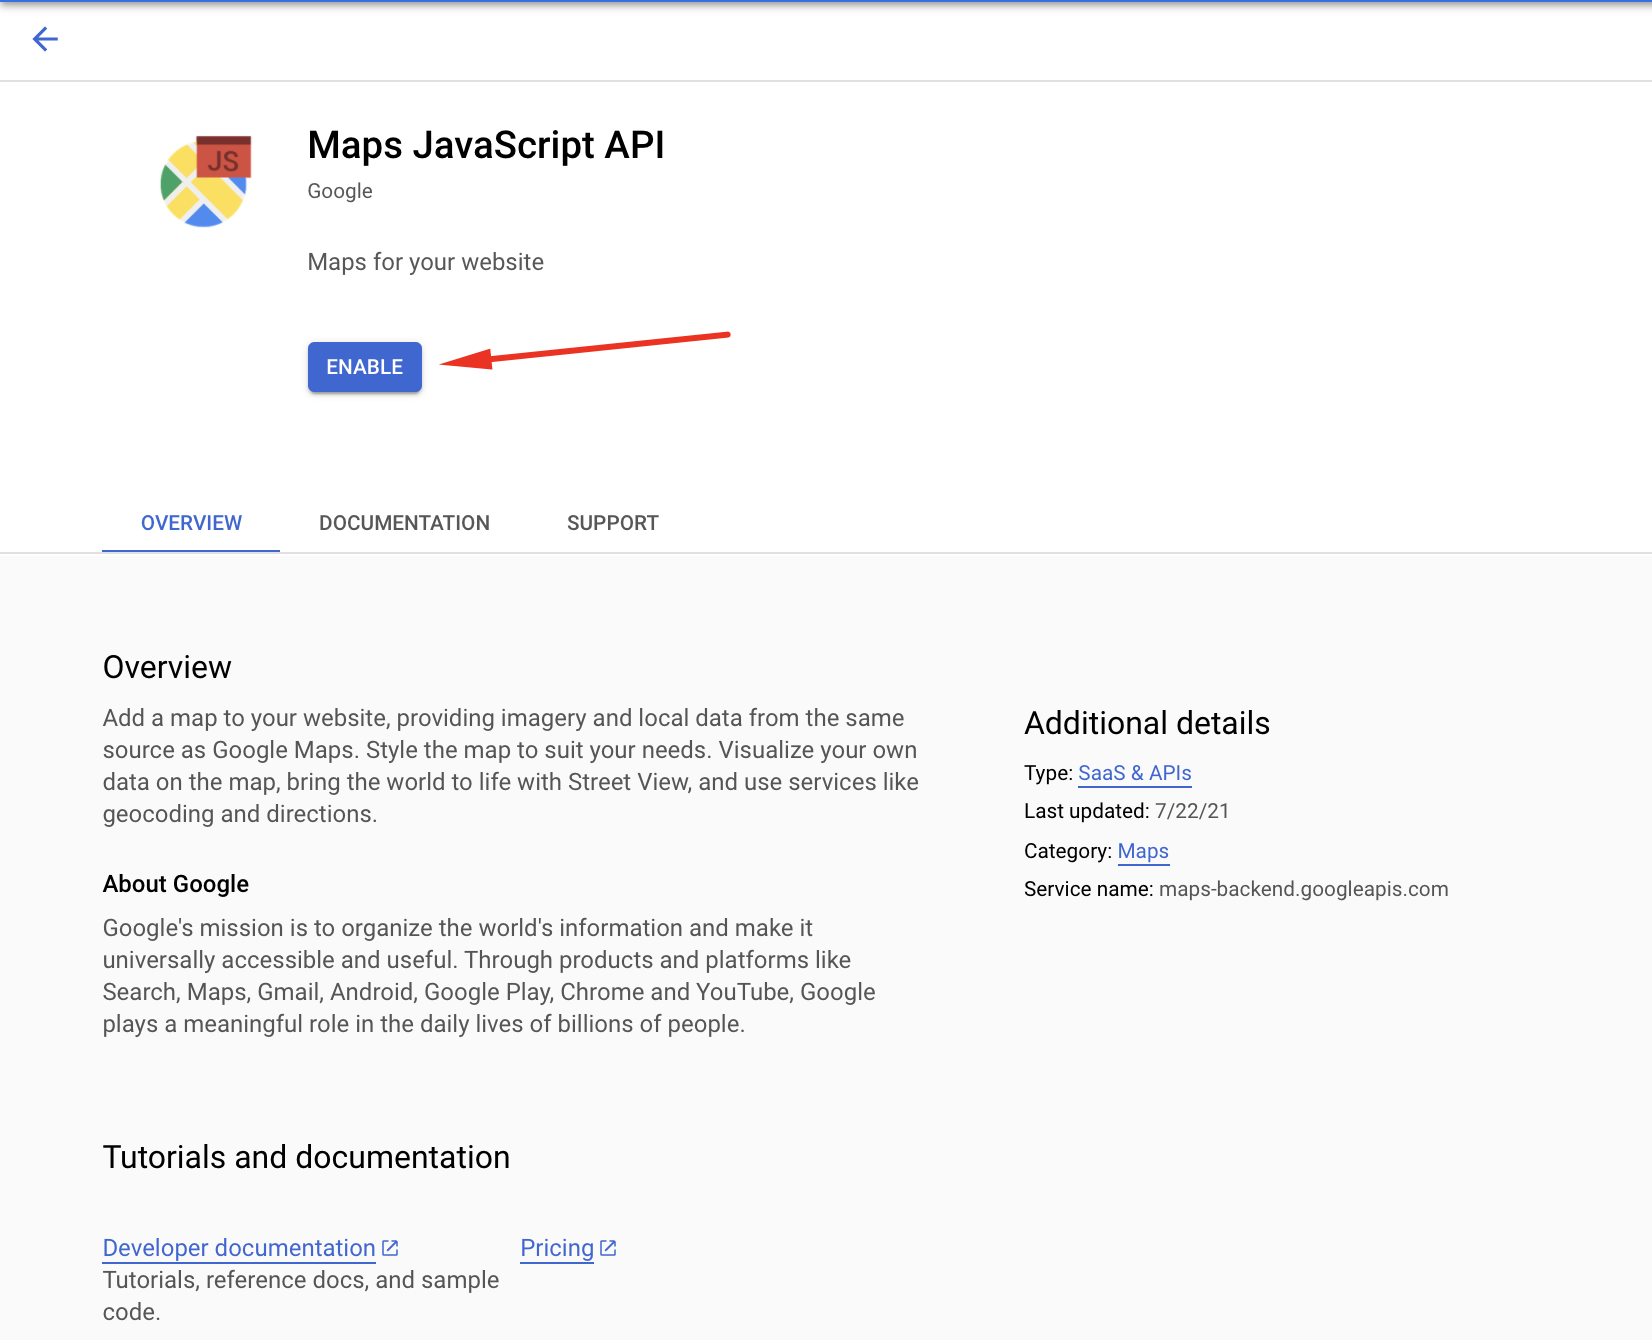
- The next step is to click the Maps Javascript API option.
- In the same way, click on Enable to enable the API.
- Both APIs have been successfully enabled, as you can see below.
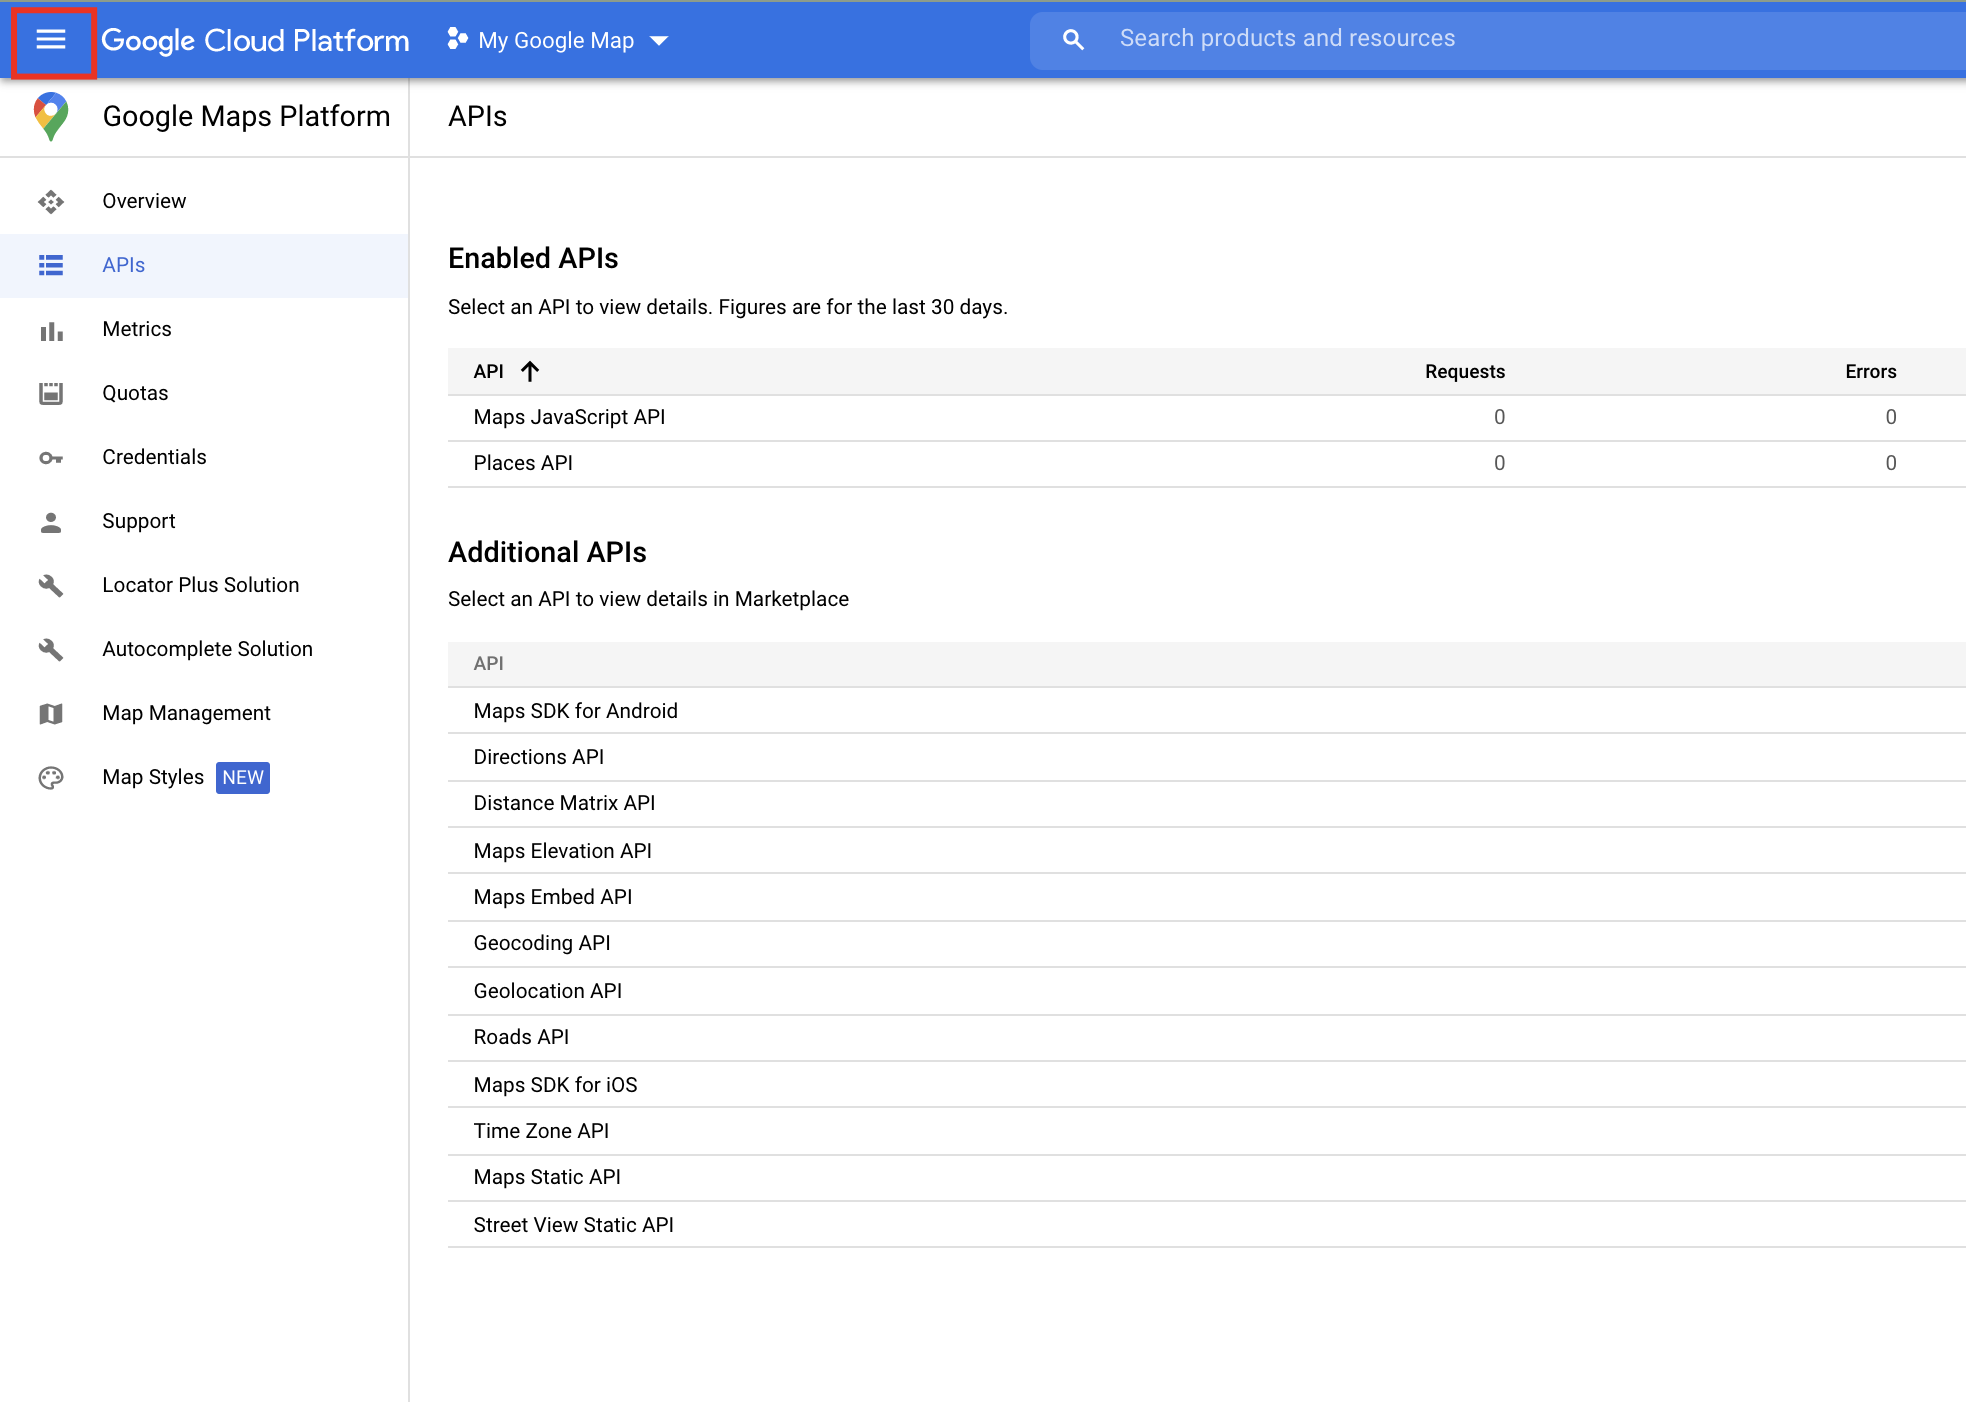
- Then click on the three lines option on the left side.
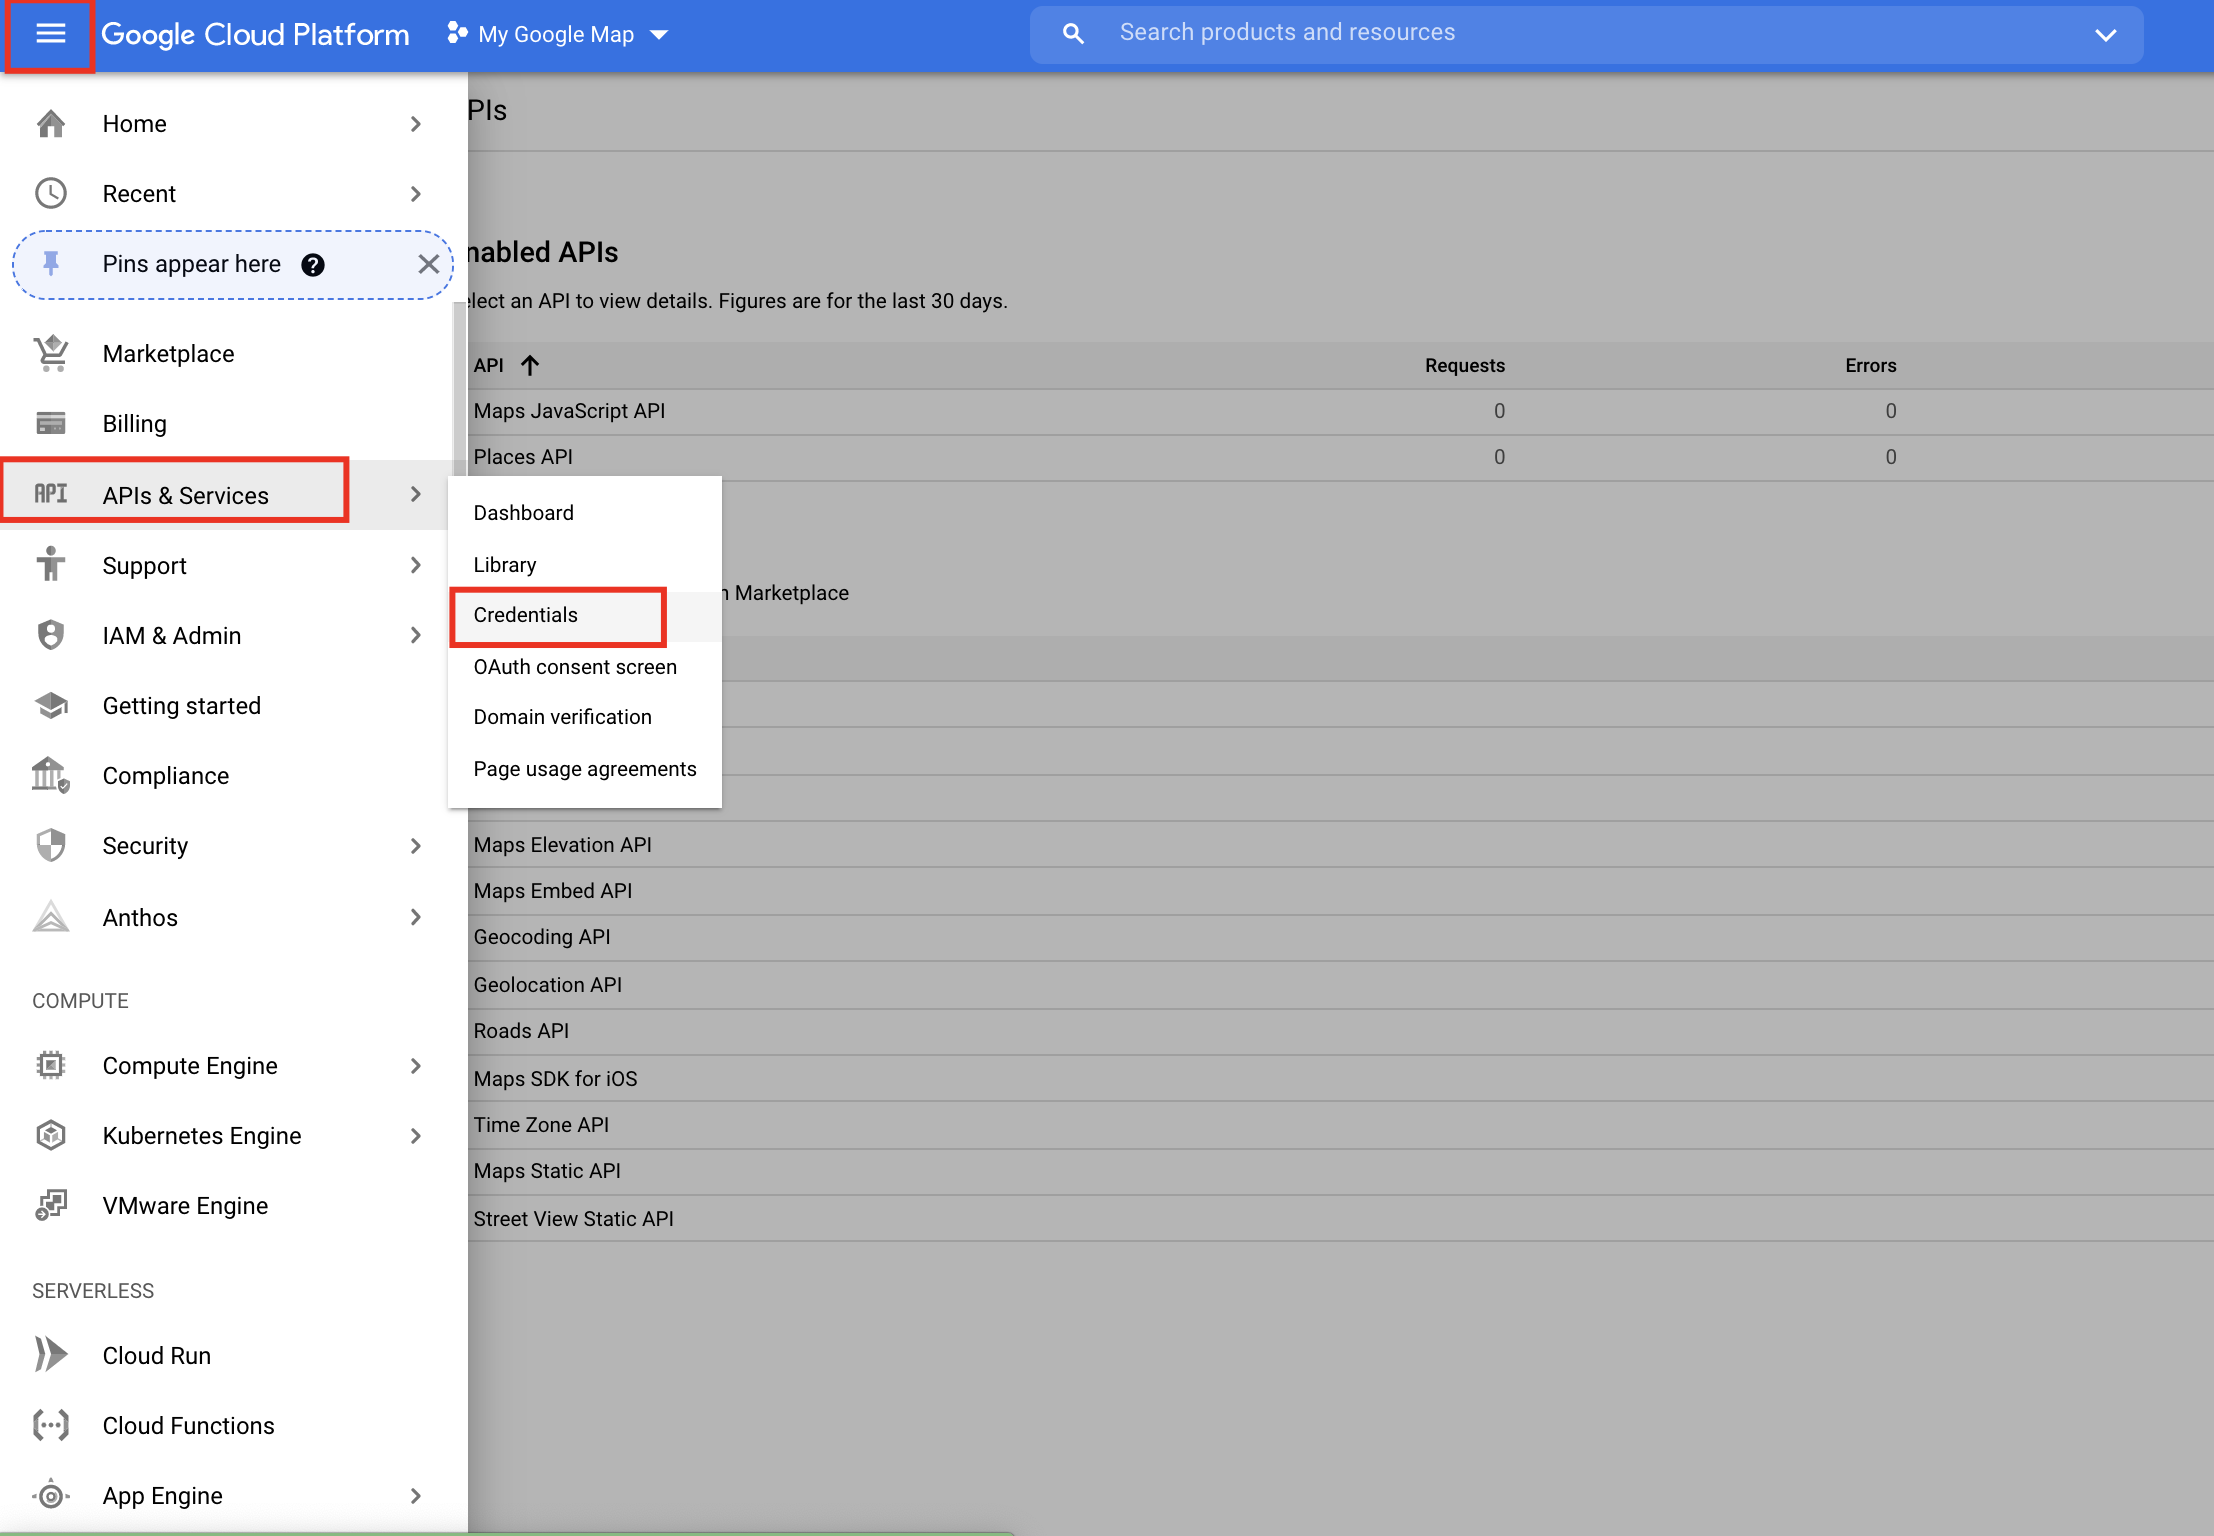
- Then click on the API & Services option following the Credentials option too.
- Here, you have to click on the Create Credentials option.
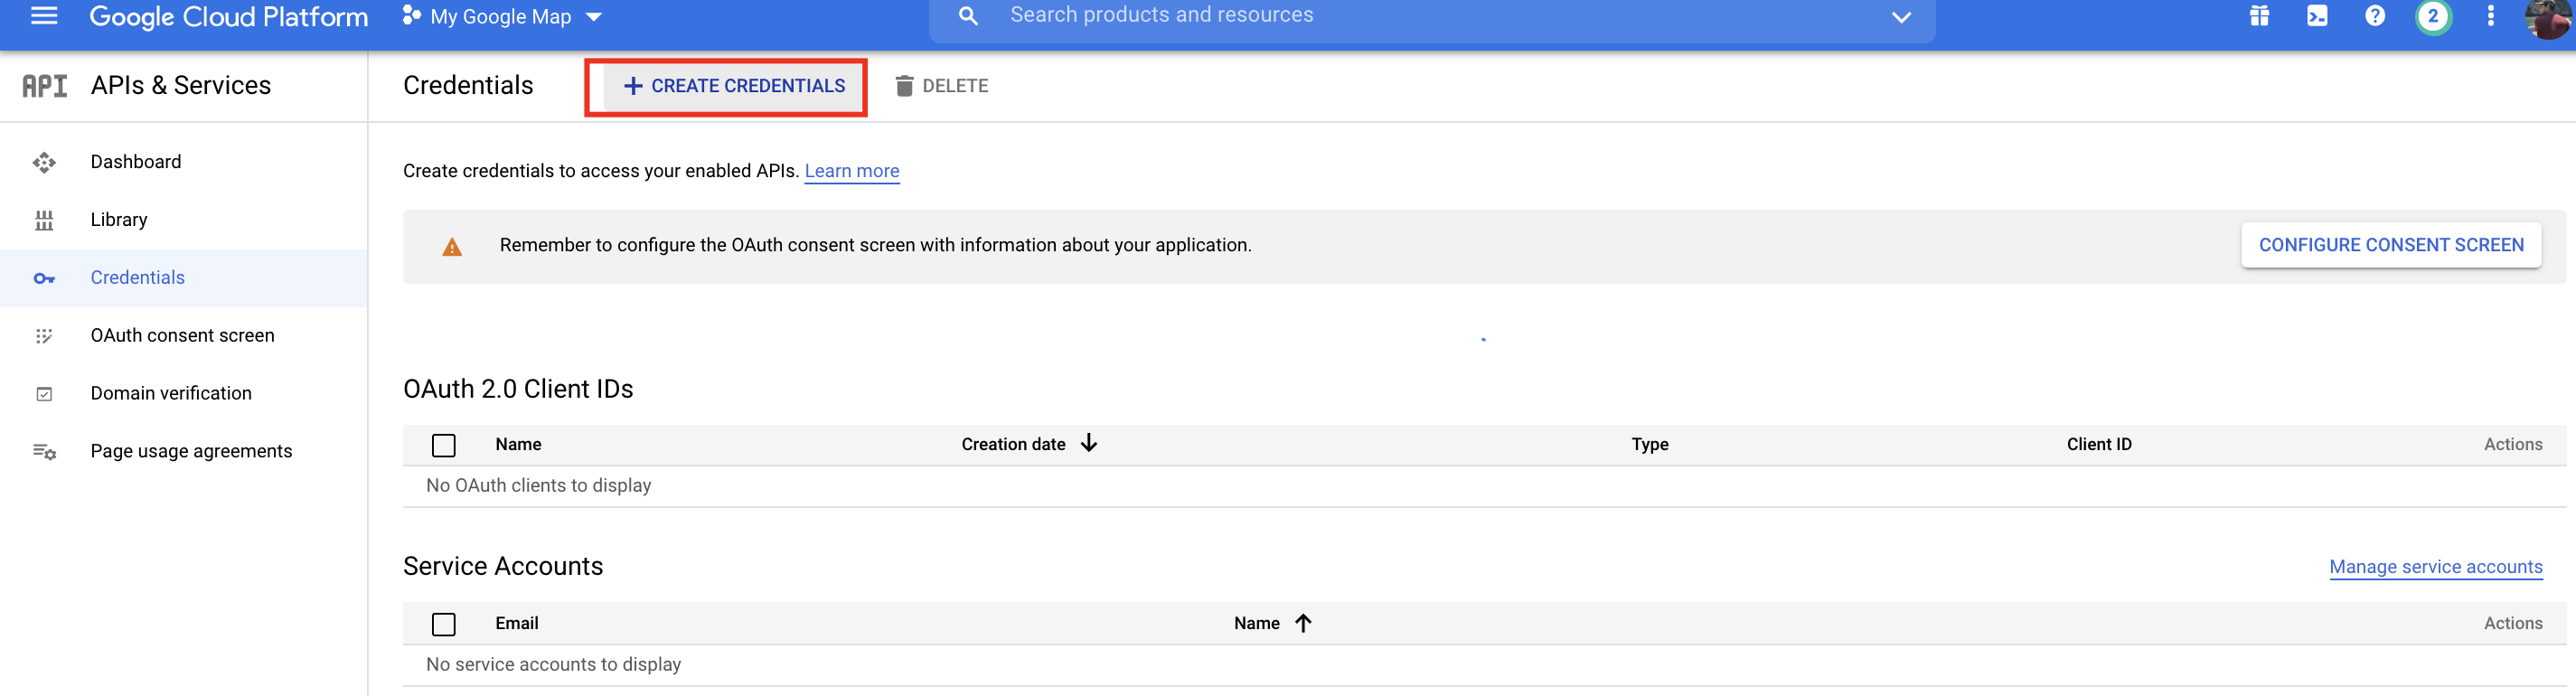
- And from the dropdown, select the API Key option.

- A pop-up box will appear where you can copy the API key.
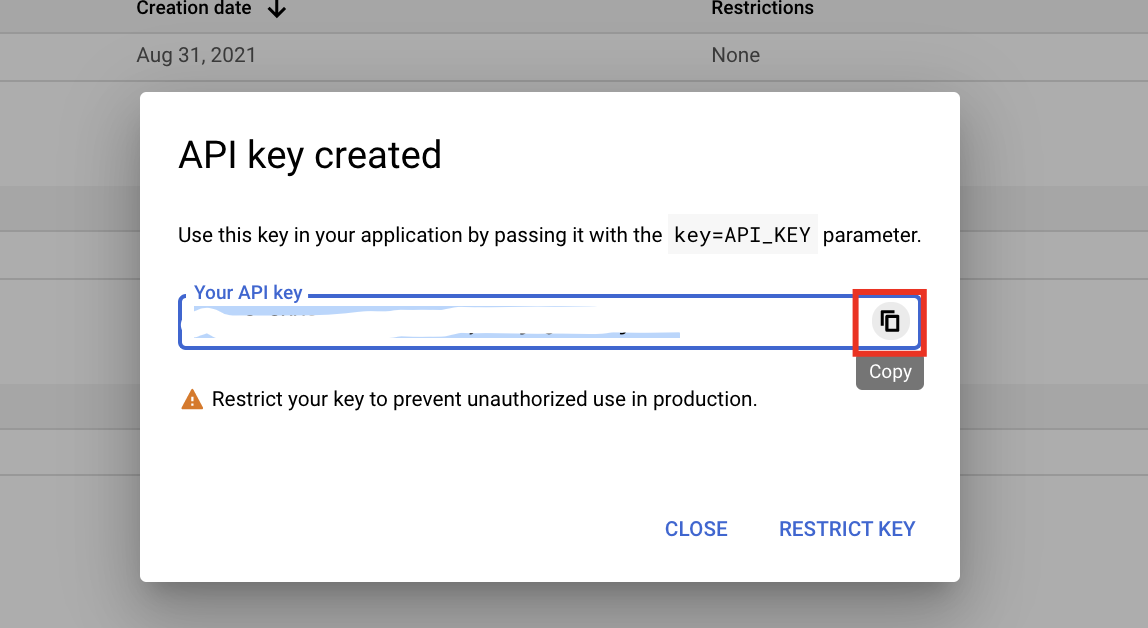
- Now, go back to the Fluent Forms Google Map Integration Settings and paste the API Key in the input field.
- Don’t forget to click on the Save Settings button.
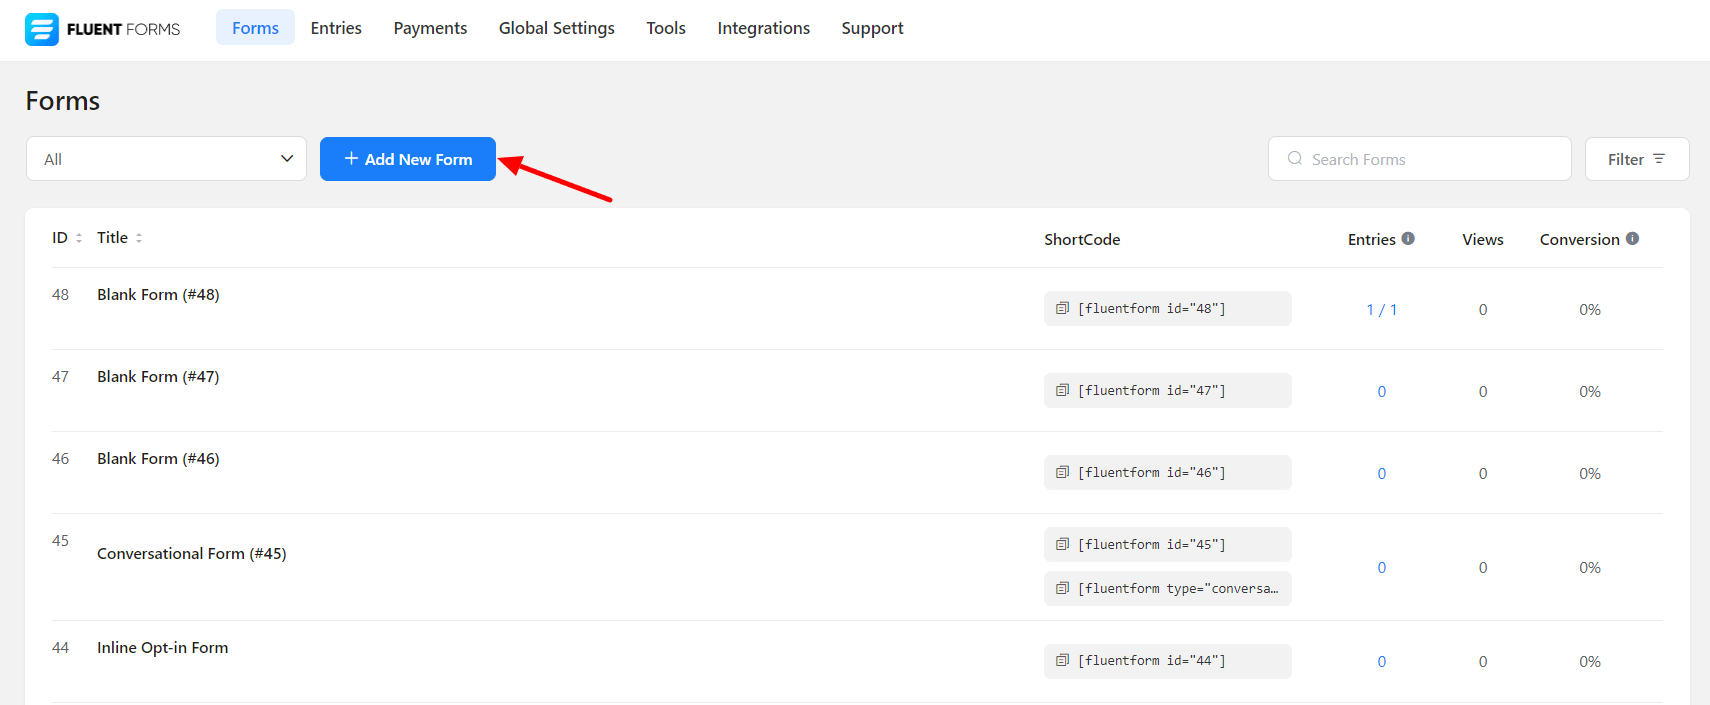
- Go to the Fluent Forms dashboard and create a new form.
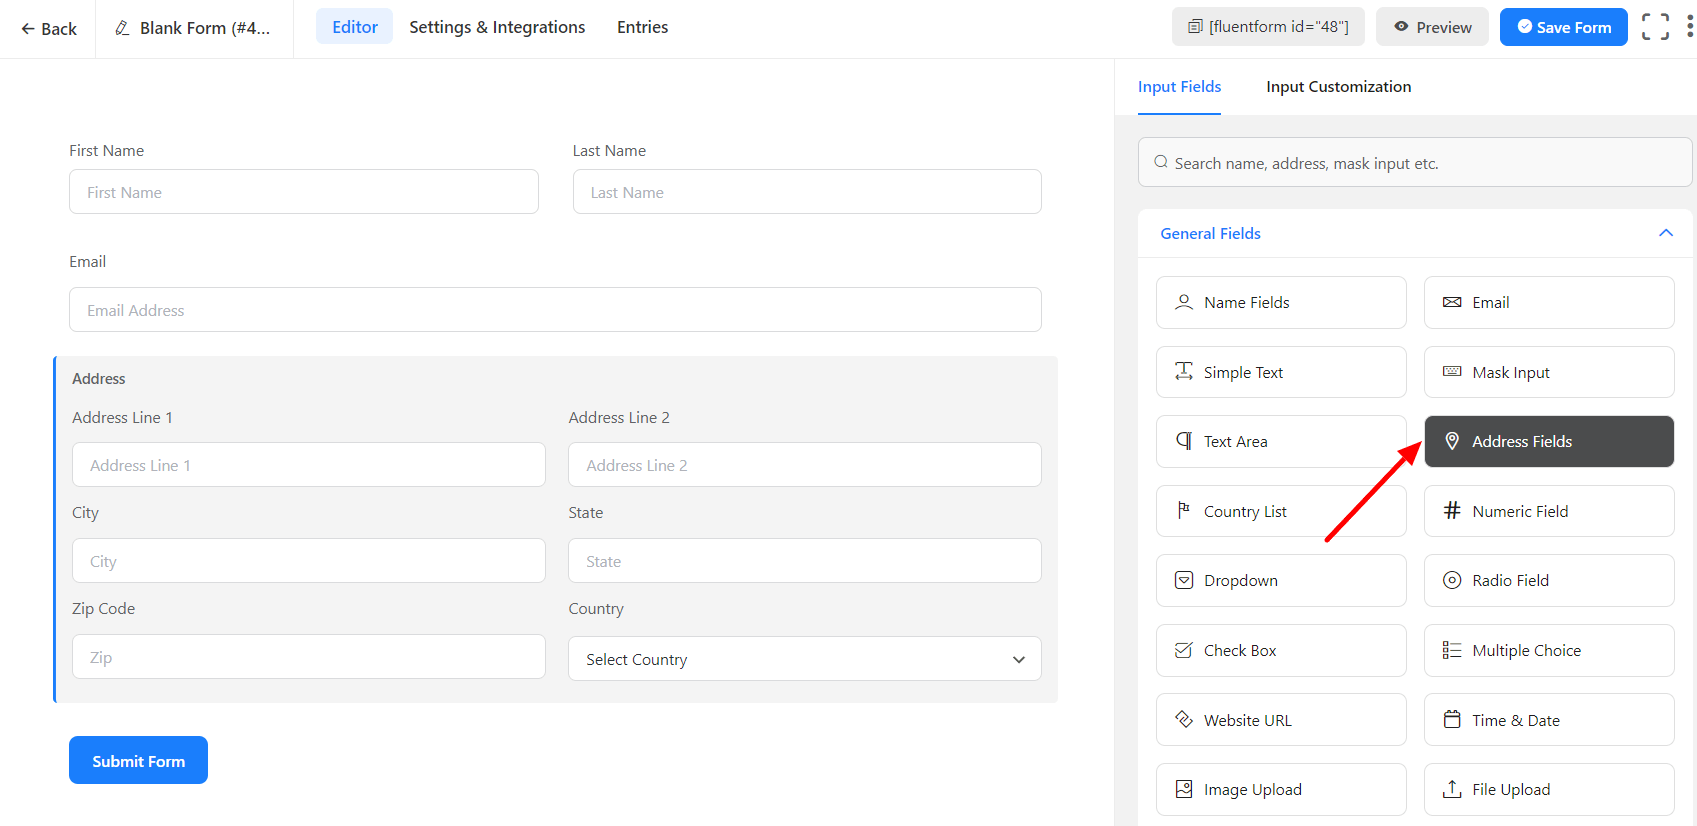
- After that, you can add an Address Field to the form.
- Then on the Address Field’s input customization, check the Enable Autocomplete (Google Map) & some list of options will appear then.
- Show Map: If you want to show the Google Map option on your Form, you can check to Enable Map (Google Map) option.
- Save Coordinates: Enable the See User Location on Map (Latitude & Longitude) option to save your users’ location coordinates. You can view these coordinates later in the form entries.

- Auto locate: The auto-locate option will display the user’s location if someone accesses the form. Three options are available here: Page Load, On Click & Disable.
When the map is enabled, Please enable Geocoding API if you want to populate the address after the map marker drag end.
- Page Load: When you choose the Page Load option, the moment the page loads, the user’s location will be immediately detected.
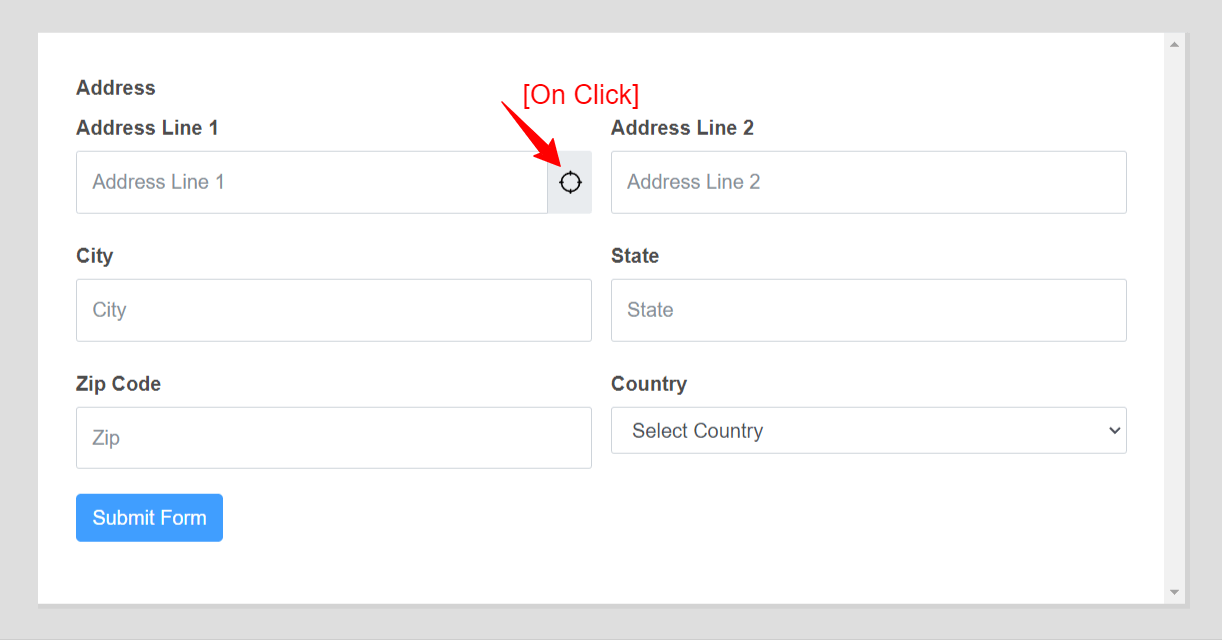
- On Click: If you choose the On Click option, a Click icon will be next to the Address box. Users’ location will be started to be located once they click on that icon.
- Disable: You can select the Disable option if you want to disable the Auto Locate option.
- Save the form and click on the Preview & Design option to view the form.
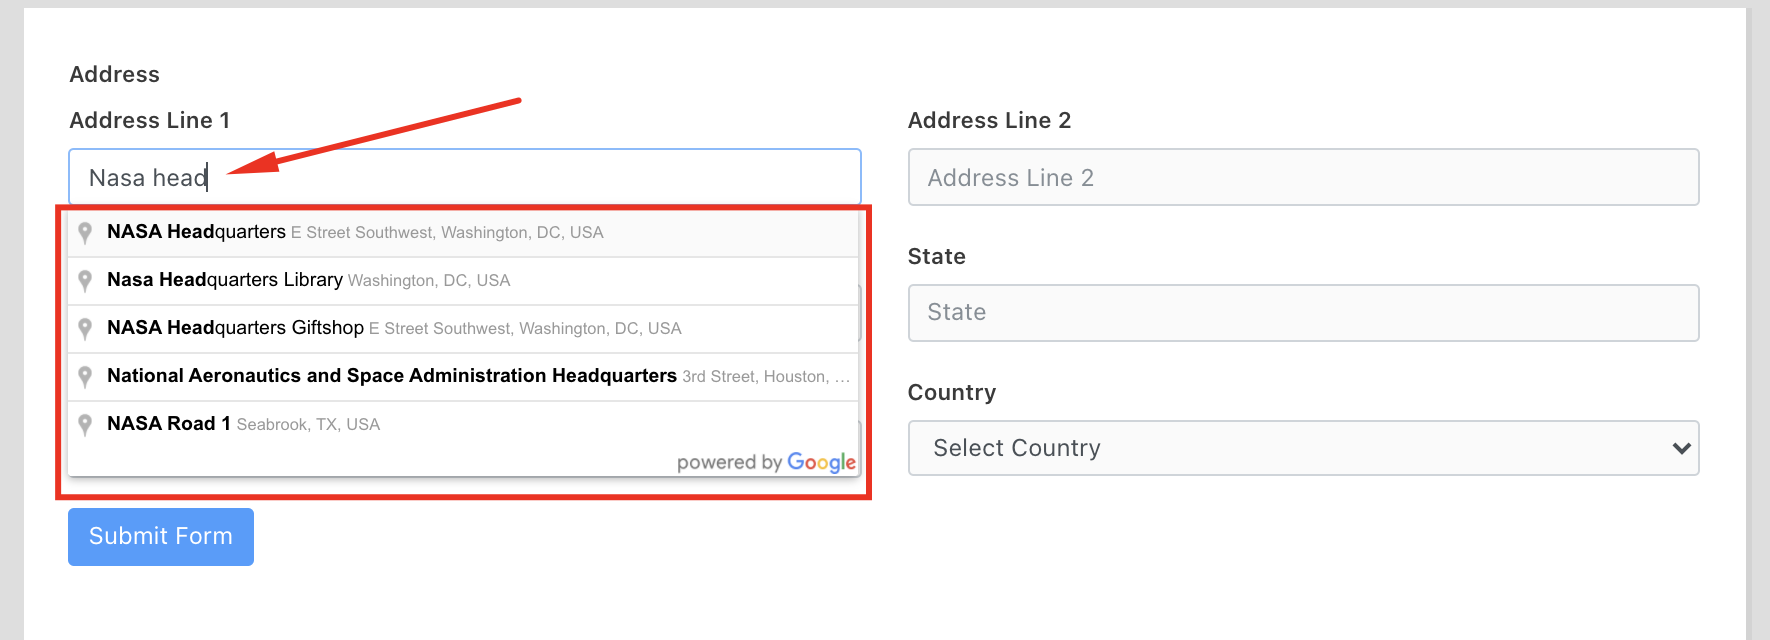
- Once you type a phrase of any place on the form, this will automatically show suggestions for the specific addresses you can choose from. –
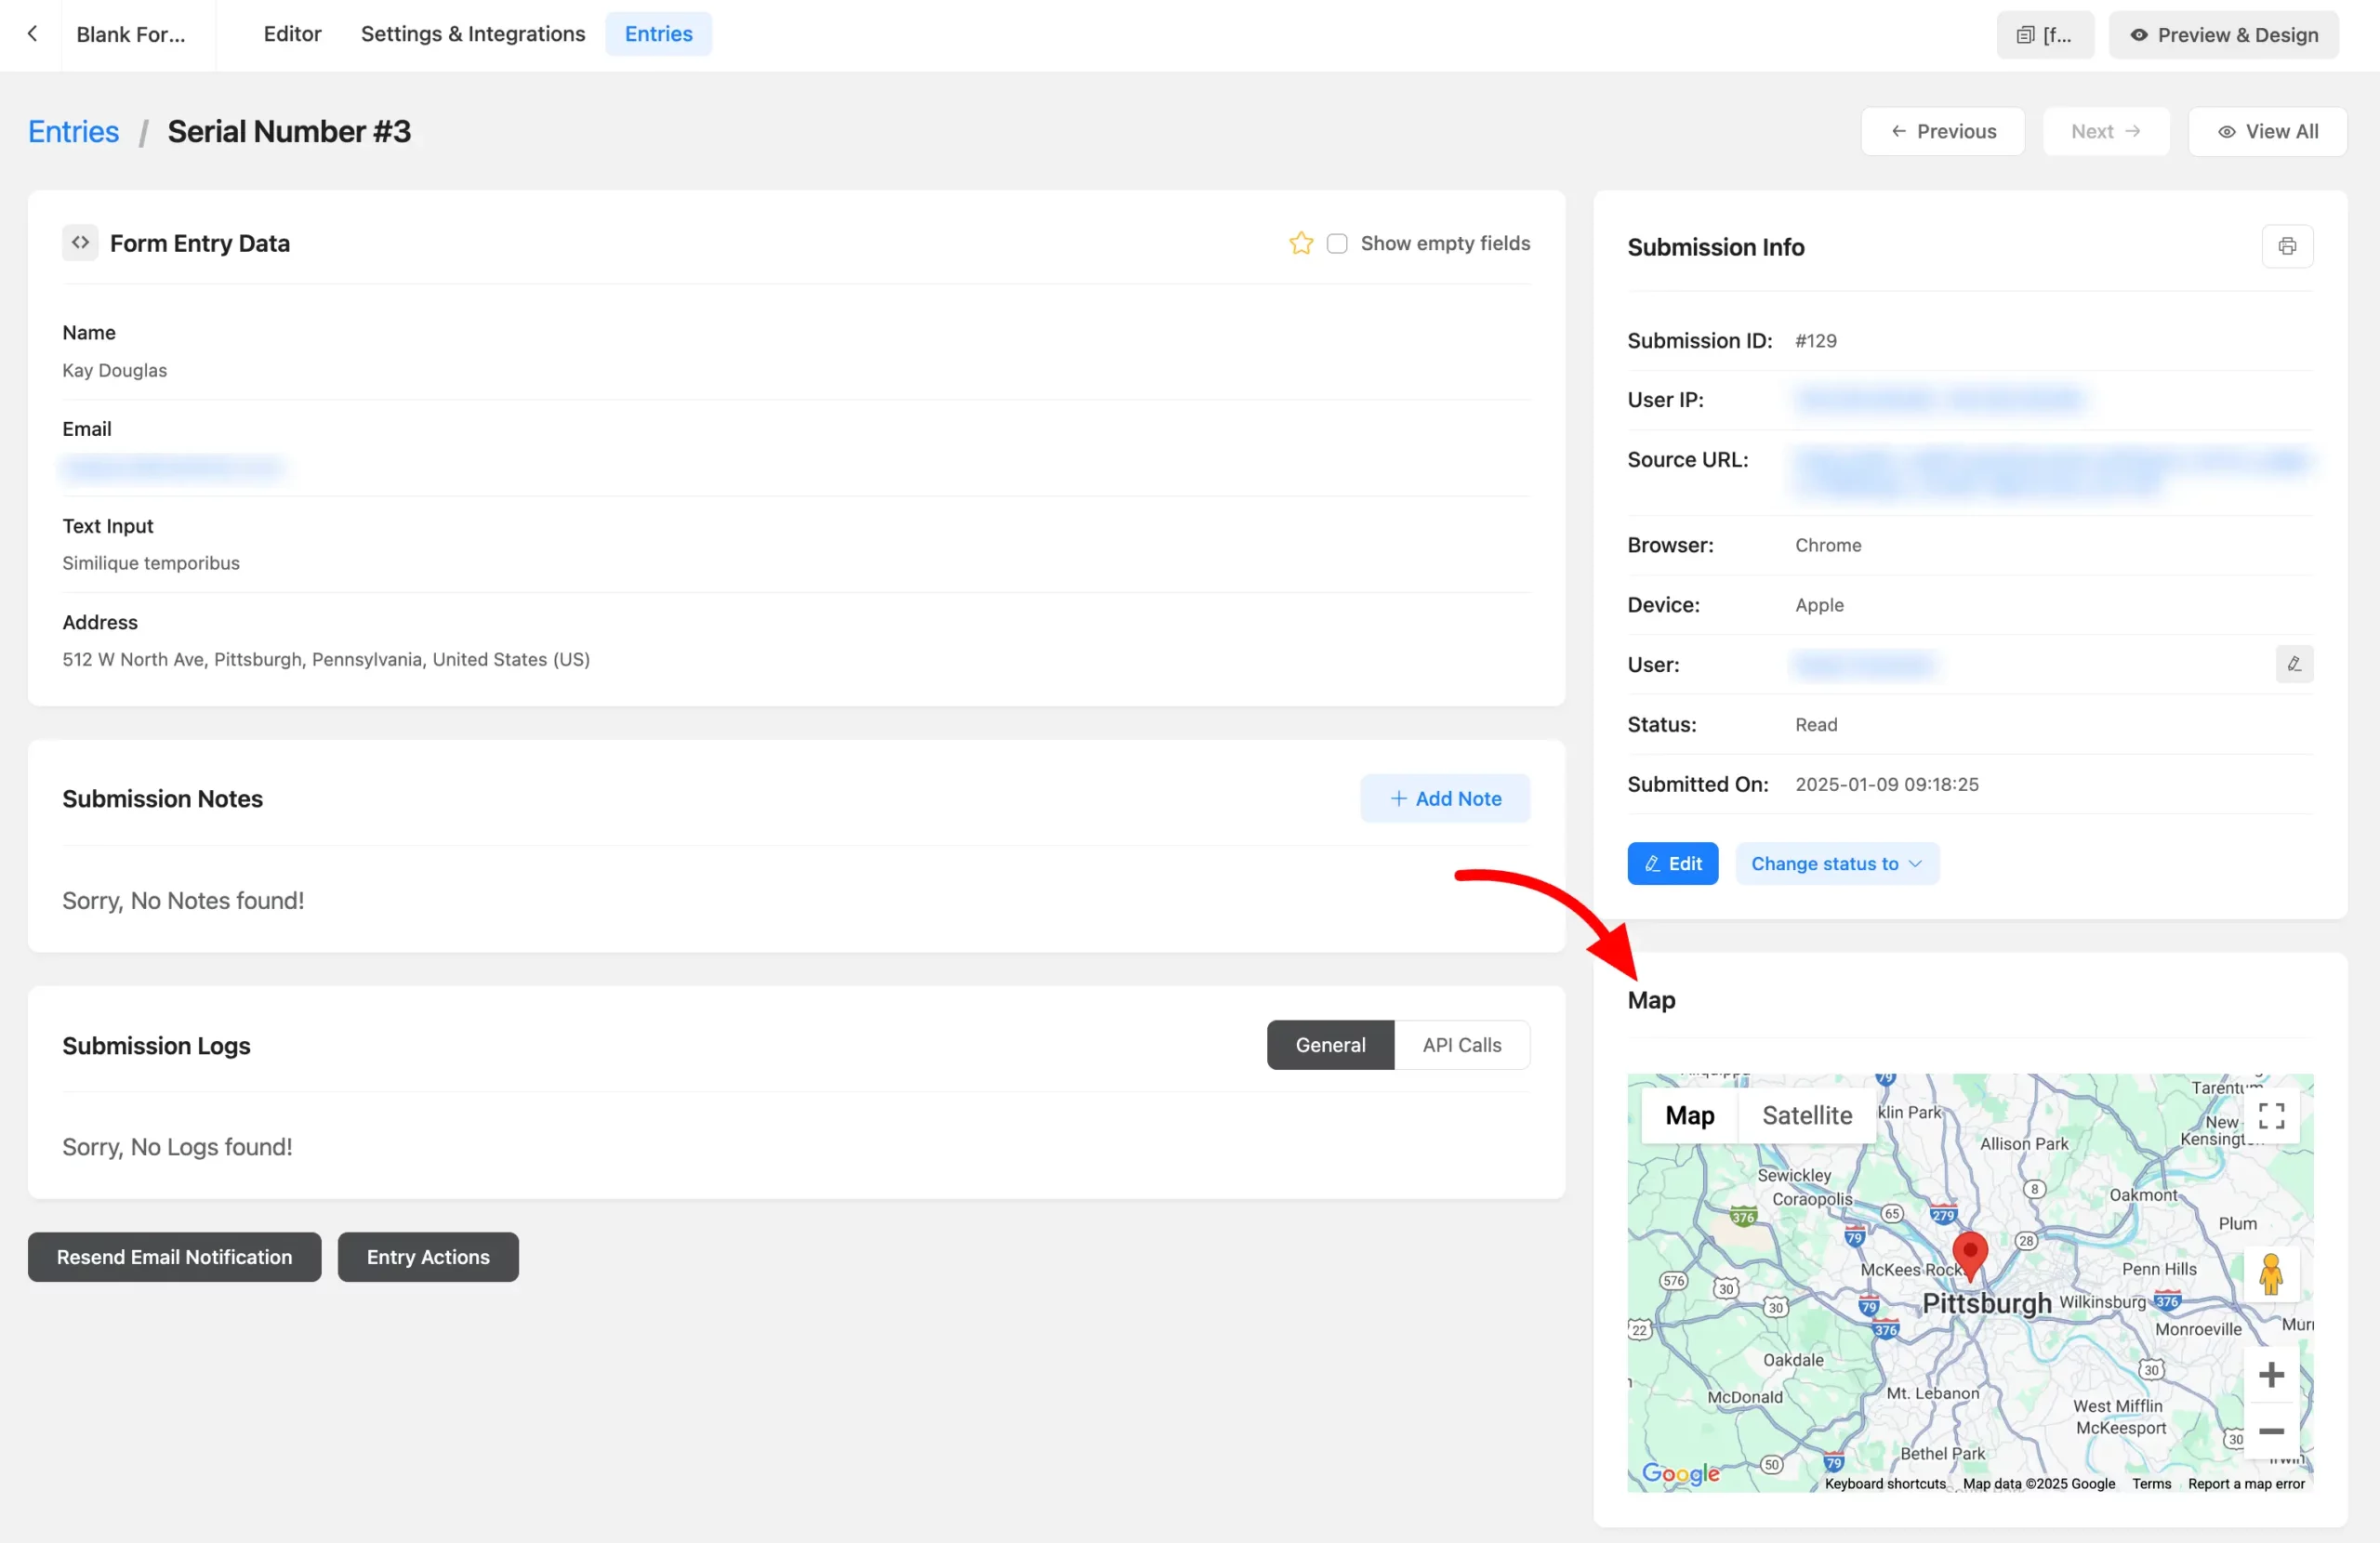
- After enabling the Save Coordinates feature, you can view the user’s saved location in the form entries, as shown in the screenshot below.
If you have any questions, suggestions, or concerns about this guideline, feel free to reach out to us. We’re here to help!