
Airtable announces Personal API keys will be deprecated by the end of January 2024. So we will close this Airtable integration after January 2024. Please use the new Airtable integration from here.
Airtable is a low-code platform for building collaborative apps. Customize your workflow, collaborate, and achieve ambitious outcomes.
Integrate your Airtable account easily with Fluent Forms Pro by following the steps mentioned below –
Steps to Integrate Airtable Legacy with Fluent Forms
- Activate the Airtable Module
- Get your Airtable API Key, Base ID, and Table ID
- Use the Airtable API Key, Base ID, and Table ID with the Airtable module
- Create/Use a Form with Fluent Forms
- Setup the integrations feed & Map the input fields
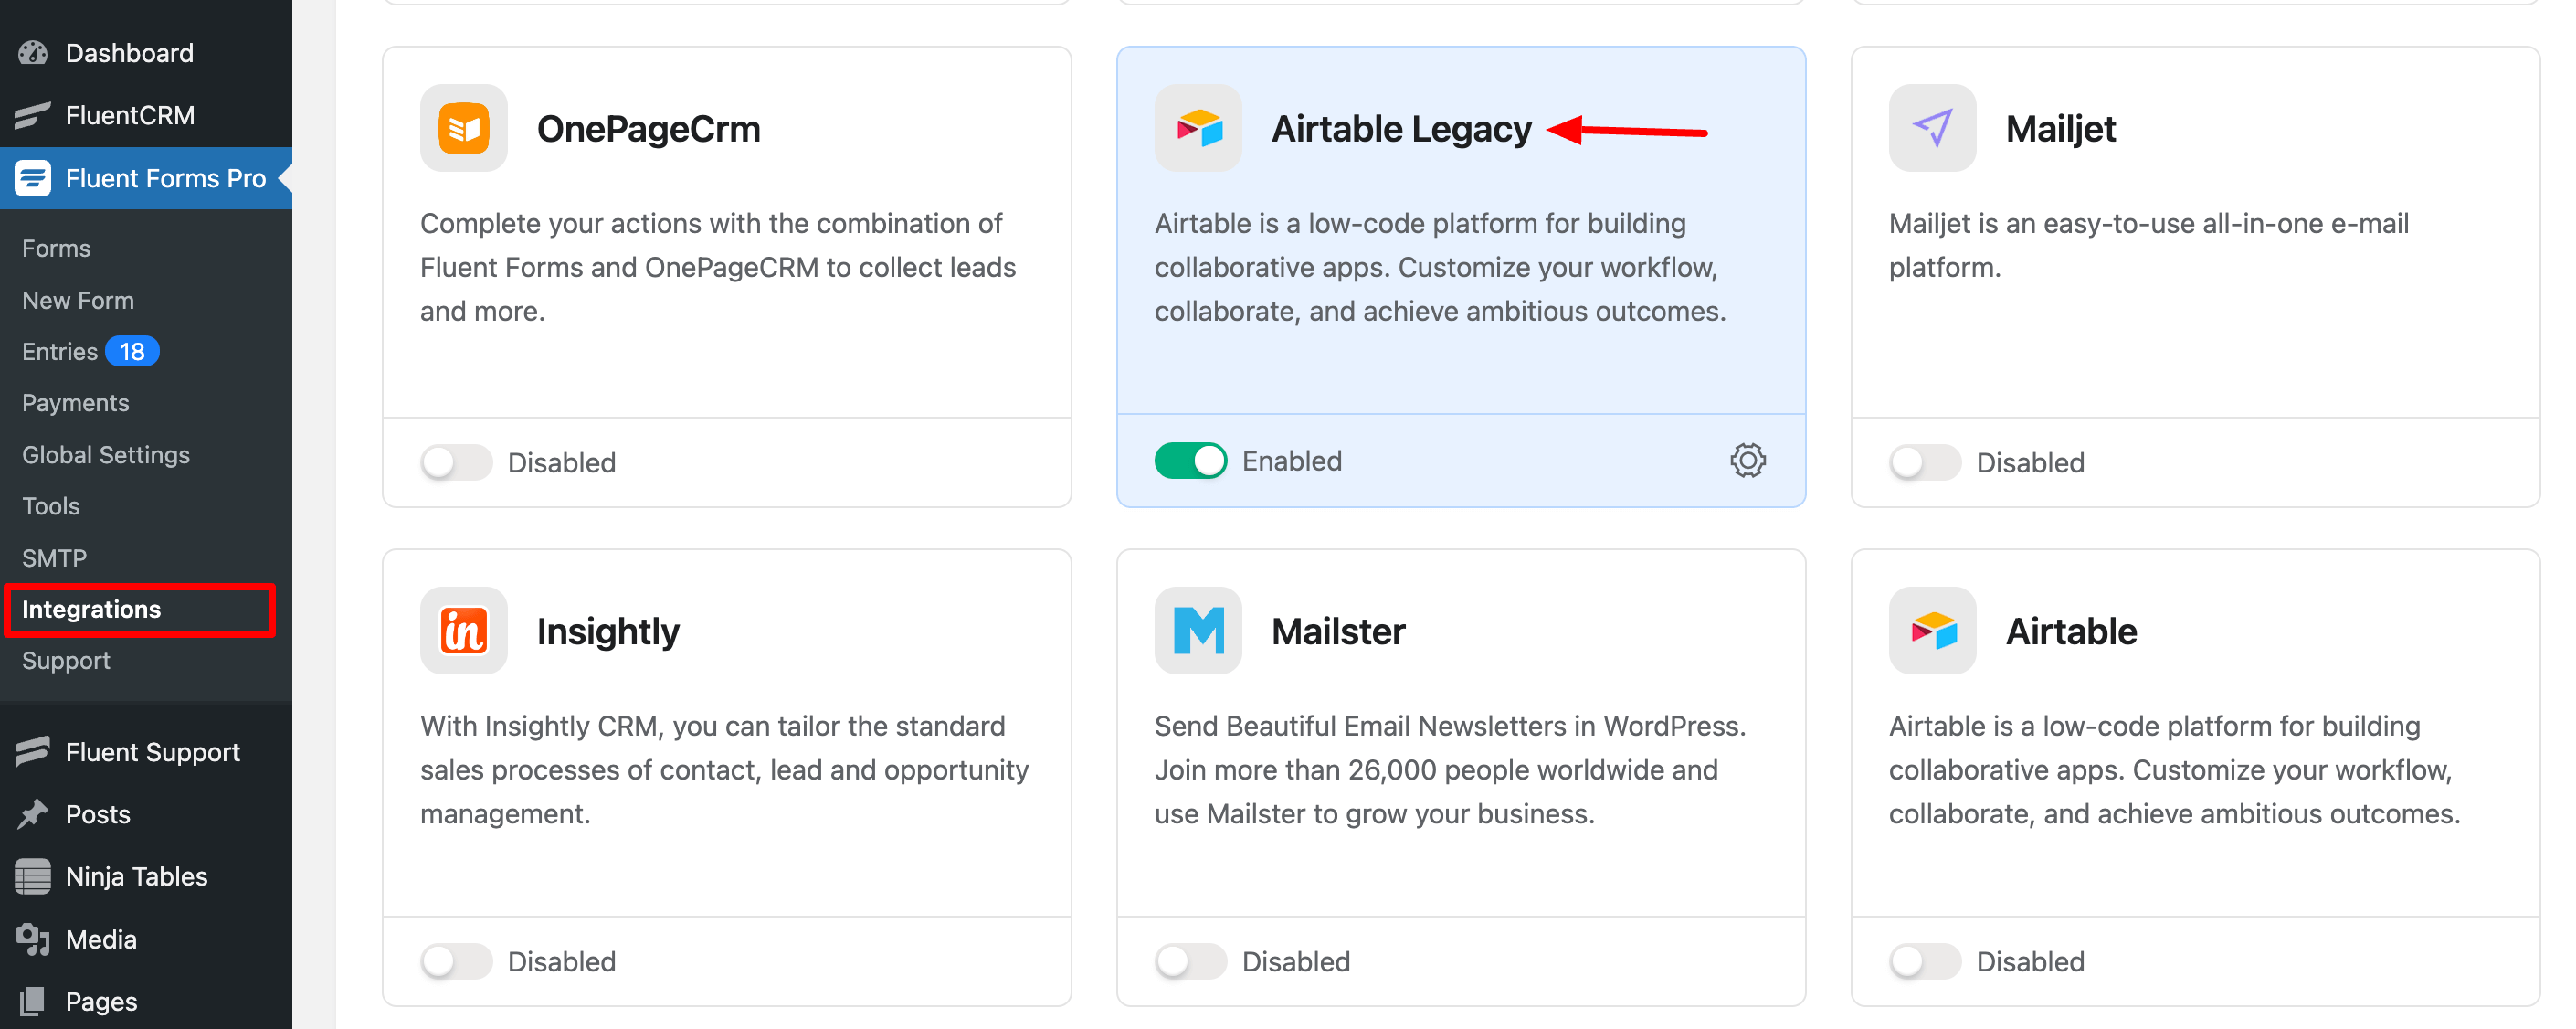
- Go to the Integrations from Fluent Forms (WordPress admin panel sidebar) and Enable the Airtable Module, as shown in the screenshot below-
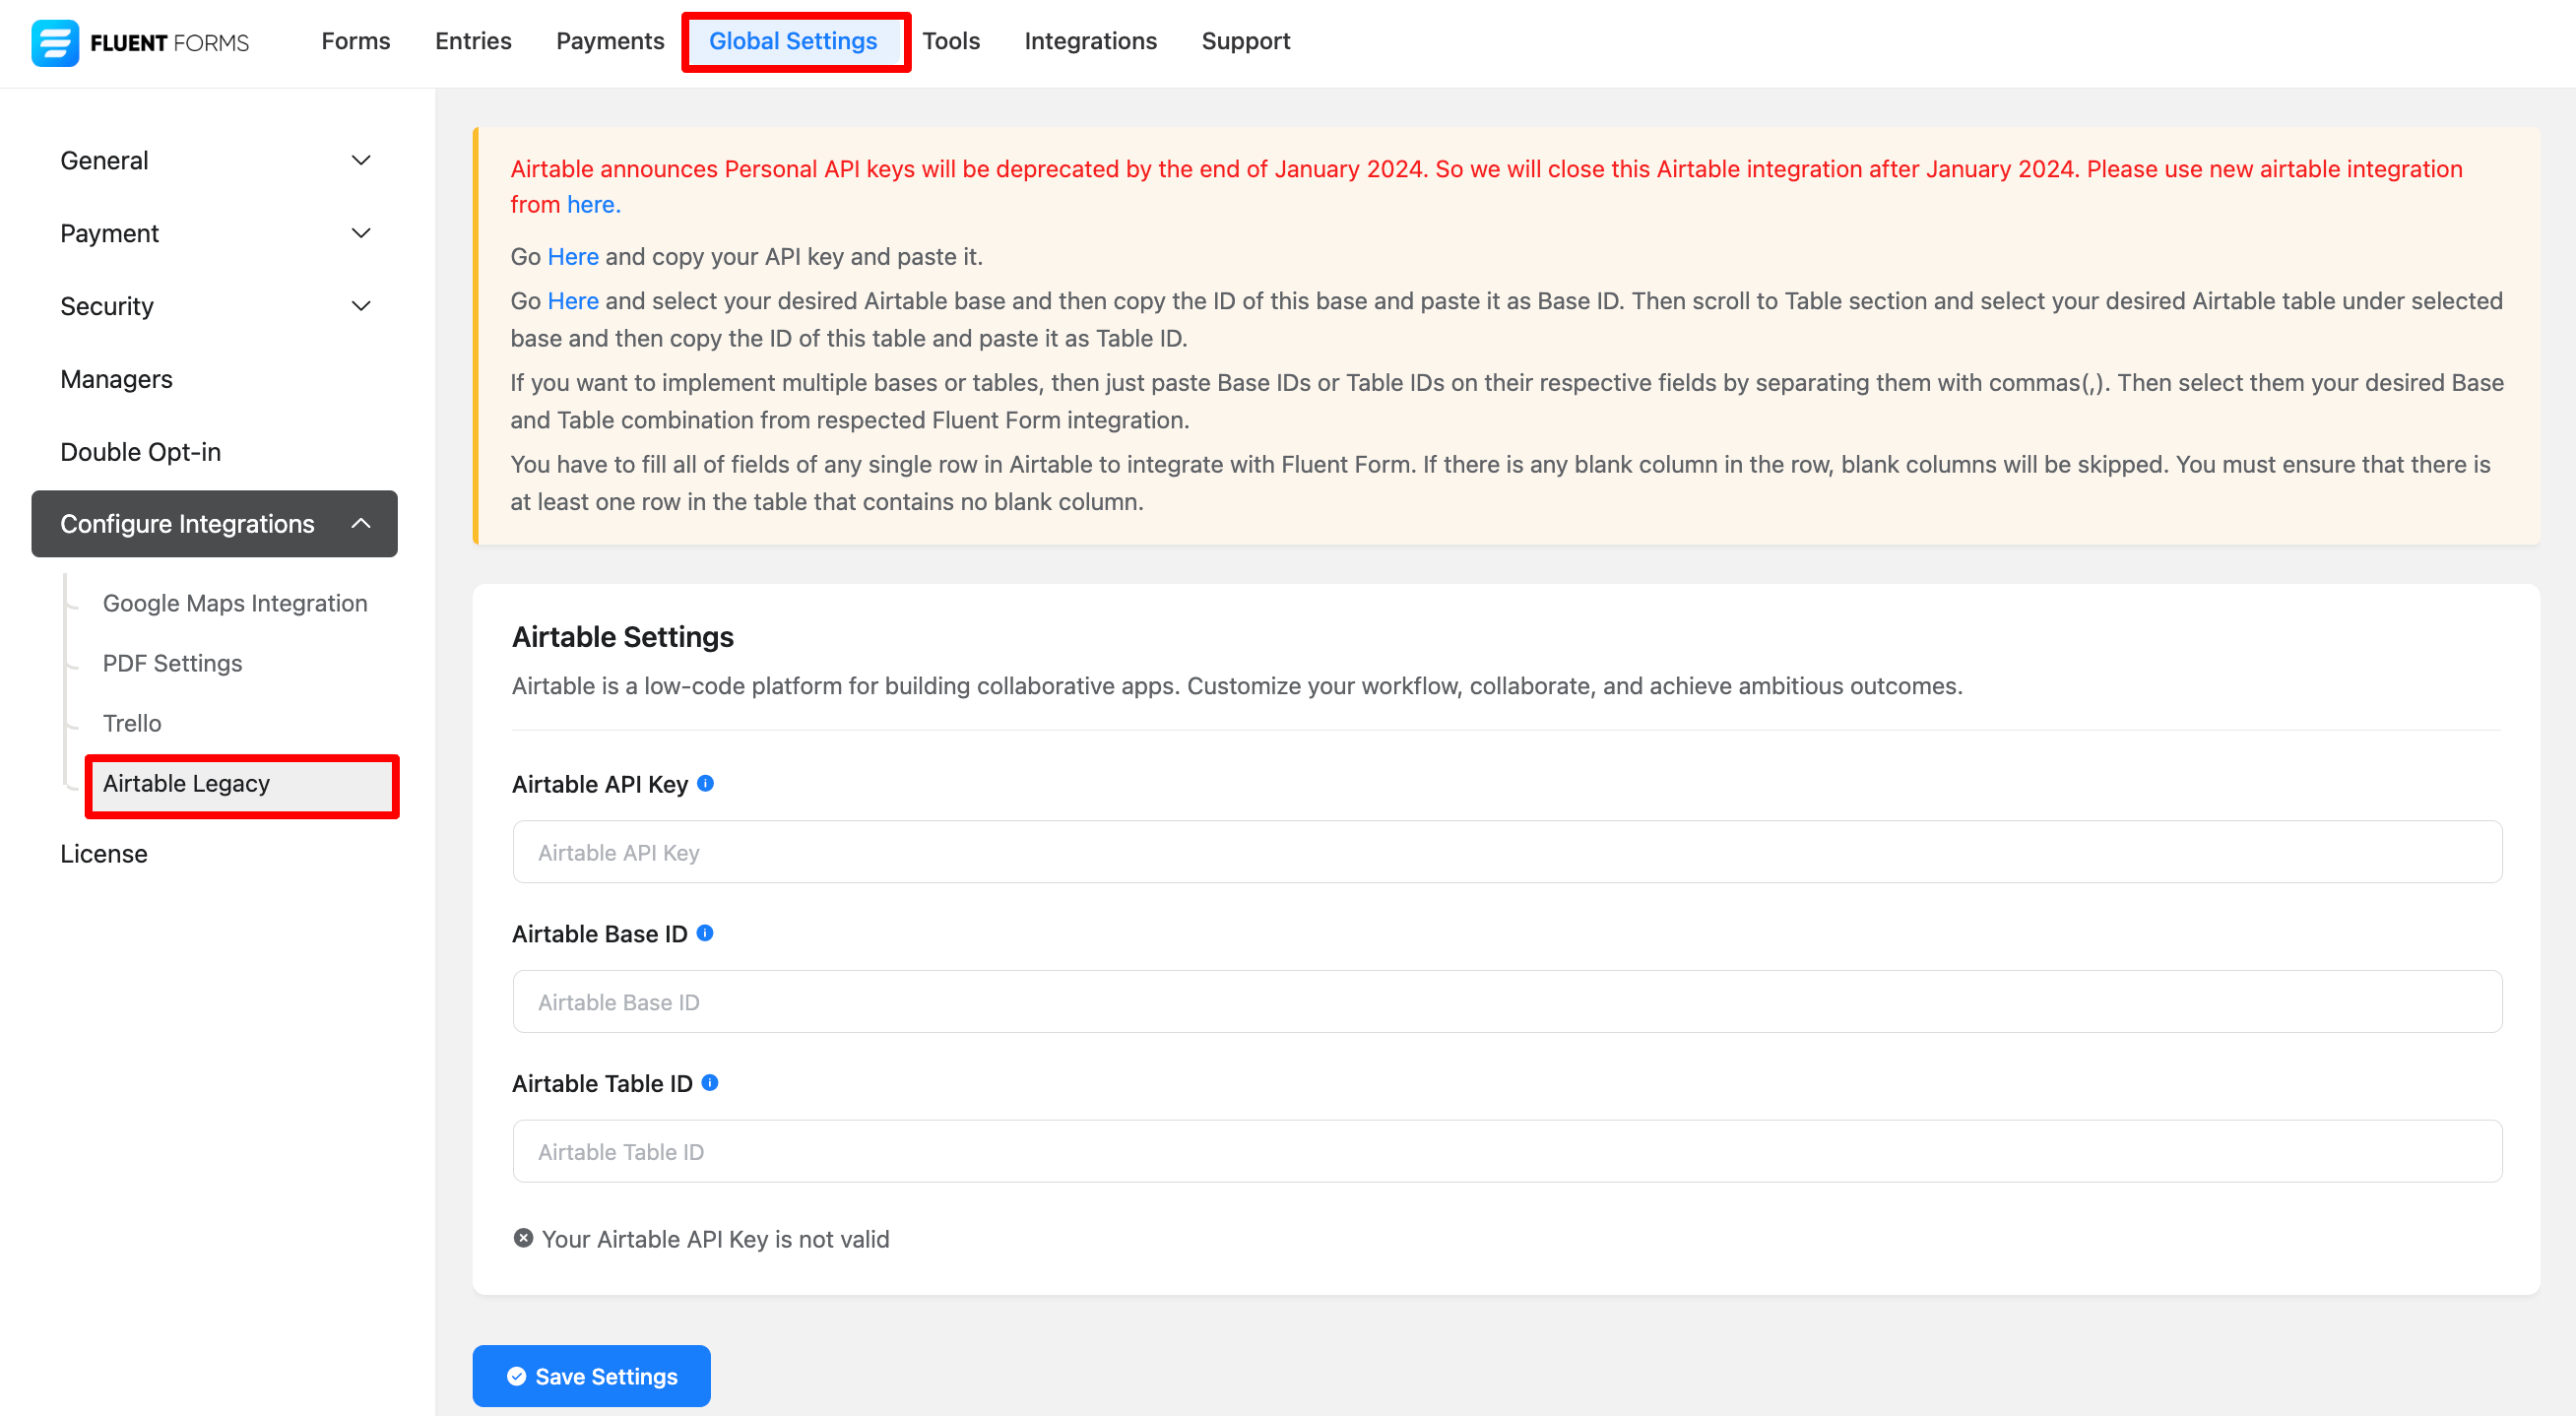
- Again hover over Fluent Forms and go to Global Settings. Select Airtable Legacy, and you will be asked for the Airtable API Key, Base ID, and Table ID here.
- If you don’t have an Airtable account, you can sign up here.
- After logging into your Airtable account, you will get the Airtable API Key by going to the Airtable Account Overview. See the below screenshot-
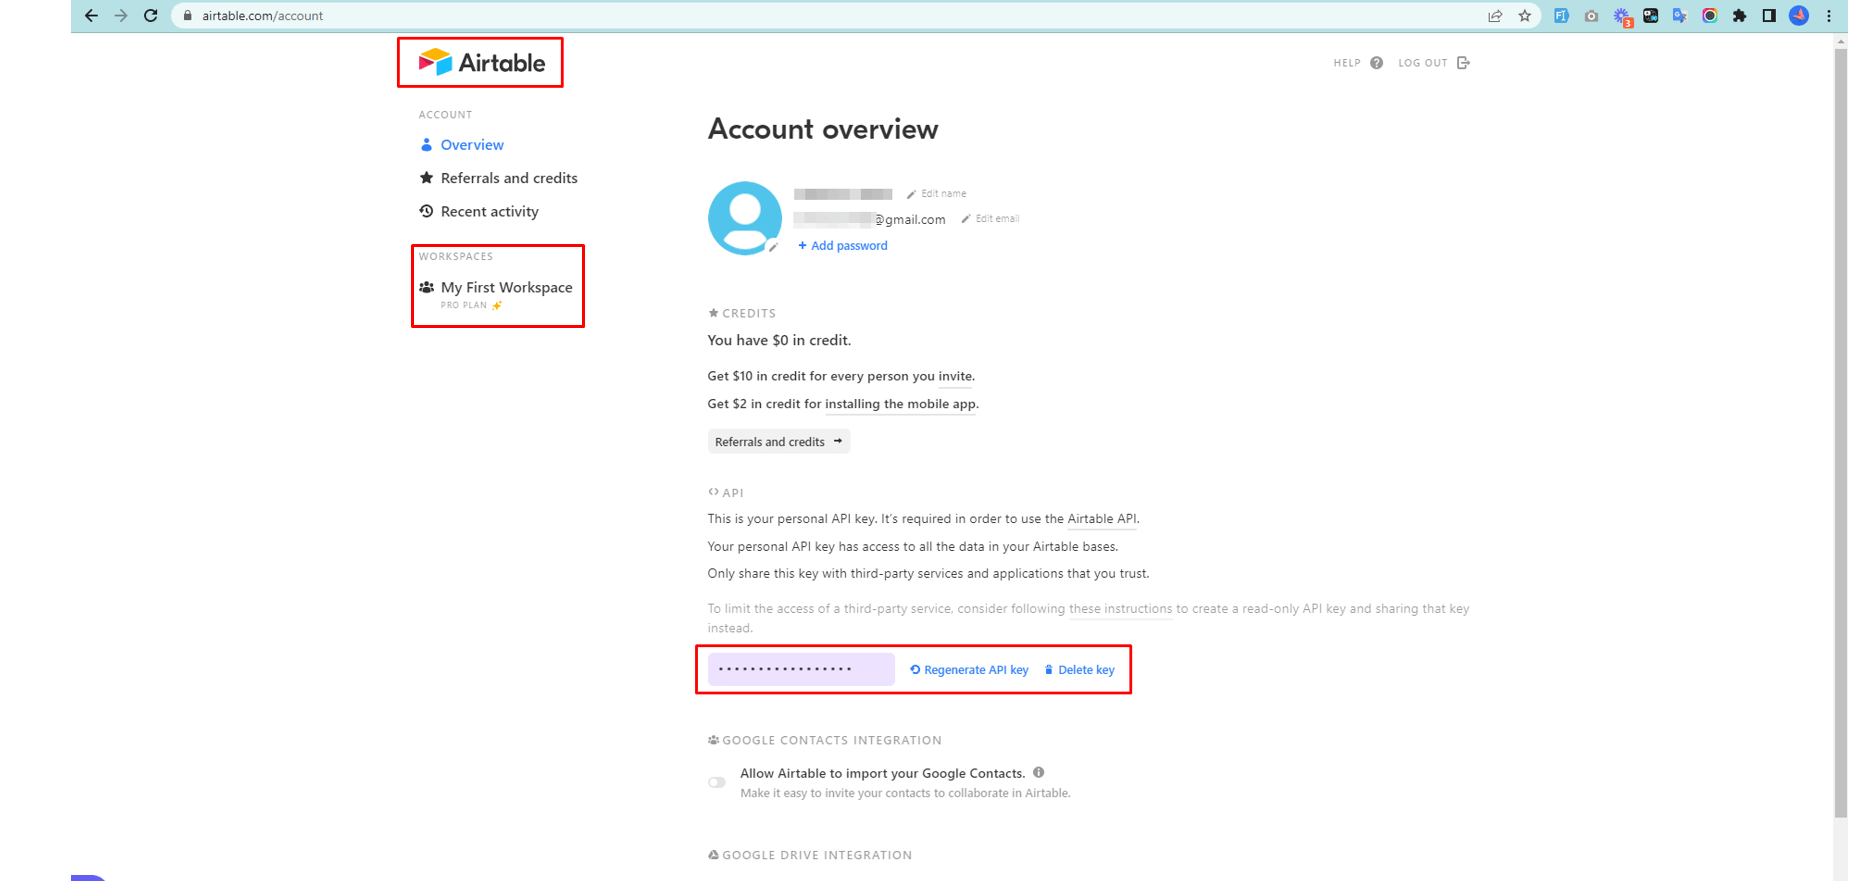
- Copy the Airtable API Key to use this in further uses.
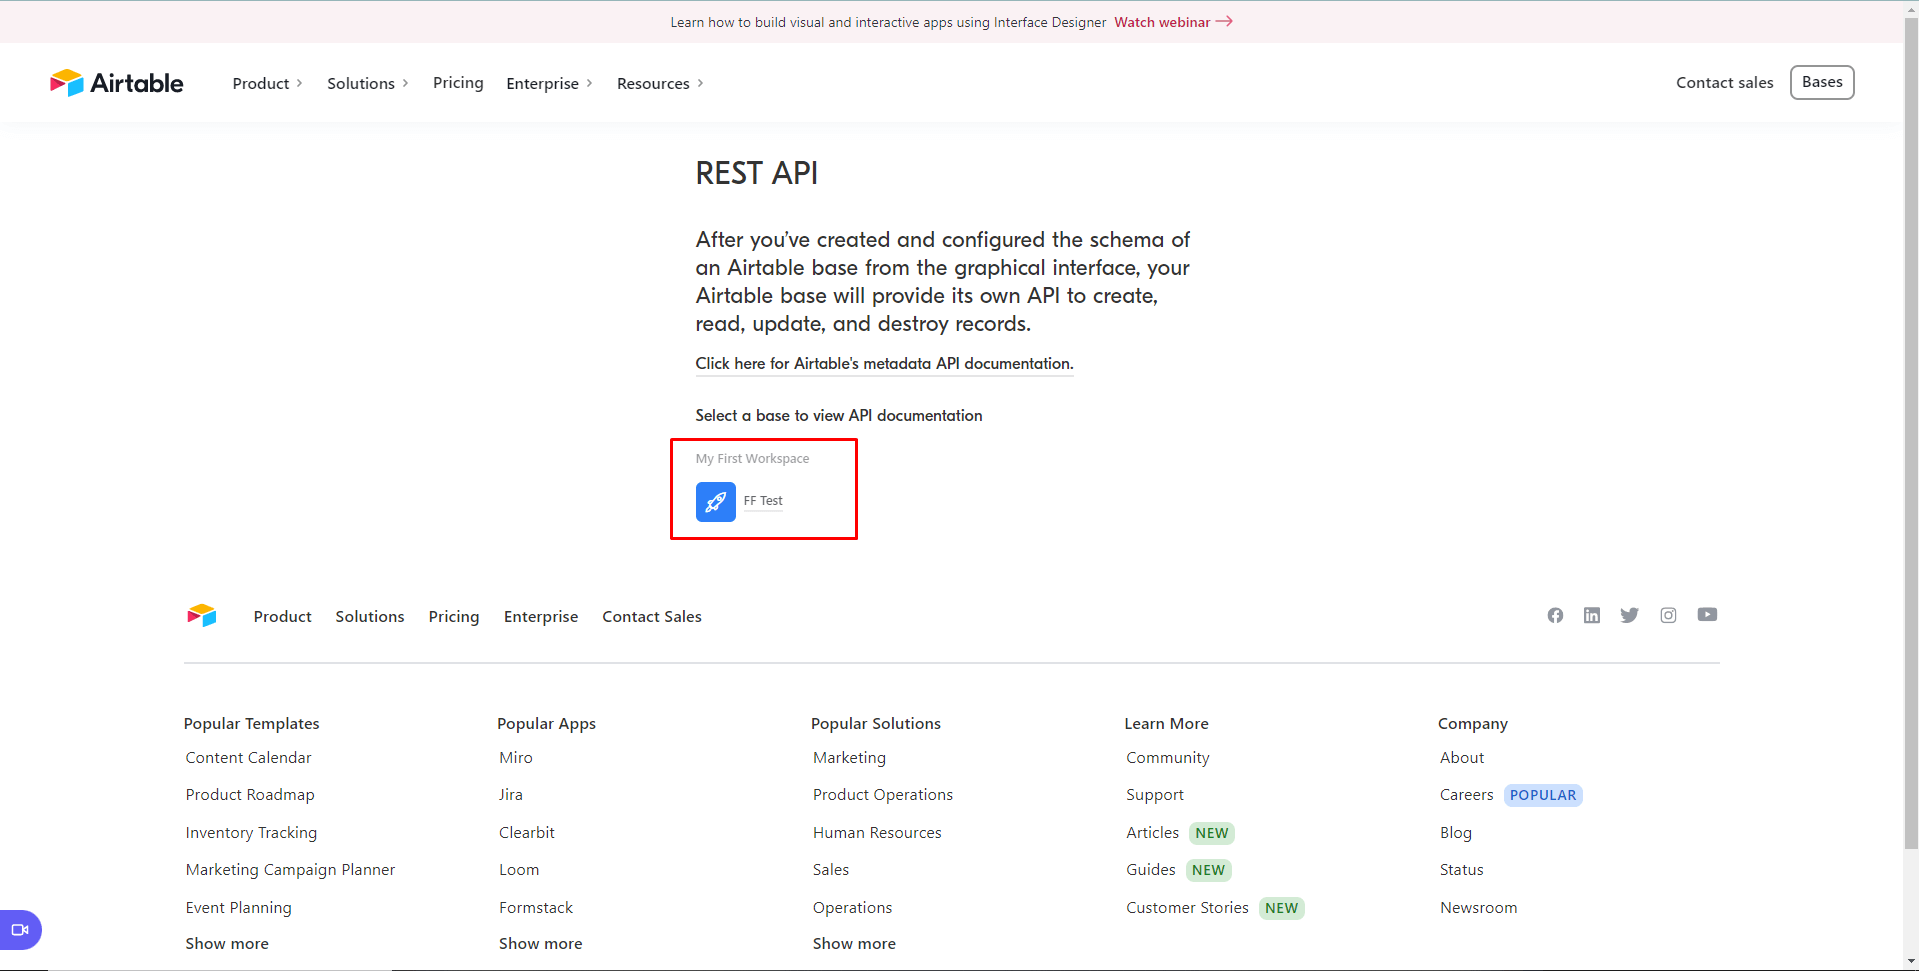
- You can create your own Workspace by going to the option My First Workspace ( see the above screenshot)
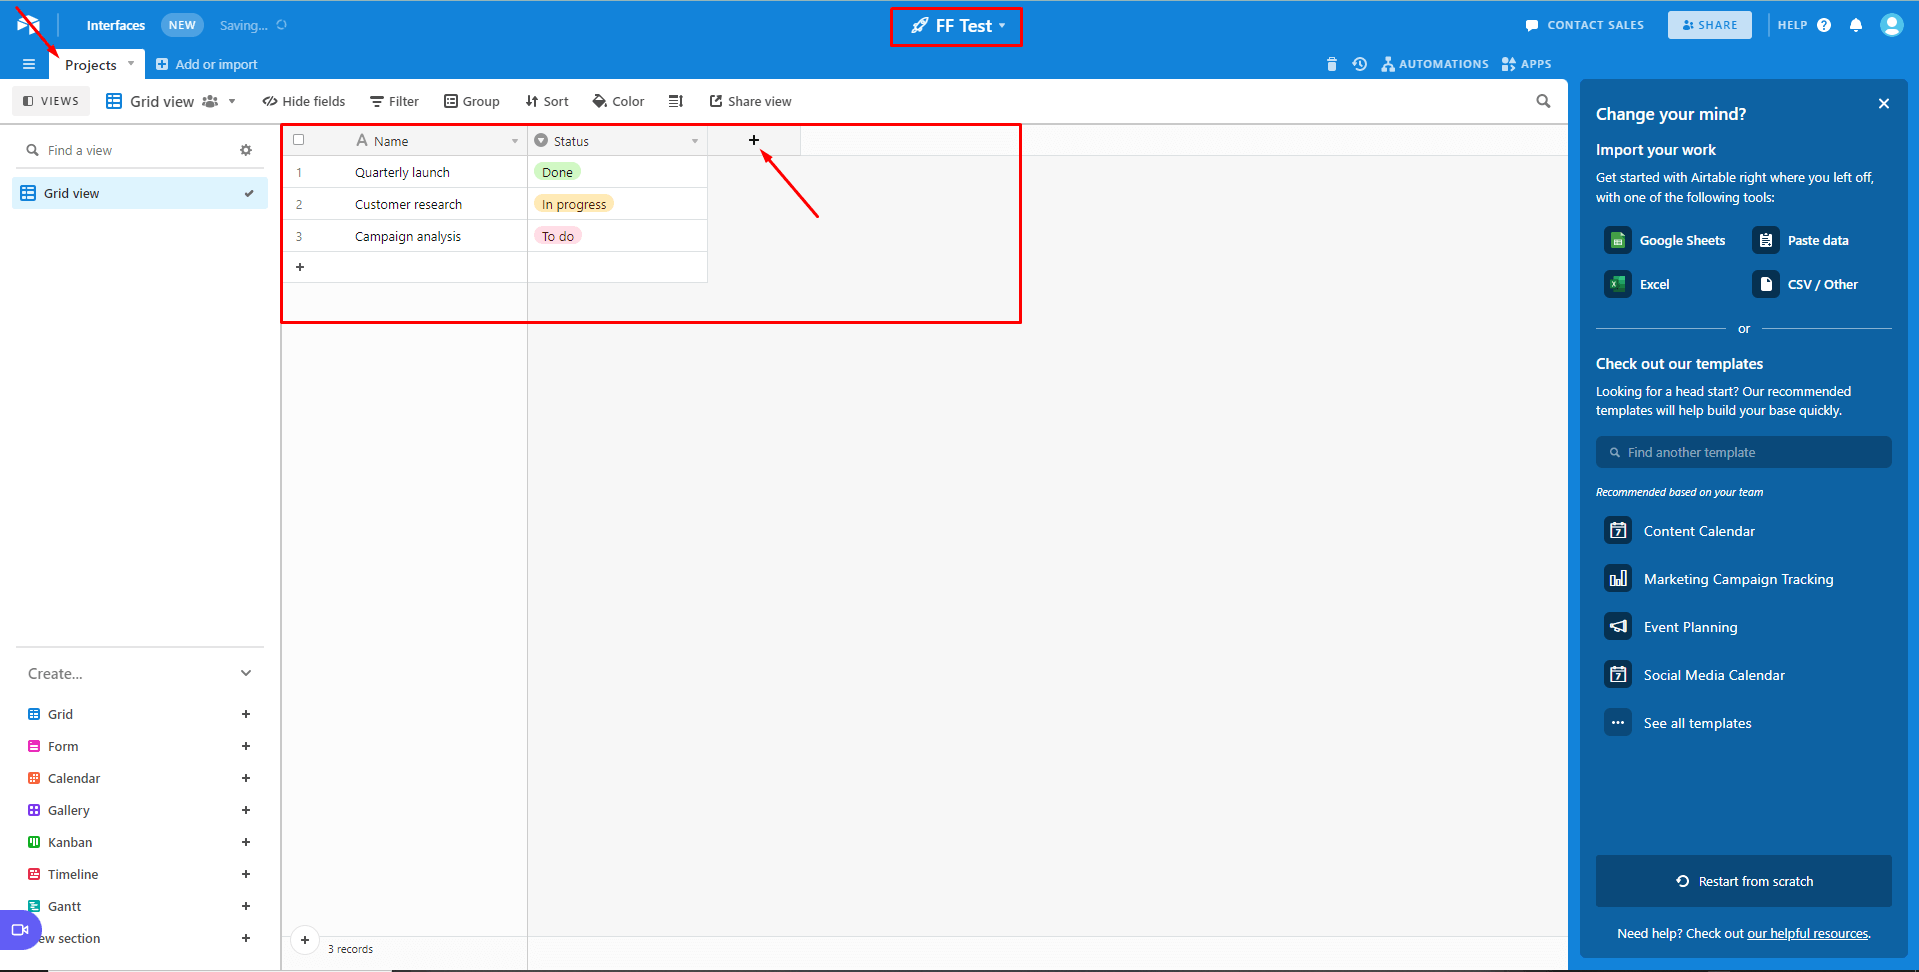
- After creating the project, an interface will appear where you’ll see your project overview.
- You can add and hide fields as much as you want here.
- To get an Airtable Base ID, Go here , and it will take you to an API Page.
- Then select your Project from the API Page.
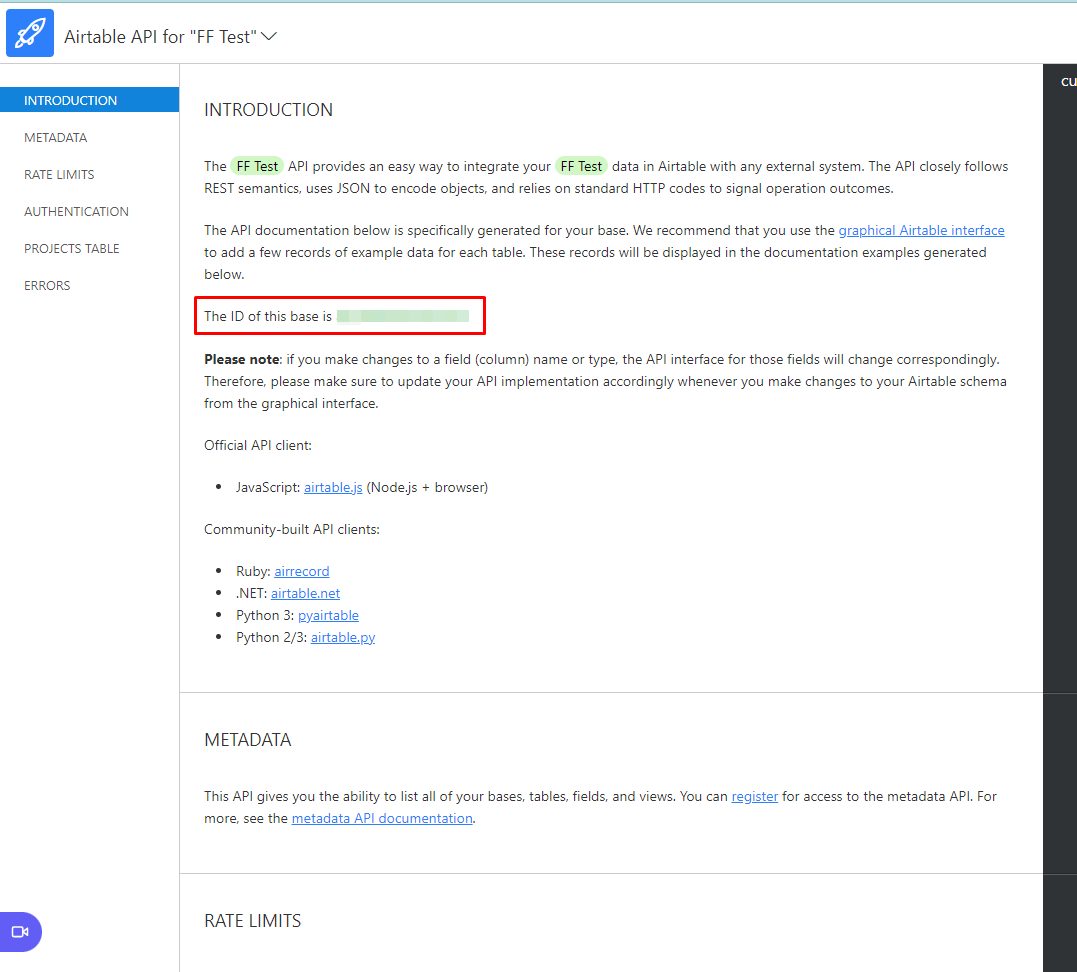
- After selecting your project, you will get your Airtable Base ID. Copy the Base ID to use this in the next use. See the below screenshot-
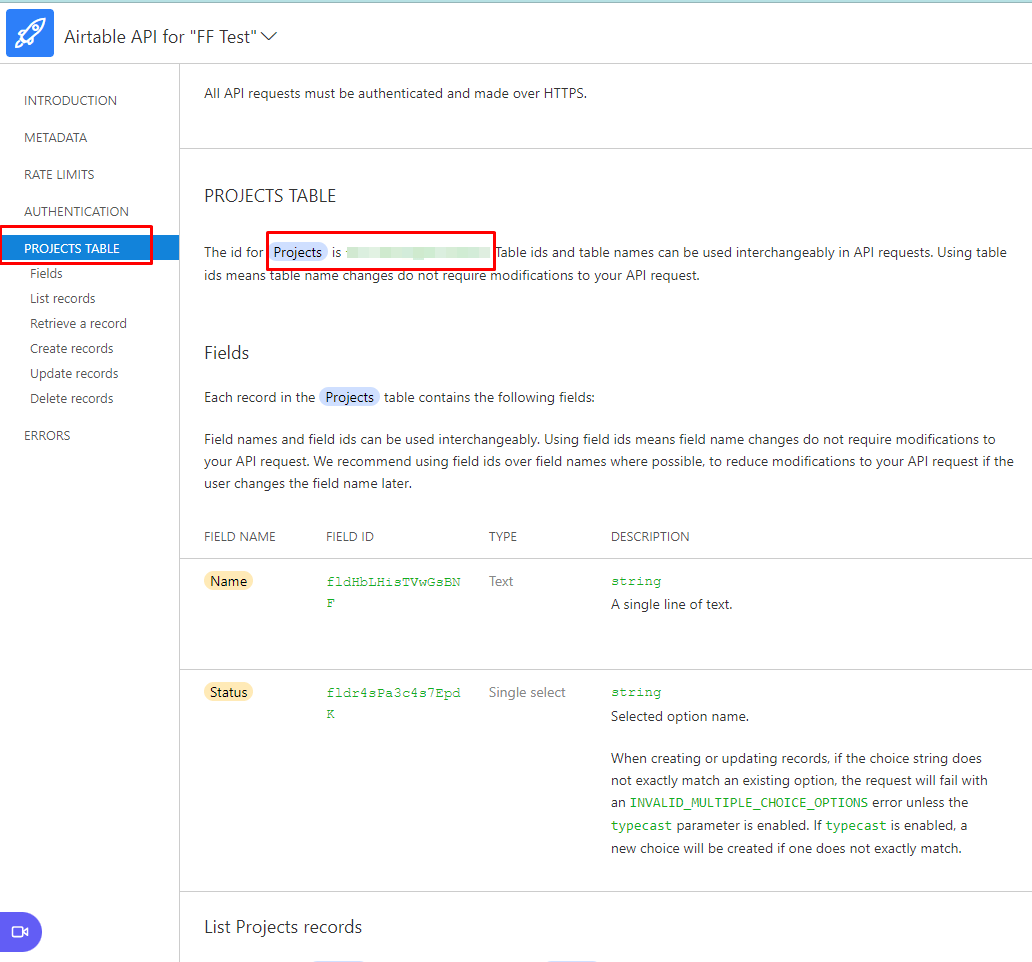
- Also, you will get your Airtable Table ID here. Copy the ID for further use.
- Now, paste your Airtable API Key, Base ID, and Table ID to Airtable’s Global Settings tab.
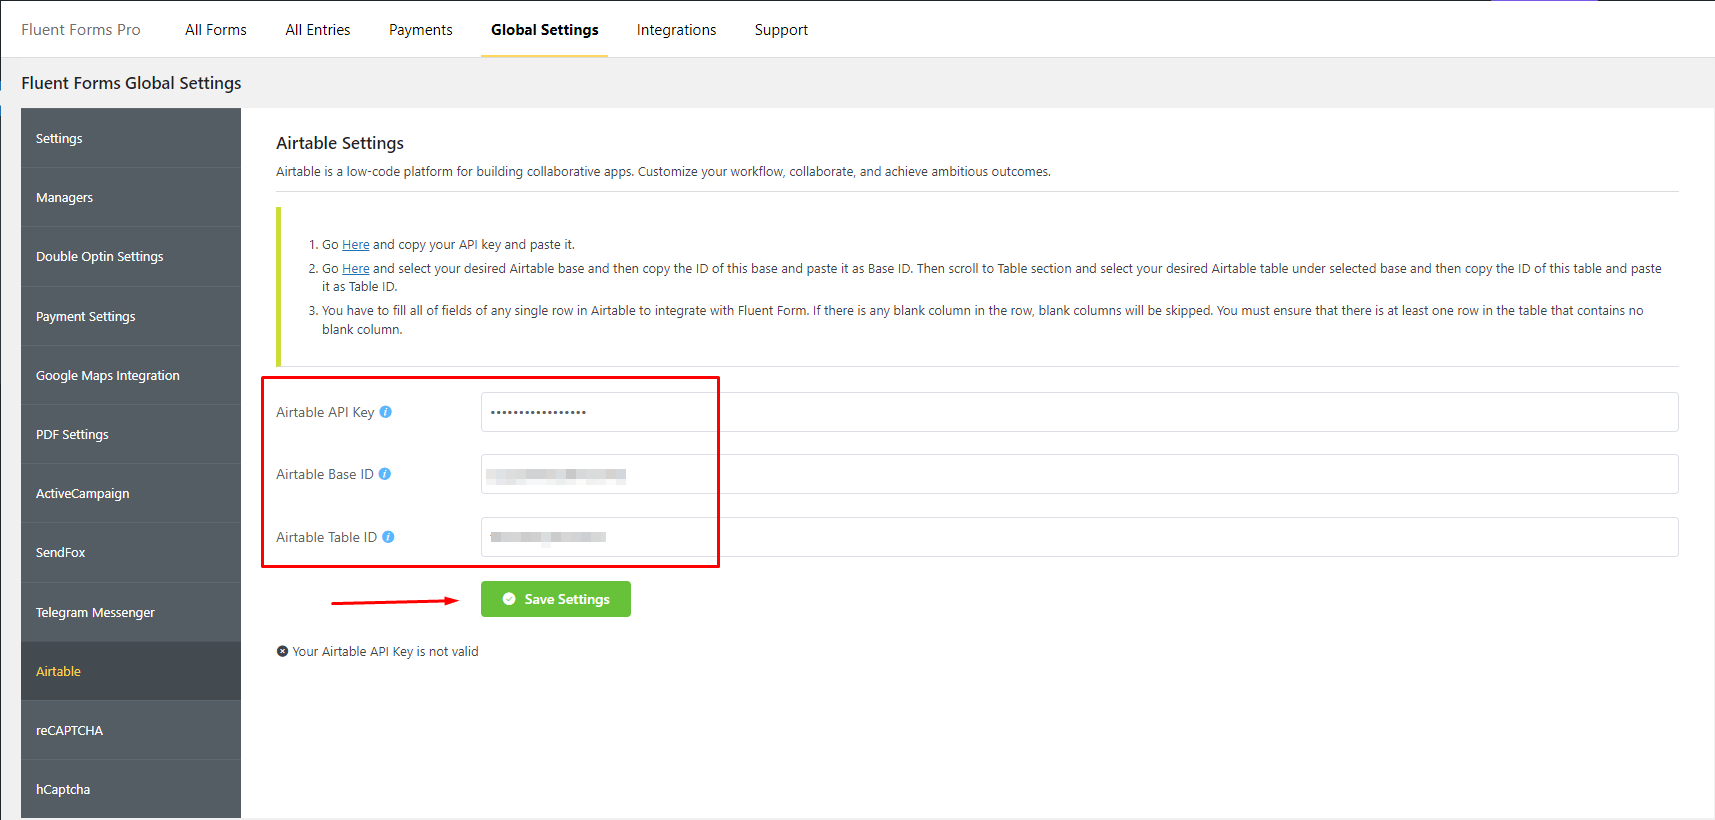
- If you want to implement multiple bases or tables, then just paste Base IDs or Table IDs on their respective fields by separating them with commas(,). See the below screenshot –
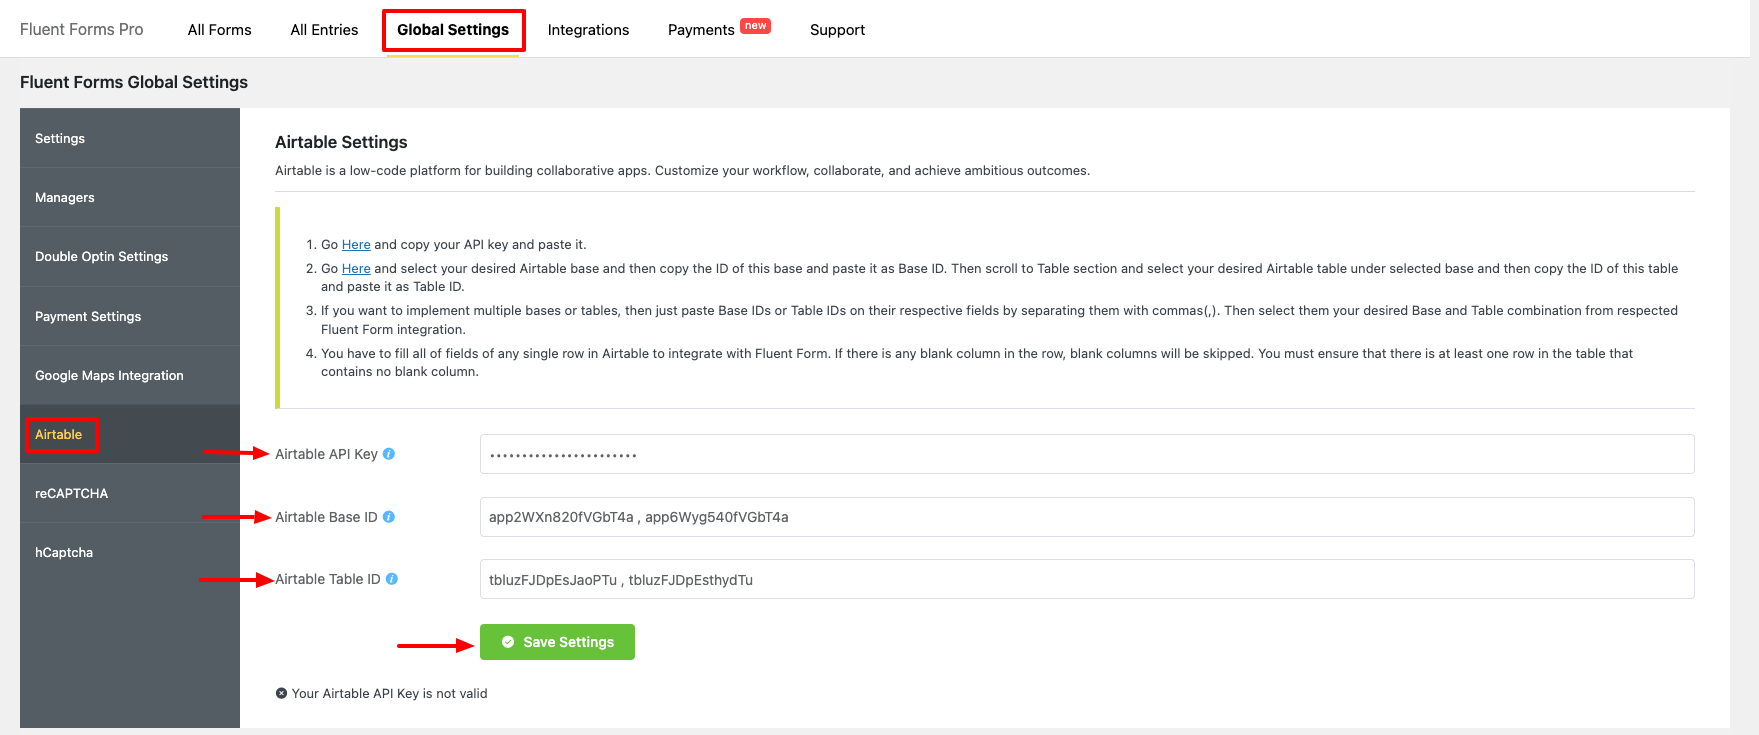
- Lastly, don’t forget to click on the Save Settings button.
You have to fill all of fields of any single row in Airtable to integrate with Fluent Form. If there is any blank column in the row, blank columns will be skipped. You must ensure that there is at least one row in the table that contains no blank column
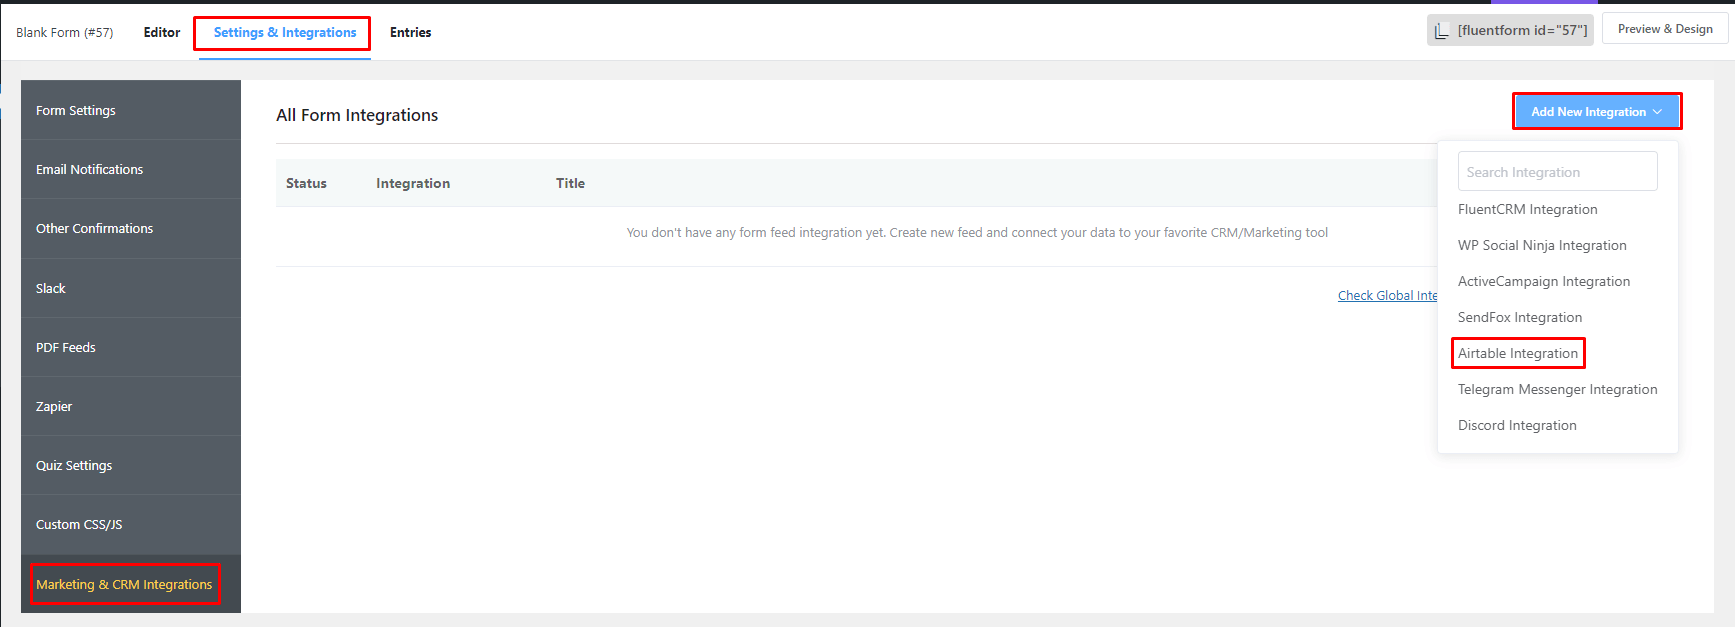
- Now go to the settings of the particular form, the entries which you want to be listed in Airtable. Click on Add New Integration and select Airtable Integration from the dropdown.
- Name the feed & select the Airtable fields from the dropdown.
- You can select your Base & Table ID from the dropdown in the airtable Configuration field if you have multiple Base IDs & Table IDs to implement. See the below screenshots –

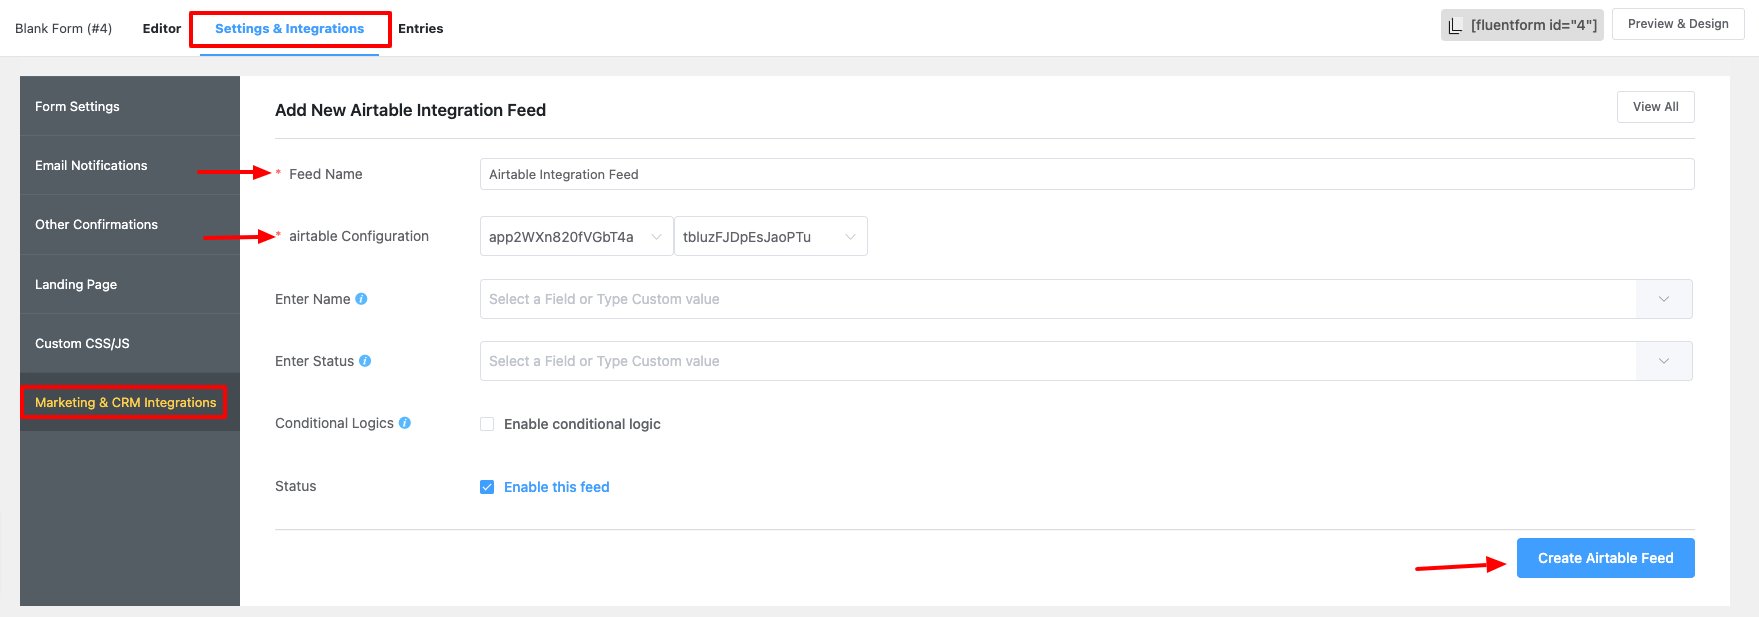
- Enable Conditional Logic if required. Learn more about Fluent Forms Conditional logic here.
- Click on Create Airtable Feed when the configuration is done.