
The fluent Forms Zapier module allows you to connect your WordPress forms with over 5000+ web apps.
Integrate your Zapier account easily with Fluent Forms Pro by following the steps mentioned below –
Steps to Integrate Zapier with Fluent Forms
- Activate the Zapier Module
- Get your Webhook URL
- Use the Webhook URL with the Zapier module
- Create/Use a Form with Fluent Forms
- Setup the integrations feed & paste the Webhook URL
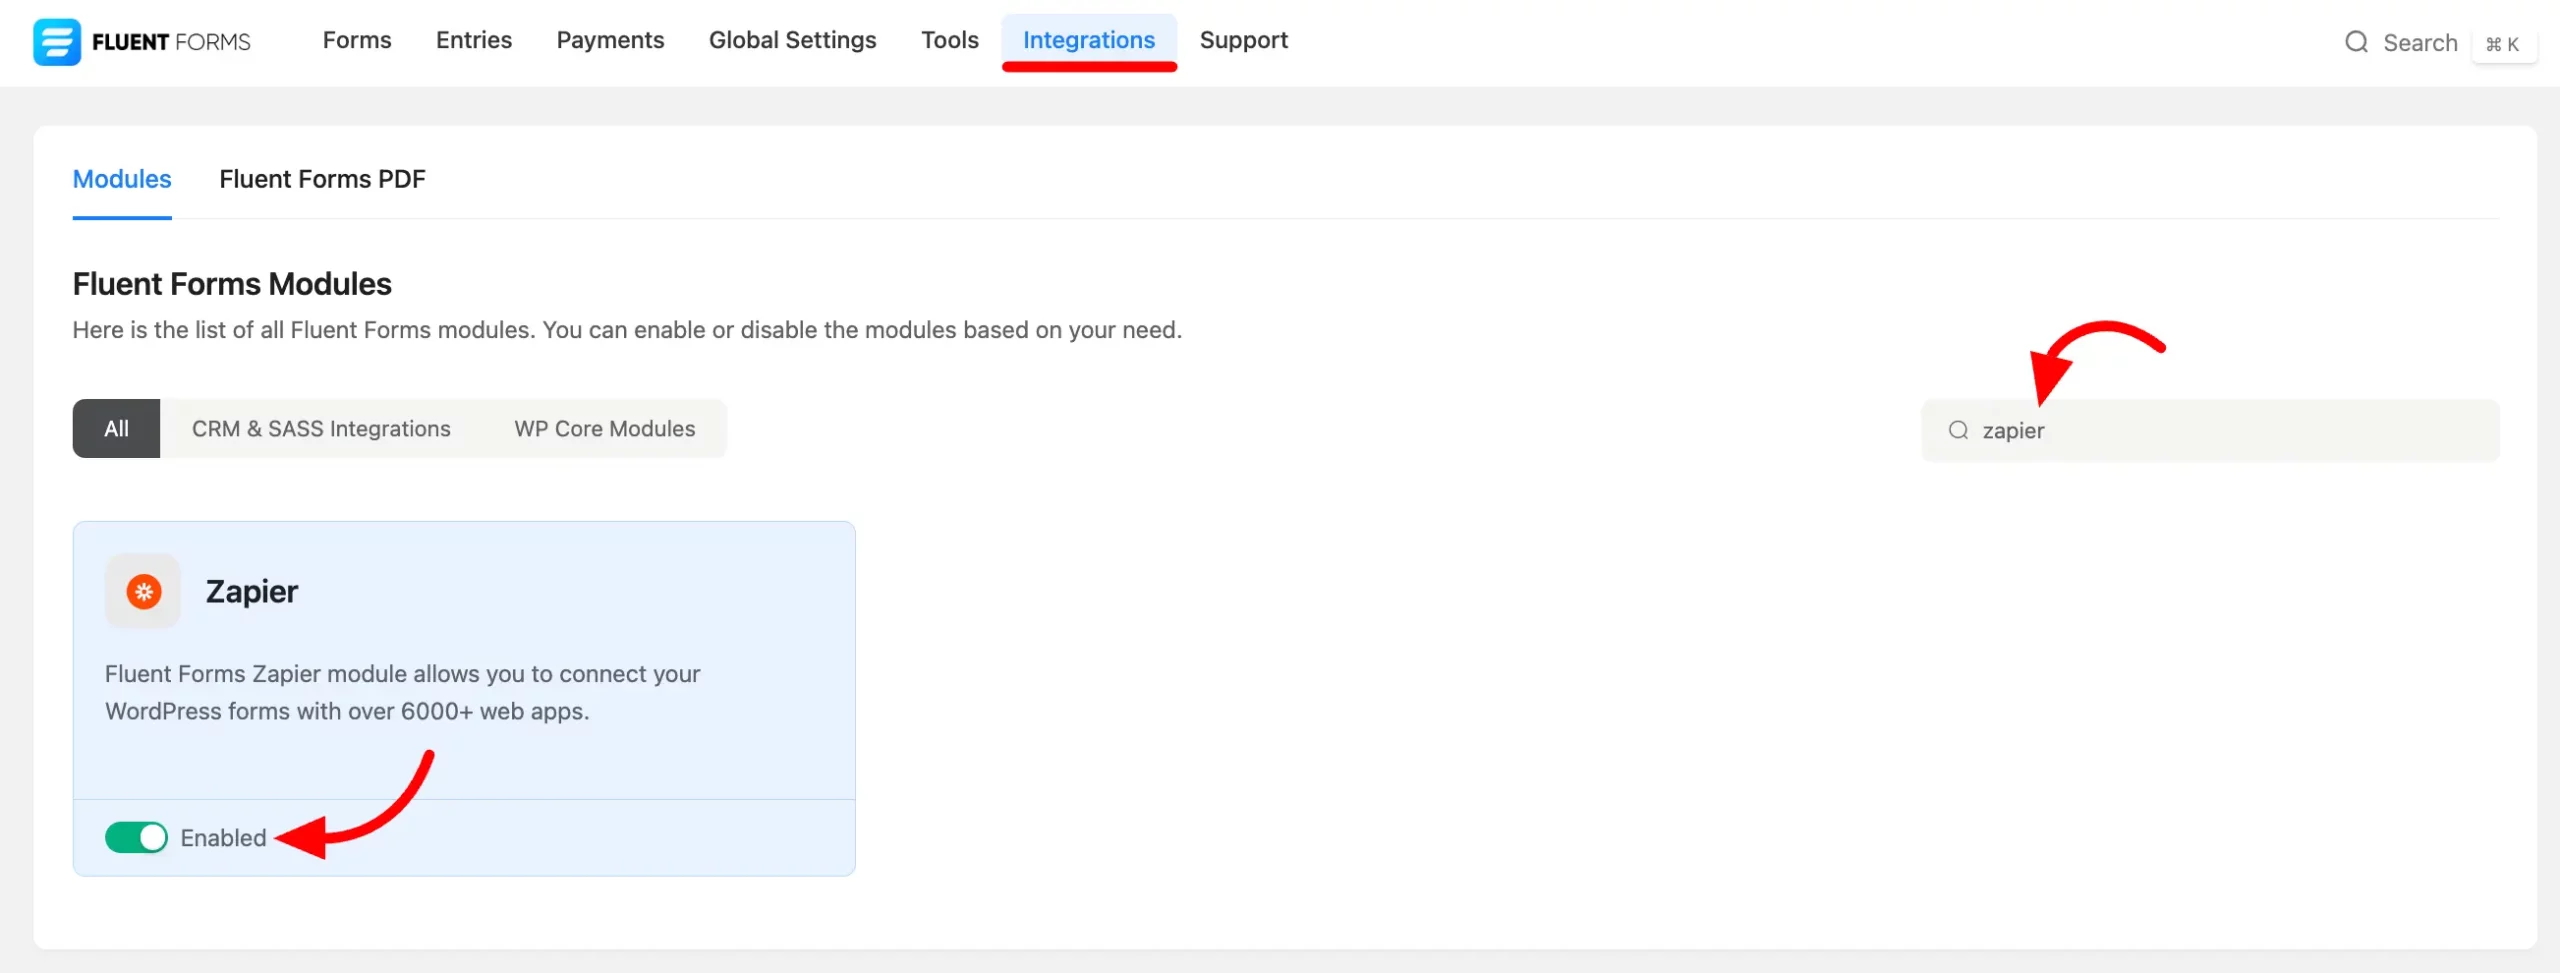
- Go to the Integration from Fluent Forms navbar or (WordPress admin panel sidebar) and scroll down or search for the Zapier Module. Enable the Zapier Module, as shown in the screenshot below-
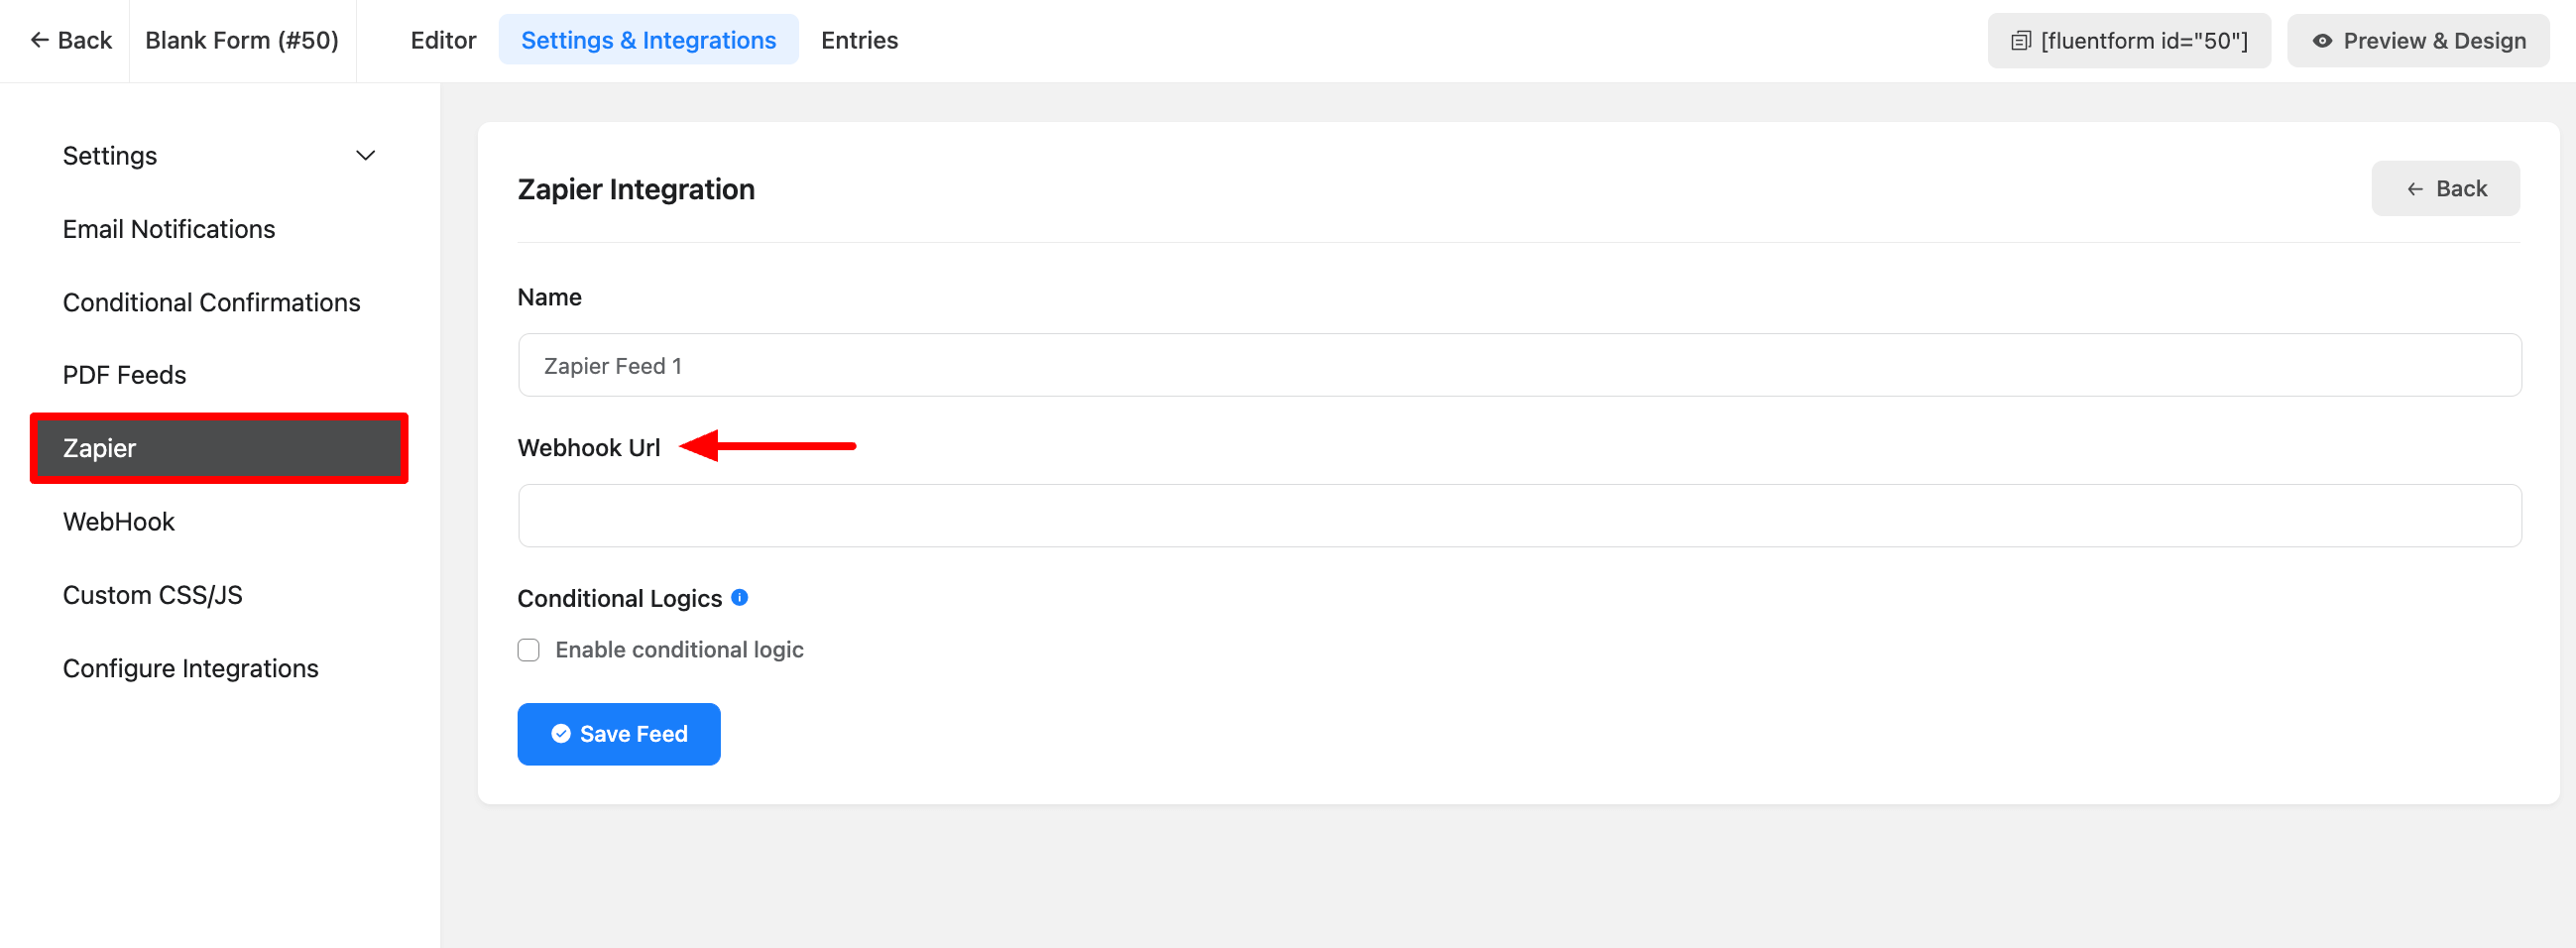
- Now, go to the settings of the particular form and the entries that you want to be listed in Zapier. Click on Settings & Integration and select Zapier from the left sidebar.
- Name the Zapier Webhook. A Webhook URL will be asked in this tab. You will get this Webhook URL in your Zapier account.
- Enable Conditional Logic if required. Learn more about Fluent Forms Conditional logic here.
- To get the Webhook URL first, log in to your Zapier account and click on the Create button. A drop-down list will arrive then select the Zaps from the list.

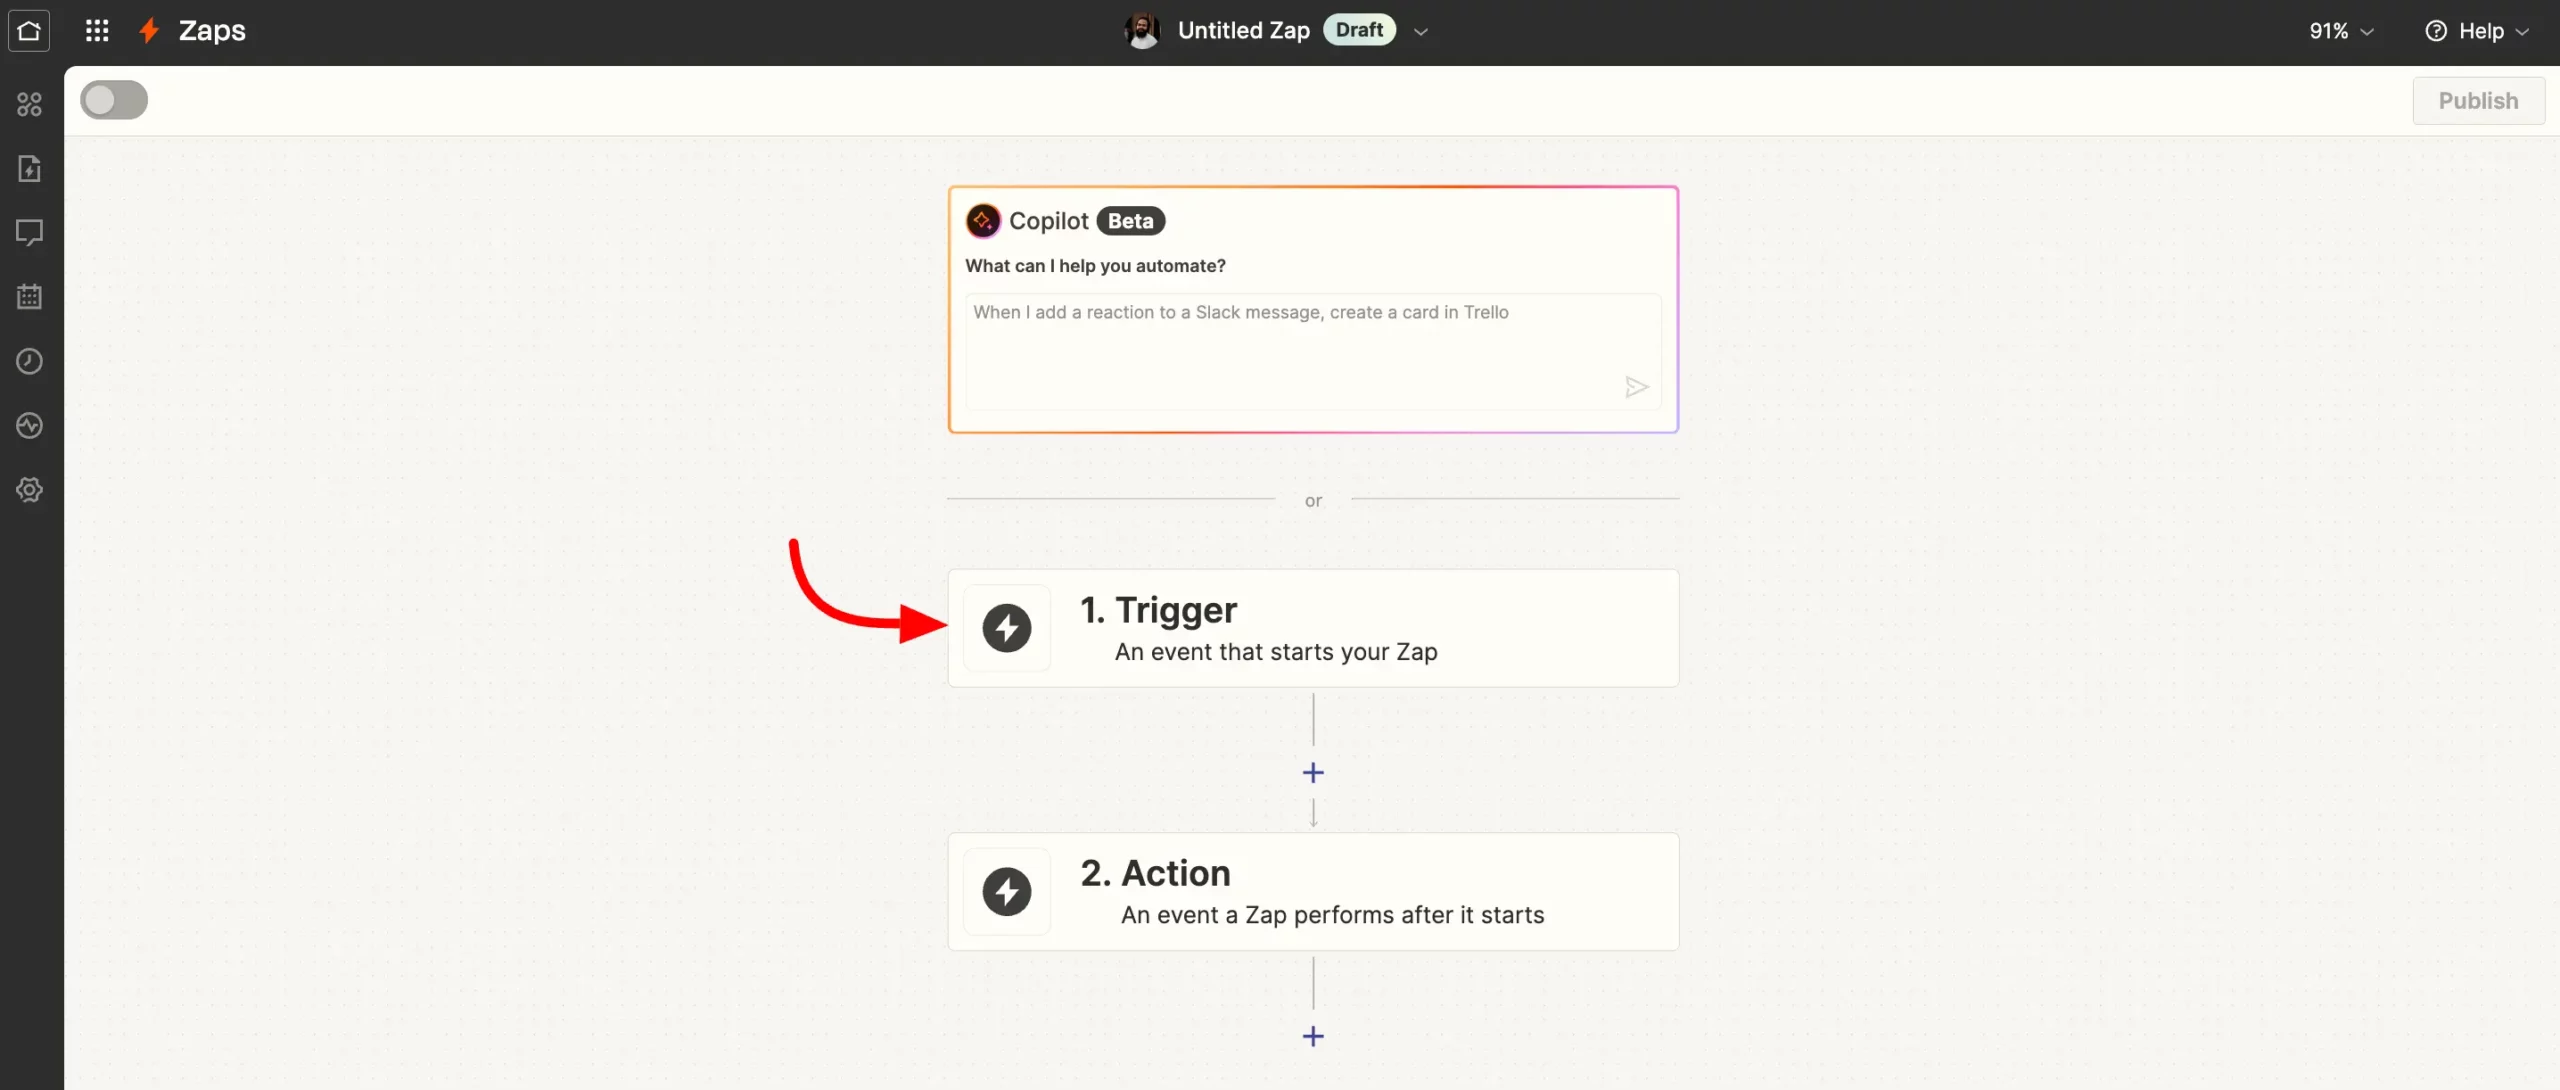
- After clicking on the Zaps an automation funnel tab of Zappier will arrive from where you have to set the Trigger and Actions. Here we have to choose the Trigger first.
- A popup will appear now with some Trigger options. Select Webhooks by Zapier from here as if Fluent Forms passes data with Zapier via Webhook.
Webhooks in the Pro feature of Zapier

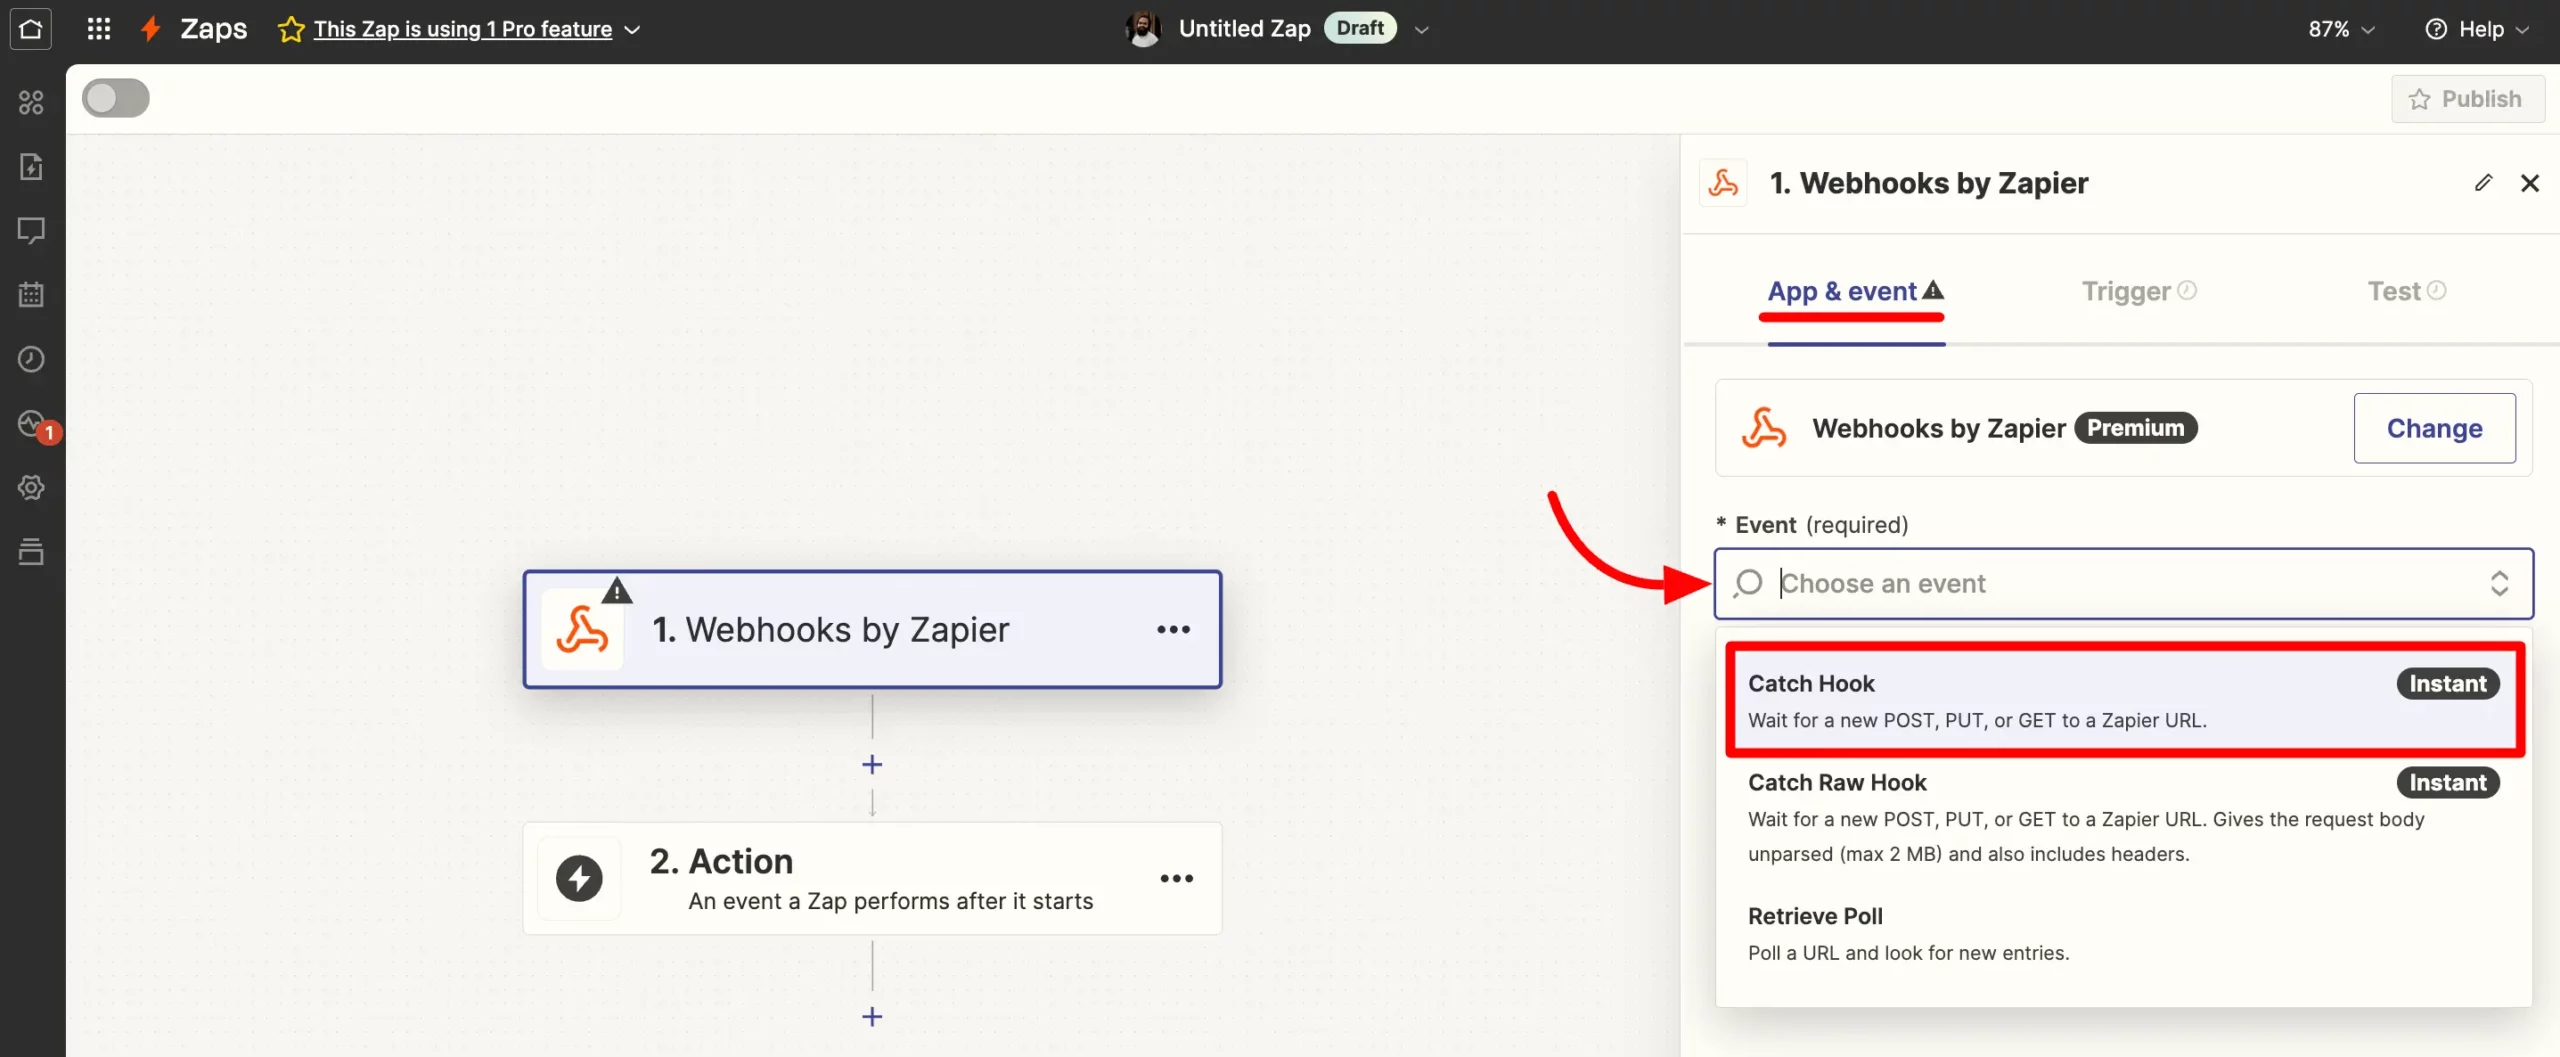
- In the Next step, a popup will appear with some Settings option for the Trigger. You will see the App & Event settings first. Here in the Event field choose the Catch Hook option and click on Continue.
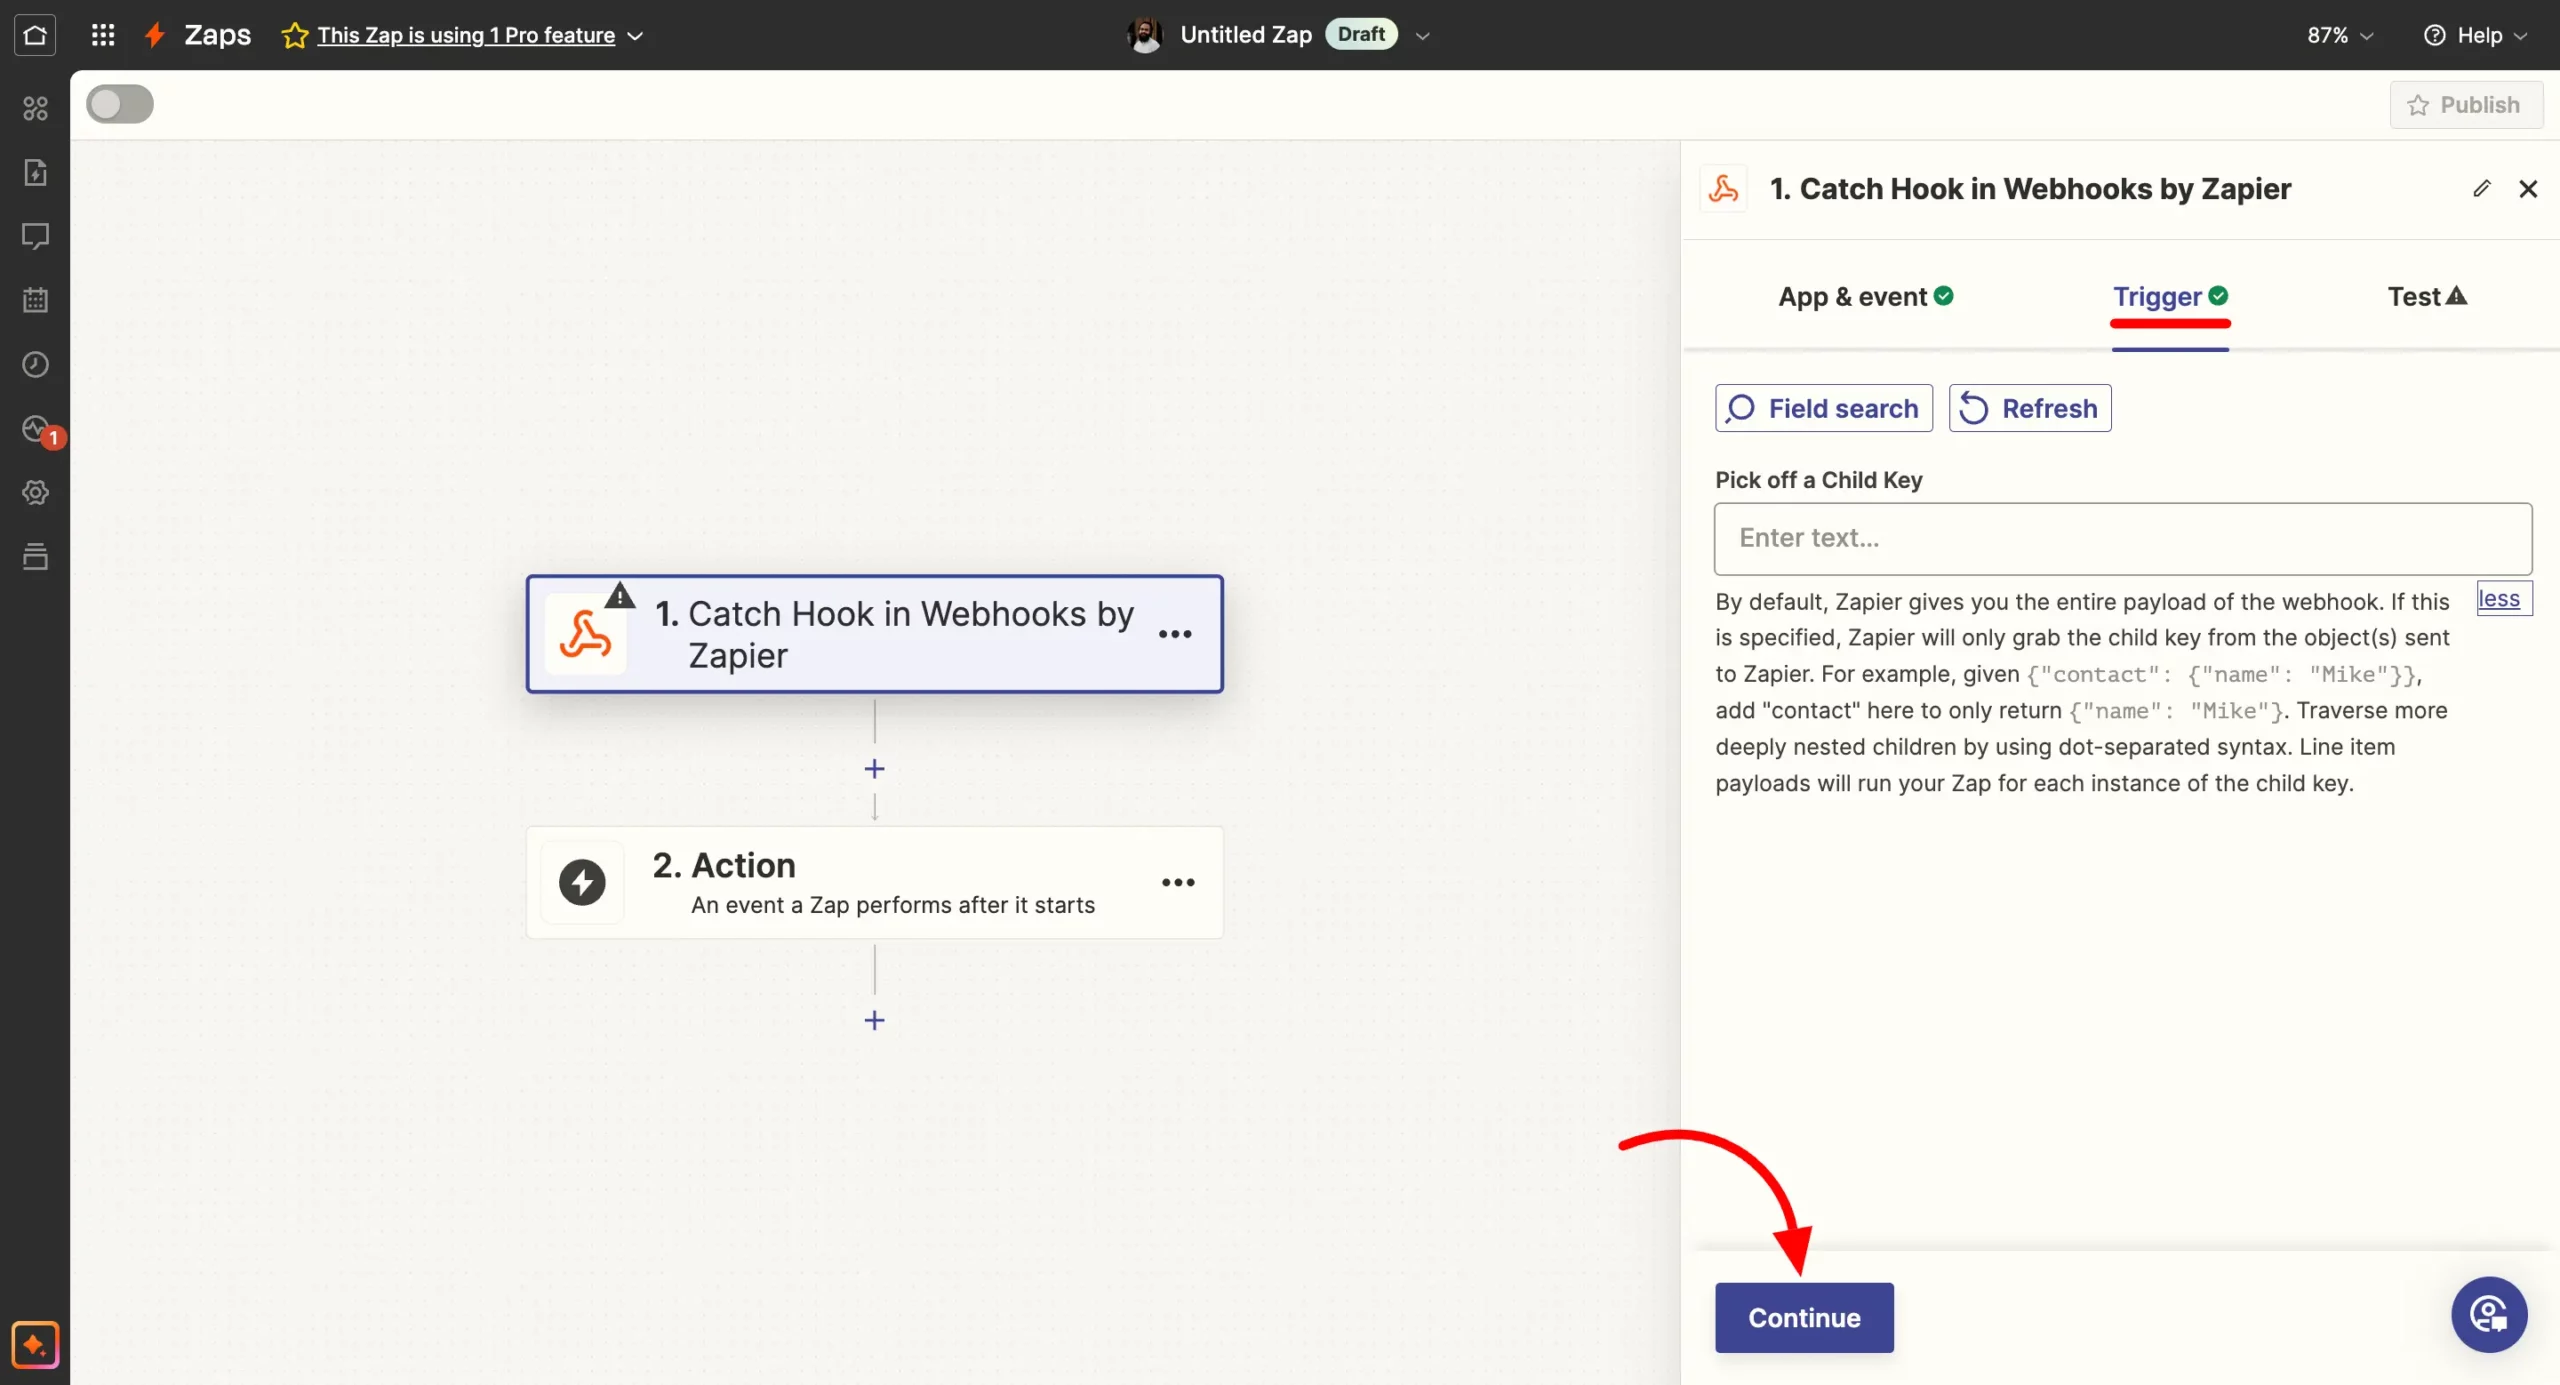
- In the Trigger section, you don’t need to change anything so simply click on the Continue button here.
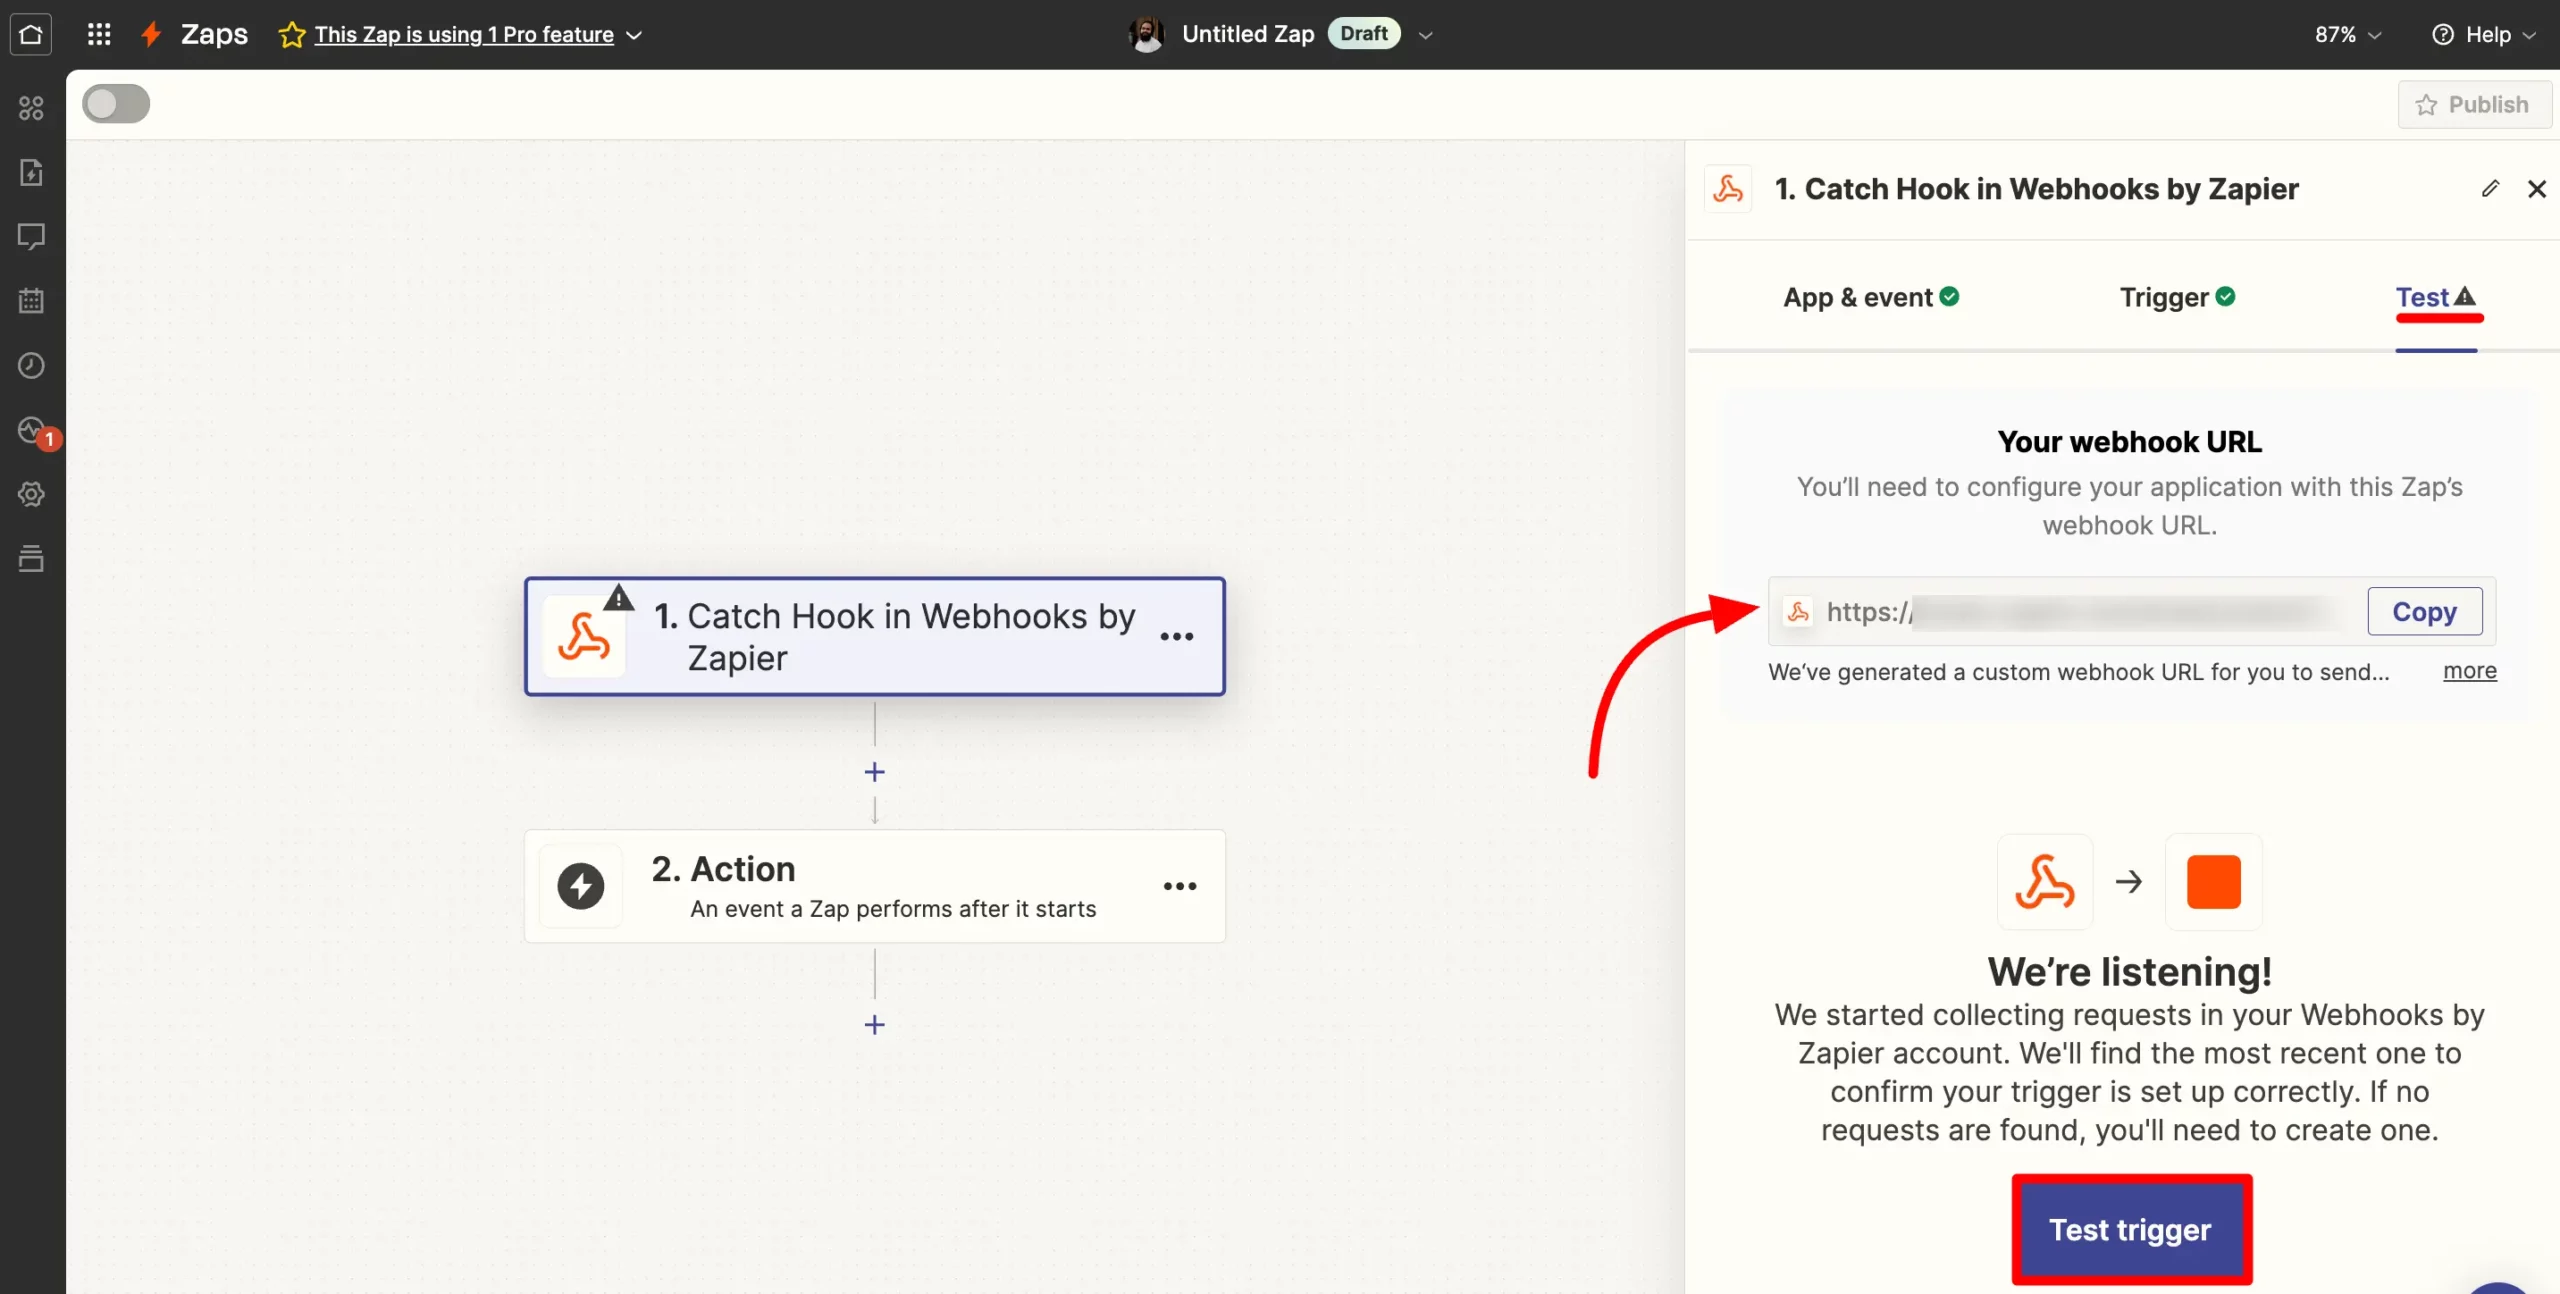
- Here in the Test section, you will get a Webhook URL in your Zapier copy the Webhook URL from here.
- A Test Trigger button is also available here that allows you to test whether is your Integration really working and passing data through the Webhook.
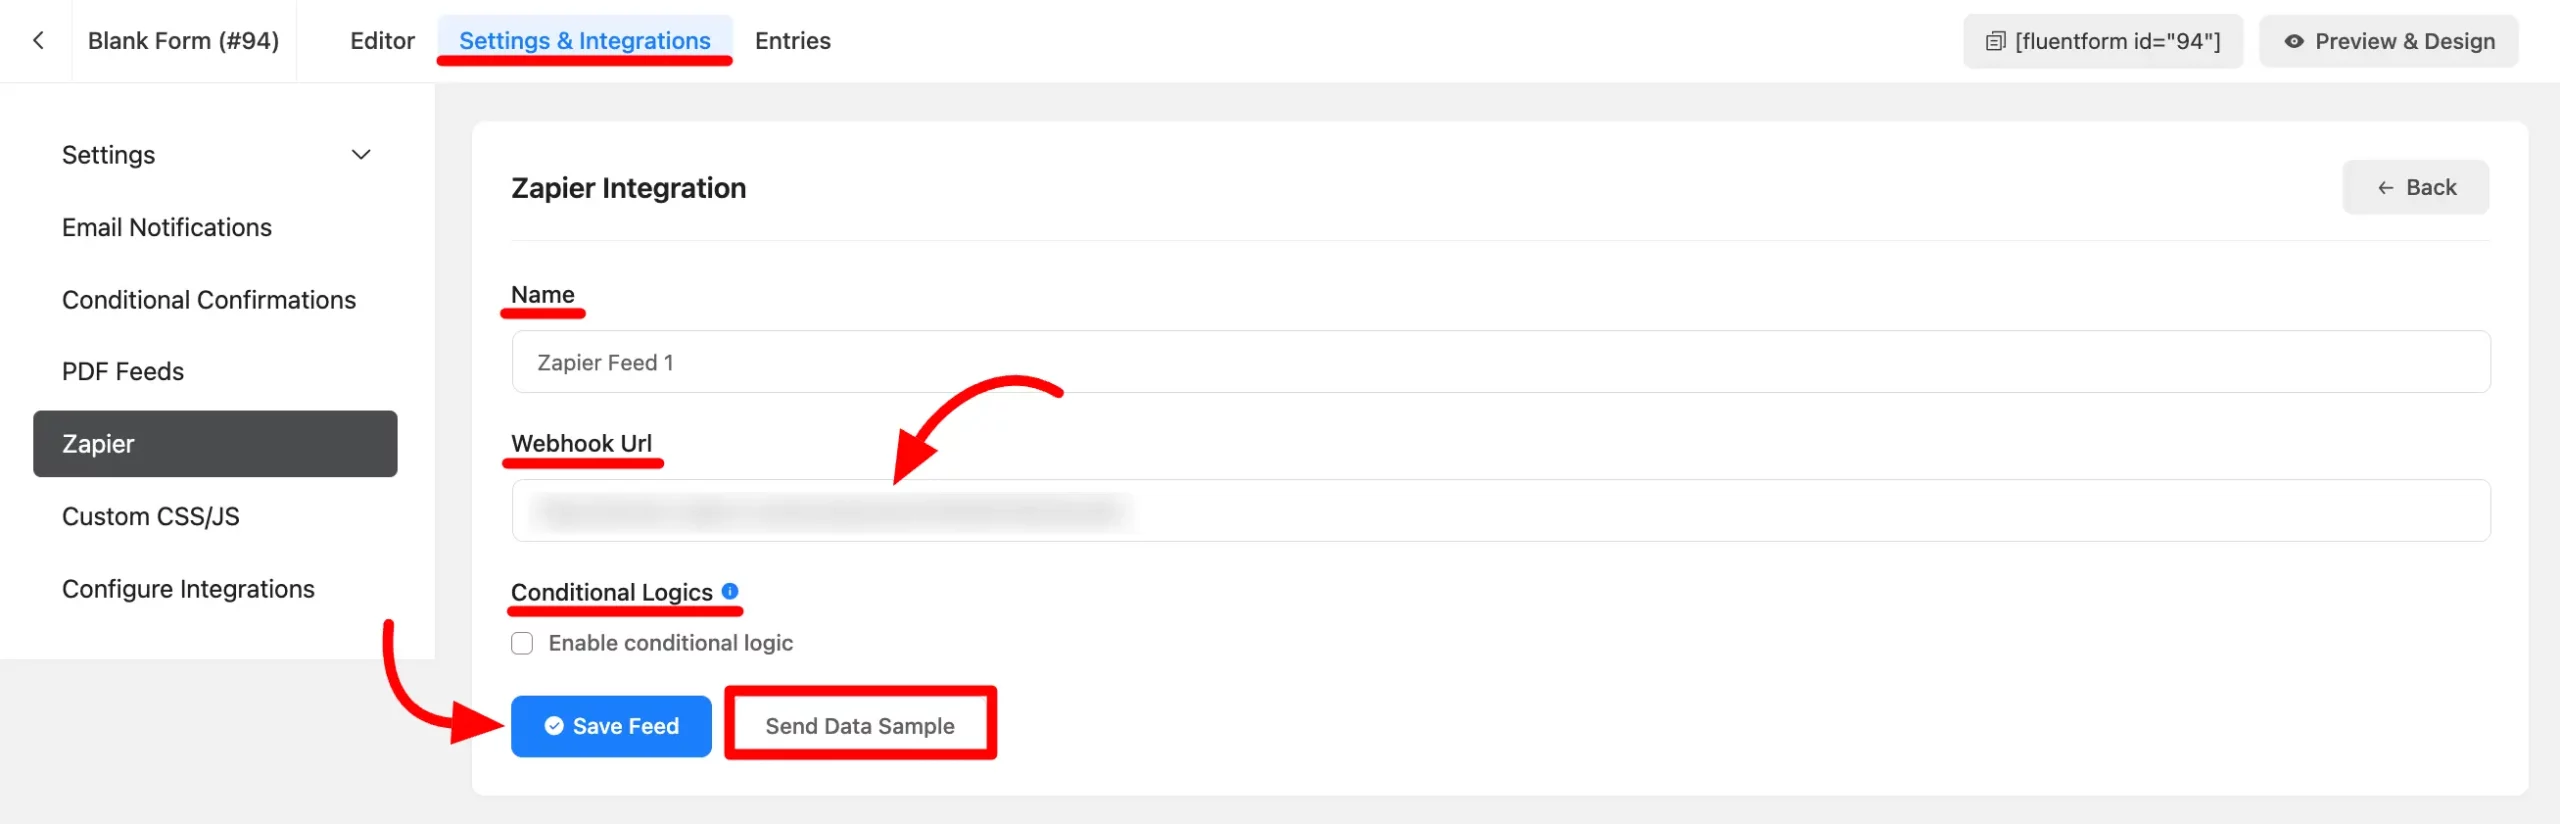
- Paste the Webhook URL that you just copied from Zapier in the Webhook field of Fluent Forms Zapier Integration settings. Click on the Save Feed button.
- To Test the trigger, you have to send sample data to Zapier.
- Just click on the Send Data Sample button from the Zapier integration in Fluent Forms or submit the form from preview mode with some random data.
- Afterward, click the Test Trigger button in Zapier, and you will get a successful request containing the labels of all the form input fields that are added to the form and also the data in case of form submission.
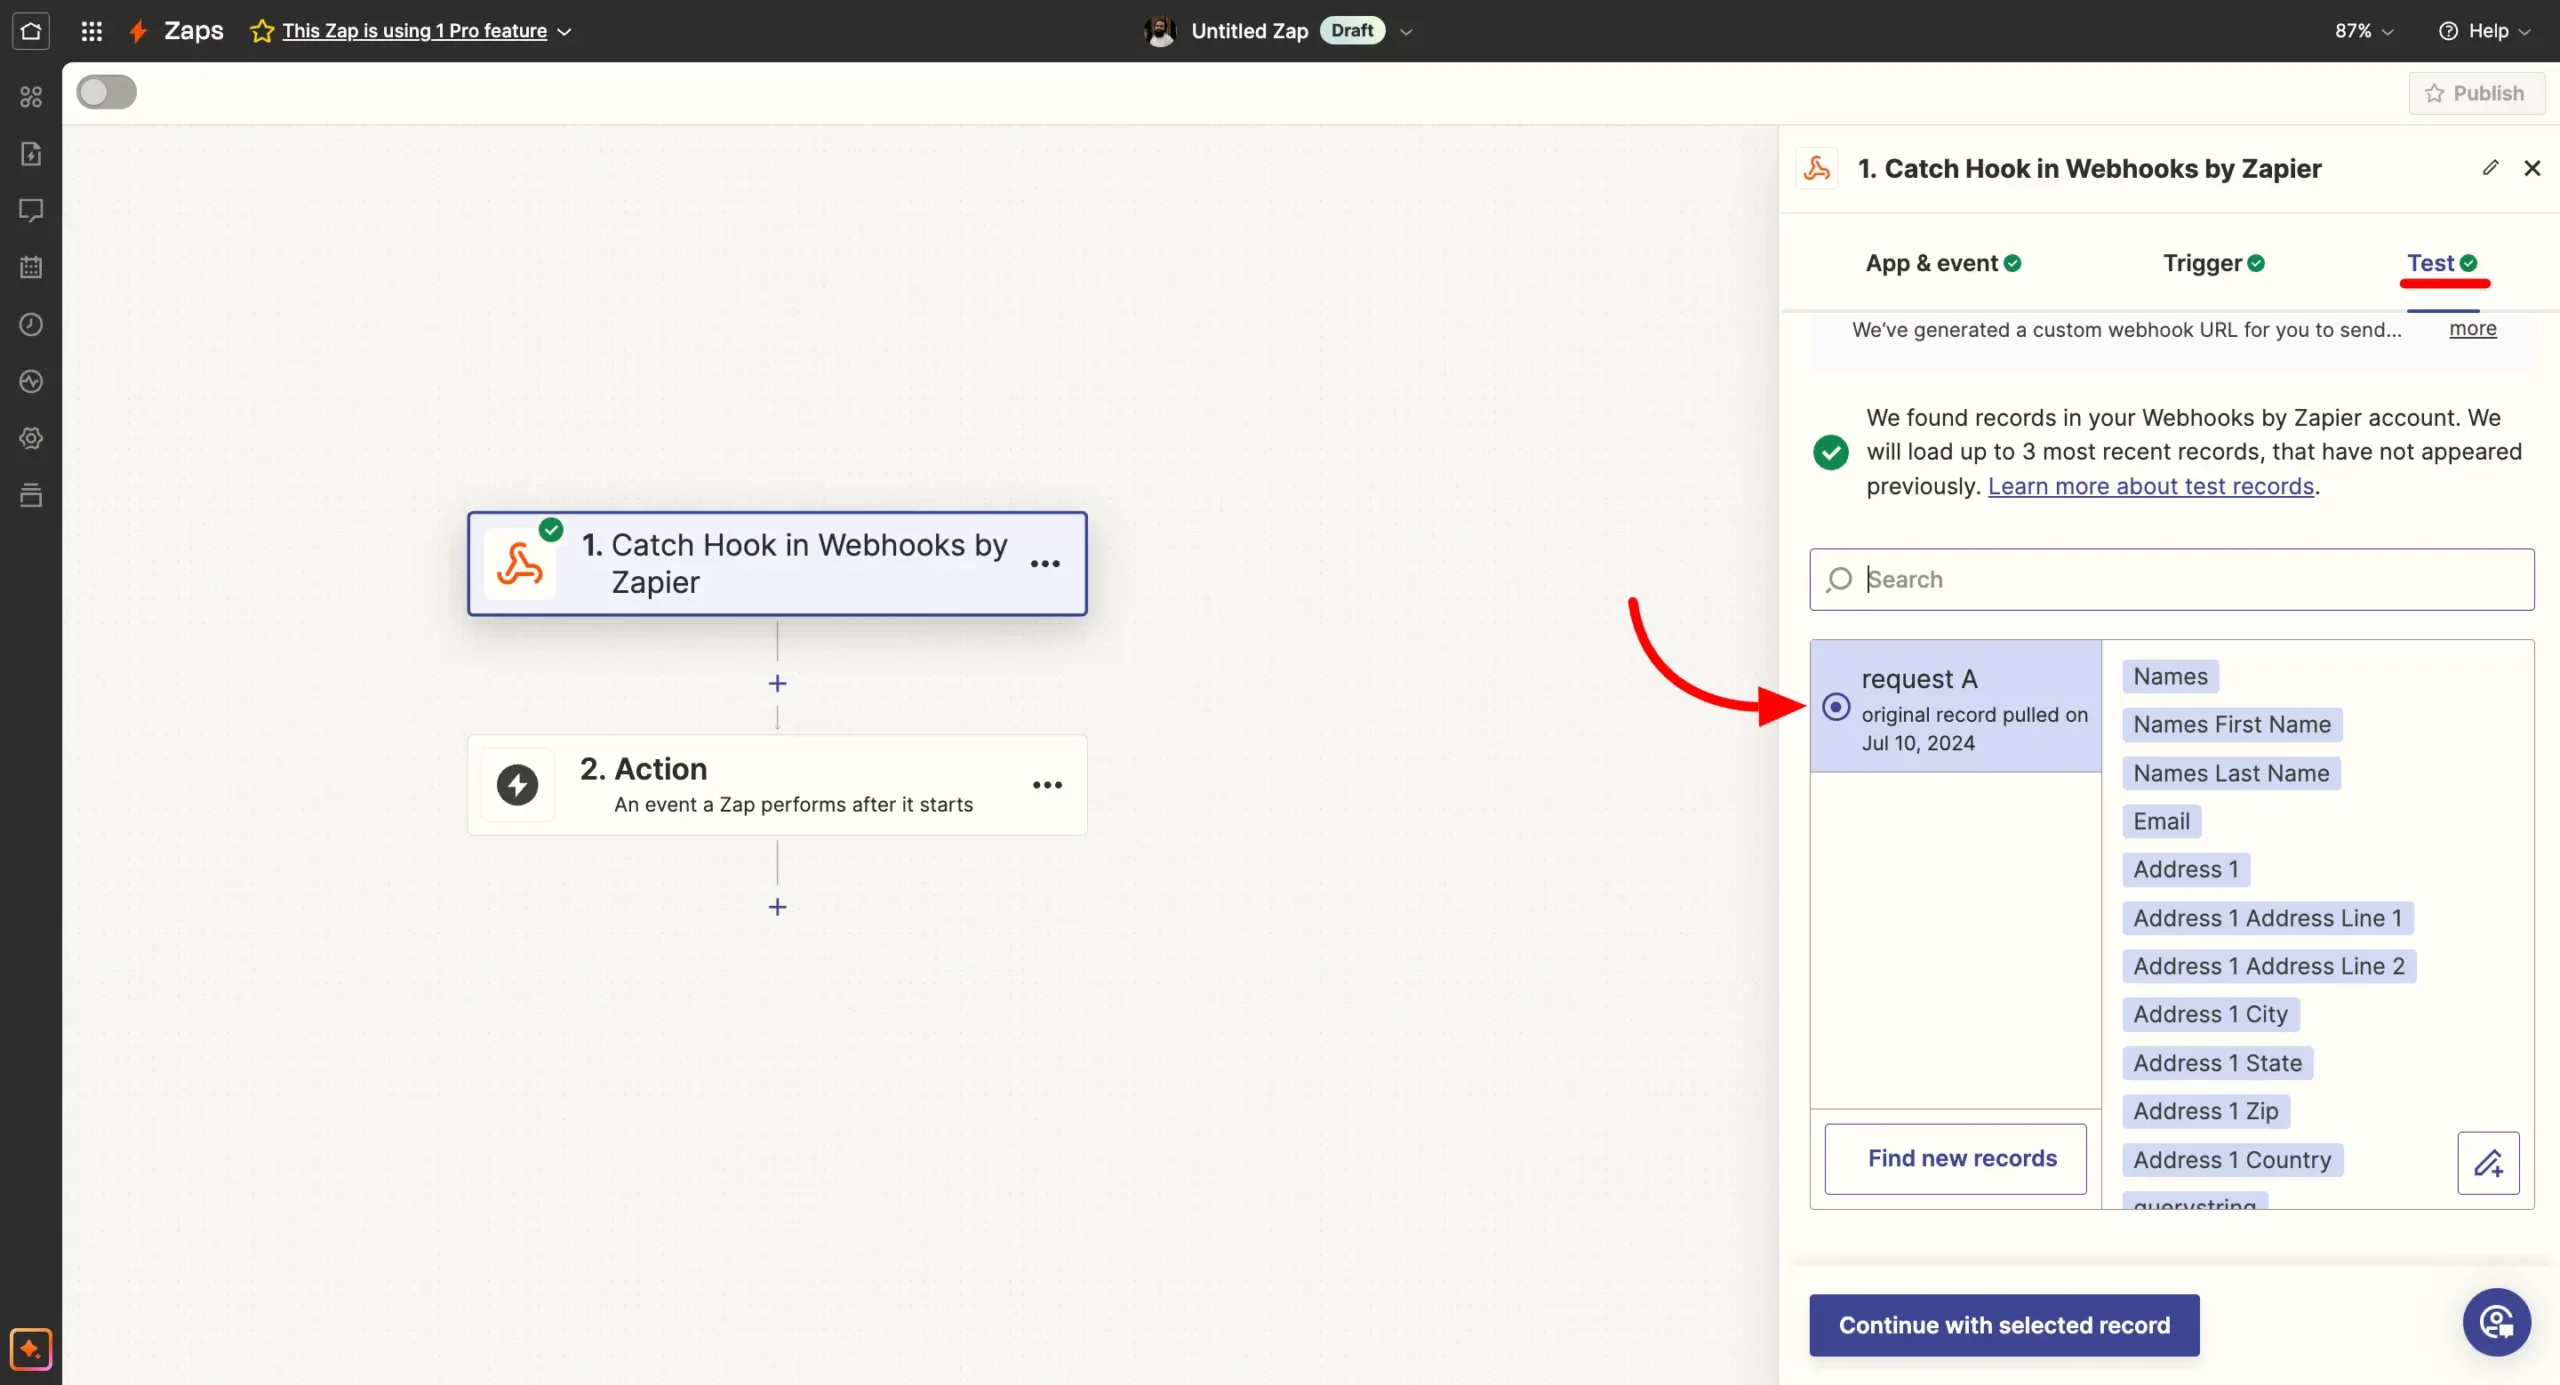
- Click the Continue with Selected Record button to finish setting up the Trigger.
- After that, you can set up an Action that will connect another App with Zapier and send the form data upon submission to that App using the integration you have just created.
If you have any further queries about this integration feel free to reach our support team.