

Fluent Forms now integrates Mautic, making Email Marketing easier for users. This article will guide you through the integration process of Mautic with Fluent Forms.
Integrate Mautic with Fluent Forms
To learn how to integrate Mautic with Fluent Forms, follow the steps accordingly with the screenshots below —
Remember, before starting the process, ensure you installed and activated both the Free Version and Pro Version of Fluent Forms plugins. You can integrate Mautic with the Free version, but you will not have access to some Pro Features such as Phone Field, Conditional Logics, etc.
Install & Activate Mautic Integration Add-on
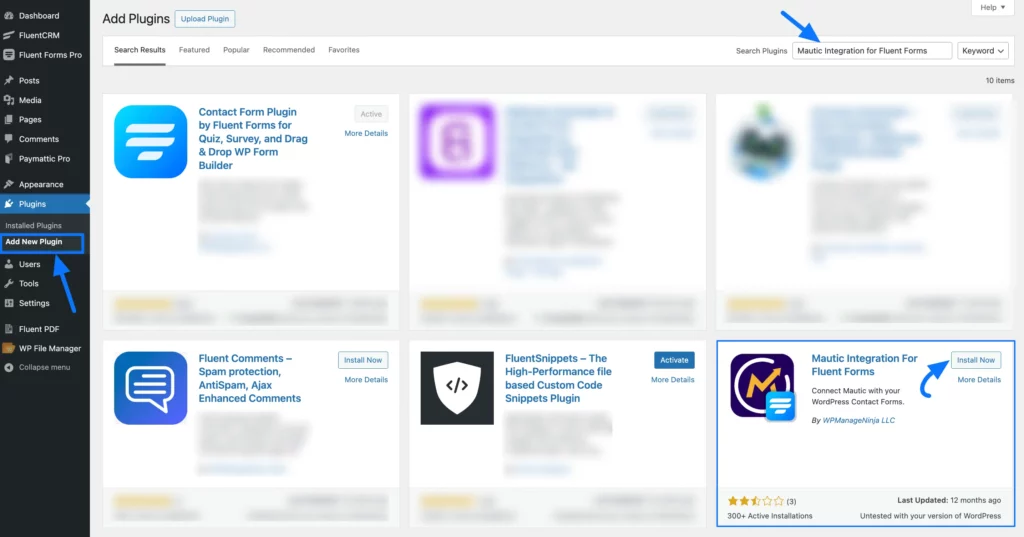
First, go to Plugins from the WordPress Left Sidebar, click the Add New Plugin, search for Mautic Integration For Fluent Forms, and click the Install Now button.
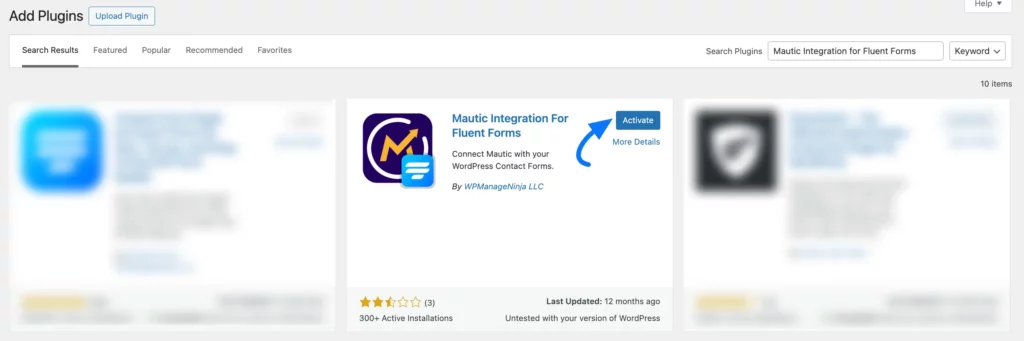
Now, click the Activate button.
And, your Mautic Integration Add-on will be Installed and Activated successfully on your WordPress Site.
Enable Mautic Integration
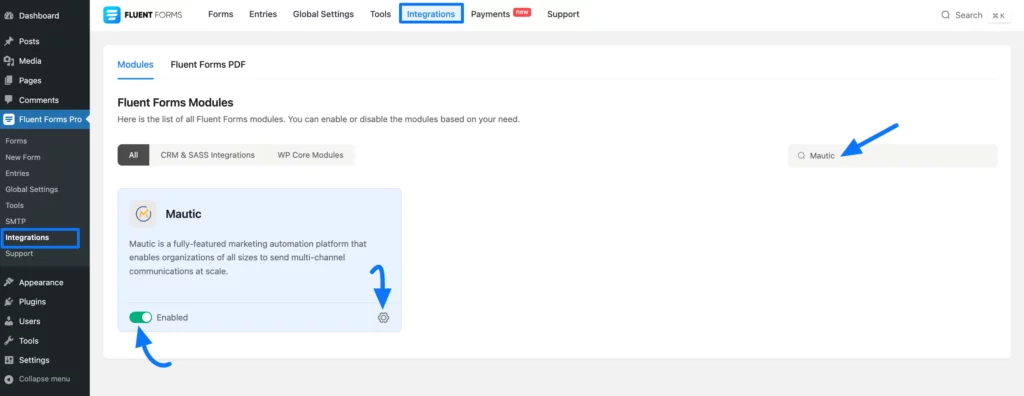
From your Fluent Forms Dashboard, go to Integrations, search for Mautic, and click the Toggle button to enable the Mautic Integration module in your FluentForms.
Then, click the Settings Icon to make the integration functional.
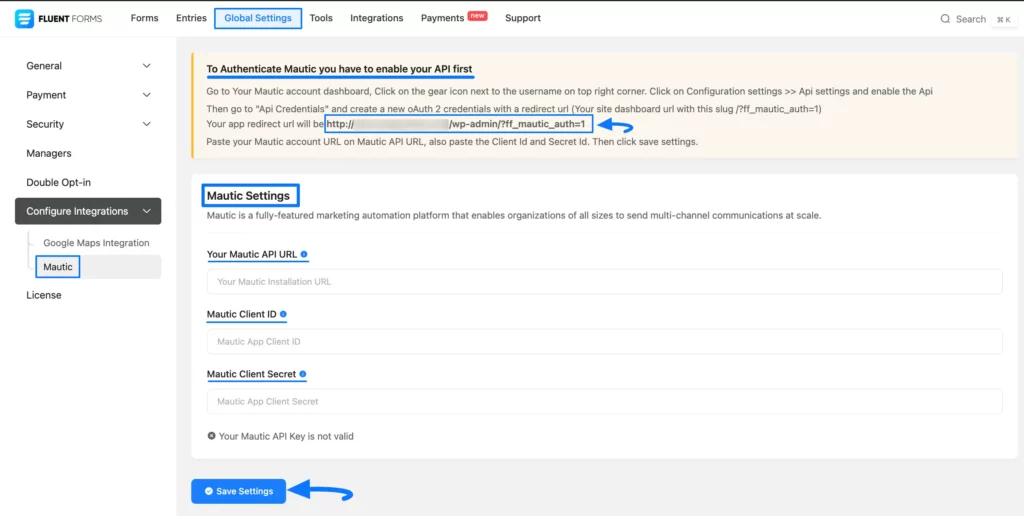
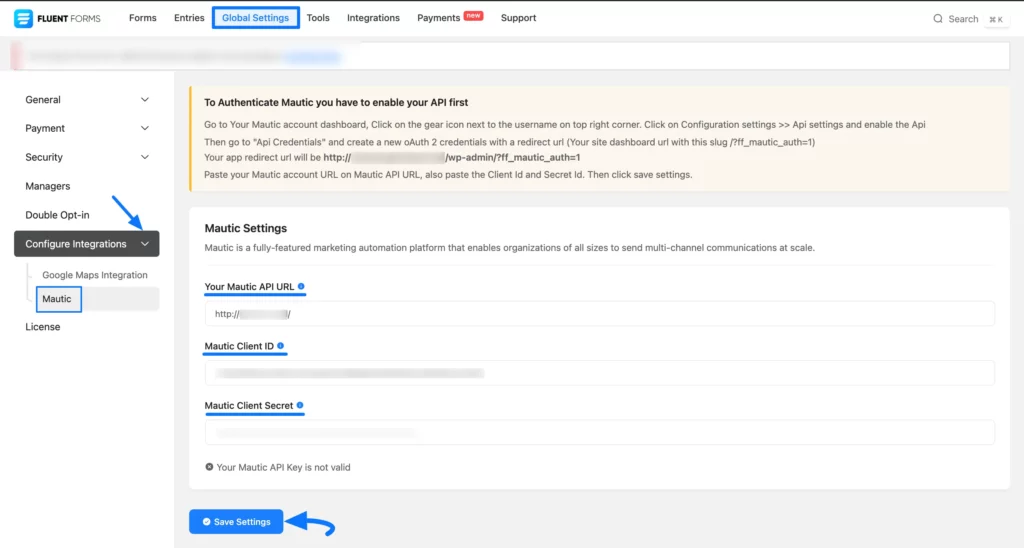
Now, under Mautic Settings, provide all the required credentials (Mautic Account URL, Client ID, and Client Secret).
Then, press the Save Settings button and your Mautic will be Integrated.
“To learn how you can get all the required credentials from Mautic, follow the instructions carefully under the “To Authentic Mautic you have to enable your API first” section. Also, copy the URL shown in the screenshot for later use.”
Get the Required Mautic Credentials
To learn where you can get all the required Mautic credentials, follow the steps with screenshots below —
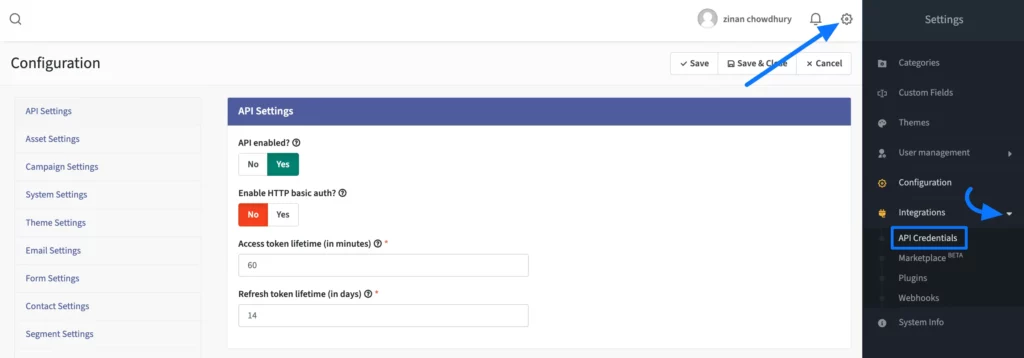
First, log in to your Mautic Account Dashboard, click the Settings Icon in the top right corner, and press the Configuration button from the left-side settings bar.
“If you do not have a Mautic Account, sign up from here.”
To access the API Credentials tab, click the Yes button to enable the API Settings..

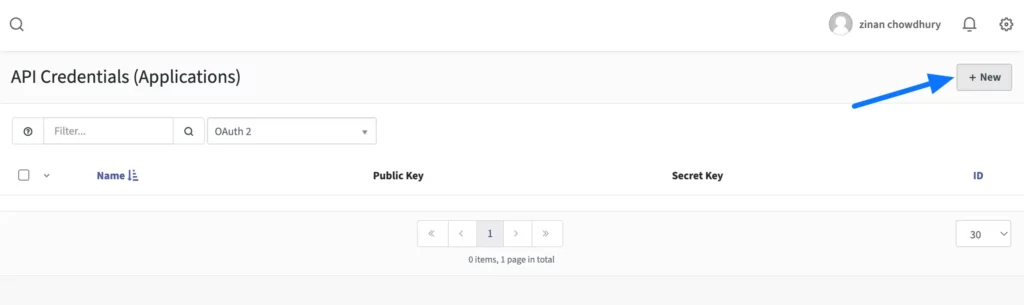
Again, go to the Settings Icon in the top right corner, expand the Integration dropdown, and click the API Credentials button in the left-side settings bar.
Click on the New button to create a new API Credentials.
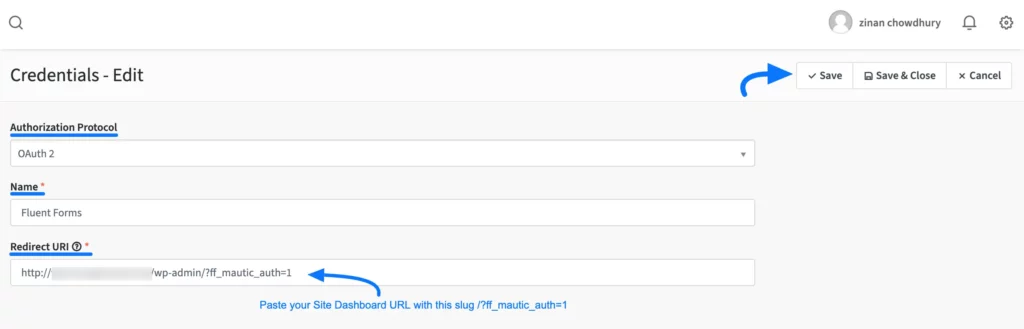
Now, select OAuth 2 as the Authorization Protocol and provide a Name for your API Credentials.
Then, paste the Redirect URL you copied from FluentForms Global Settings.
Finally, click the Save button in the top right corner.
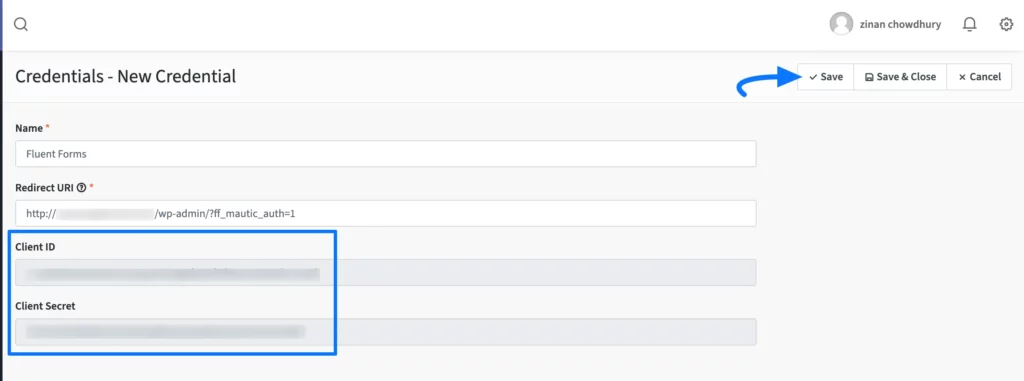
Finally, you will get your required Client ID and Client Secret. Copy them and press the Save button to save all the Mautic API Credentials.
Configuring Mautic in Fluent Forms
Once you get all the credentials, return to the Global Settings from the Fluent Forms Navbar, expand the Configure Integrations, and open the Mautic tab from the left sidebar.
Now, provide your Mautic Account’s URL into Your Mautic API URL field.
Then, paste the Client ID and Client Secret you copied from Mautic into the Mautic Client ID and Mautic Client Secret fields respectively.
Once you complete the configuration process, press the Save Settings button.
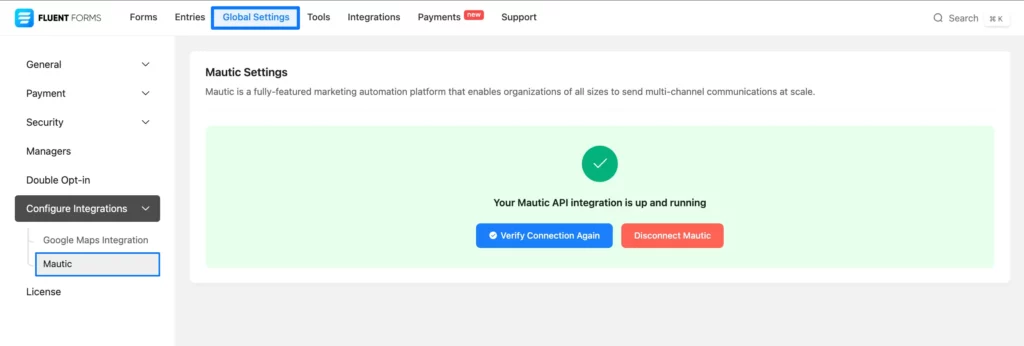
Finally, click the Accept button to permit Fluent Forms to connect with your Mautic Account.

Here, you can see your Mautic Integration feed is enabled and ready to use!
Add Mautic Integration Feed in a Form
To learn how to add the Mautic Integration feed in a specific form to list its entries in Mautic, follow the steps with the screenshots below –
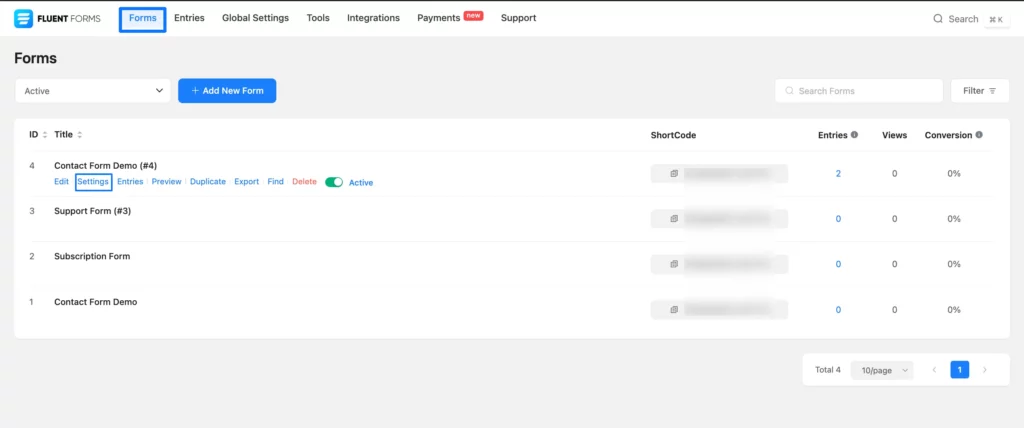
First, go to the Forms section from the Fluent Forms Navbar, and click the Settings button of your desired form where you want to add the feed.
“If you do not have any existing form, read this Documentation to create one”.
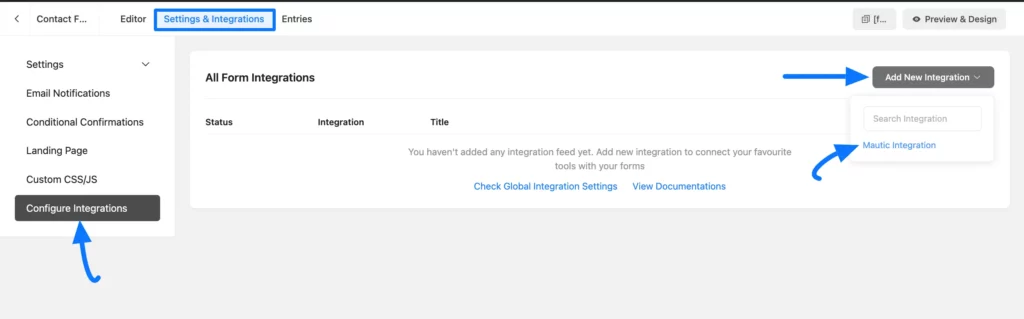
Open the Configure Integrations tab, expand the Add New Integration tab, and click the Mautic Integration feed.
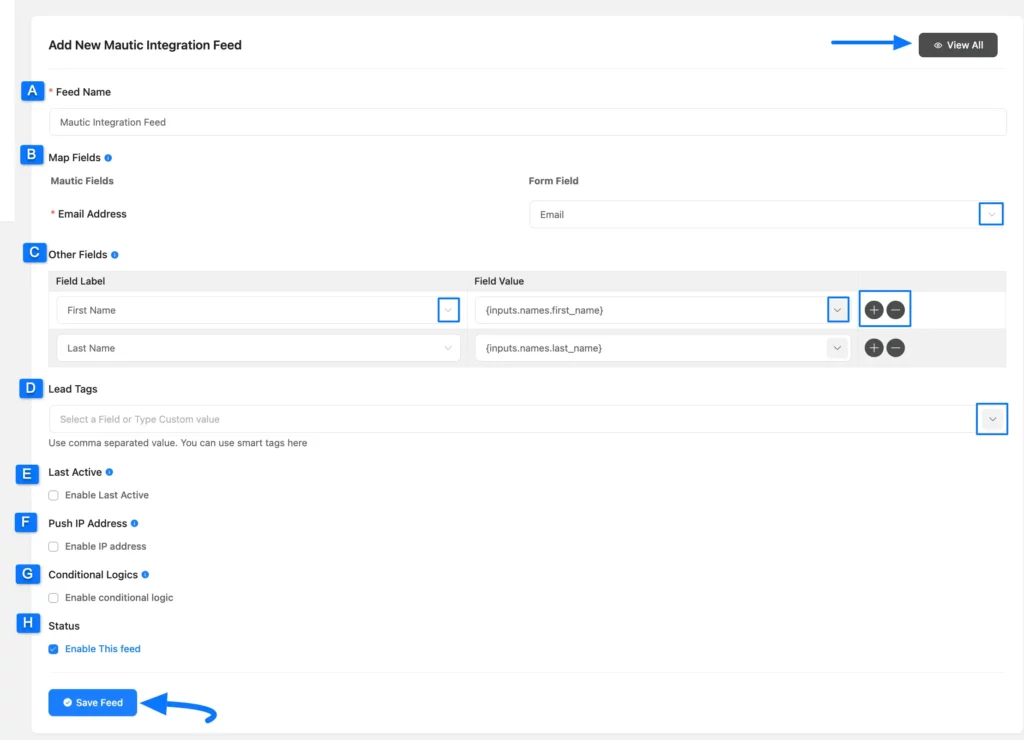
Now, set up your Mautic Integration Feed according to your needs using all the following available settings options.
A. Feed Name: Give a name to your feed so that you can find it later easily.
B. Map Fields: Associate your Mautic Field with the Fluent Forms Field by selecting the appropriate form field from the dropdown (you can also give your custom value if needed).
C. Other Fields: Use this option to add or delete fields using the Plus or Minus icon. Here, also pair the Mautic Field with the Fluent Forms Field by selecting the appropriate form field from the dropdown. You can provide a custom value if needed.
D. Lead Tags: With this option, you can assign Tag/s using the SmartCodes from the dropdown list or by entering a custom value. And, the user information collected through form submissions will be directly added to the Contacts and Tags section of your Mautic Account.
E. Last Active: When this option is enabled, FluentForm will pass the lead creation time to the Mautic lead.
F. Push IP Address: When this option is enabled, FluentForm will pass the ipAddress to Mautic.
G. Conditional Logics: This option allows Mautic integration to work conditionally based on your submission values. To learn more about Fluent Forms Conditional logic click here.
H. Status: Uncheck the Enable This Feed box if you want to save this Mautic Feed as Draft. Otherwise, enable this box to make this feed functional.
“Once you are done, click the Save Feed button to save all your setup.”
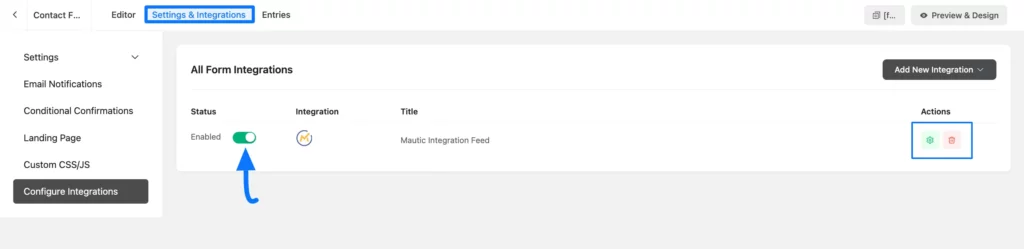
Here, you can see the Mautic Integration Feed is added!
You can disable the feed anytime by clicking the Toggle button if needed.
Also, you can customize the feed anytime by clicking the Settings icon and delete it by clicking the Trash icon.
This is how you can integrate Mautic with Fluent Forms!
If you have any further questions, concerns, or suggestions, please do not hesitate to contact our @support team. Thank You.