
Form Step field allows you to create multi-step forms. Multi-step forms let you collect more data without scaring the users away.
Creating and managing a multi-step form is not easy in WordPress unless you use suitable tools. In this case, Fluent Forms Pro makes it super easy.
- To add steps to your form, drag and drop the Form Step input field from the Advanced input fields.
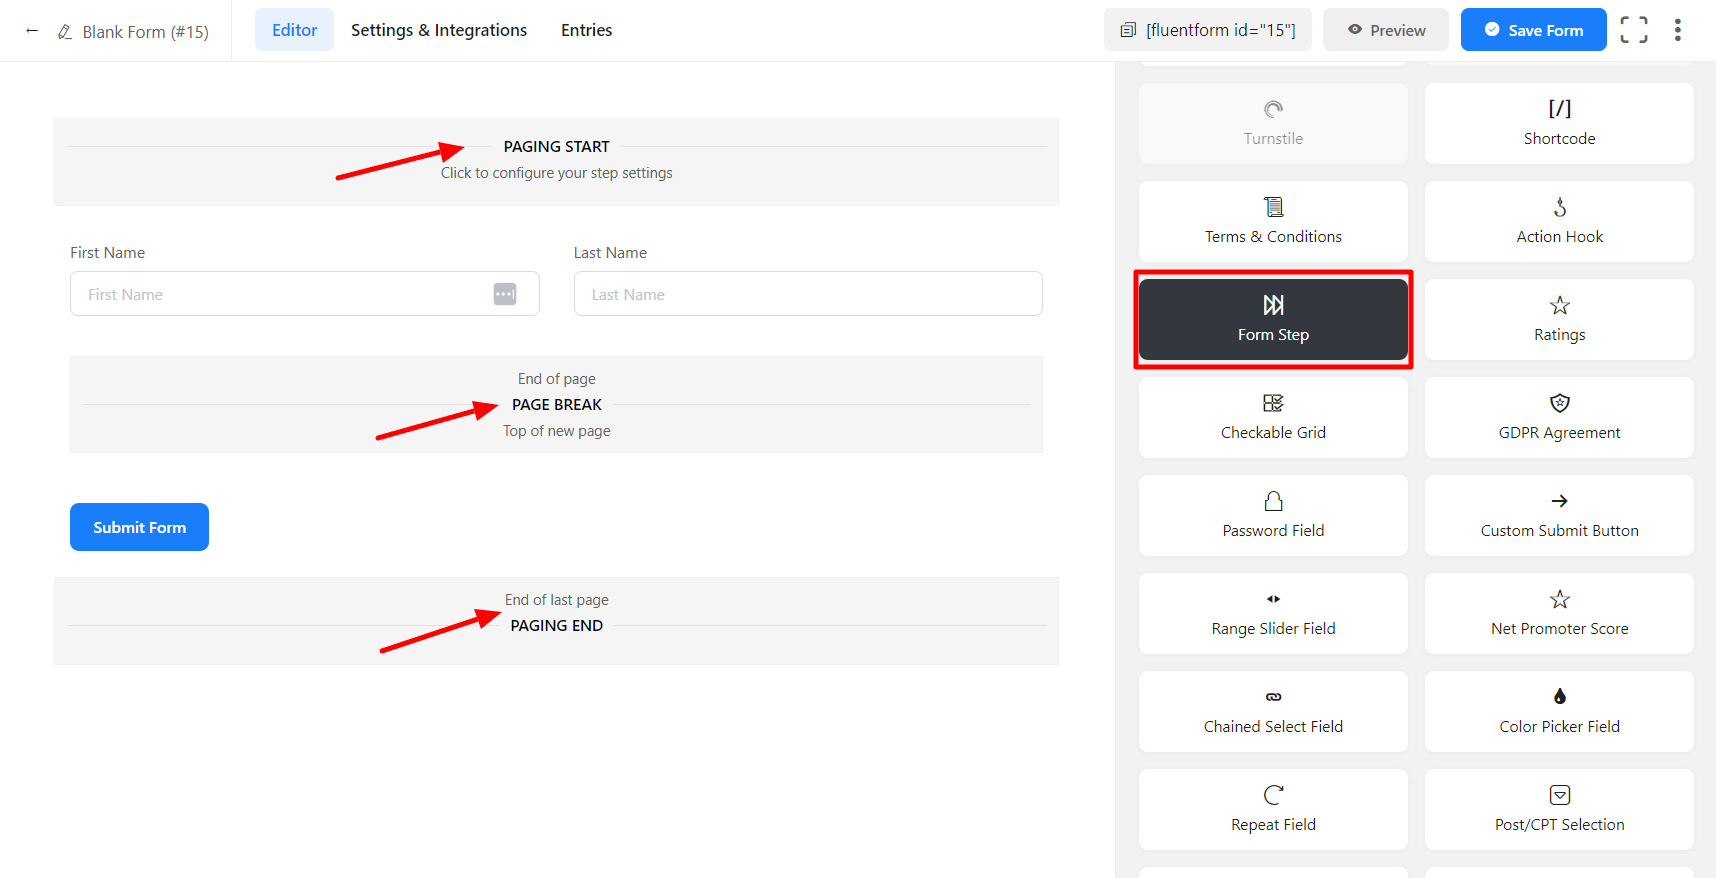
The Form Step comes in 3 parts. These are described below.
Paging Start
This is the first part of the Form Step input field. This section contains the first page of the multiple-page form. When we add the first part of the form, it will automatically load into the Paging Start section.
You can customize this part by clicking the edit icon get when hovering over the field.
- Element Class: Add custom CSS classes to the input field itself.
- Progress Indicator: You will find three options for the indicator bar style here. Users will see the progress of the form steps according to their choice.
- Progress Bar: Choosing the Progress Bar will show users a progress bar in the form. So that they can have a numeric idea of their progress (in the form of “1 of 4 steps completed”)
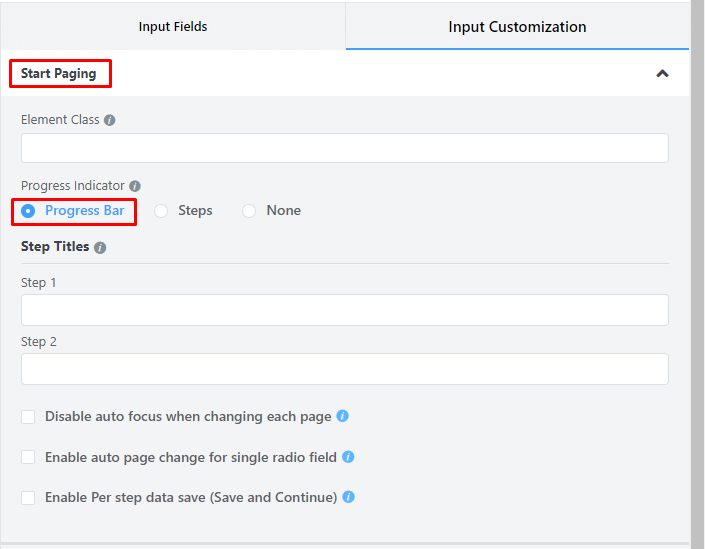
- Choosing Steps will show users the names of the steps in the form so they can visualize their progress.

- Choosing None will show users no progress indicators.
Page Break
Page Break portion of the form automatically creates a new step or section. Every time you need to create a new step, just click or drag and drop Form Step on the builder point. Then you will find that a new space has been created to input a new field for the next step.
You can customize this part by clicking the edit icon get when hovering over the field.
- Previous Button: Choose from the two options:
– Choosing Default shows a Text button for the previous page
– Choosing an Image shows an icon of your choice.
- Previous Button Text: Edit the previous button text or add the icon link to show an image.
- Next Button: Choose from the two options:
– Choosing Default shows a Text button for the next page
– Choosing an Image shows an icon of your choice.
- Next Button Text/Image: Edit the Next button text or add the icon link to show an image.
- Element Class: Add custom CSS classes to the input field itself.
Paging End
The last portion of the Form Step is the Paging End section. It determines the ending of the multiple pages form.
You can customize this part by clicking the edit icon get when hovering over the field.
- Element Class: Add custom CSS classes to the input field itself.
- Previous Button: Choose from the two options:
– Choosing Default shows a Text button for the previous page
– Choosing an Image shows an icon of your choice.
- Previous Button Text: Edit the previous button text or add the icon link to show an image.
This guide will help you set up Form Step in your form, allowing you to create a multi-page form on your form.
Disable Auto-Scroll
Auto-scroll is enabled by default on your step form. You can disable auto-scroll by enabling this checkbox.
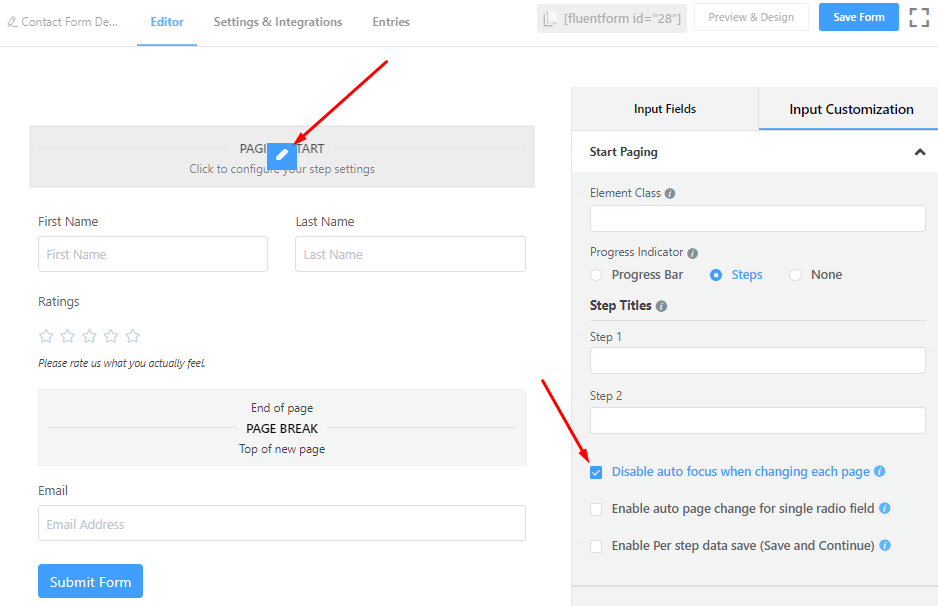
Enable Auto Page
Auto page change is disabled by default on your step form. You can enable auto-page by selecting this checkbox. If you enable this, then for last radio item field will trigger the next page change. For more details, click here
Enable Per Step Data Save
If you enable this, then on each step change, the data current step data will be persisted in a step form
Your users can resume the form where they left it. Follow this simple guide
Set Scroll Offset
If your website has a sticky header menu, you might face some problems, such as the form being hidden beneath the header menu while auto-scroll is enabled. To solve the problem, you can follow this guide