
You can show Fluent Forms Entries in the Frontend with any table plugin, for instance, Ninja Tables.
Let’s go through the article to learn how to accomplish that.
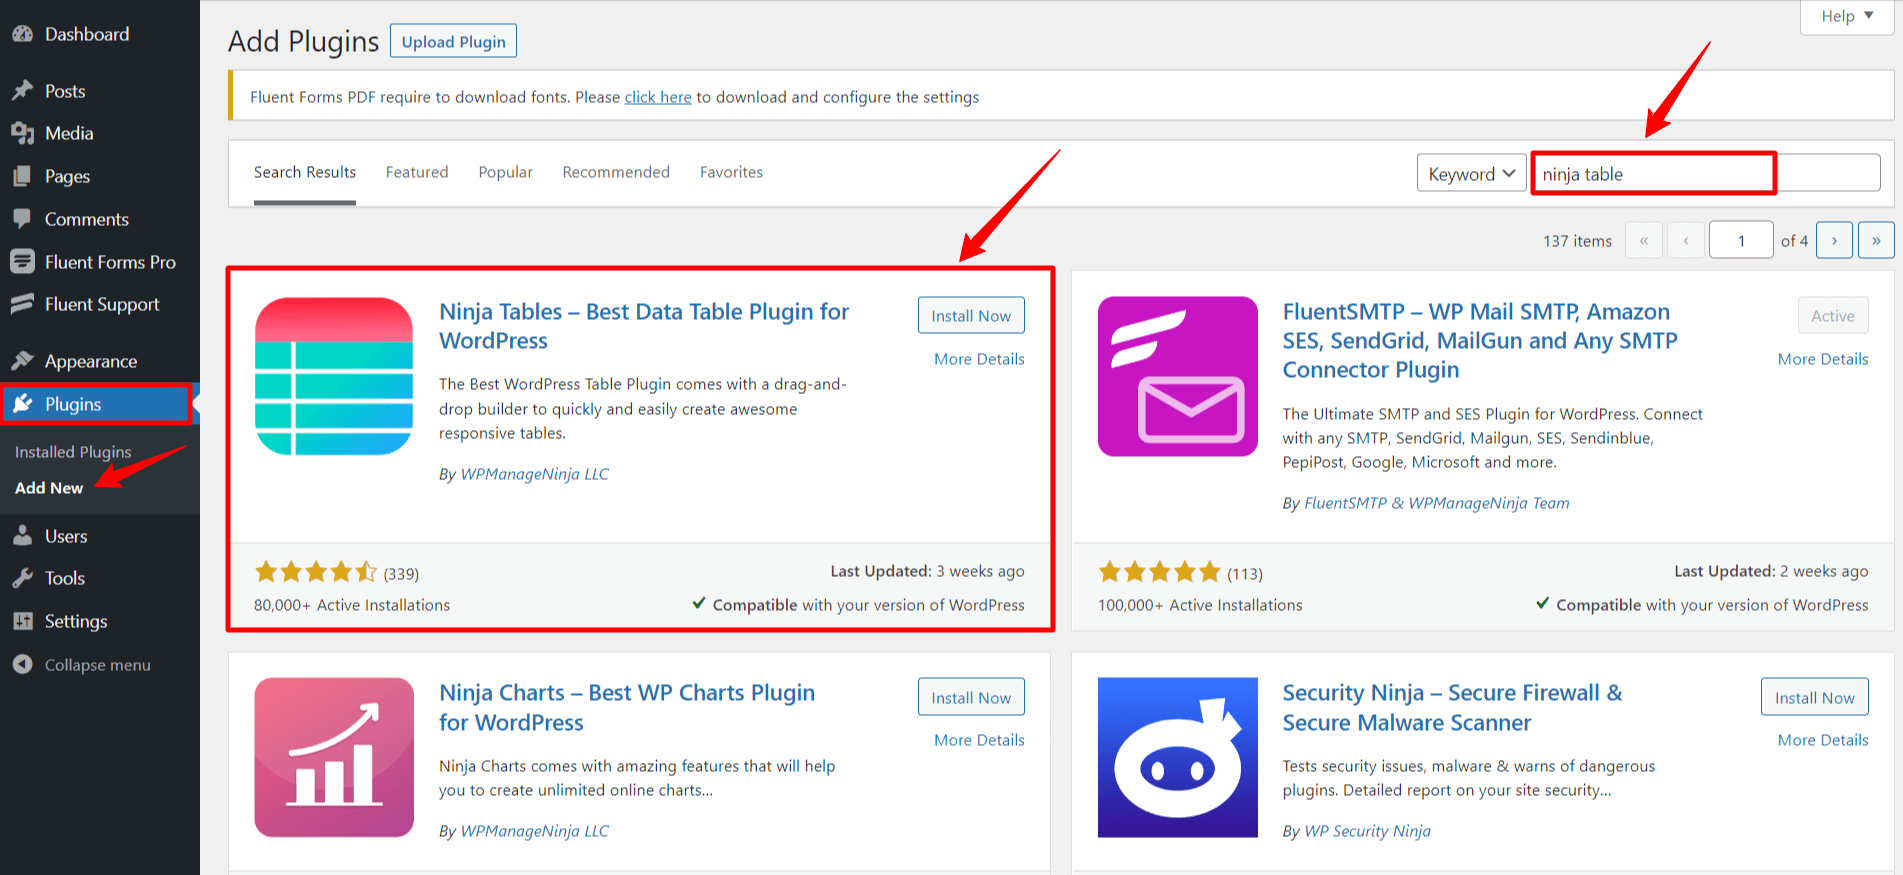
- Ensure the Ninja Tables plugin is installed before integrating it with Fluent Forms.
- Go to the Plugin → Add New & search for Ninja Tables plugin in the search box, then install & activate it.
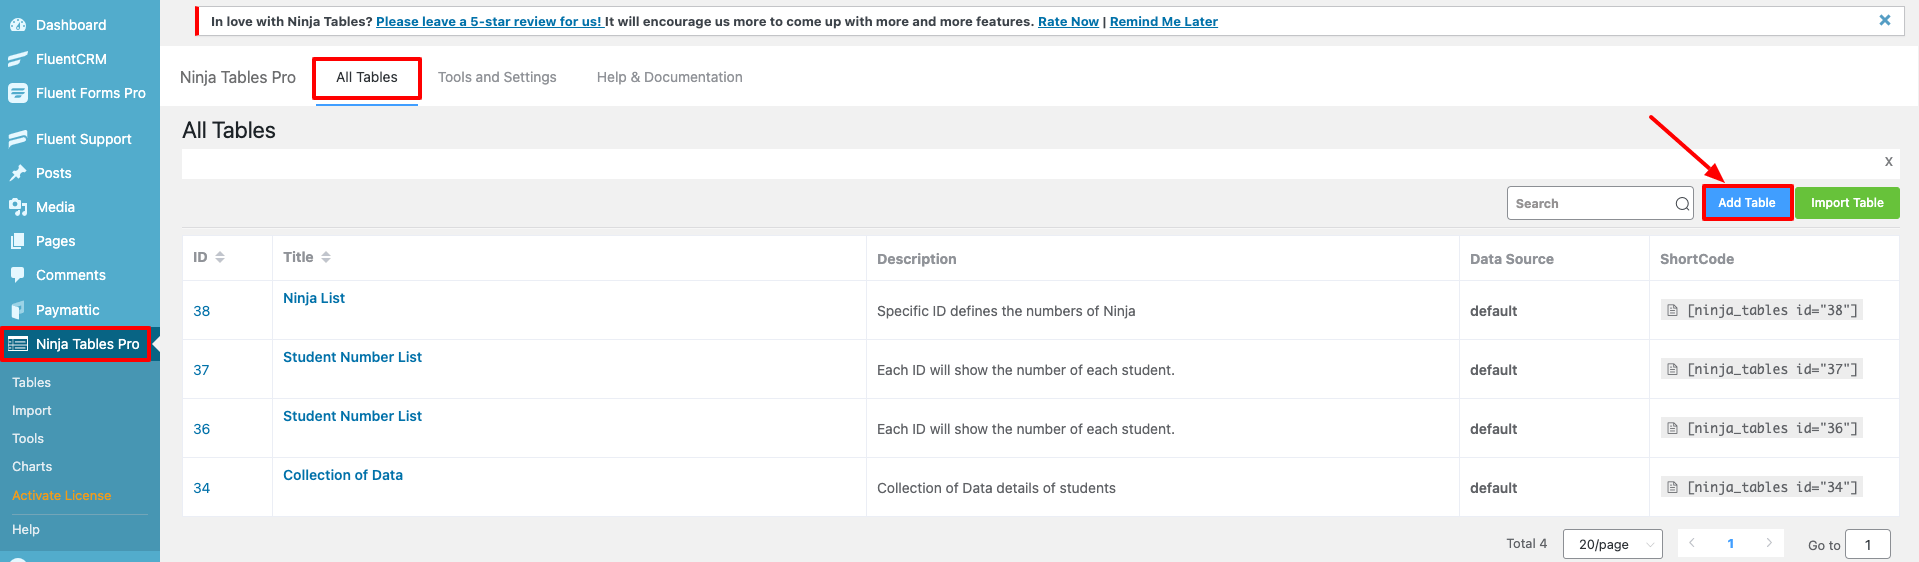
- To configure the entries in the front end, go to the Ninja Tables dashboard and click on Add Table.
- A pop-up box will show up on the screen after that.
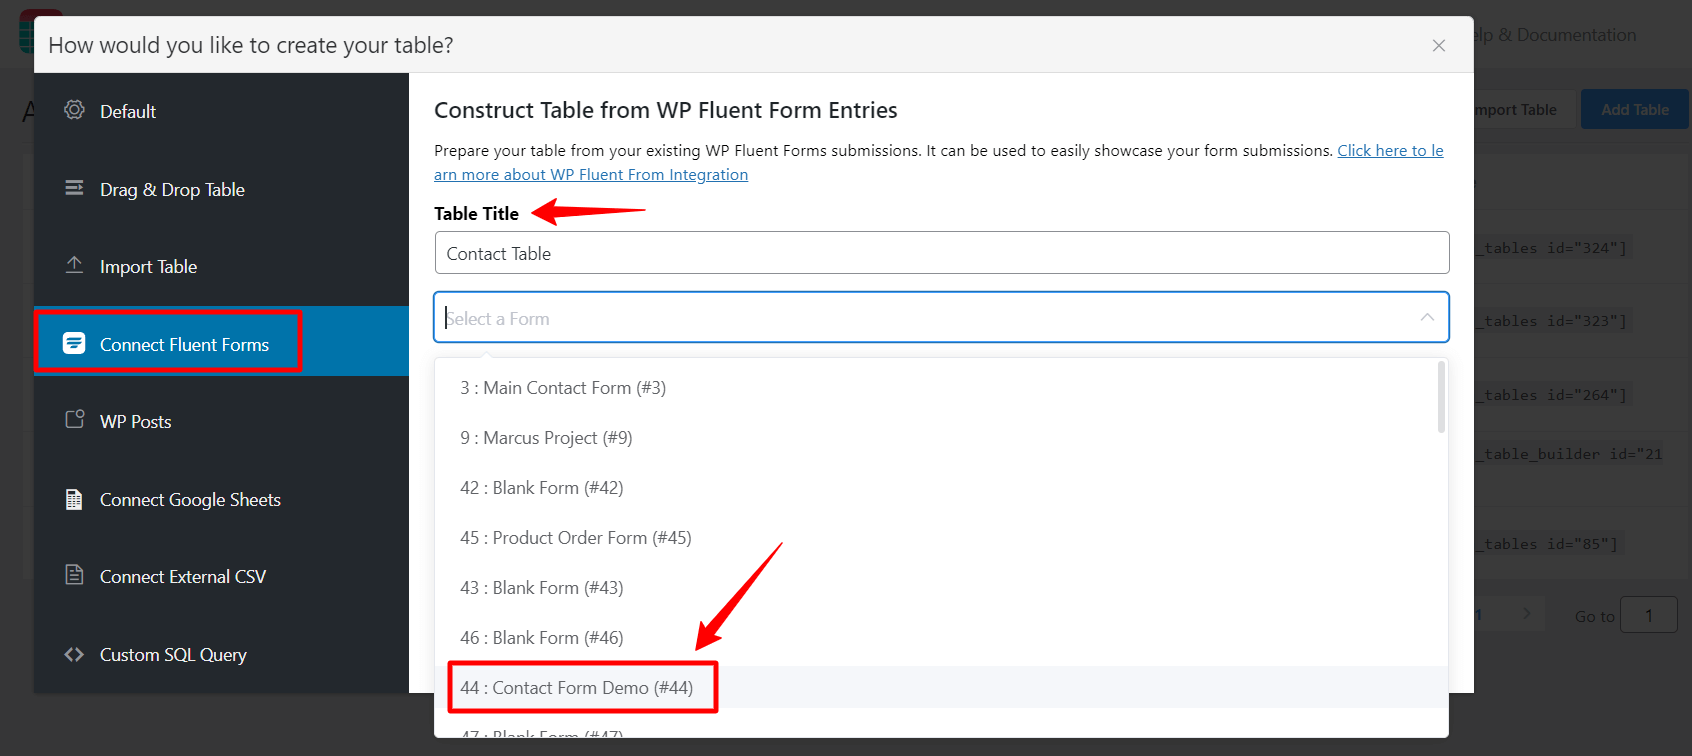
- Click Connect Fluent Forms from there, and give a title to your table. Then choose your preferred Fluent Forms Form using the box. Select a Form like the below screenshot.
- If you don’t have any created forms before, check this link to learn how to create a Form in Fluent Forms.
- After connecting your form, all fields of your selected form will now show just under the search box. From here, you can choose and save all fields or any unique field you wish to view in the table.
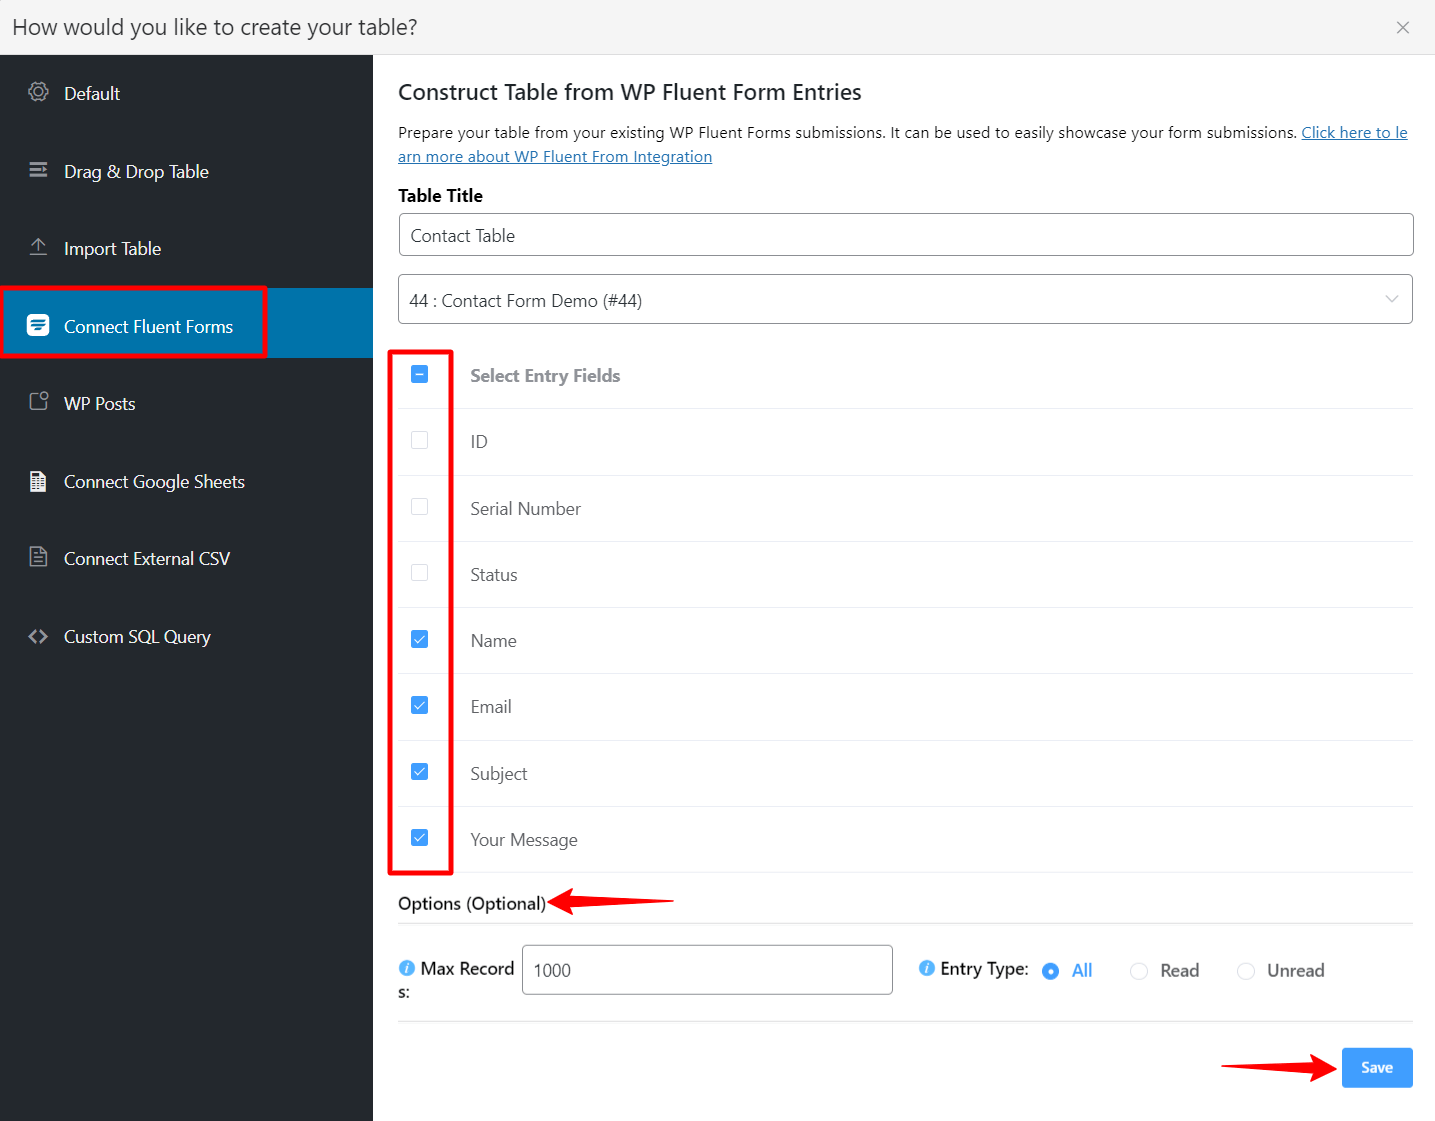
- Then you will notice that the selected fields in your form are shown below. You can also customize your columns according to your needs.
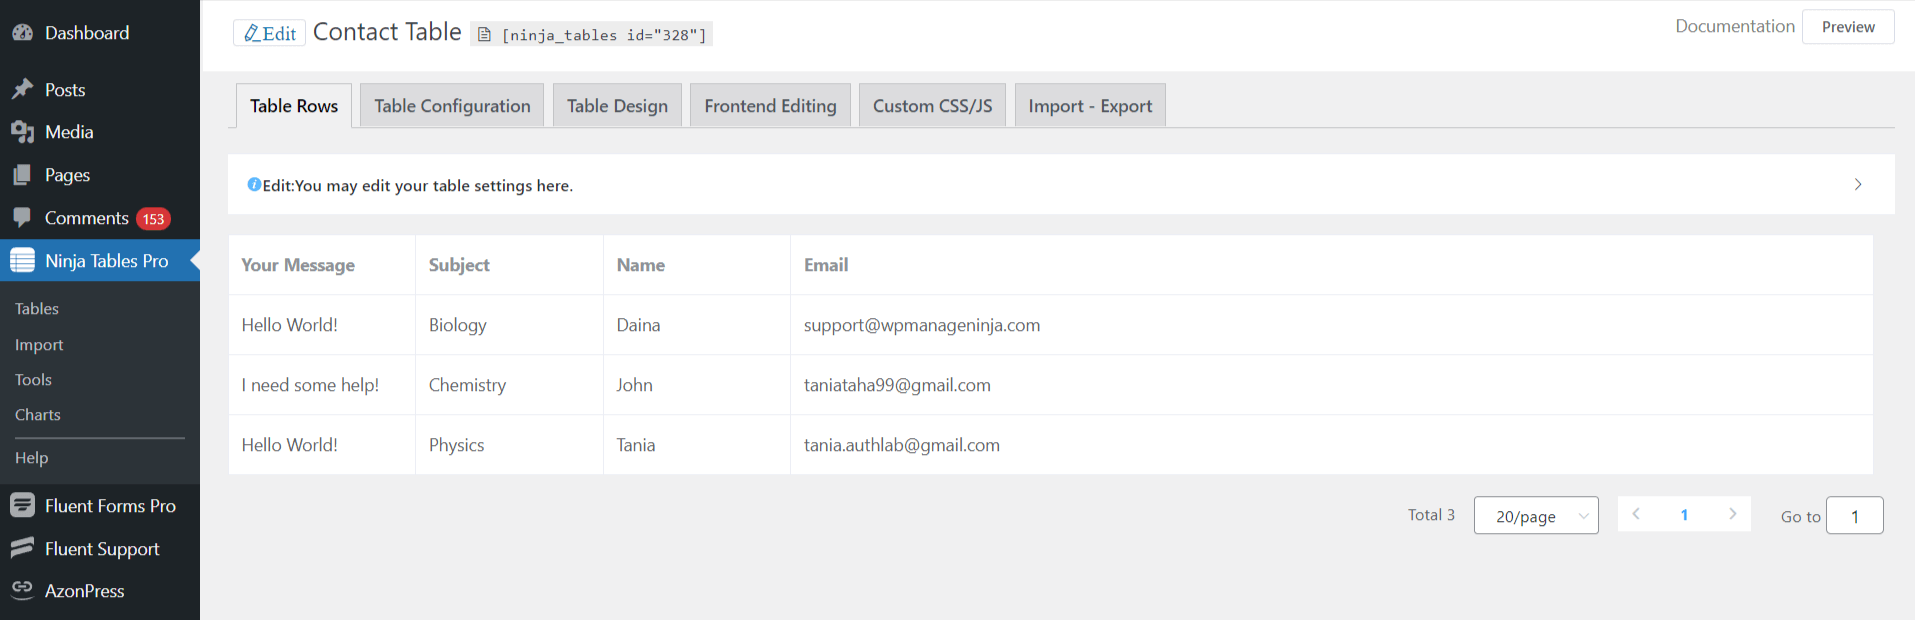
- Now, copy your Form Shortcode & paste it into the page you want to show (See the below screenshot)
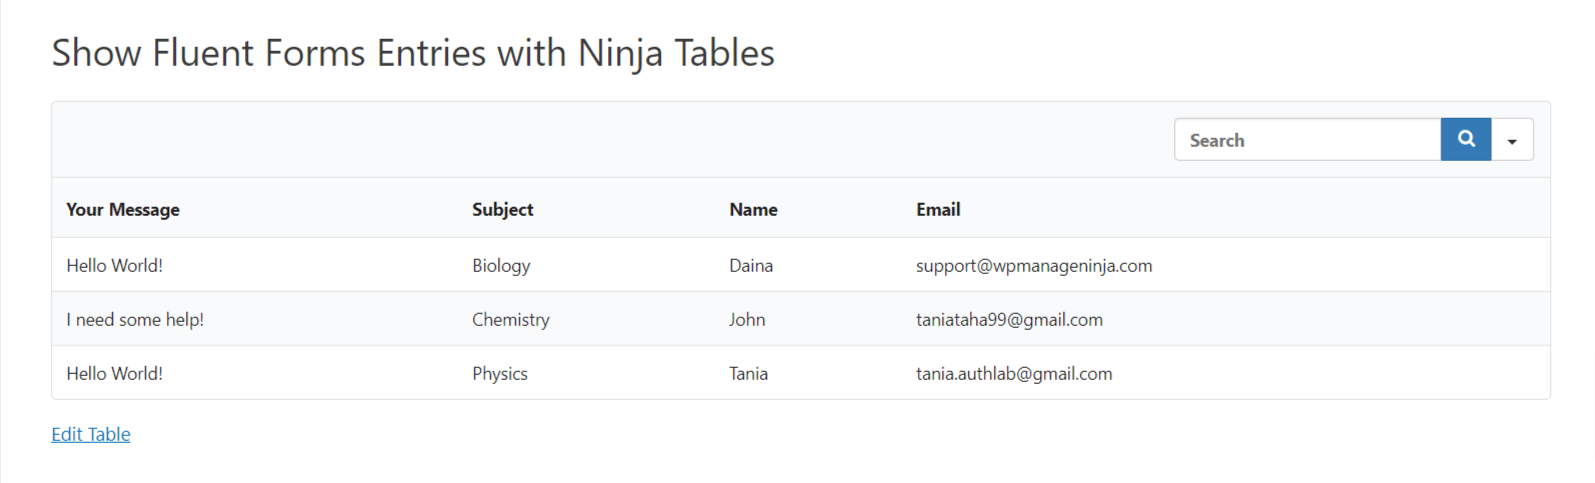
This is how you can Show Entries on the Frontend with Ninja Tables!