You can easily accept payments in Fluent Forms using Paddle. The integration process is simple and involves just a few simple steps. In this guide, we’ll walk you through how to set up Paddle as a payment method in your form.
Enable Paddle Payment Method
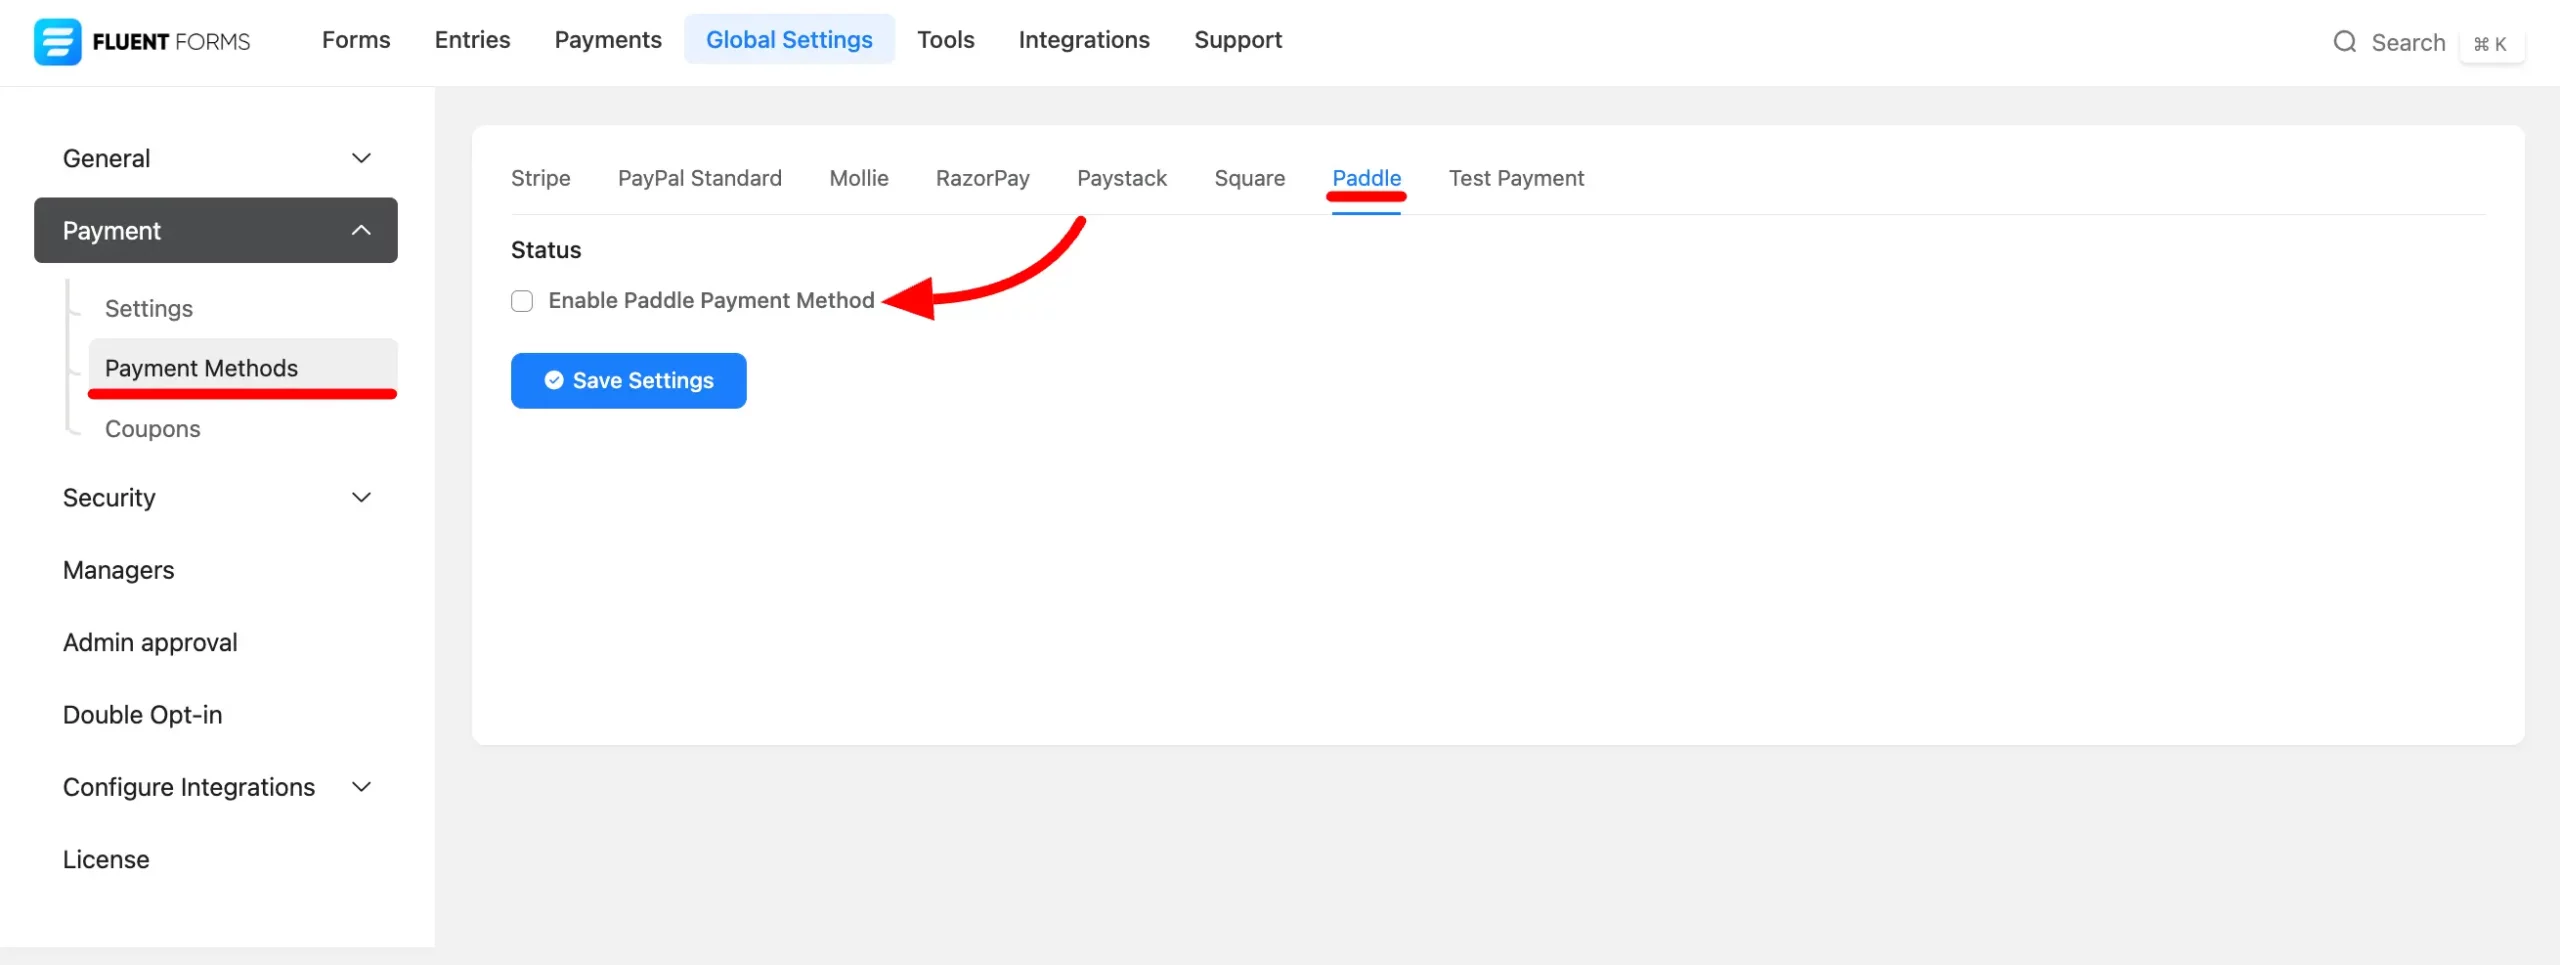
First, navigate to Fluent Forms and select Global Settings from the top menu. Then, from the left sidebar, choose Payment then the Payment Methods section.
You’ll see Paddle listed along with other available payment options in Fluent Forms. Click on Paddle, and then check the box labeled Enable Paddle Payment Method to activate it.
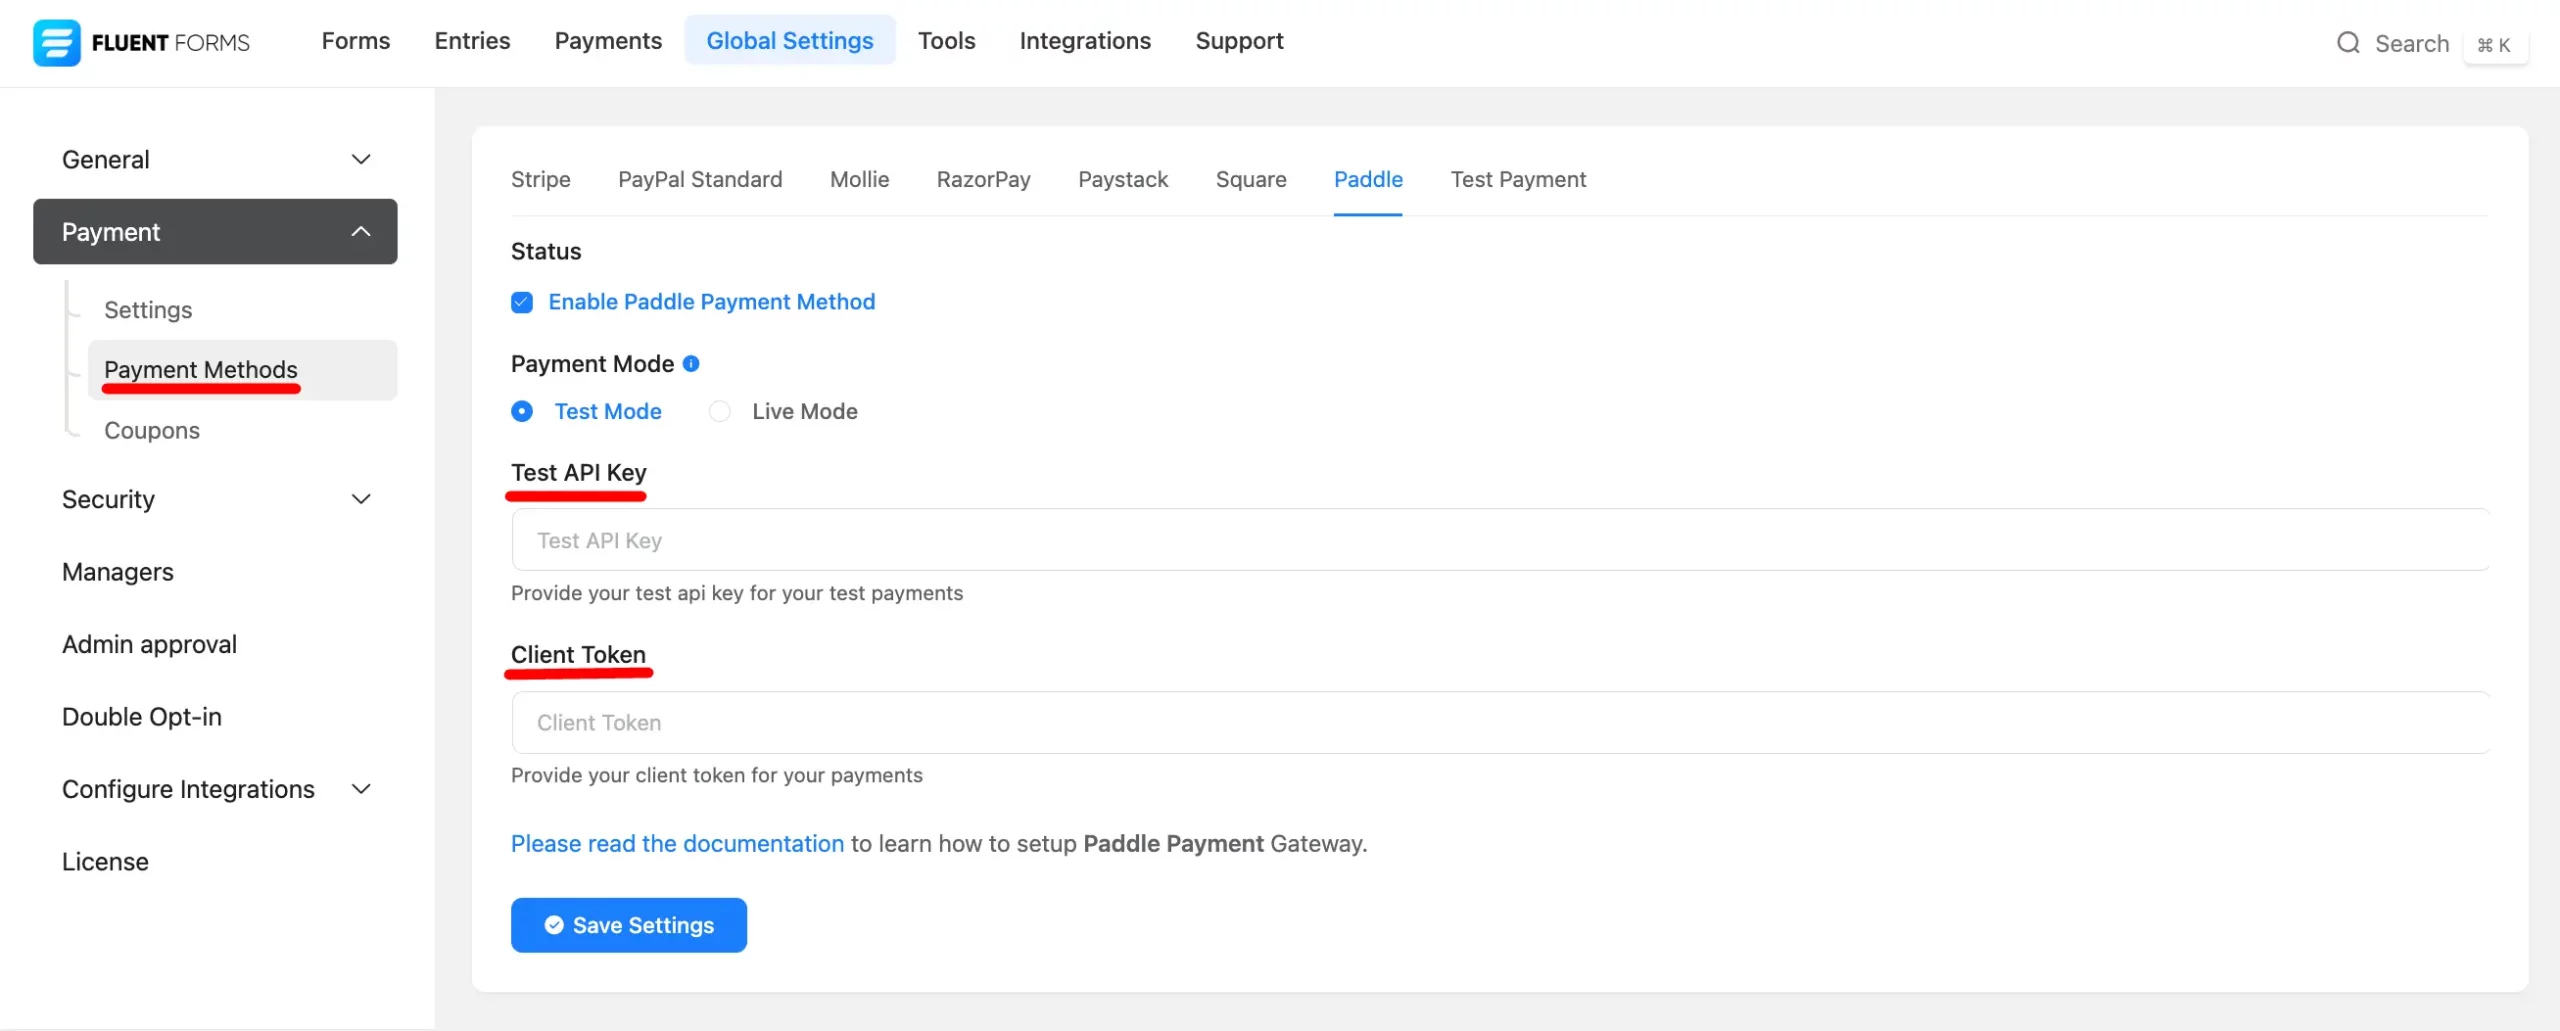
On the Paddle configuration page, you will find two modes for your payment setup.
Test Mode: In Test Mode, you can use Paddle to simulate transactions and test your payment process. We’ll guide you through the setup in this mode to ensure everything works smoothly.
Live Mode: Live Mode is for processing real transactions on your site. All other settings will remain the same as in Test Mode.
You’ll also notice that Paddle requires an API Key and Client Token to integrate with Fluent Forms. You can obtain these credentials from your Paddle account.
Get-Credential from Paddle
To obtain the credentials from your Paddle account, log in or create a new account if you don’t have one.
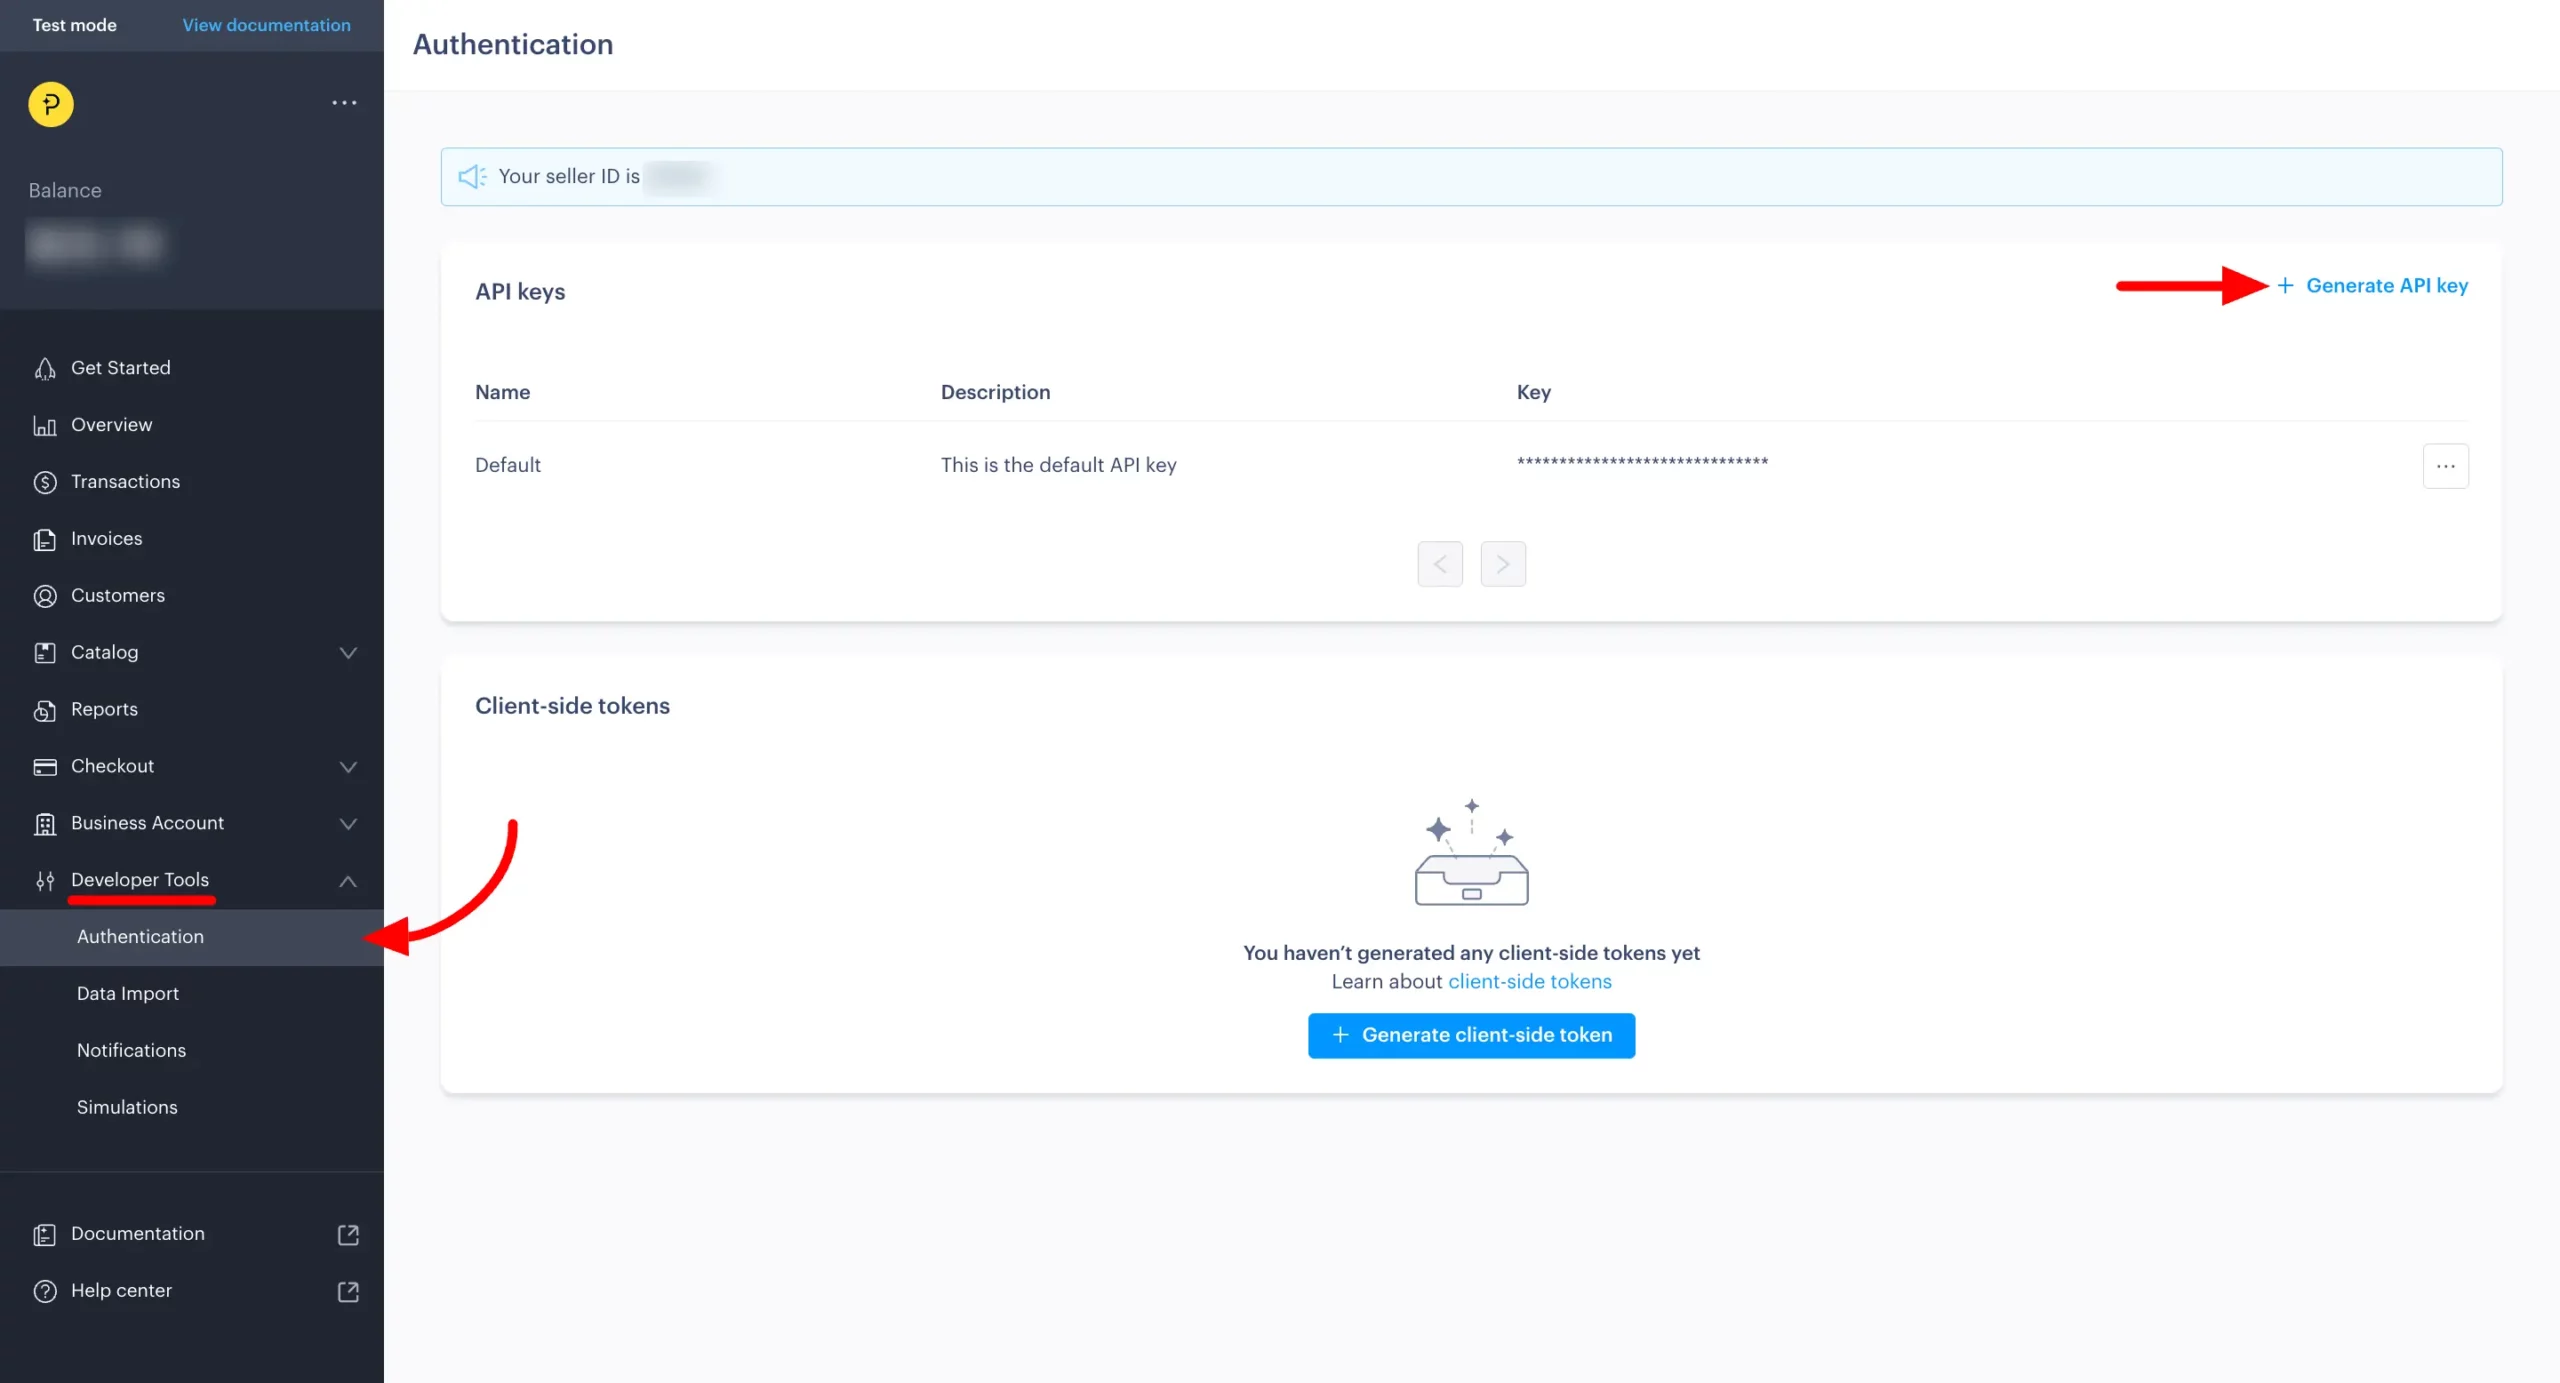
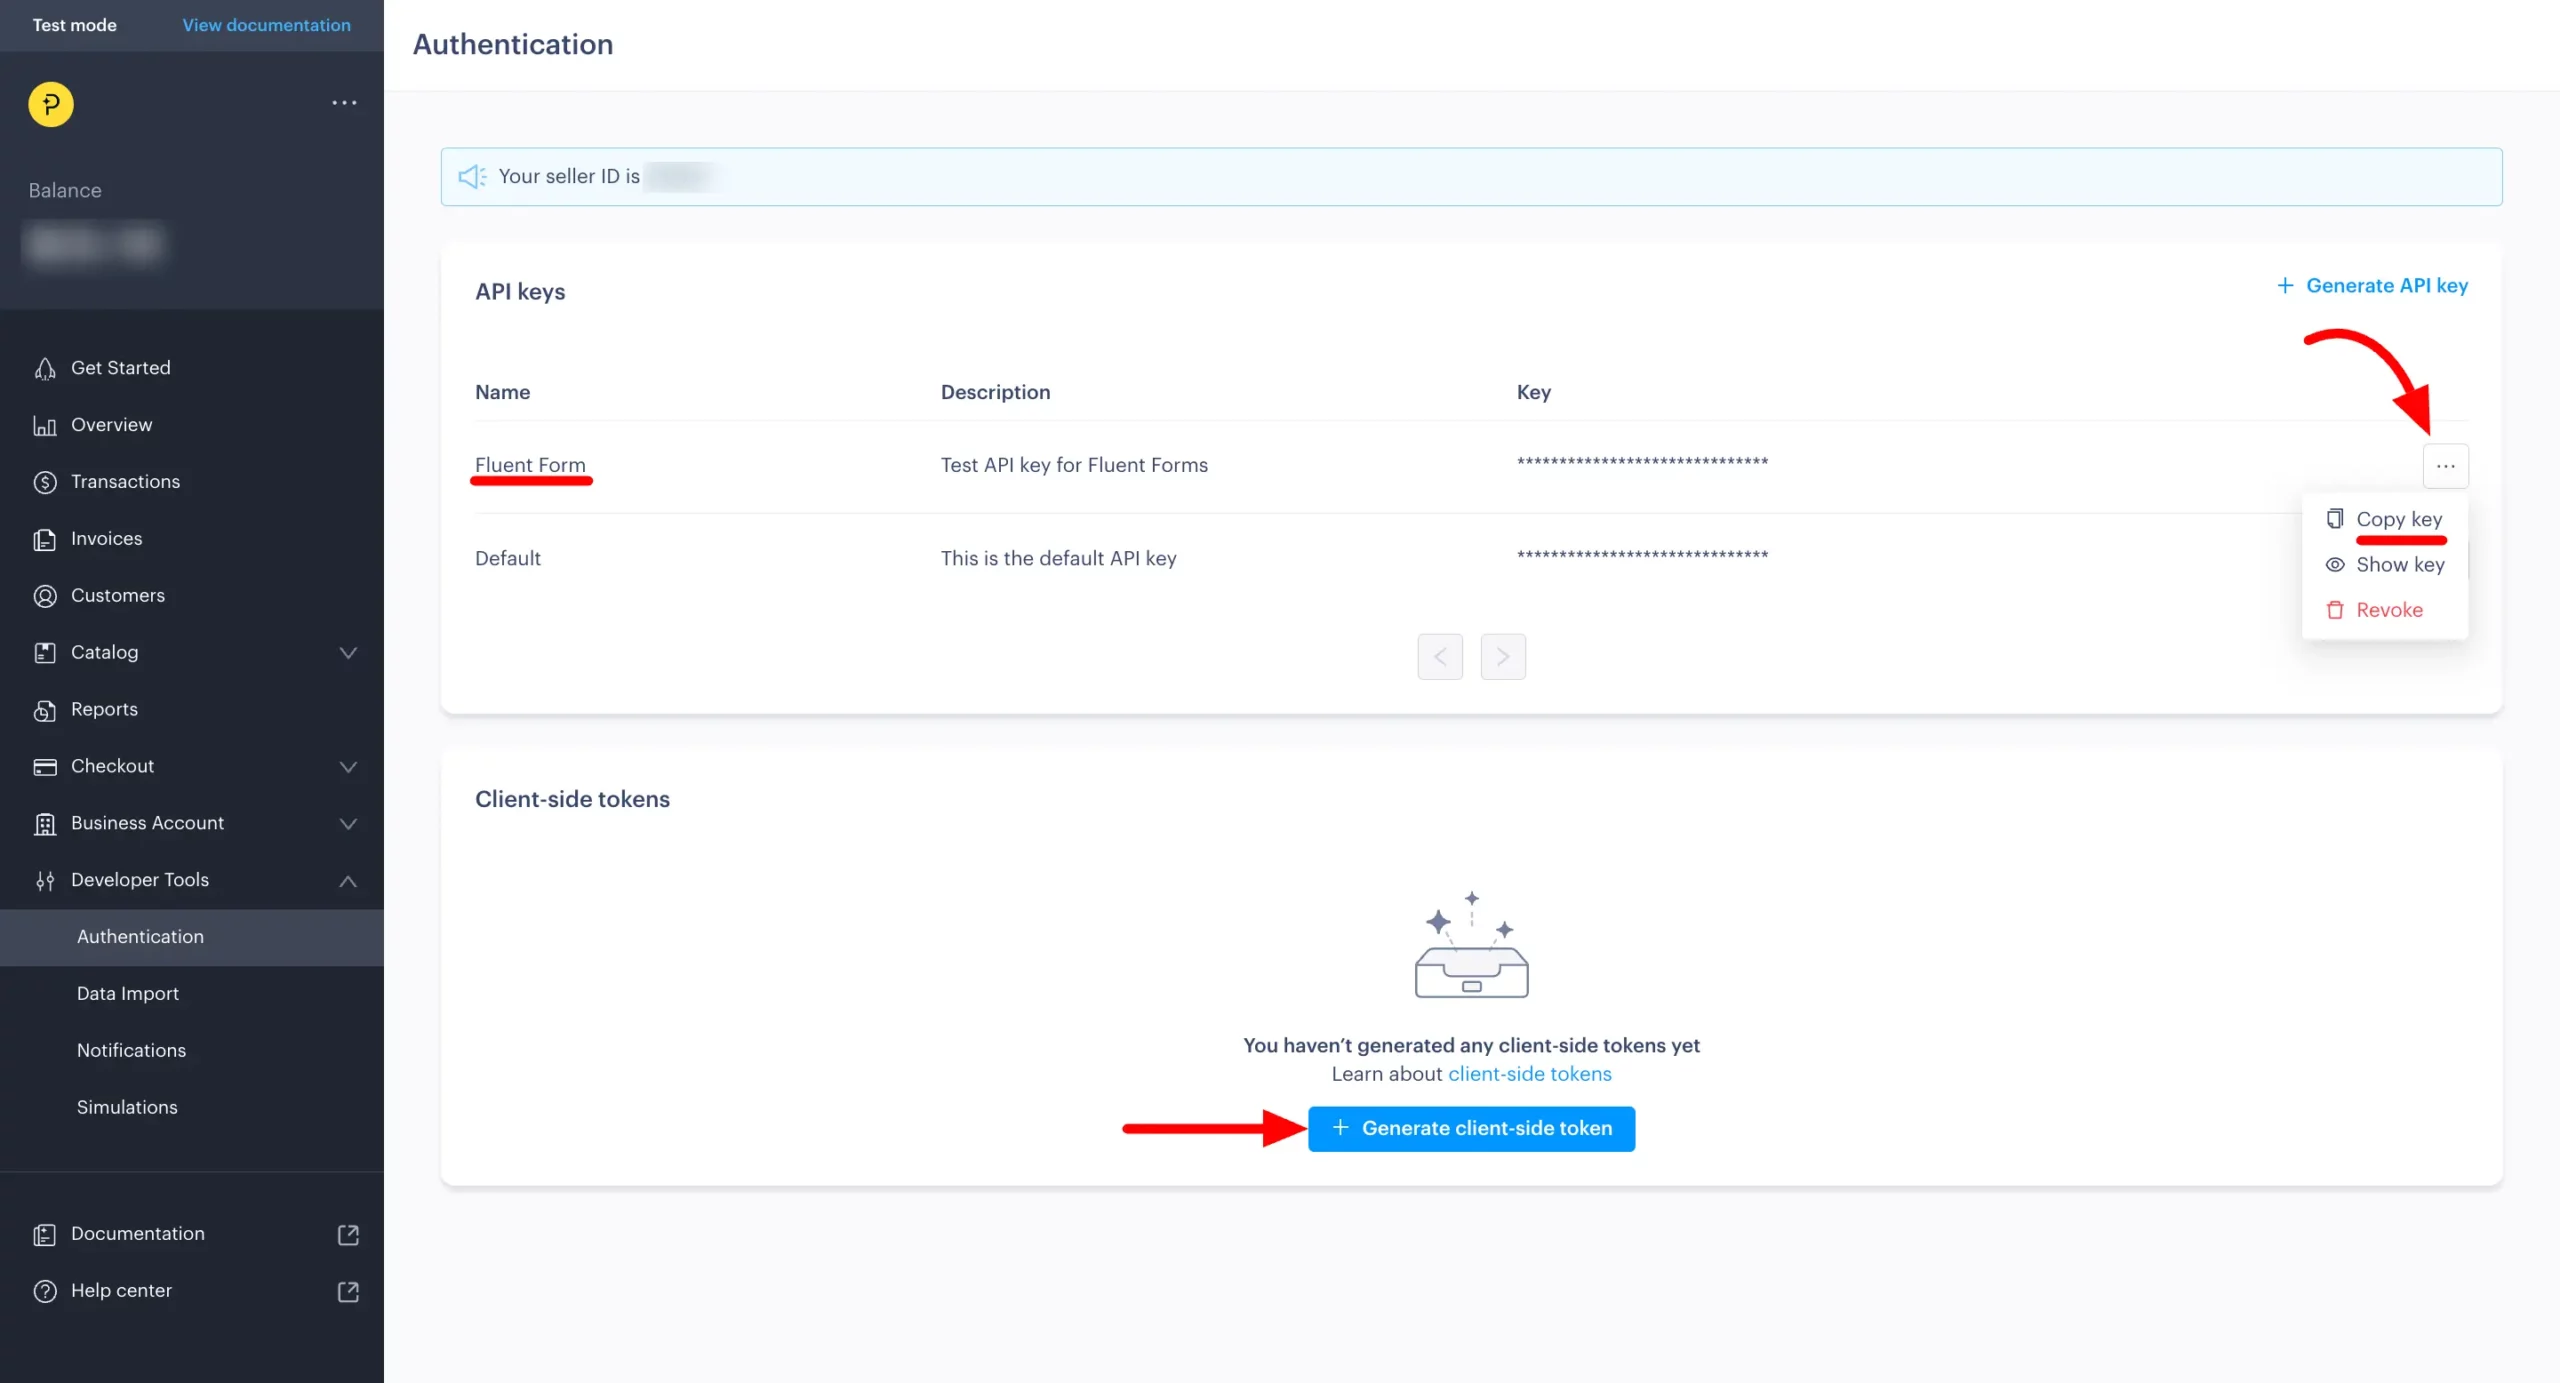
Once logged in, go to your Dashboard. From the left sidebar, select Developer Tools and then click on Authentication. Here, you’ll find the settings for your API Key and Client-side Token.
To create a new API Key, click the Generate API Key button in the top right corner, or you can use the default API Key already available.
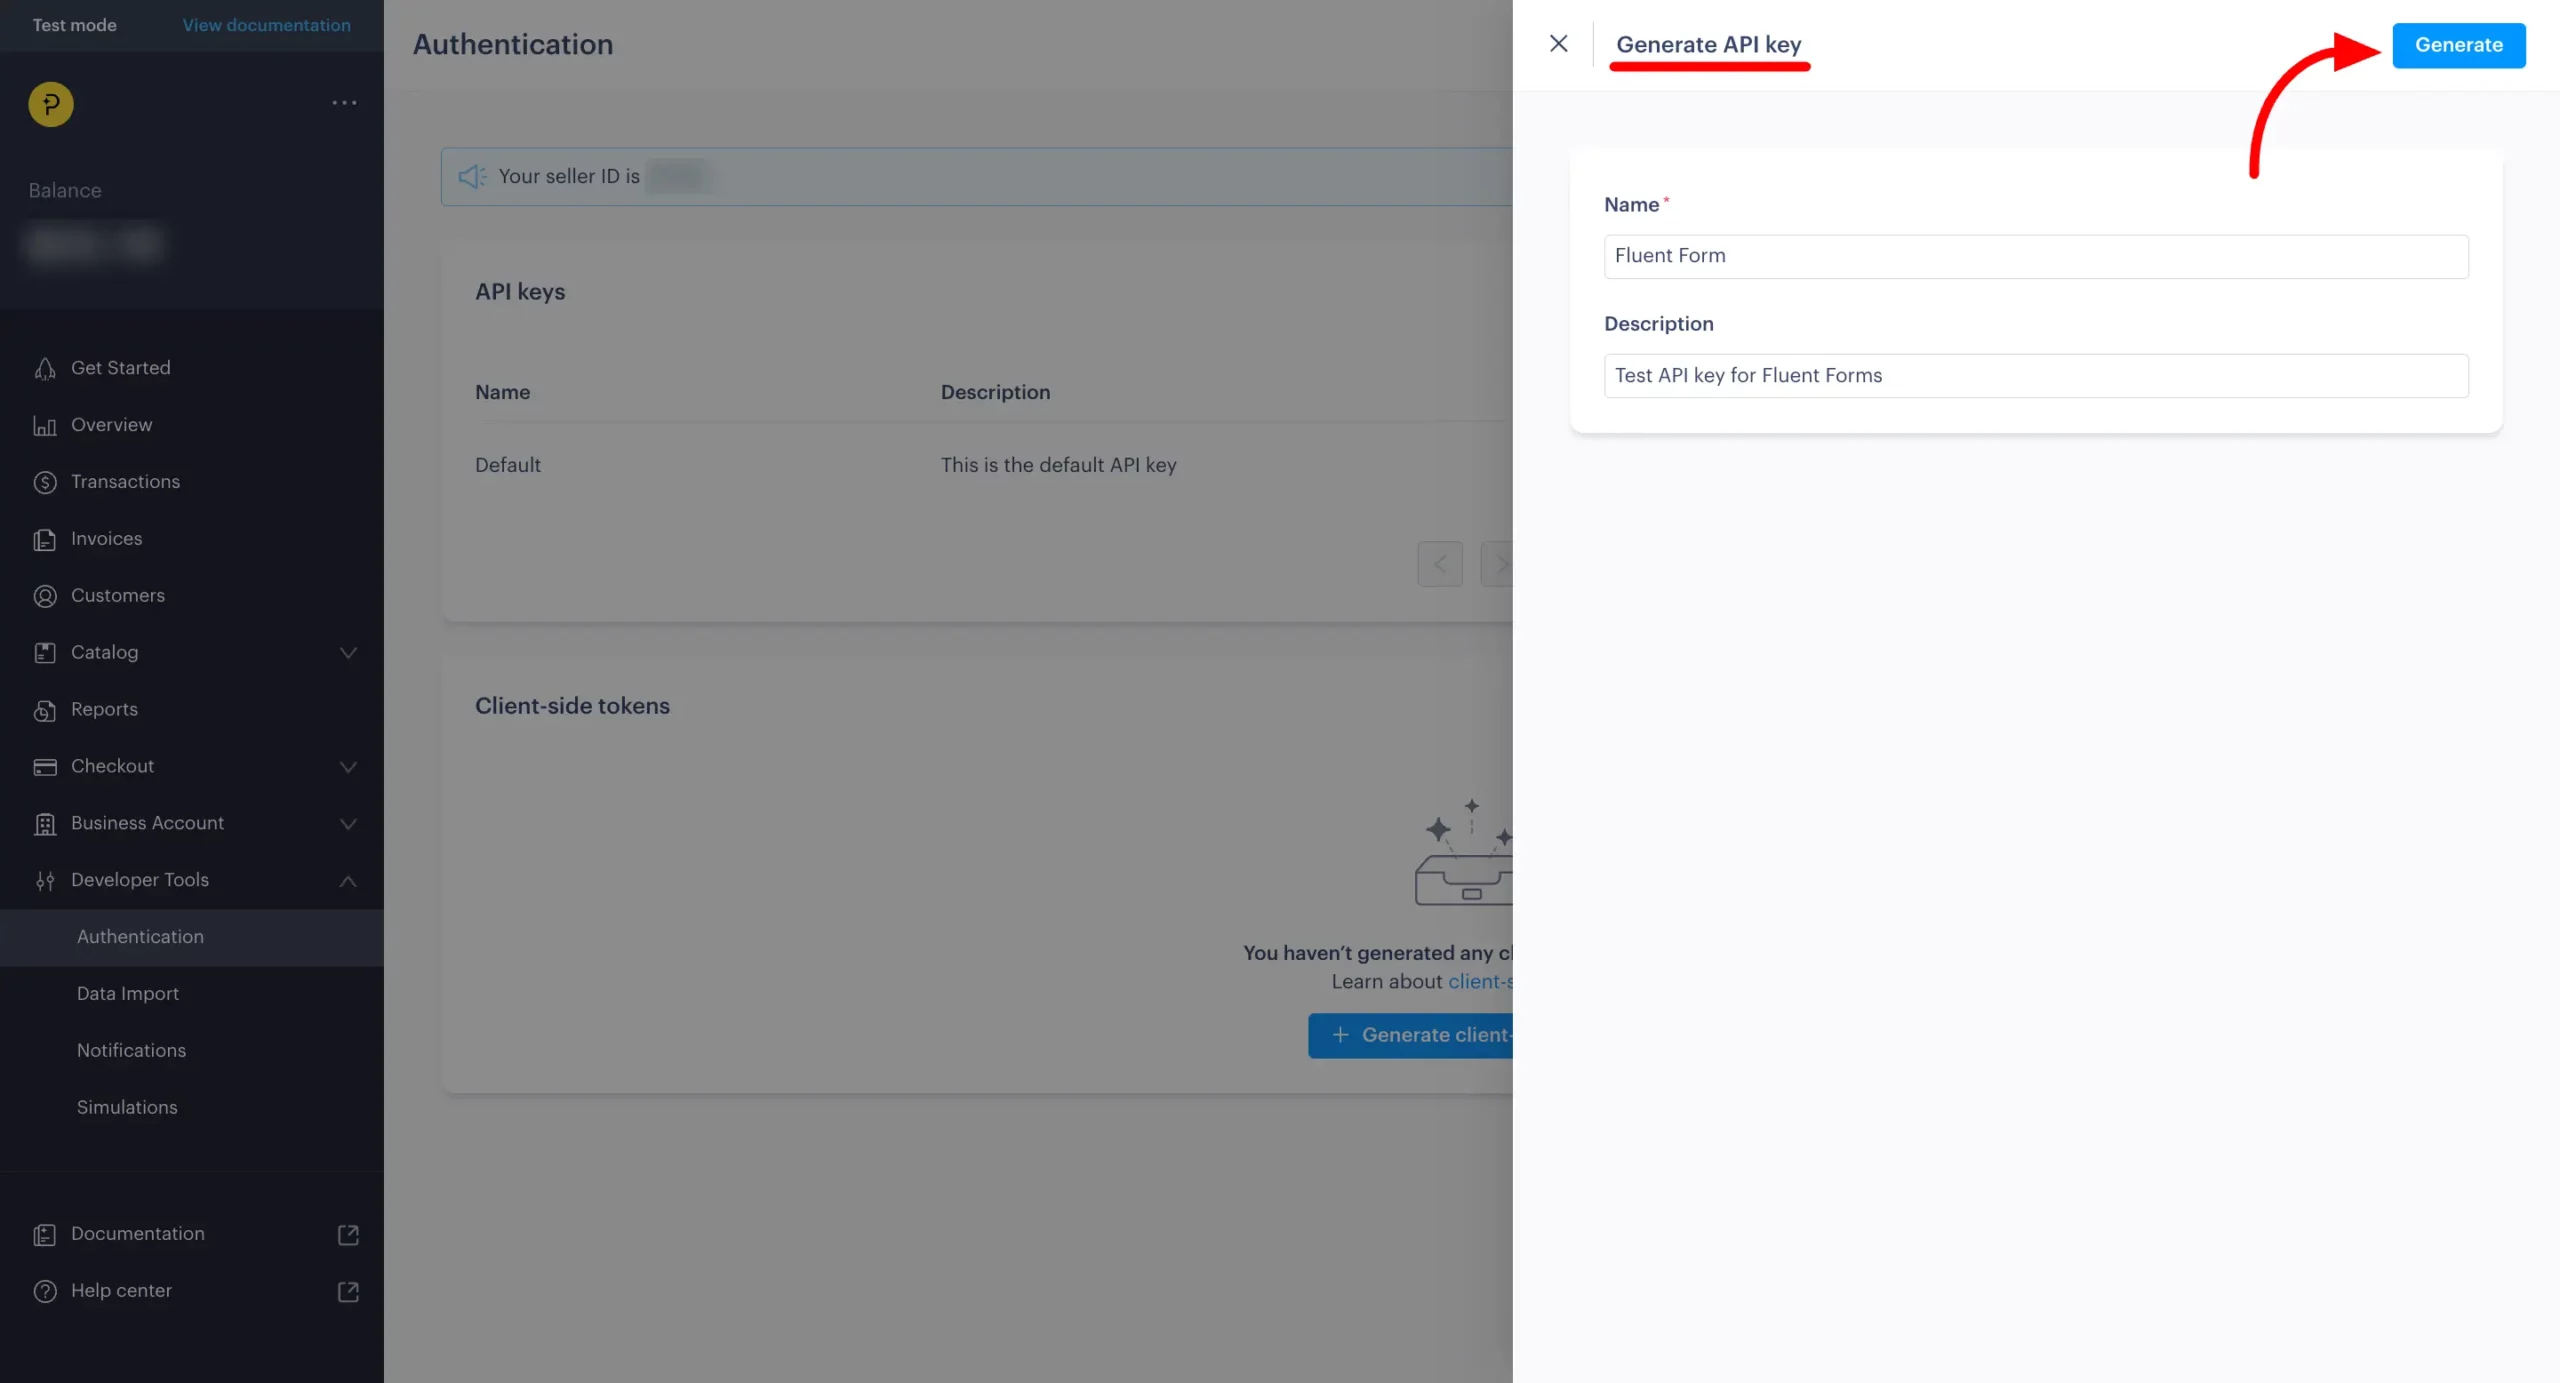
After clicking on Generate API Key, a pop-up will appear prompting you to name your API key and provide a description. Fill in the required details and click the Generate button to proceed.
Your API key is created, you’ll see it listed. Click the three-dot button next to the key, then select Copy to copy the API key to your clipboard.
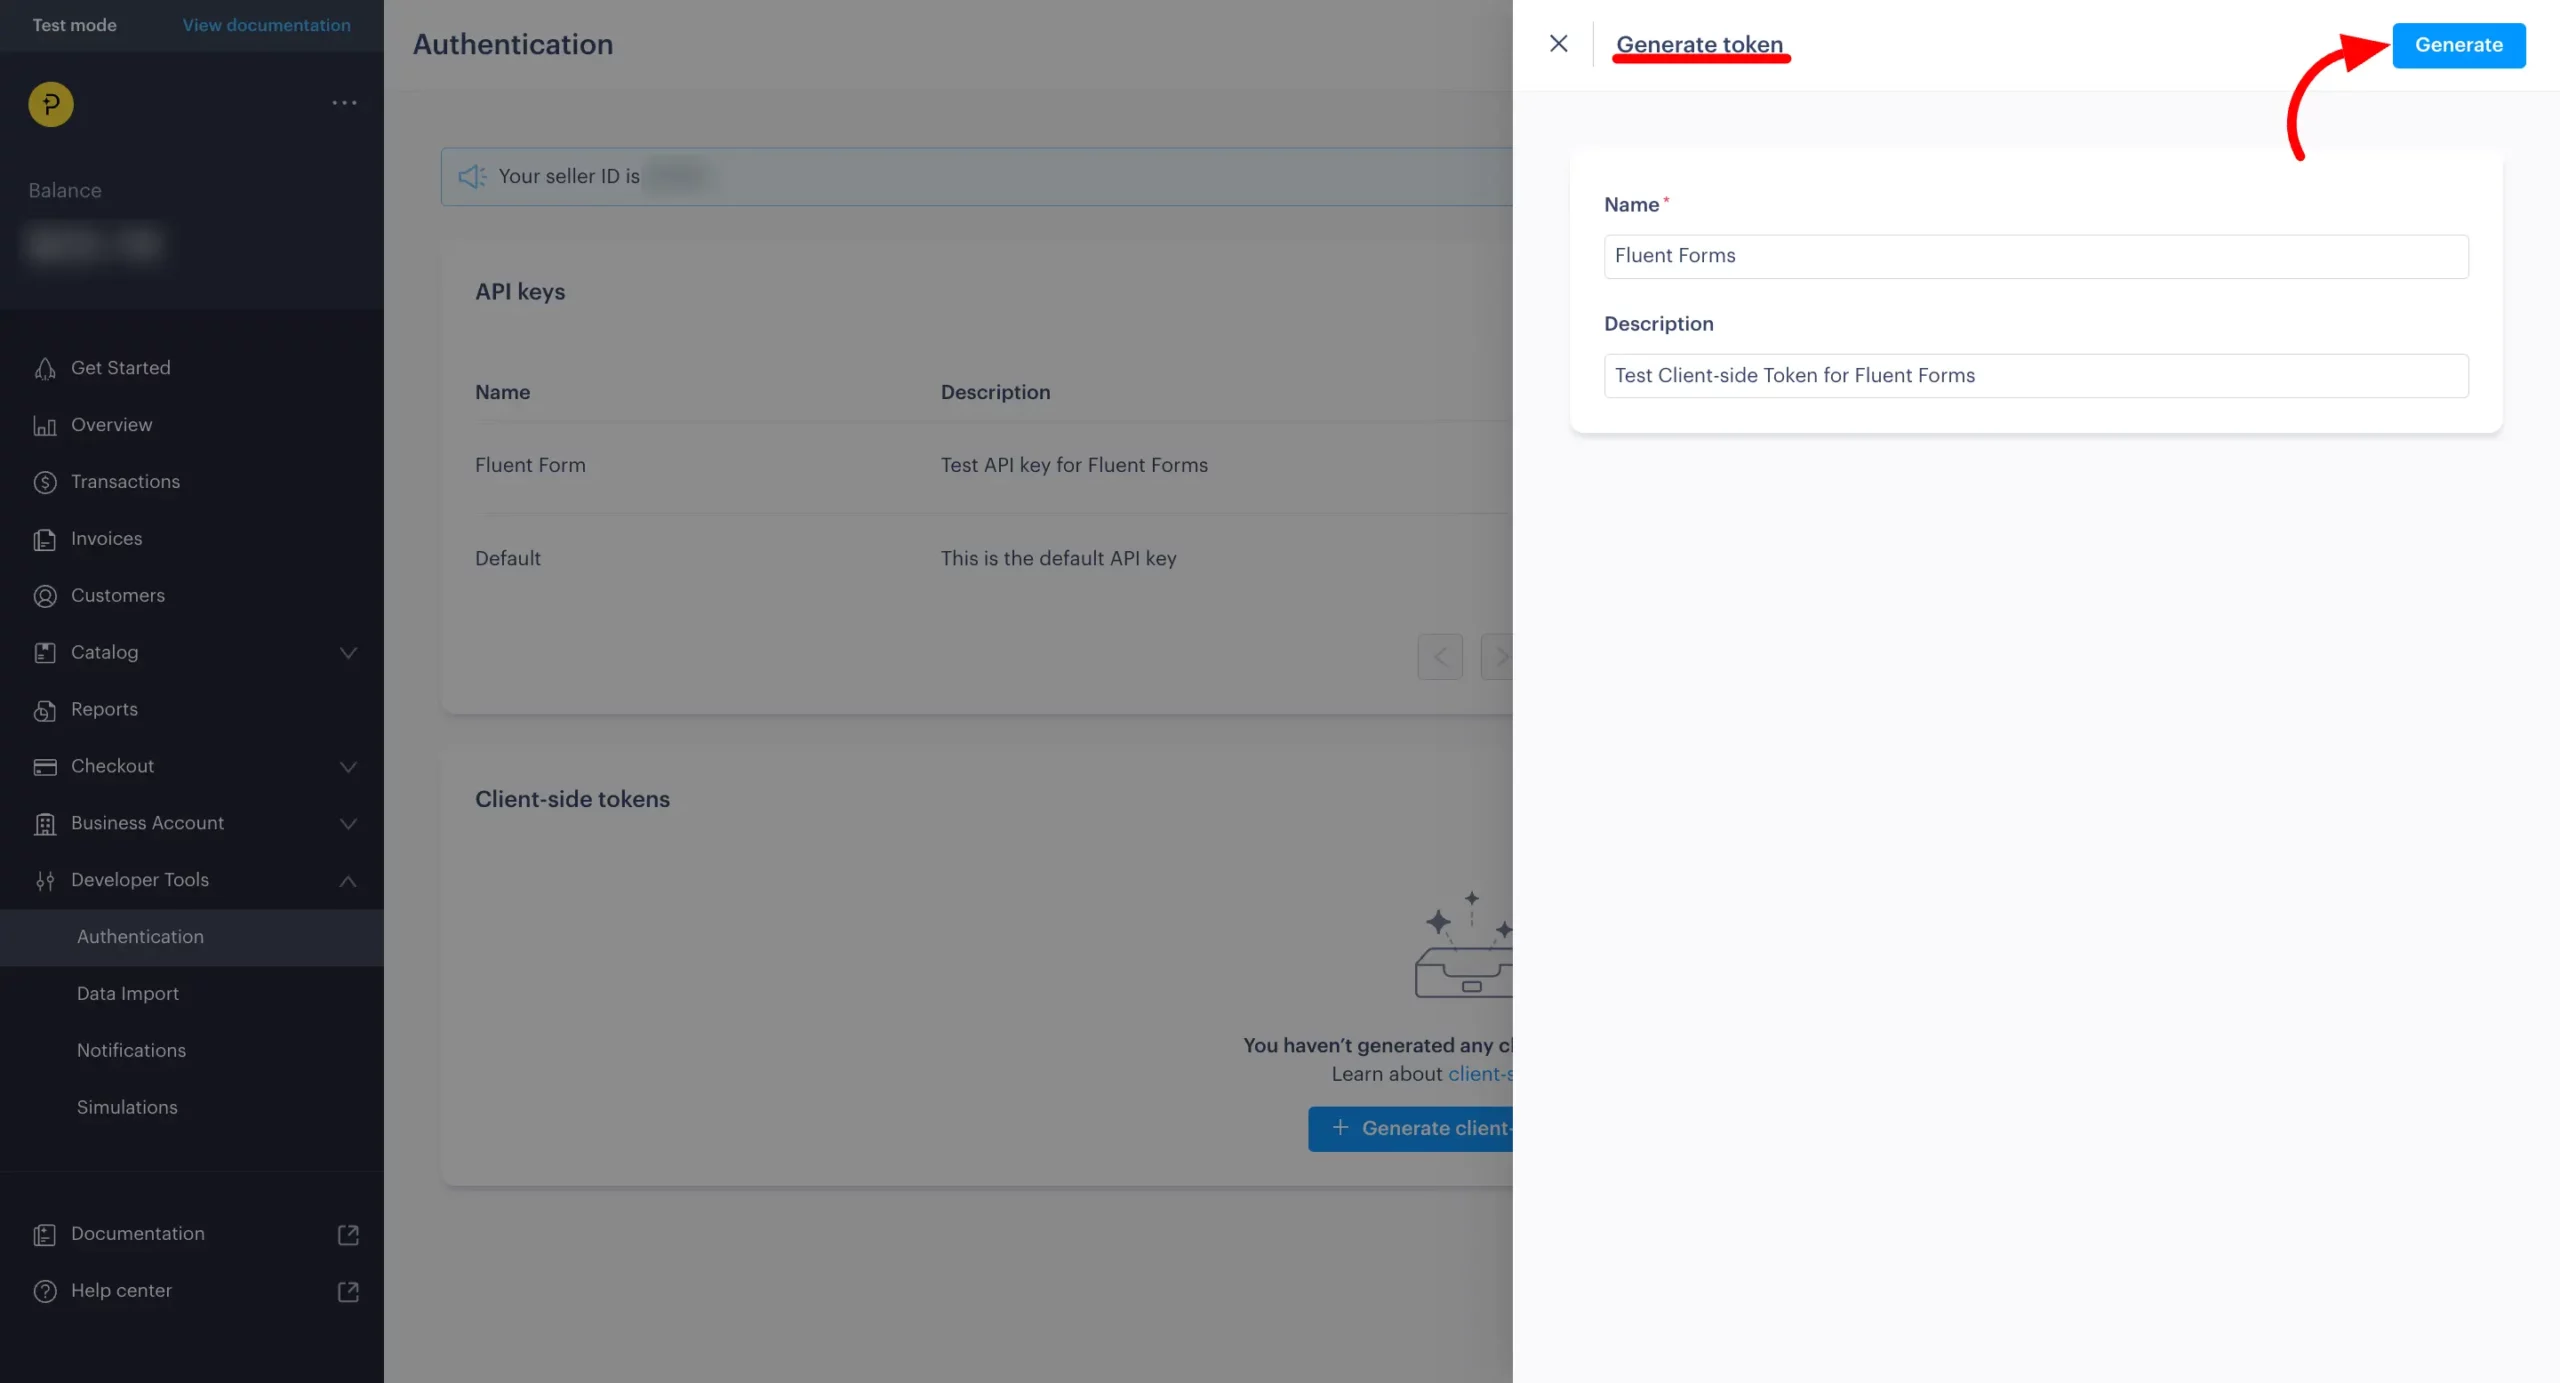
To create a Client-side Token, click on the Generate Client-side Token button.
Another pop-up will came up where you have to give the name and description for the Client-side Token and click on the Generate button.
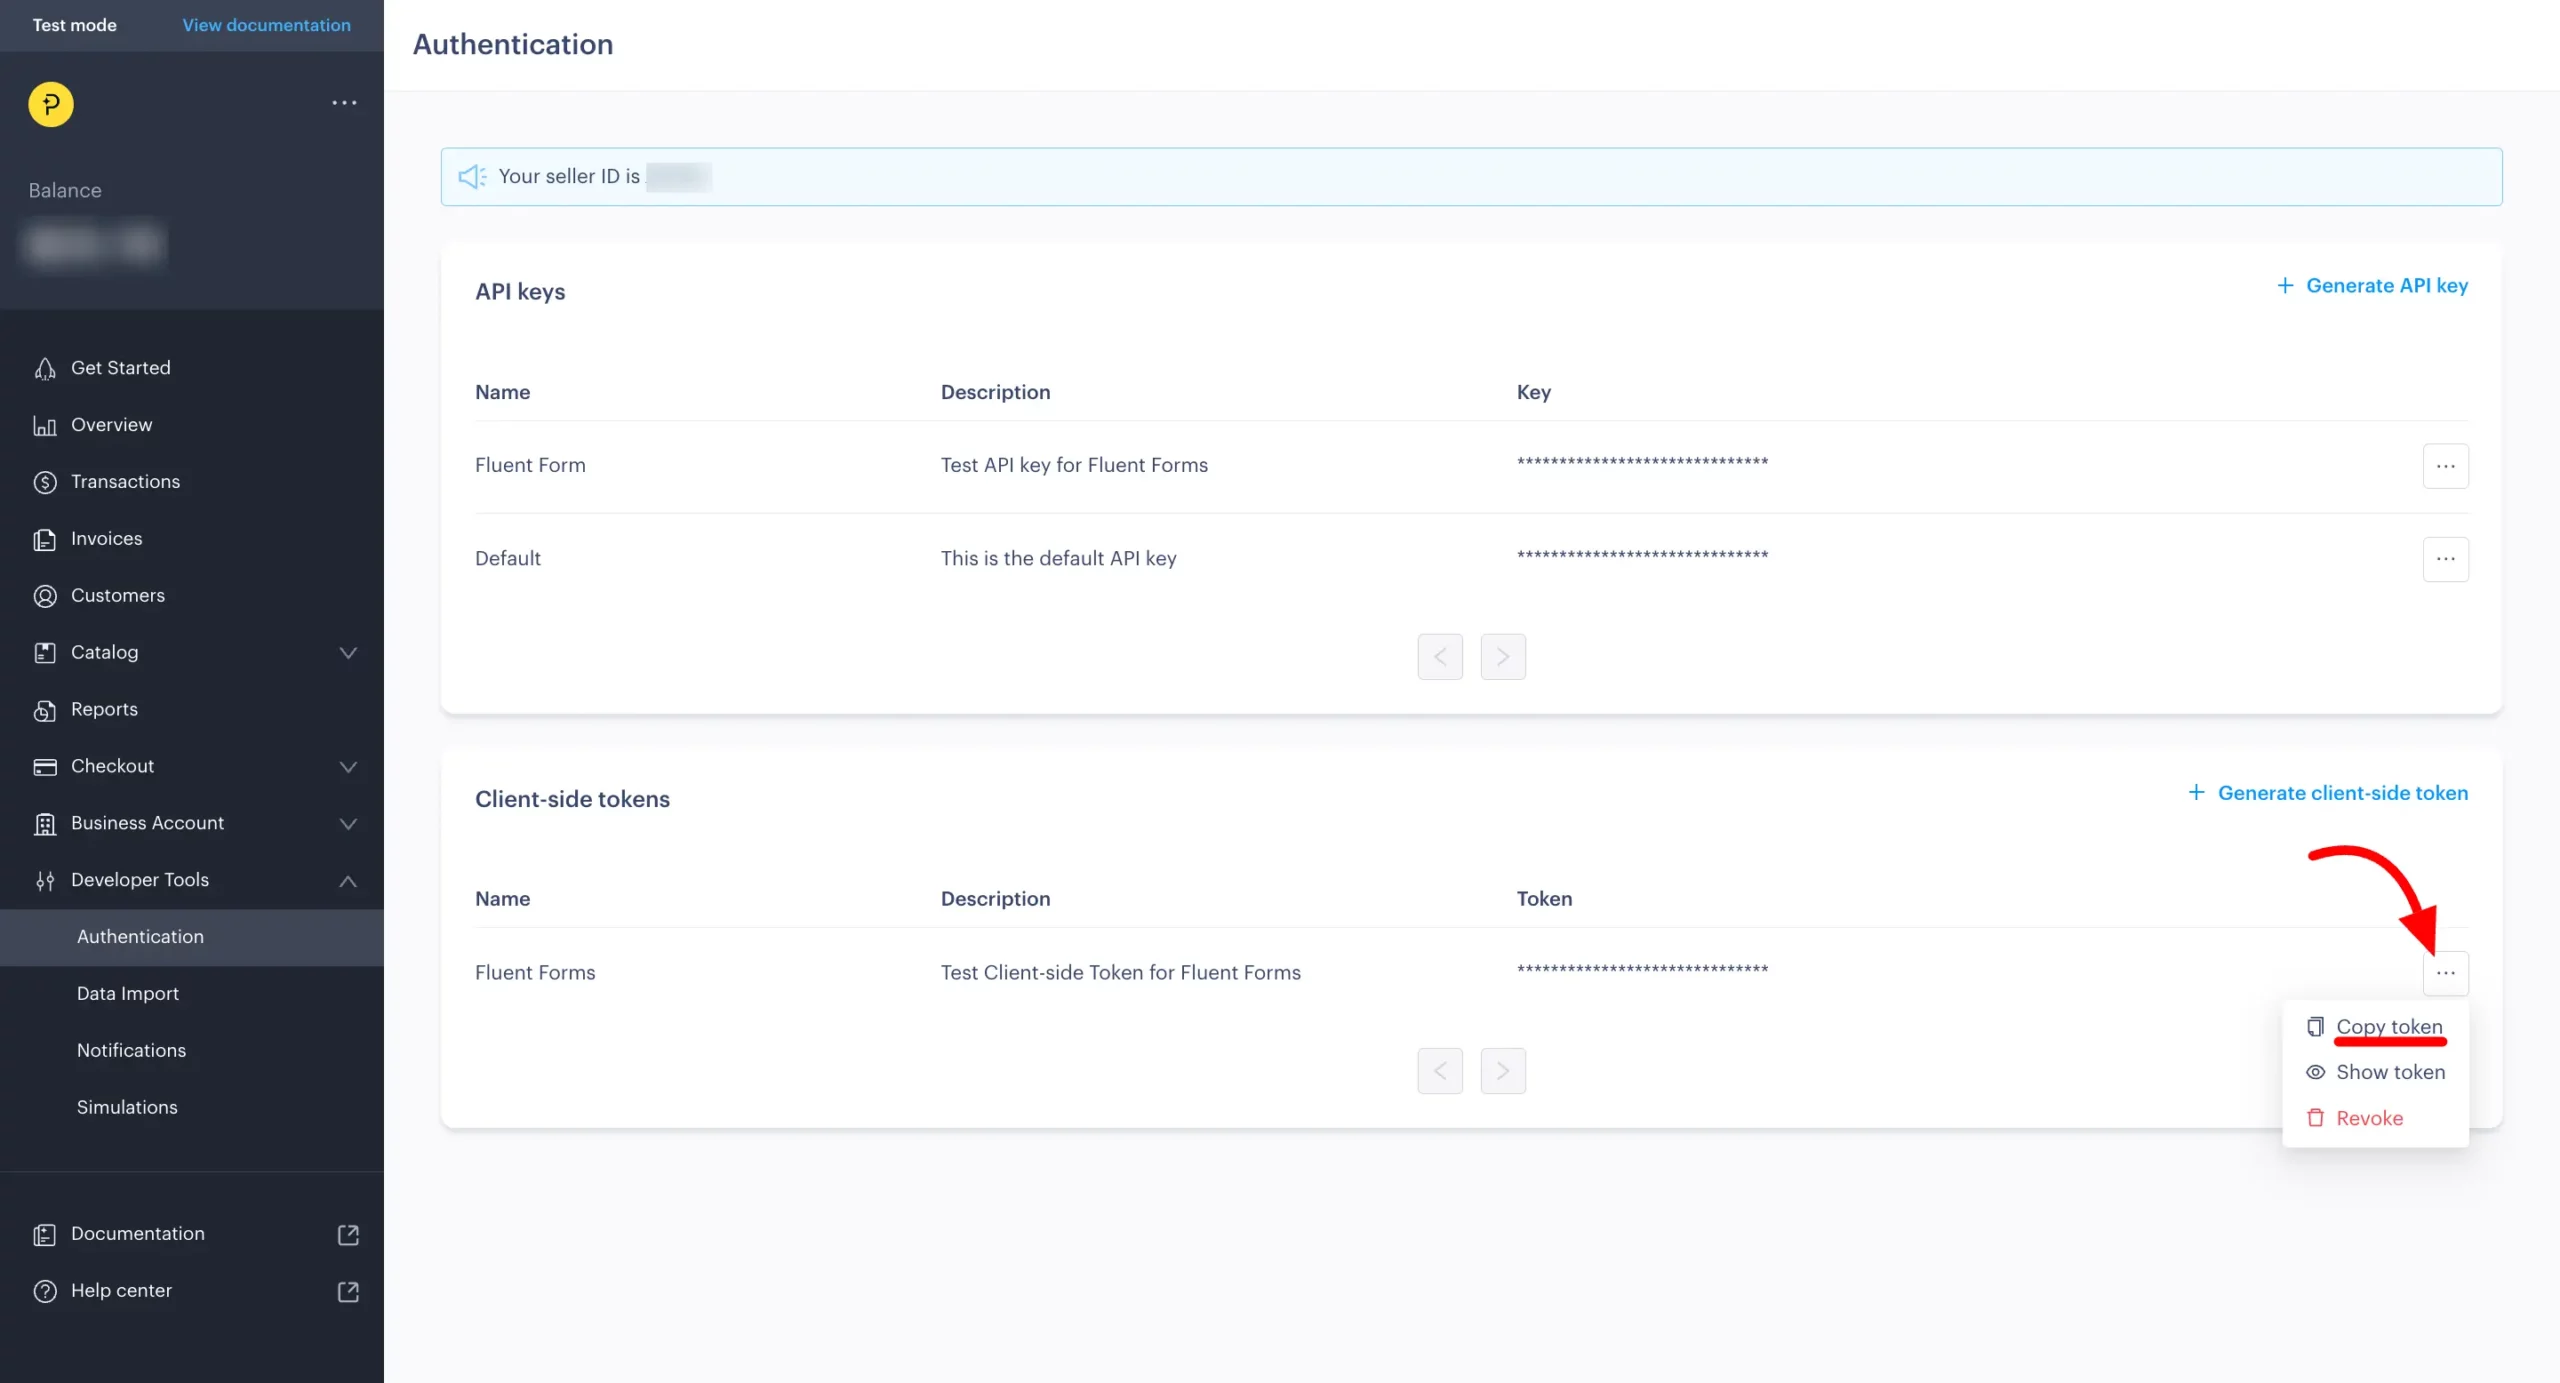
Next, click the three-dot button next to the Client-side Token and select Copy to copy it to your clipboard.
Checkout Settings & Website Approval
Now, set your checkout settings by providing the link to your website in the Default Payment Link field. Once you’ve entered the link, click the Save button.
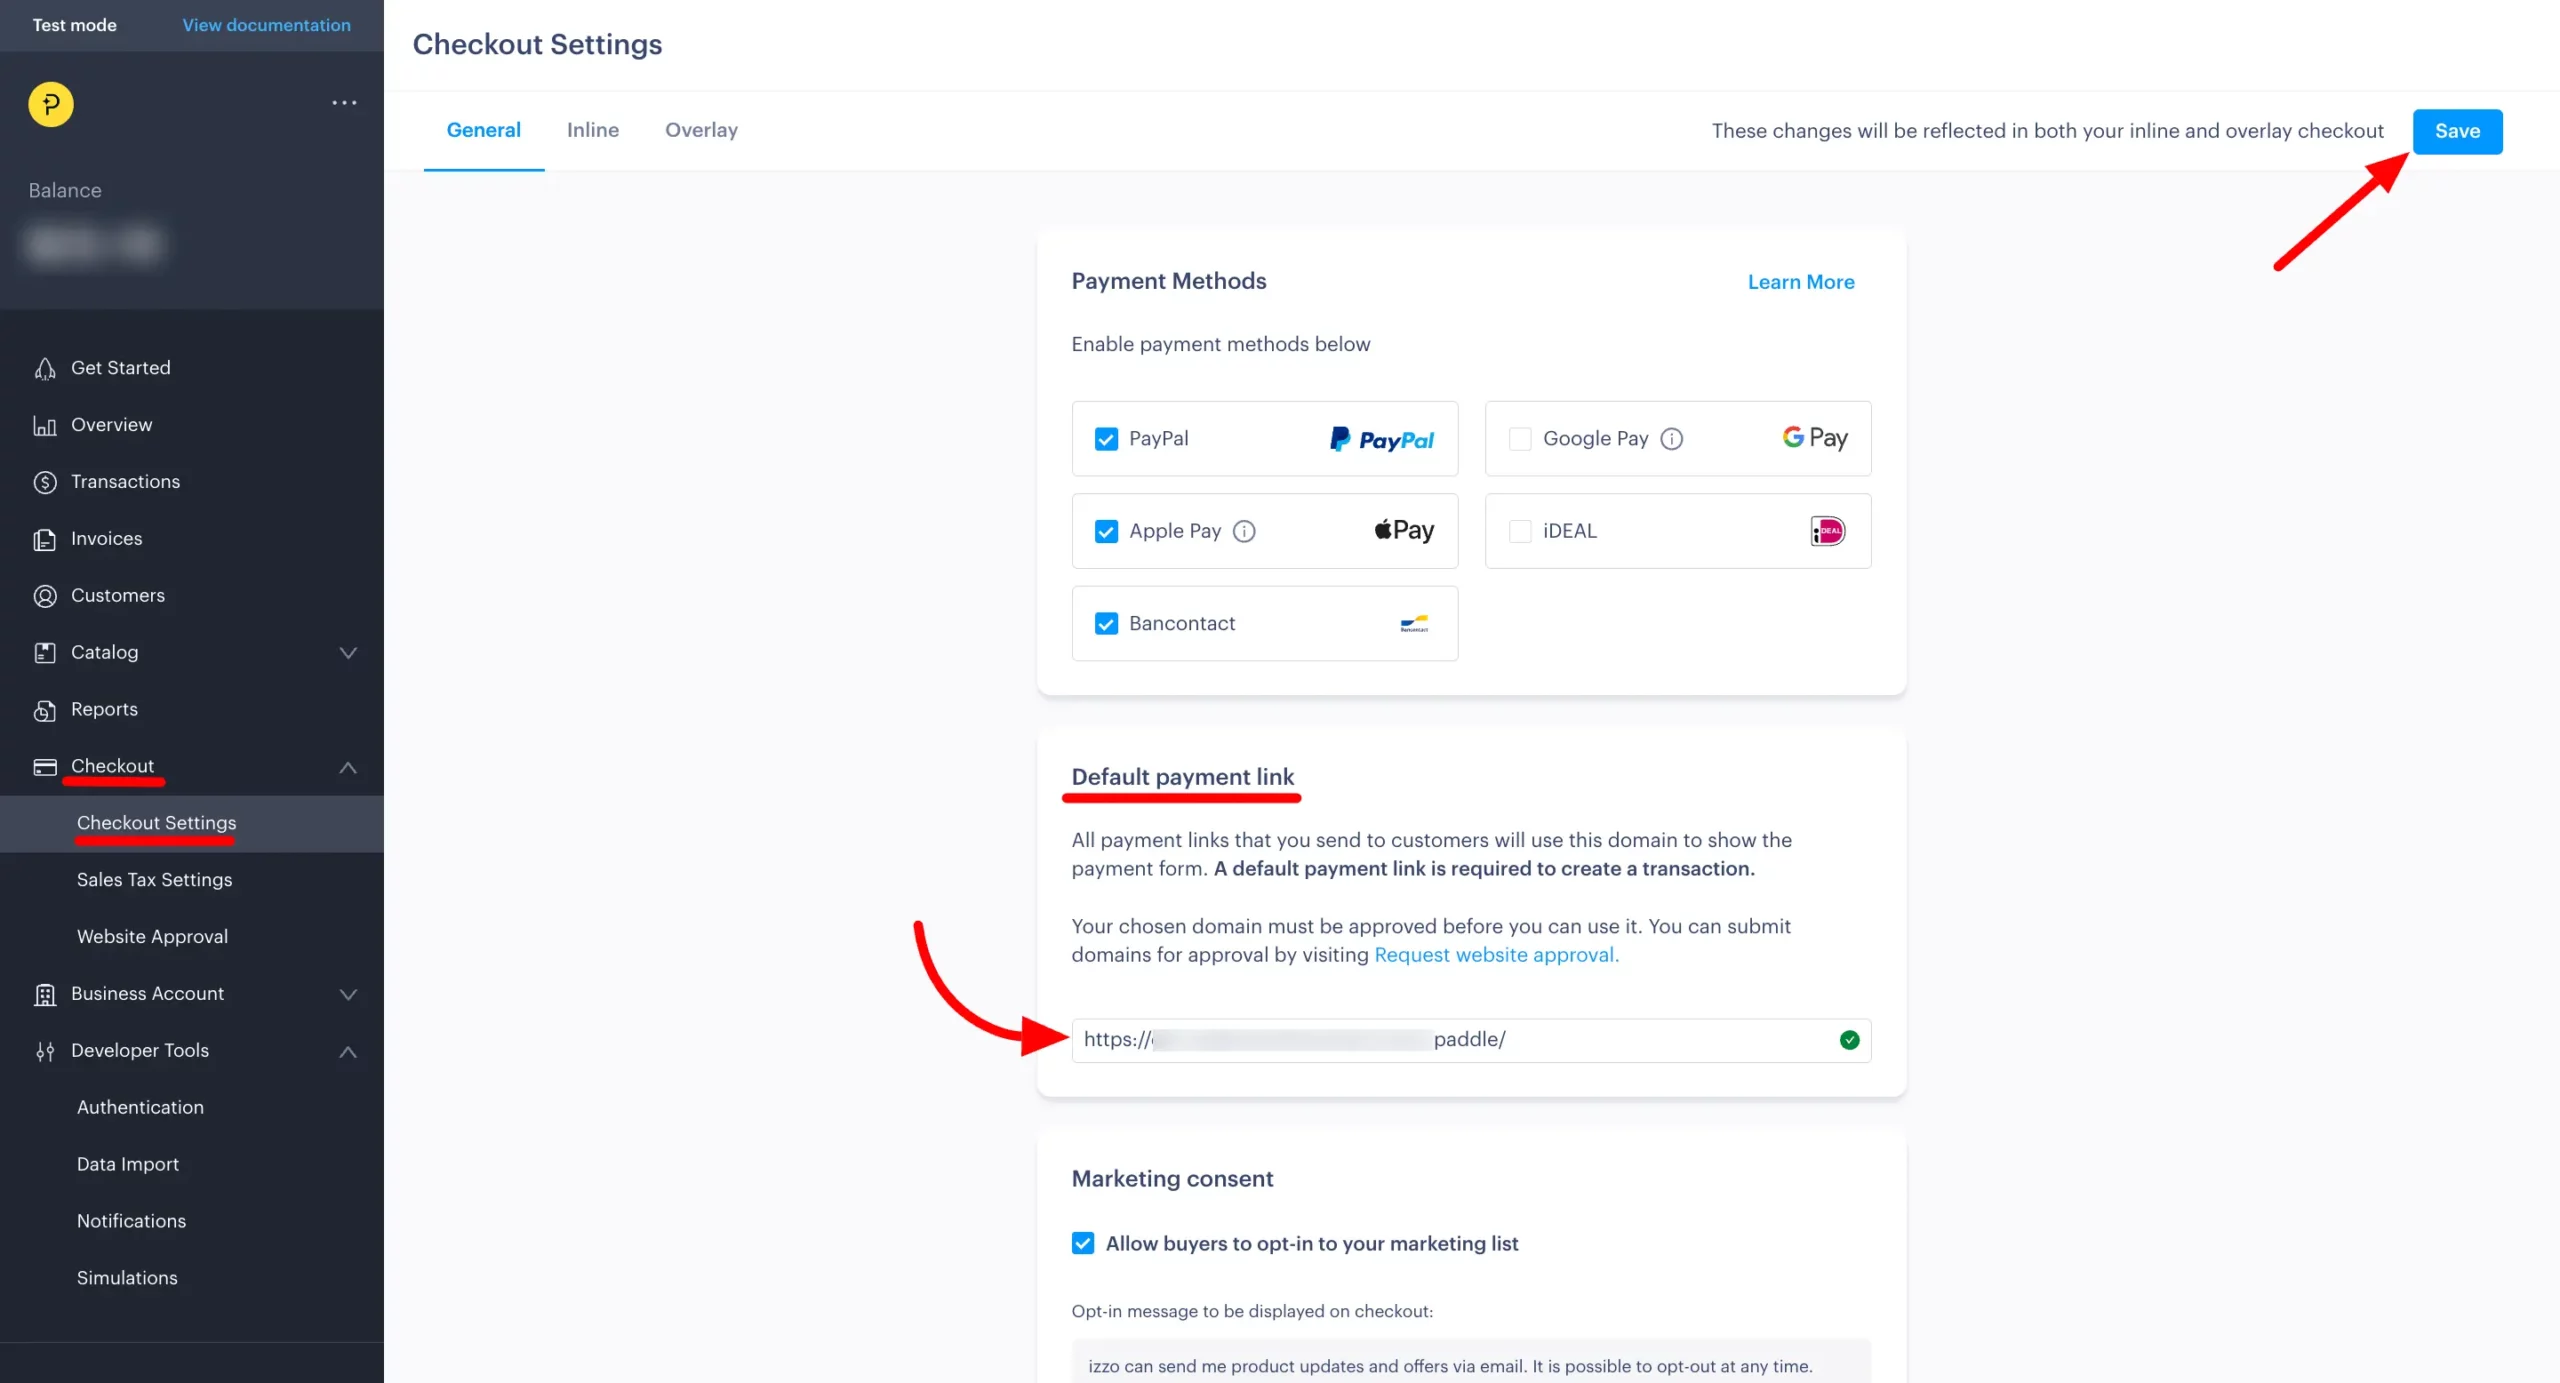
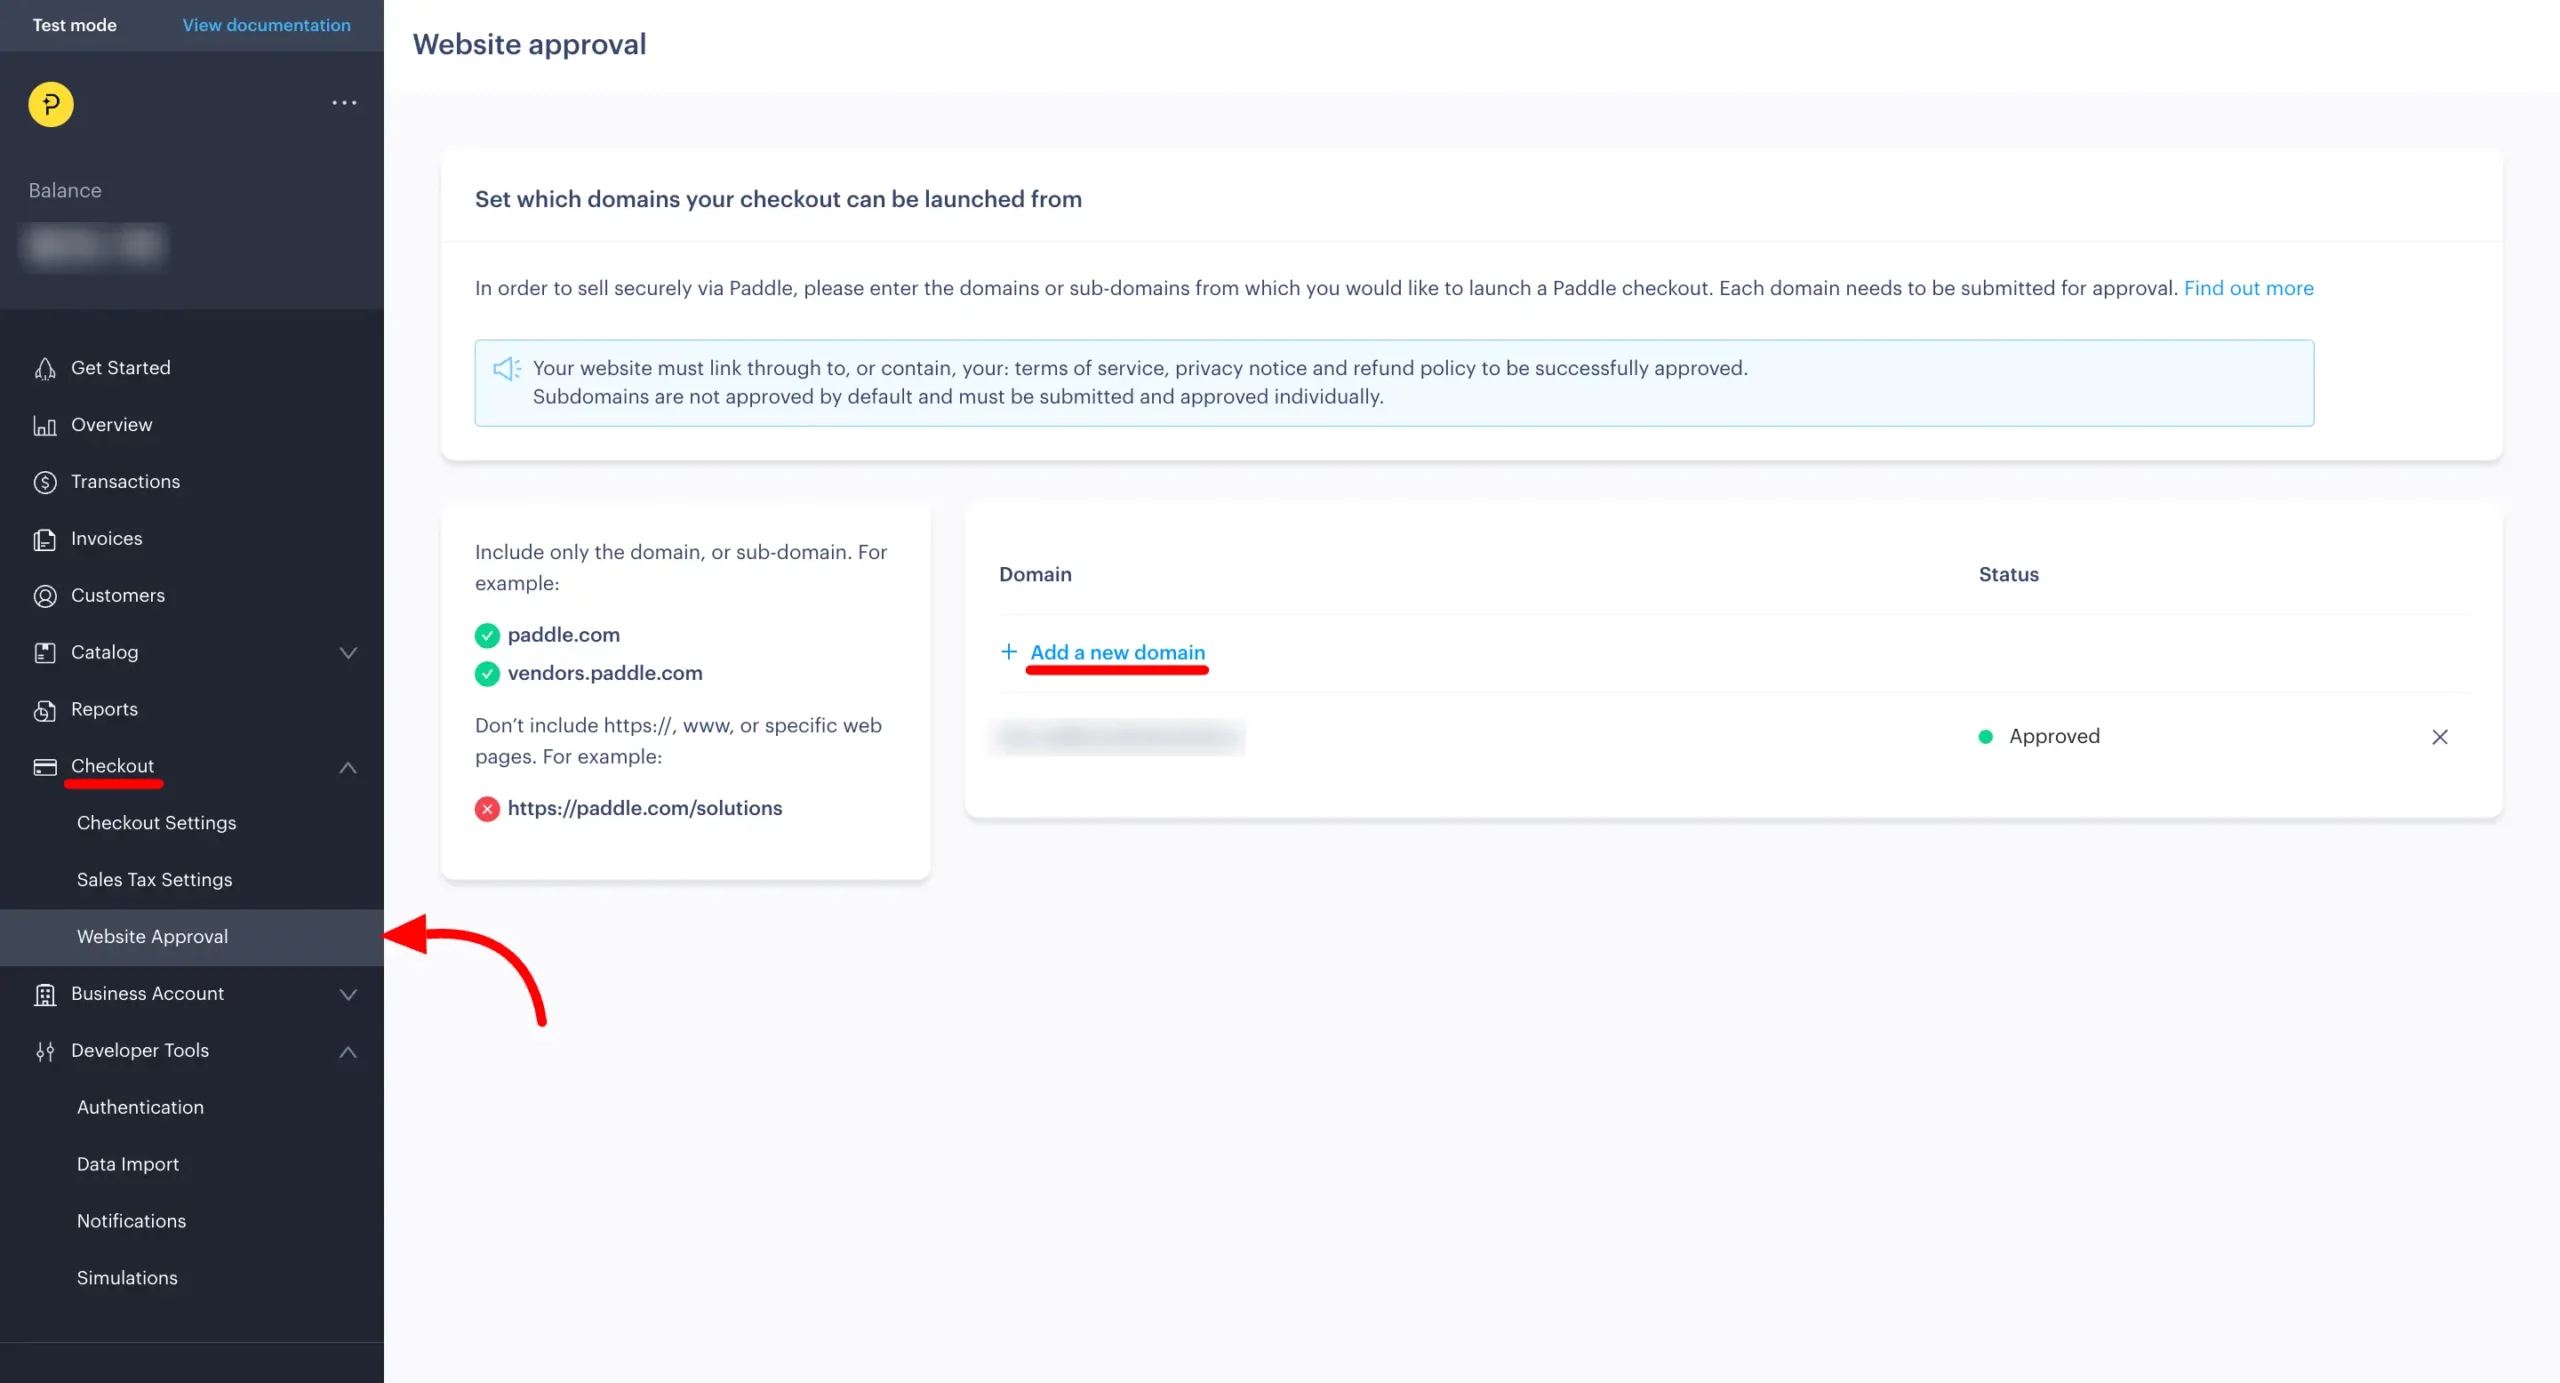
Next, navigate to the Website Approval section under the Checkout option. Enter your domain name following the format provided.
Configuring Fluent Forms with Paddle Payment
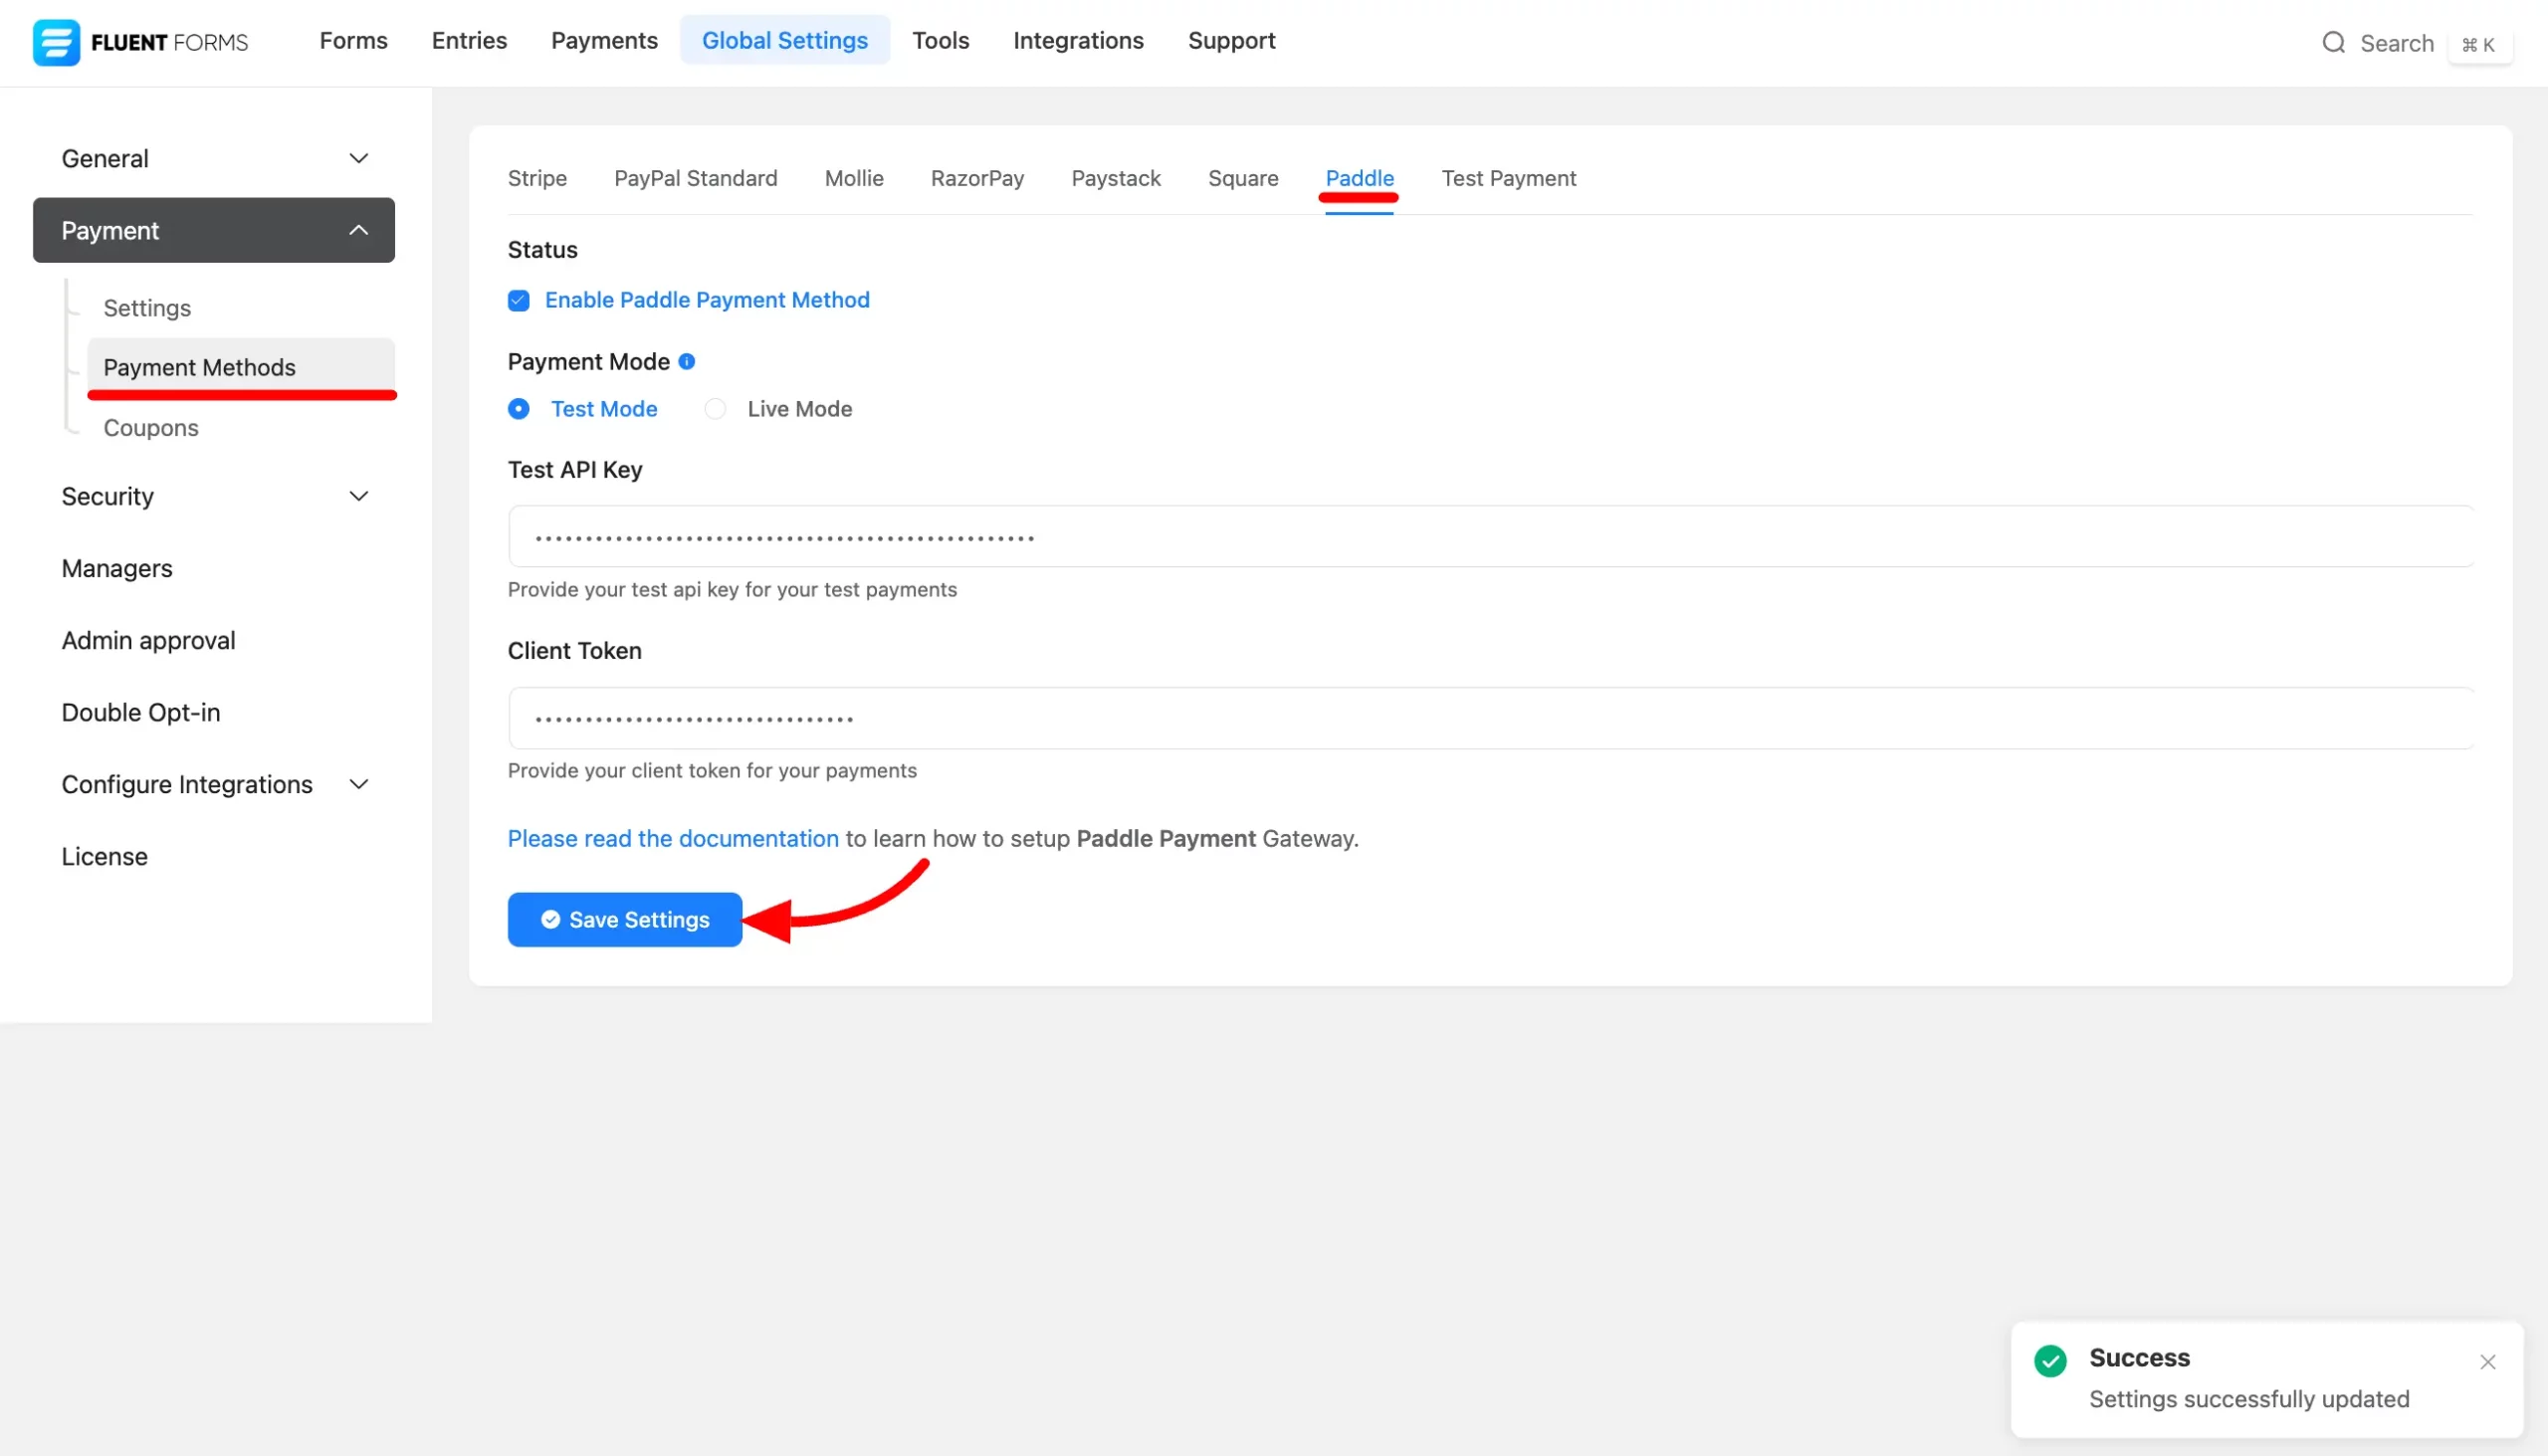
Now paste the API Key and Client Token in the dedicated field then click on the Save Settings button and you are done.
Form Settings
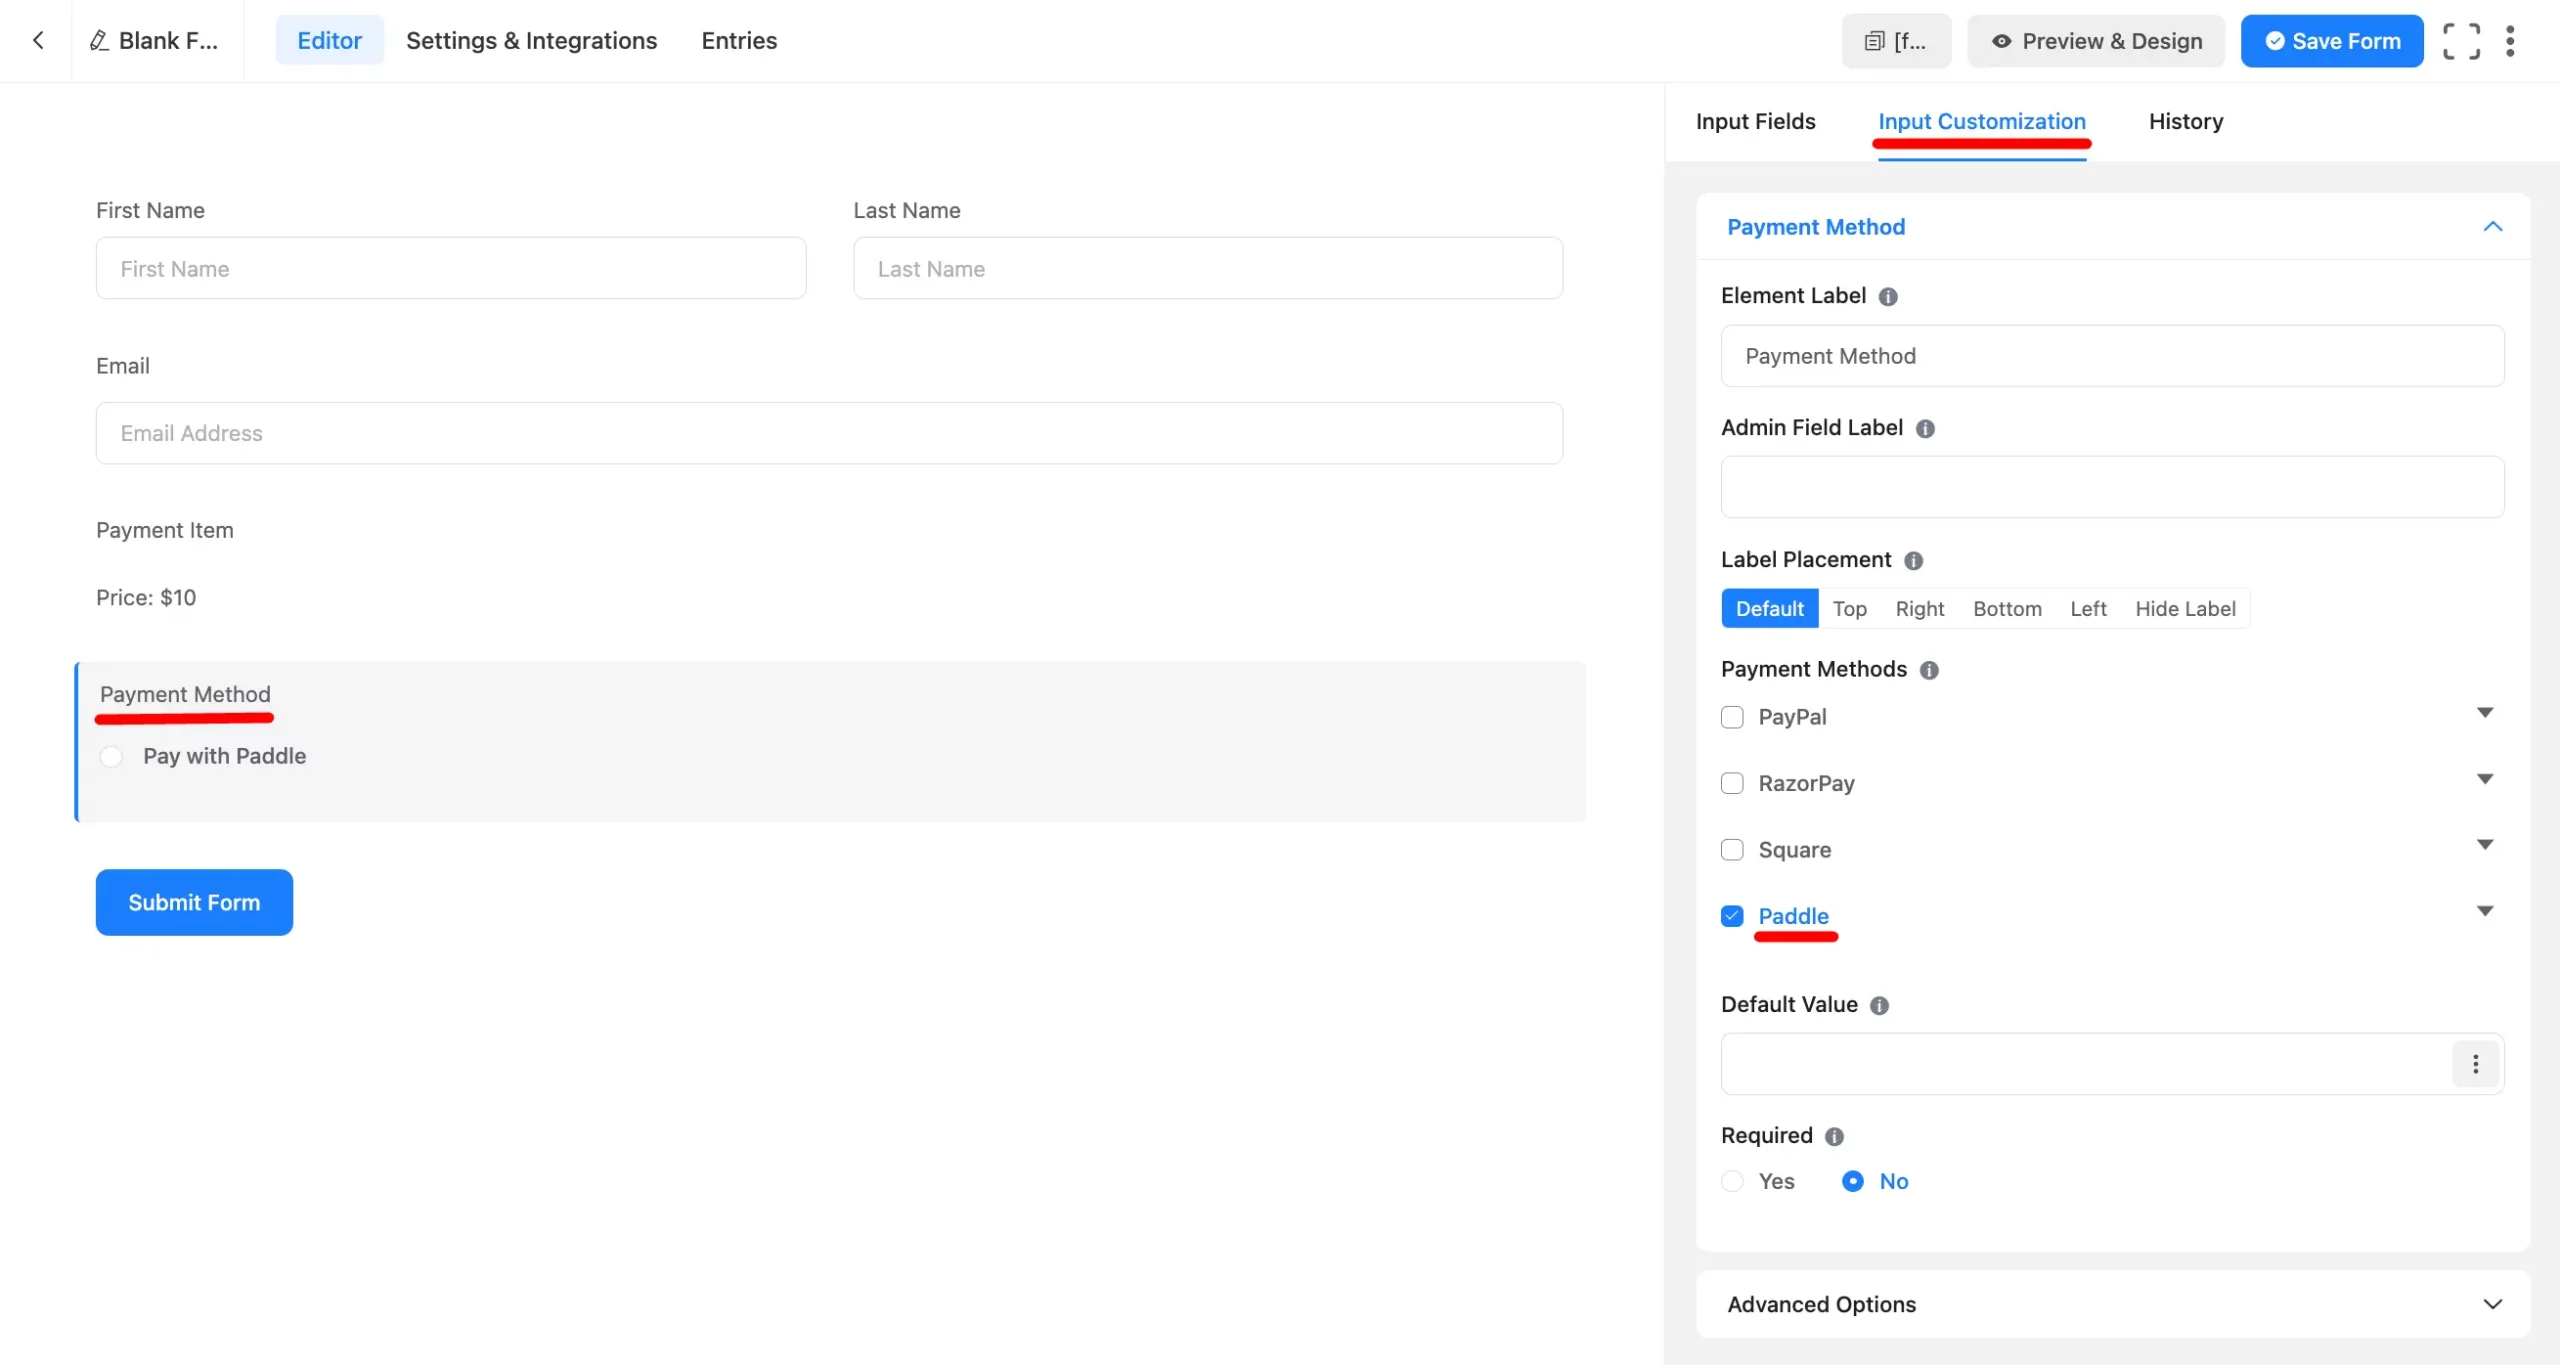
Navigate to the specific form where you want to accept payments through Paddle. Add the Payment Method field, then go to Input Customization. Here, you’ll find the Paddle option select it.
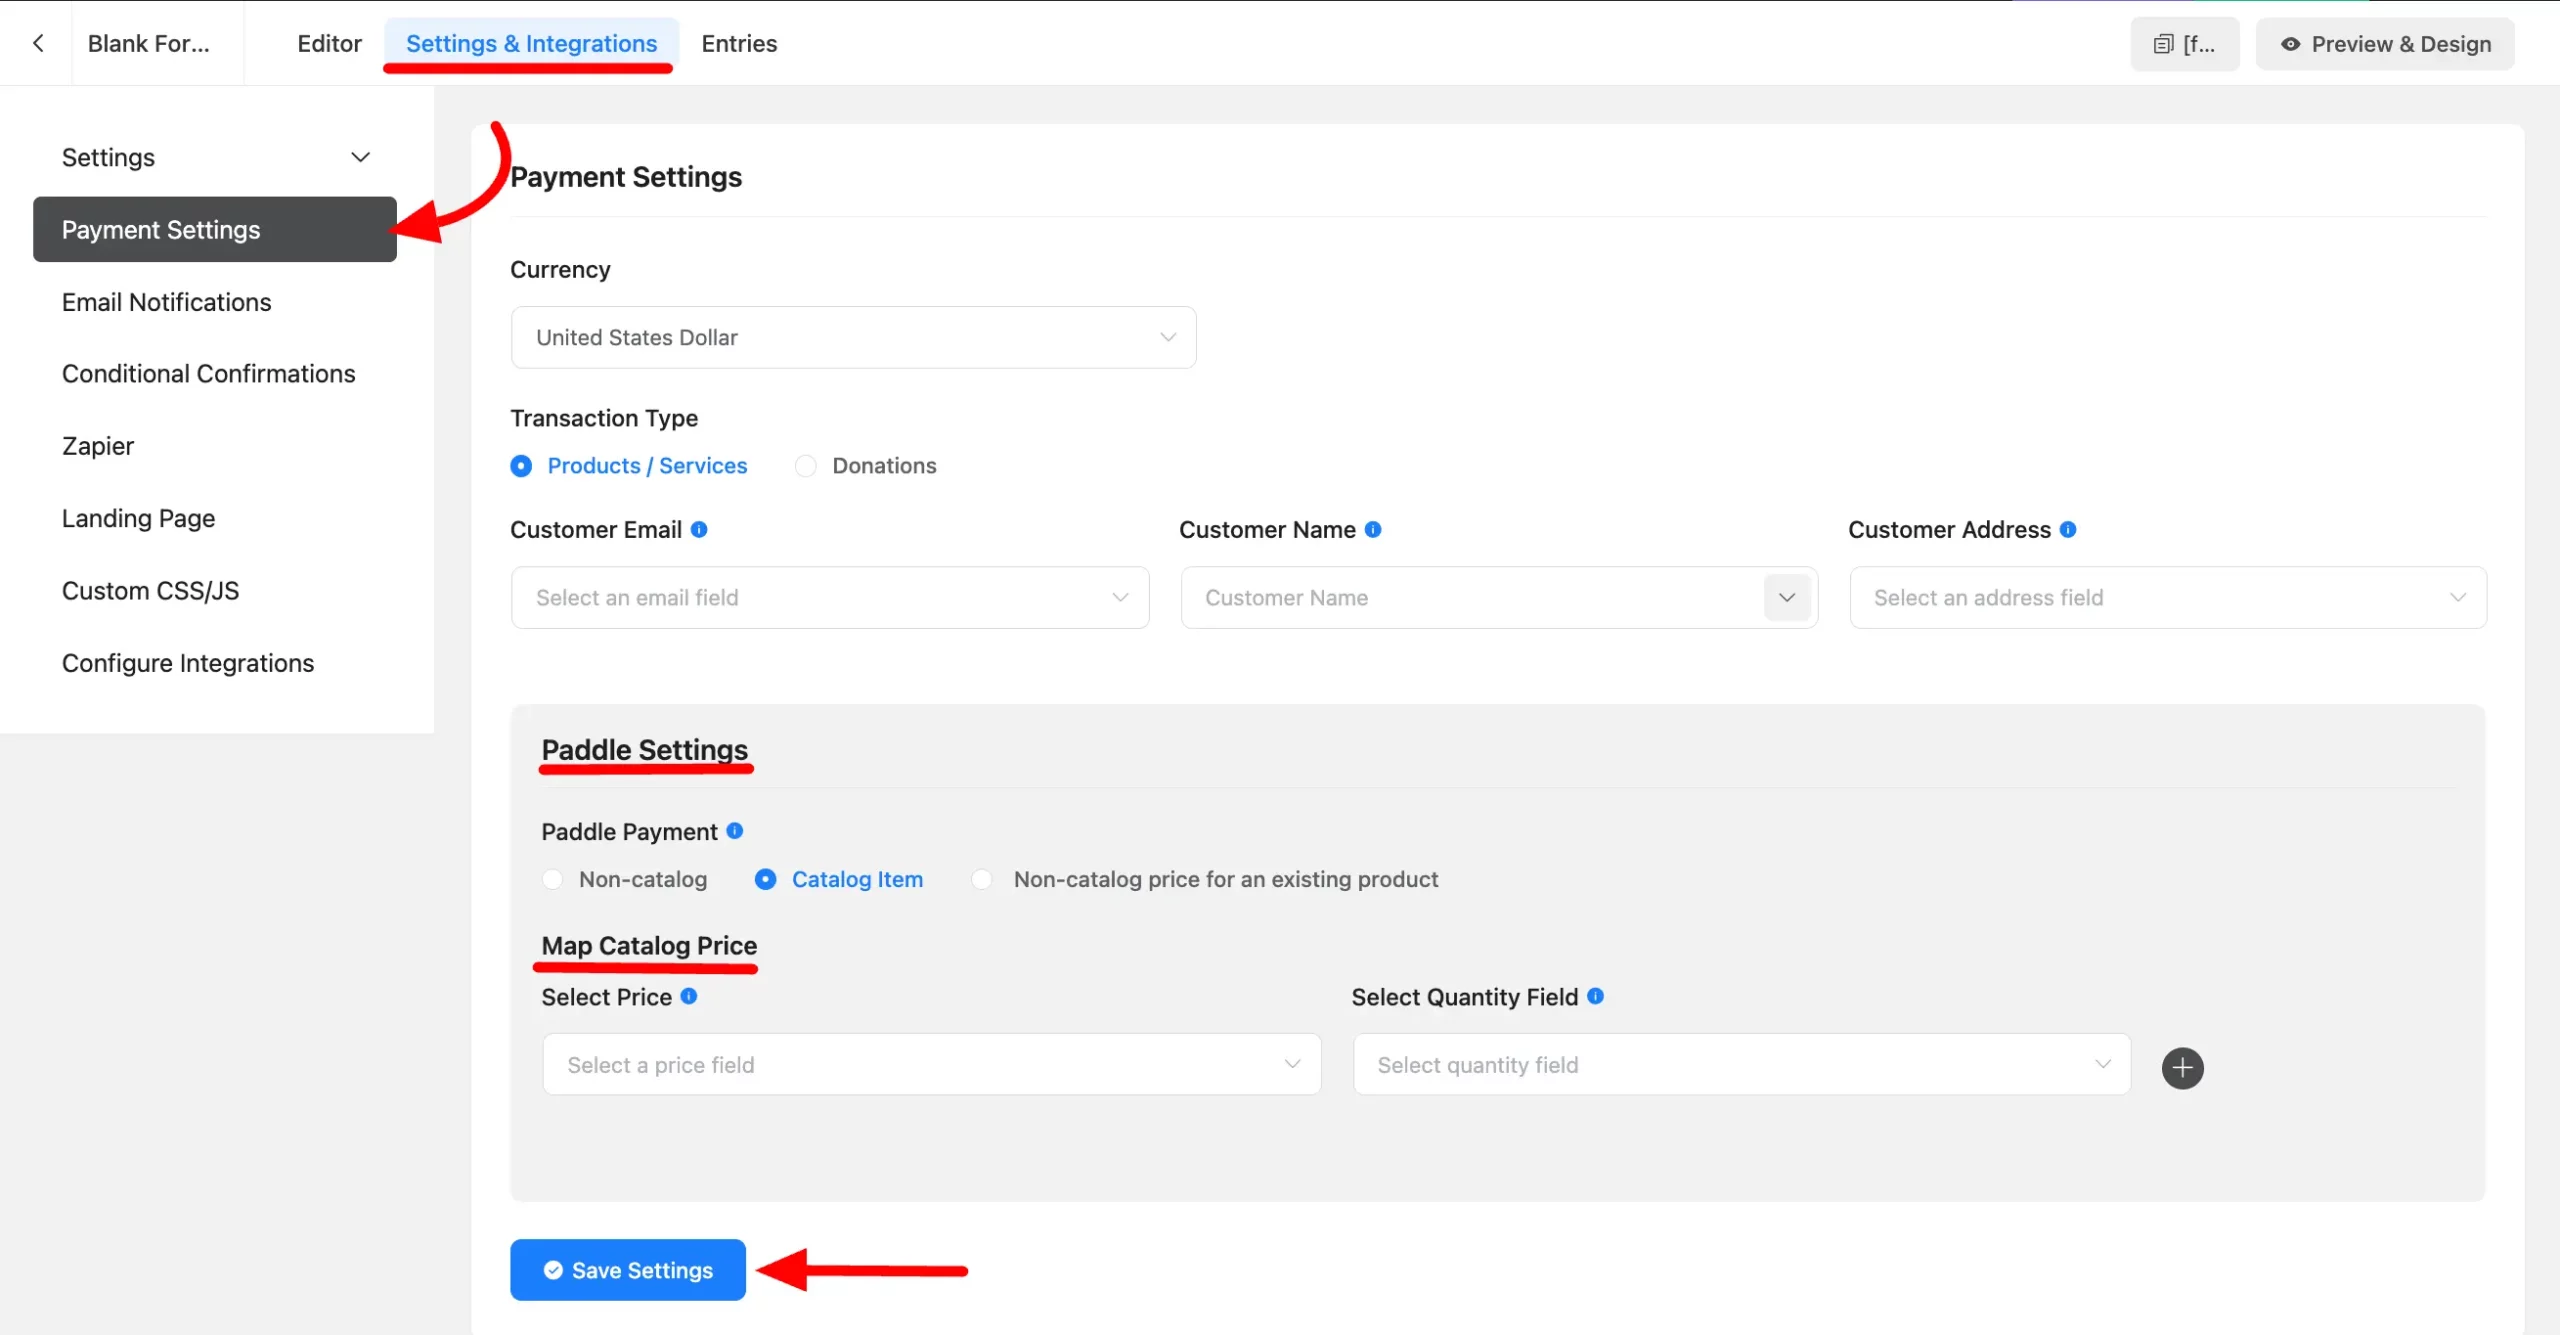
You’ll also find additional settings for Paddle Payments. To access them, go to Settings and Integration, click on Payment Settings from the left sidebar, and you’ll see some options for Paddle Payments.
- Non-catalog: It’s for normal payment. Here you don’t have to map any product with Paddle.
- Catalog Item: You will get all cataloged prices from your Paddle or you can leave it empty, which will get the price from the Fluent Forms payment item. You can also map the quantity field.
- To set a non-catalog price for an existing product, you need to map it with your Paddle product and the corresponding Fluent Forms payment item. Make sure to map them carefully to prevent any unintended payments in Paddle.
If you have any further questions about this guide, please don’t hesitate to contact us.