Mailchimp is a marketing platform for small businesses. Send beautiful emails, connect your e-commerce store, advertise, and build your brand. Use Fluent Forms to collect customer information and automatically add it to your Mailchimp campaign list.
Integrate your Mailchimp account easily with Fluent Forms by following the steps mentioned below-
Steps to integrate Fluent Forms with Mailchimp
- Activate the Mailchimp Module
- Get your Mailchimp API Key
- Use the API Key with the Mailchimp module
- Create/Use a Form with Fluent Forms
- Setup the integrations feed and Map the input fields
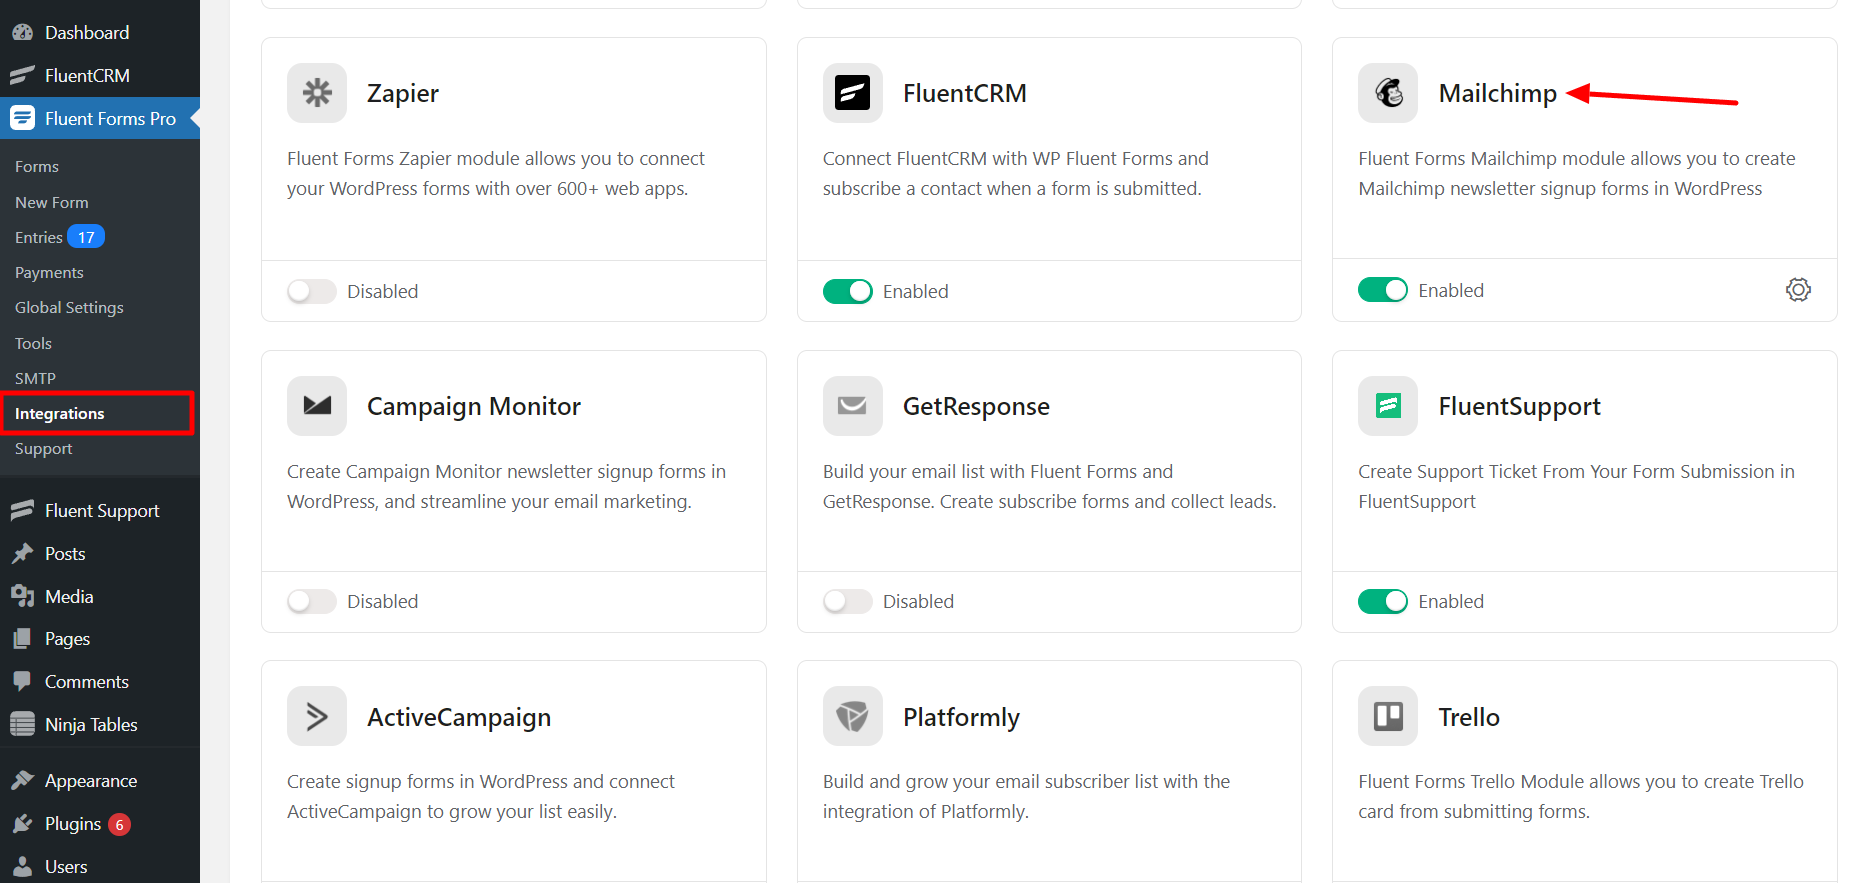
- Go to the Integration Modules from Fluent Forms (WordPress admin panel sidebar) and turn on the Mailchimp Module, as shown in the screenshot below-
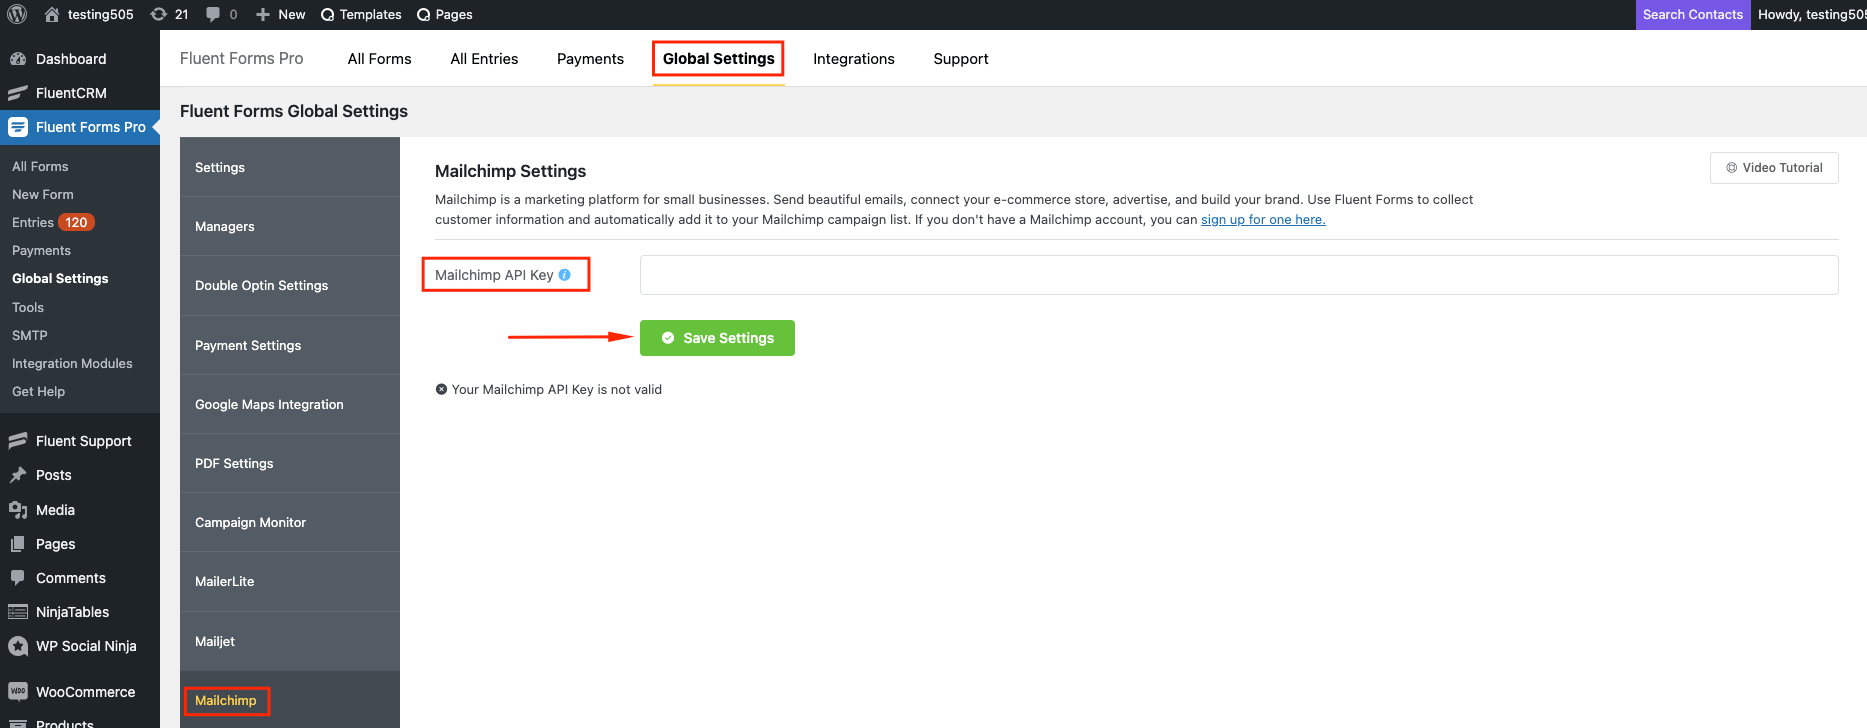
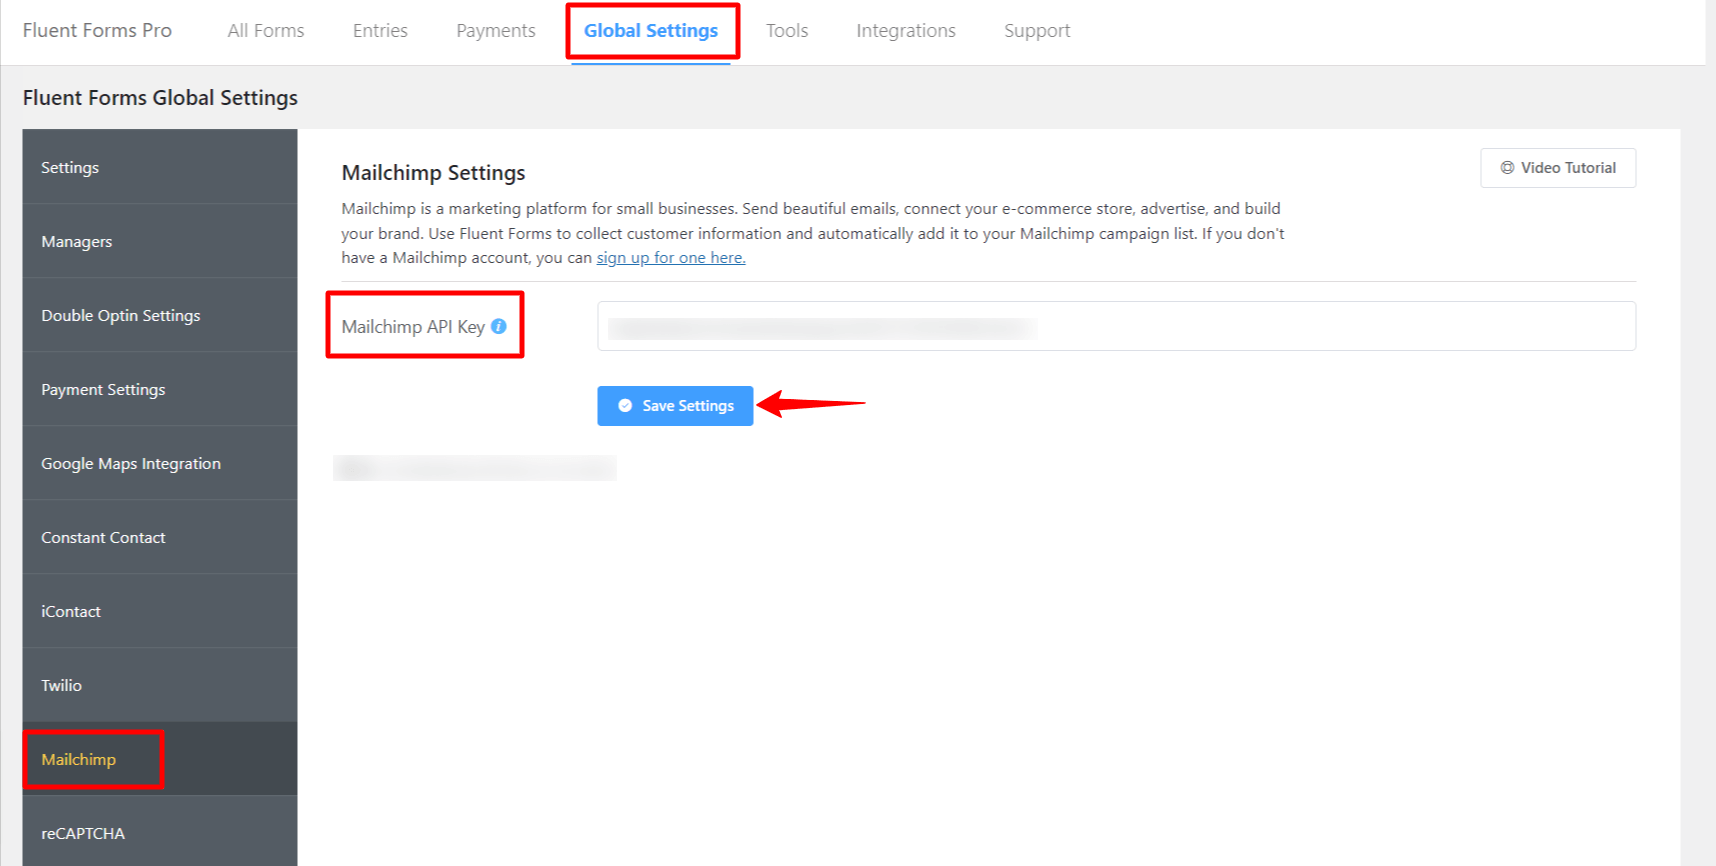
- Again hover over Fluent Forms Pro and go to Settings. Select Mailchimp, and you will be asked for the Mailchimp API Key here.
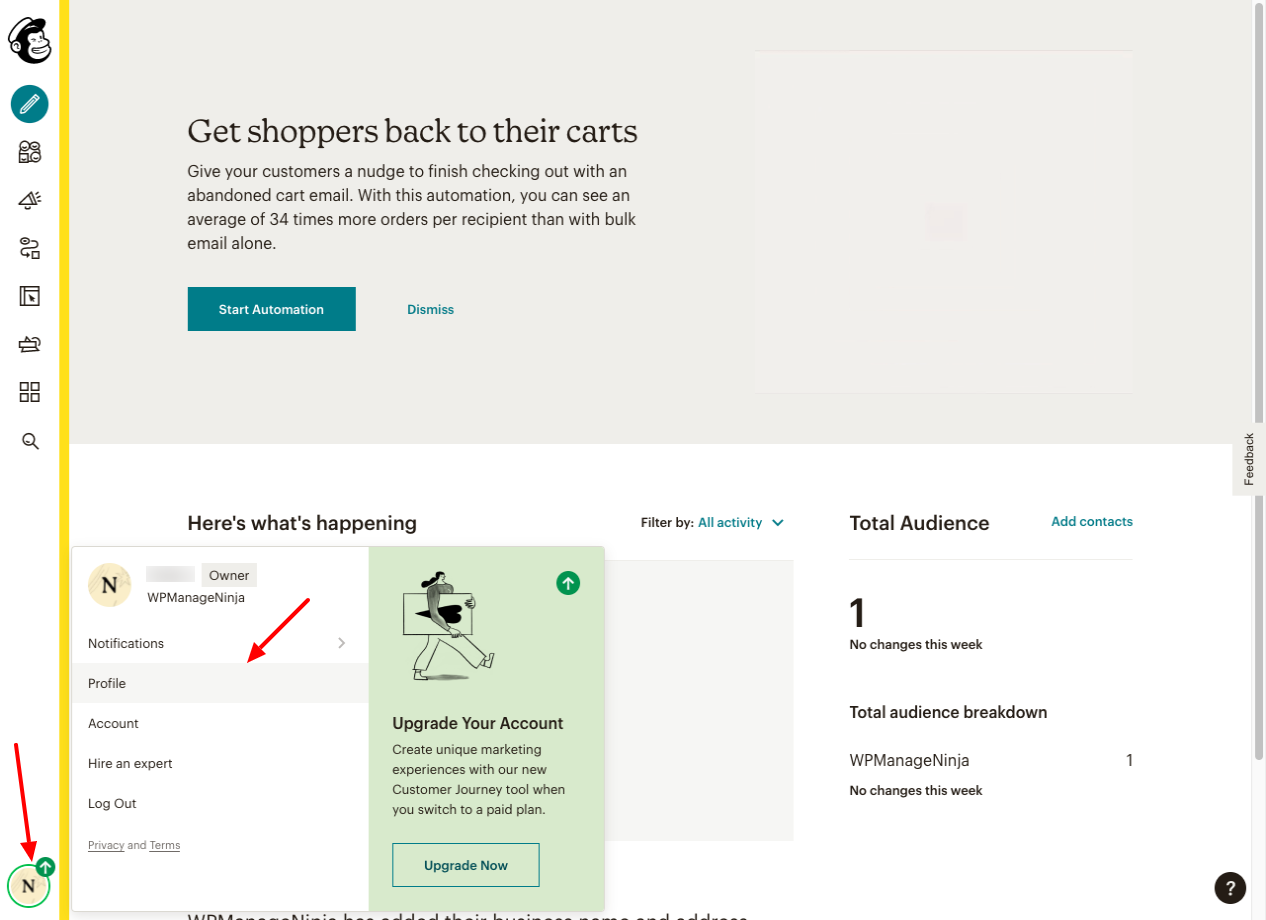
- If you do not have an API key, please log in to your MailChimp Account and then Go to Profile → Extras → API Keys.
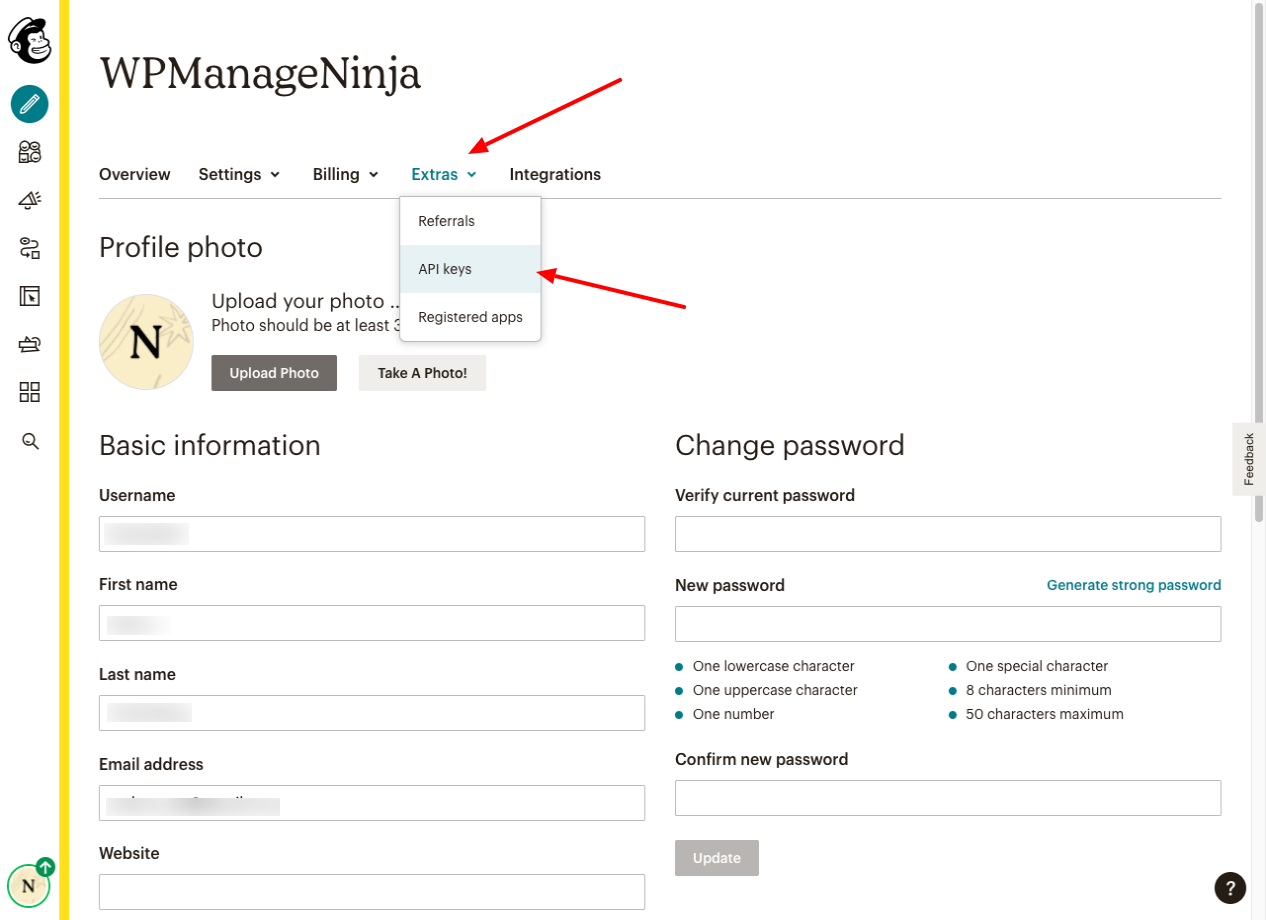
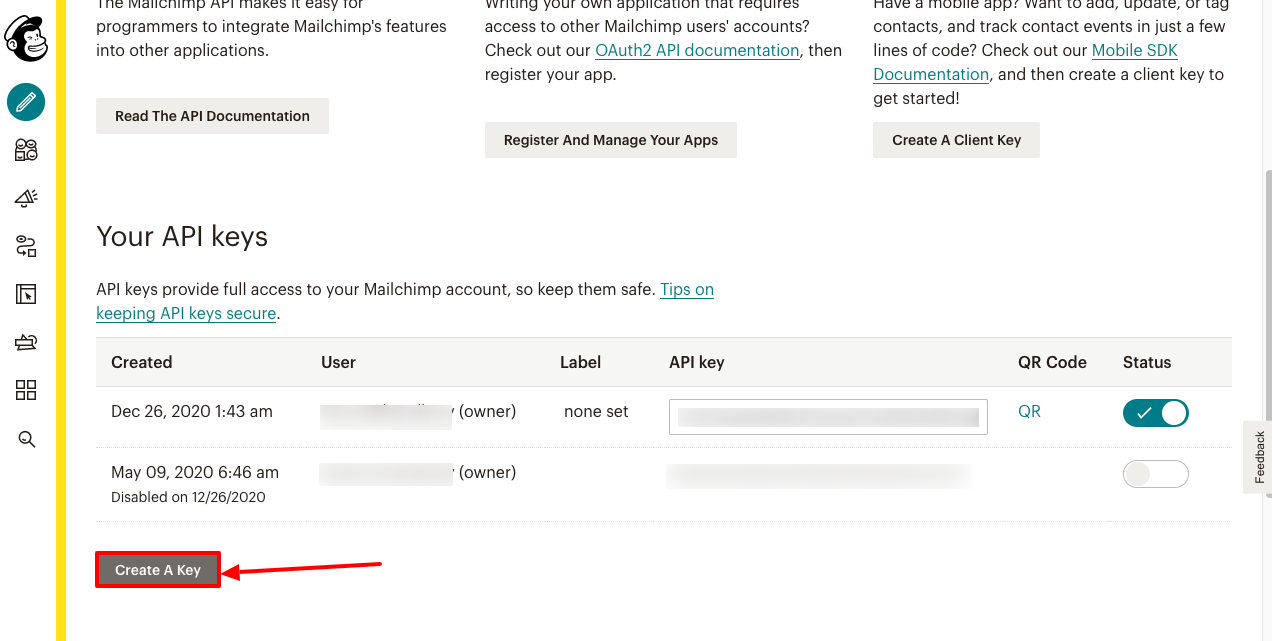

- Copy the Mailchimp API Key to use this in the next step.
- Paste the Mailchimp API Key to Mailchimp’s Global Settings tab.
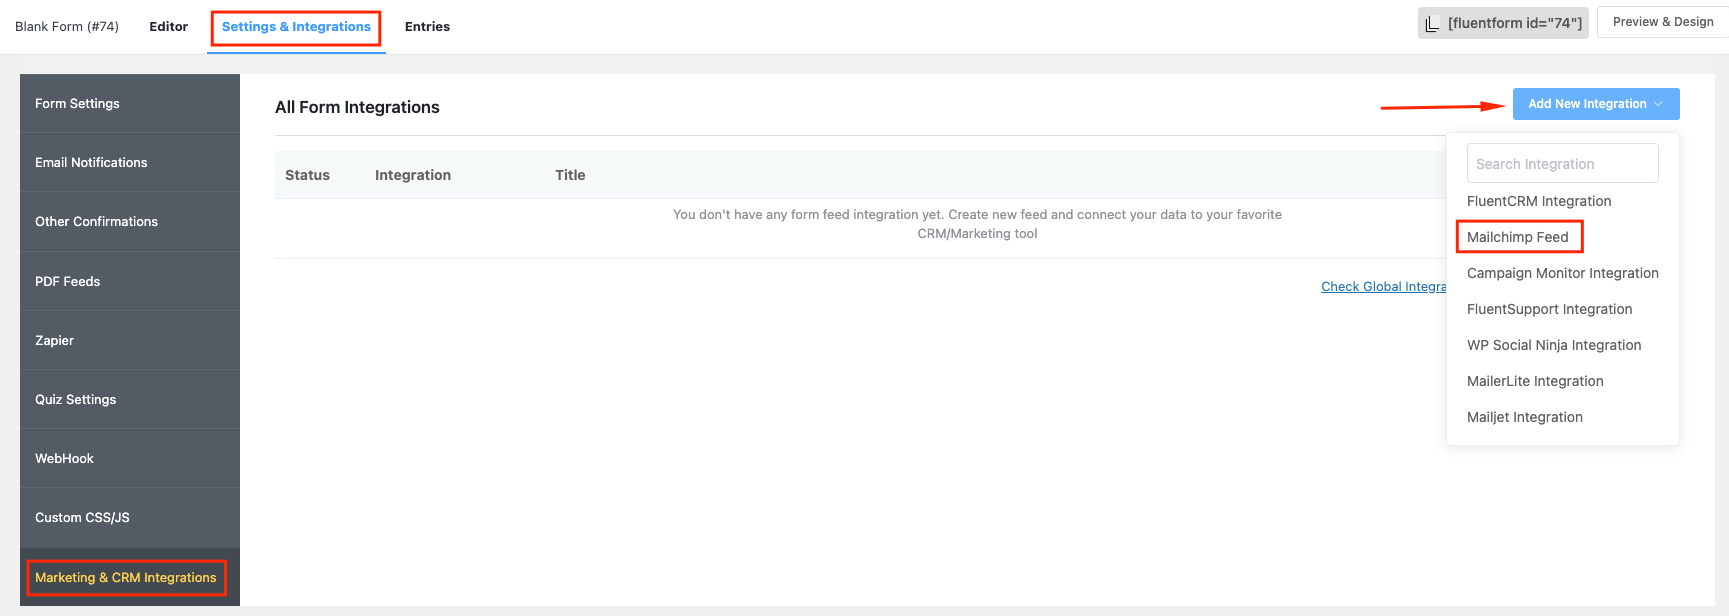
- Now go to the particular form’s settings for the entries you want to be listed in Mailchimp. Click on Add New Integration and select Mailchimp Integration from the dropdown.
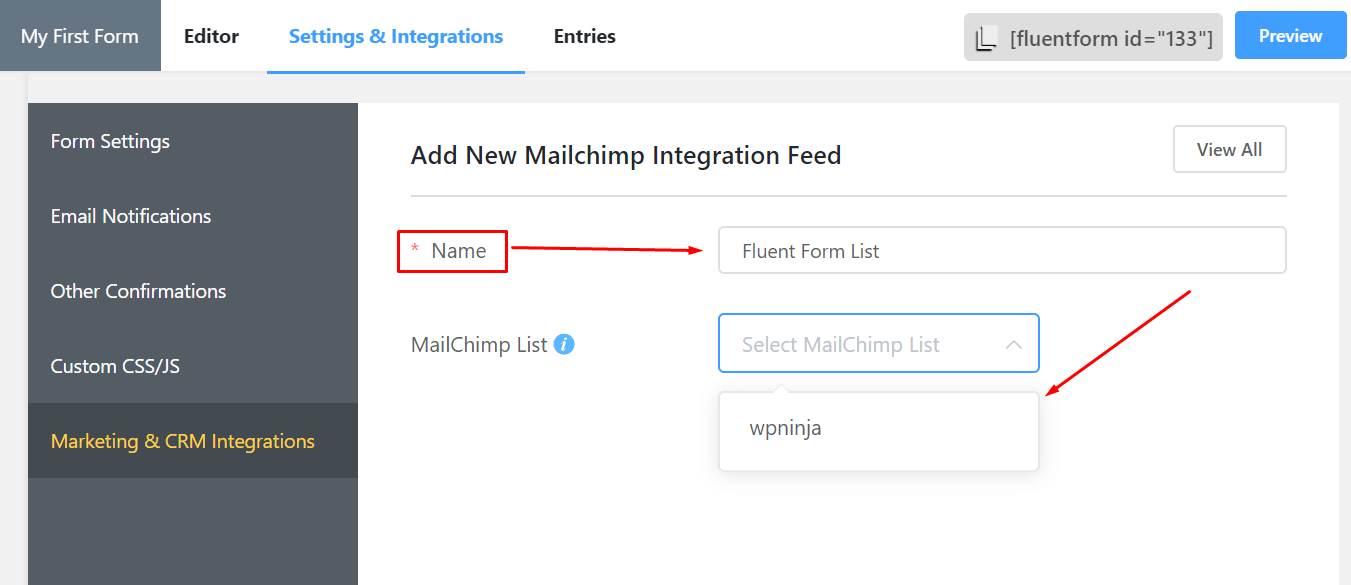
- Name the Feed & select the Mailchimp services from the dropdown list and create the Mailchimp Feed.
- Configure Field Mapping. Correlate the Mailchimp Fields with the form’s input fields (e.g. Email Address with Email, First Name with names[First Name], Last Name with names[Last Name], Birthday with Date of Birth, etc).
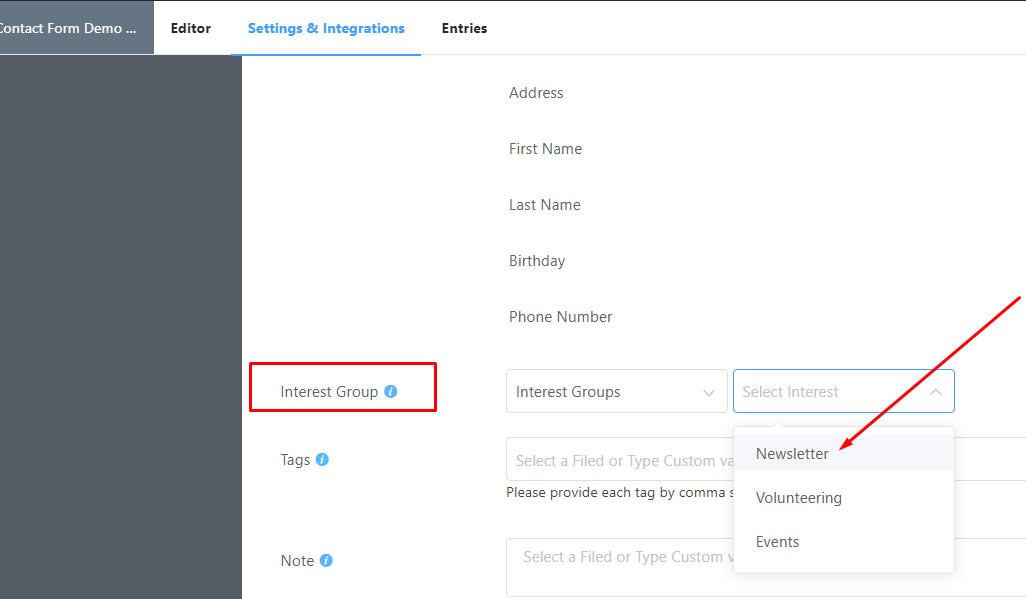
- You can add users to groups for better segmentation & targeting. Groups can help to sort your subscribed contacts based on their interests and preferences.
- Check/Uncheck Double Opt-in; when the Double Opt-in option is enabled, Mailchimp will send a confirmation email to the user and only add them to your Mailchimp list upon confirmation.
- Mark Resubscribe if this option is needed. When this option is enabled, if the subscriber is inactive or has previously been unsubscribed, they will be re-added to the active list. Therefore, this option should be used with caution and only when appropriate.
- Mark VIP if needed; when enabled, this contact will be marked as VIP.
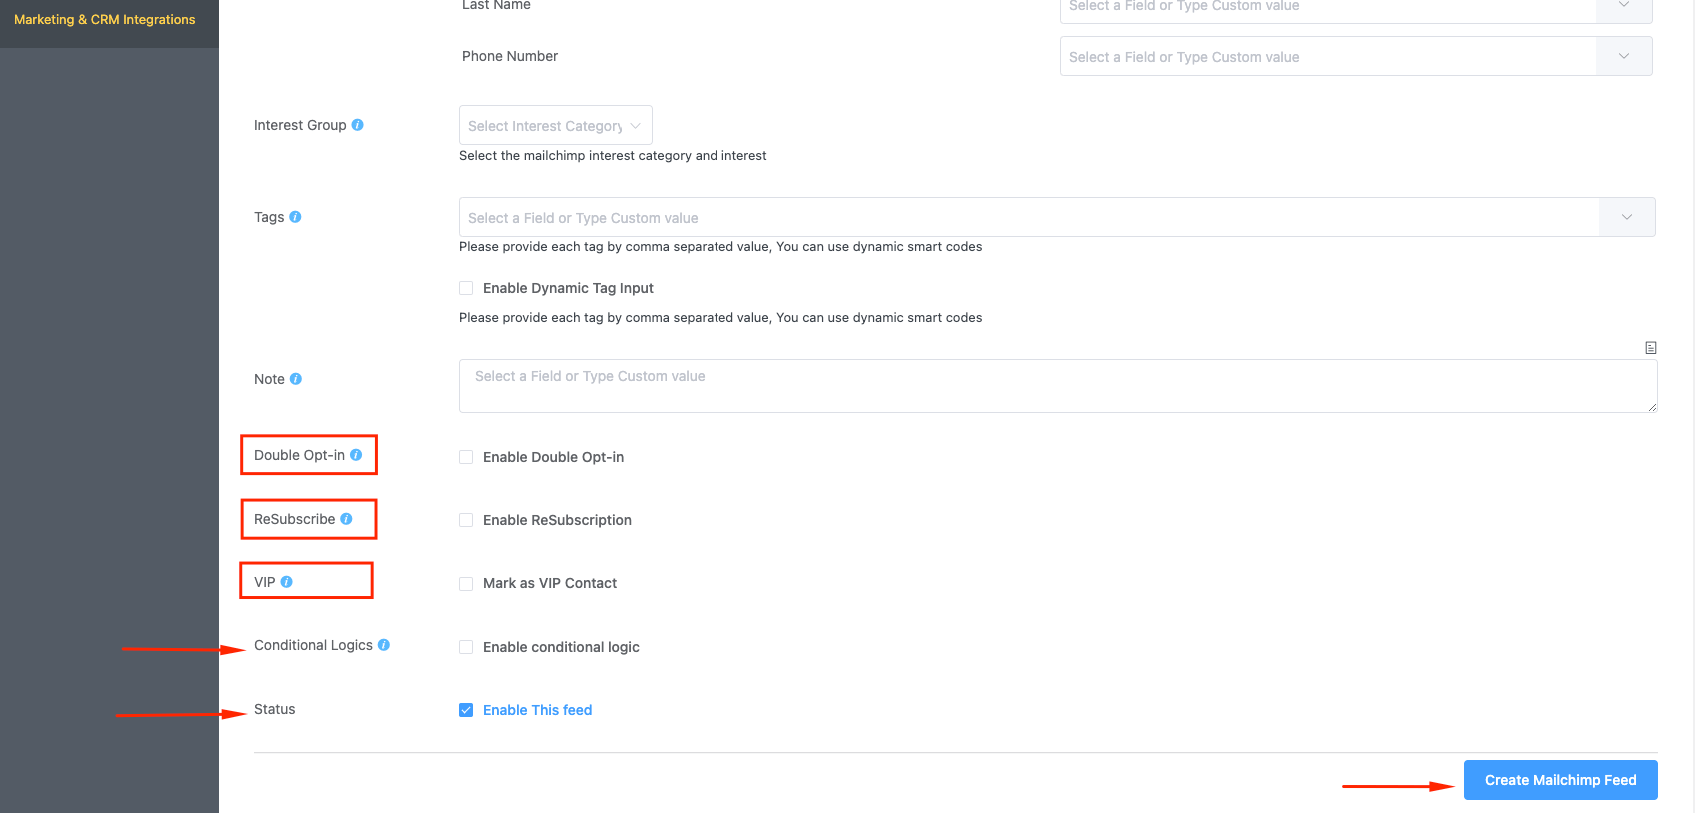
- Enable Conditional Logic if required. Learn more about Fluent Forms Conditional logic here.
- Click on Create Mailchimp Feed when the configuration is done.


