

Fluent Forms now integrates Fluent Forms AI, making it easier for users to create Forms effortlessly with simple commands. This article will guide you through creating a form using Fluent Forms AI.
Remember, this is Fluent Forms’ free default AI feature for quick and easy form creation, and it also supports Form Creation using OpenAI ChatGPT.
Create Forms using Fluent Forms AI
To learn how to create a Form using Fluent Forms AI, follow the steps with screenshots below –
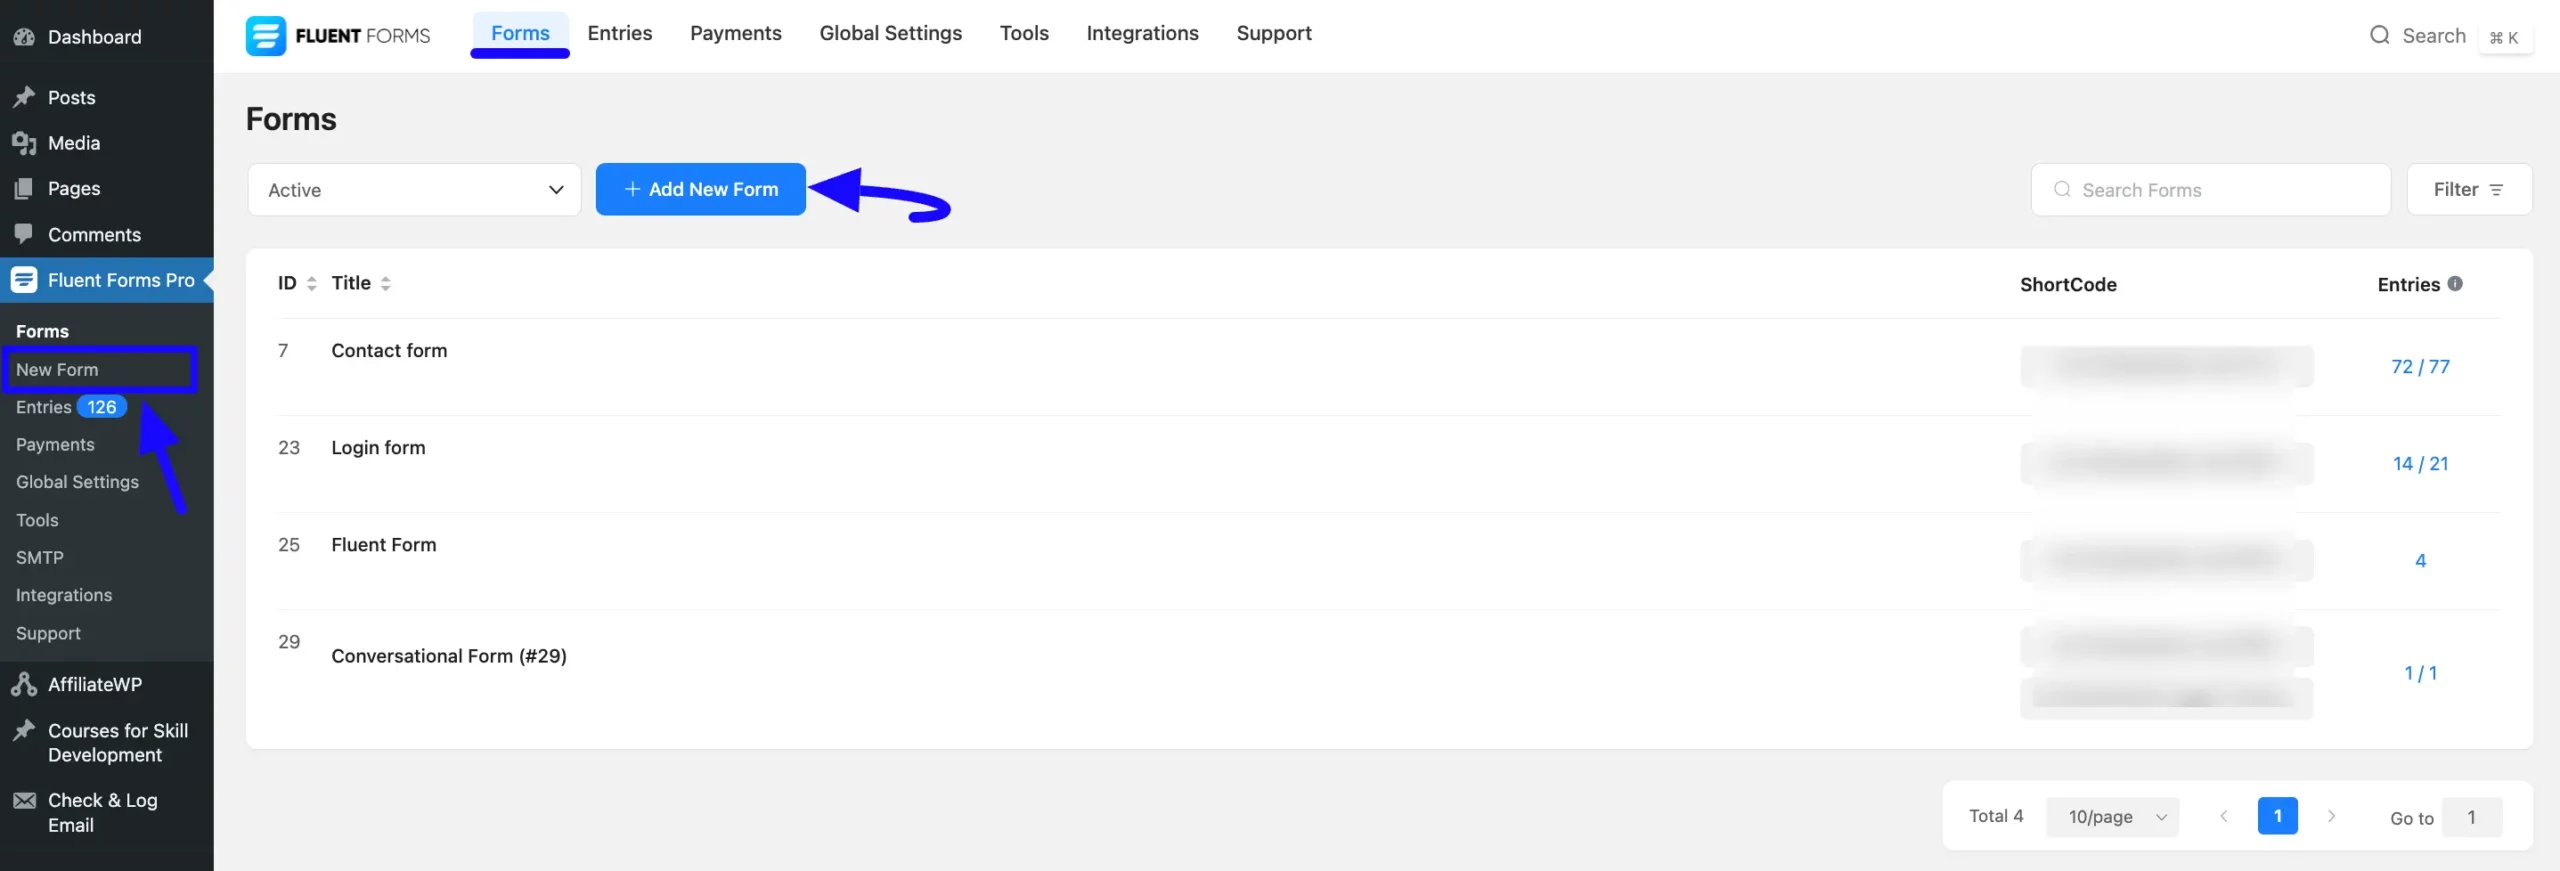
To start, log into your WordPress Dashboard. Now, navigate to the Fluent Forms Plugin and click the New Form button from the left sidebar. Or, go to the Fluent Forms Navbar, click the Forms, and click the + Add New Form button.
Now, a pop-up will appear with various options. Click the Create using ChatGPT tab.
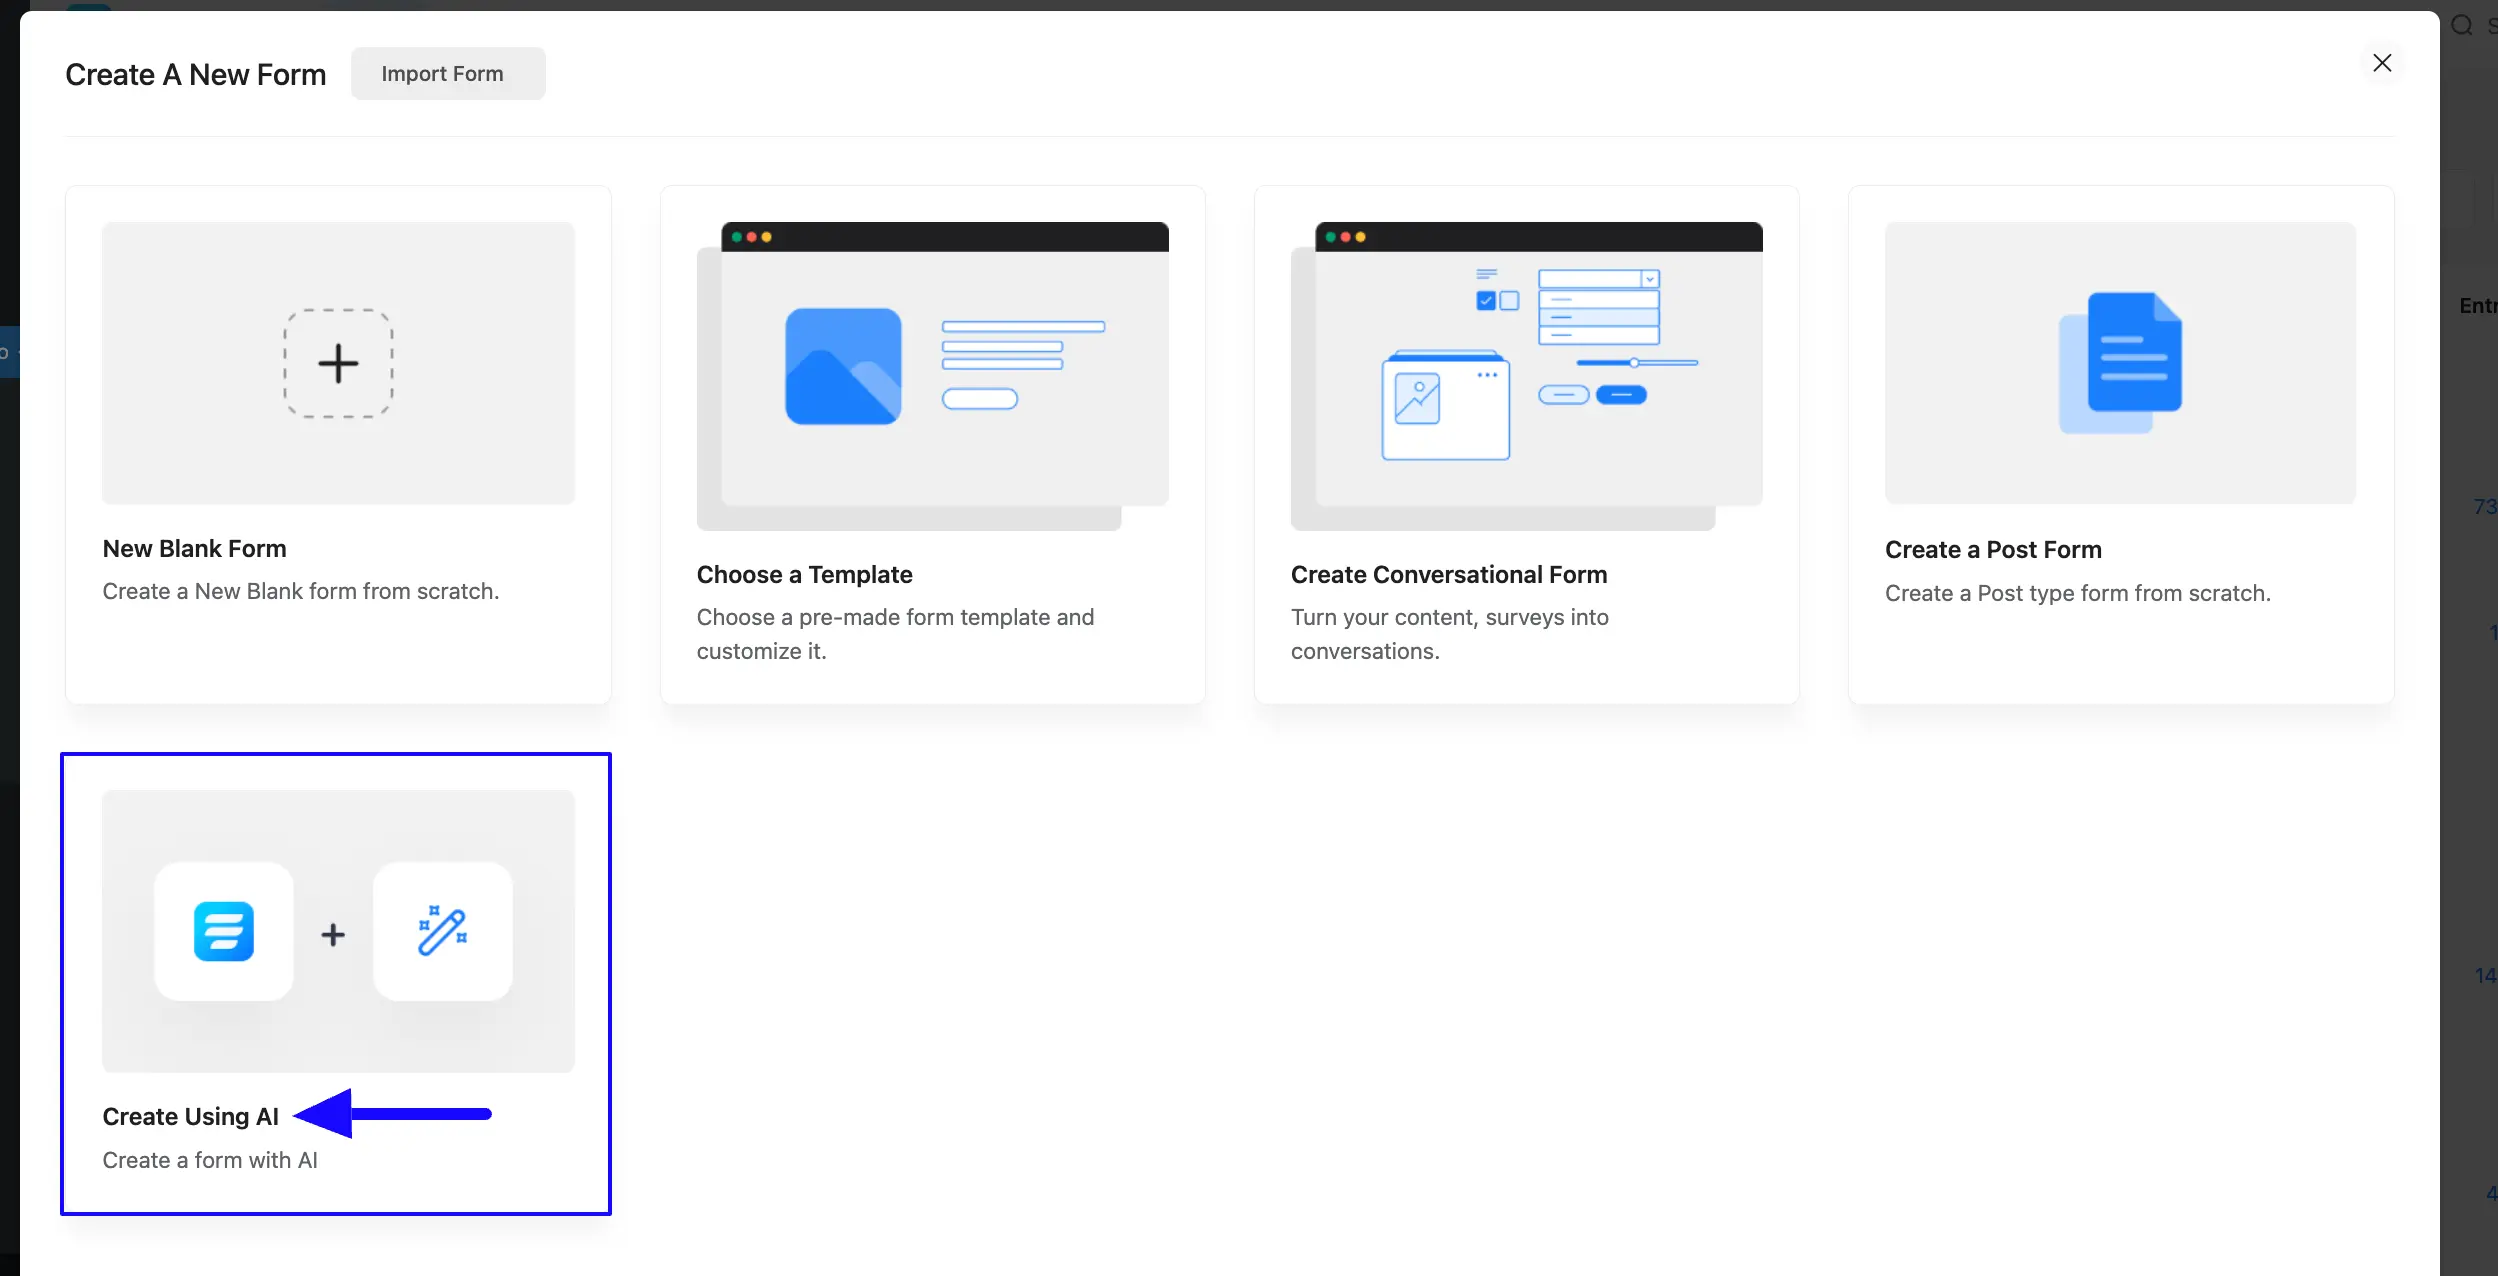
Now, a new pop-up will appear with the following options:
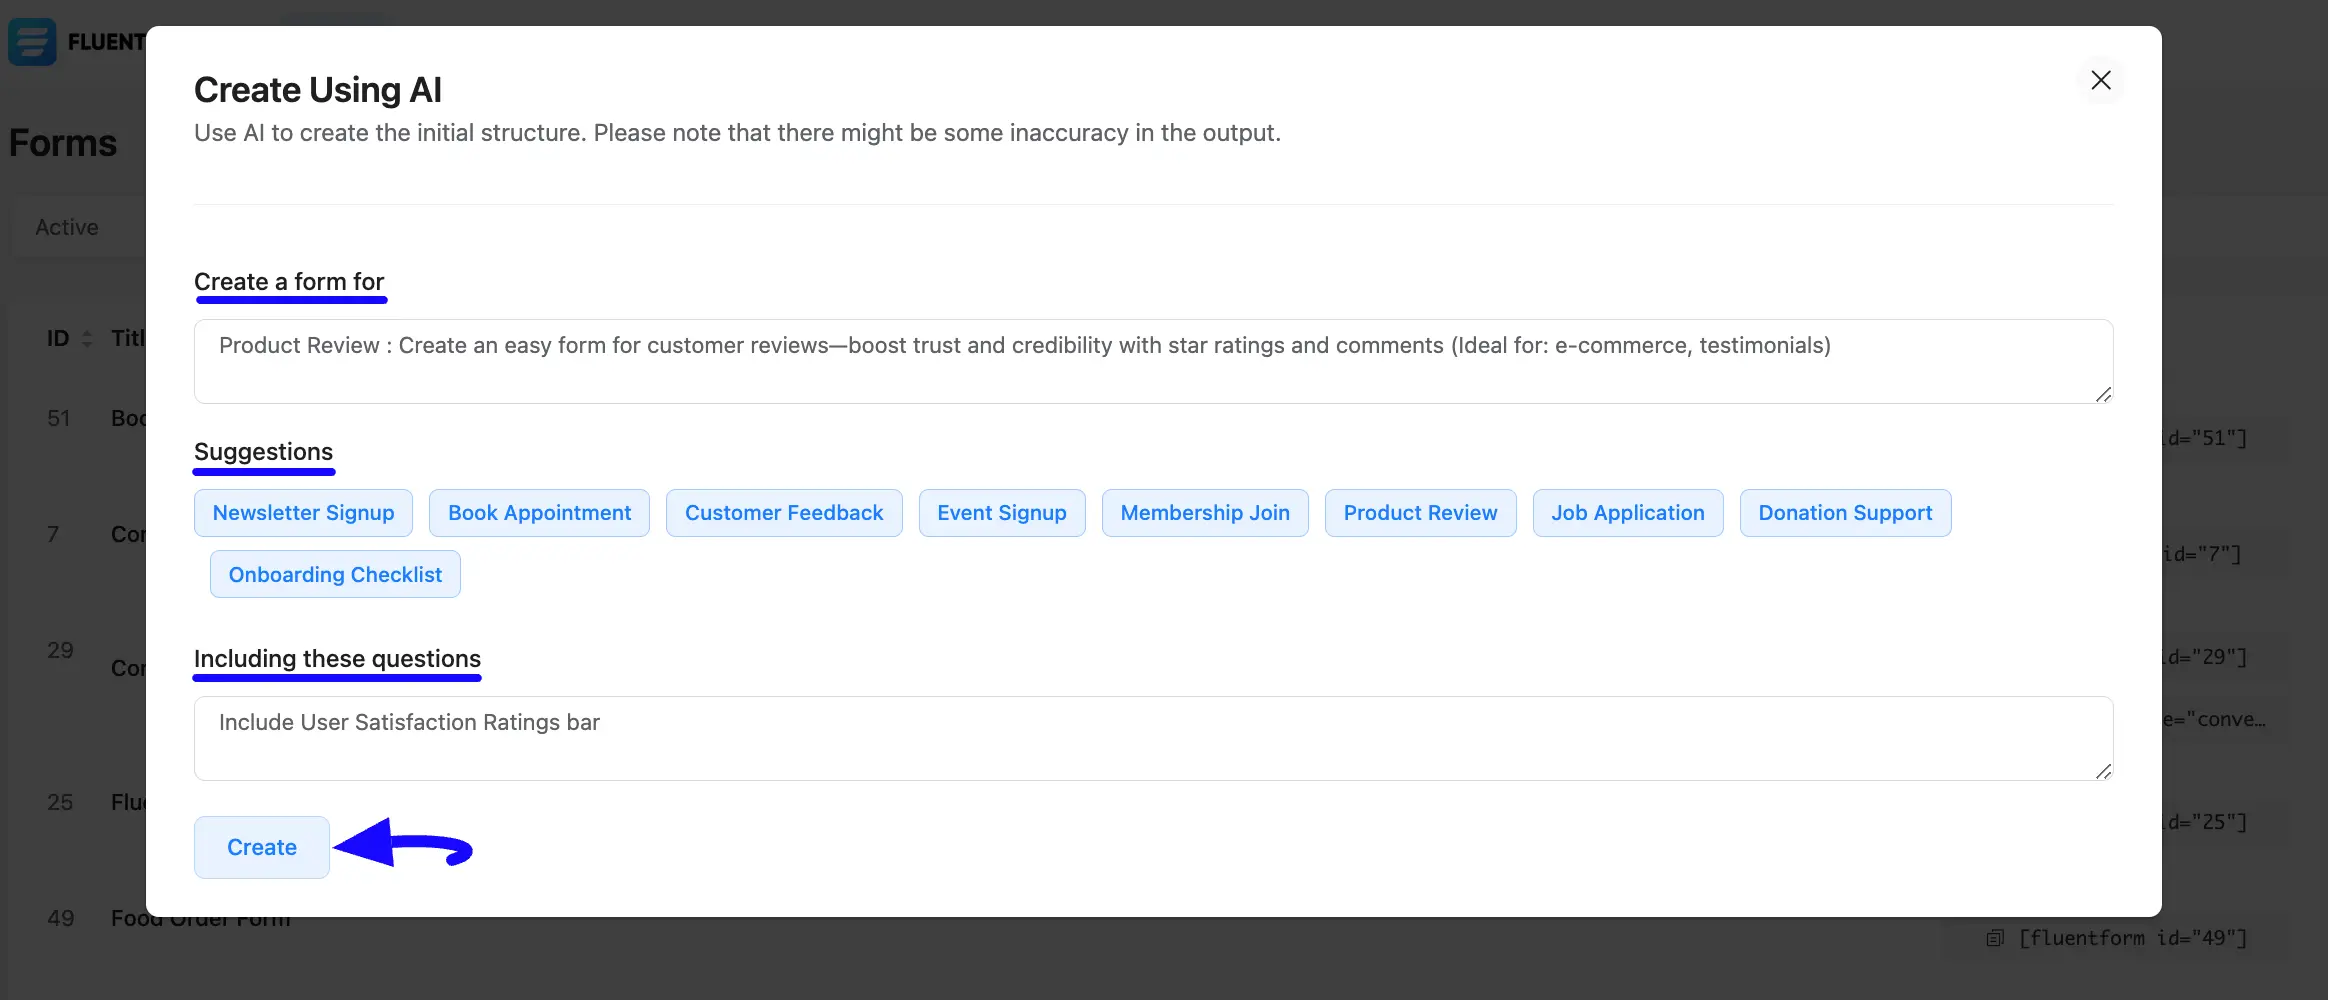
- Create a Form for: Here, you need to enter Title/Purpose to specify the type of form you want to create (e.g., survey, payment, registration form, etc.). You can also choose the pre-built prompts suggested below to avoid writing commands from scratch.
- Suggestions: Here, you’ll see some pre-built commands. Simply select the type of form you want and click the button. The ready-made command will automatically be added to the Create a Form field.
- Including these questions: Here, you can provide extra detailed instructions about the information you want to include in your form.
For example, here I wanted to create a form for collecting reviews for my product, so I chose the Product Reviews pre-built command. I also added extra instructions as needed. You can include instructions based on your requirements.
Once you are done providing your desired commands, click the Create button.
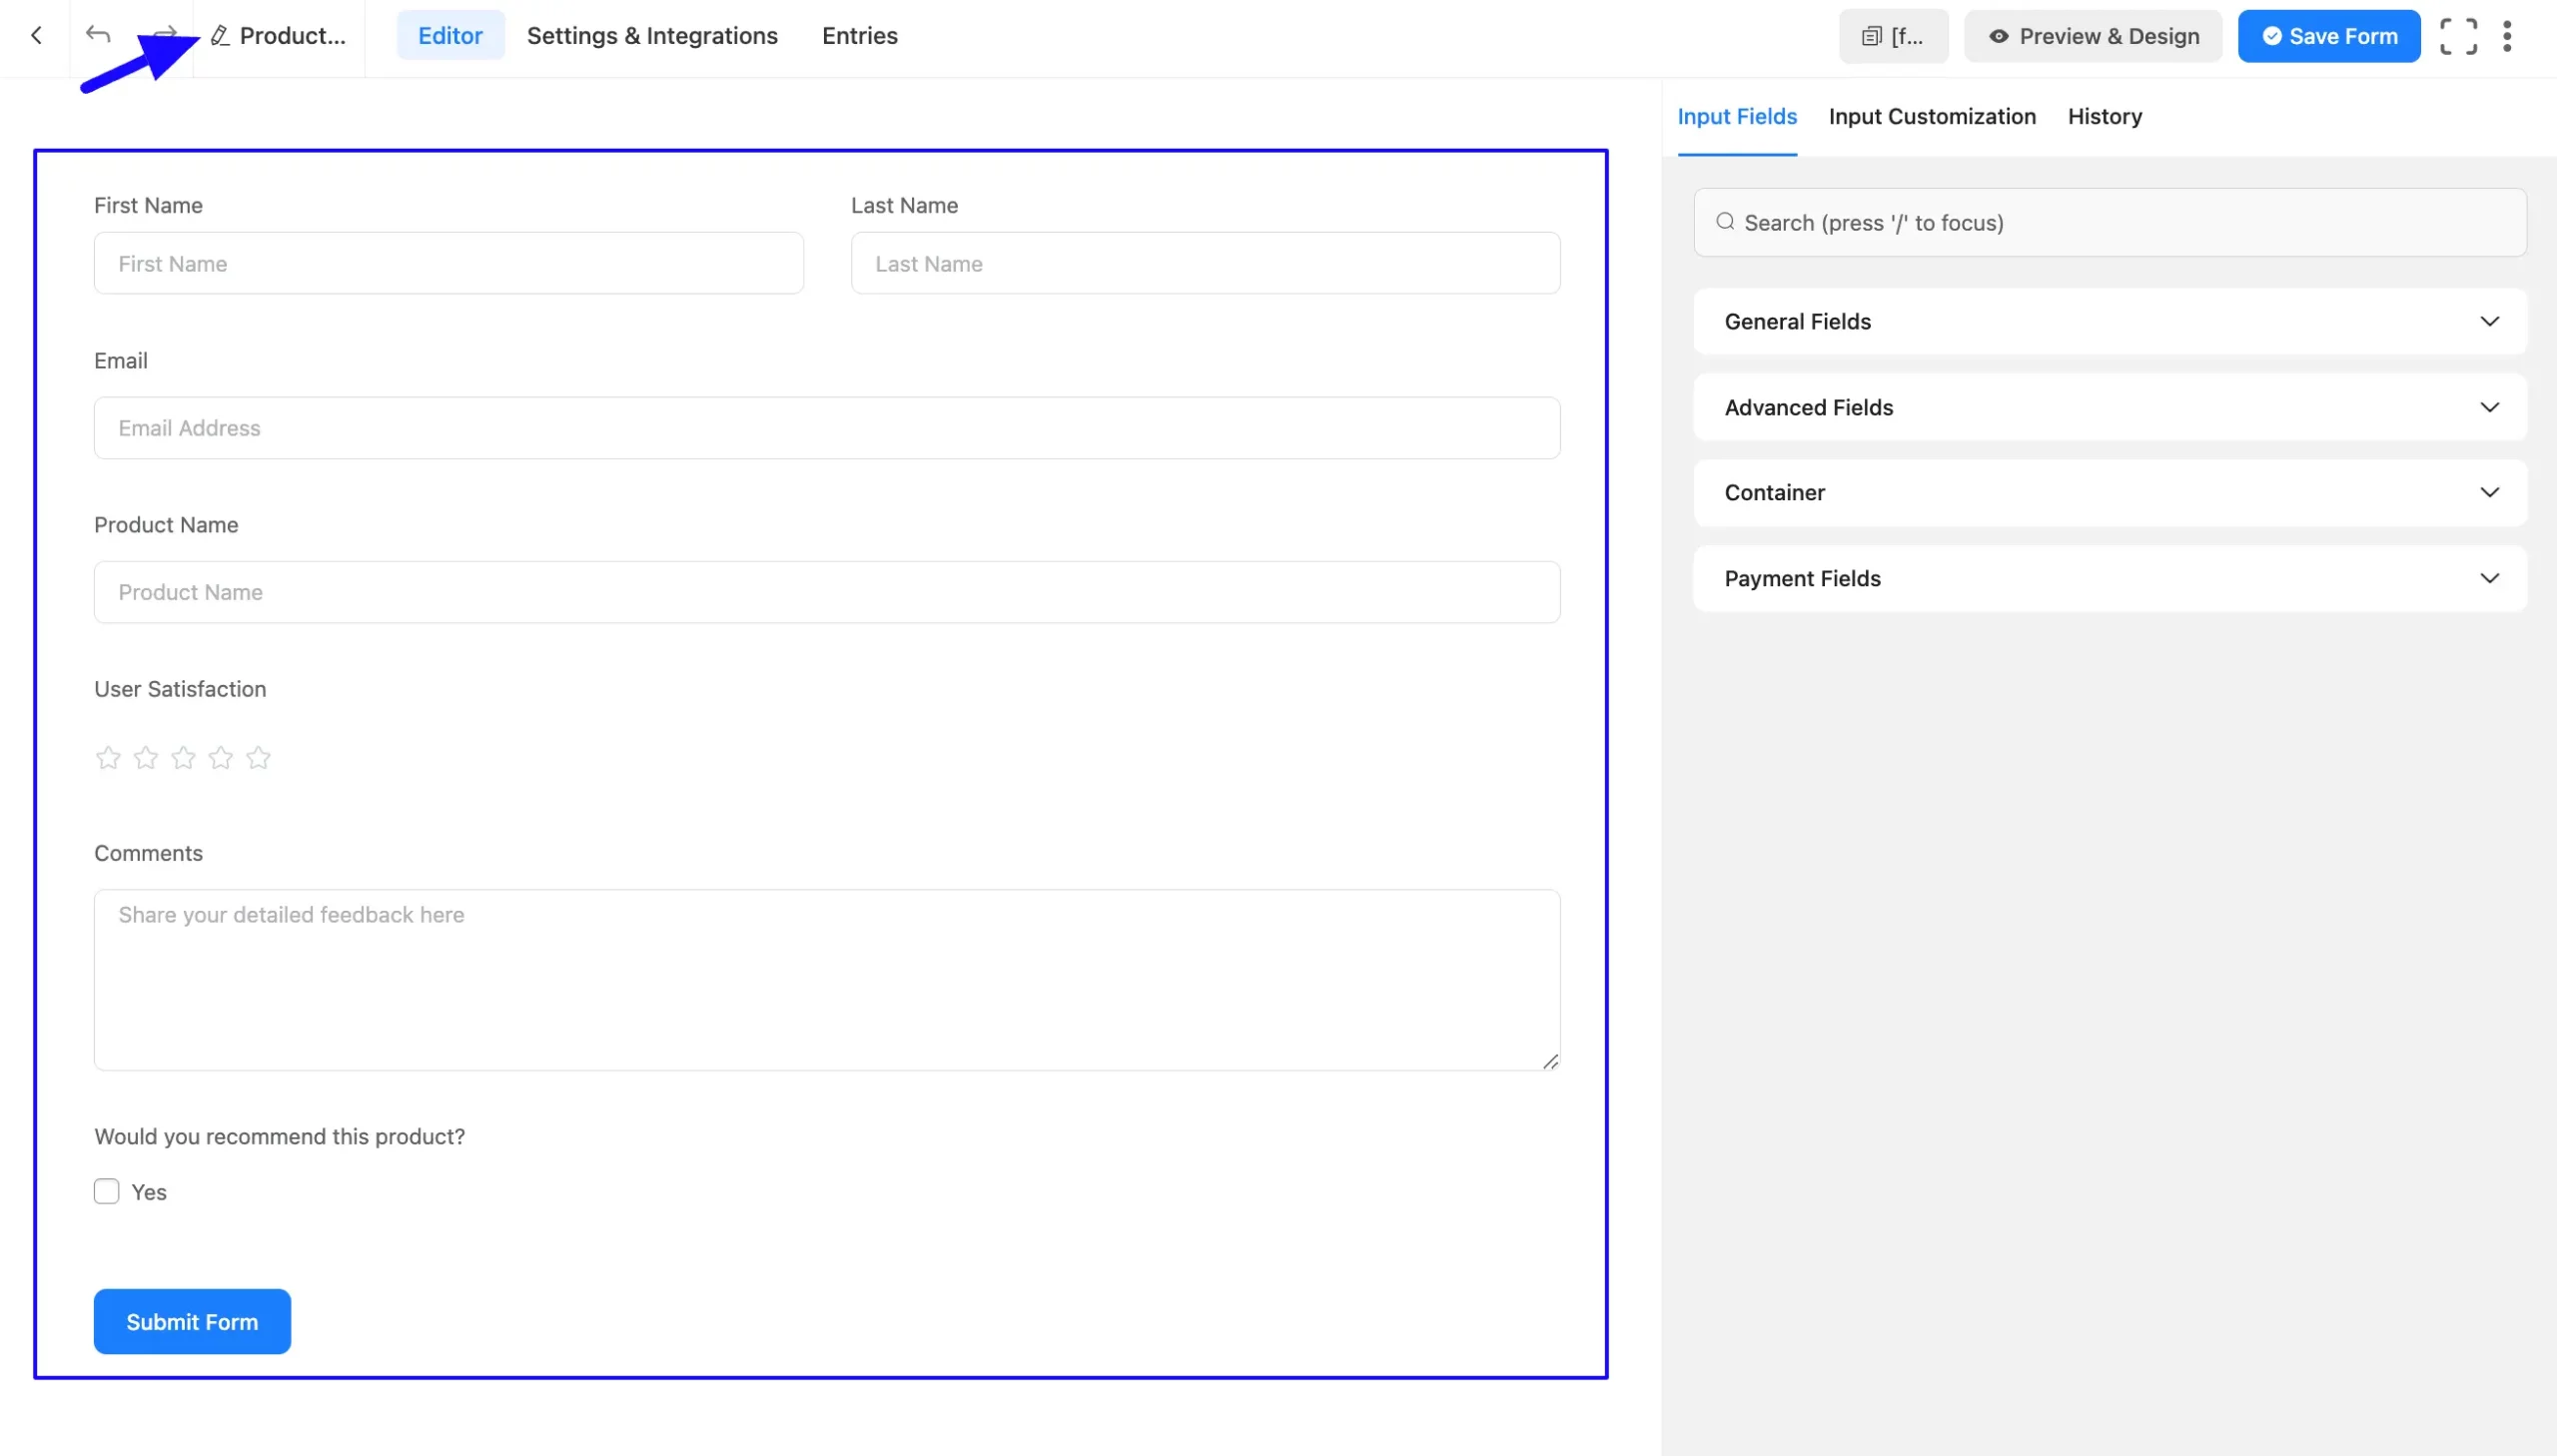
Here you can see that the Product Review Form is fully ready with less time and effort only by using a few simple commands of Fluent Forms AI!
Also, you can edit the Form Name by clicking the Pencil Icon in the top left corner.
Customize the Form
Once you are on the Editor page of your newly created form you can customize the added fields according to your needs.
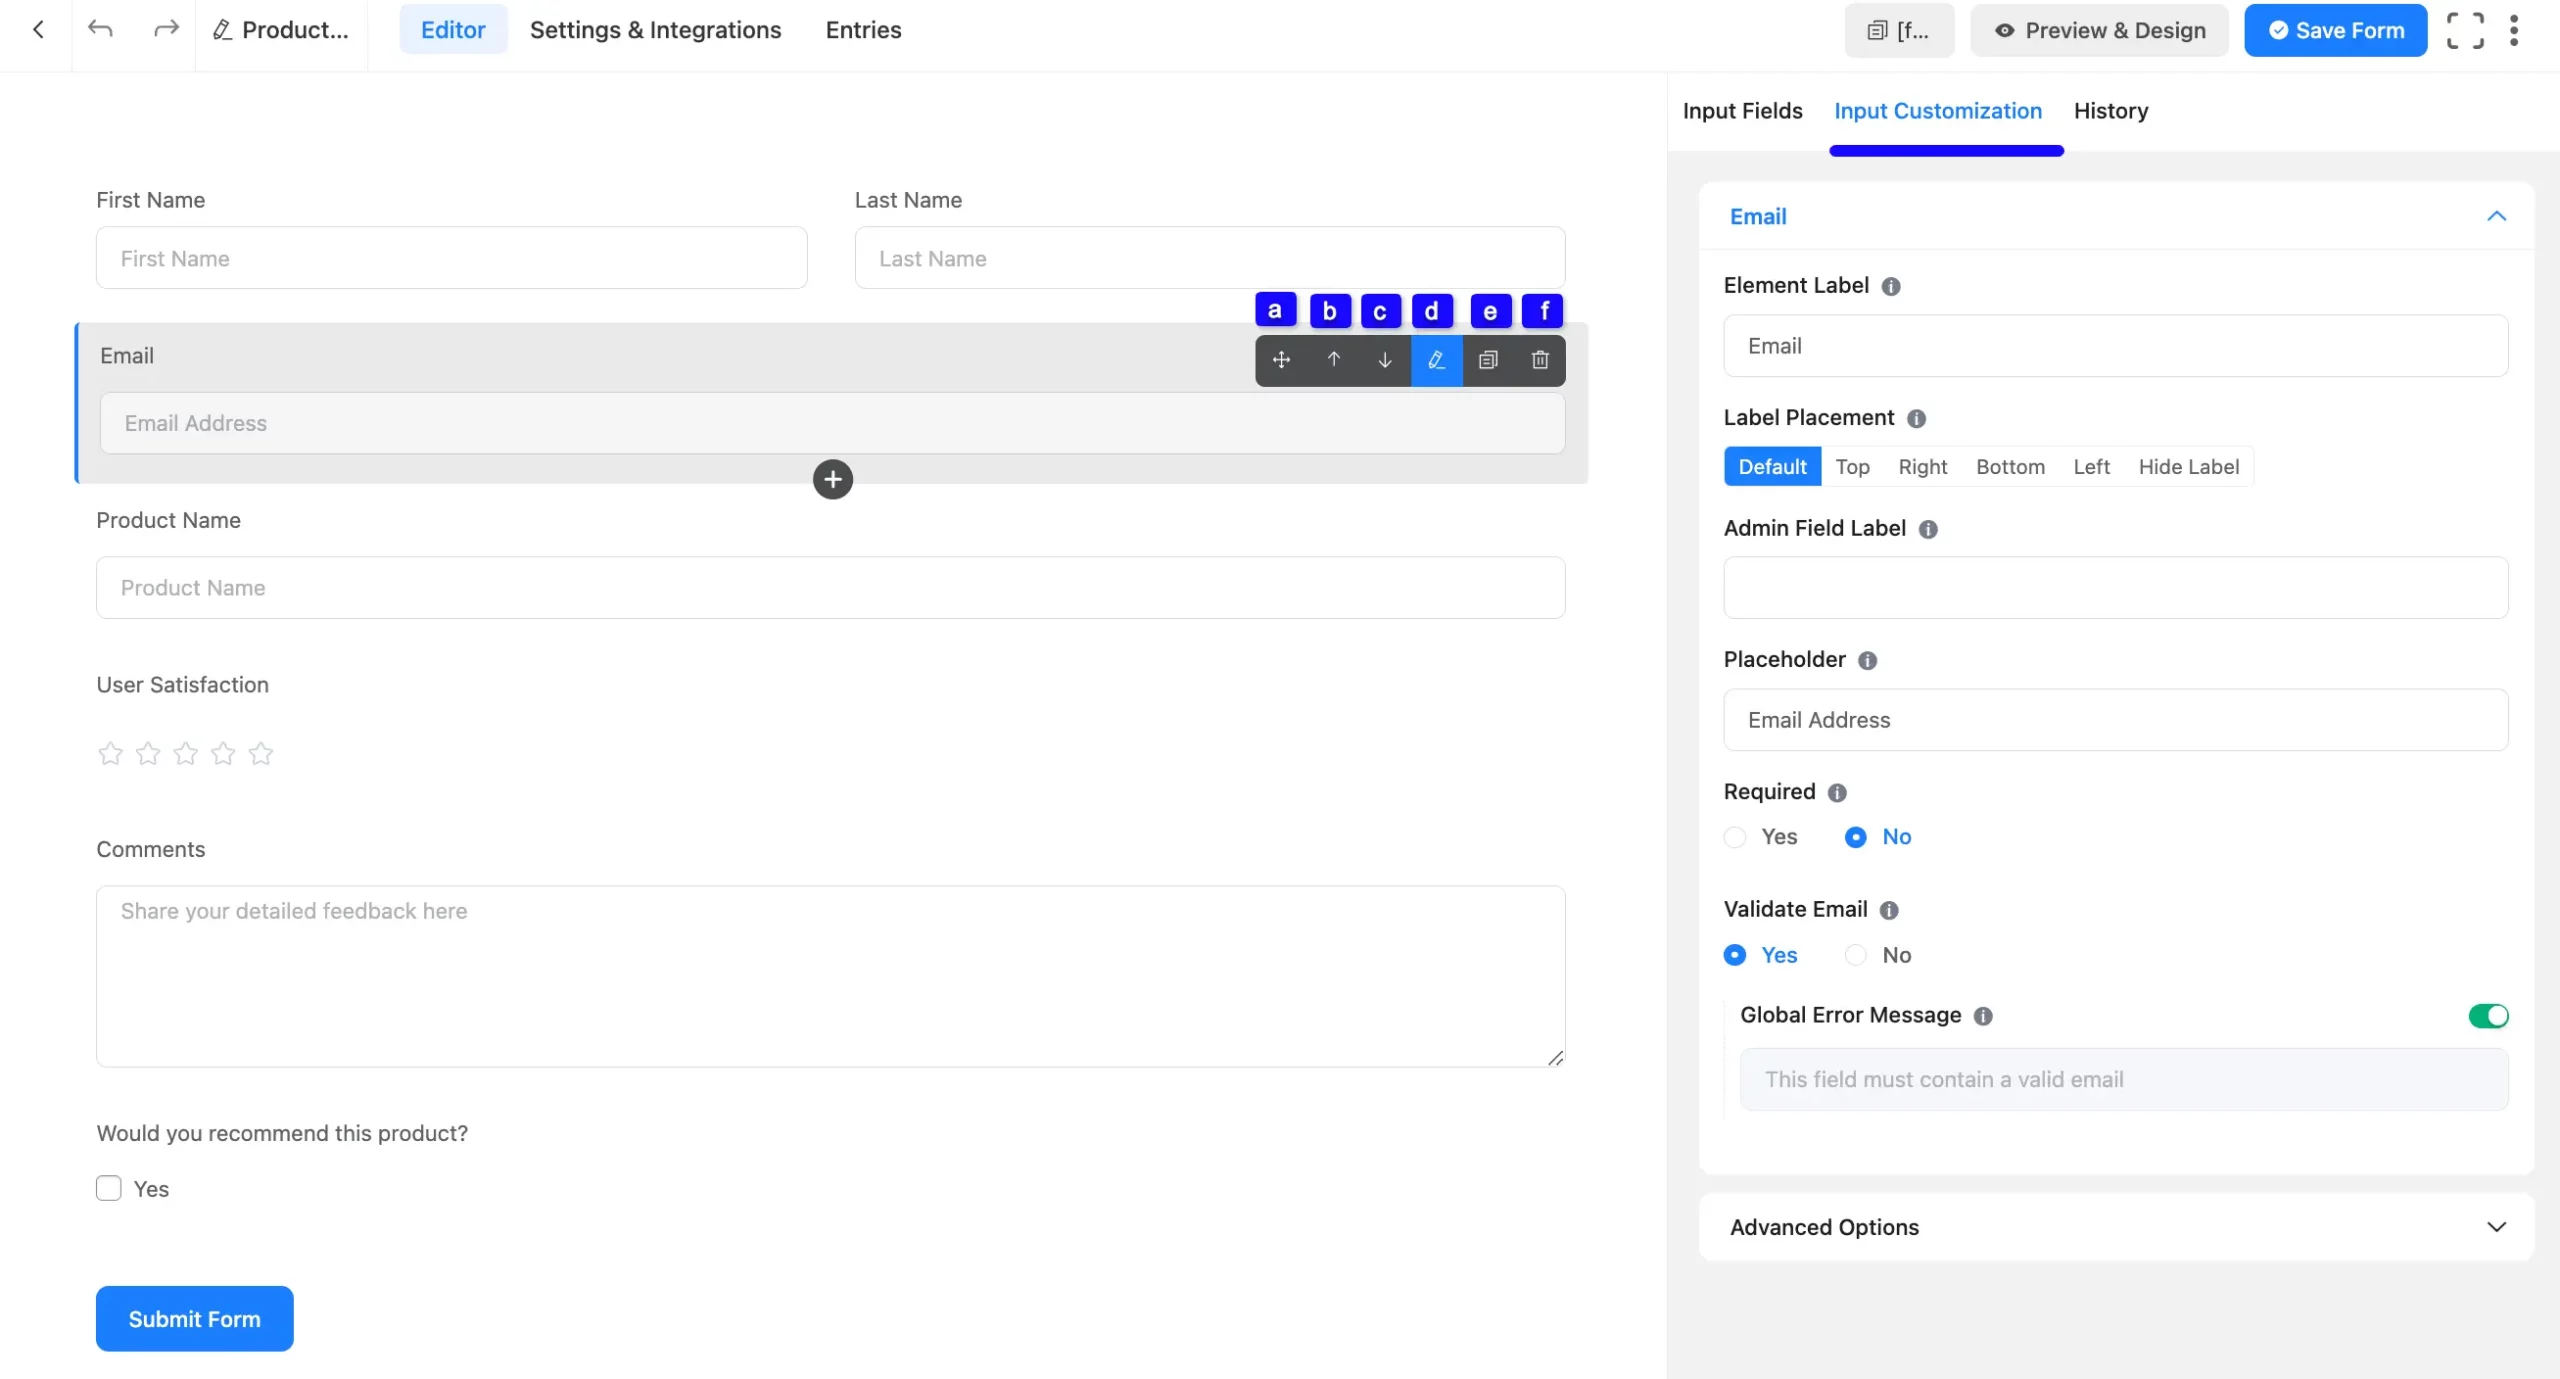
To customize an added field, hover over it and the following customization options will appear.
a. Drag & Drop: With this option, you can move your fields anywhere easily.
b. Move-Up: Using this arrow, you can move your fields one step up.
c. Move-Down: Using this arrow, you can move your fields one step down.
d. Edit: Click the Pencil/Edit Icon, and it will take you to the Input Customization tab on the right sidebar which offers a wide range of options for customization.
e. Duplicate: Click this button and the field will be duplicated.
f. Delete: Click this Trash Icon and your field will be deleted.
Add New Fields
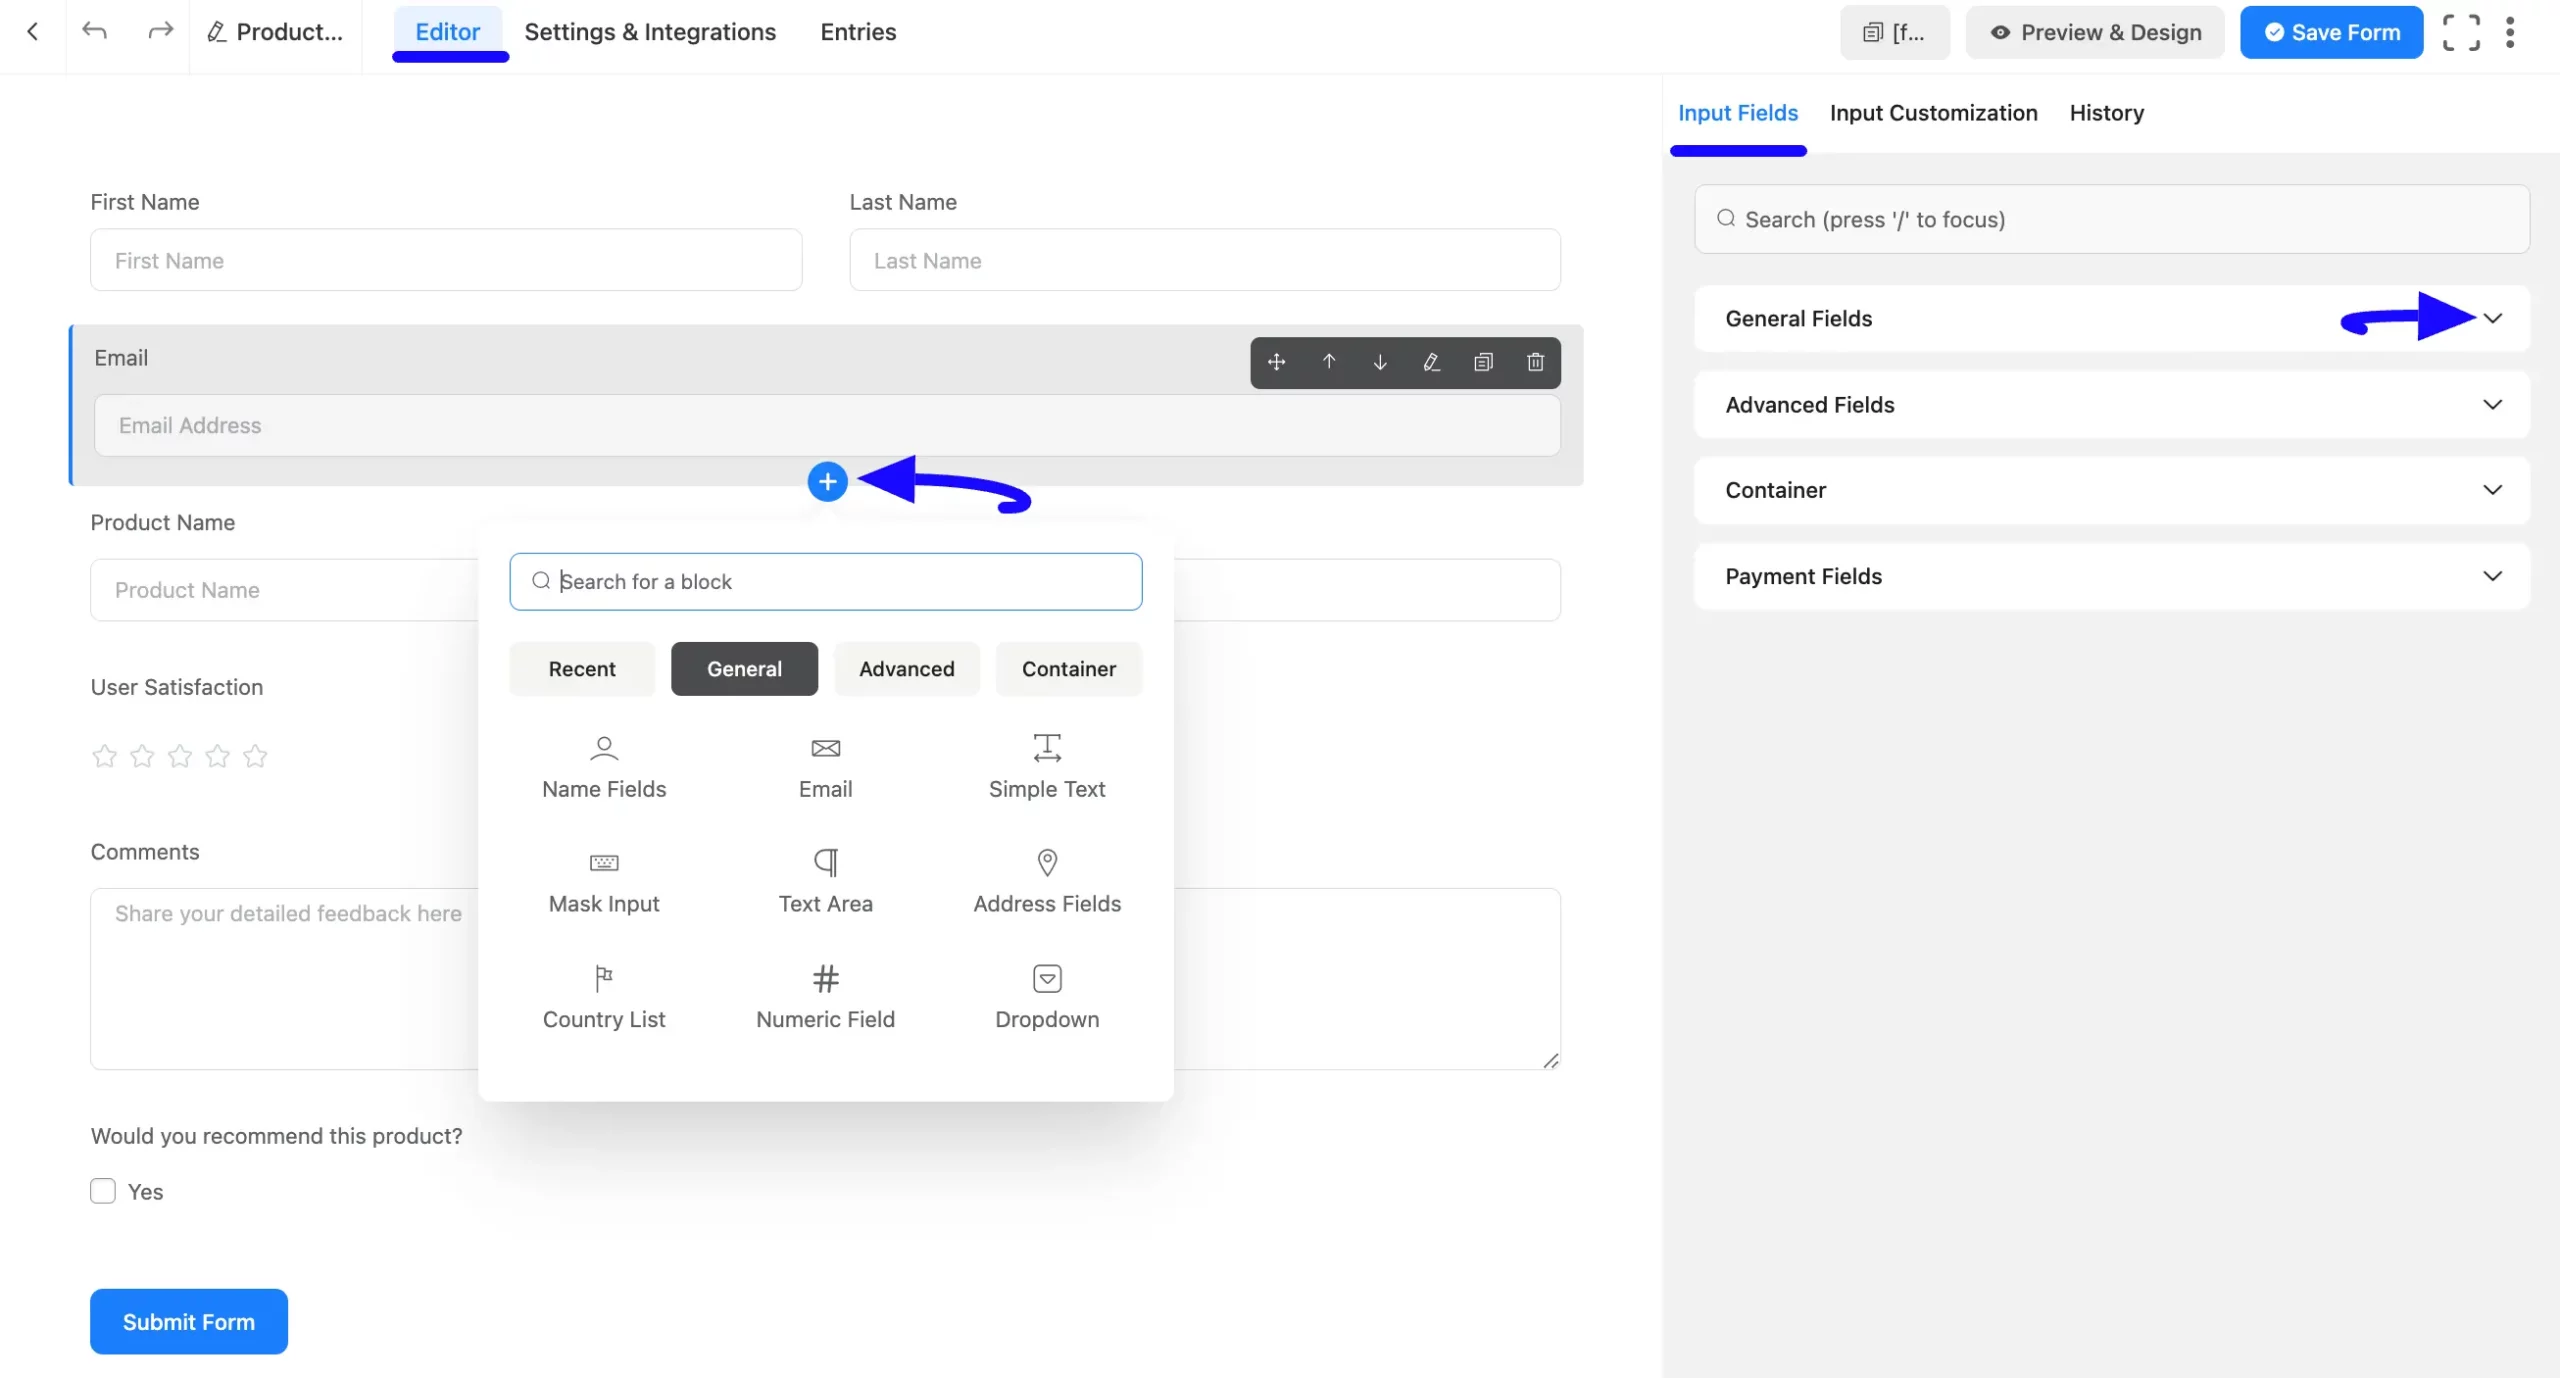
From the Editor page of your newly created form, you can also add new fields based on your needs.
To add the desired fields, click the Plus Icon, go to the desired Fields section, and press the field you want to add. Or, go to the Input Fields tab on the right side, open the desired Fields sections by clicking the Dropdown Arrow, and select the field you need.
You can also search for the desired fields through their name using the Search Bar.
Remember, separate documentation is available for each Input Field under the Field Type category. Read them thoroughly to understand the detailed use of each field.
Embed Form into Frontend
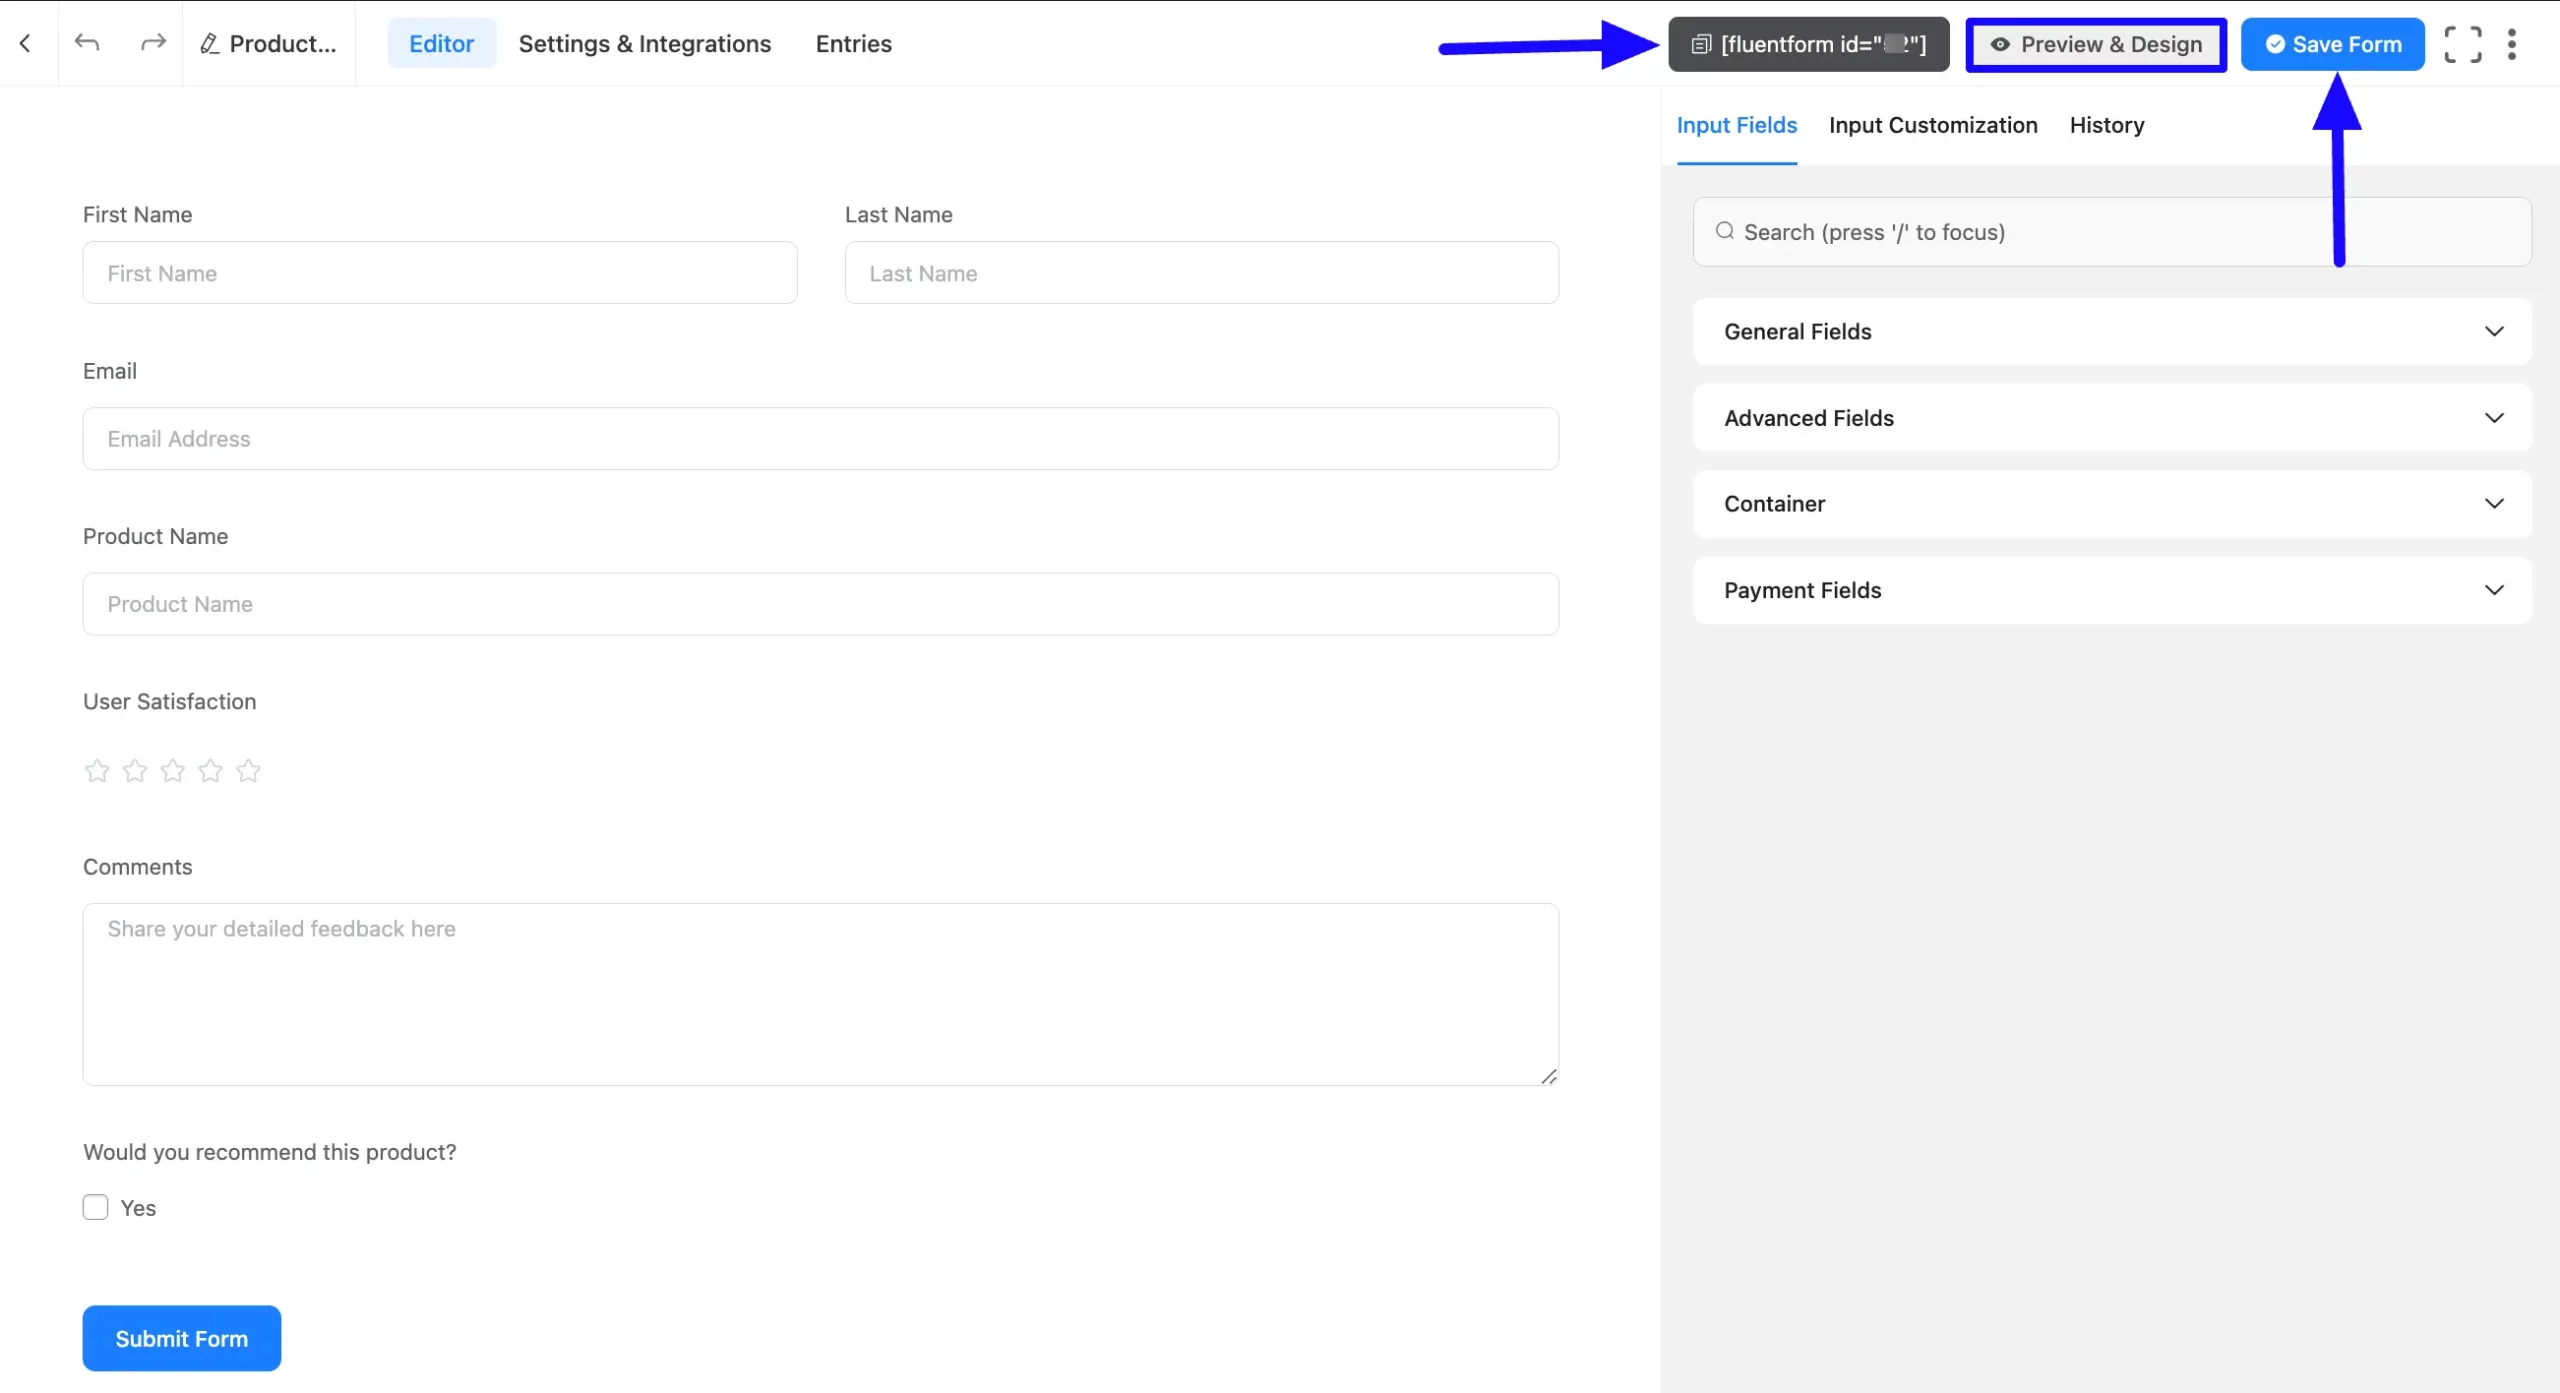
Once you complete the process, you can embed and display the form on the desired Page/Post of your WordPress Site by copying the Shortcode on the top right side.
Also, to see the form preview, click the Preview & Design button in the middle.
Finally, press the Save Form button to save all your changes.
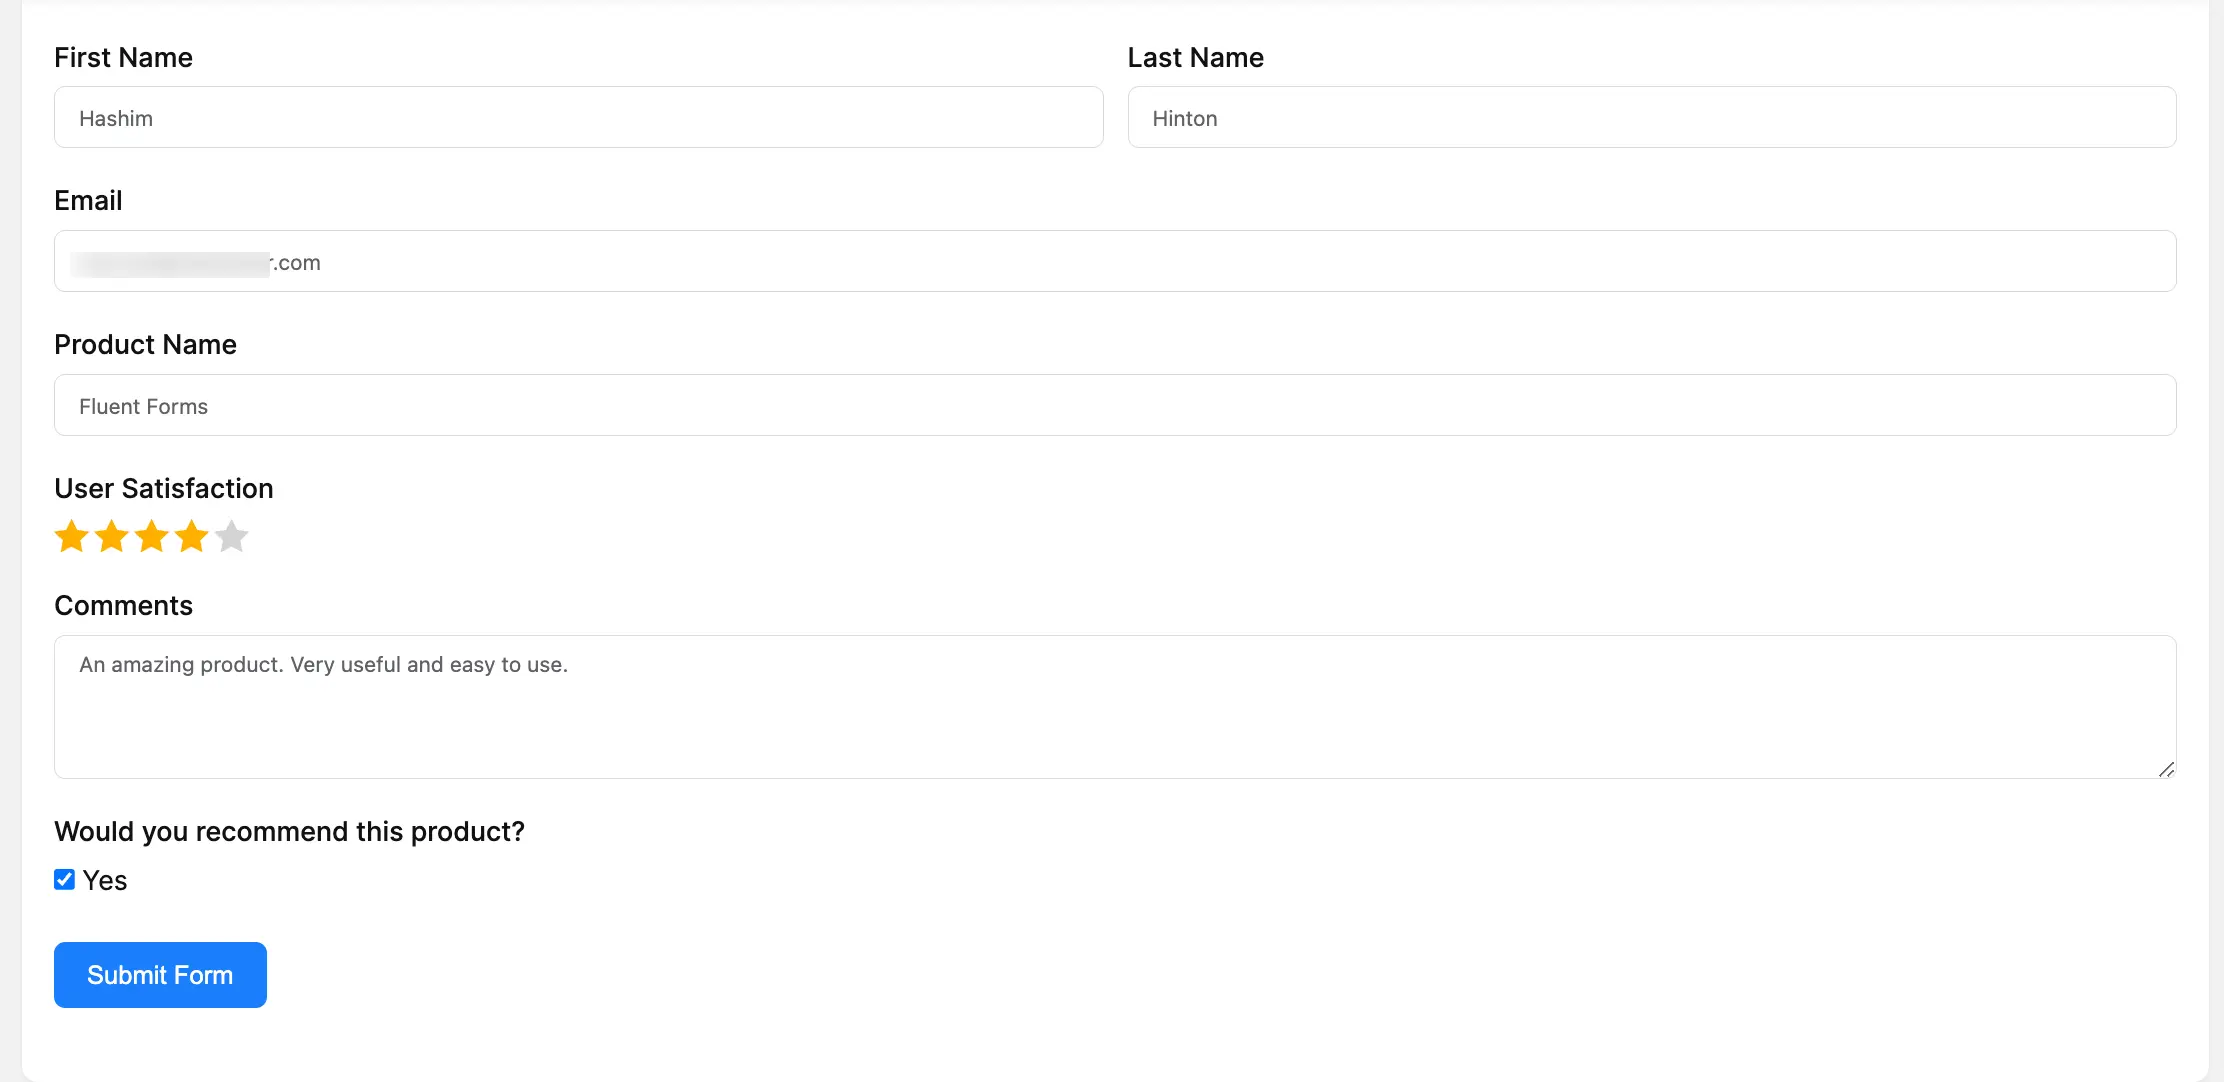
Preview of Form
Here is the preview of the Form that we just created.
This way you can easily create the Forms by using the Fluent Forms AI!
If you have any further questions, concerns, or suggestions, please do not hesitate to contact our @support team. Thank you.