In order for Stripe to function completely for subscription/recurring payments, you must configure your Stripe webhooks.
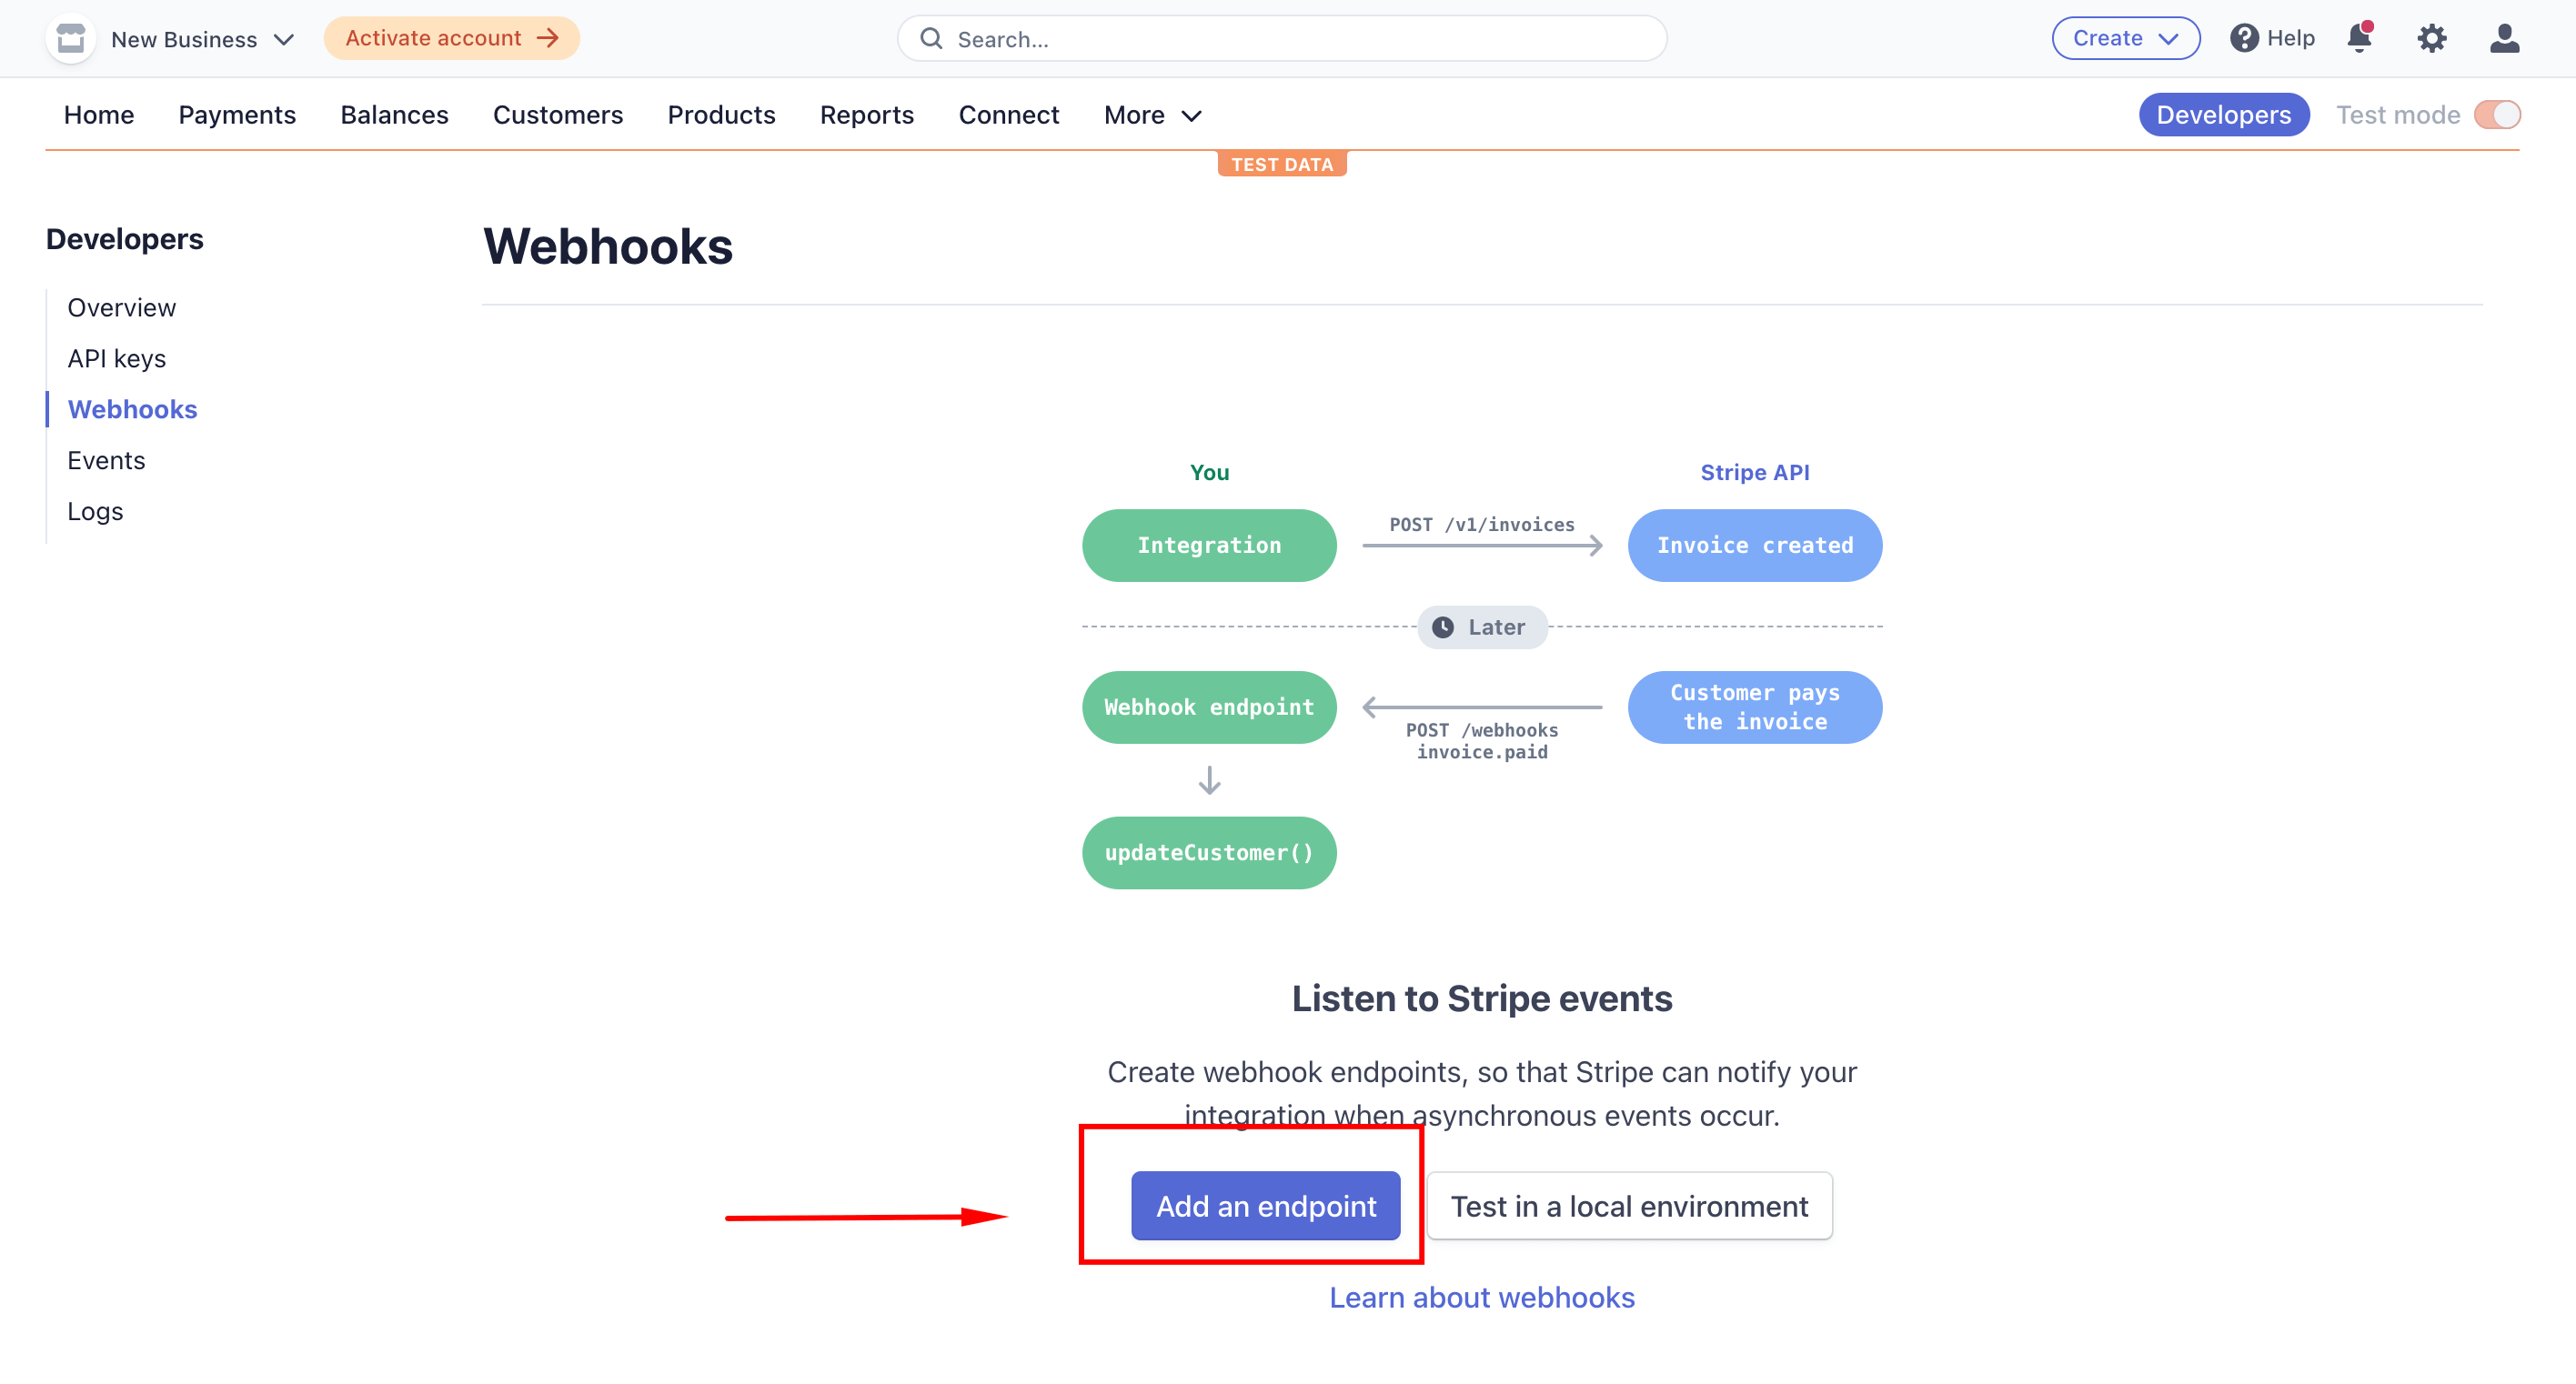
- First, log in to your Stripe Dashboard and go to Stripe Webhook.
- Click on Add an endpoint button, as shown in the screenshot below –
- At this point, you will be asked to give certain values.
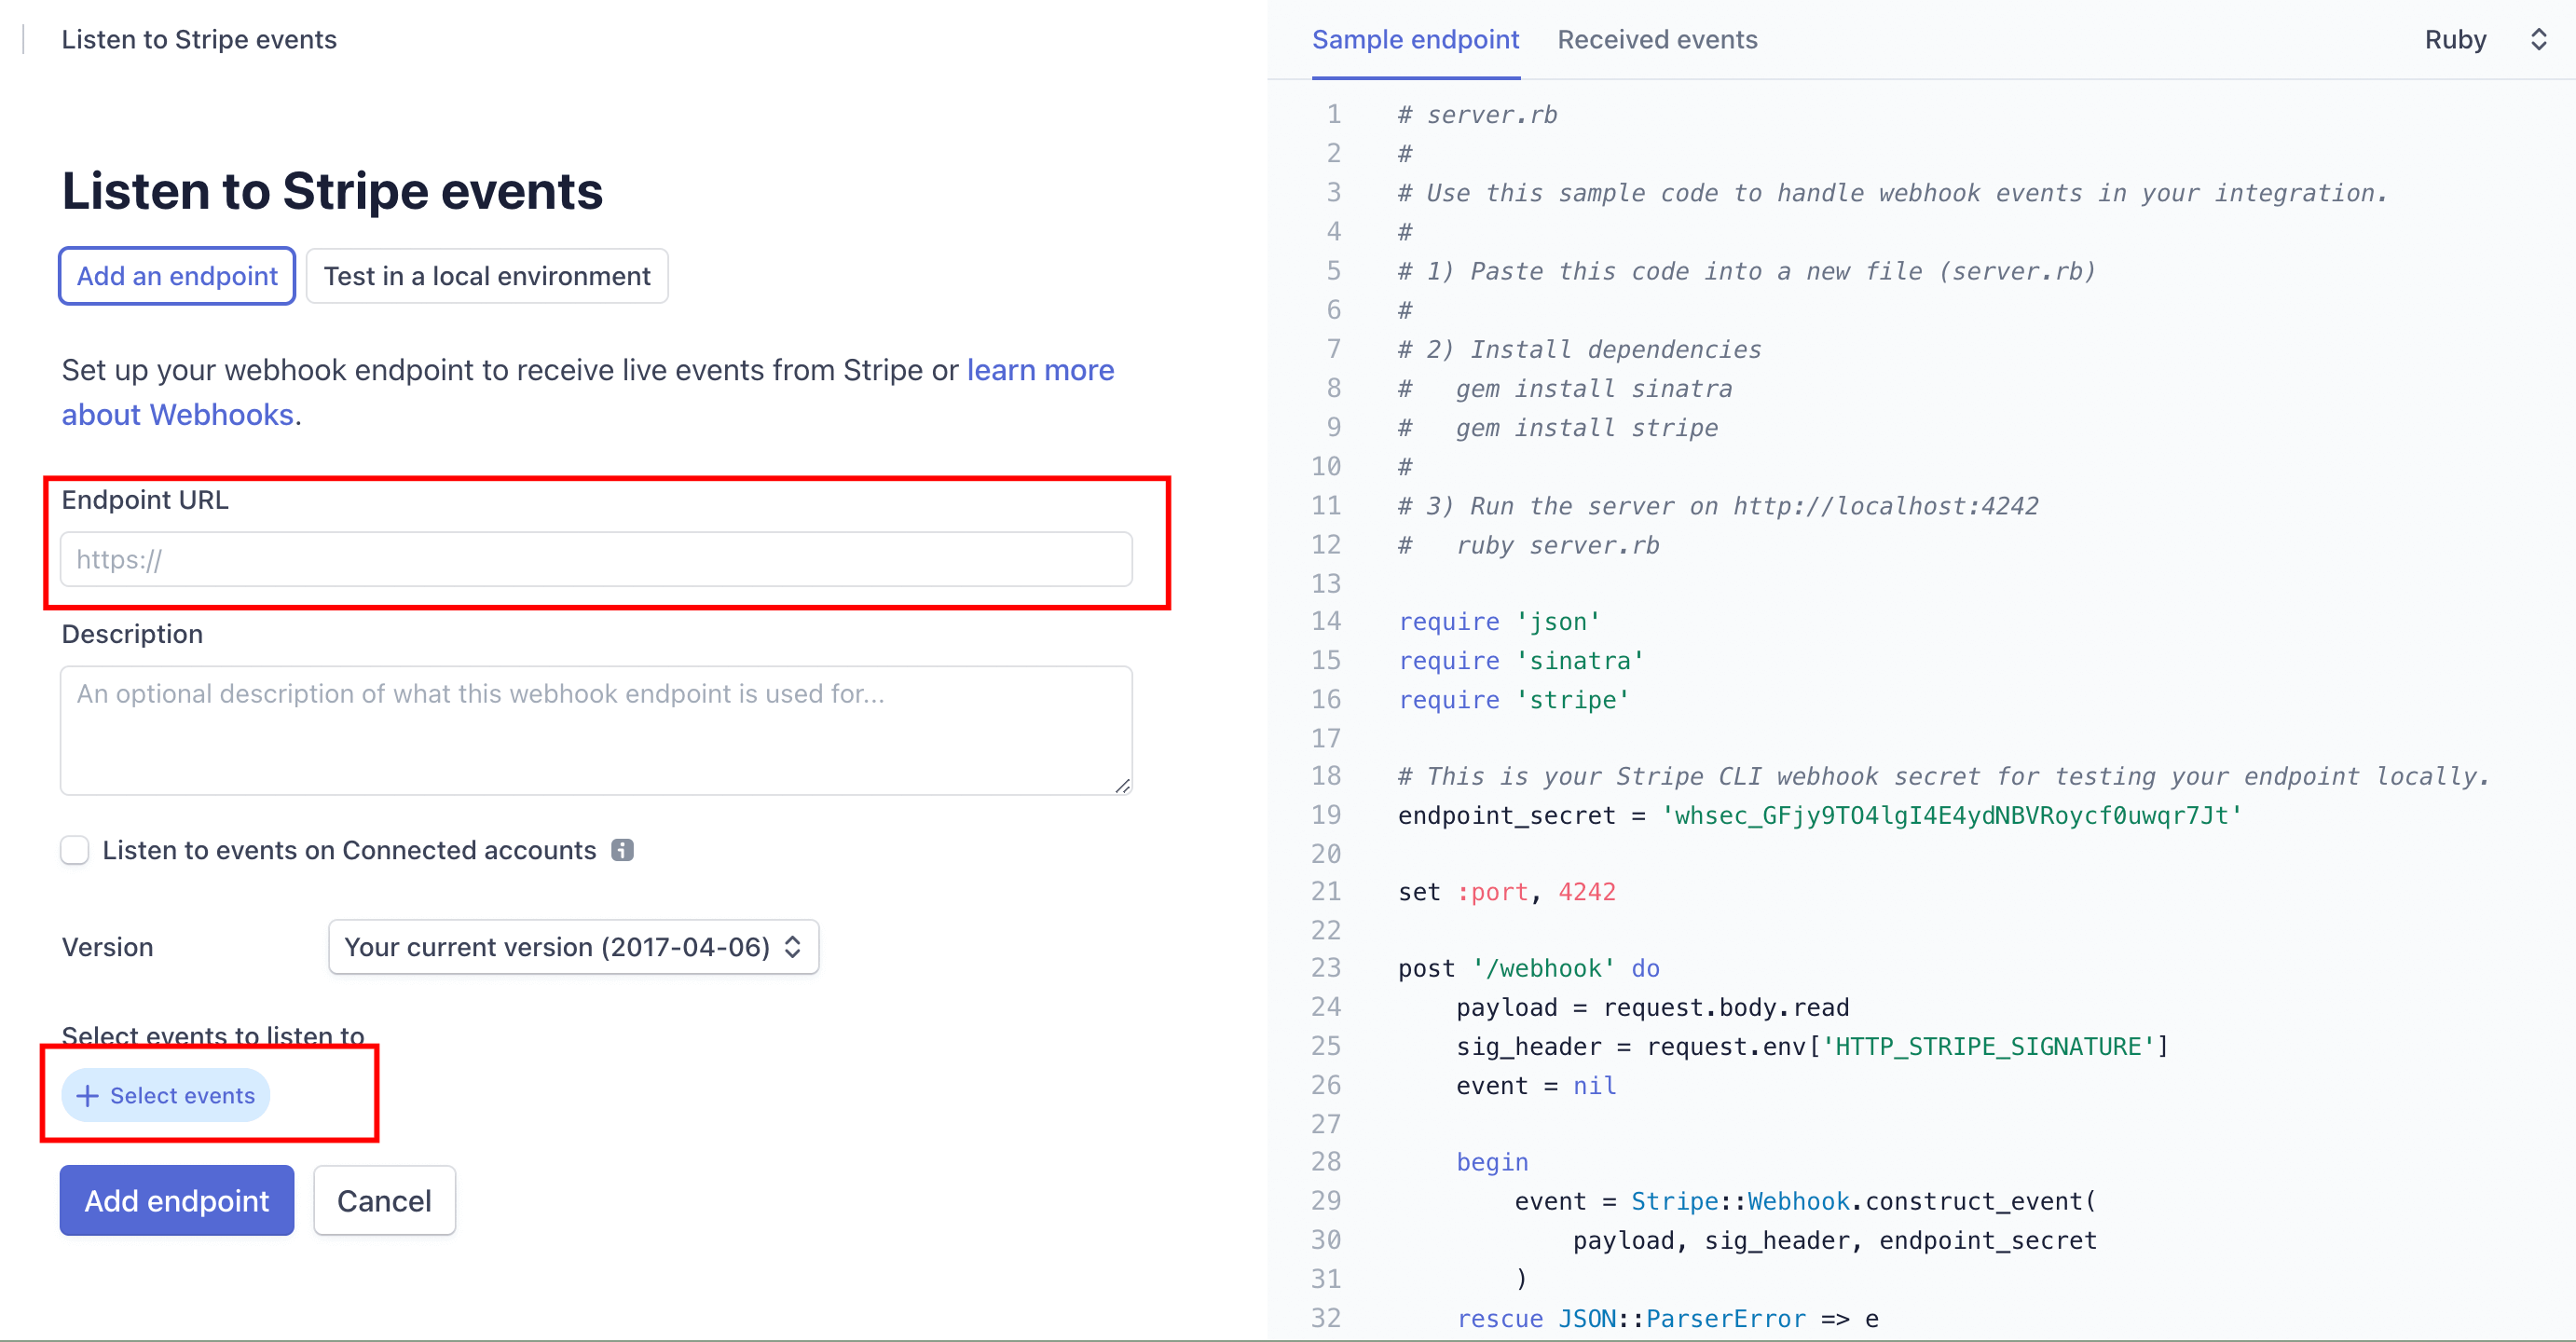
- For these values, you need to go to your Fluent Forms Global Settings → Payment Settings → Stripe.
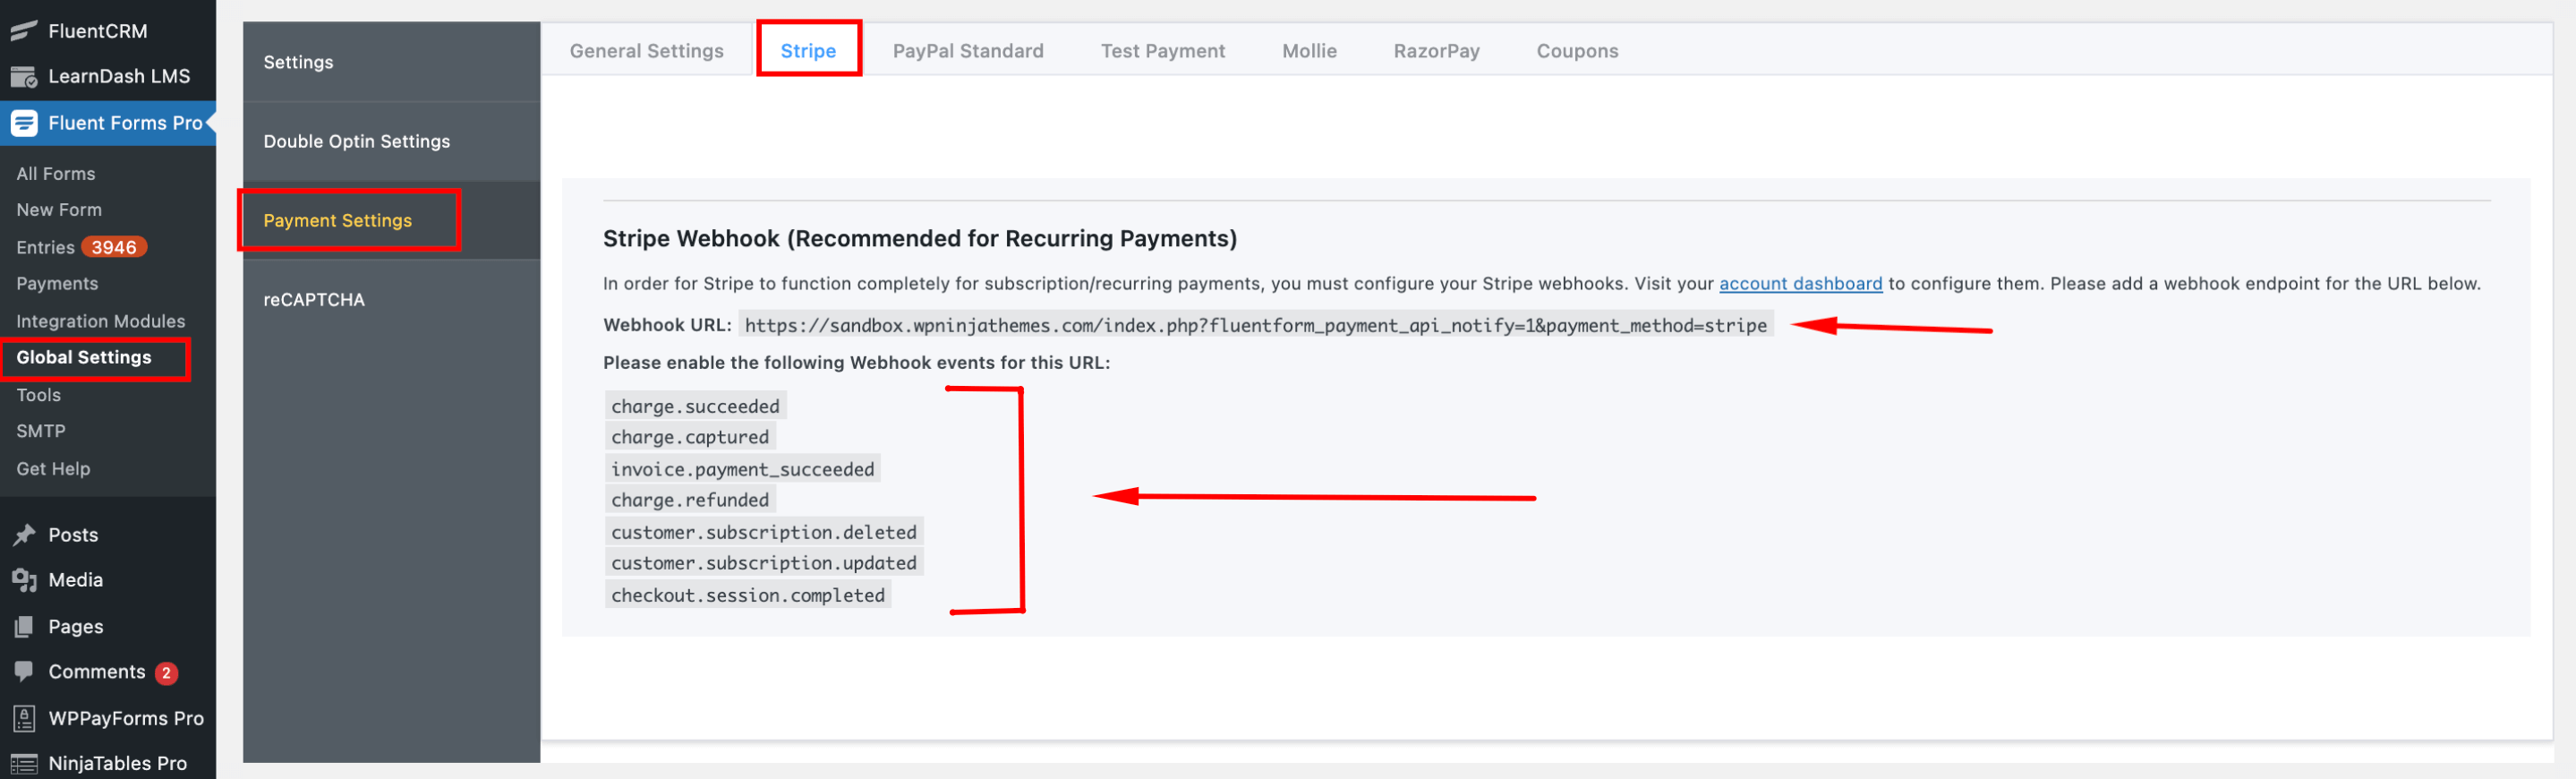
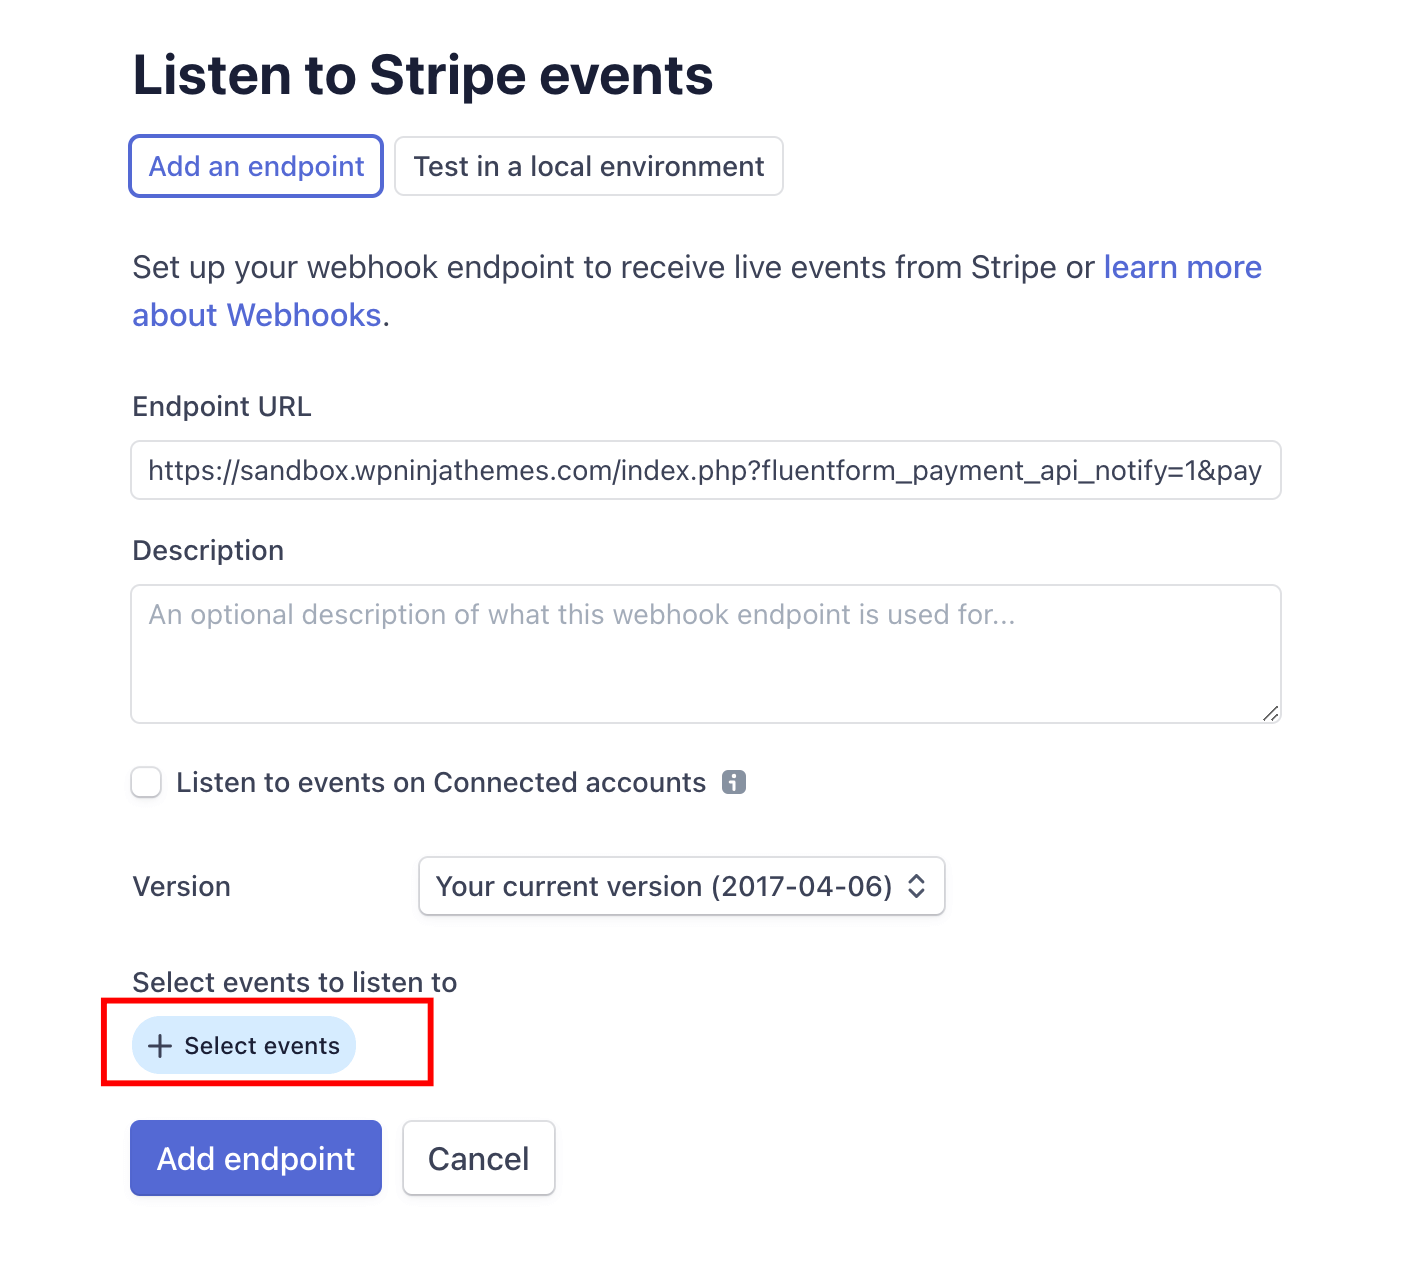
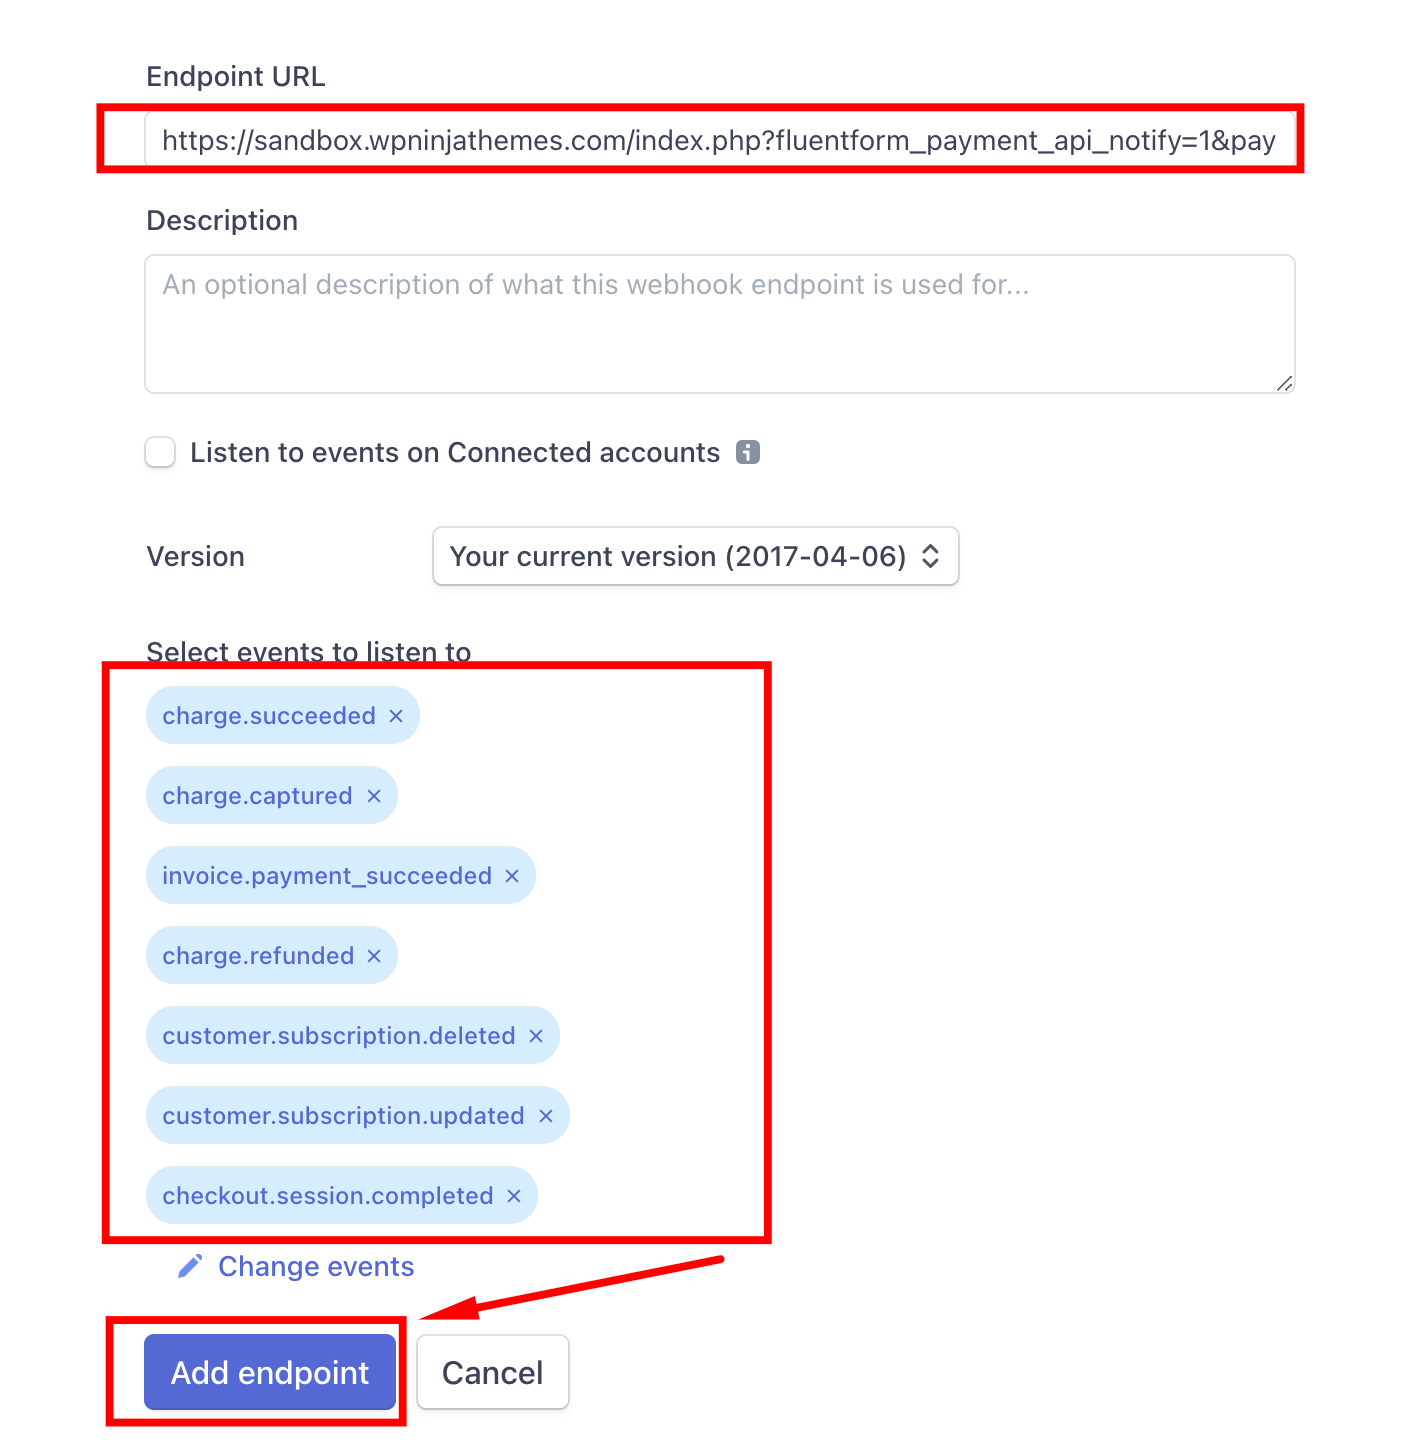
Webhook URL: Copy the webhook URL as shown in the above picture and paste it into the Endpoint URL input field.
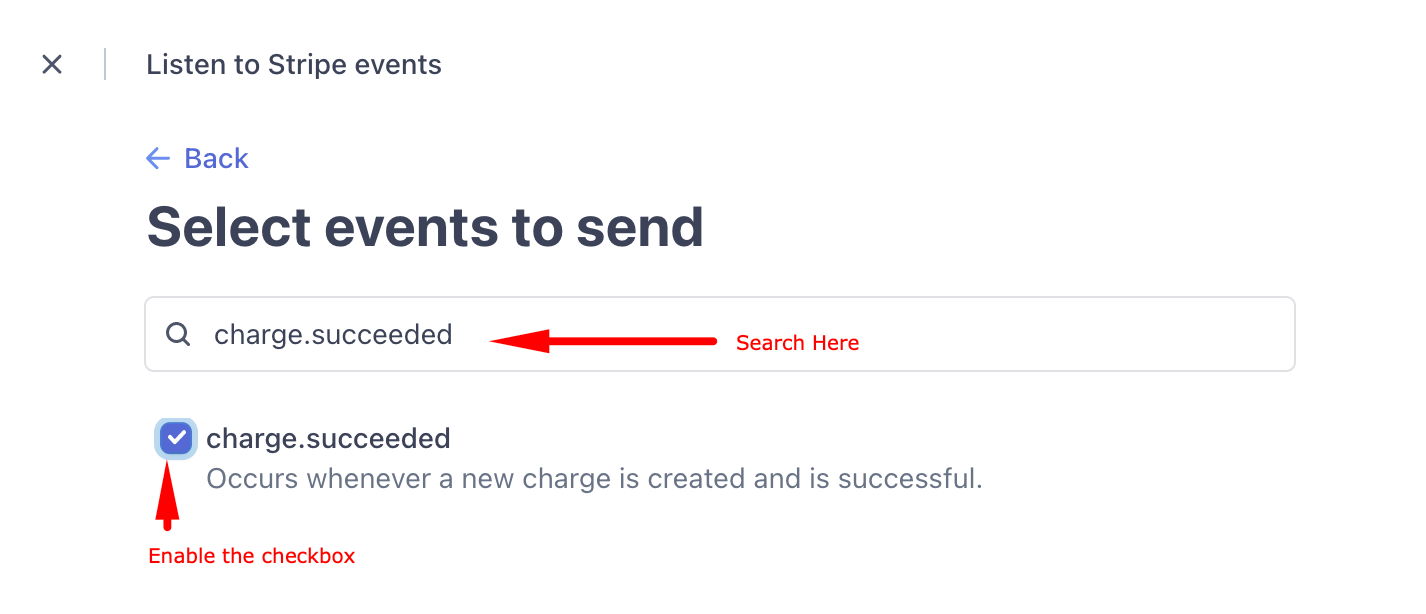
Webhook Events: You must enable certain events by clicking on the Select events option.
You will see a search box; you need to search these events:
charge.succeededcharge.capturedinvoice.payment_succeededcharge.refundedcustomer.subscription.deletedcustomer.subscription.updatedcheckout.session.completed
and enable each one of them like the screenshot below –
- After selecting all of them, click on the Add events button.
- Now you should see all the selected events. Now to finalize the settings, click on the Add endpoint button.
You will see the webhook is enabled.
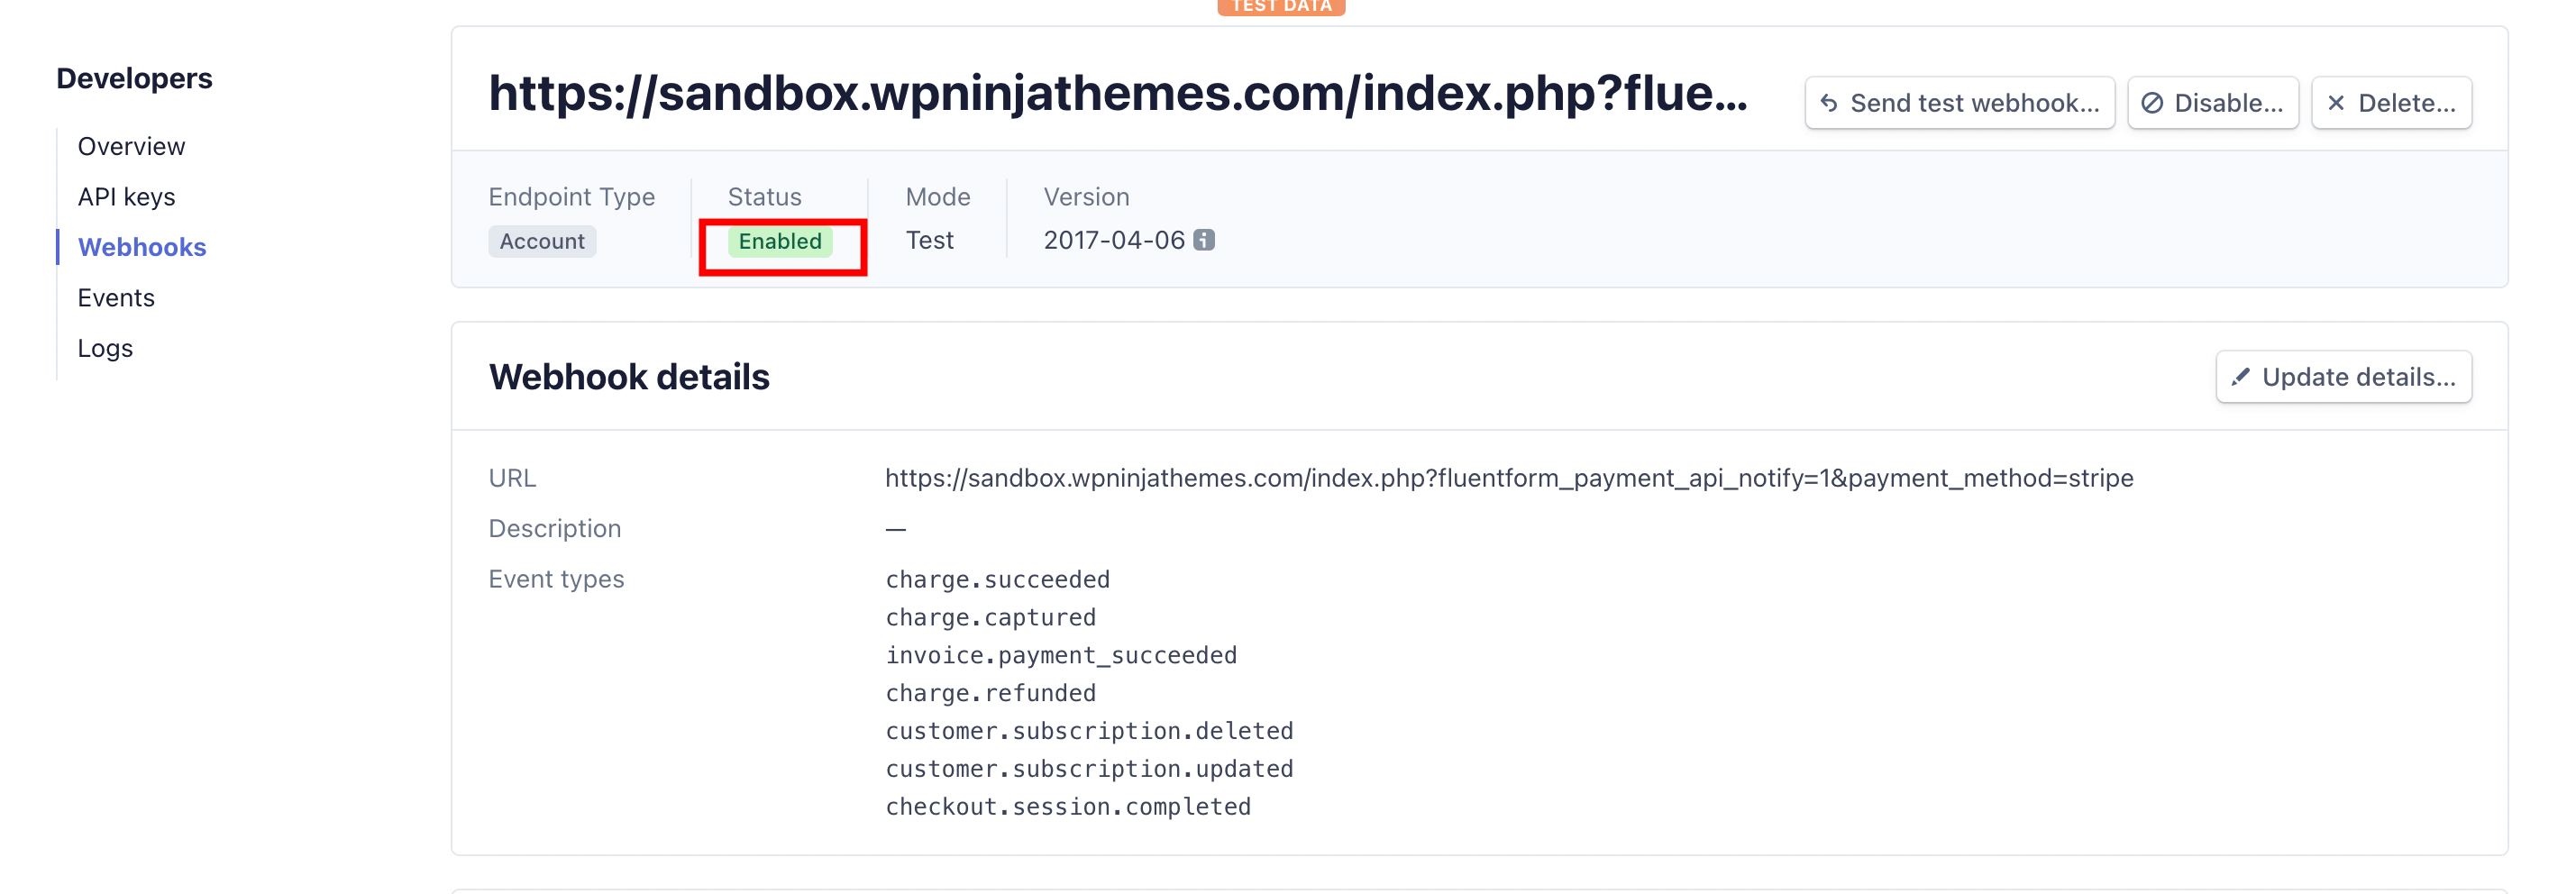
That’s it; now you can seamlessly take subscription payments using stripe.