Stripe is a globally recognized payment gateway that offers Fluent Forms inline payment options and a smooth and secure payment experience using credit and debit cards.
This article will guide you through integrating Stripe into your WordPress Site with the Fluent Forms plugin.
Remember, you can integrate Stripe Payment Methods with the Free Version of Fluent Forms plugin, but a minimum fee of 1.9% per transaction applies. But, premium users of the Fluent Forms Pro plugin do not need to pay any extra fees for using Stripe on your site
Enable Stripe Payment Method
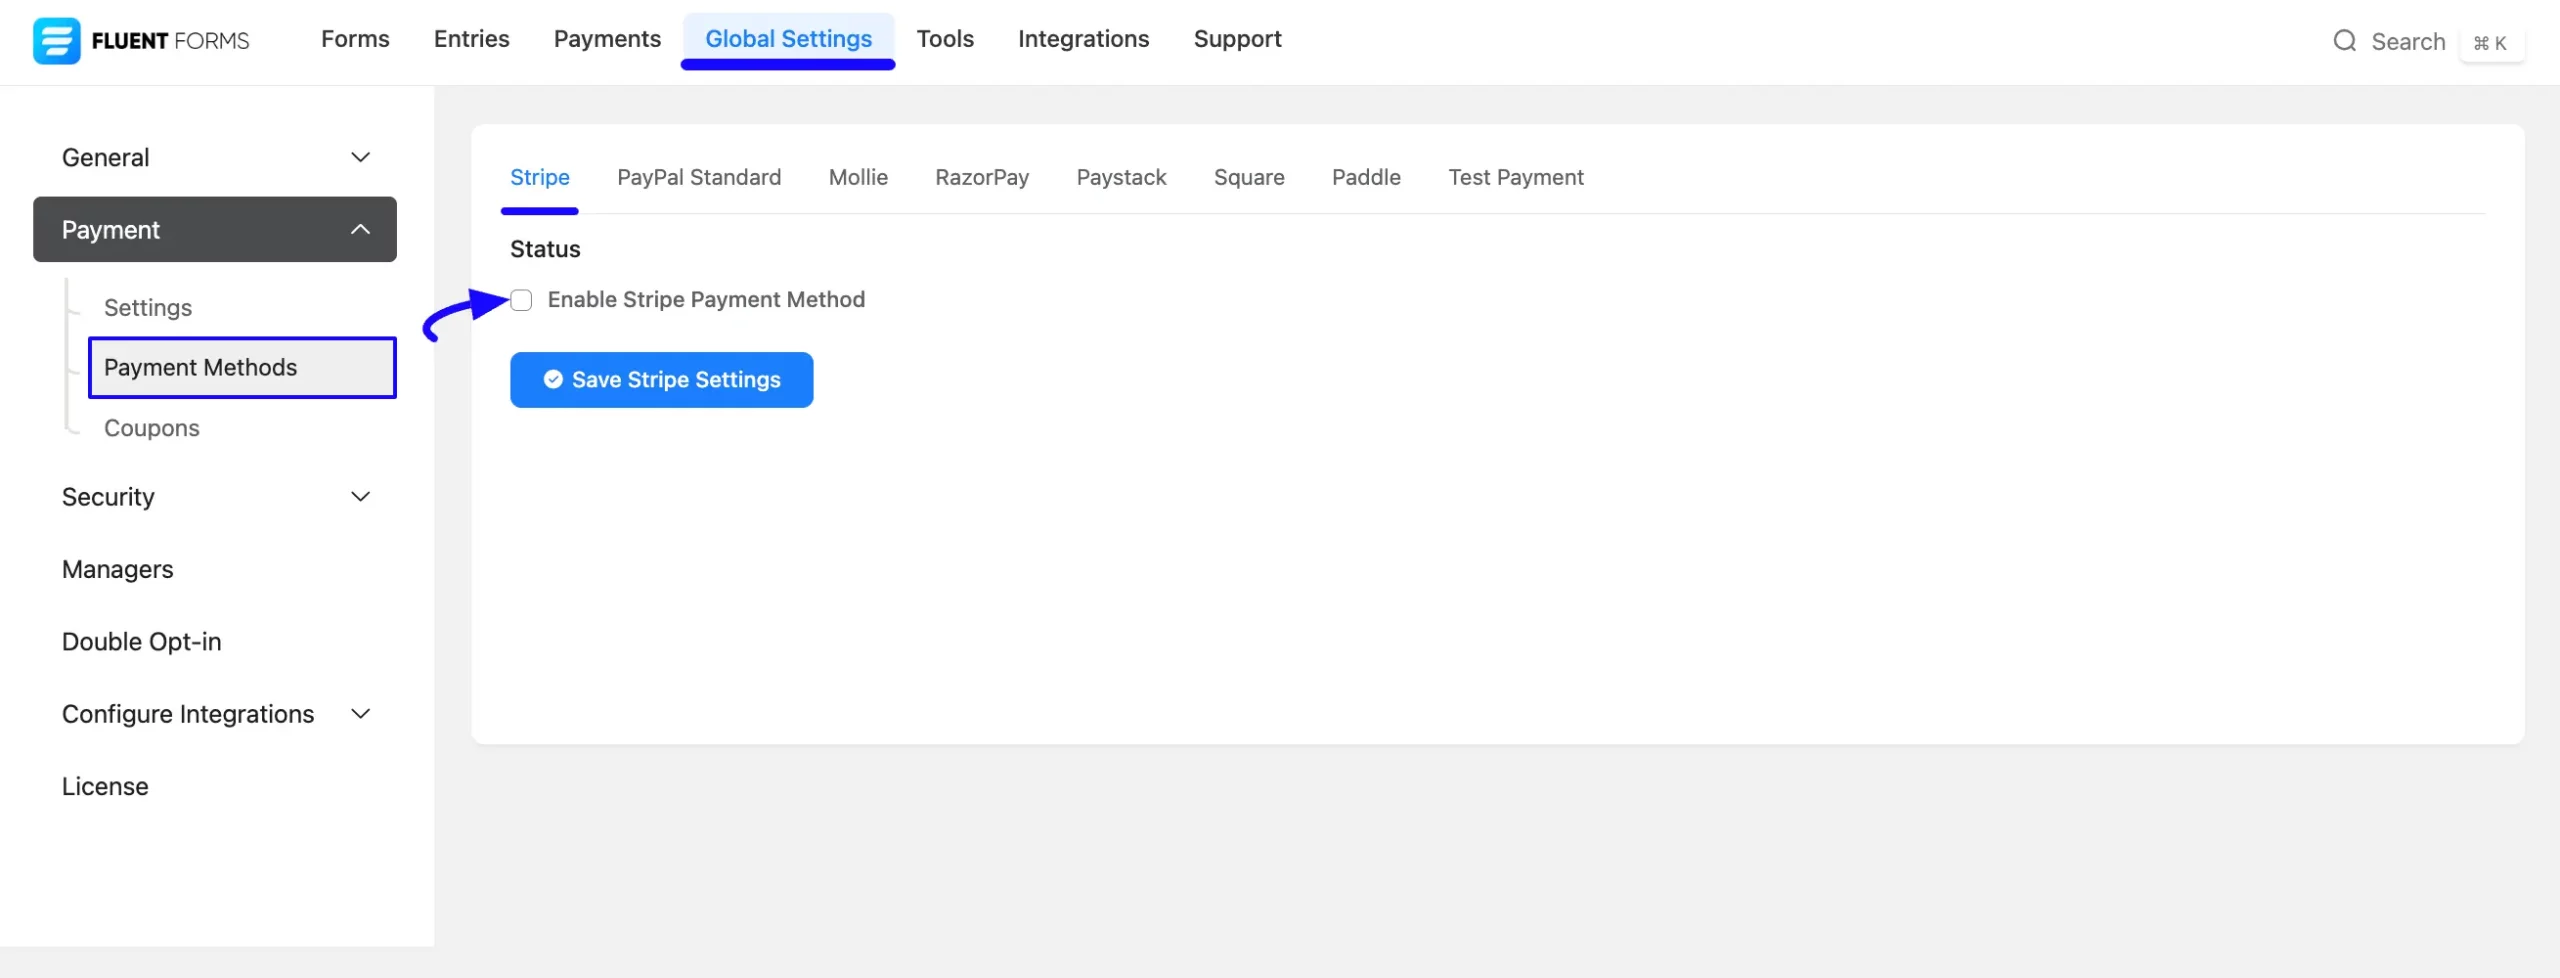
First, go to Global Settings from the Fluent Forms Navbar, open the Payment tab from the left sidebar, and click the Payment Methods option.
Now, go to Stripe in the top navbar and click Enable Stripe Payment Method. The Stripe Payment Method will be enabled globally for all forms.
Configure Stripe with Fluent Forms
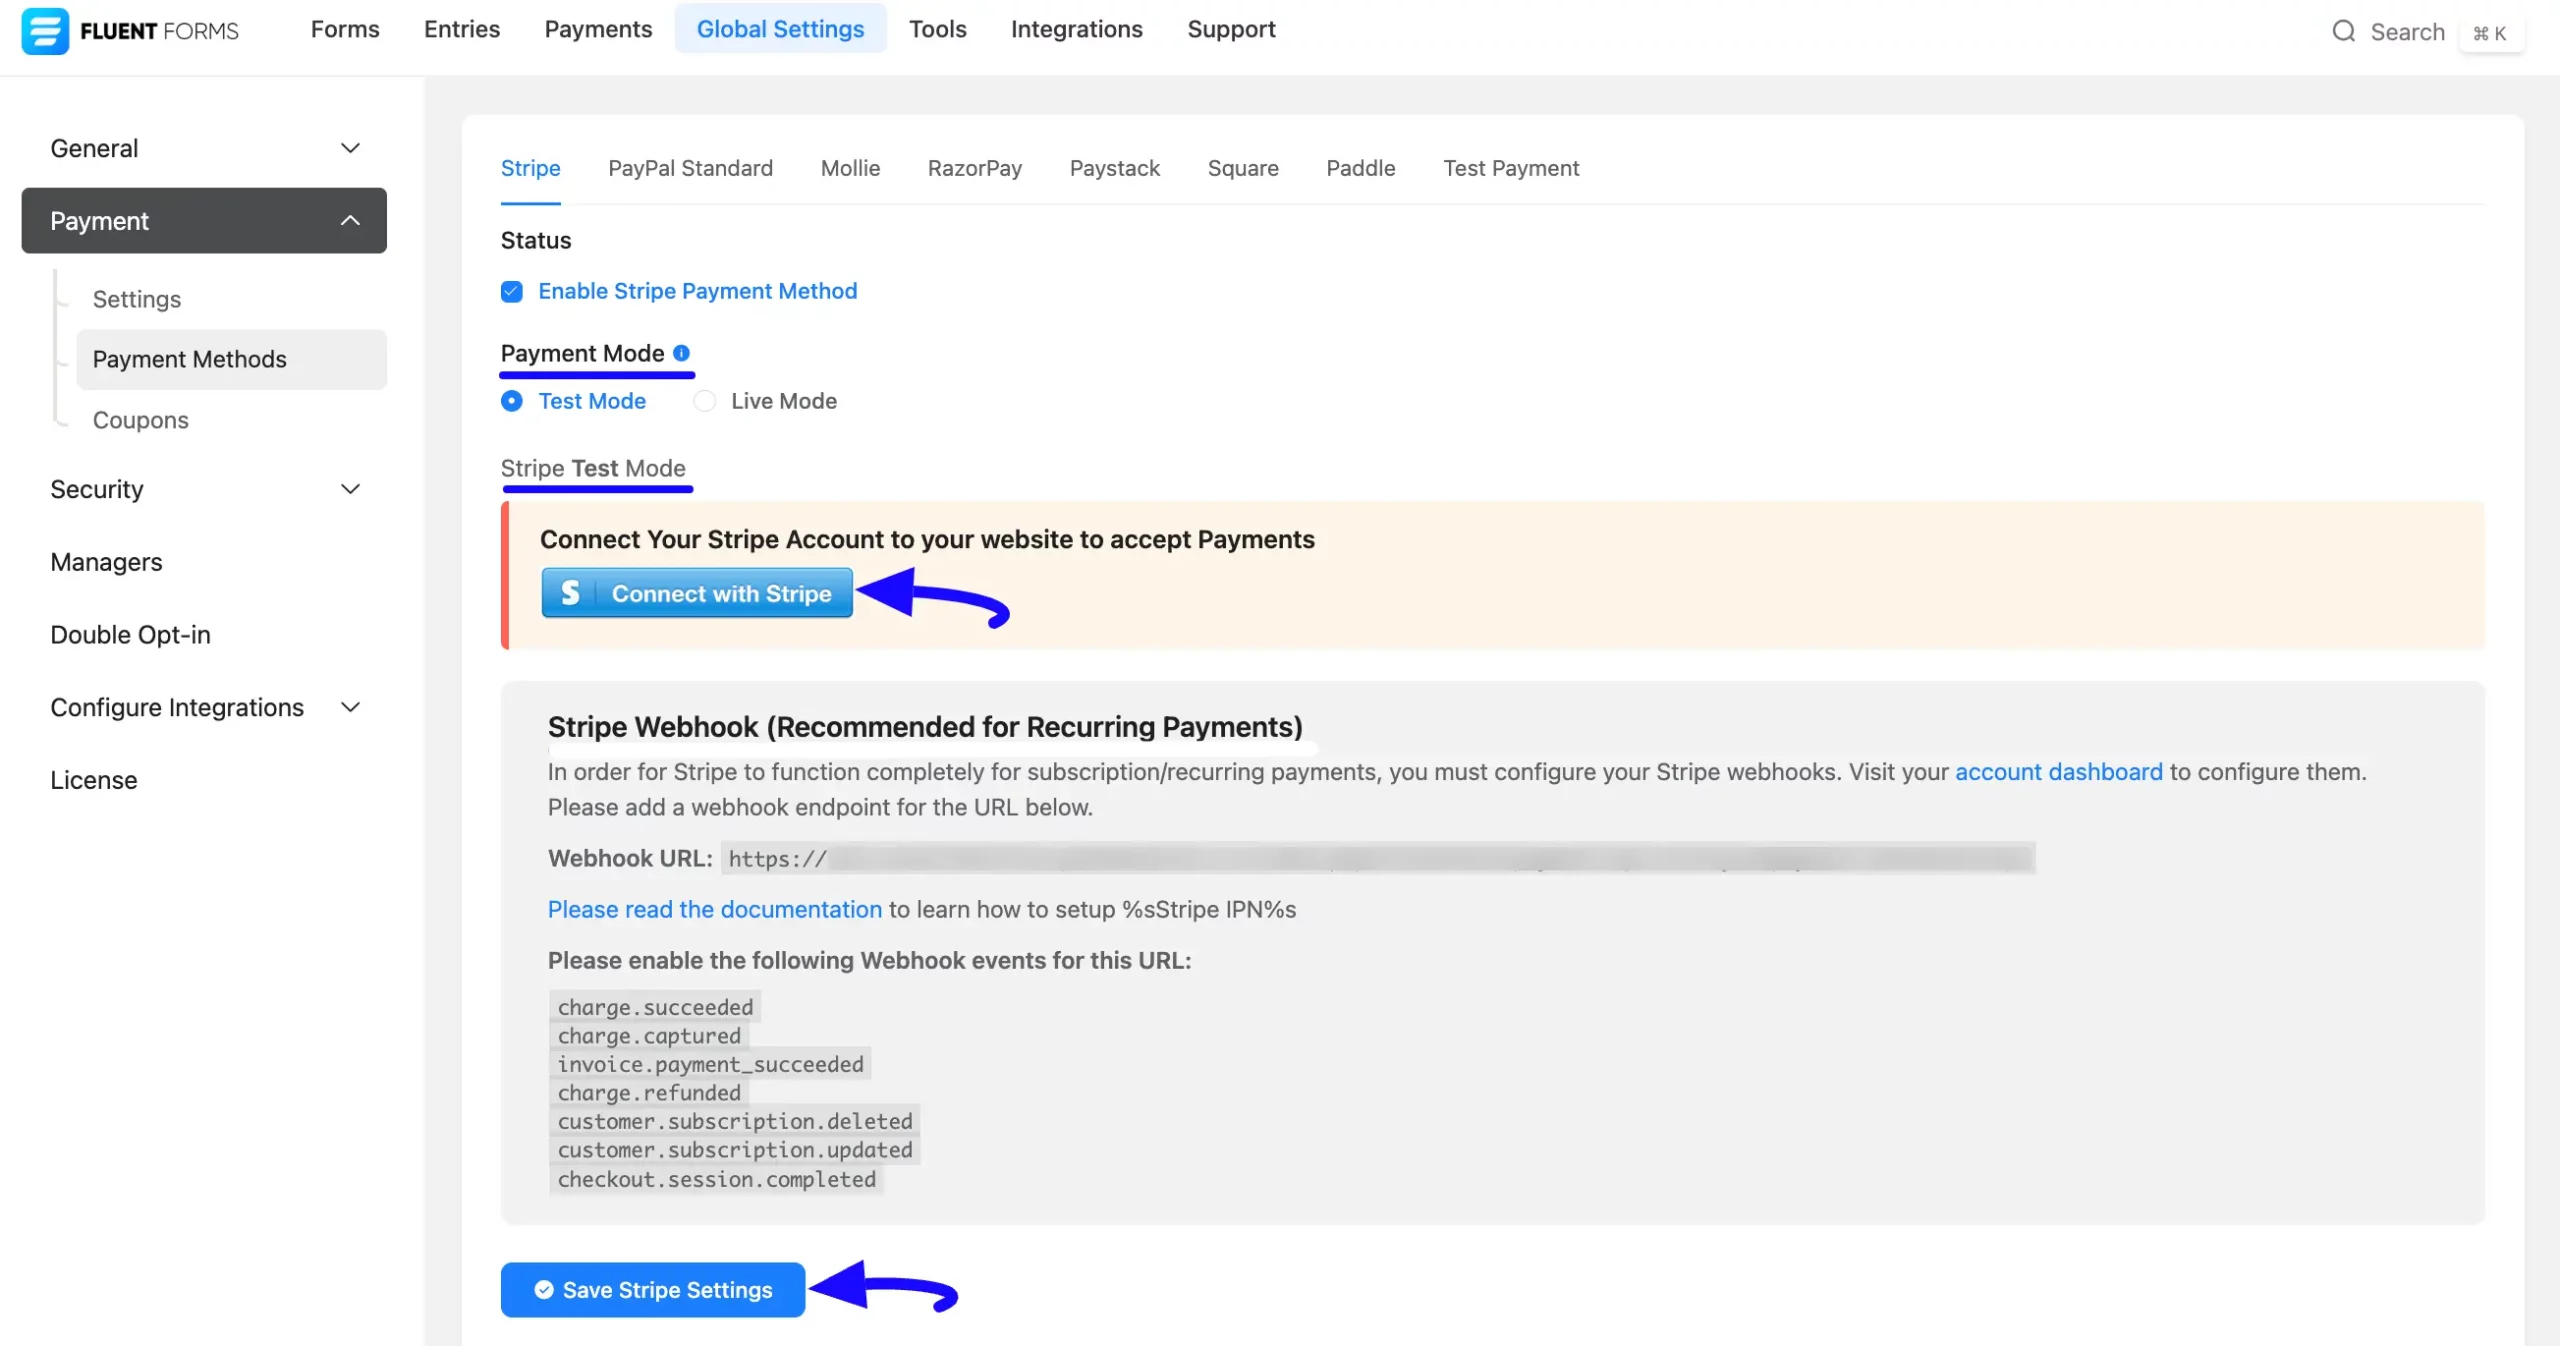
Once you enable the Stripe, all the required settings will appear to configure the Stripe with Fluent Forms.
Before starting the configuration, select any Payment Mode between Test (for test payments) and Live (for real payments) as both options follow the same process, e.g., I choose the Test Mode.
Then, click the Connect with Stripe button to redirect you to the Stripe Login Page to connect your Stripe Account.
Do not forget to press the Save Stripe Settings button to save all your changes.
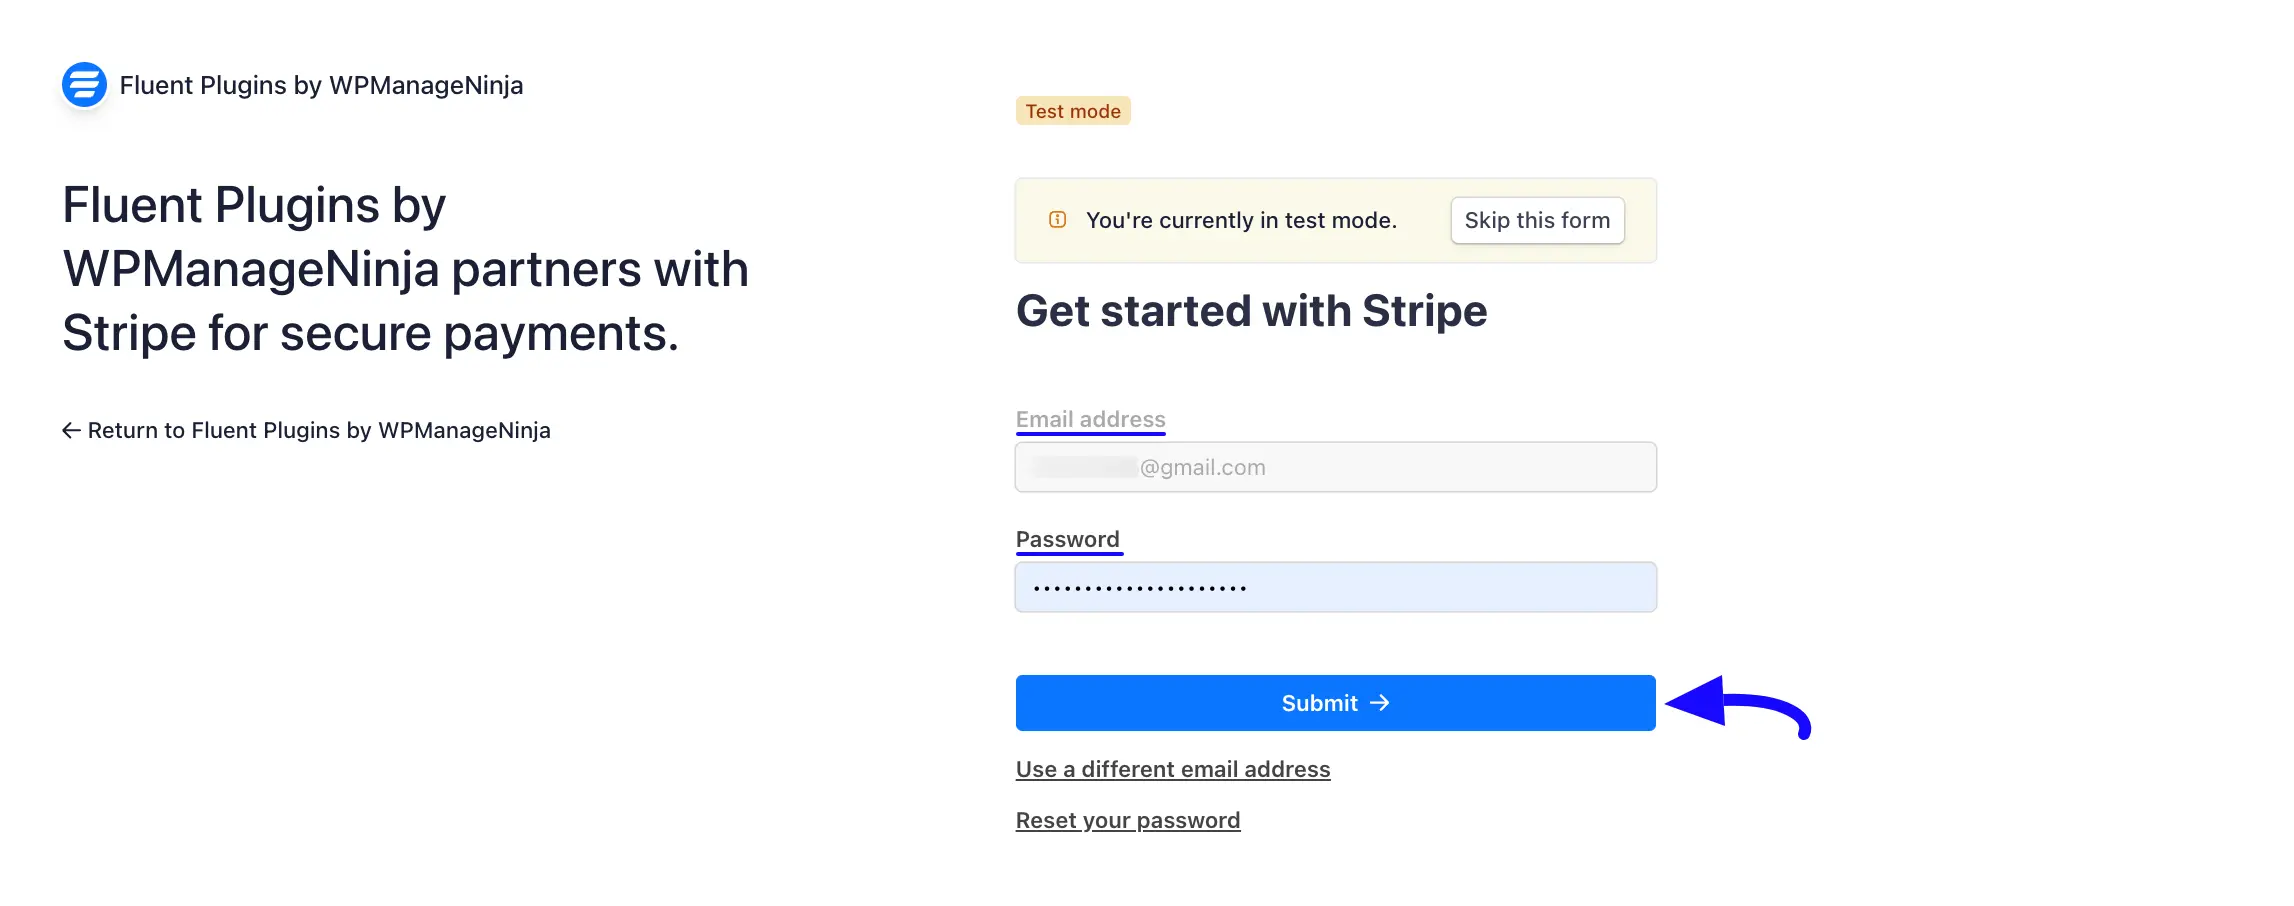
Here, provide the login credentials of your desired Stripe Account that you want to connect with Fluent Forms, click the Submit button, and your Stripe will be configured.
If you do not have an existing Stripe Account, click here to open a new account.
Remember, Fluent Forms offers the above-mentioned Connect with Stripe option by default for secure and easy integration with Stripe. Also, Fluent Forms recommends using this option for all Stripe Verified Partners.
But, if you prefer the traditional API Key method for the integration, you can Disable this Connect with Stripe option by adding the following code snippet to your theme’s functions.php file or a code snippet plugin.
We recommend you use the Fluent Snippet Plugin to add any snippet code to your WordPress Site.
add_filter('fluentform/disable_stripe_connect', '__return_true');Configure Webhook to Setup Stripe IPN
After configuring Stripe, you can set up IPN (Instant Payment Notification) Settings to enable notifications for subscription or recurring payments in Stripe.
IPN (Instant Payment Notification) is a post-message notification sent by Stripe after a successful subscription or recurring payment. For Stripe to function completely for subscription/recurring payments, you must configure your Stripe webhooks.
To learn how to configure Stripe Webhooks, follow the steps with screenshots below –
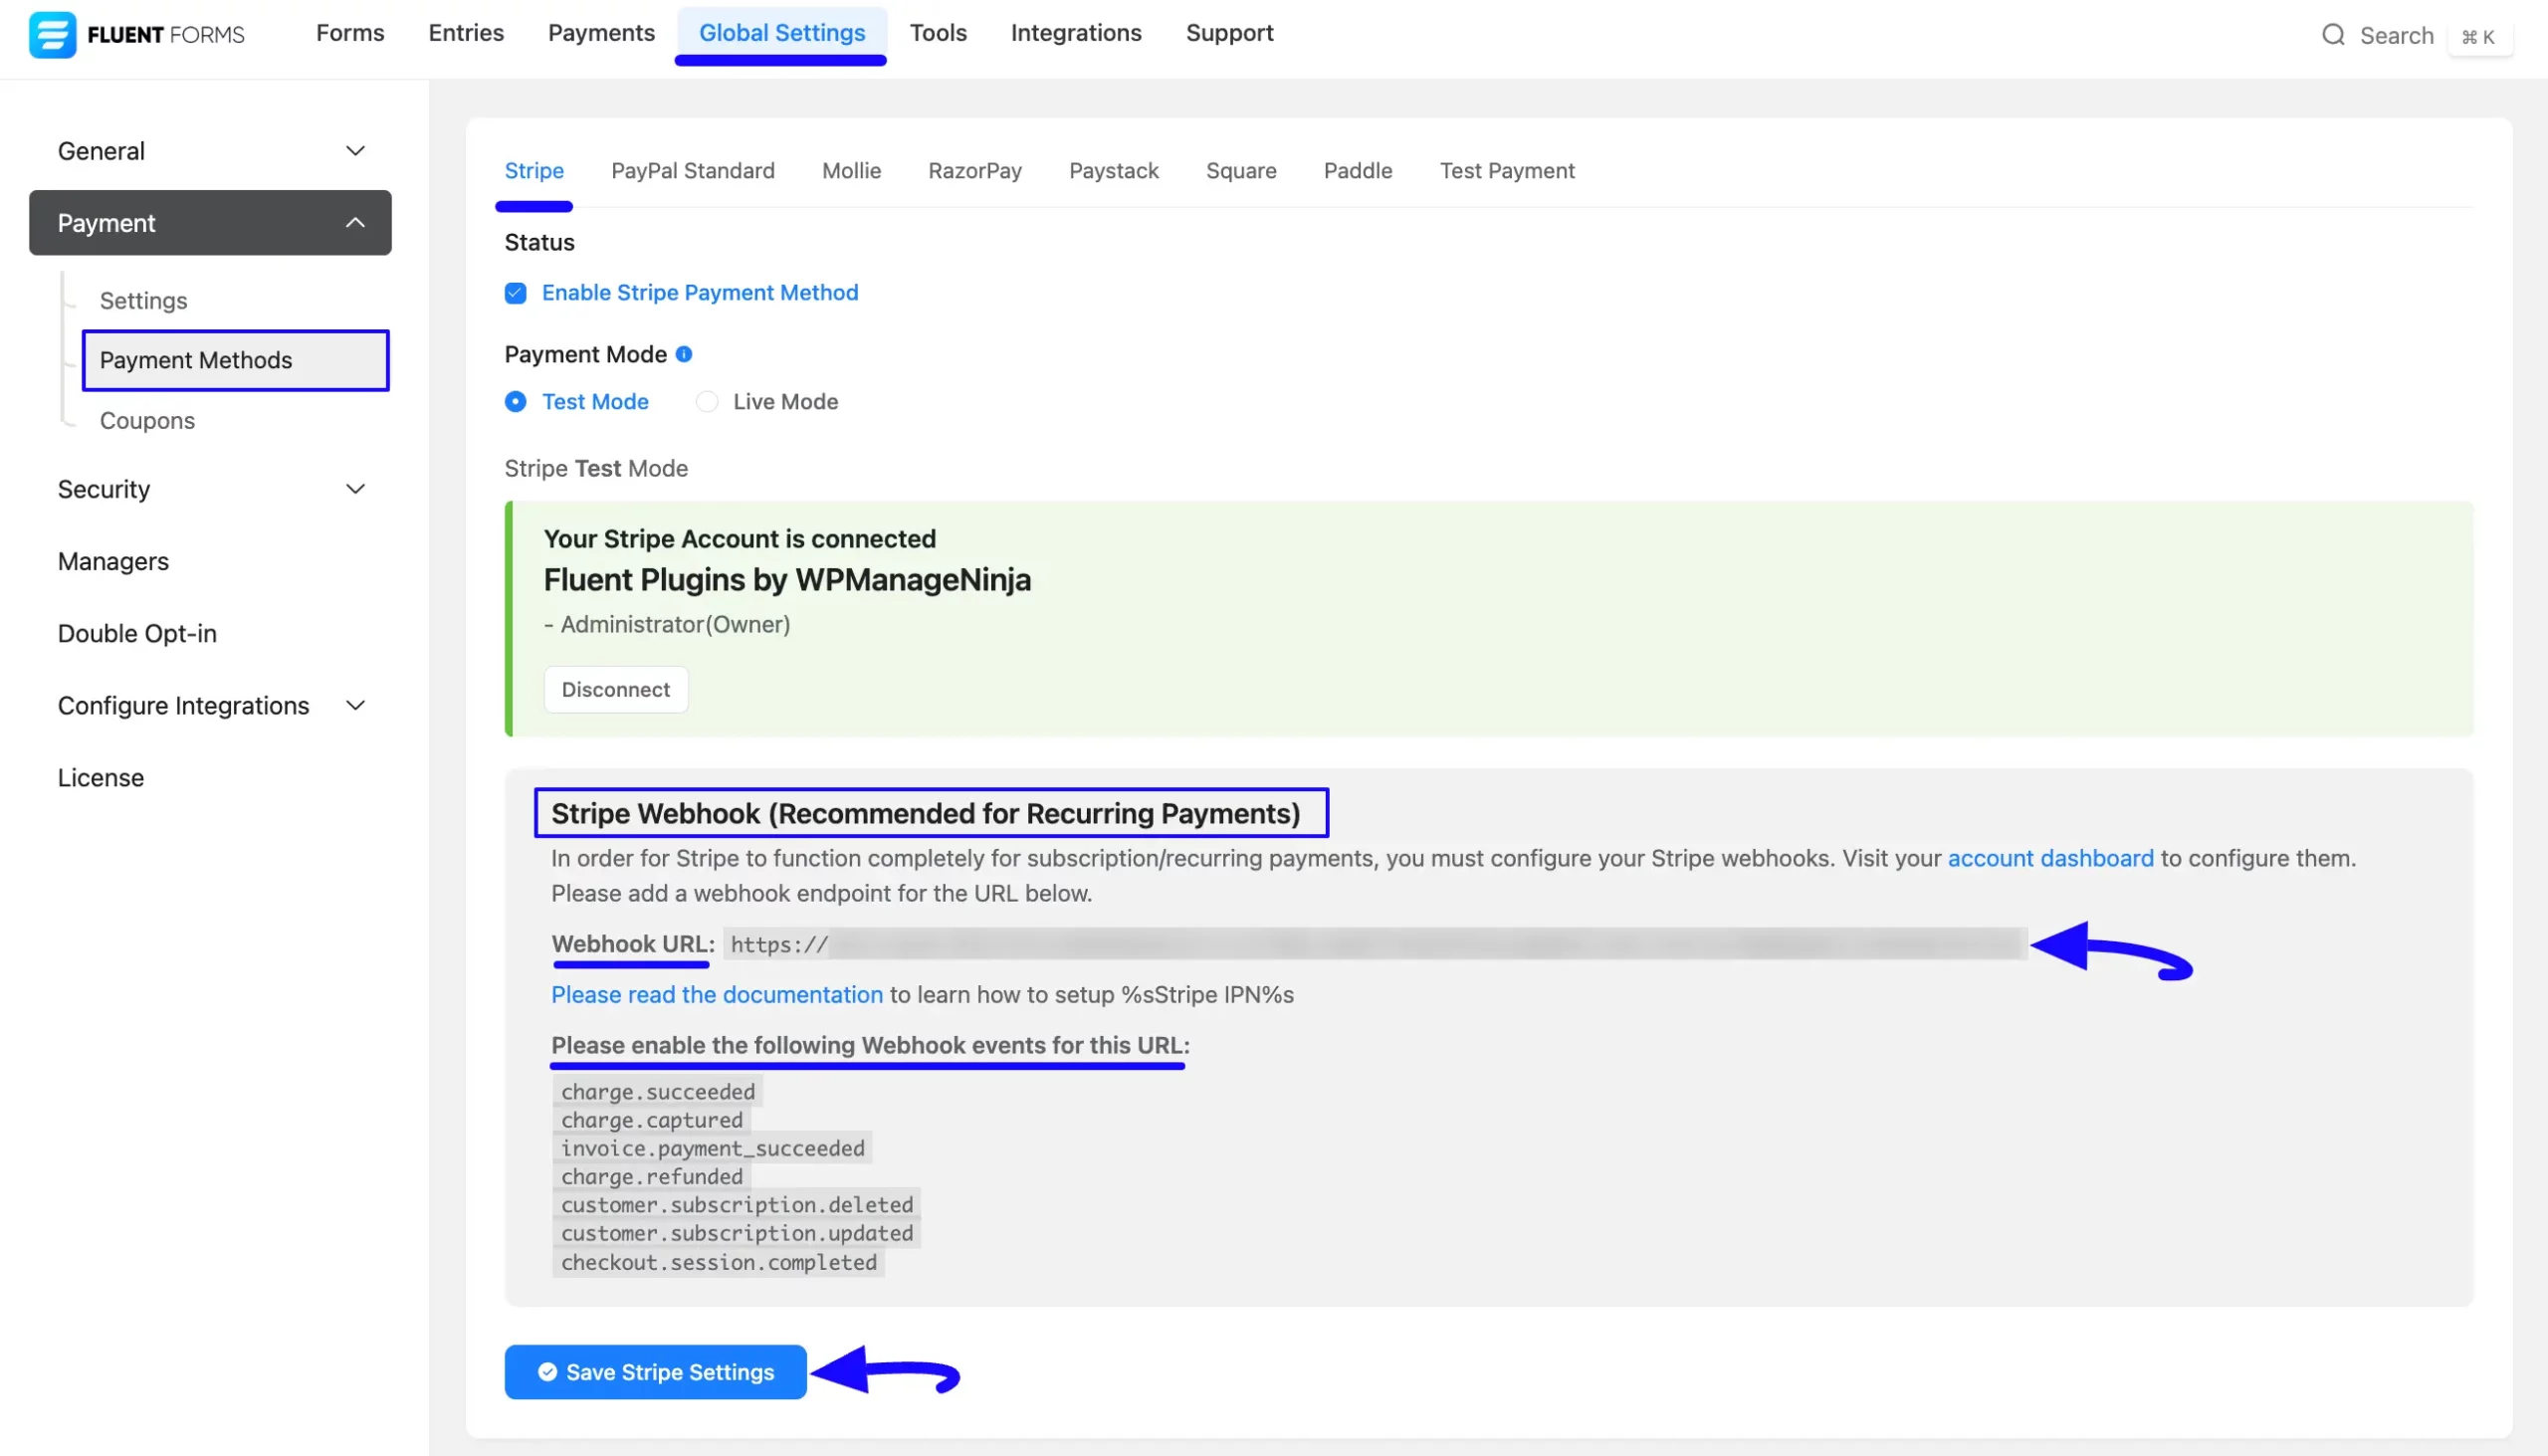
First, go to Global Settings from the Fluent Forms Navbar, open the Payment tab from the left sidebar, and click the Payment Methods option.
Now, go to Stripe, and scroll down to the Stripe Webhook (Recommended for Recurring Payments) option.
Then, copy the Webhook URL and the recommended Webhook Events for smooth transactions based on Stripe Data related to Subscription/Recurring payments.
Do not forget to press the Save Stripe Settings button to save all your changes.
Now, visit your Stripe Account Dashboard, click the Developers from the bottom-left corner, and press the Webhooks.
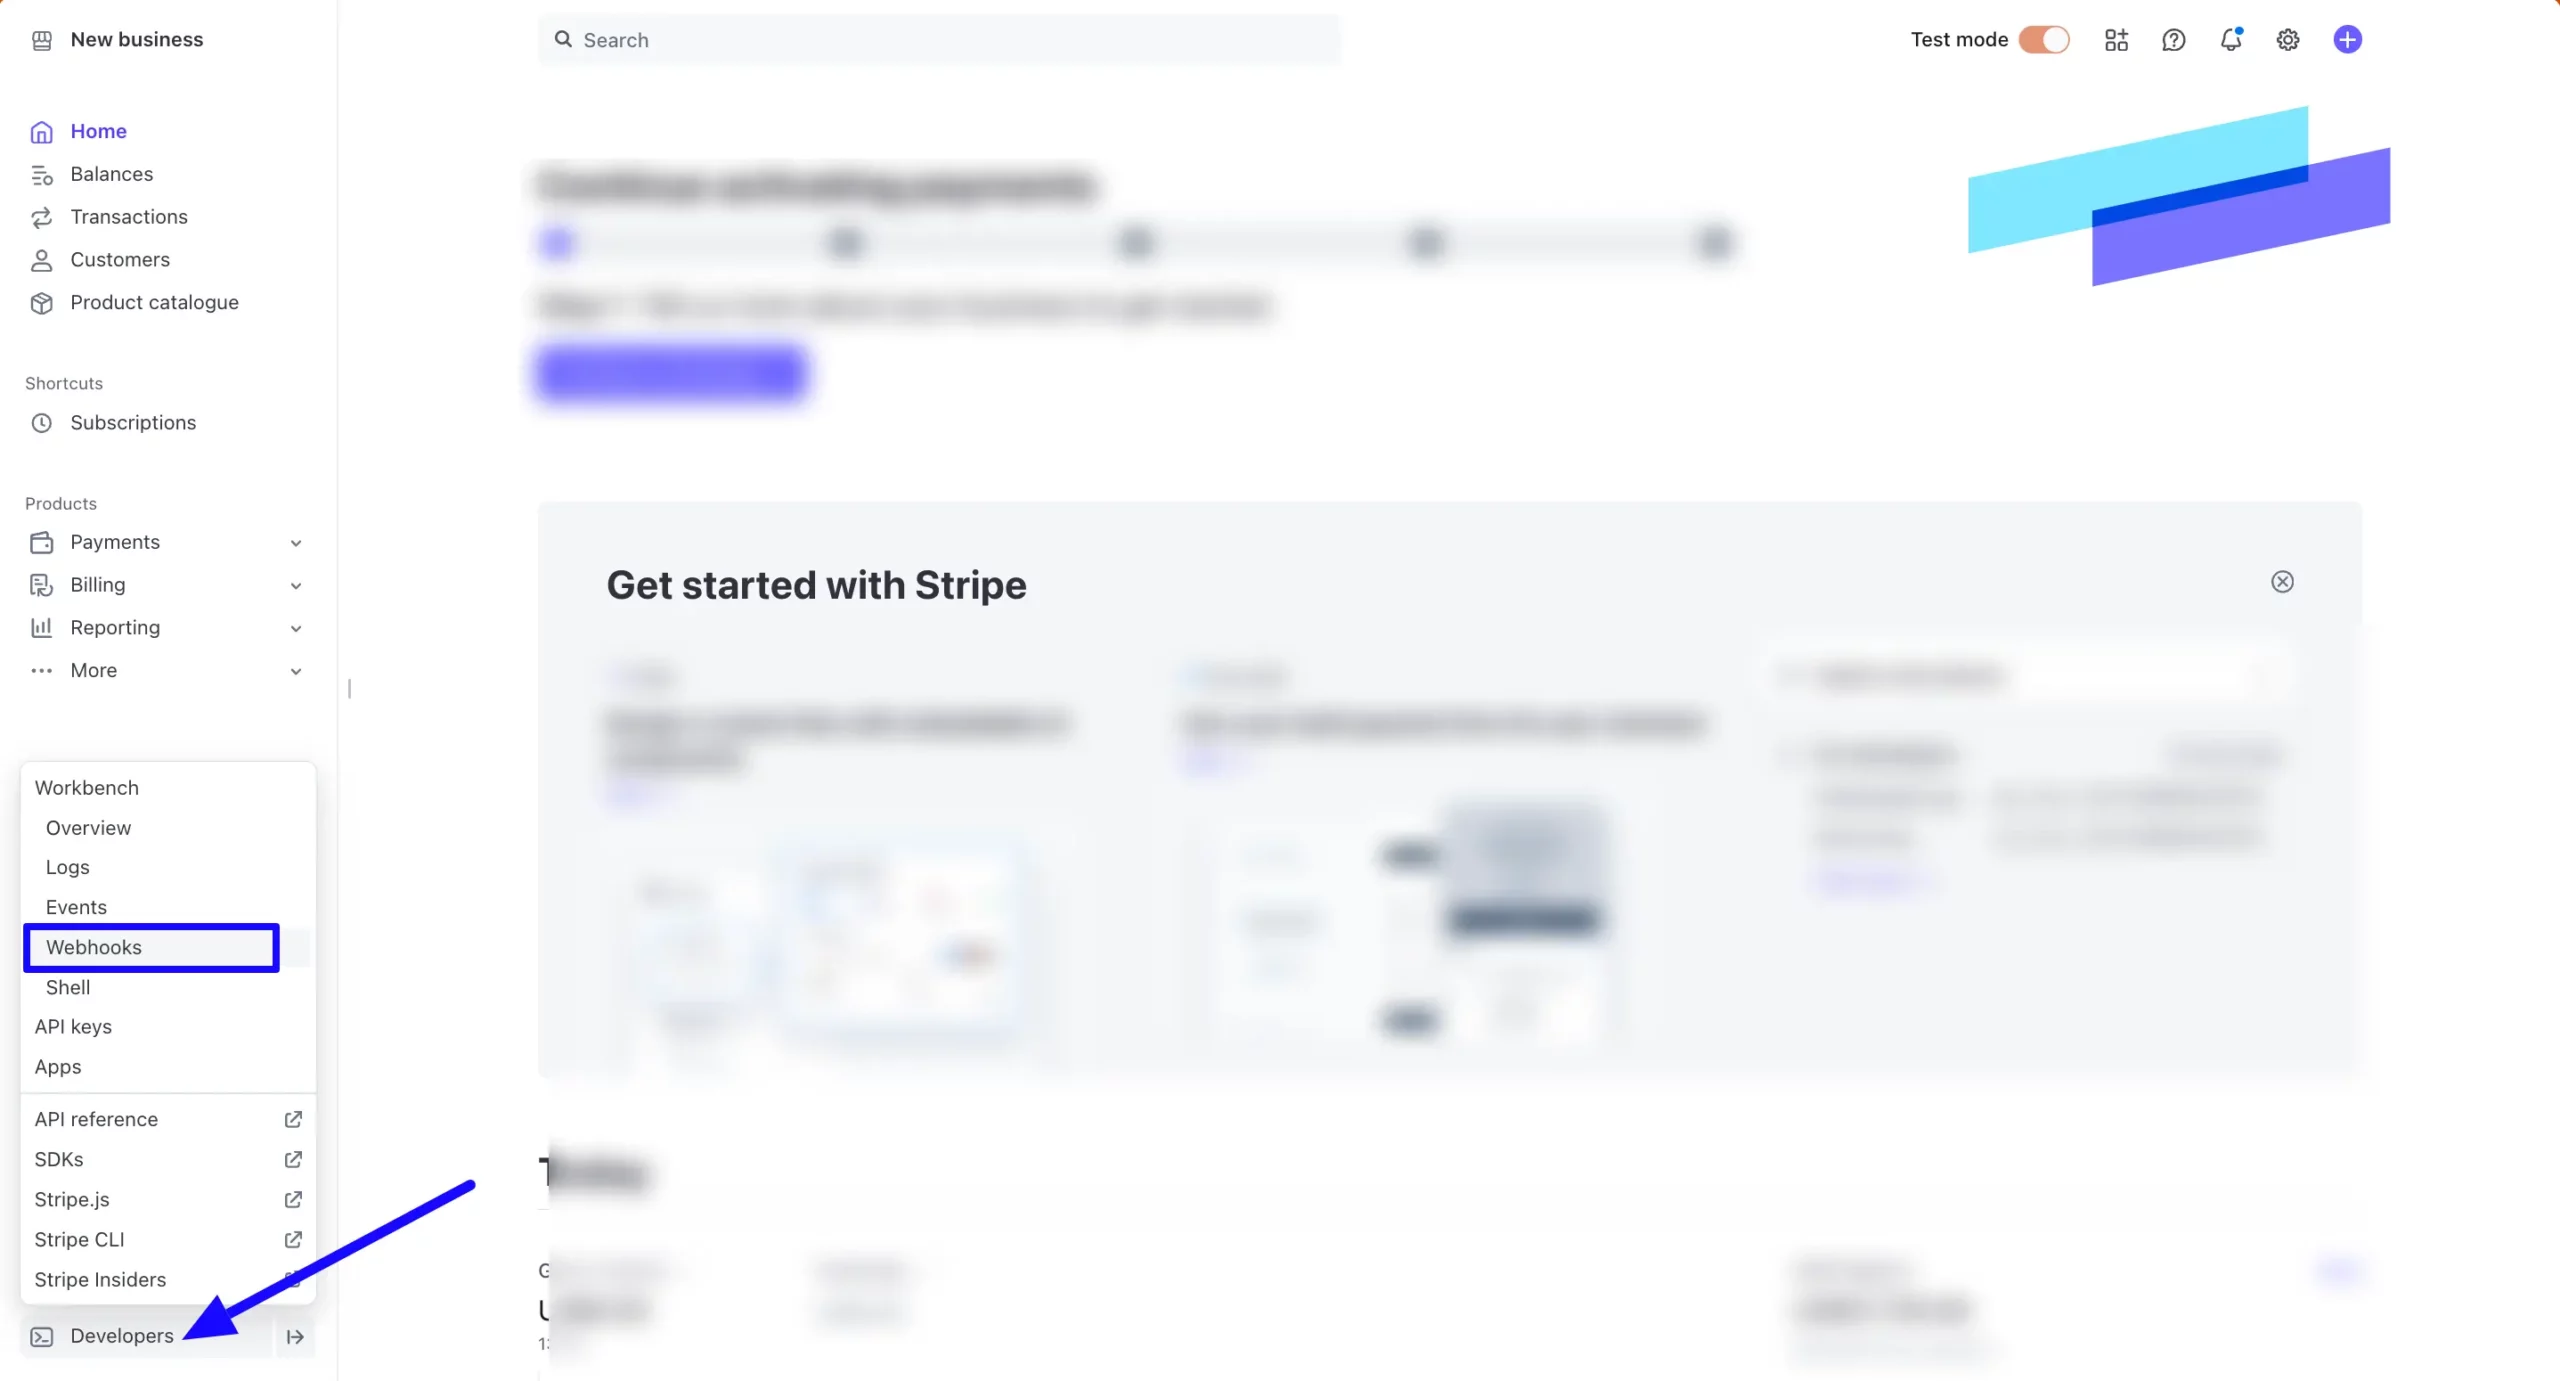
Click the + Add destination button.

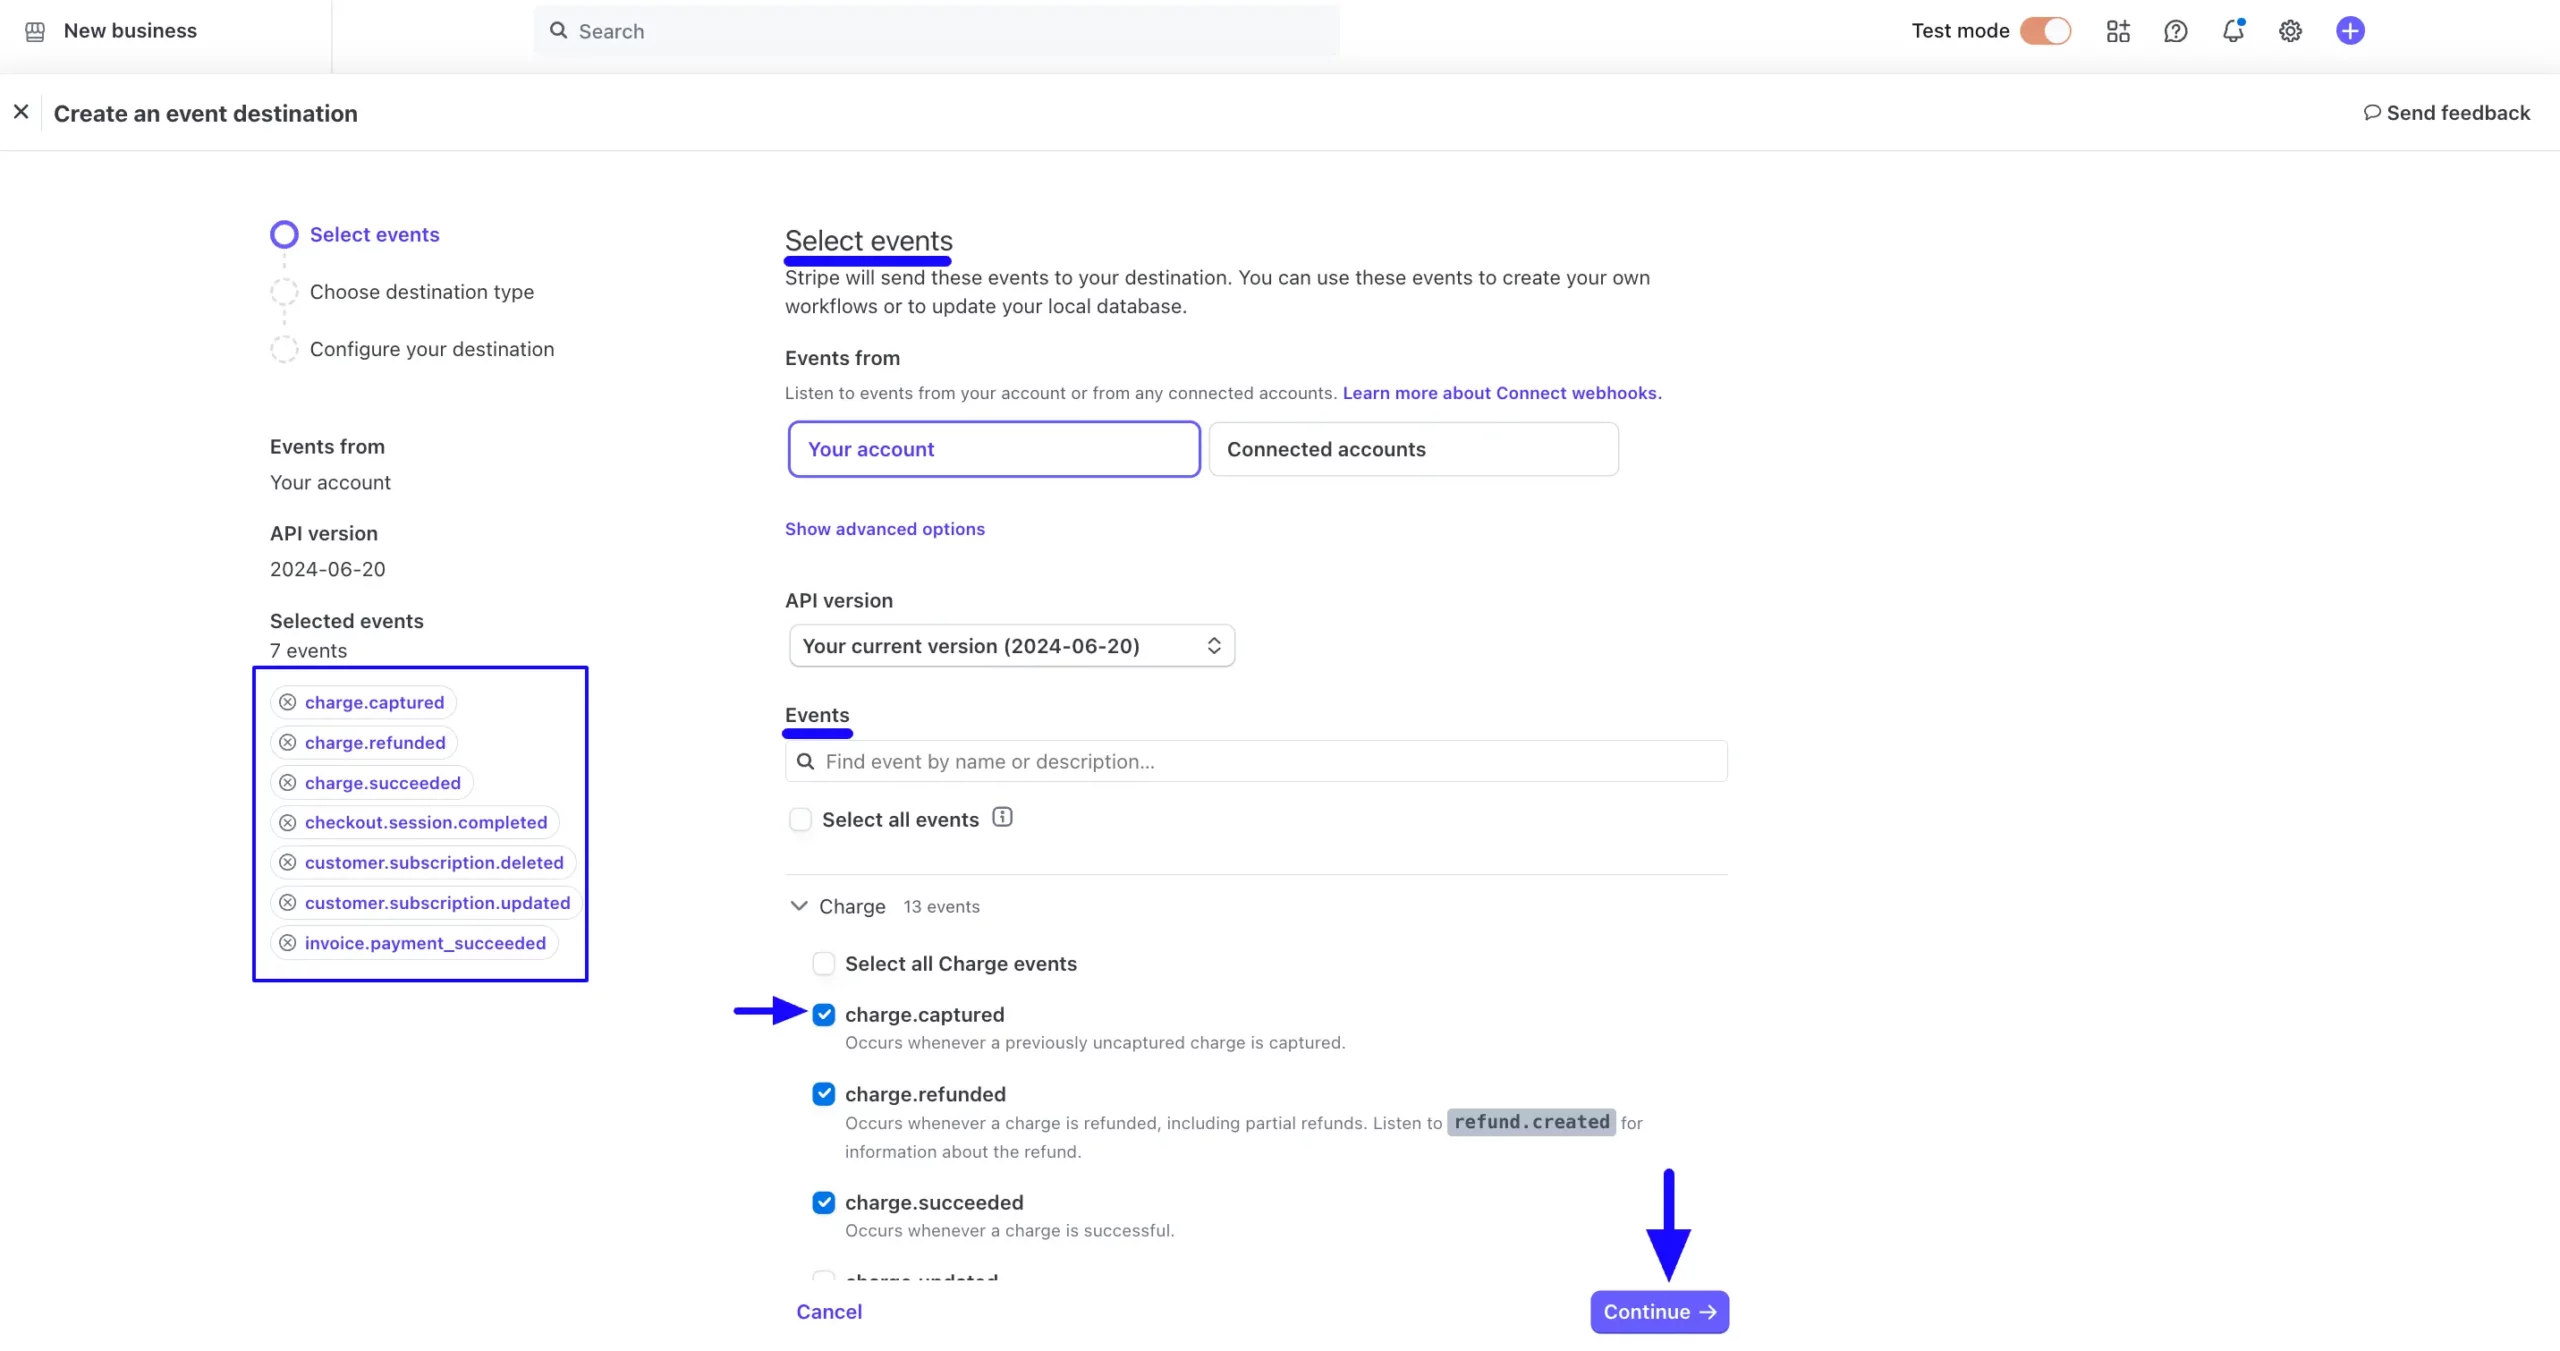
Now, choose the events recommended by the Fluent Forms for Stripe to send to your endpoint.
You can find your desired events by entering their Name or Description into the Events fields and can select events by clicking the checkbox.
The Events recommended by Fluent Forms are briefly explained below:
- charge.succeeded: This triggers when a charge is successfully processed, basically this event occurs when a payment is completed on Stripe.
- charge.captured: This triggers when a previously authorized charge is successfully captured. You must use this for Hold payments.
- invoice.payment_succeeded: This triggers when a payment for an invoice is successful. This is often used for Subscription payments.
- charge.refunded: This triggers when a charge is refunded. This event helps track refund activity that happened on Stripe.
- customer.subscription.deleted: This triggers when a customer’s subscription is canceled or ends. This could be due to customer action, automatic cancellation, or a failed payment after retries.
- customer.subscription.updated: This triggers when a customer’s subscription is changed or updated.
- Checkout.session.completed: This triggers when a checkout session is completed. This event confirms that the customer successfully paid for the session.
Once you select all the suggested Webhook Events, Click the Continue button.
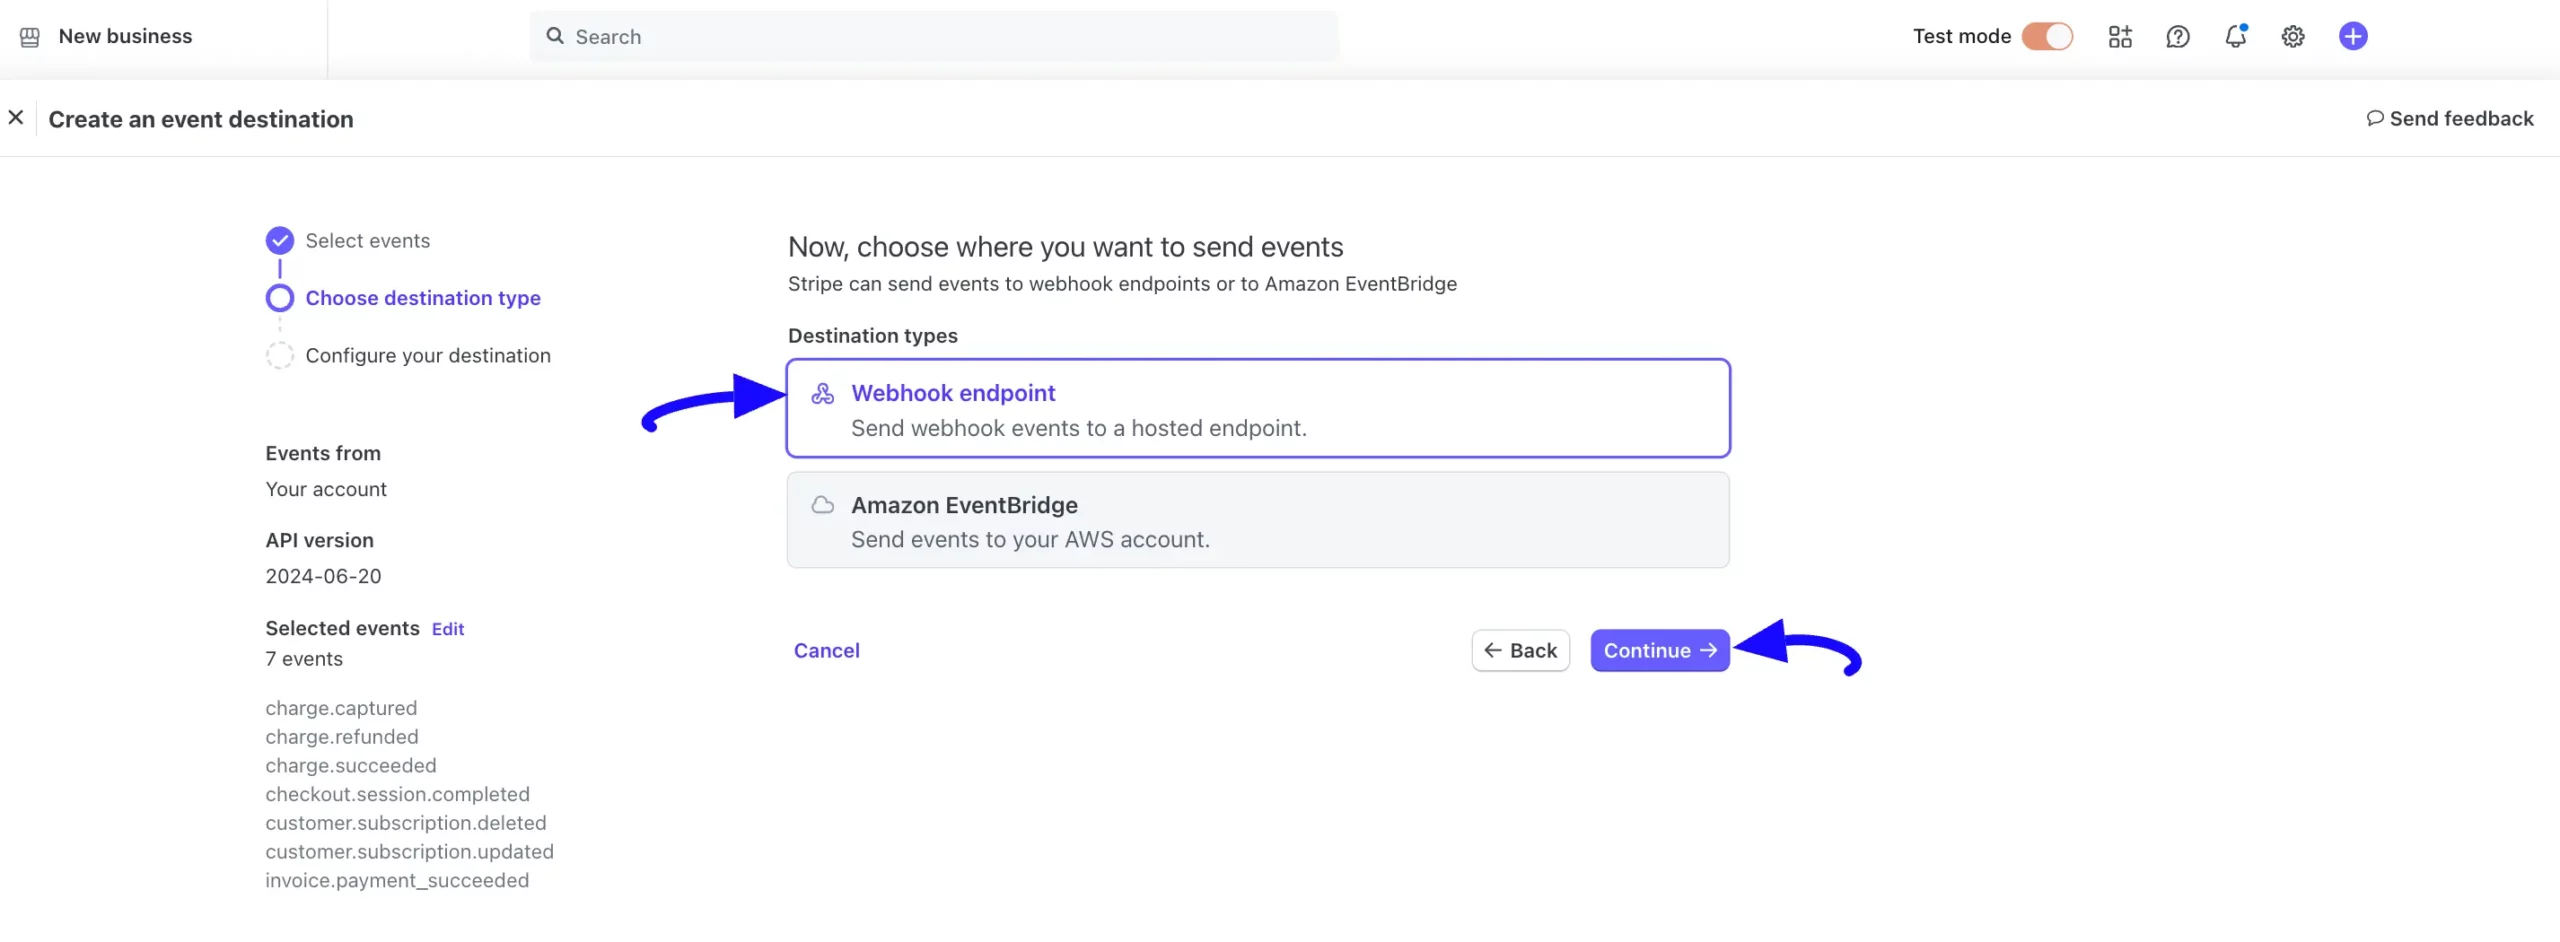
Then, select the Webhook endpoint and again click the Continue button.
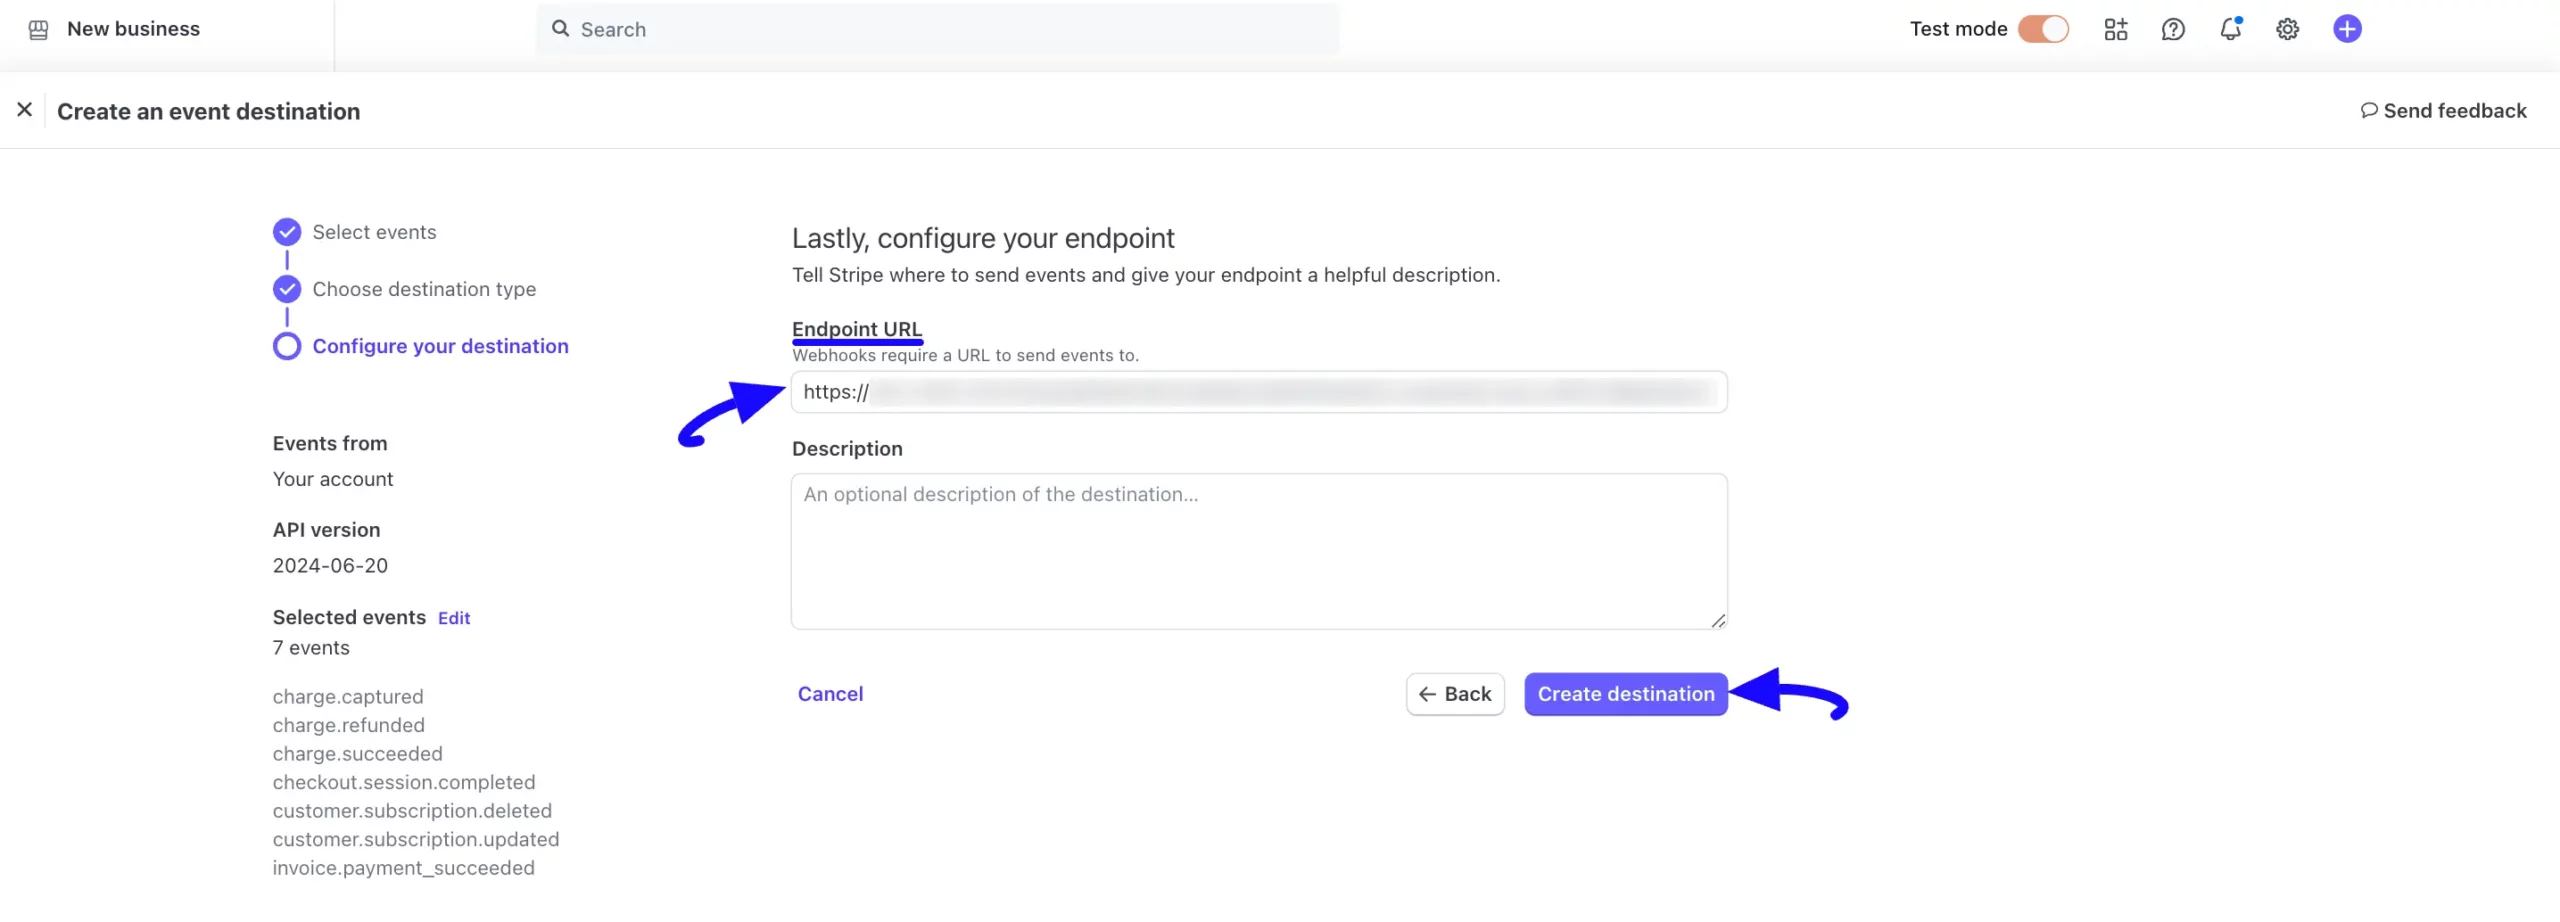
Finally, paste the Webhook URL you copied from the Stripe Settings page into the Endpoint URL field and click the Create destination button.
And, the Stripe Webhooks will be configured with your WordPress Site!
Integrate Stripe in Forms
Once you finish setting up your Stripe payment method, you can easily add this payment method to any of your existing Forms.
If you do not have any existing Forms, read this Documentation to learn how to create one. But, to integrate Stripe in a form, you need to add a Payment Item/Subscription and a Payment Method fields
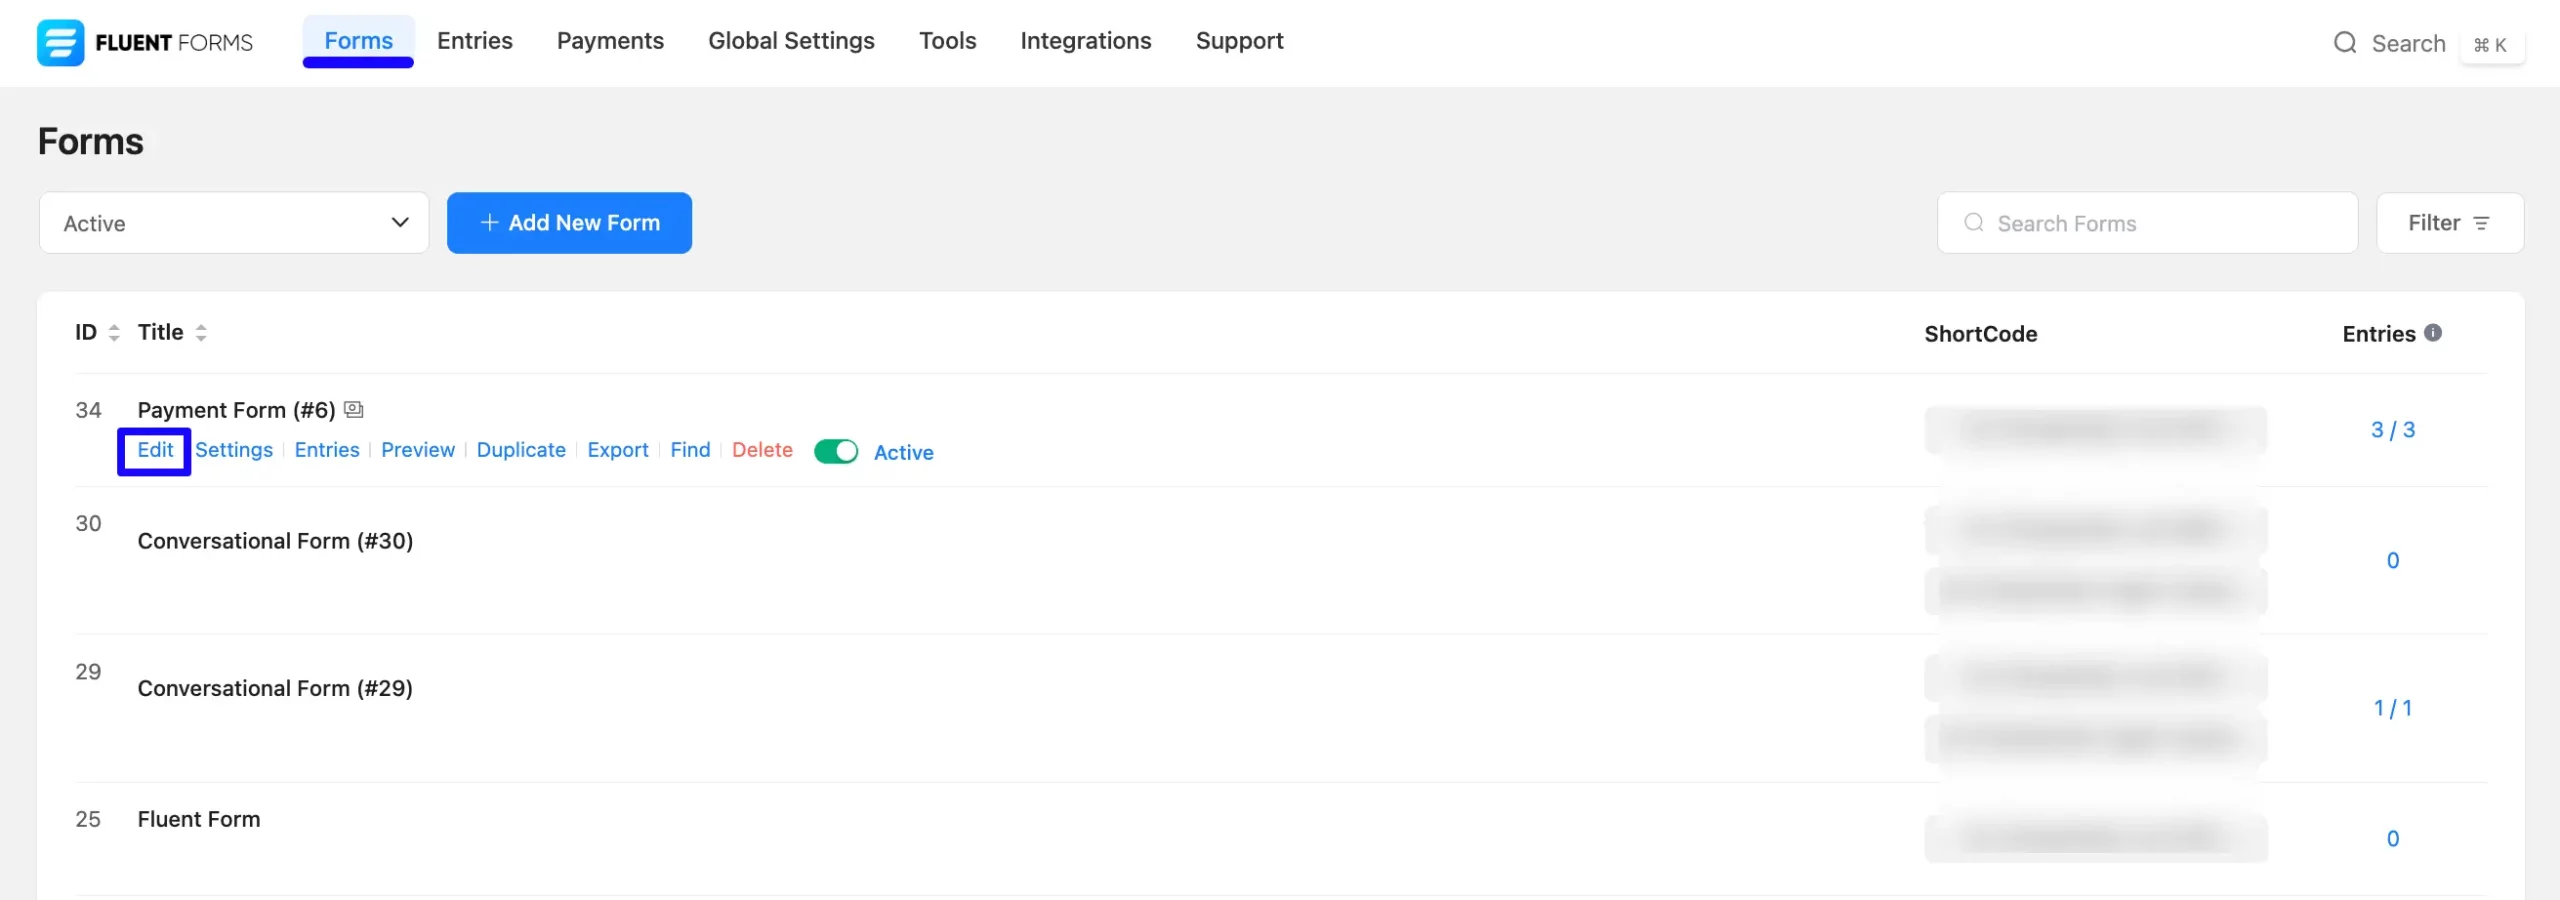
First, go to the Editor page of your desired form by clicking its Edit option.
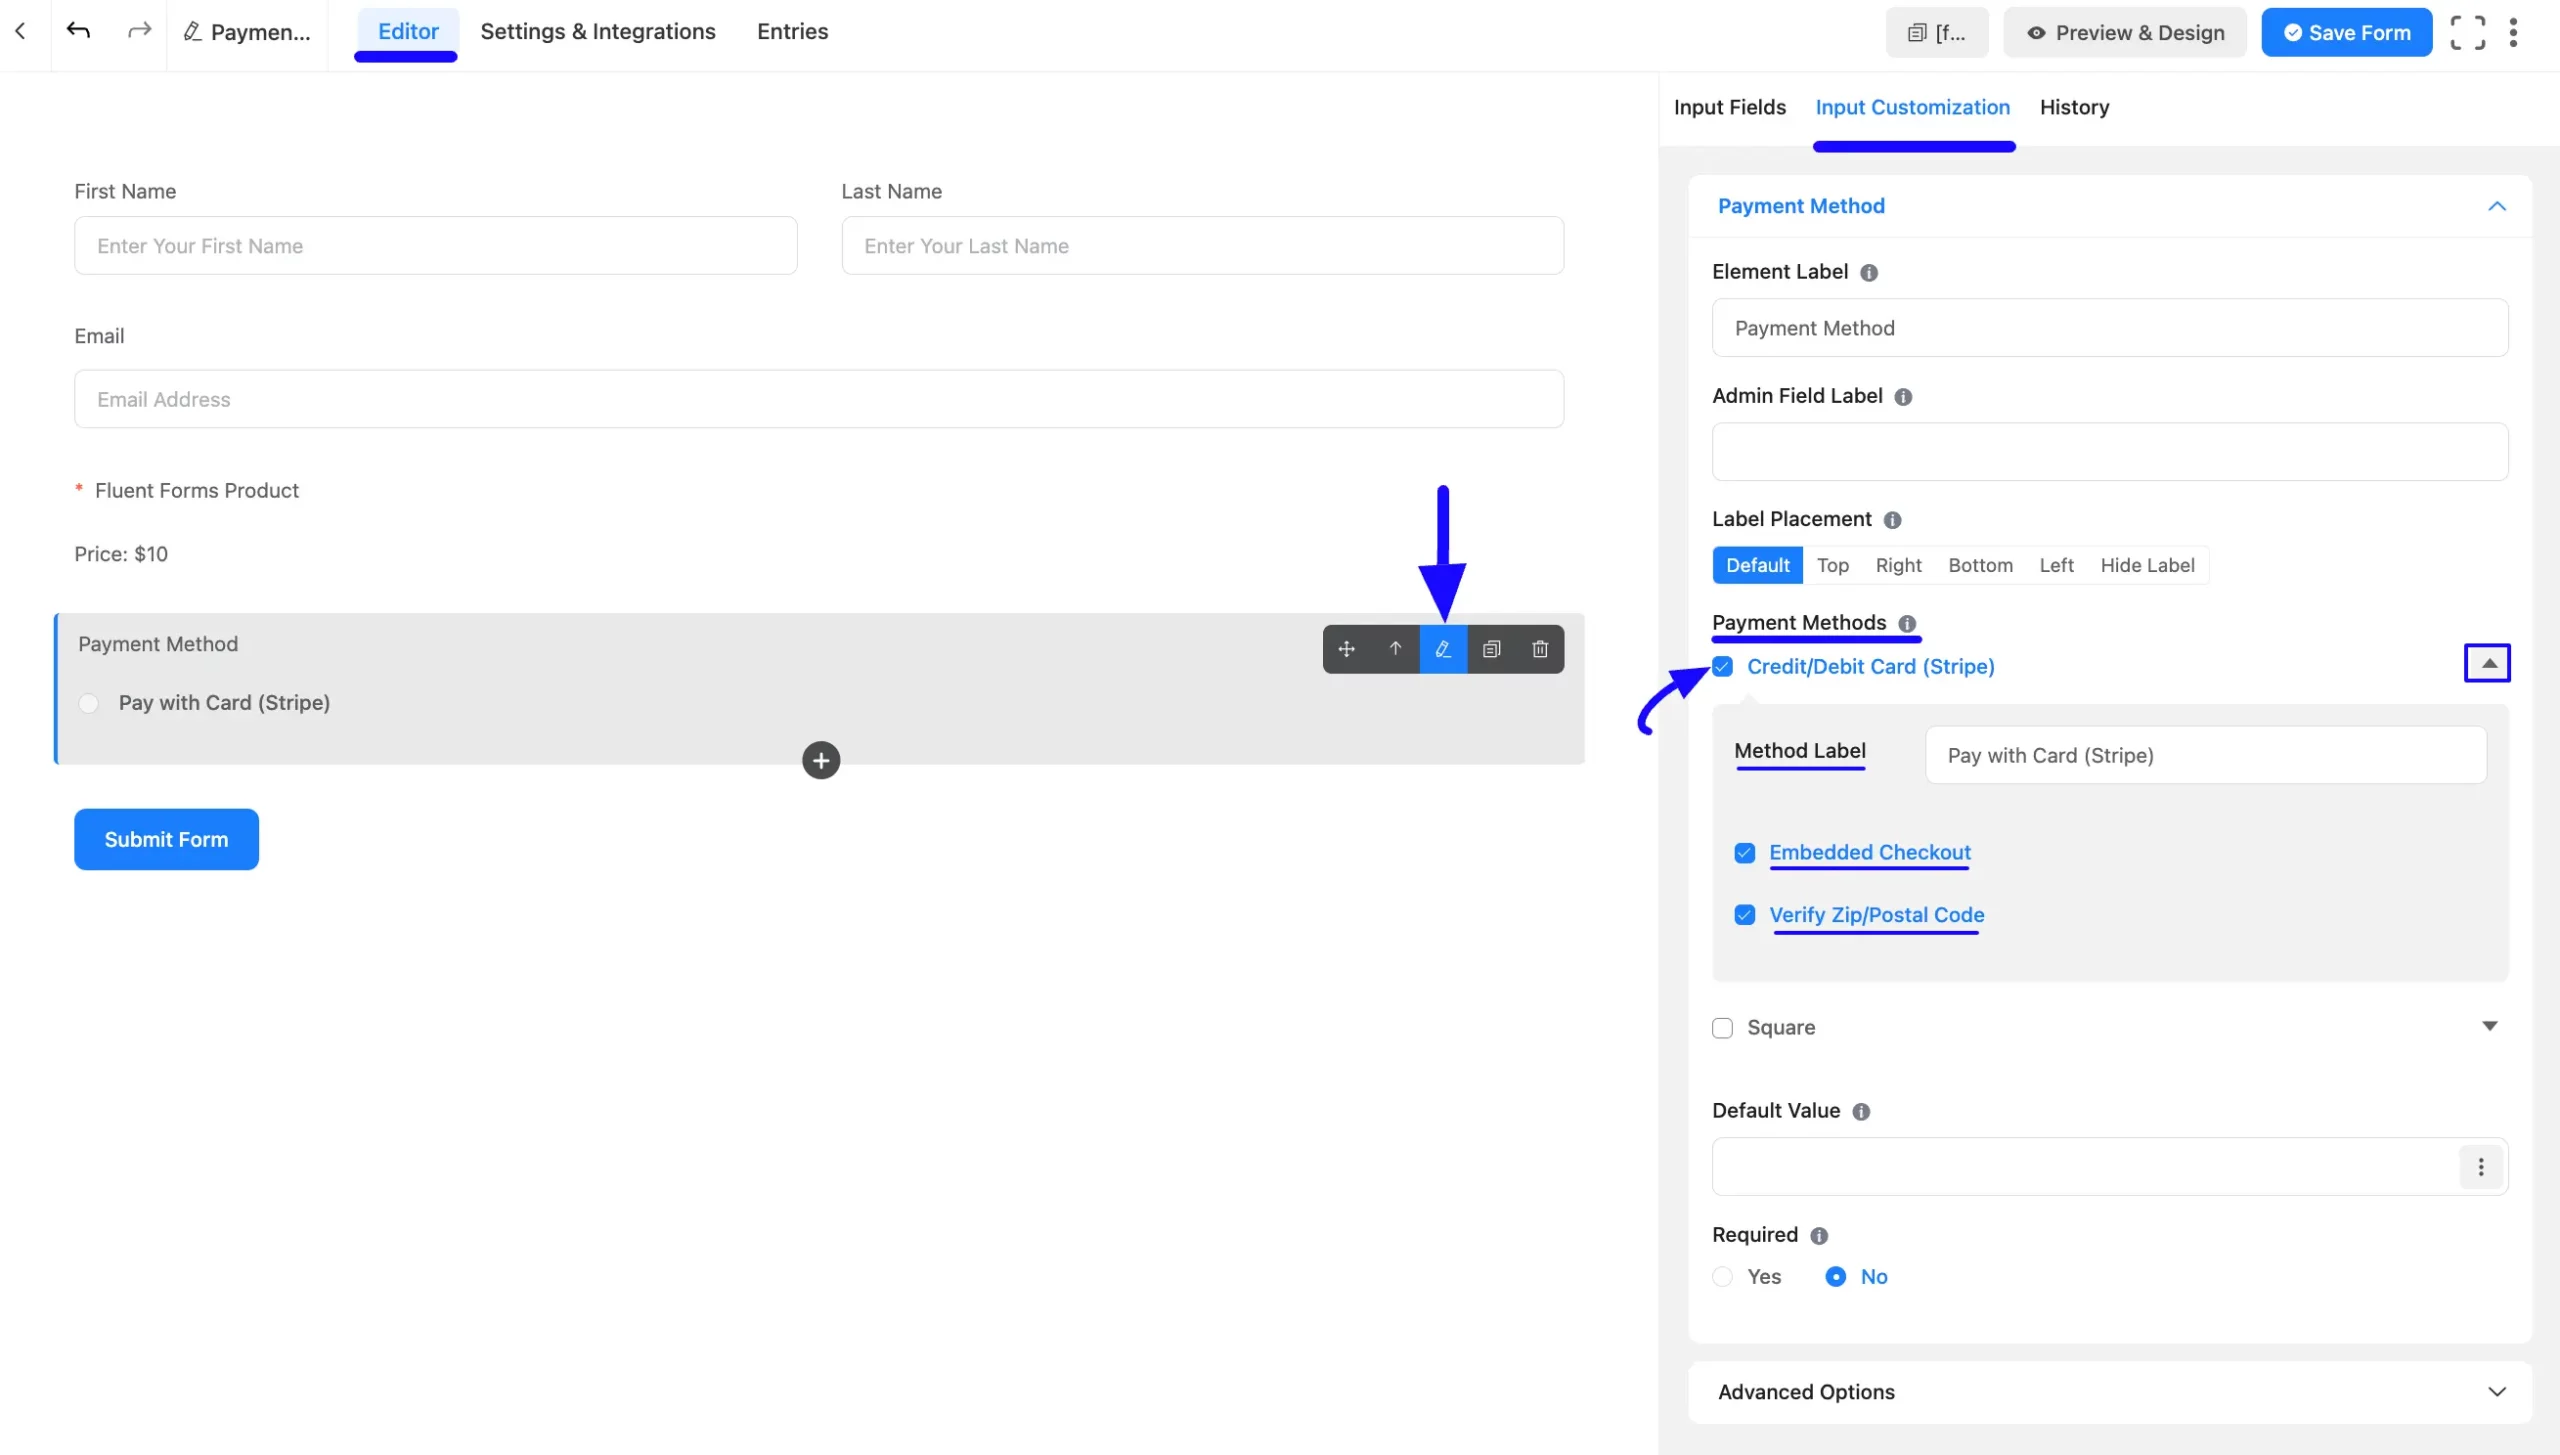
Once you are on the Editor page, go to the Input Customization menu on the right side of the added Payment Method field by hovering over it and clicking the Pencil Icon.
Now, go to the Payment Methods, check the Stripe option, click the Dropdown Arrow, and you will get three options. These are:
- Method Label: Here, you can change the label based on your preference for your added payment method.
- Embedded Checkout: Check this box to activate Stripe as an inline payment option.
- Verify Zip/Postal Code: Check this box if you want to make providing the Zip/Postal Code information mandatory for your users to submit the forms.
To learn more details about the Payment Method field, read this Documentation.
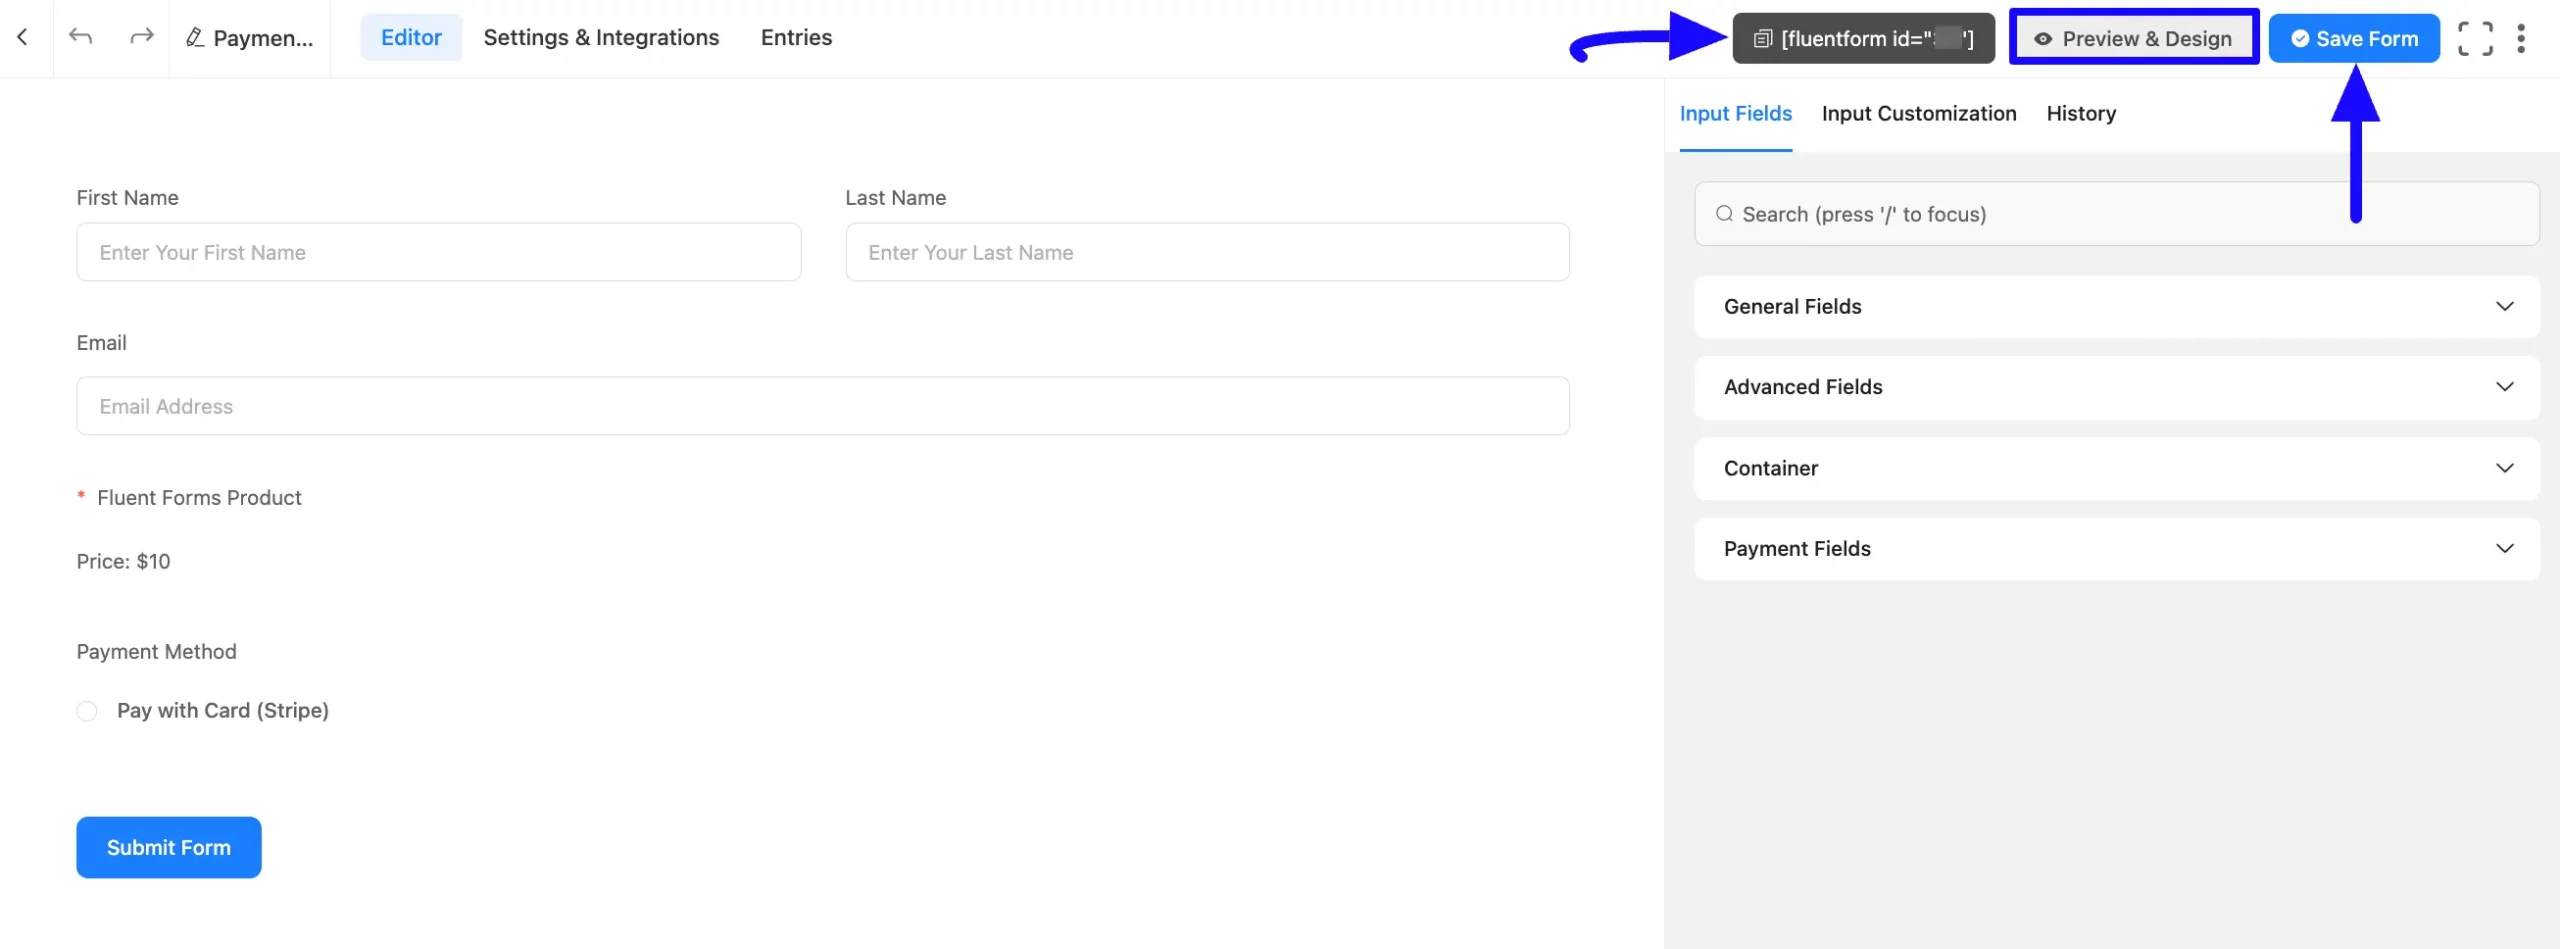
Once you complete the edit, press the Save Form button to save all the changes.
Now, to embed and display the form on a specific Page/Post, copy this Shortcode from the top right side and paste it into your desired Page/Post.
Also, to see the Preview of the form, click the Preview & Design button in the middle.
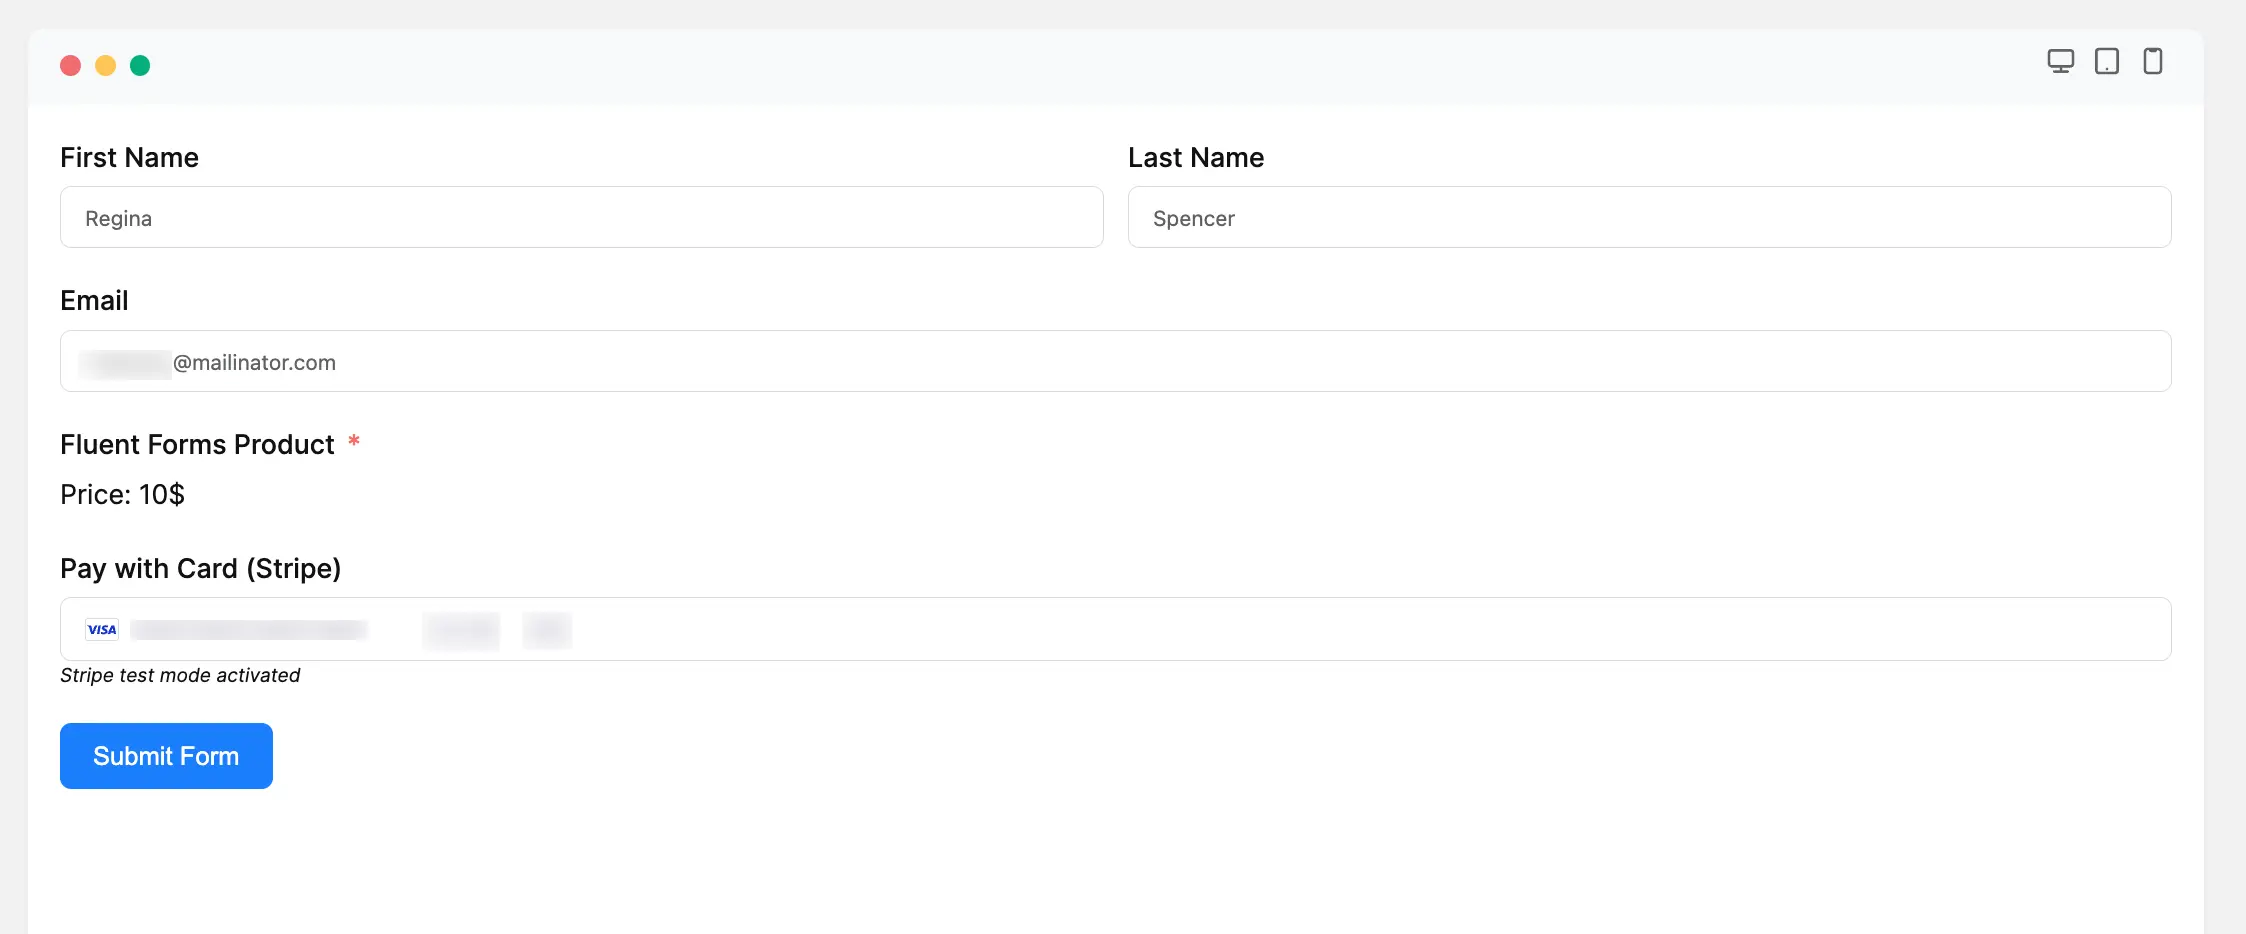
Preview of Added Payment Method
Here is the preview of the Payment Method that we just added.
Form Specific Stripe Settings
You can also customize the Stripe Settings for a specific form according to your needs.
To customize the Stripe Settings, go to the Forms from the Fluent Forms Navbar, and click the Settings option of a desired Form.

Once you are on the Settings and Integrations tab, click the Payment Settings option, scroll down to Stripe Settings, and customize it based on your needs.
Do not forget to click the Save Settings button to save all your changes.
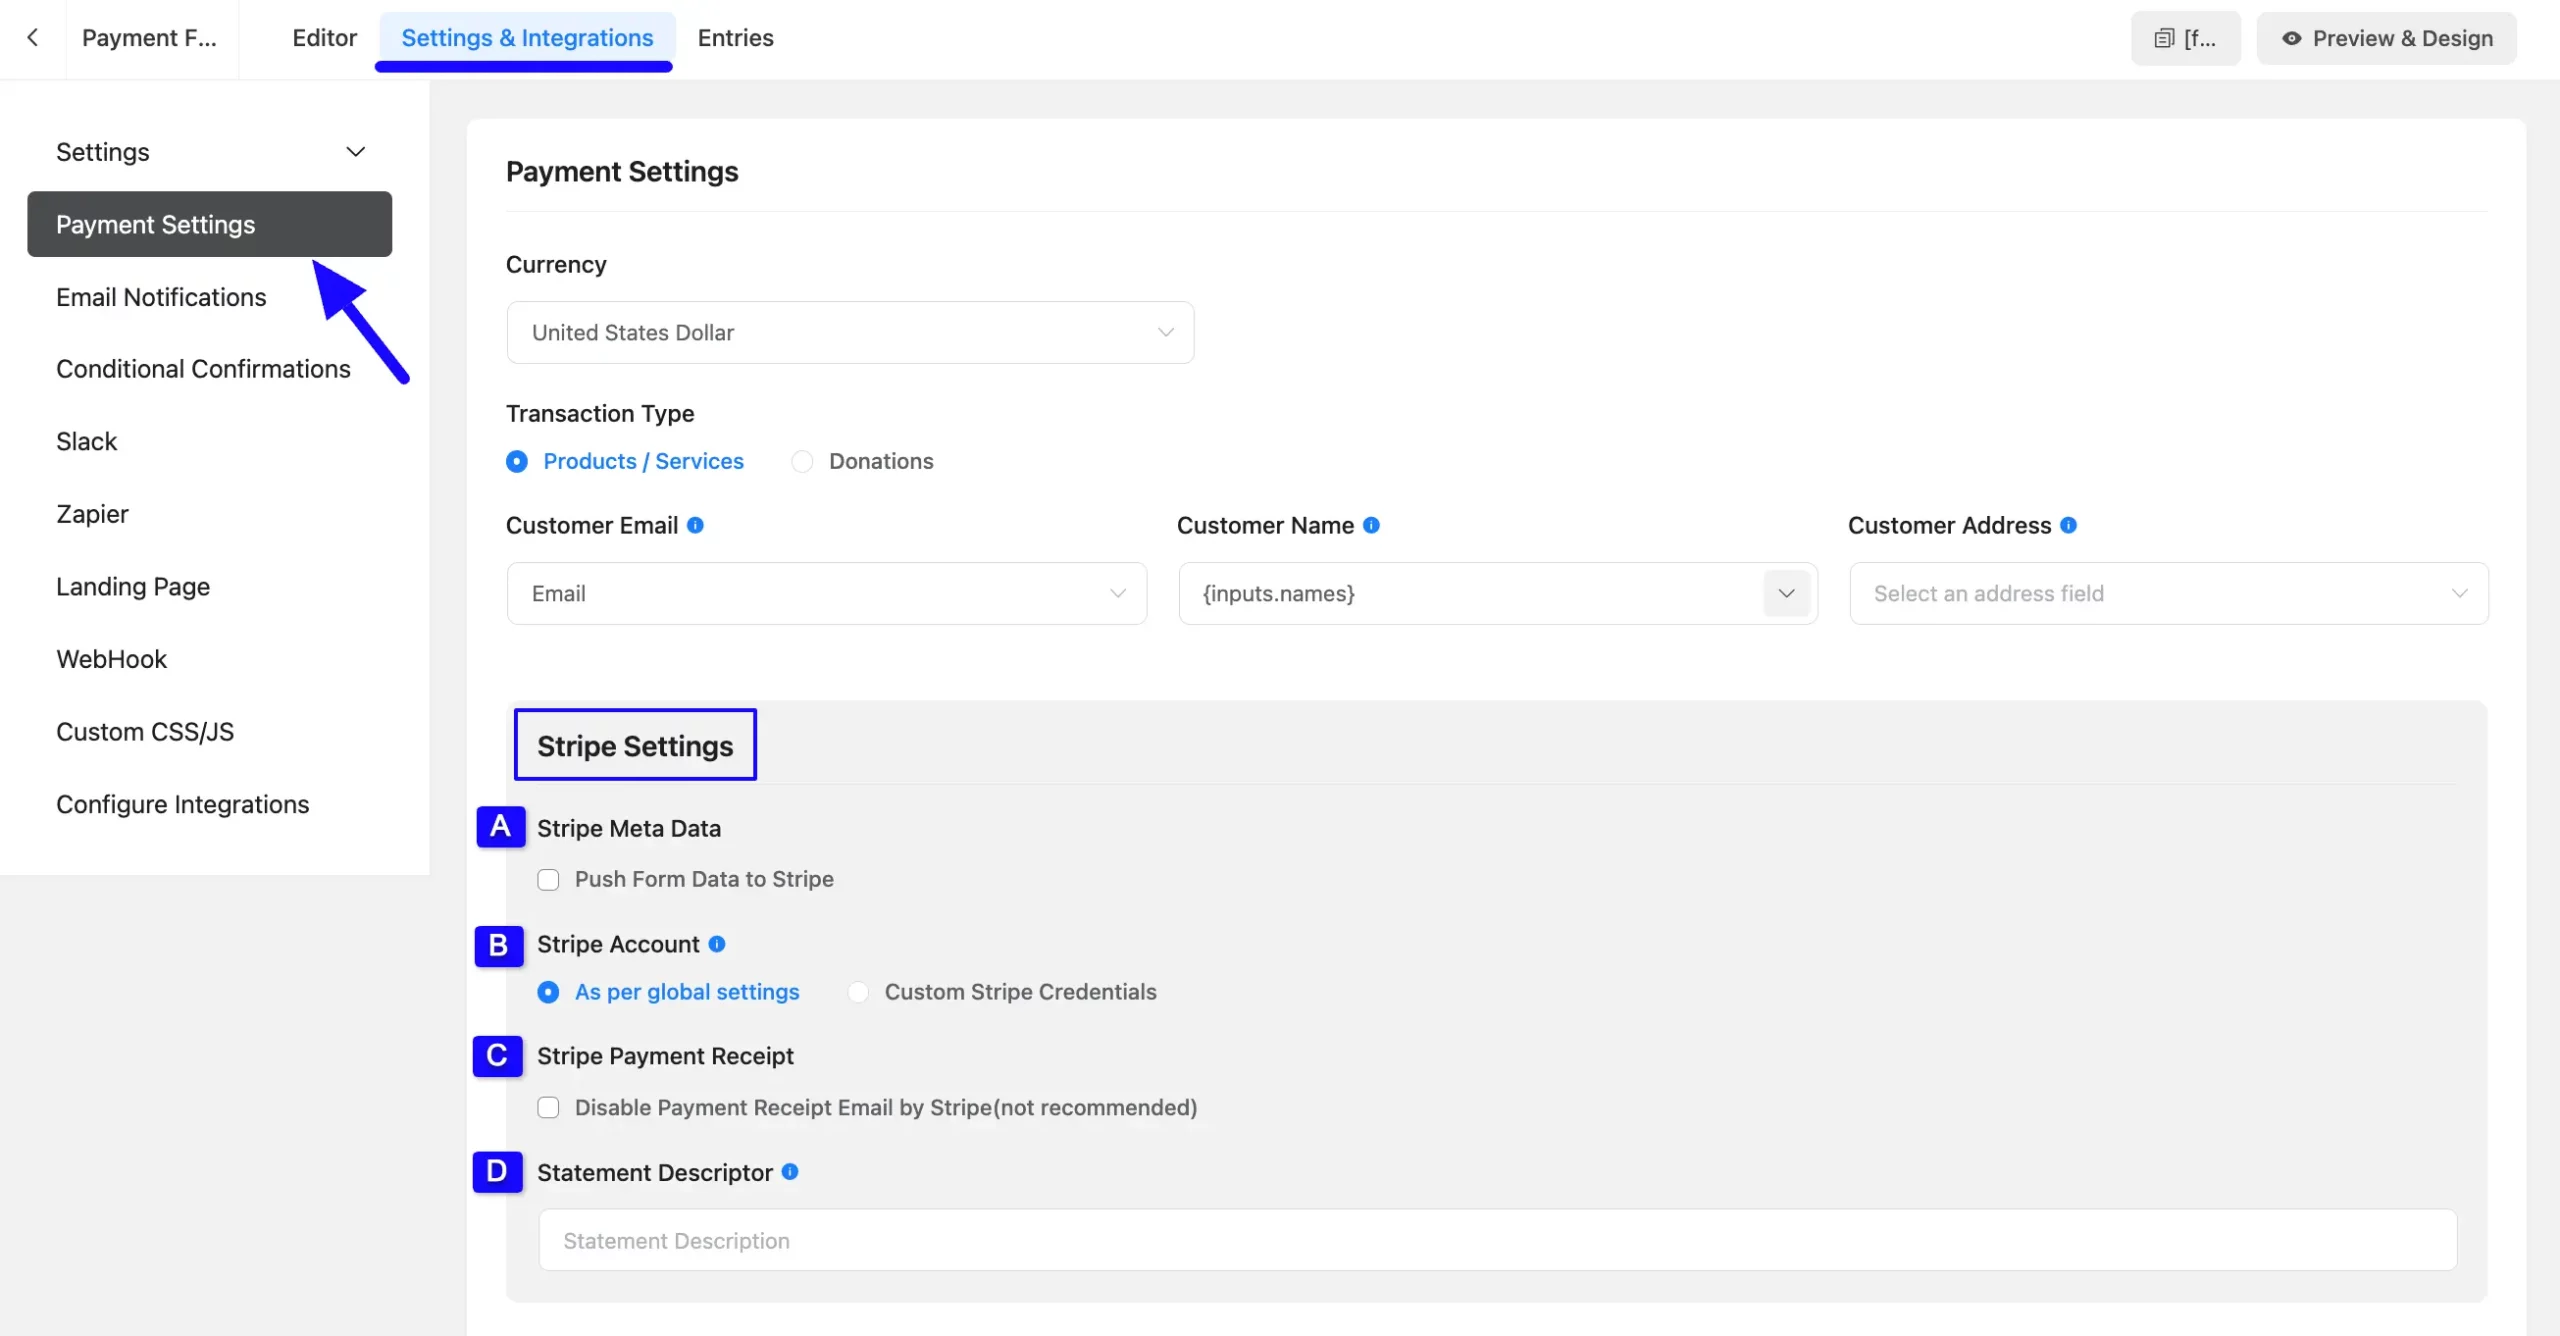
All the Stripe Settings options mentioned above are briefly explained below:
A. Stripe Meta Data
Check the Push Form Data to Stripe to send the form submission date to your Stripe.

B. Stripe Account
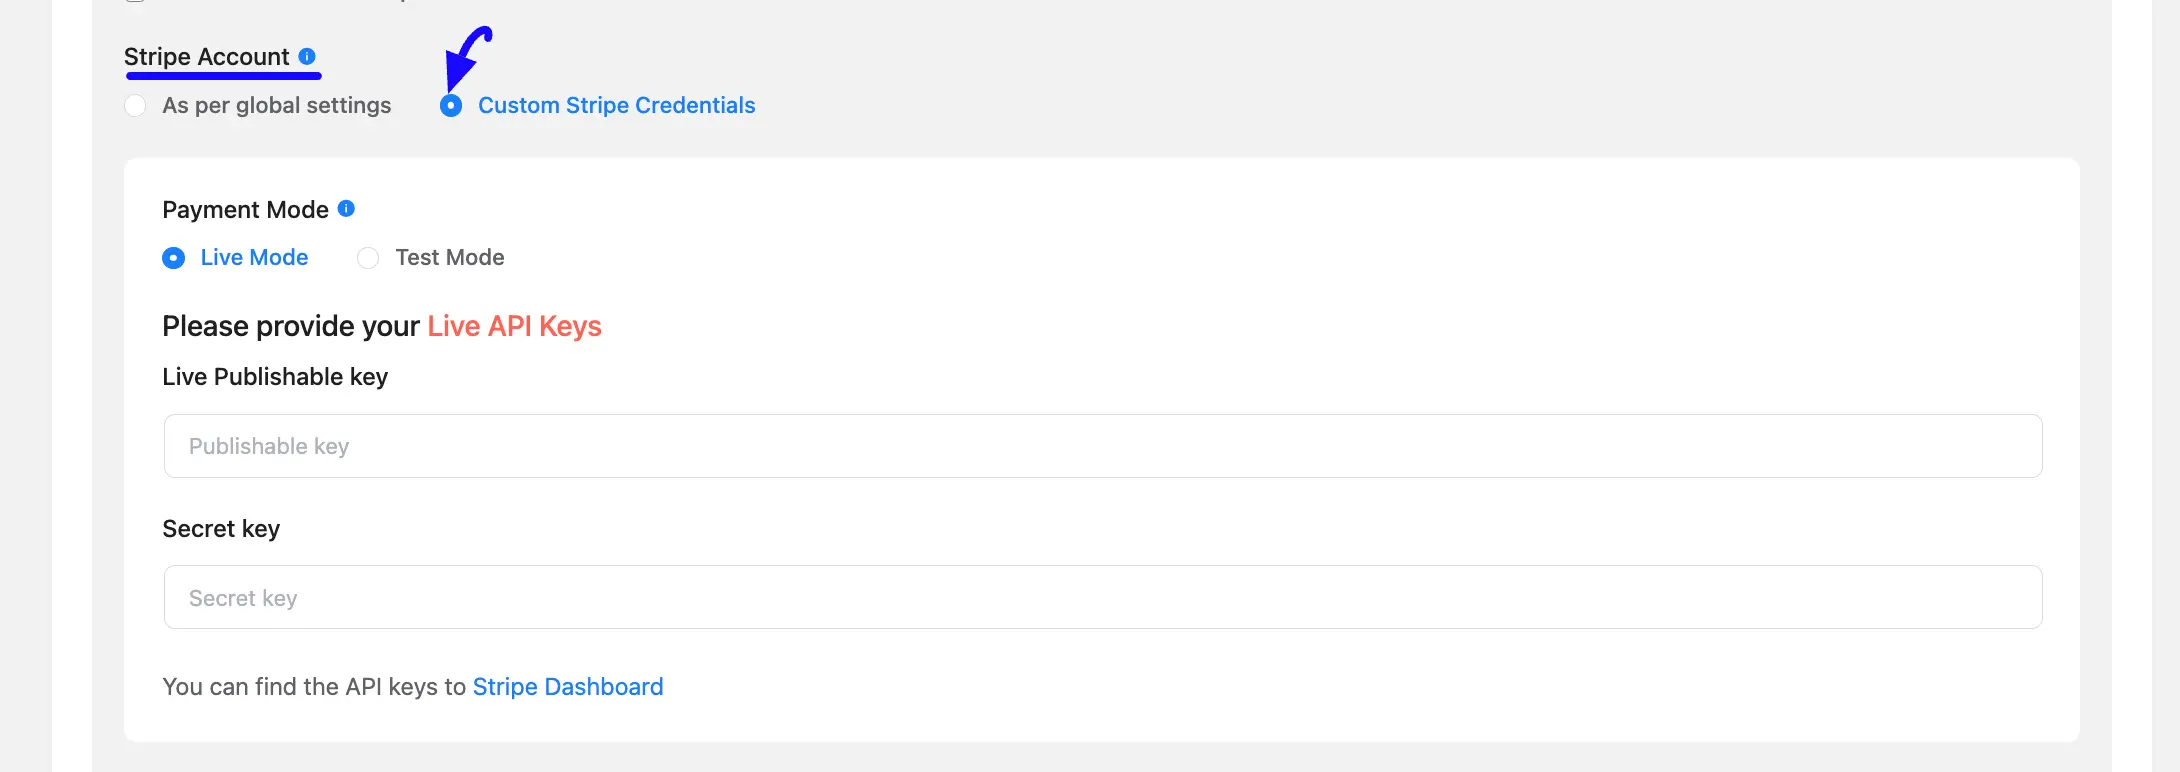
Here, you can select which stripe account credential (Global or Custom) will be used for this form. Select the Custom Stripe Credentials if you want to set up a different Stripe account for this specific form.
C. Stripe Payment Receipt
Check this option if you want to disable the option of receiving payment receipt email notifications of this form.
But we recommend you do not disable this option if you want to keep track of your payment transactions.

D. Stripe Descriptor
Here, provide the text as per your wish (Contains between 5 and 22 characters) as a statement descriptor. If you keep it empty, your Form Name will be set as a statement descriptor.

If you have any further questions, concerns, or suggestions, please do not hesitate to contact our @support team. Thank you.


