To integrate Paystack into Fluent Forms, you will need an API key and an API Secret. If you don’t already have a Paystack account, you should sign up for one now.
Paystack integration is a pro feature and only users of the pro version will be able to use this. Dont miss the Per Form Settings
Setting up
- To set up Paystack with Fluent Forms, go to the global Settings from your dashboard and then choose Payment Settings from the left sidebar.
- Now, click on the Payment Methods → Paystack as shown in the screenshot below –
- Check the Status box to Enable the Paystack Payment Method. This will unlock several payment options.
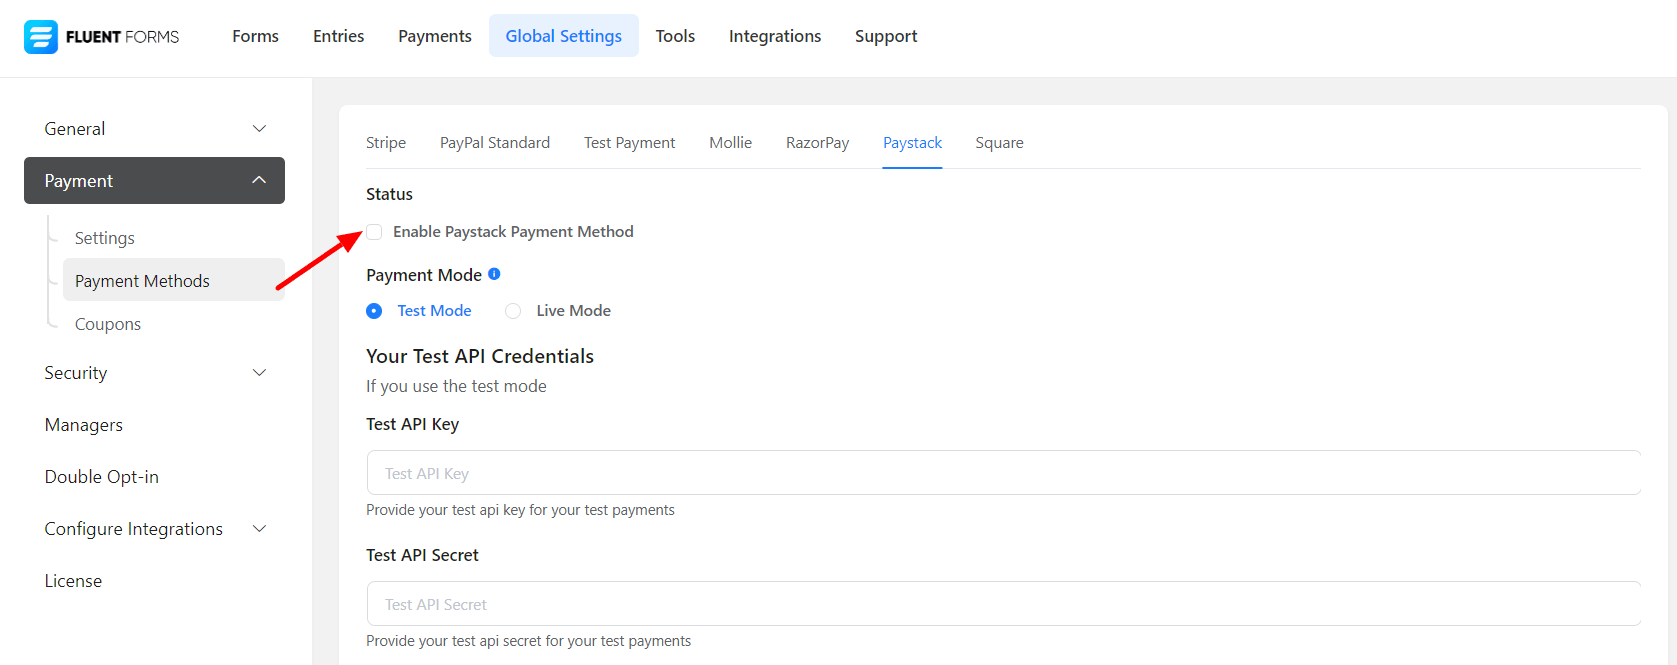
- You will be asked to choose a Payment Mode. There’s a Test Mode and a Live Mode. Let’s set up the Test Mode.
- Be notified that the Live Mode can be enabled like we set up the Test Mode.
- Next, you must provide the test API Keys and test API Secrets. Login to your Paystack account to obtain these keys.
- After login, you need to go to Settings → API Keys and Webhooks option, or you can click on this link.
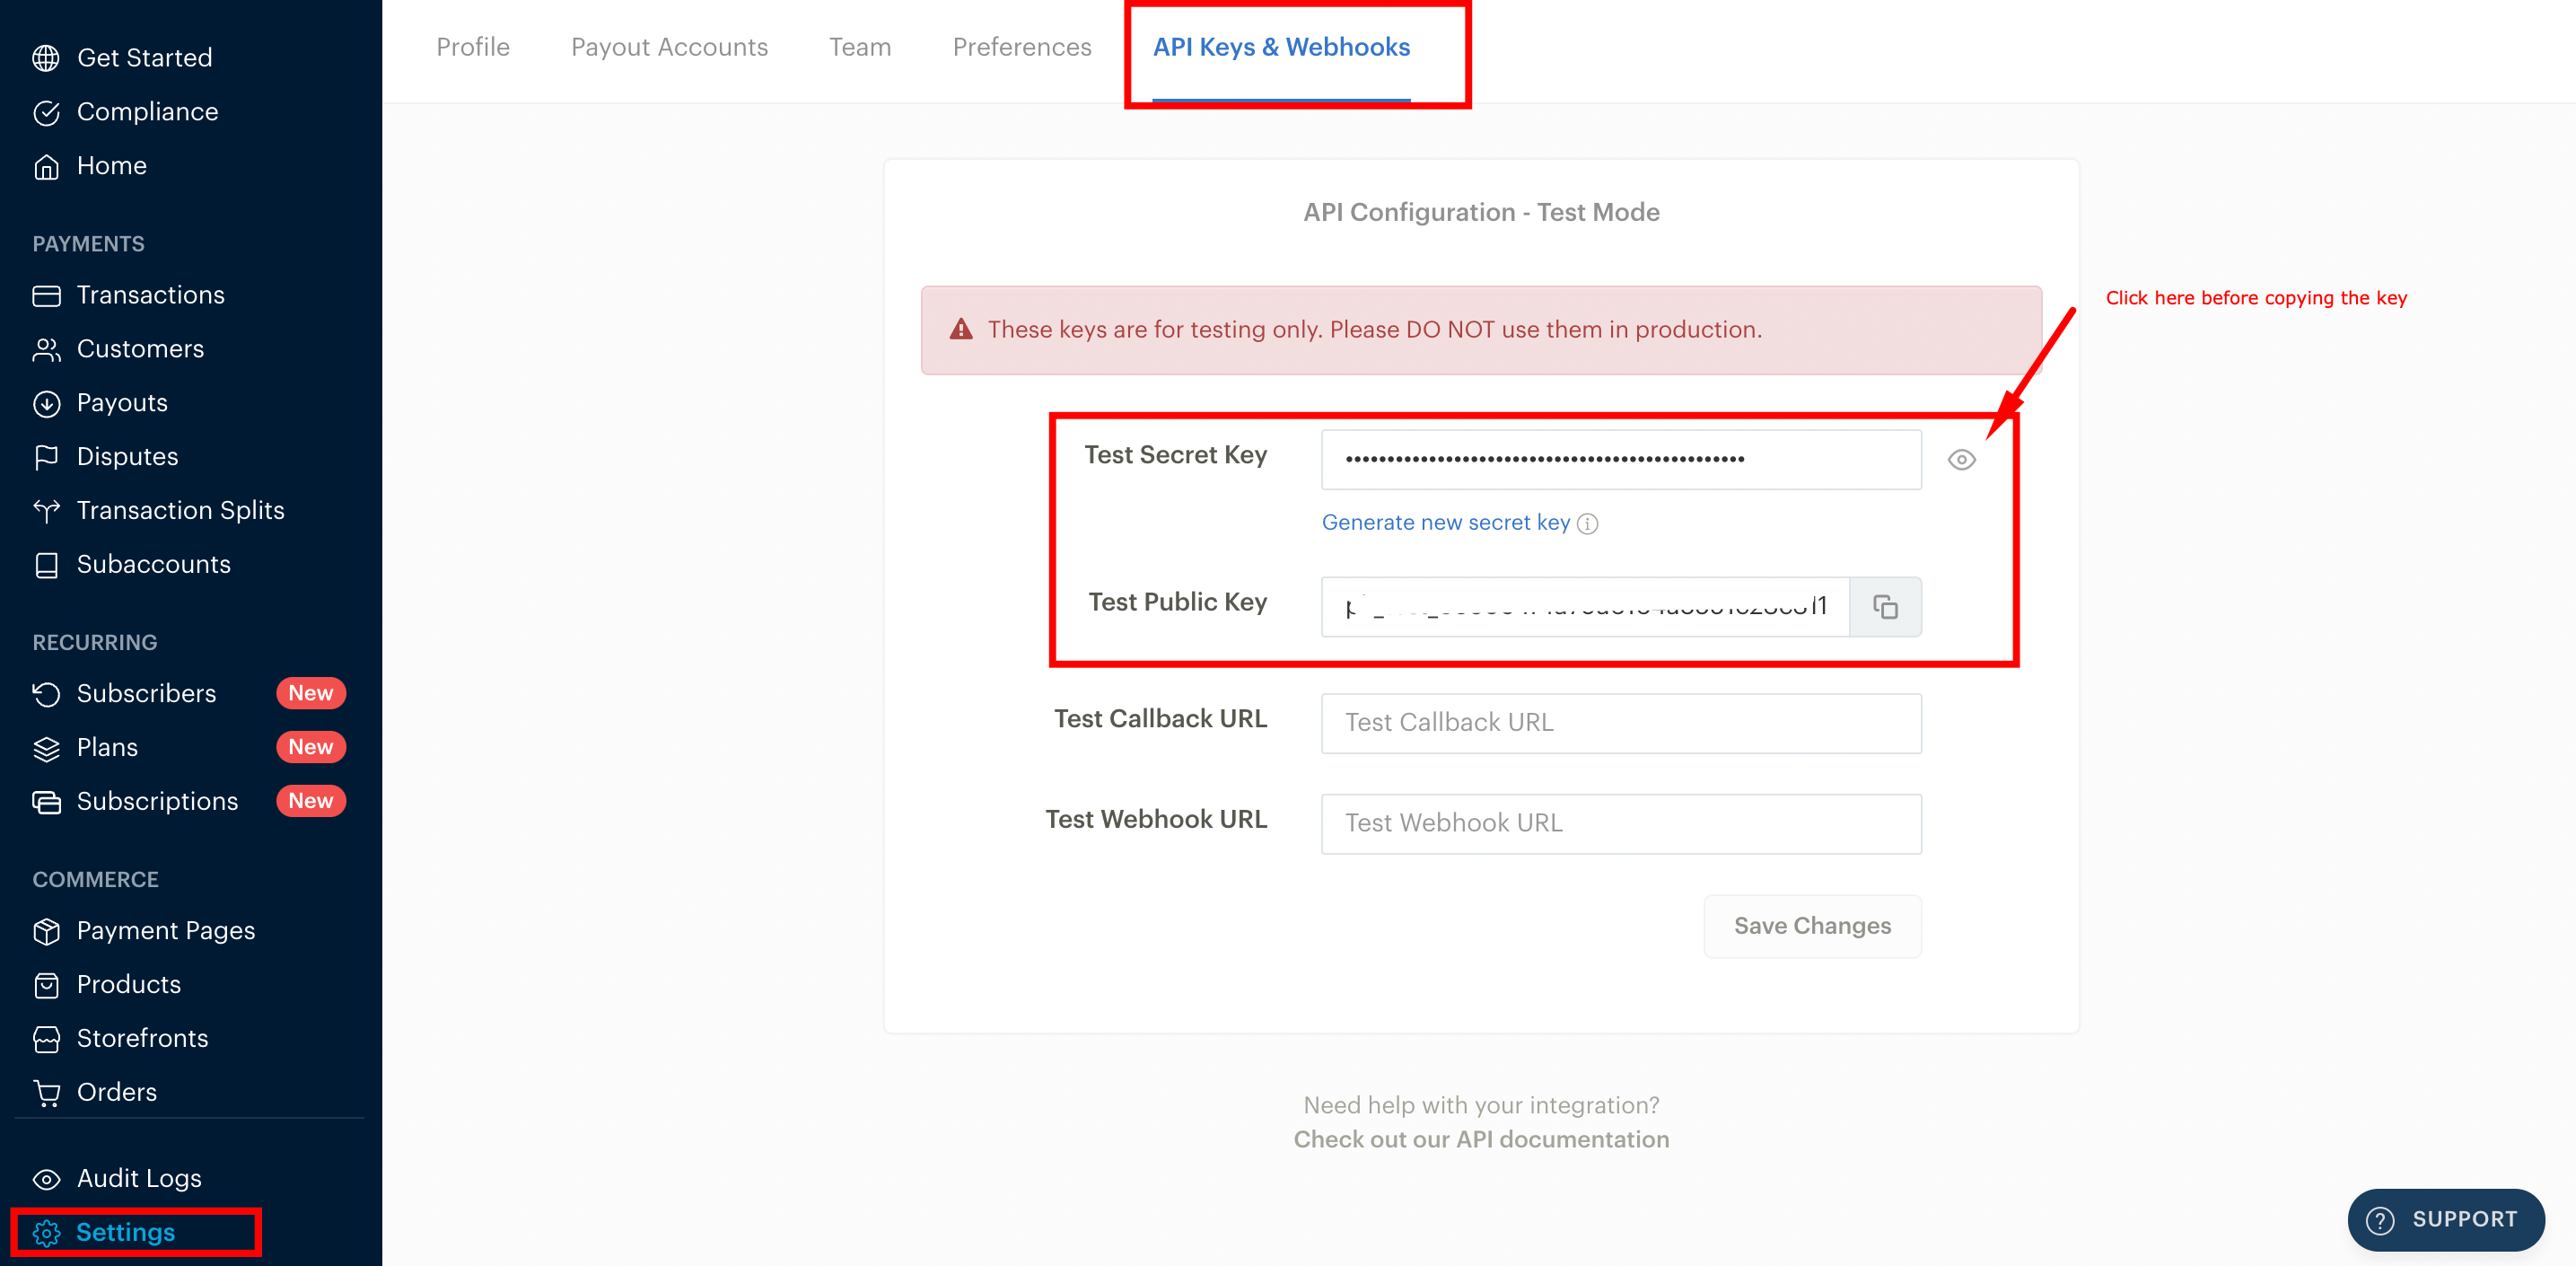
- Grab the generated Secret Key and paste it into the Test API Secret inside the Fluent Forms Paystack settings. The same goes for Test Public Key; add it in the Test API Key input field.
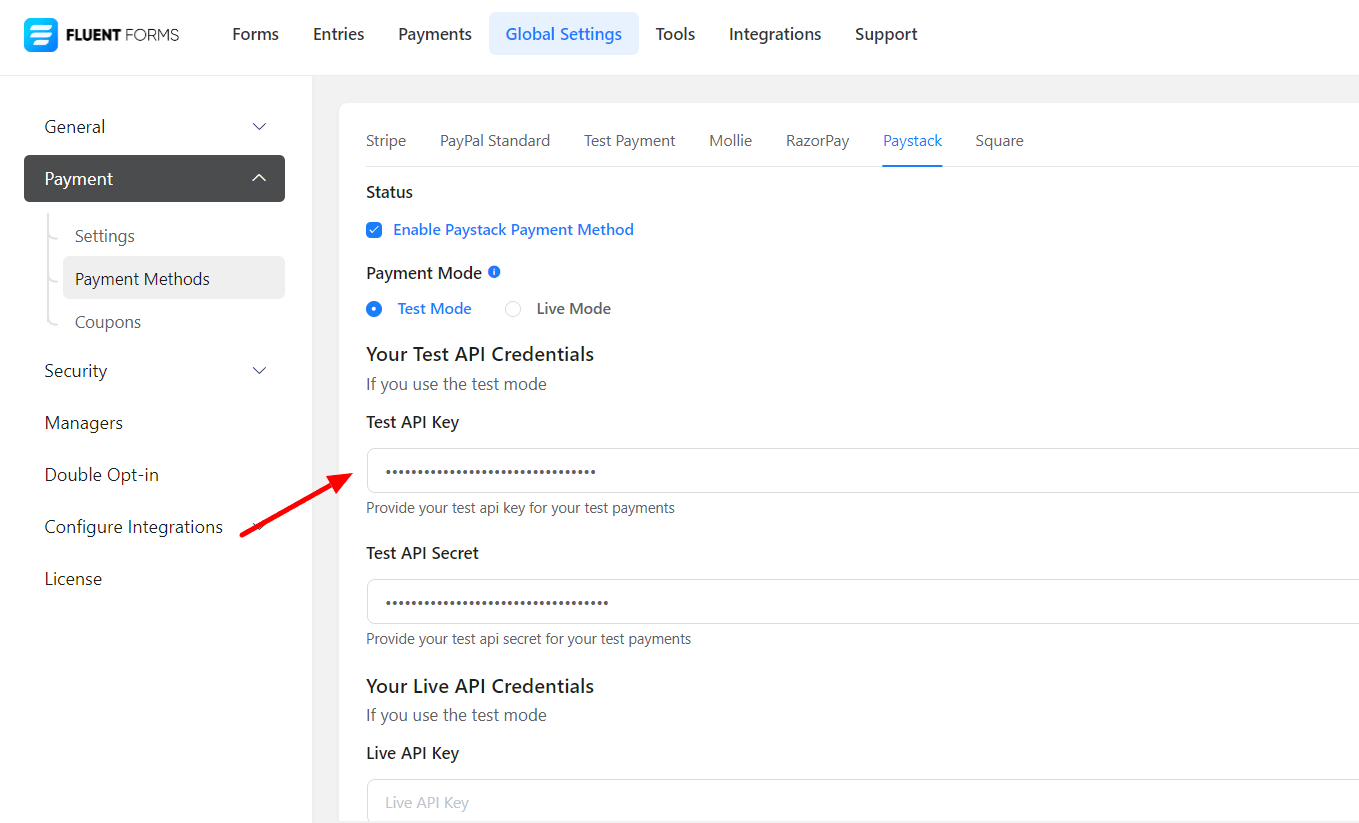
- After doing so, click on the Save Settings button.
Additional Settings (Per Form)
- Now you can add a Payment Method field, and you should be able to see the Paystack option; just click the checkbox to enable it.
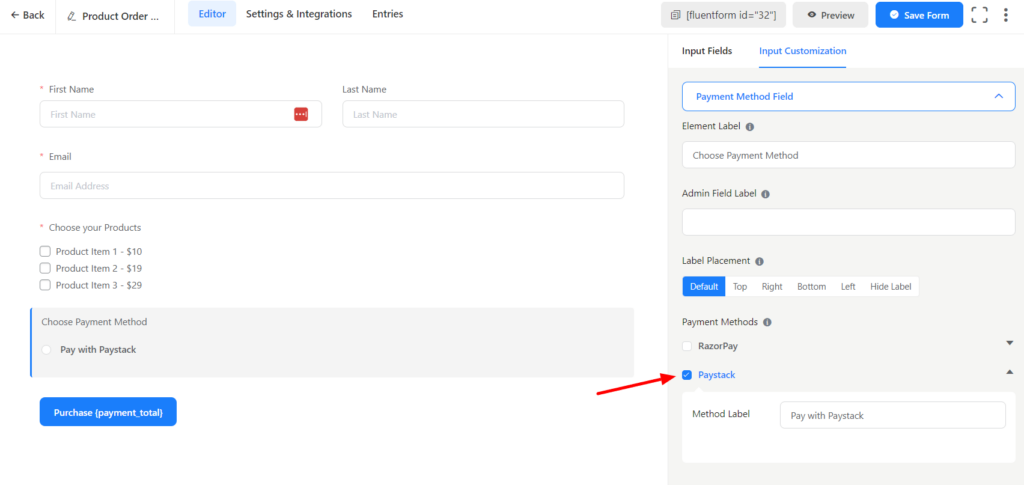
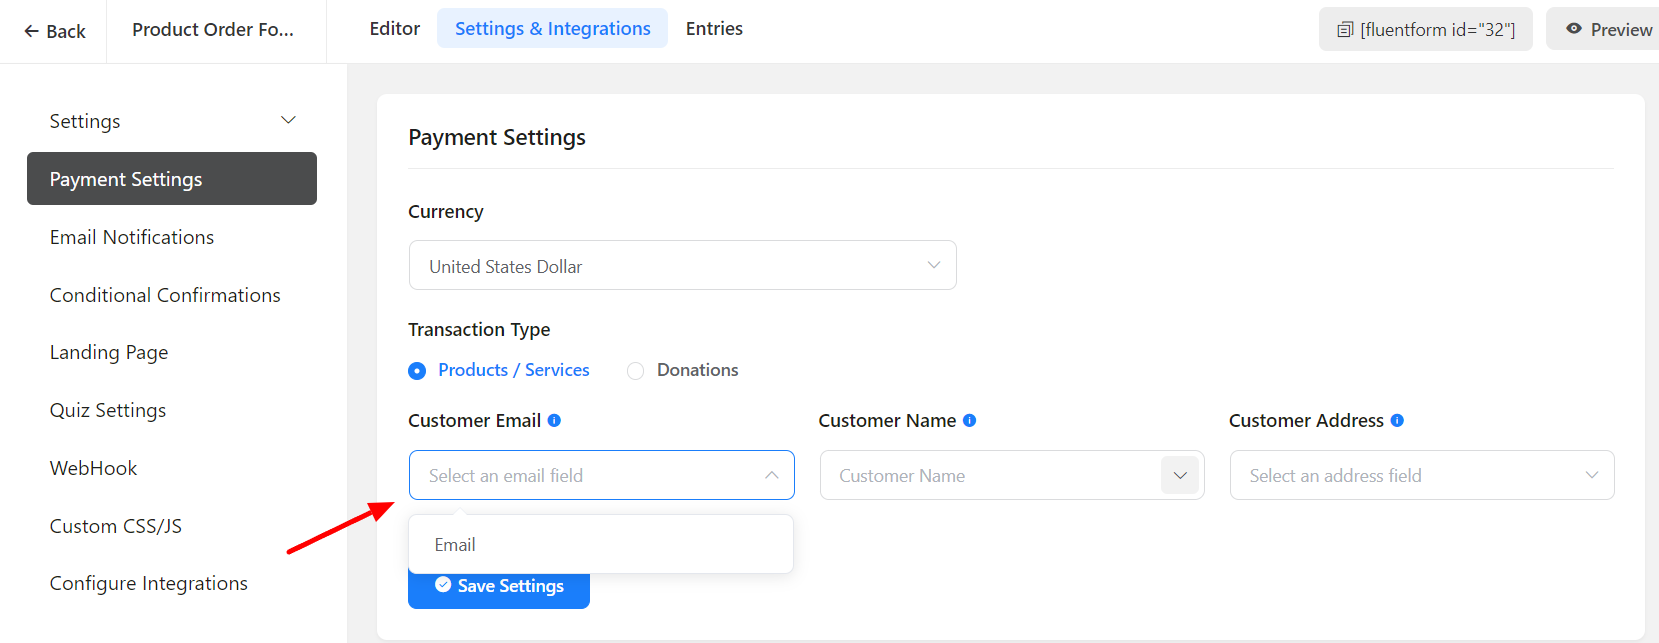
- Now for Paystack to work properly, you must add an email field on your form and select the email field as Customer Email in your forms Payment Settings options. This is a very important step; otherwise, your payment will be failed.
That’s it! You are good for taking payments using Paystack.


