This document is applicable for Google Analytics : Universal Analytics [version 3]
According to Google Universal Analytics (v3) will be deprecated from July 1, 2023.
Please follow our Google Analytics (GA4) guide for latest version of Analytics integration.
- Creating Fluent Forms Variables
- Creating Fluent Forms Trigger
- Creating Fluent Forms Tags
- Final Result in Google Analytics
Let’s have a look at a brief overview of what Google Tag Manager (GTM) & Google Analytics (GA) is below:
Google Tag Manager is a tag management system (TMS) that allows you to quickly and easily update measurement codes and related code fragments collectively known as tags on your website or mobile app. Once the small segment of Tag Manager code has been added to your project, you can safely and easily deploy analytics and measurement tag configurations from a web-based user interface.
Google Analytics includes features that can help users identify trends and patterns in how visitors engage with their websites. Features enable data collection, analysis, monitoring, visualization, reporting and integration with other applications.
Let’s also have a look at how GTM & GA interacts with website data or we can share or flow data towards various platforms:
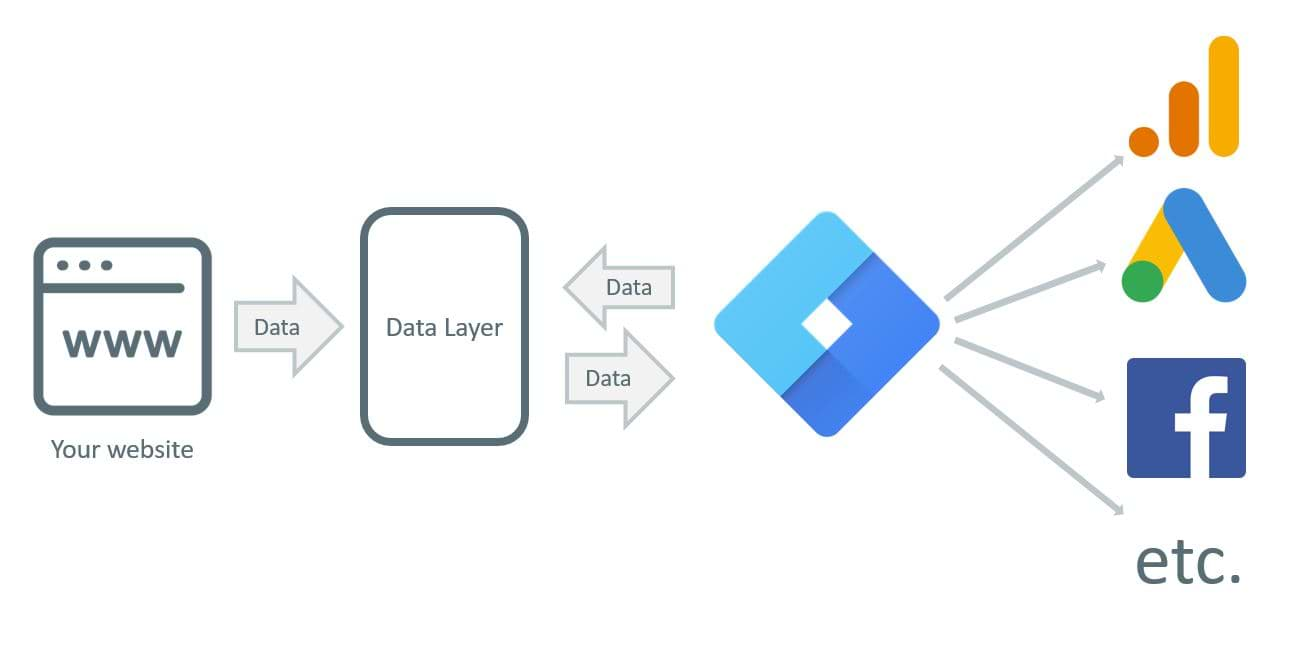
In this tutorial, we will track 2 types of Fluent Forms Events (Form View and Form Submission) with Google Tag Manager and then pass the events to Google Analytics for Graphical Representations and further analysis. There are plenty of methods to track Form Events by GTM. Fluent Forms fire jQuery Events in different Form States, so it will be very easy to track events with Google Tag Manager via a Custom Code, and no further advanced debugging is needed inside of GTM, such as in Preview Mode.
We assume that Google Tag Manager is installed on your website globally or all pages. Please follow the below instructions carefully to implement the tracking of Fluent Forms Events through GTM.
Here is the number of elements we will be interacting with inside GTM for our Fluent Forms Events & then forward the data to Google Analytics:
| Tags | Triggers | Variables | |
| 2 | 1 | 3 (2 Required, 1 Optional) | |
| Type | cHTML, Universal Analytics | Custom Event | 2 Data Layer, 1 Javascript |
We will also use a built-in Variable [Event] for identifying the type of events that happened in Fluent Forms.
Step 1 – Creating Fluent Forms Variables:
Variables are Data Types to define the properties and their values that come or are pushed from the website.
Go to your Google Tag Manager dashboard and navigate to Variables and then under User-Defined Variables and then click the New button.
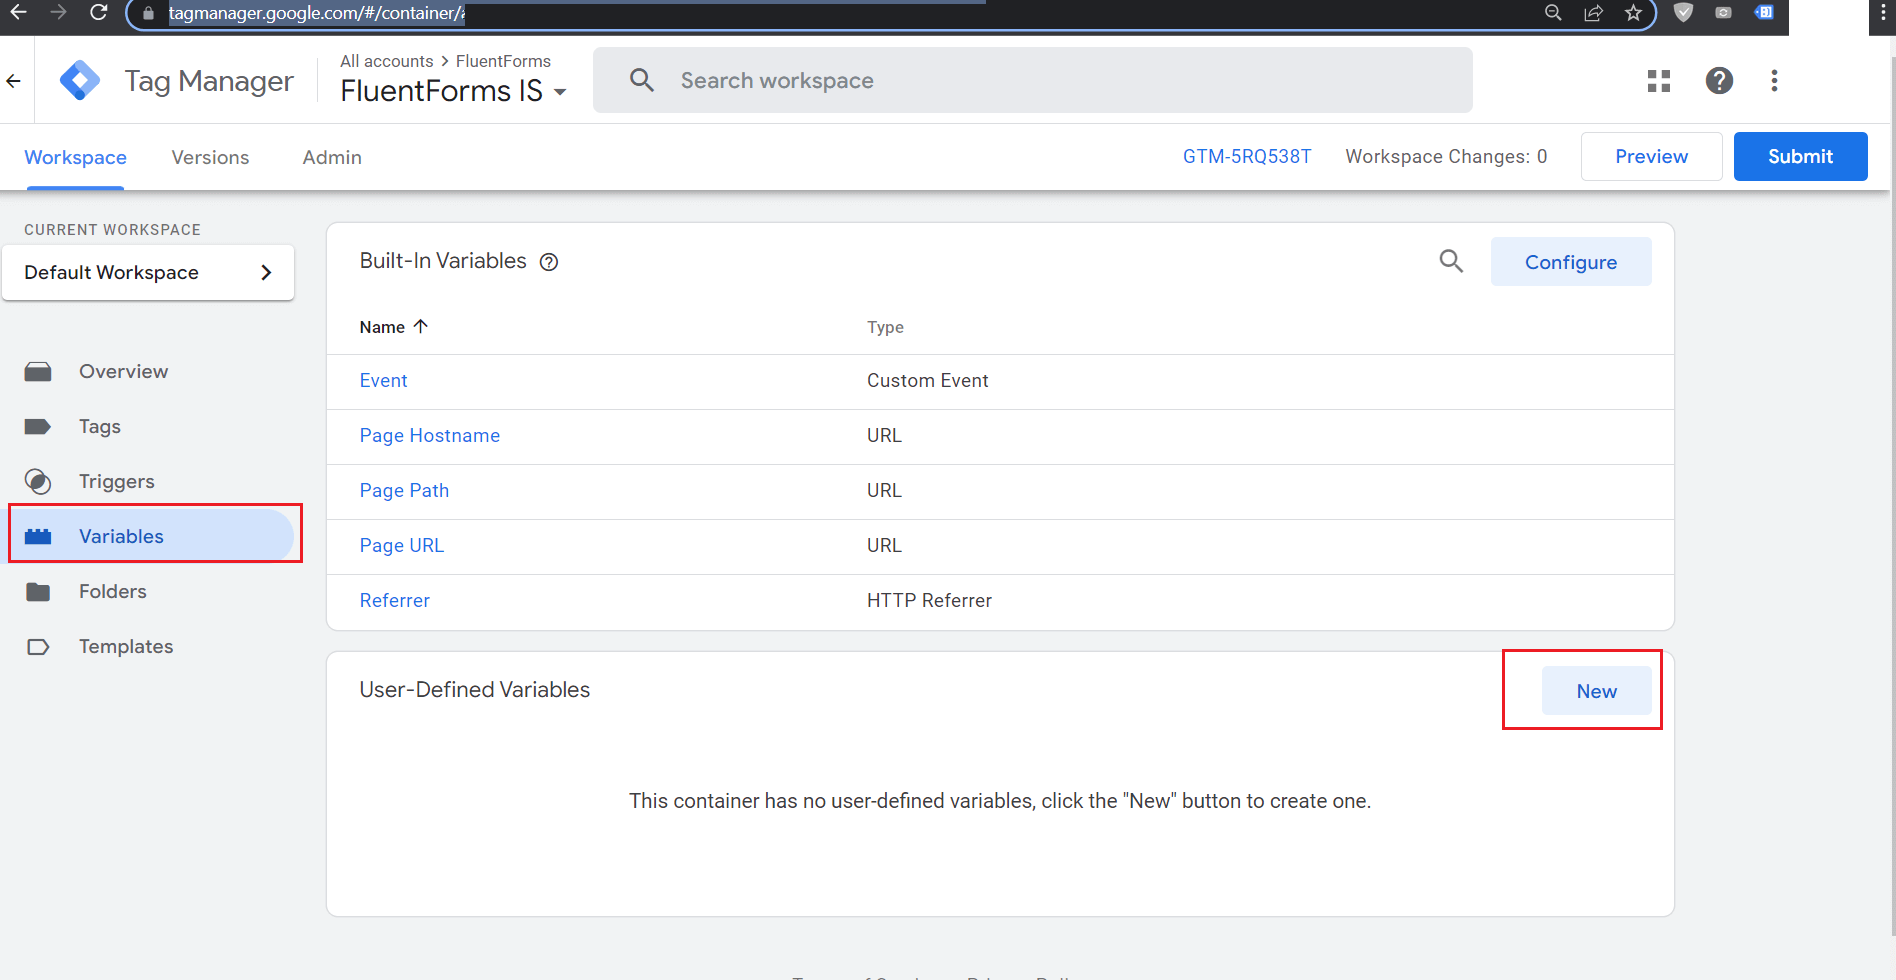
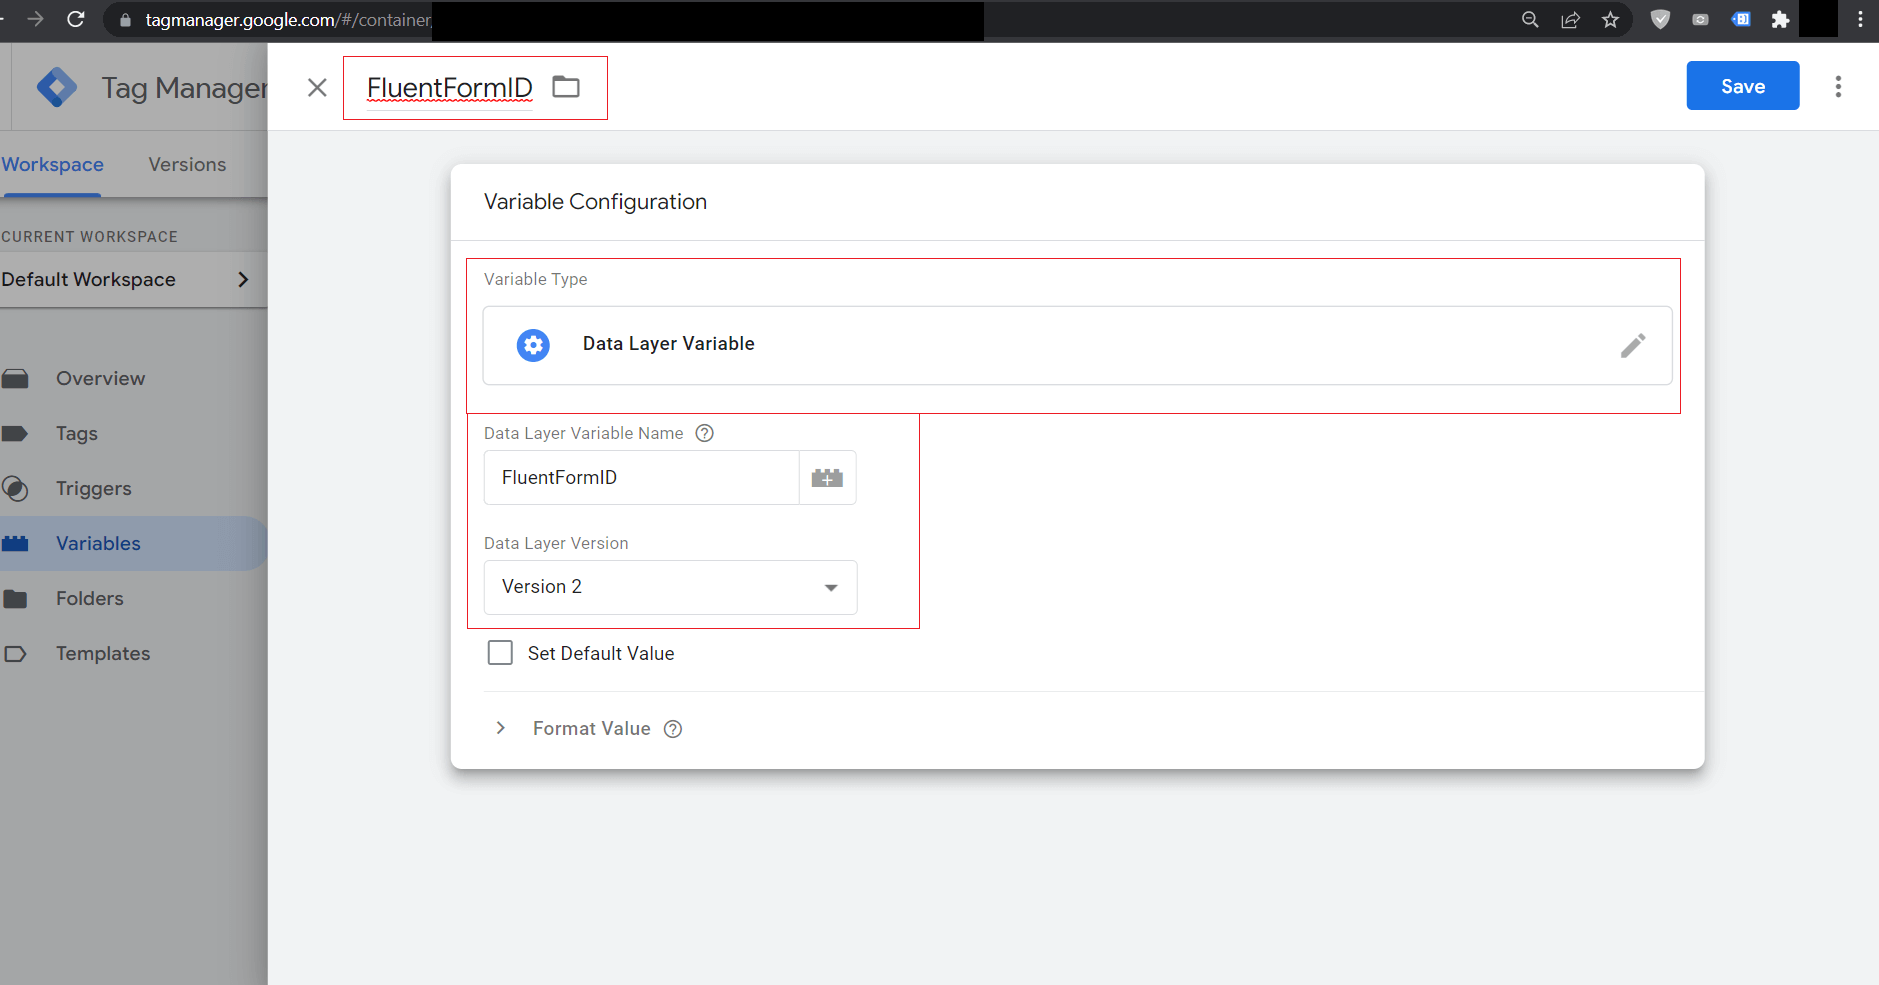
Your Variable properties should be like this:
| Title | FluentFormID |
| Variable Type | Data Layer Variable |
| Data Layer Variable Name | FluentFormID |
| Data Layer Version | Version 2 |
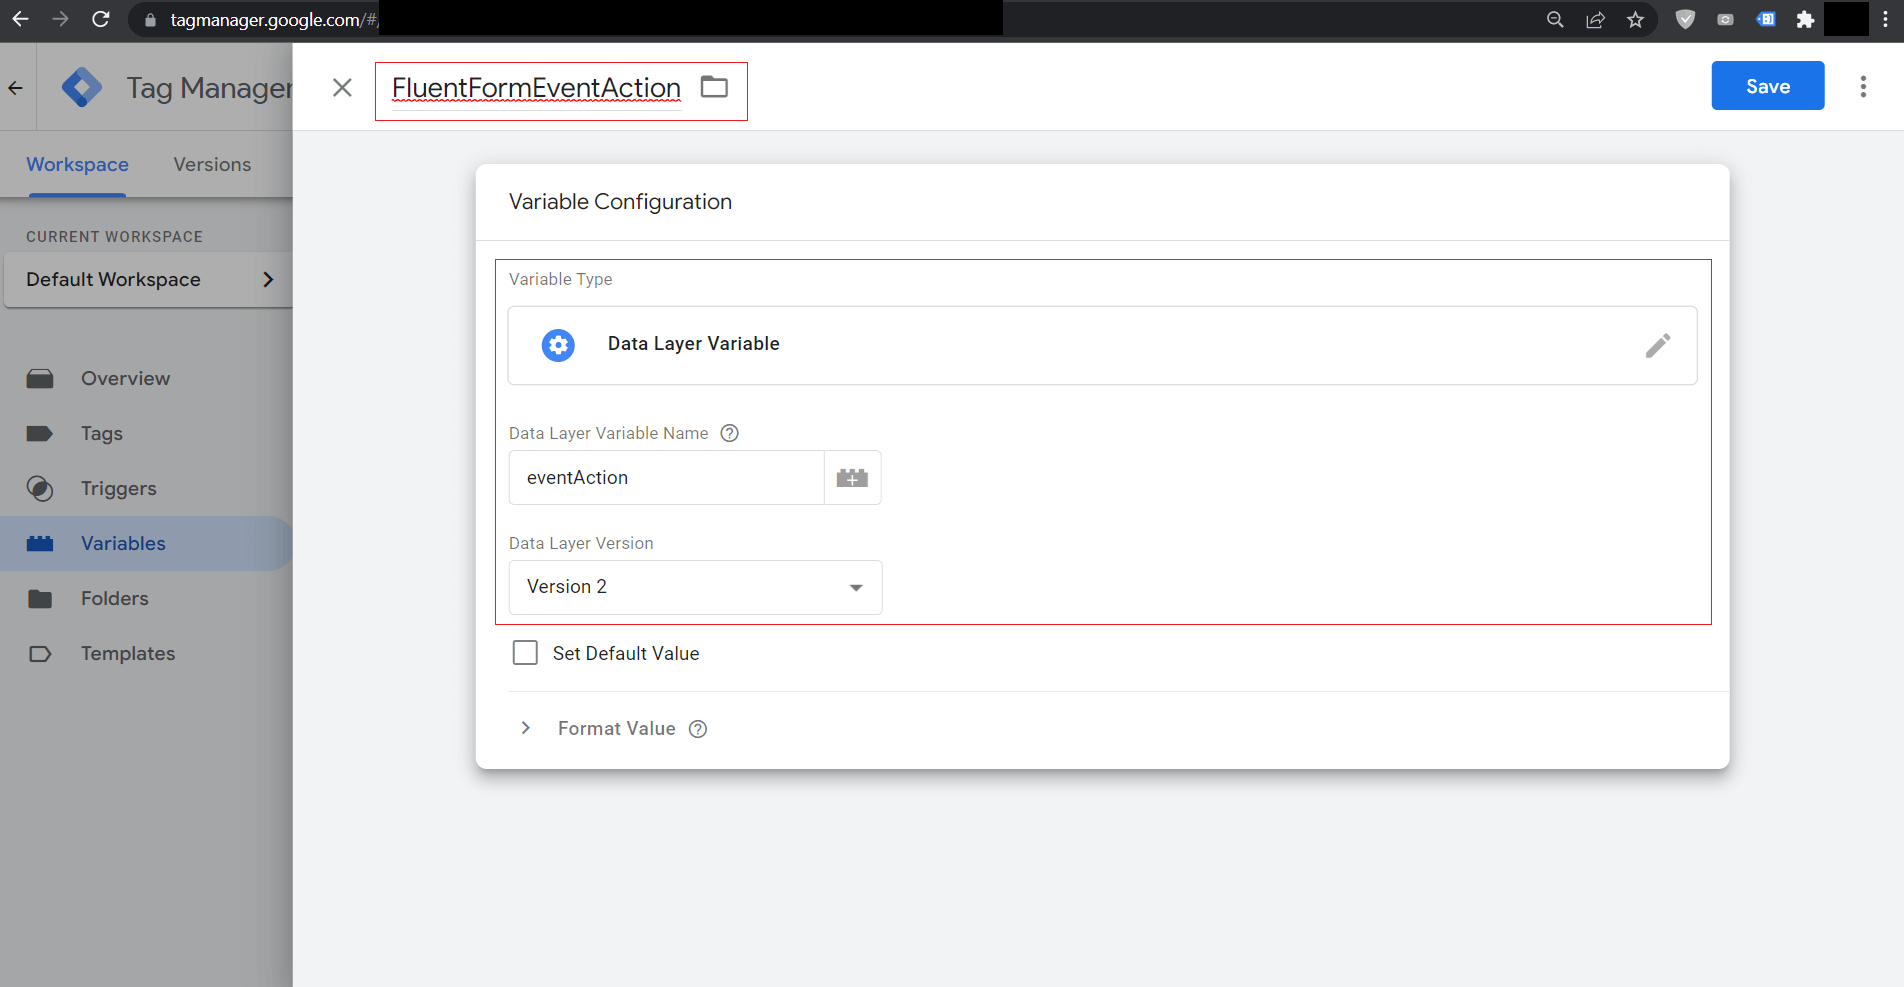
Create Another Variable using the following configuration:
| Title | FluentFormEventAction |
| Variable Type | Data Layer Variable |
| Data Layer Variable Name | eventAction |
| Data Layer Version | Version 2 |
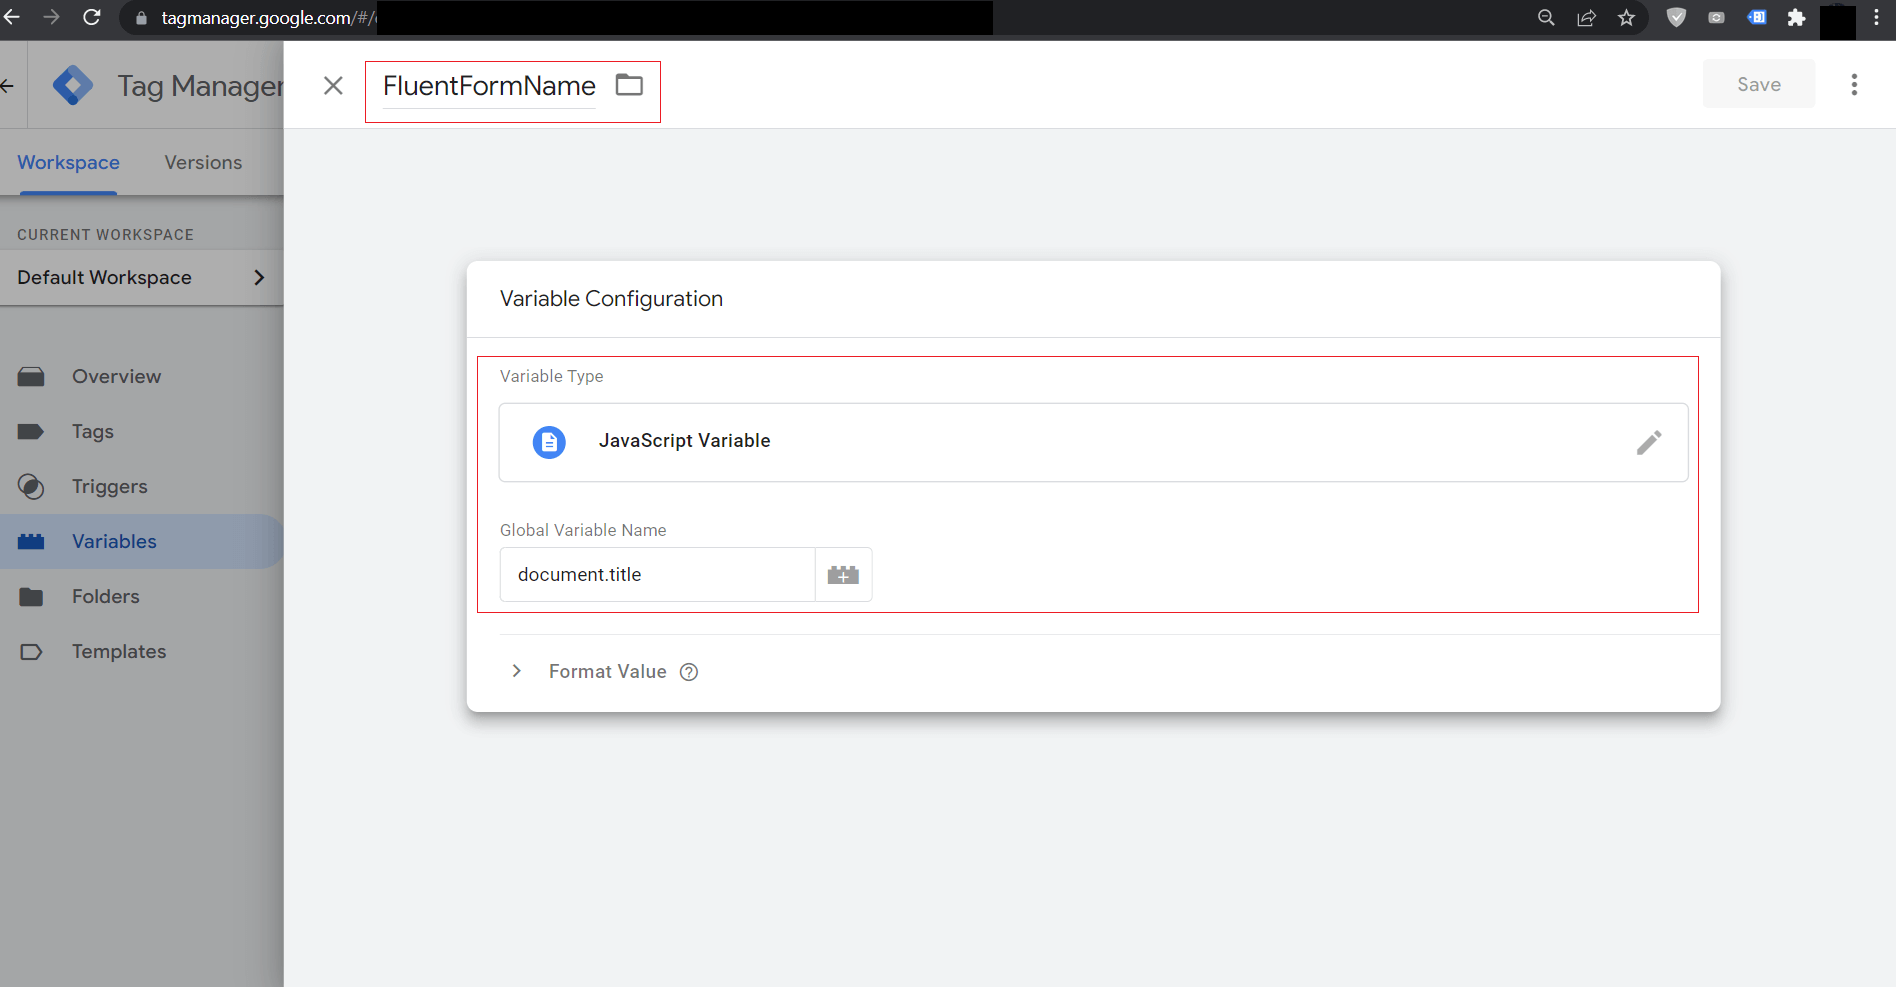
[Optional] Create Another Variable using the following configuration to display Form Page Title:
Step 2 – Creating Fluent Forms Trigger:
Triggers are the most important thing for identifying exactly when GTM will do a task according to our intentions. For example: When a webpage loads with a Fluent Form, What will GTM do when someone submits a Fluent Form.
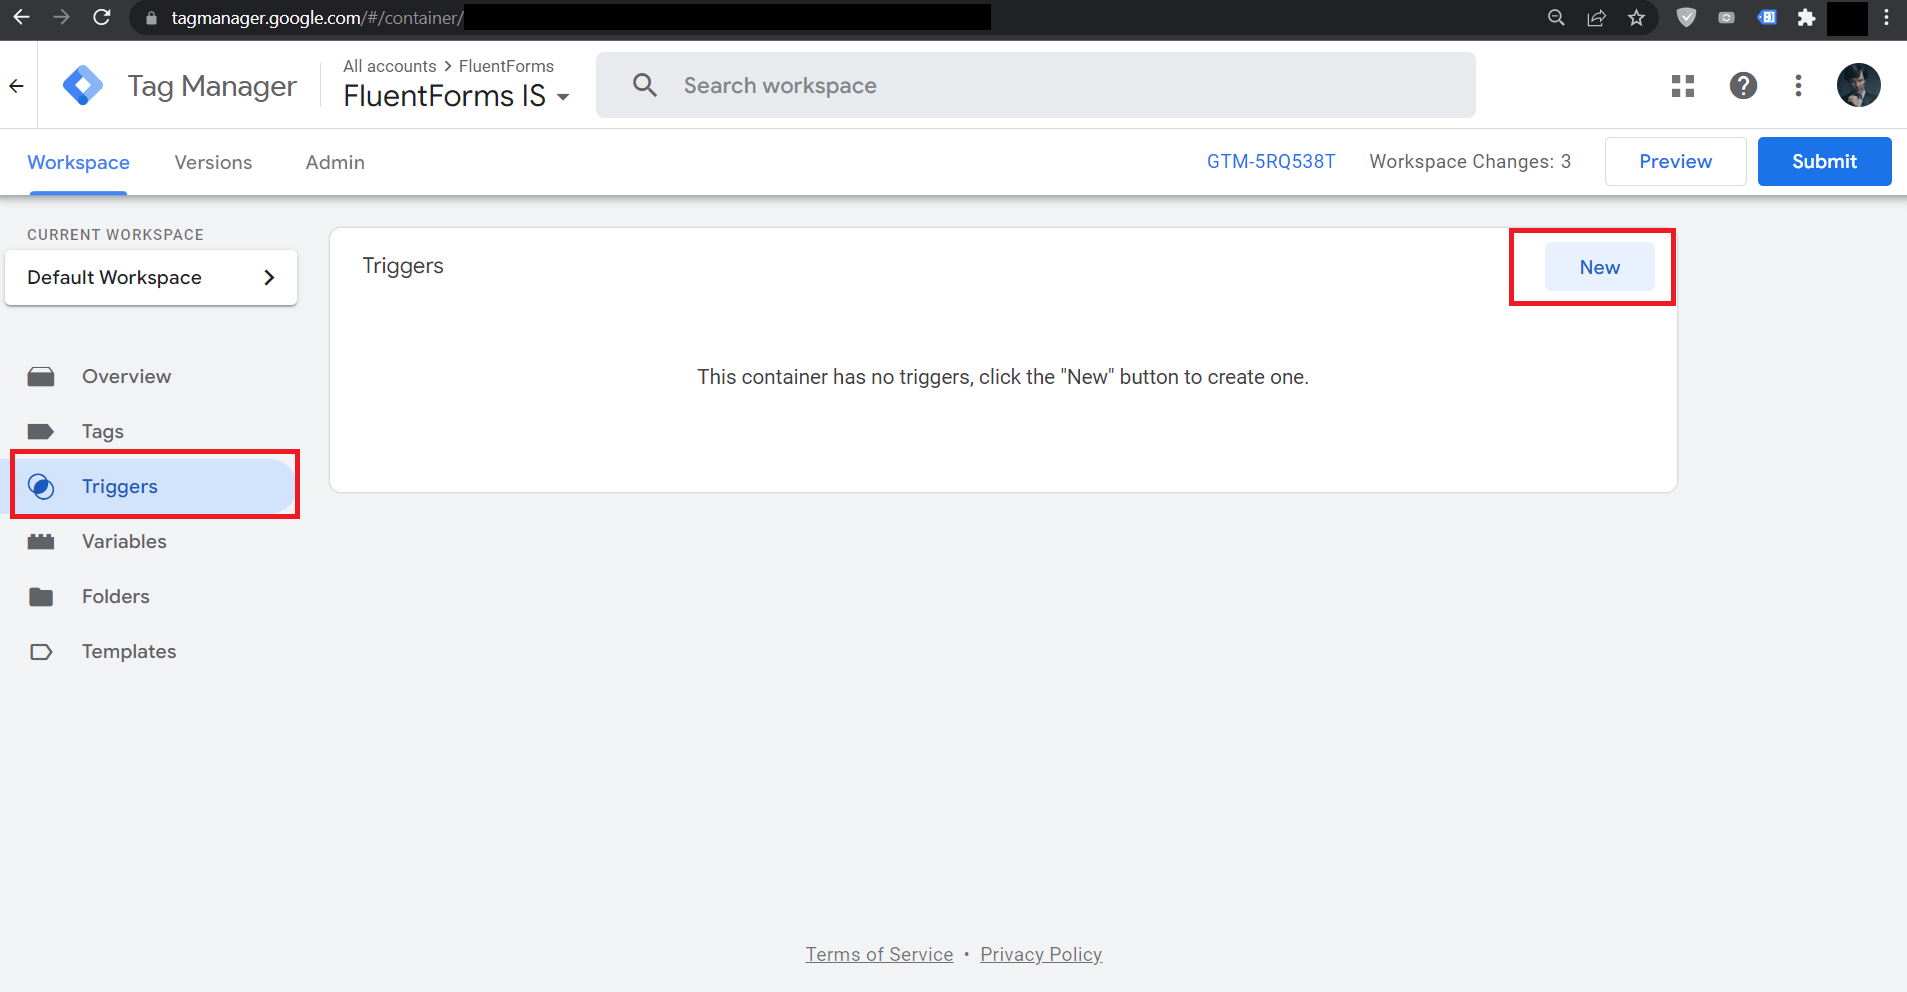
To create a trigger for Fluent Forms, Go to Trigger and Add a New Trigger as below:
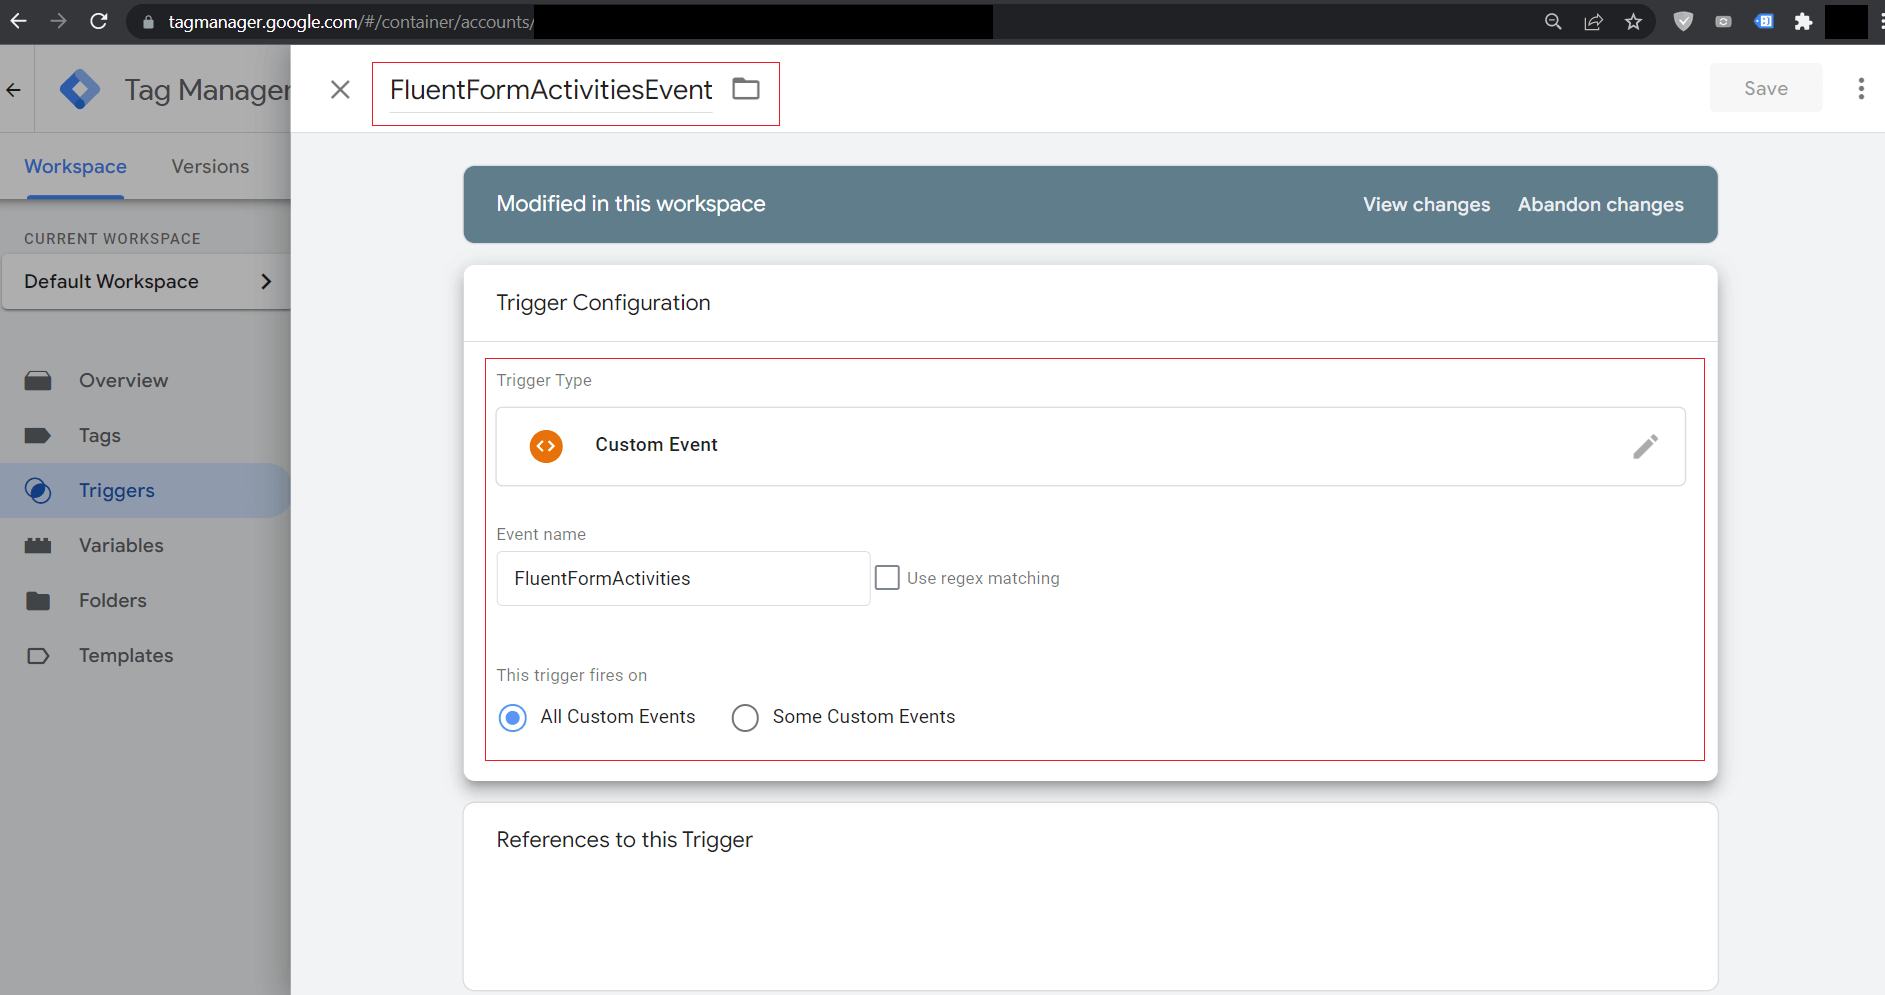
Now follow the below data for the target trigger:
| Title | FluentFormActivitiesEvent |
| Event Type | Custom Event |
| Event Name | FluentFormActivities |
| Trigger Fires on | All Custom Events |
Step 3 – Creating Fluent Forms Tags:
Tags are the things for which we use Google Tag Manager. Tags can be in various types configured according to our needs. It’s more like an automation instance when a trigger fires and finishes the task defined in Tag.
We will be using a Google Analytics: Universal Analytics type of Tag and then pass the form events data from the website using a Custom JavaScript Snippet attached to webpages also by the Google Tag Manager itself by another Custom HTML type Tag.
Let’s create the Custom HTML Tag first as below:
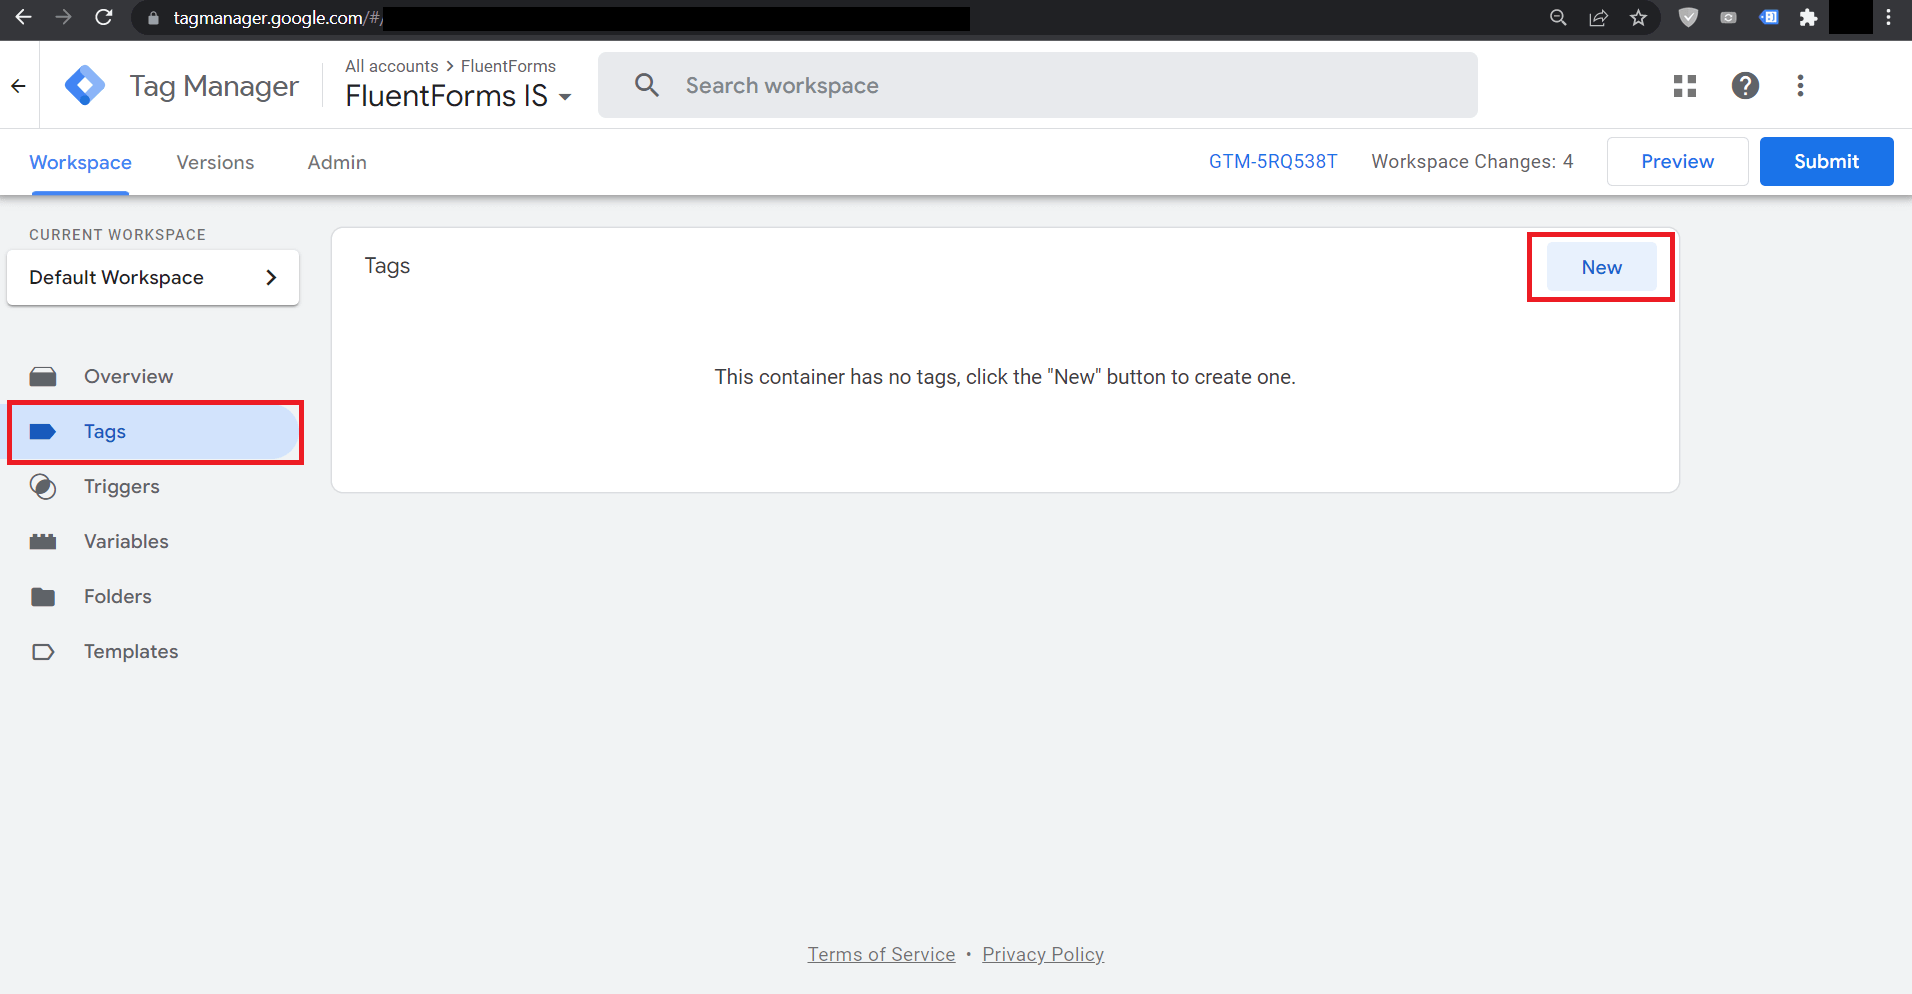
Go to Tags and click New
Then Select Tag Type as Custom HTML and Put the Custom Code provided below inside the GTM Code Editor with provided data below:
| Title | cHTML – FluentFormsDataPush |
| Tag Type | Custom HTML |
<script>
   (function($){
     var fluentForms = $('form.frm-fluent-form');
     fluentForms.each(function() {
       var $form = $(this);
       var formId = $form.attr('data-form_id');
       dataLayer.push({
        'event': 'FluentFormActivities',
        'eventCategory': 'FluentForm',
        'eventAction': 'FormView',
        'FluentFormID' : formId
      });
   $form.on('fluentform_submission_success', function() {
     dataLayer.push({
       'event': 'FluentFormActivities',
       'eventCategory': 'FluentForm',
       'eventAction': 'FormSubmitted',
       'FluentFormID' : formId
     });
   });
  });
 }(jQuery));
</script>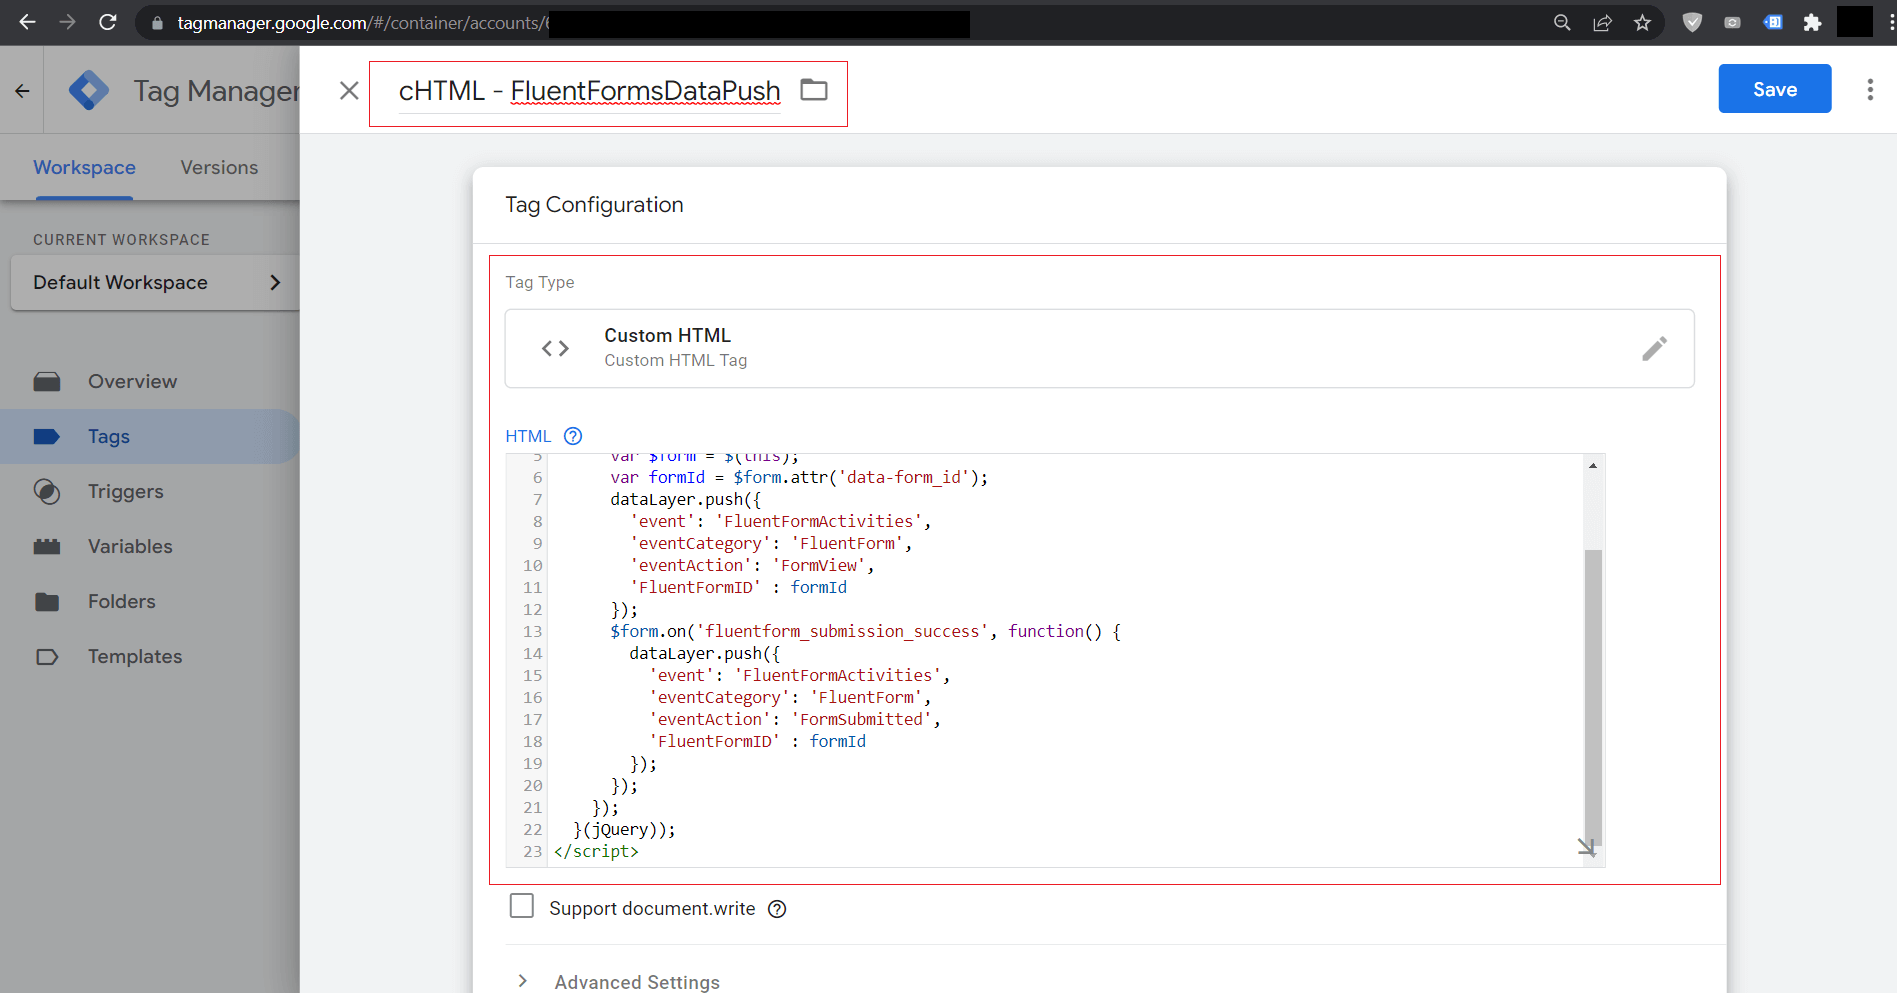
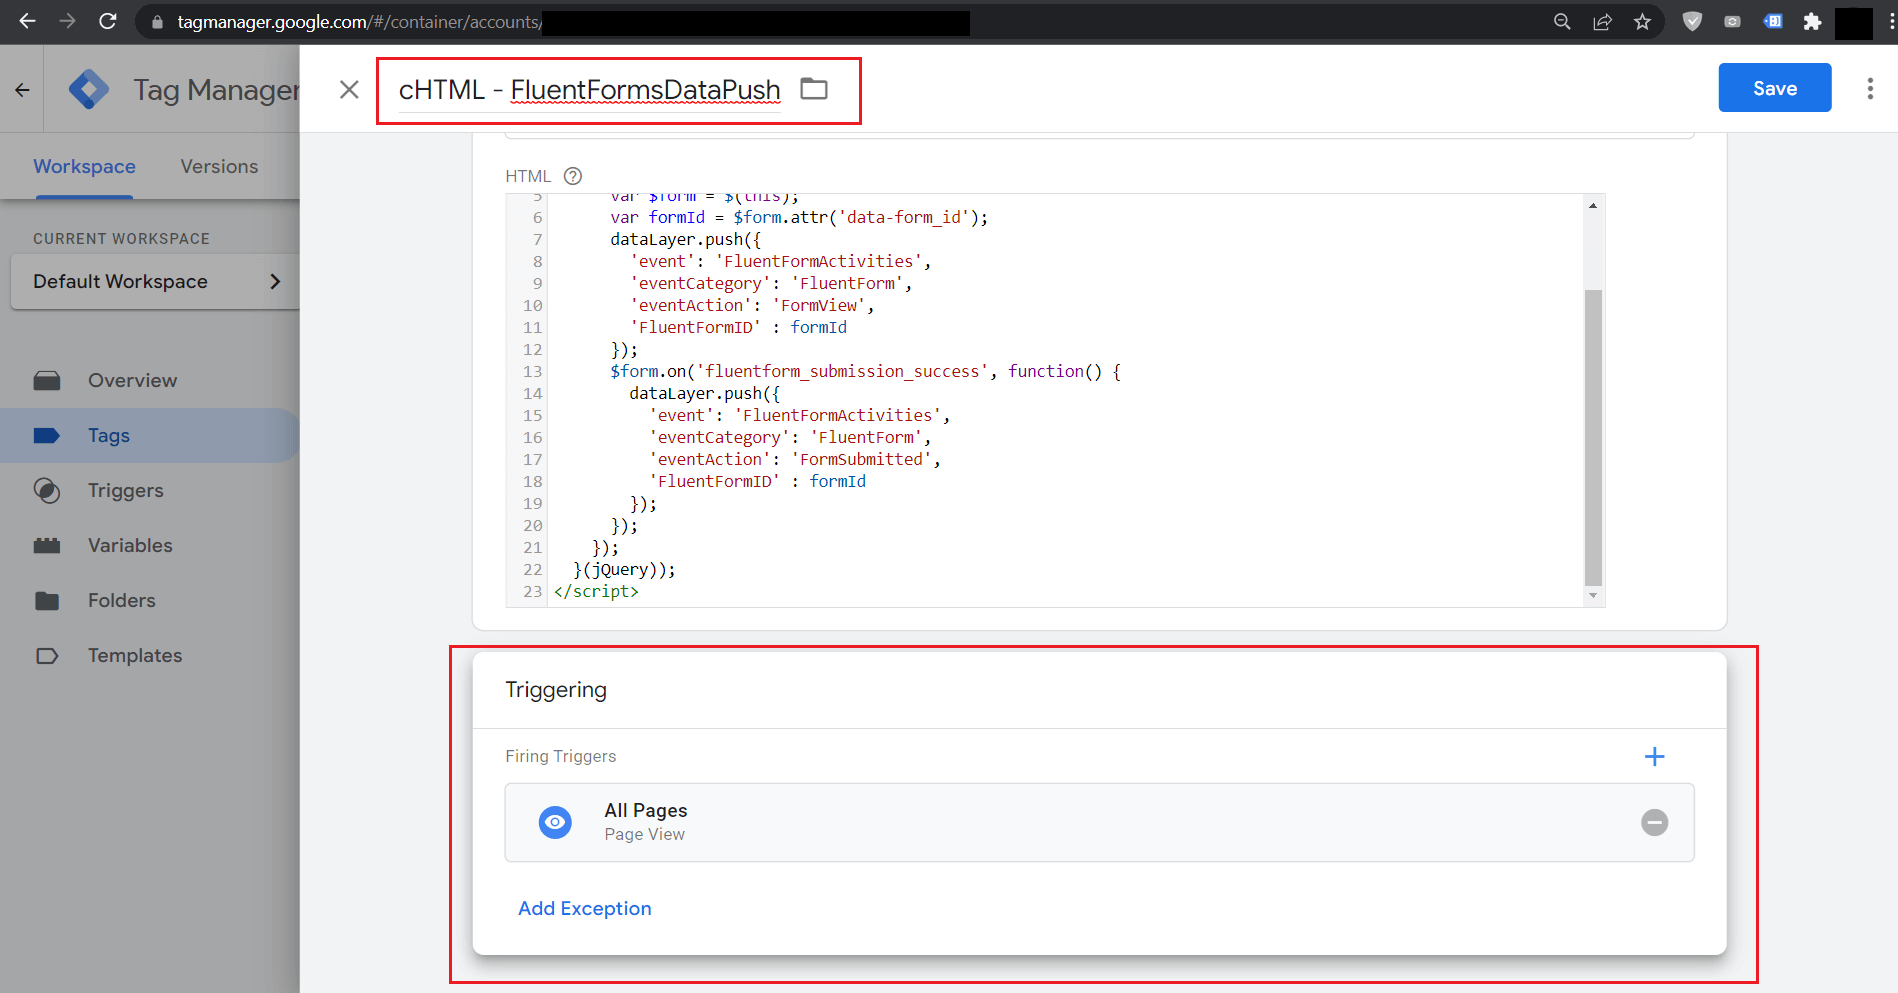
When that code is inserted please click on anywhere inside the Triggering Field and Select Firing Triggers as Page View [ All Pages] as below:
Now we are almost close to achieving our target and need to create one last Tag which will fetch the event data and then forward it to Google Analytics. We will also format the properties that will be sent to Google Analytics.
Again Go to Tags and create a new Tag as below:
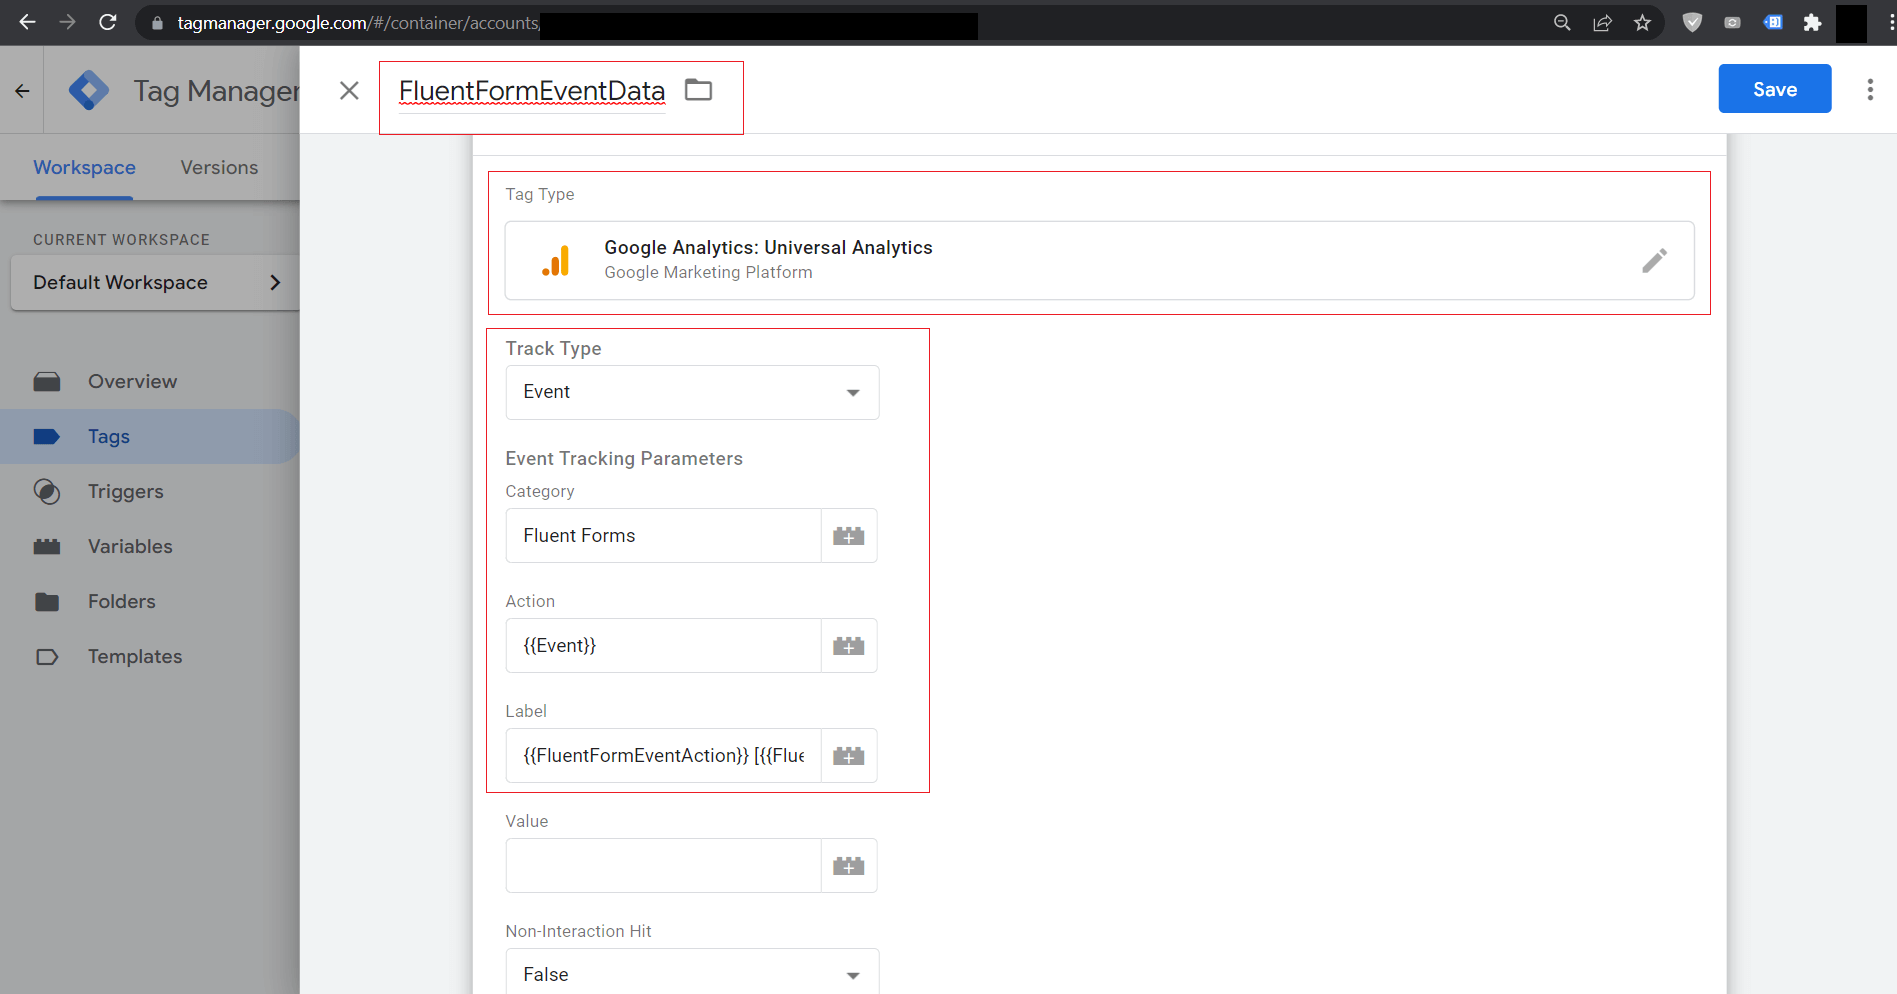
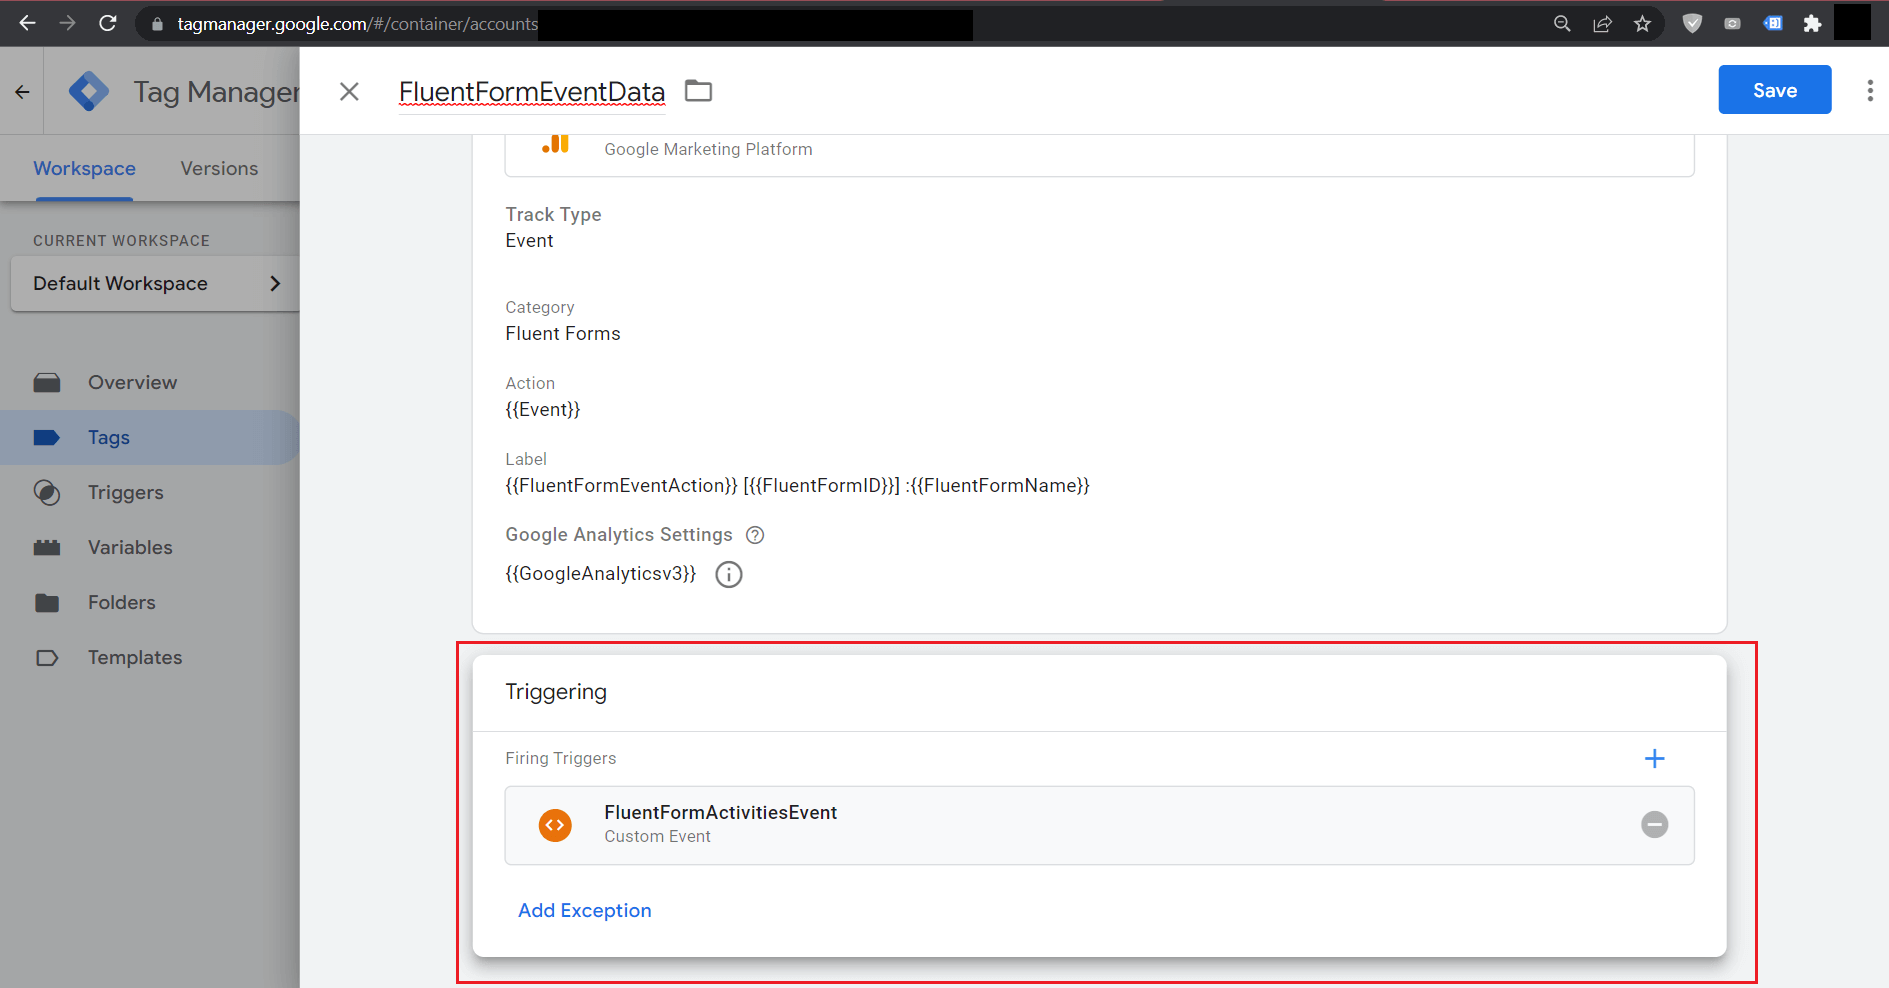
| Title | FluentFormEventData |
| Track Type | Event |
| Category | Fluent Forms |
| Action | {{Event}} |
| Label | {{FluentFormEventAction}} [{{FluentFormID}}] :{{FluentFormName}} |
| Google Analytics Settings | PLEASE FOLLOW BELOW INSTRUCTION |
Create a New Variable or Select an Existing one that is already connected to your desired Google Analytics Account.
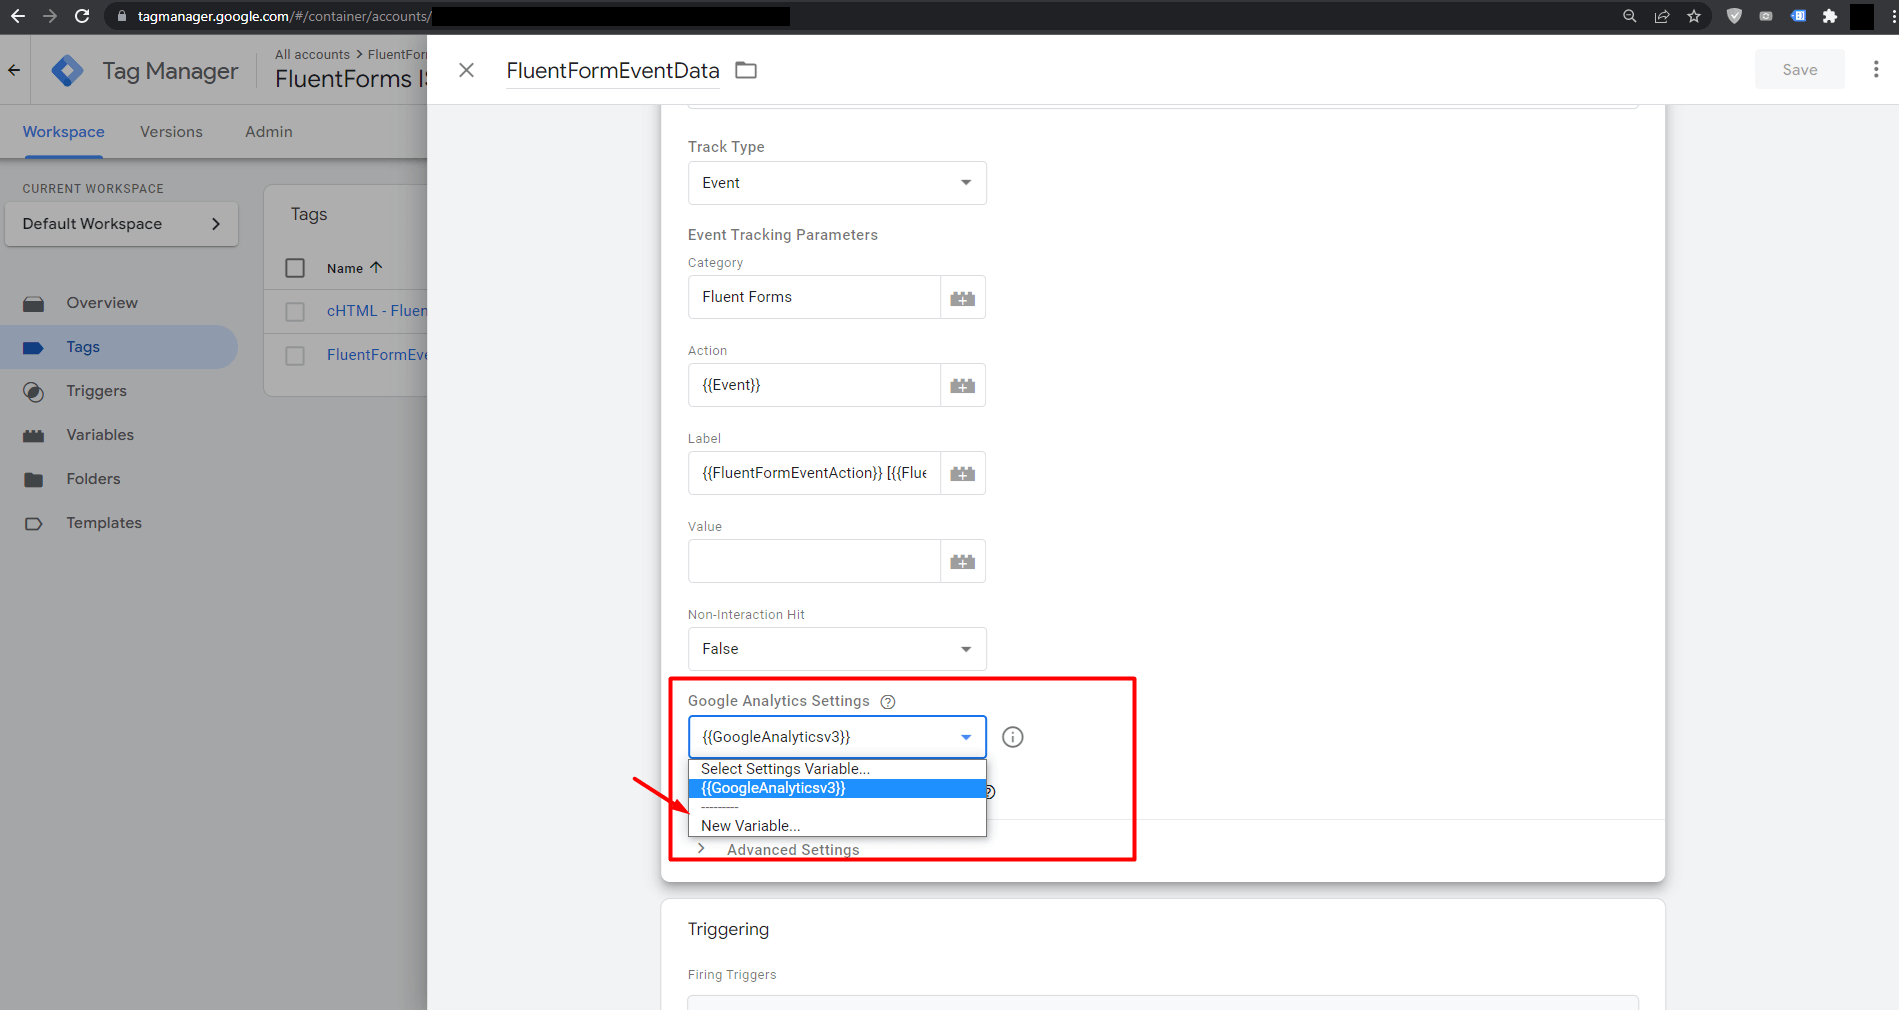
If you want to create a new one Select Variable Type as Google Analytics Settings and in Tracking ID put your Google Analytics Version 3 or traditional Universal Analytics Tracking Code which looks like UA-XXXXXXXX-X
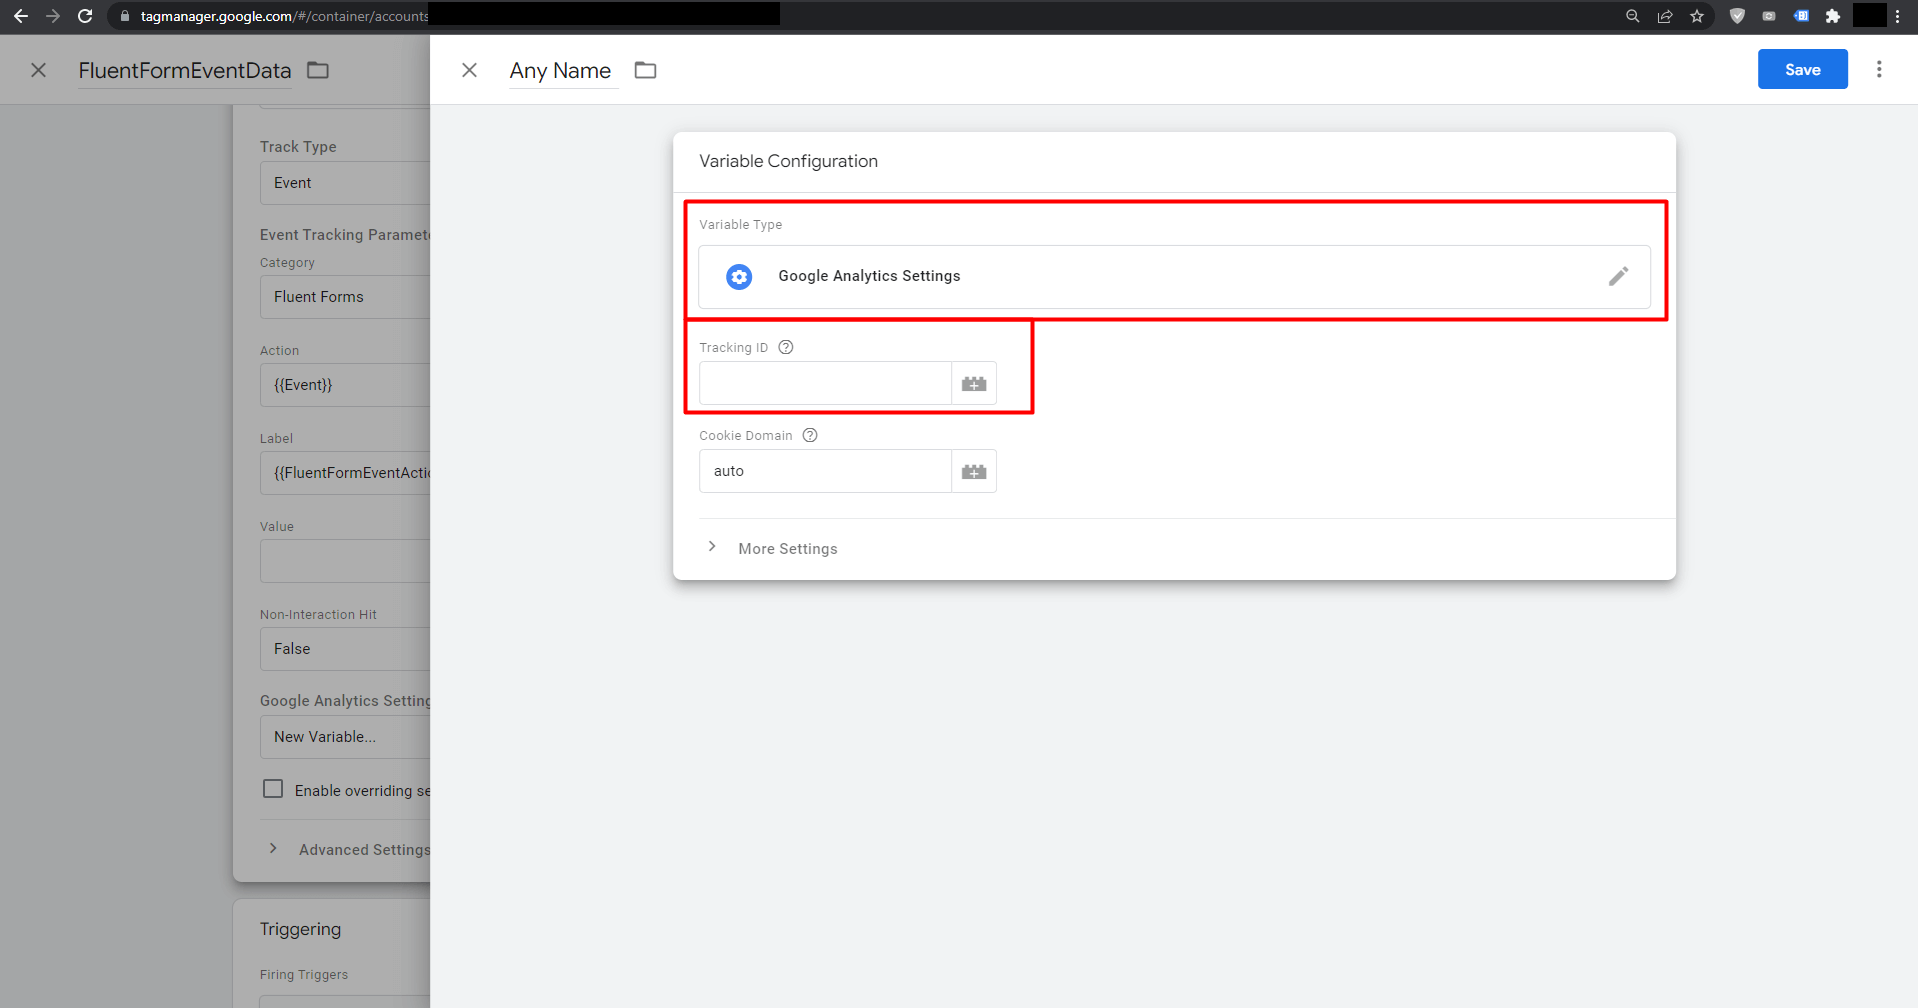
For your convenience finding a Tracking ID from Google Analytics is also guided below:
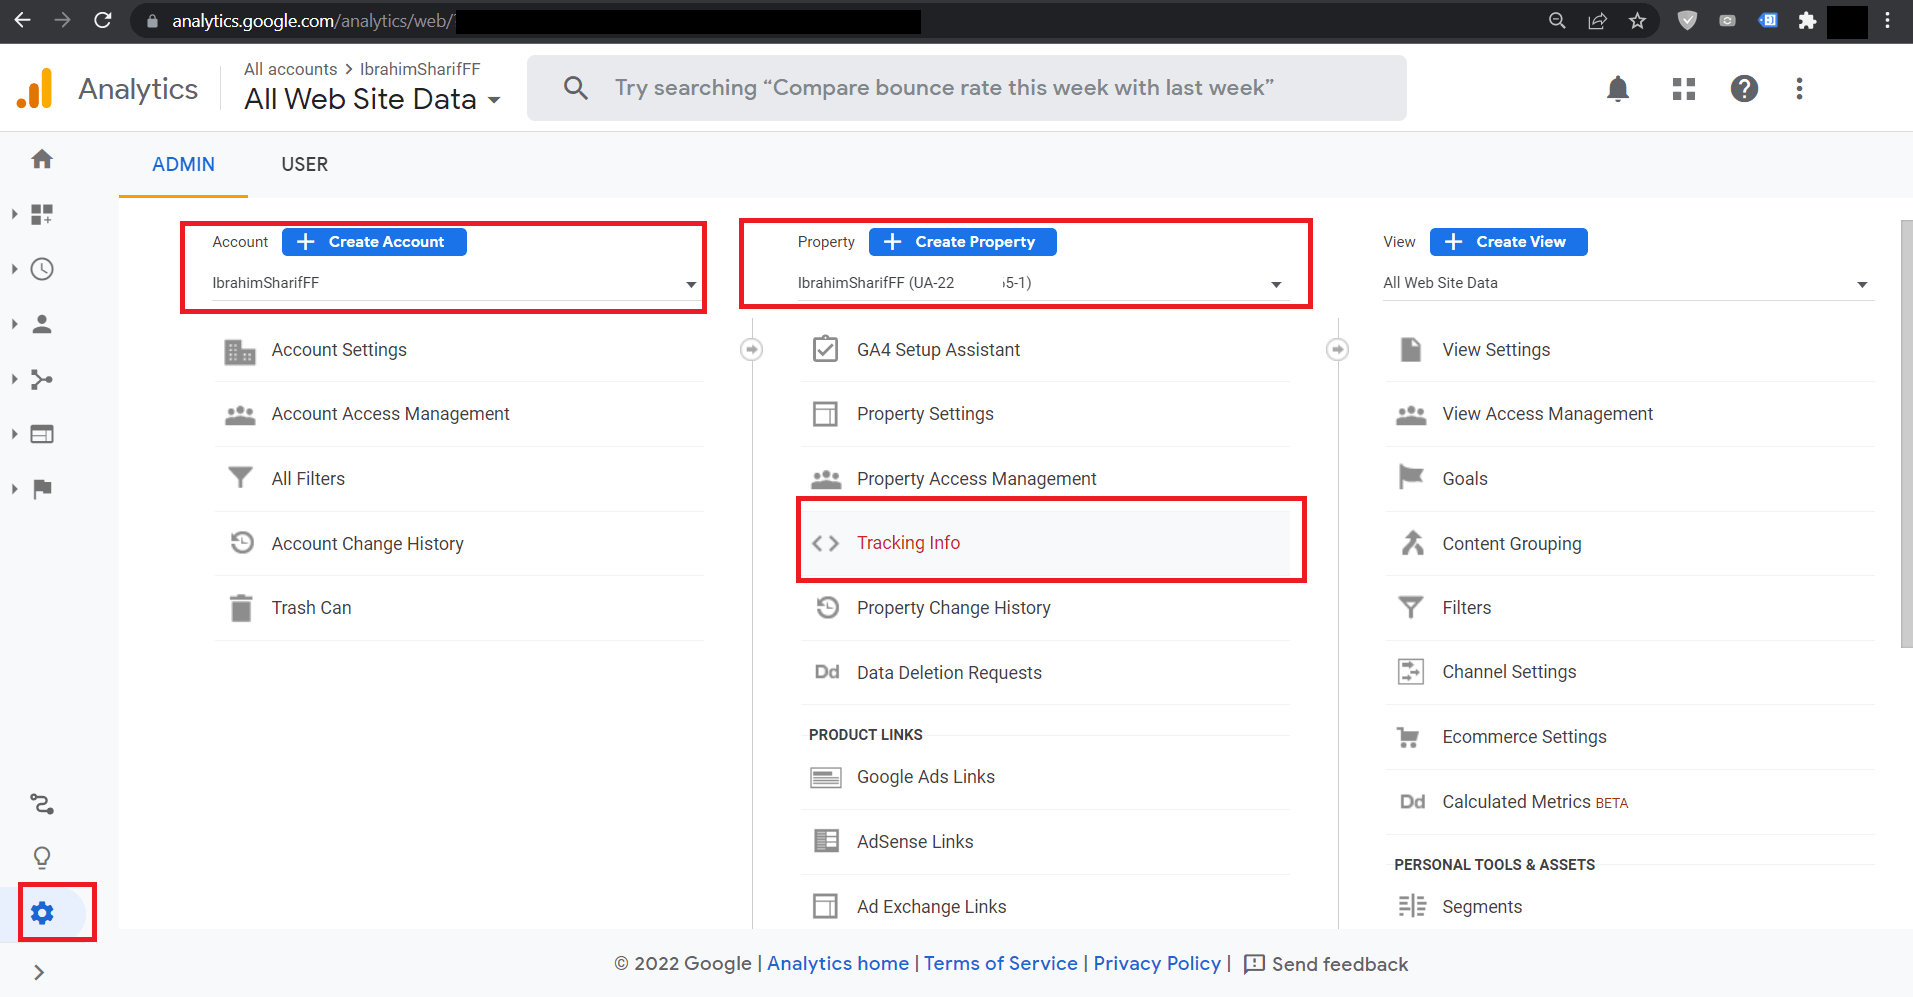
Go to your Google Analytics Dashboard and then click on Admin (Gear Icon on the Left Bottom of the page)
Then select the target account or create a new one with your desired details. Also, select an existing Property if you already have or create a new one with desired details. Under the Property Name Tracking Info option is available and then click on it:
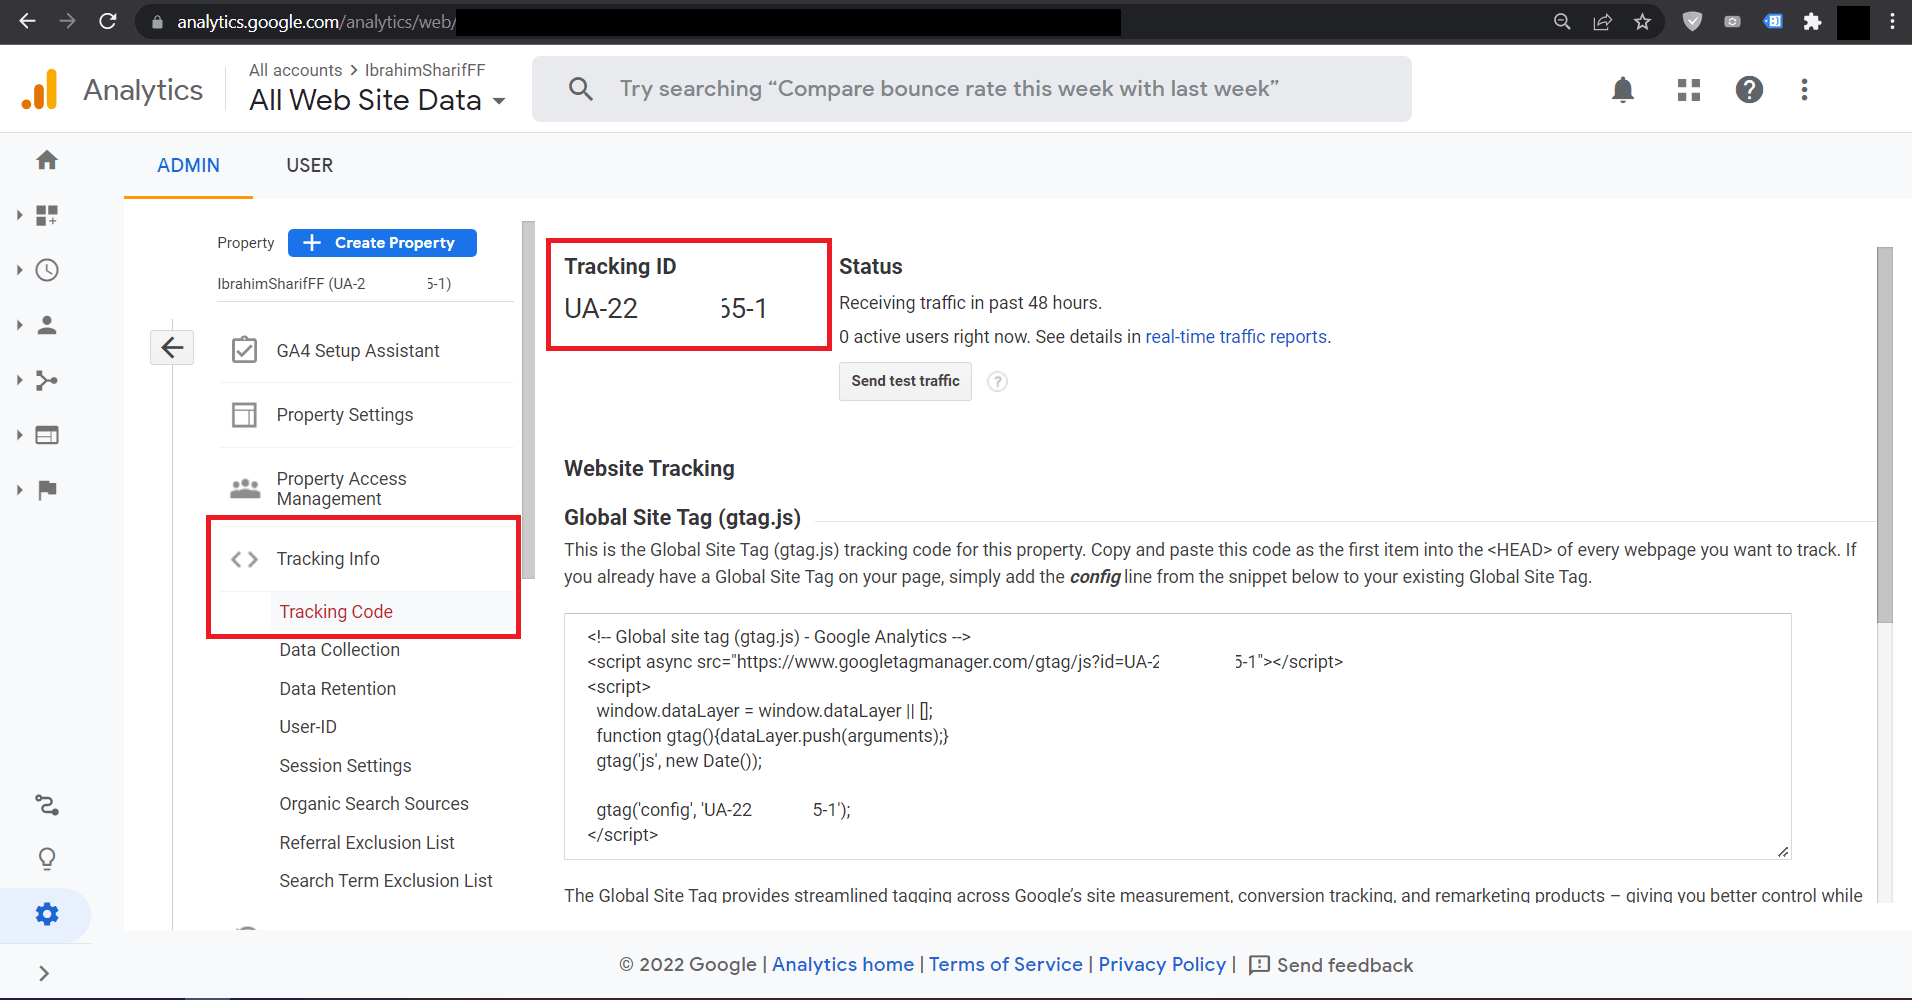
Then you will see the Tracking Code option and click to get the Tracking ID as below:
Now Let’s get back to the last Tag we were creating. When the Google Analytics Settings is also selected now it is time to select the trigger like previously we did for Custom HTML.
This time Select the Trigger we created previously named FluentFormActivitiesEvent
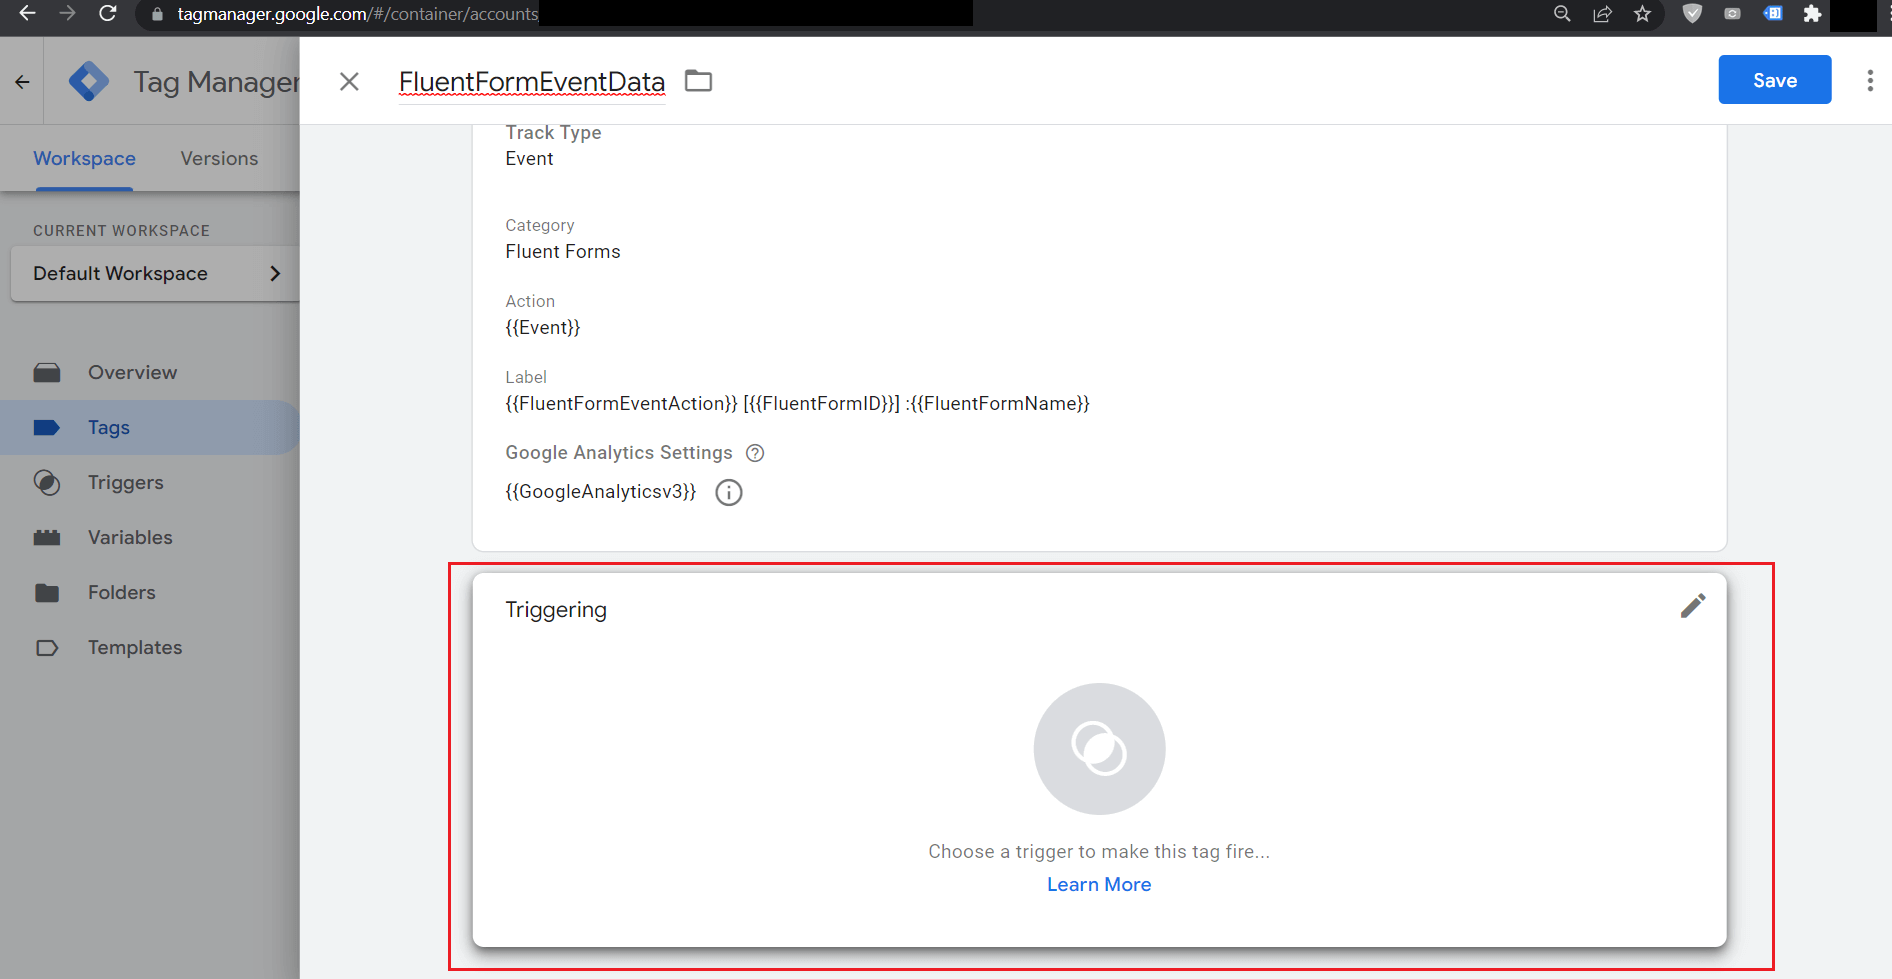
Then from the Selection popup select the FluentFormActivitiesEvent trigger:
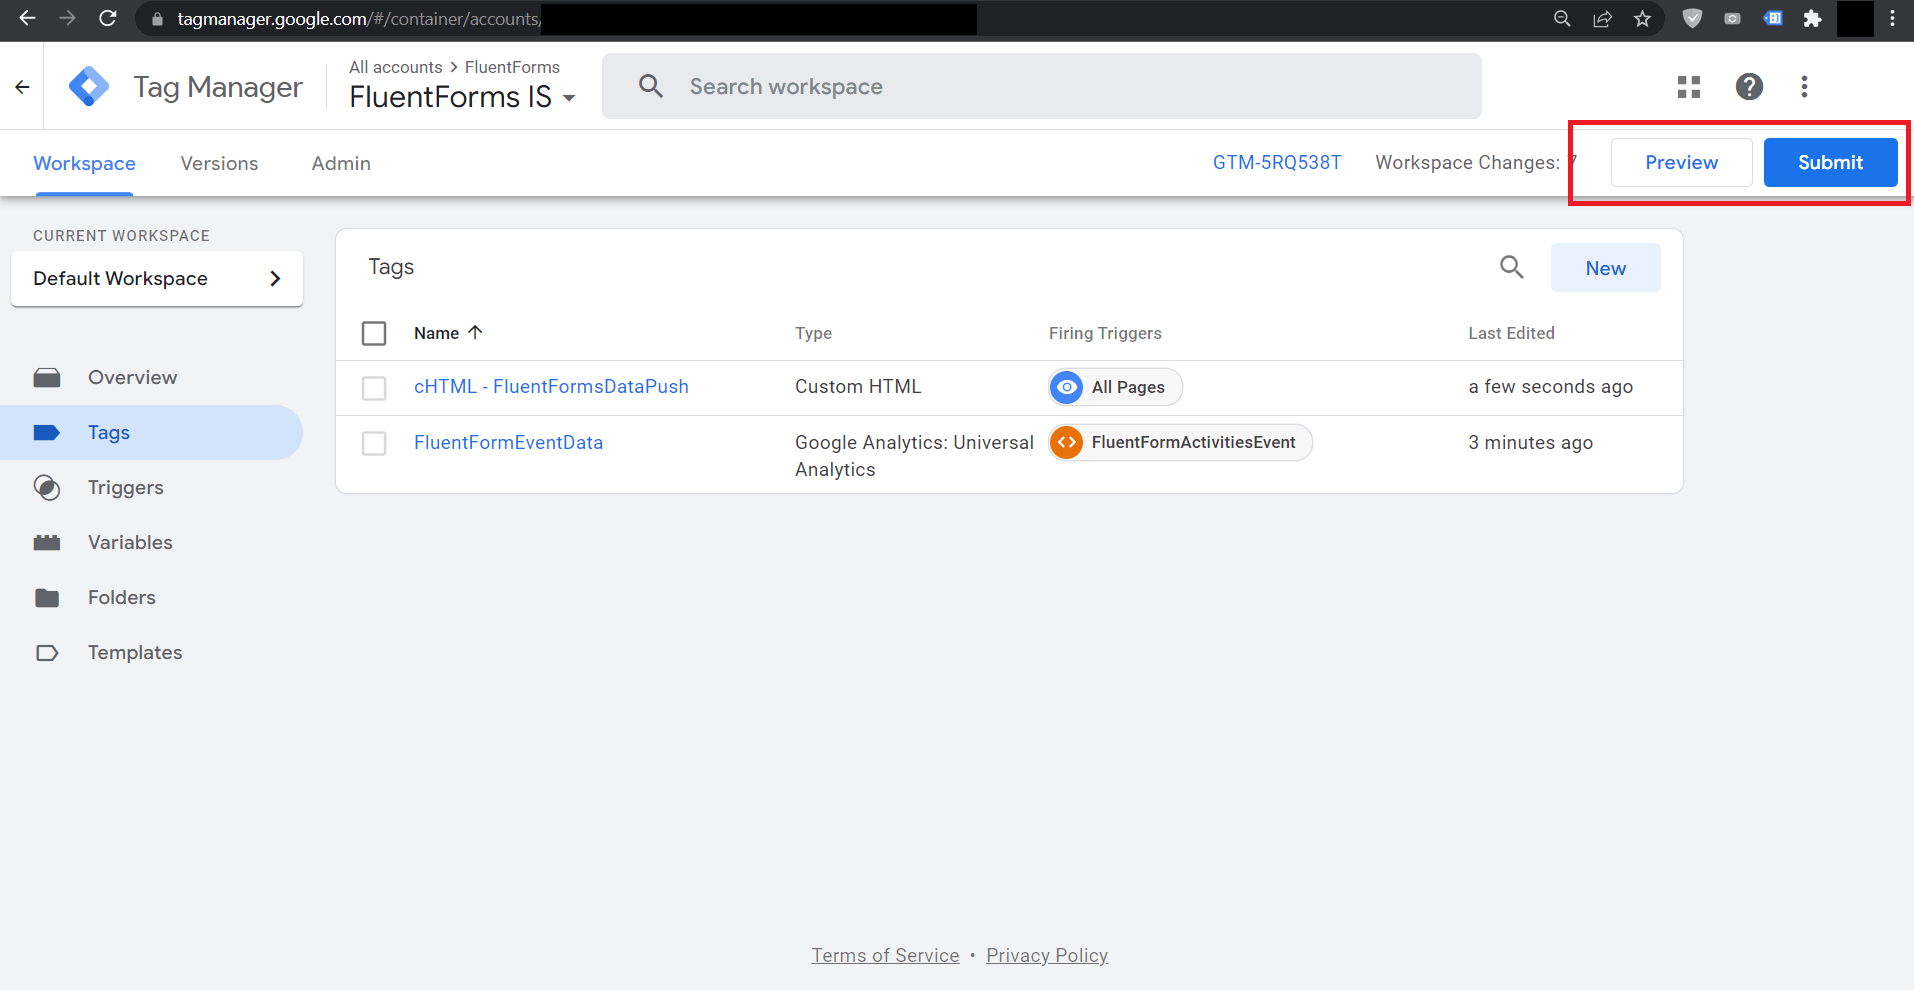
Now we are done with tasks. We can now debug what we just did live in Preview Mode or make the settings public by Publishing from the Workspace.
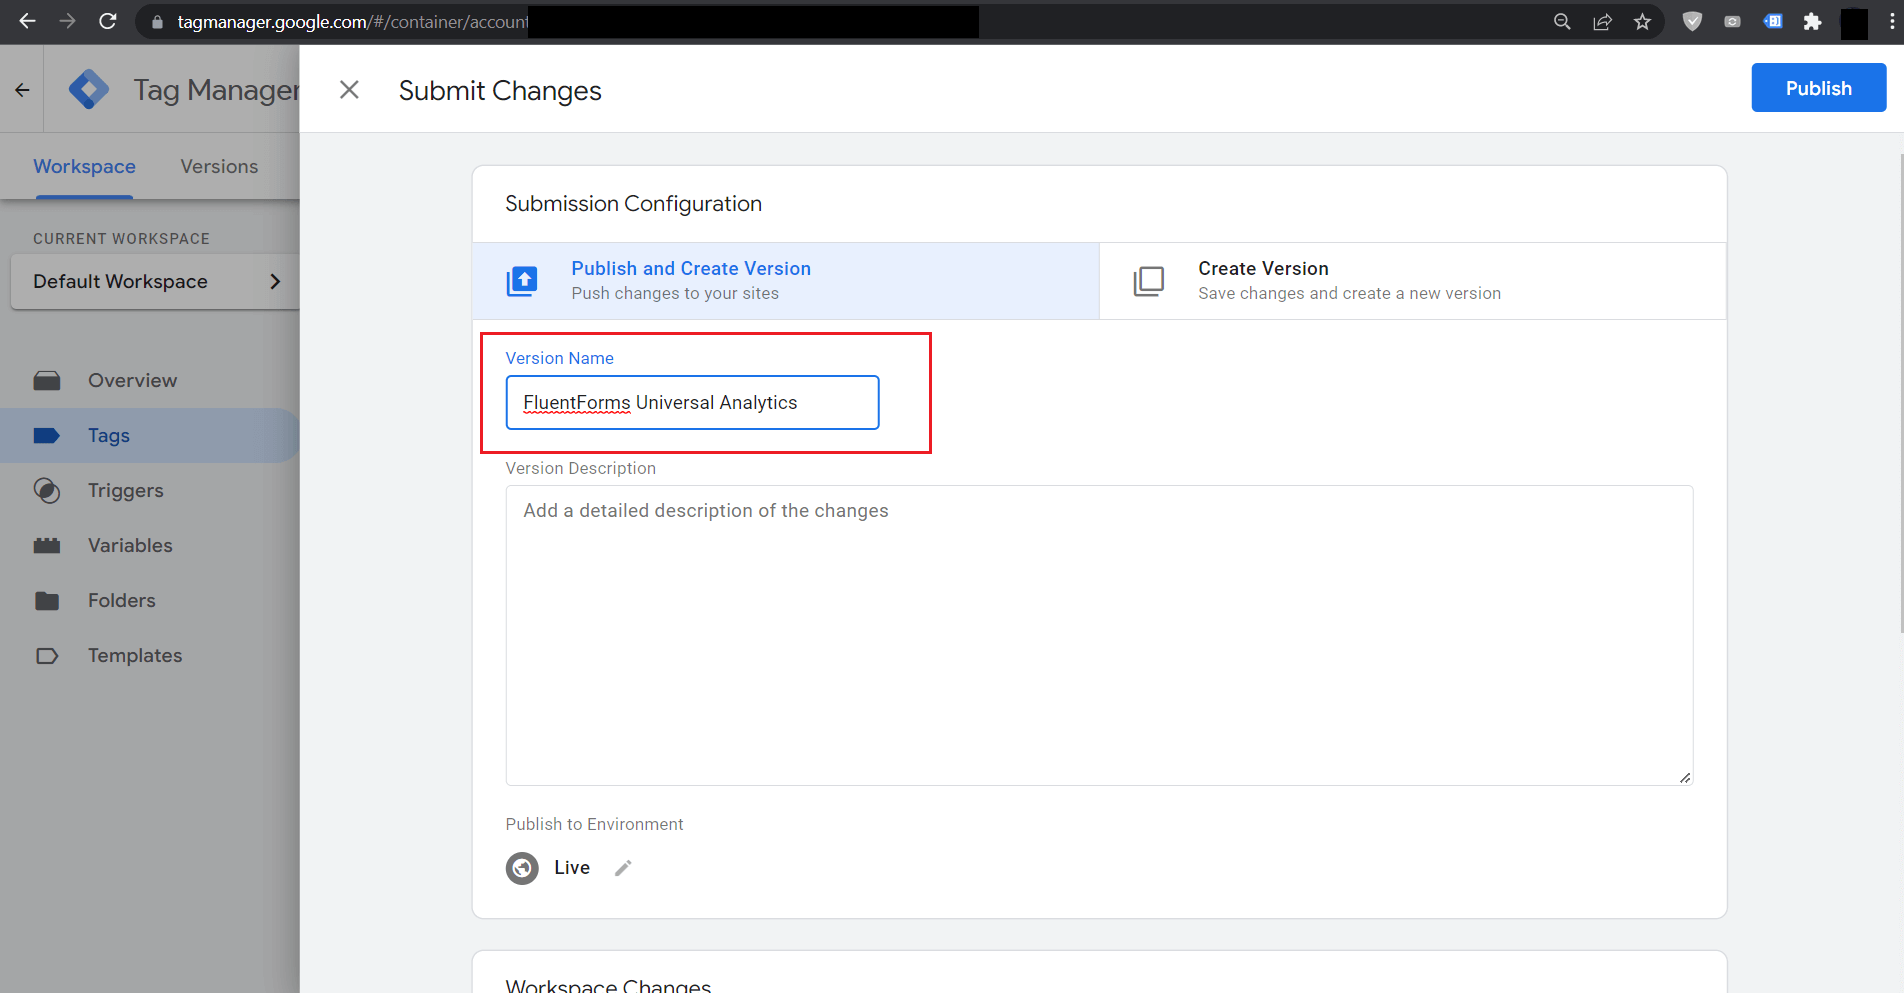
Type in a meaningful Version Name which can be anything for future purposes if anything goes wrong while working in the future identify works done till now and can revert to this stage if we like.
Since this method is confirmed for Fluent Forms I am going to Publish my Workspace and then check in Google Analytics by opening a Page that contains a Fluent Form and then submit the form with some data and check the Events inside Google Analytics.
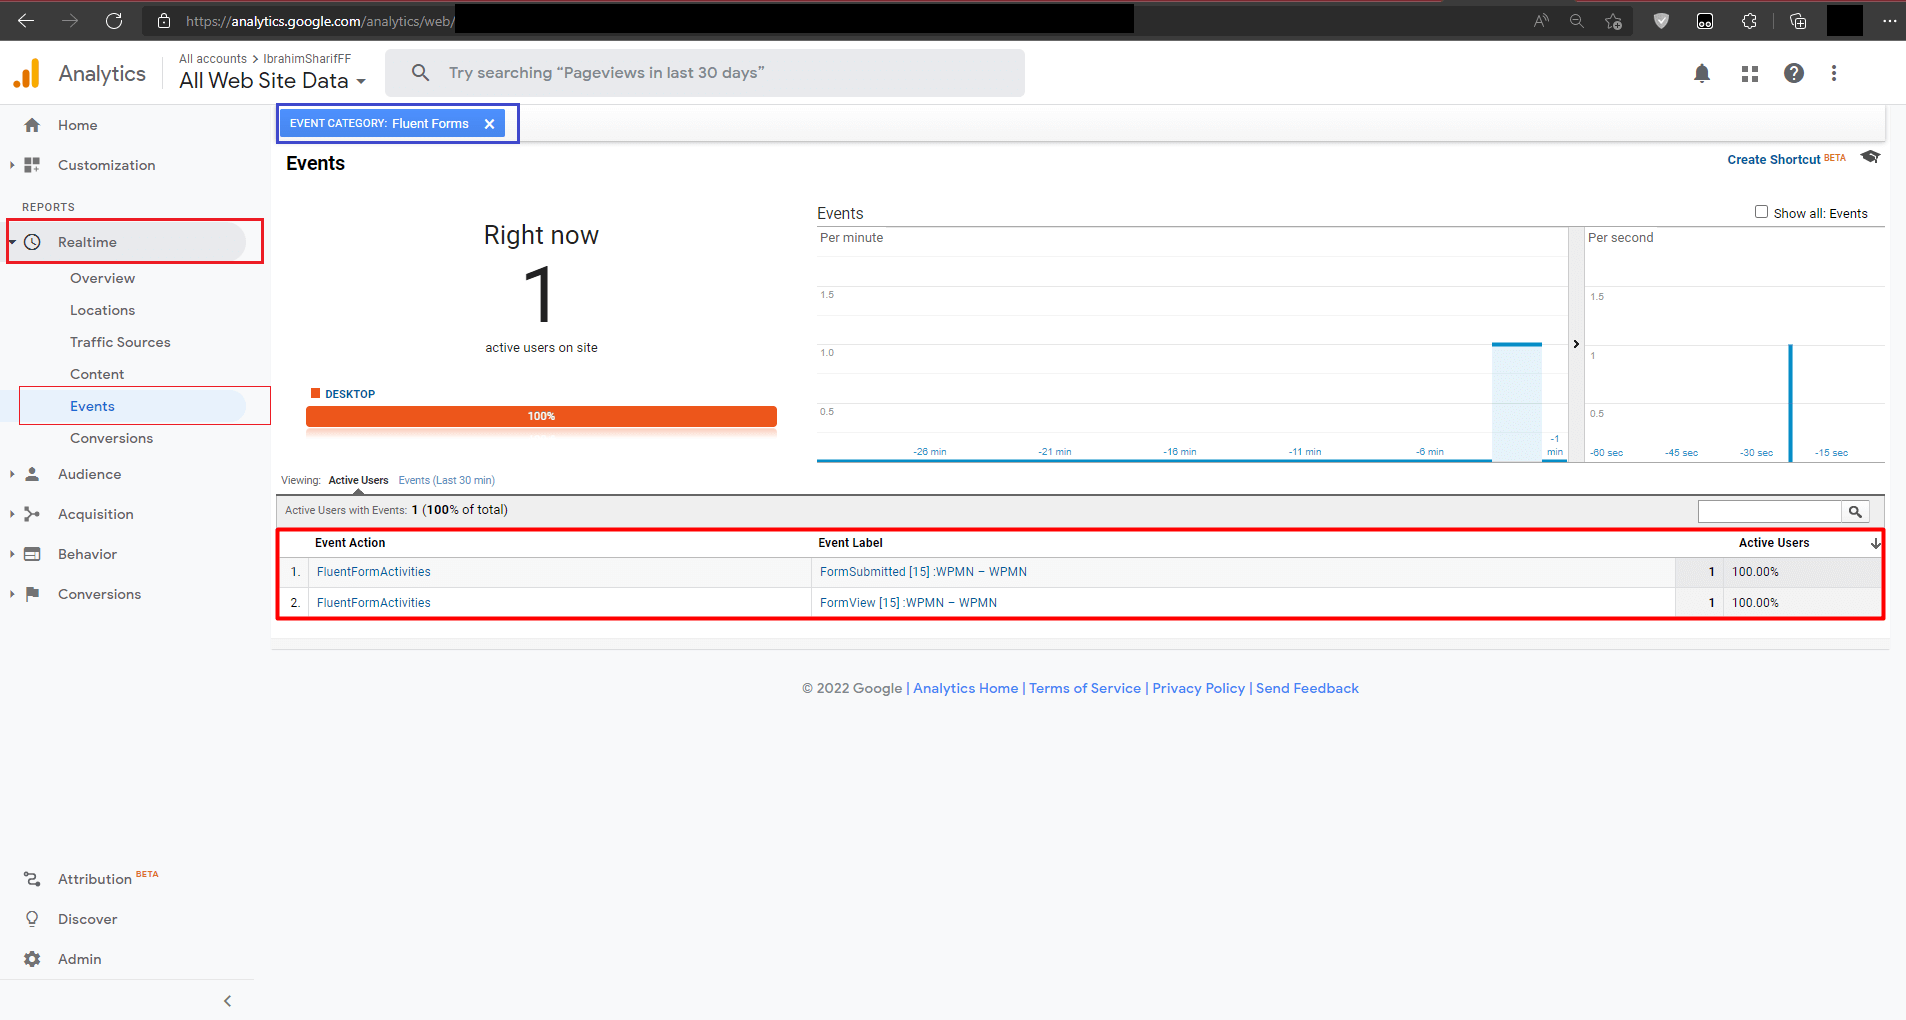
The final result in Google Analytics:
The sample form which is being tested looks like the below:

After page loading even without clicking anything on the page the form sends an event named FormView to GTM and then it is triggered by our configuration and now shows up in Google Analytics. Also after submitting the form we can see there is another event pushed which is FormSubmitted.
We can notice that the Event Label contains the Event Name including the Form Number on the website and then the webpage title which contained the form.
That’s it. Now you will get events to Google Analytics for all the Fluent Forms on your website.


