Salesforce is the World’s No-1 customer relationship management (CRM) platform. It helps your marketing, sales, commerce, service, and IT teams work as one from anywhere — so you can keep your customers happy everywhere.
Salesforce provides API Access to this four account editions only:
- Enterprise Edition
- Unlimited Edition
- Developer Edition
- Performance Edition
You can also check out this link to know more.
Integrate your Salesforce account easily with Fluent Forms Pro by following the steps mentioned below-
Steps to Integrate Salesforce with Fluent Forms
- Activate the Salesforce Module
- Get your Salesforce Domain URL, Consumer Key & Consumer Secret
- Use the Domain URL, Consumer Key & Consumer Secret with the Salesforce module
- Create/Use a Form with Fluent Forms
- Setup the integrations feed & Map the input fields
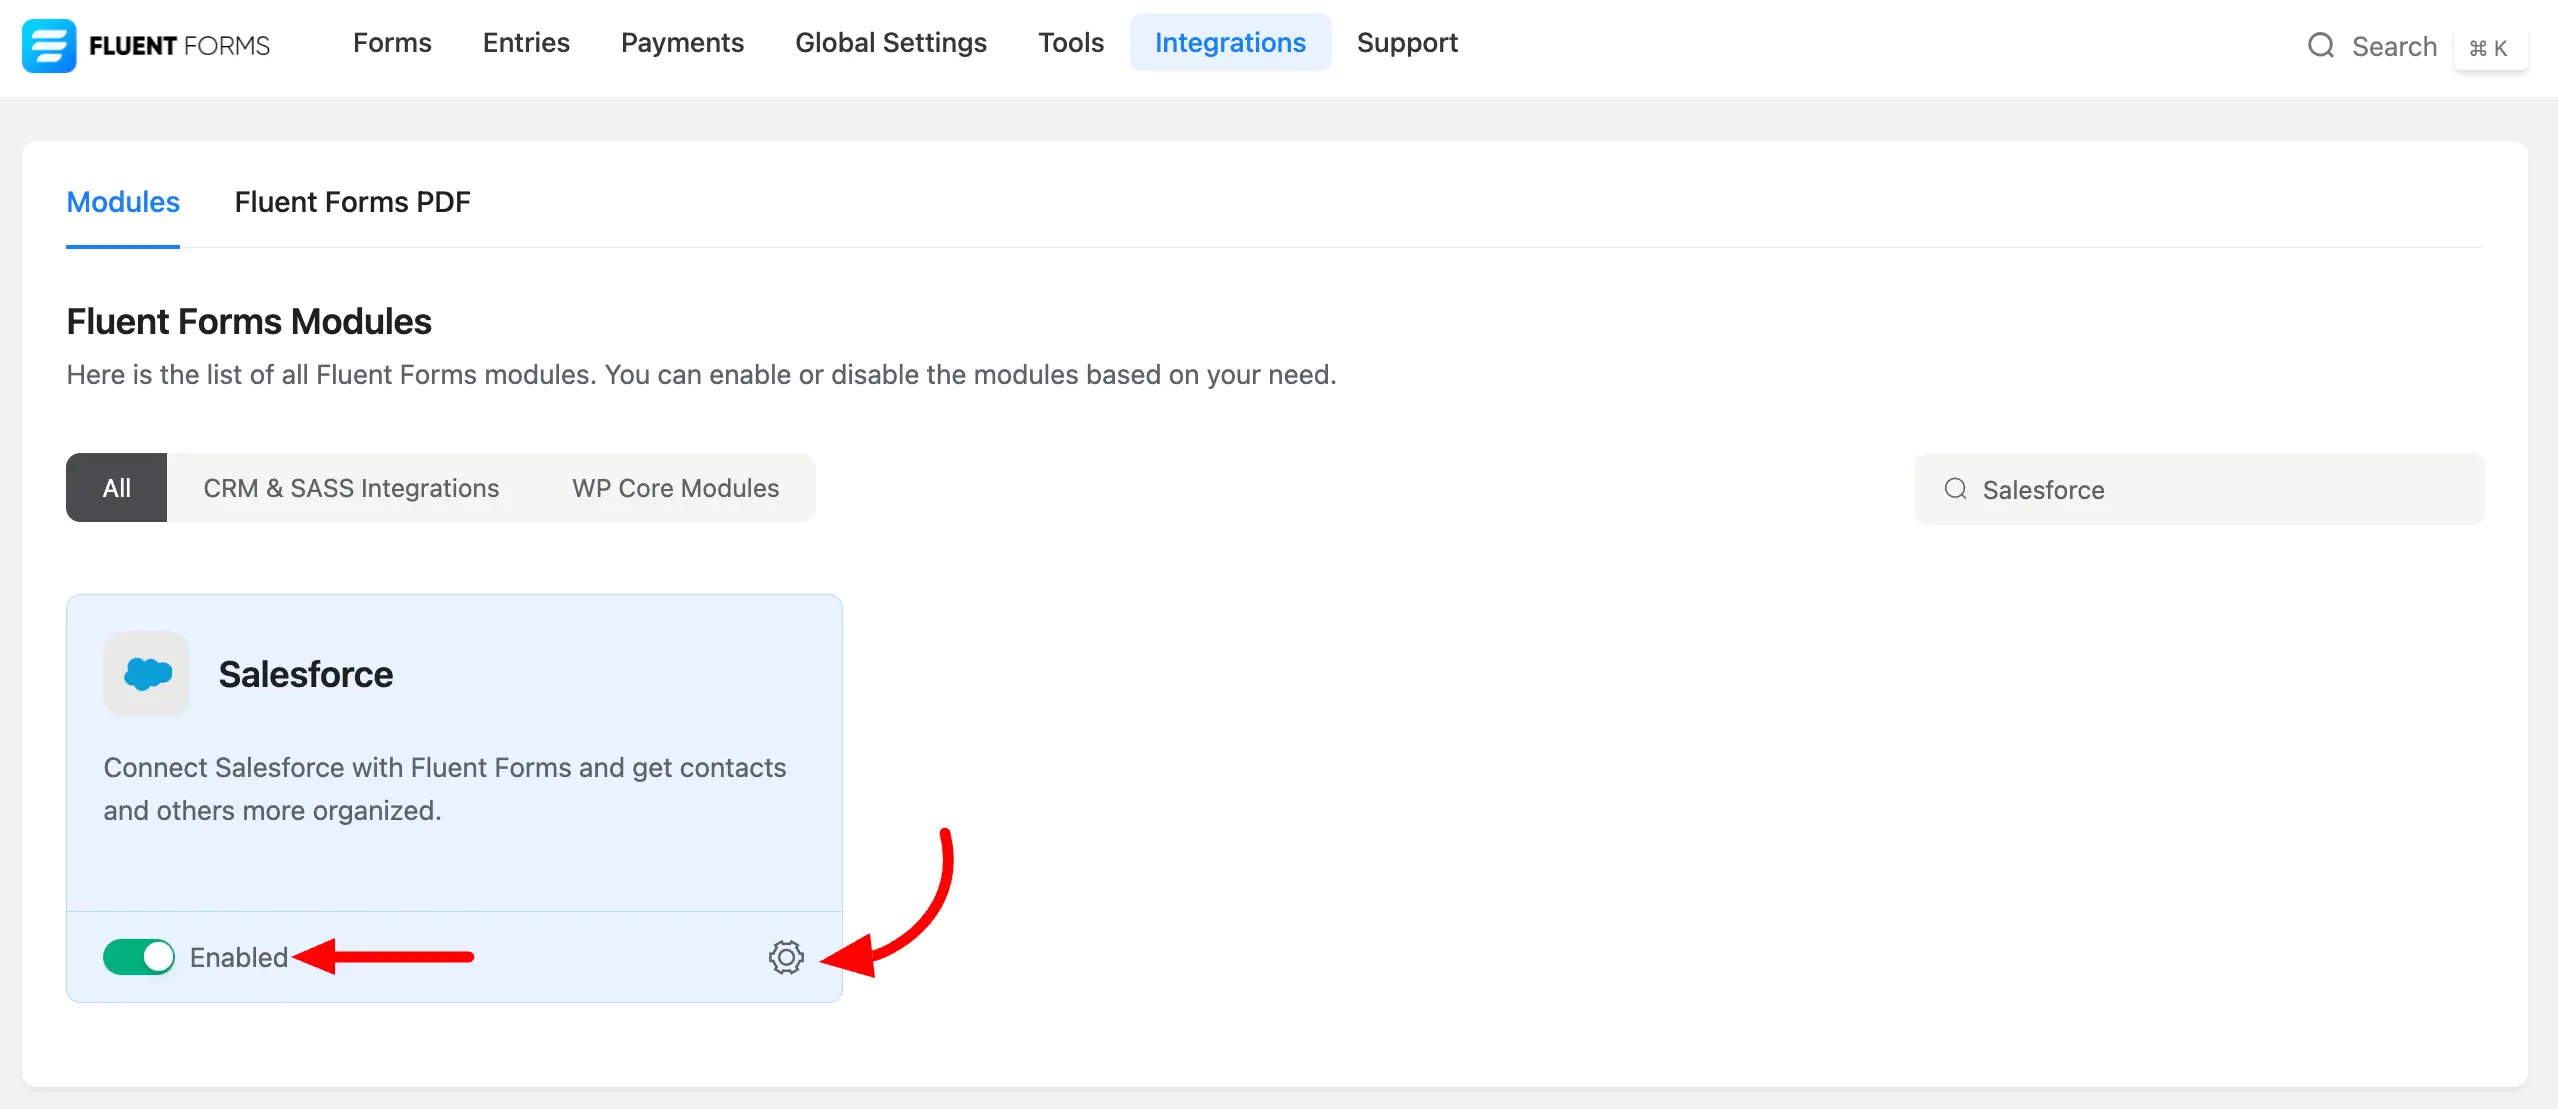
- Go to the Integration Modules from Fluent Forms (WordPress admin panel sidebar) and turn on the Salesforce Module, as shown in the screenshot below.
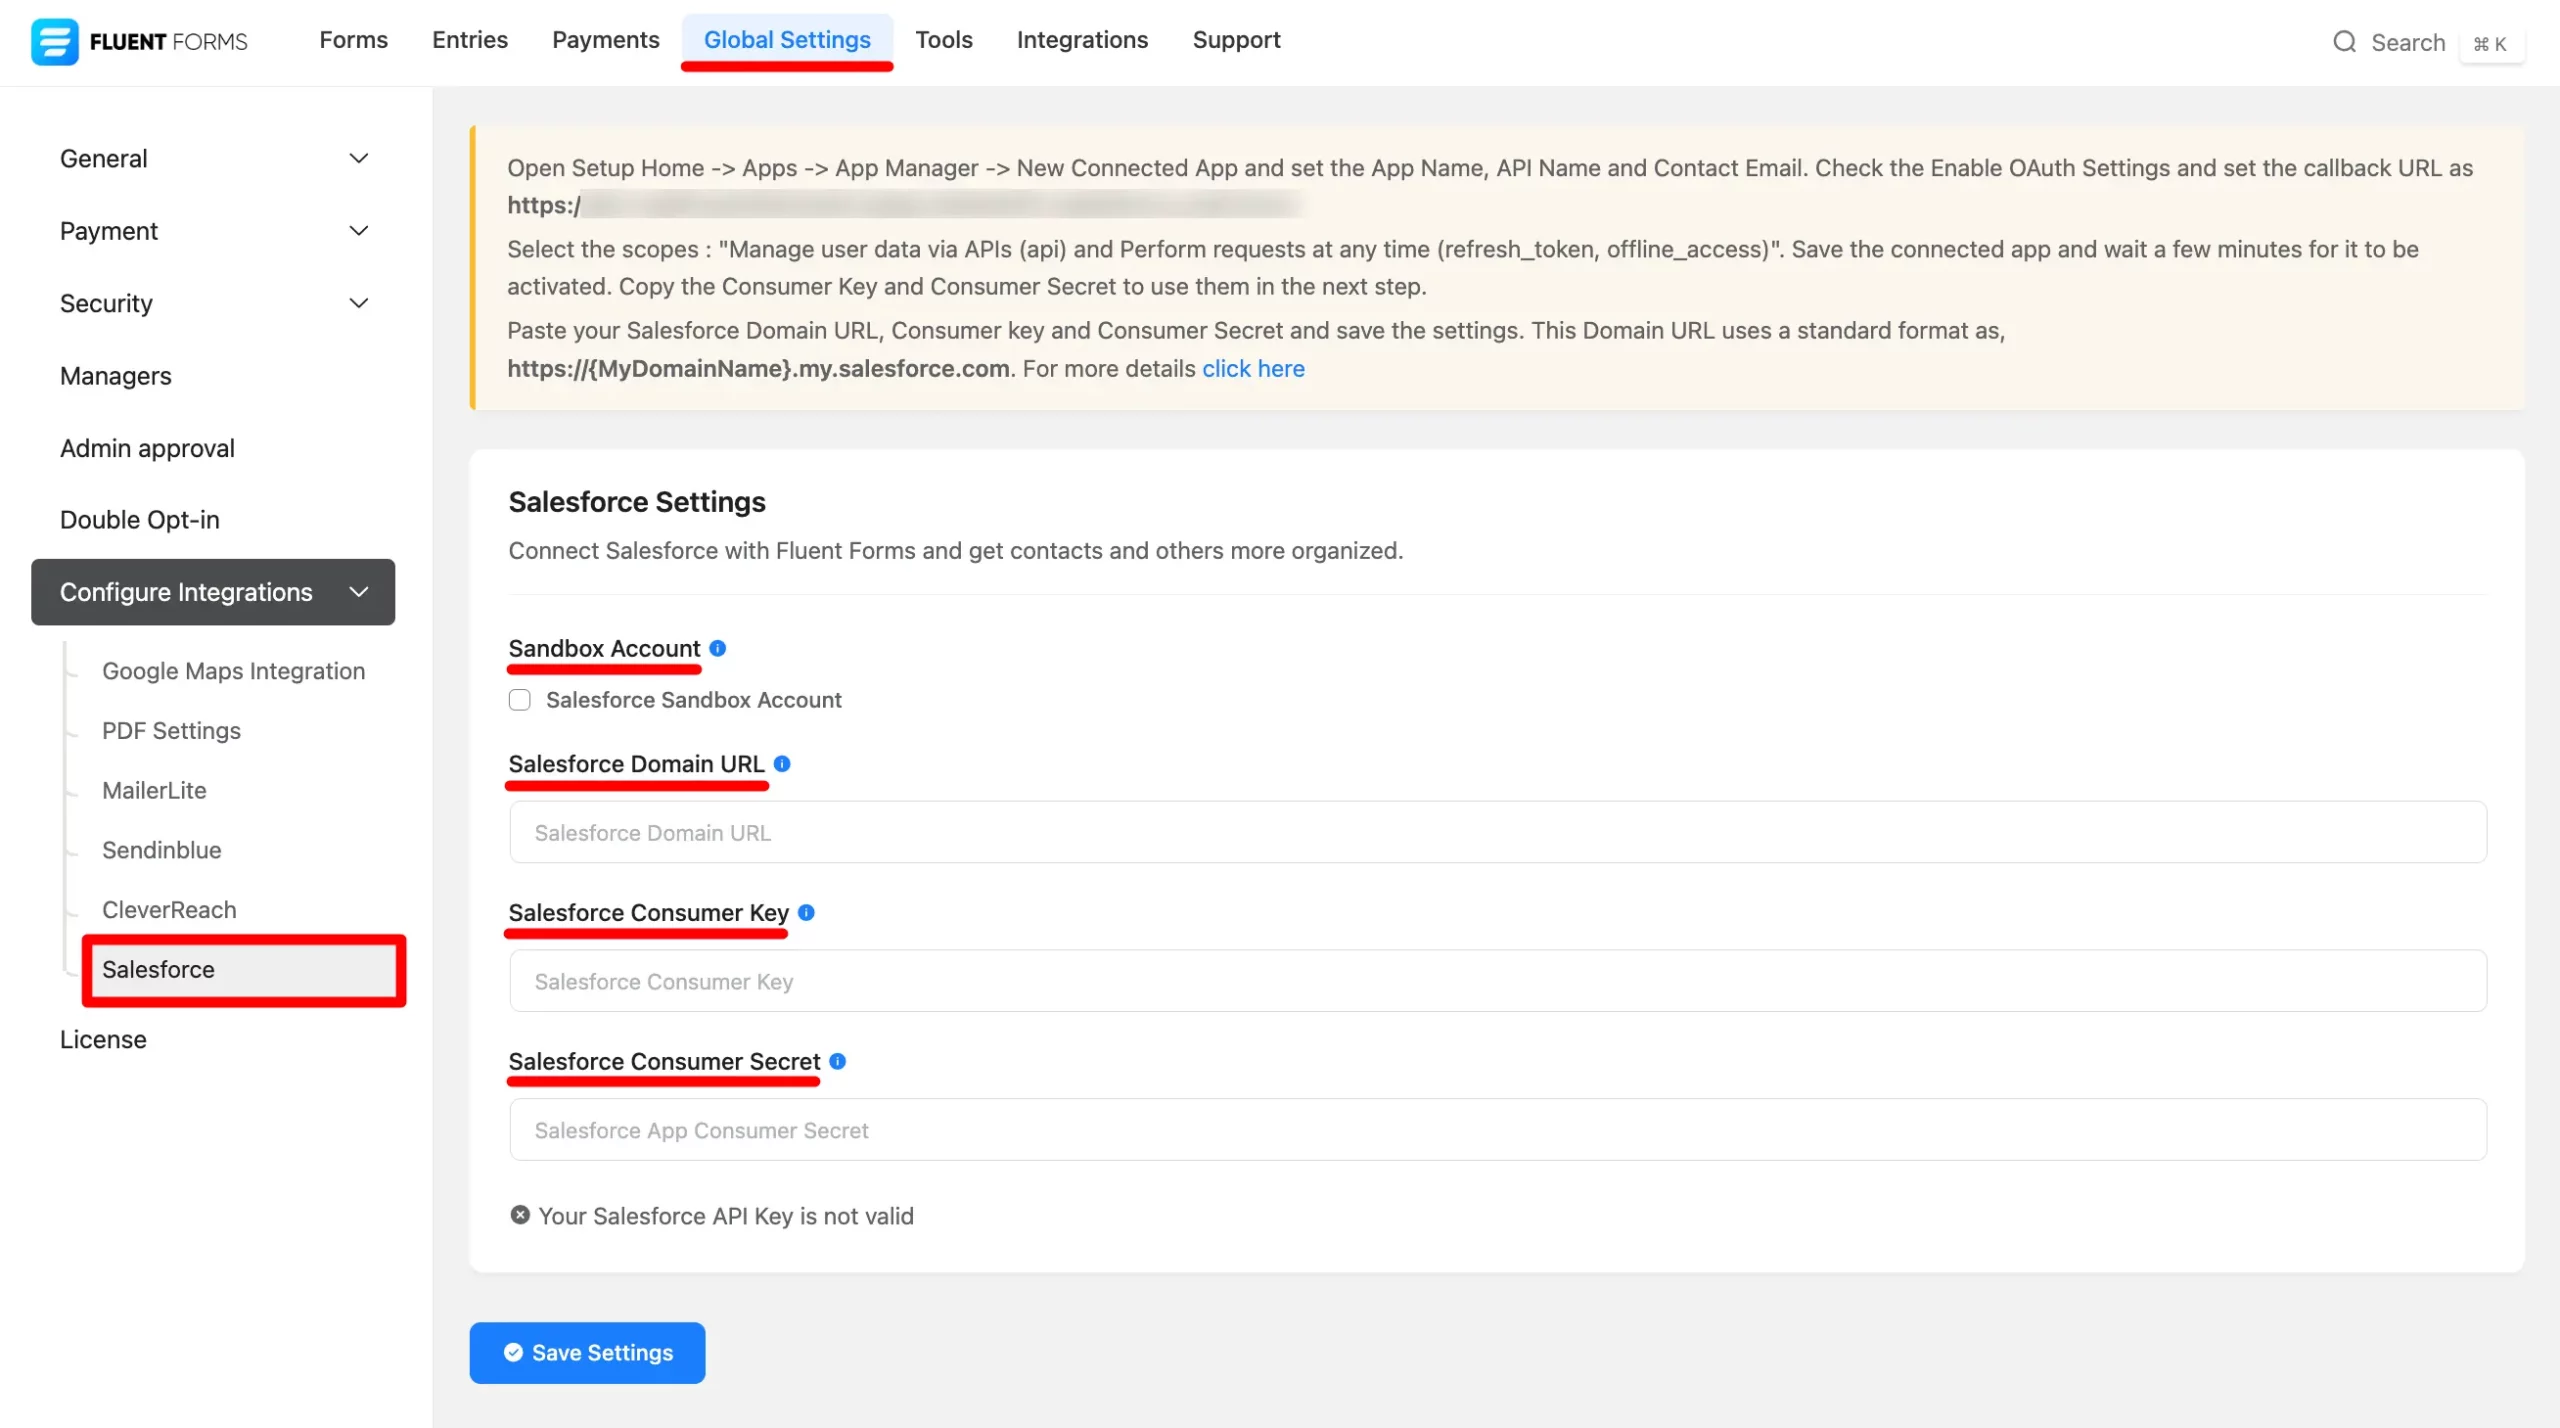
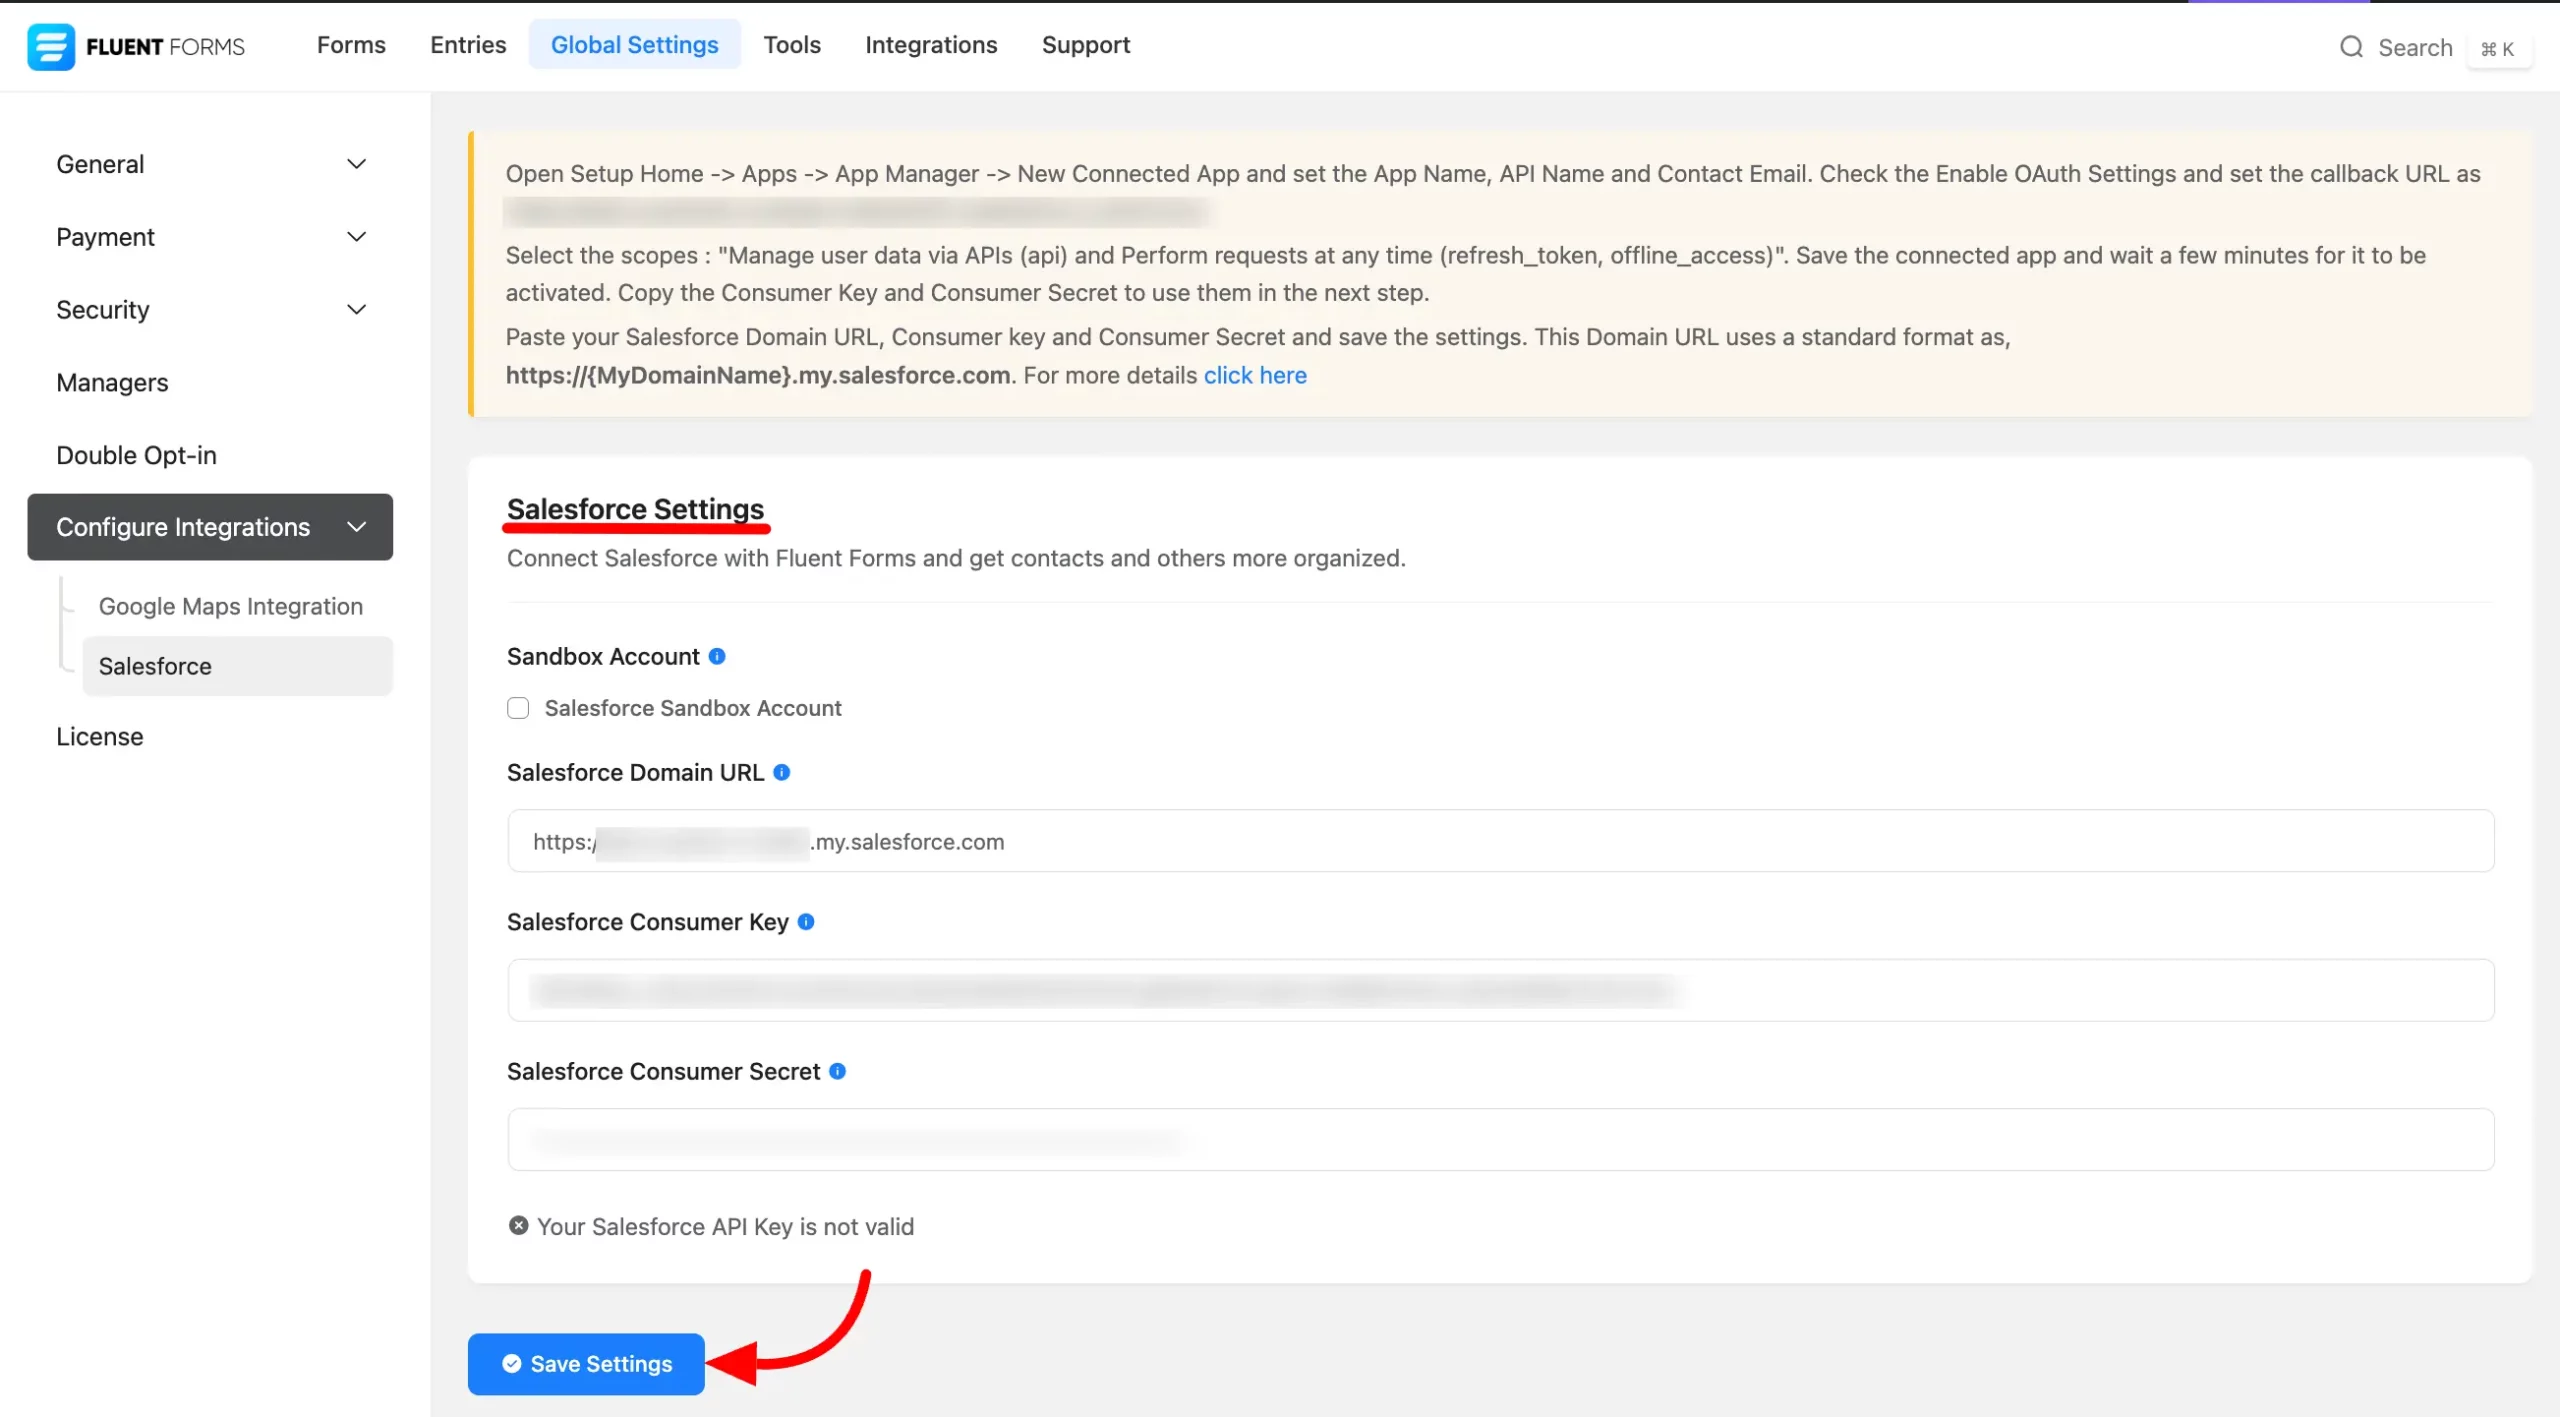
- Again hover over Fluent Forms Pro and go to Global Settings > Configure Integration. Select Salesforce, and you will be asked for the Salesforce Domain URL, Consumer Key & Consumer Secret here. If you are using Sandbox Account then check on the Salesforce Sandbox Account checkbox.
- If you don’t have a Salesforce account, you can sign up here.
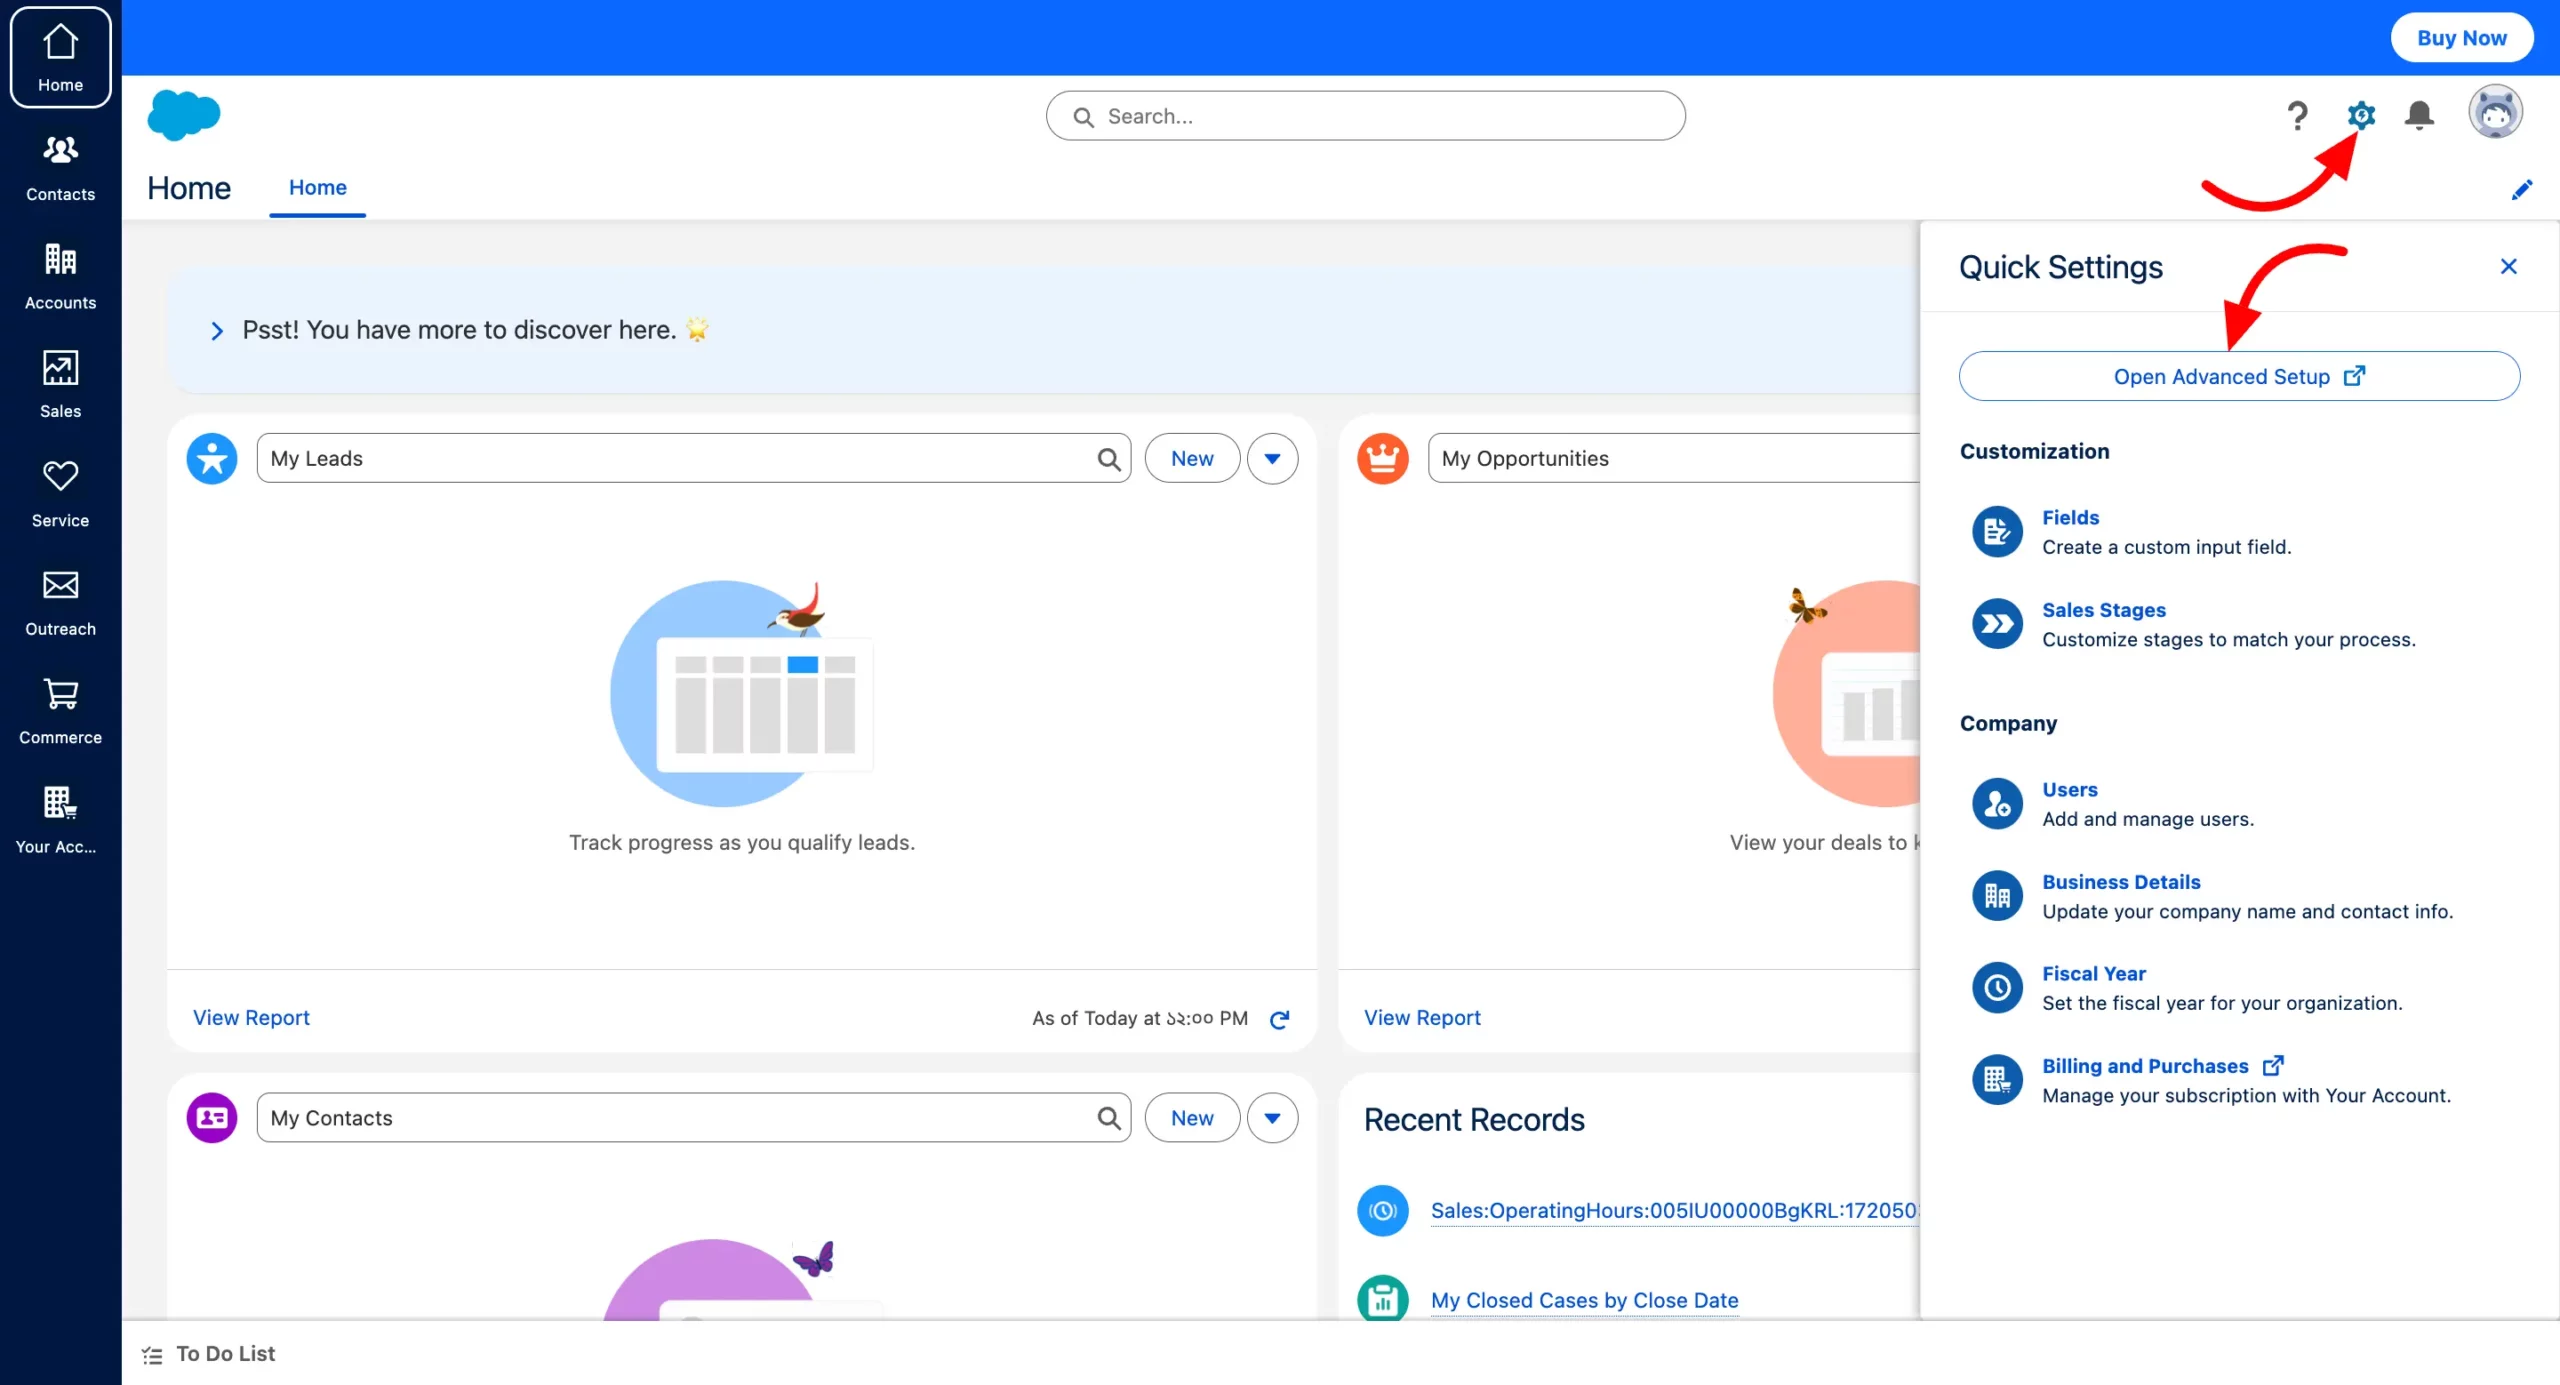
- After login into your account, a Setup Home page will appear. Click on the Settings icon button and then select the Open Advanced Setup.
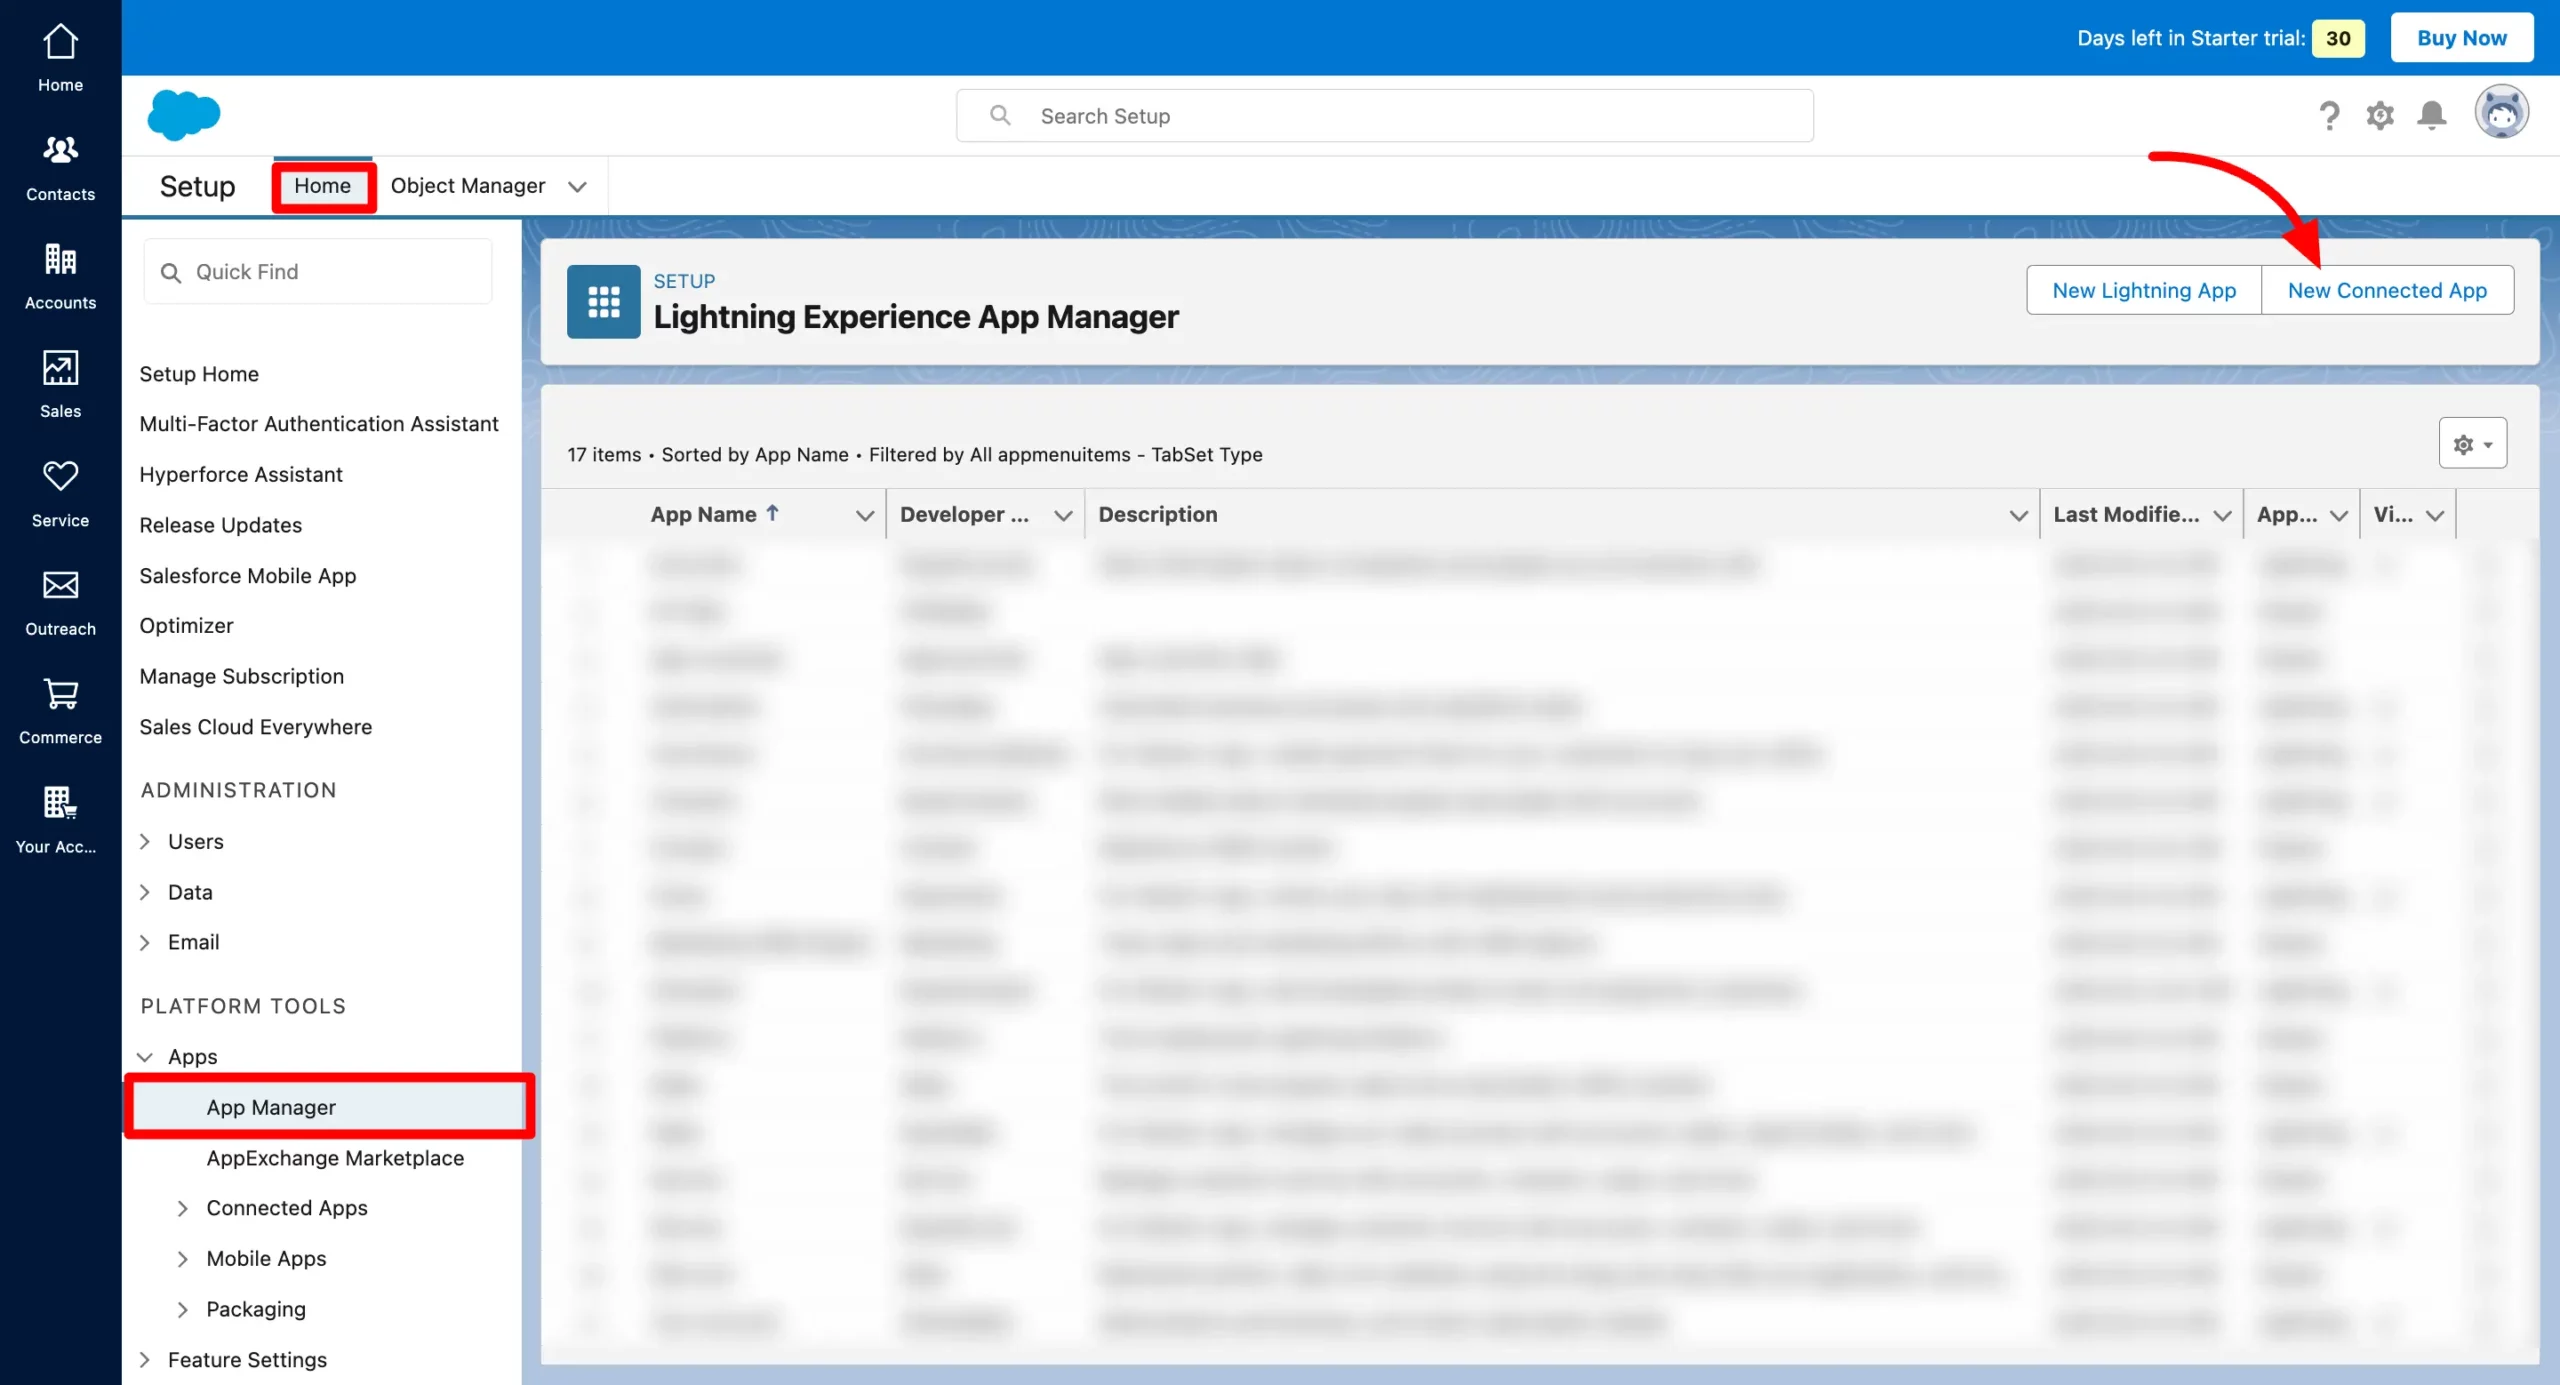
- Select the App Manager from the left sidebar and click on the New Connected App button.
- Set the Connected App Name, API Name, and Contact Email.
- Check the Enable OAuth Settings and set the Callback URL. You will get your URL from the Global Setting of the Fluent Forms Salesforce integration settings.
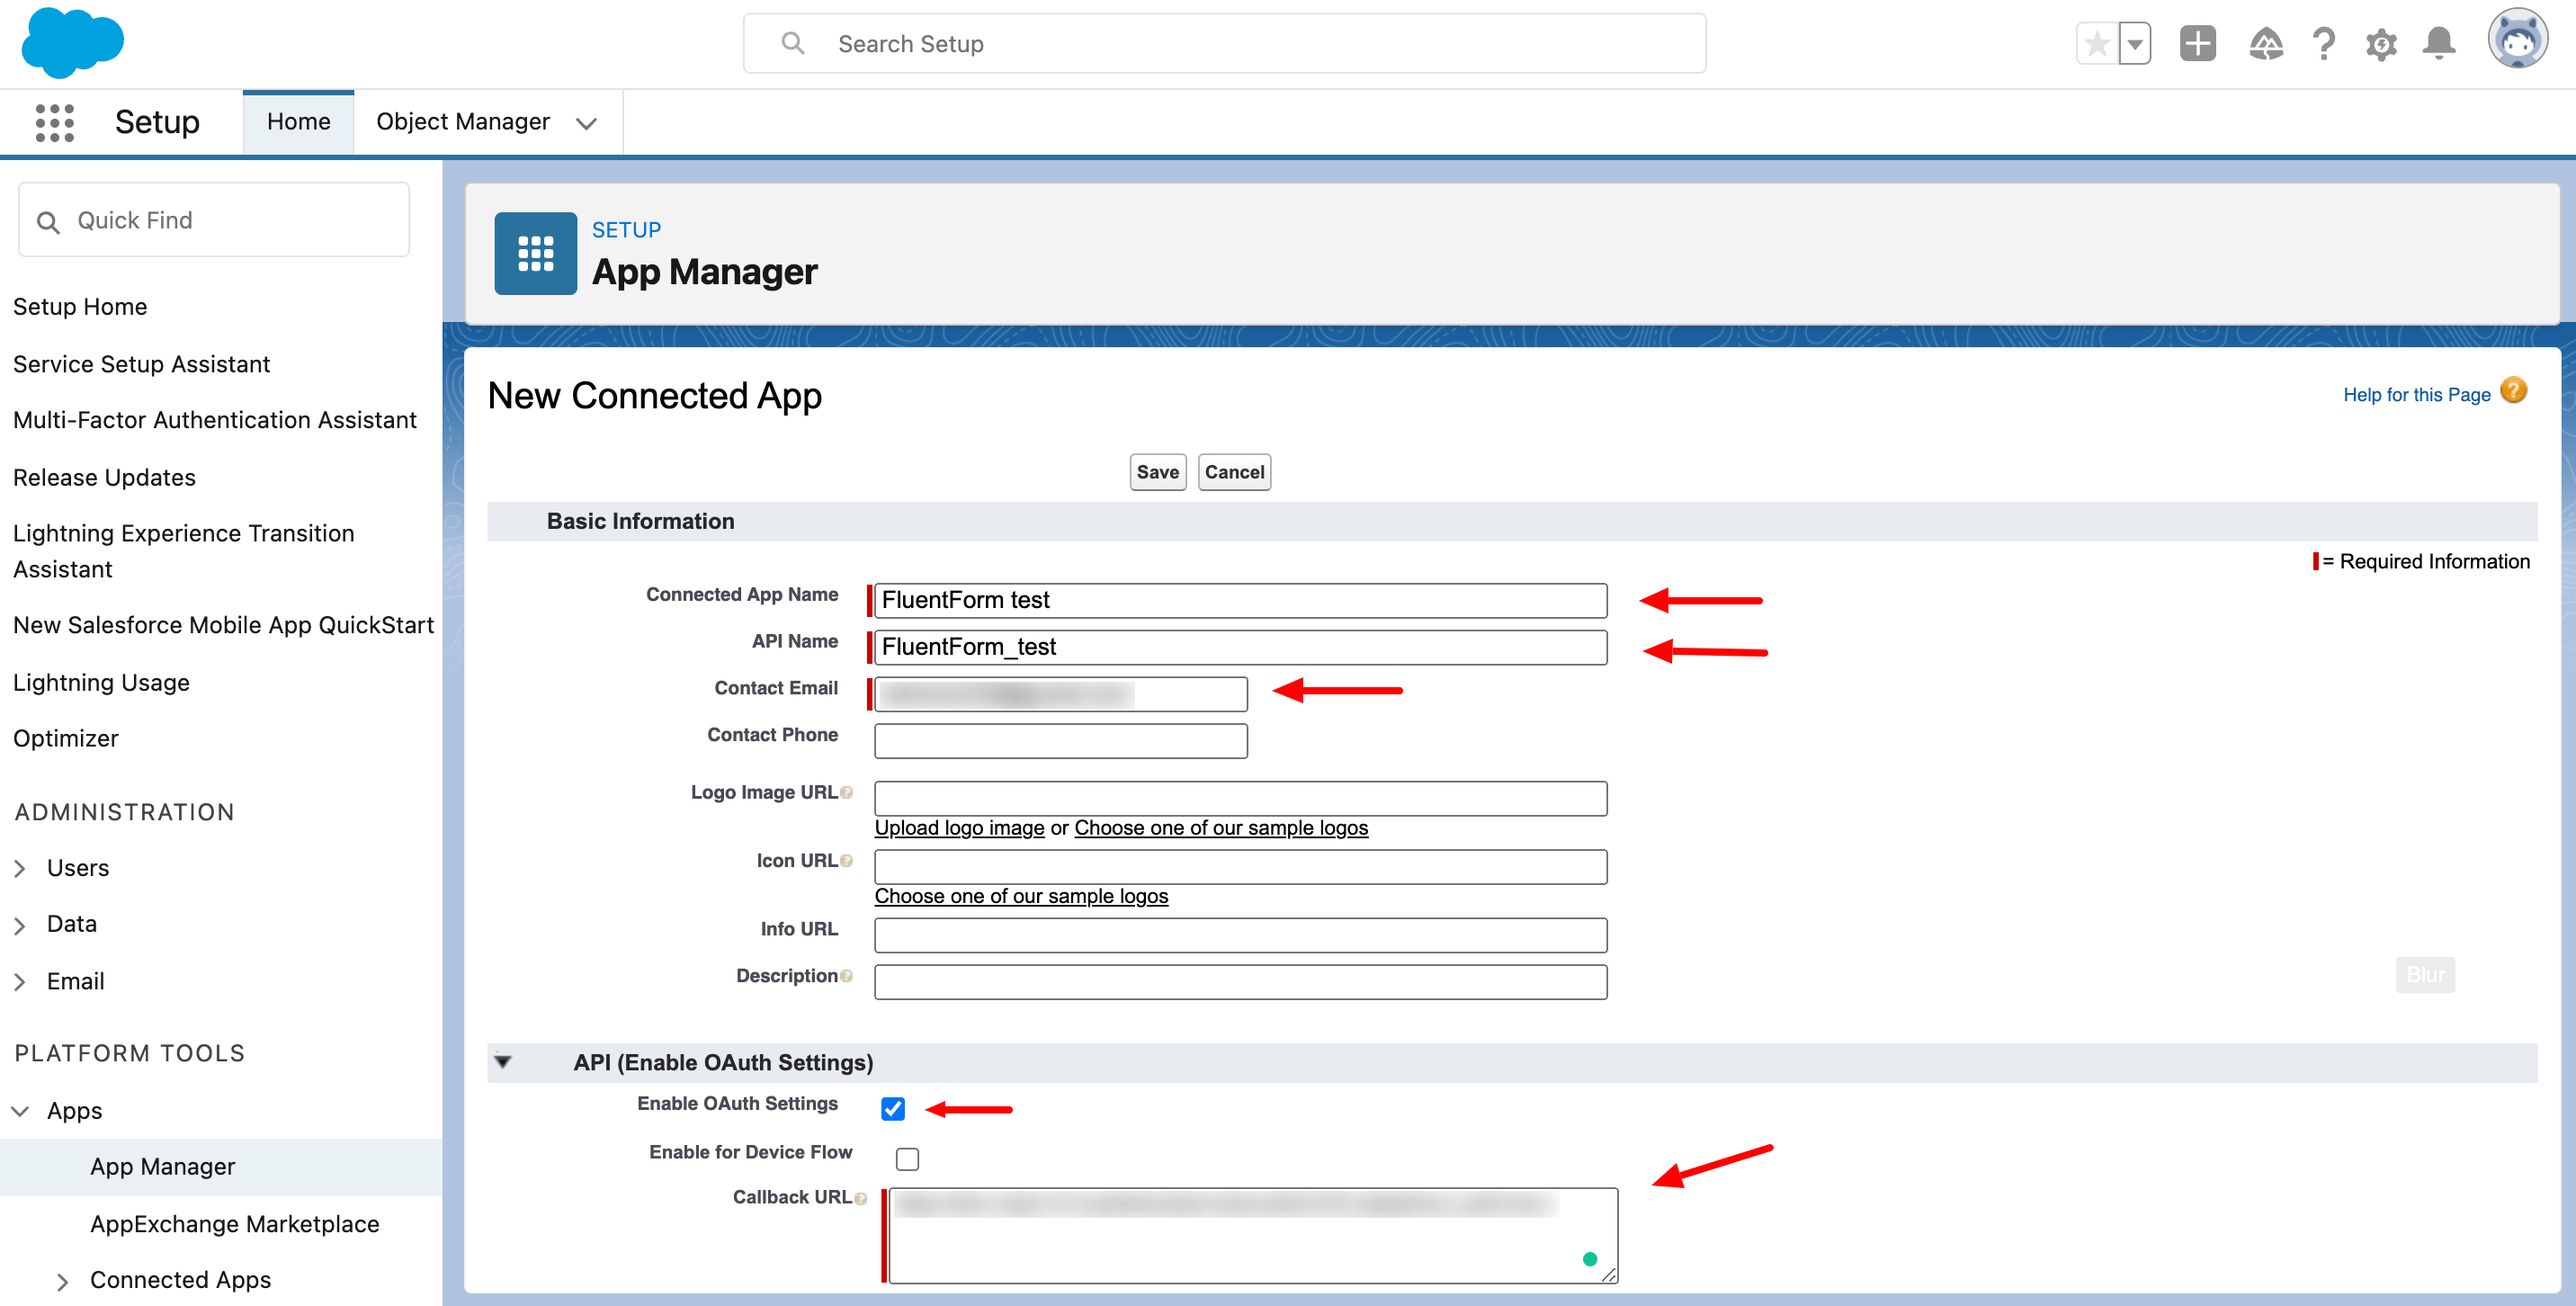
- The Callback URL is unique for every single site.
- Select the scopes: “Manage user data via APIs (API) and Perform requests at any time (refresh_token, offline_access)“. Save the connected app and wait a few minutes for it to be activated.
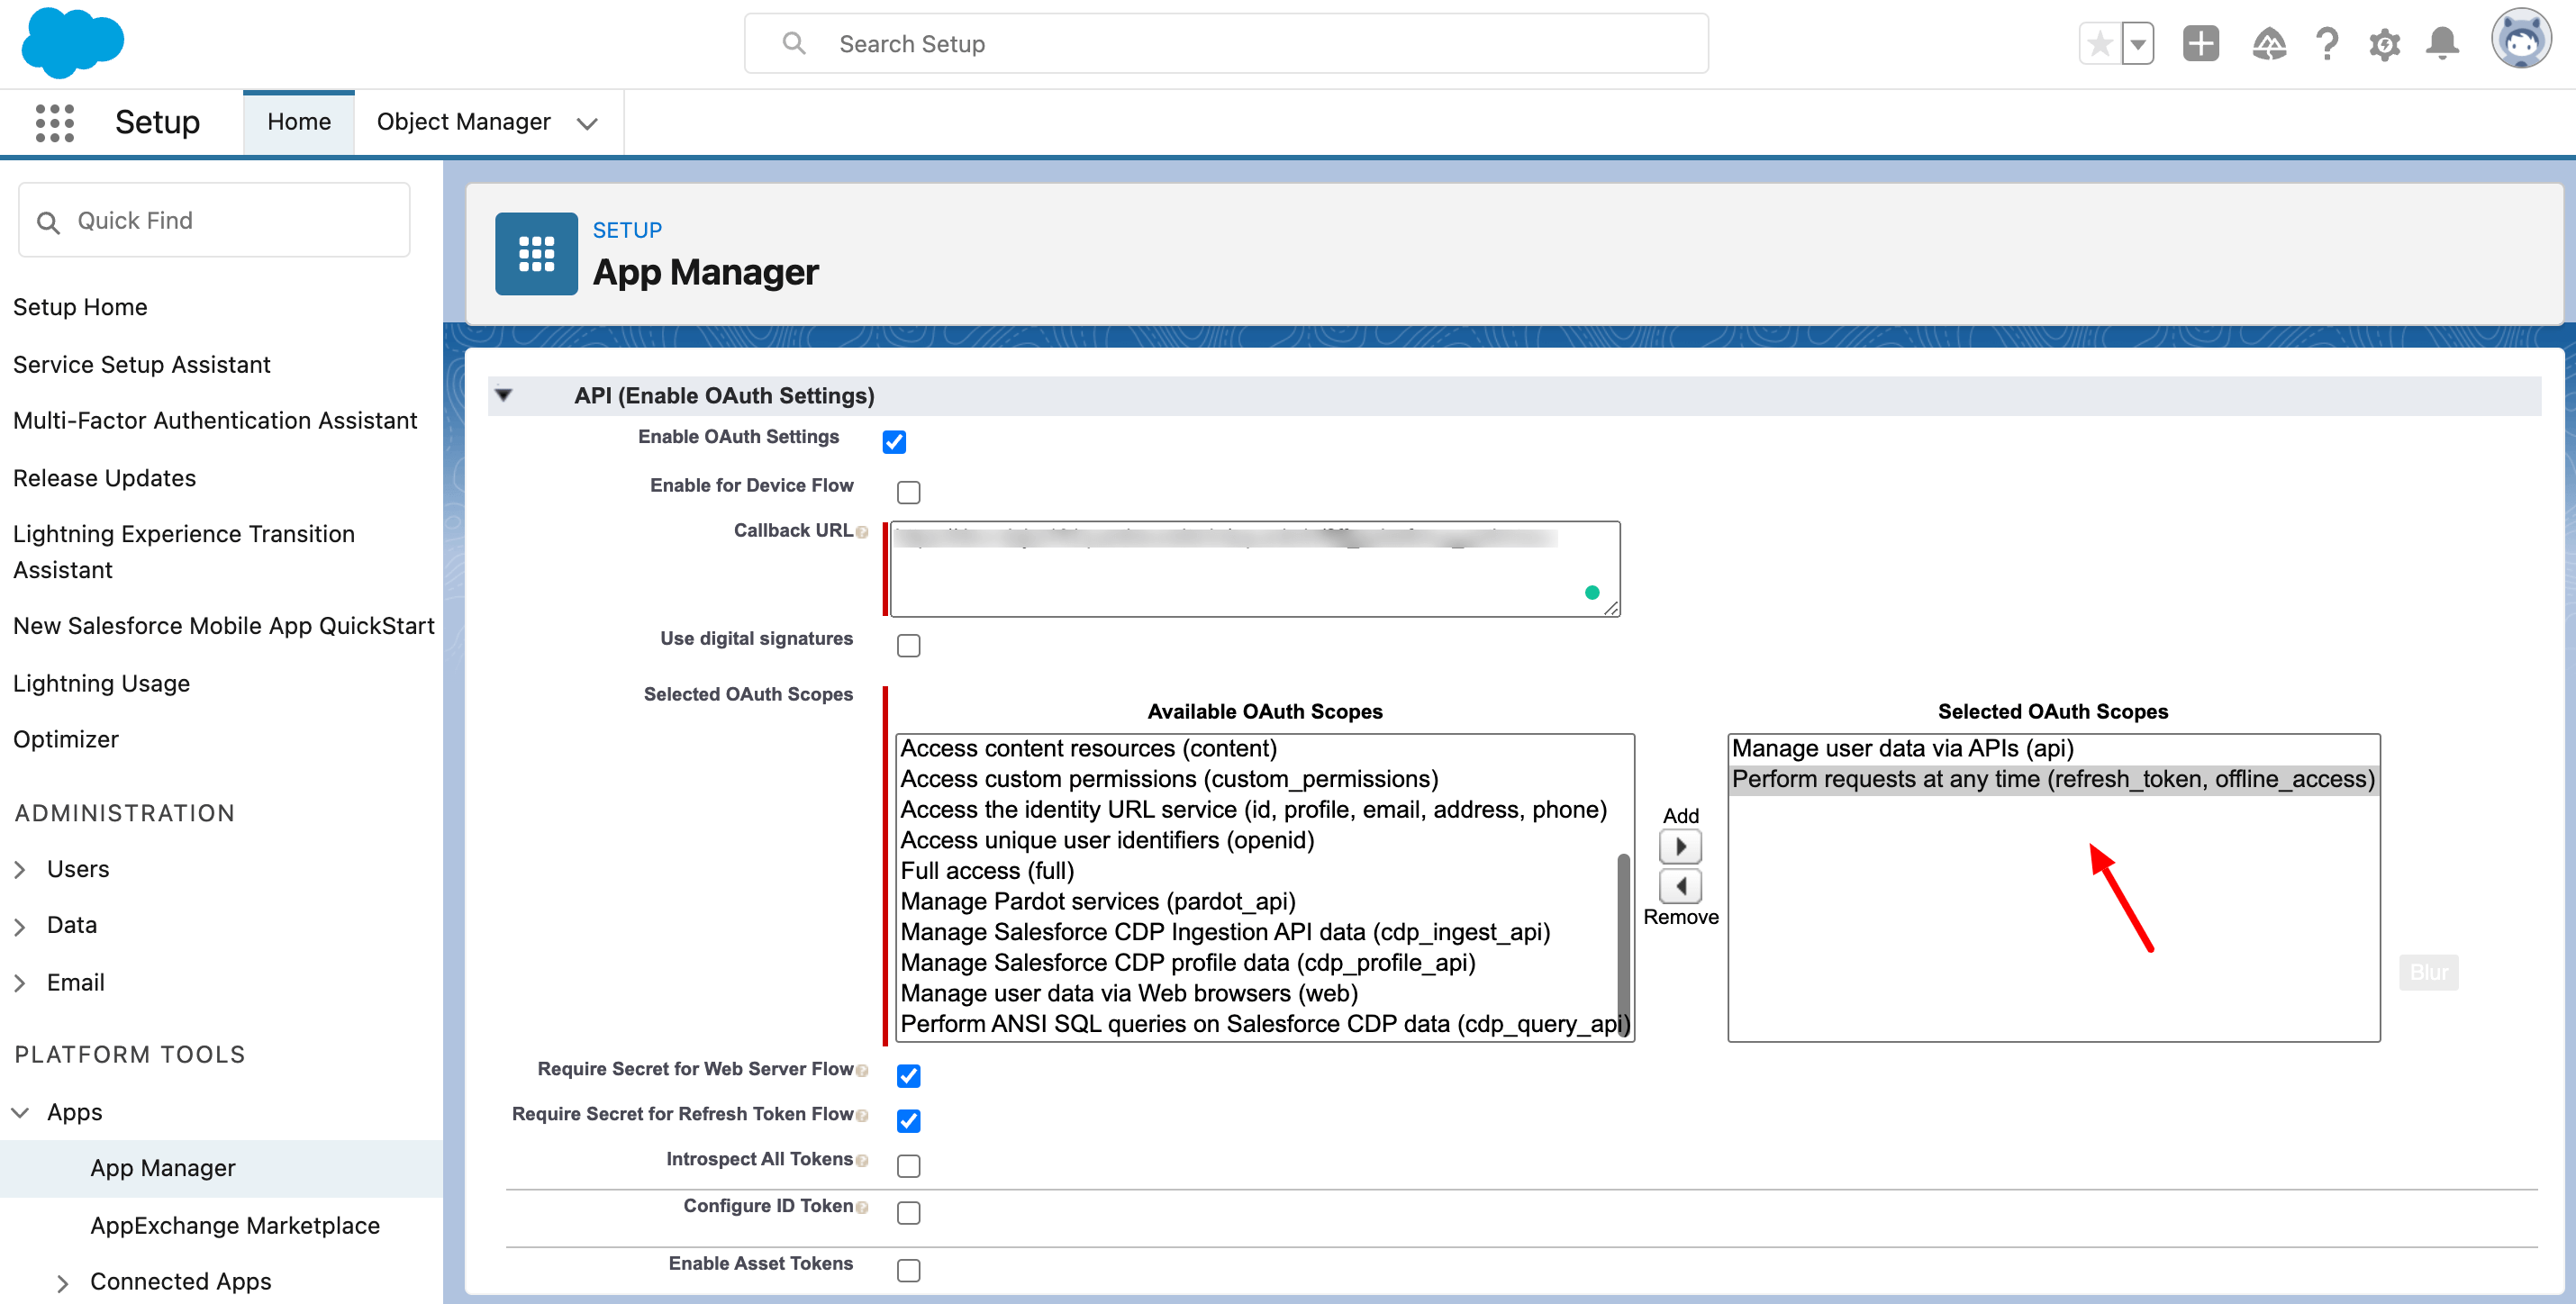
- Copy the Consumer Key and Consumer Secret to use them in the next step.

- Paste your Salesforce Domain URL, Consumer Key, and Consumer Secret to Salesforce’s Global settings tab and Save Settings.
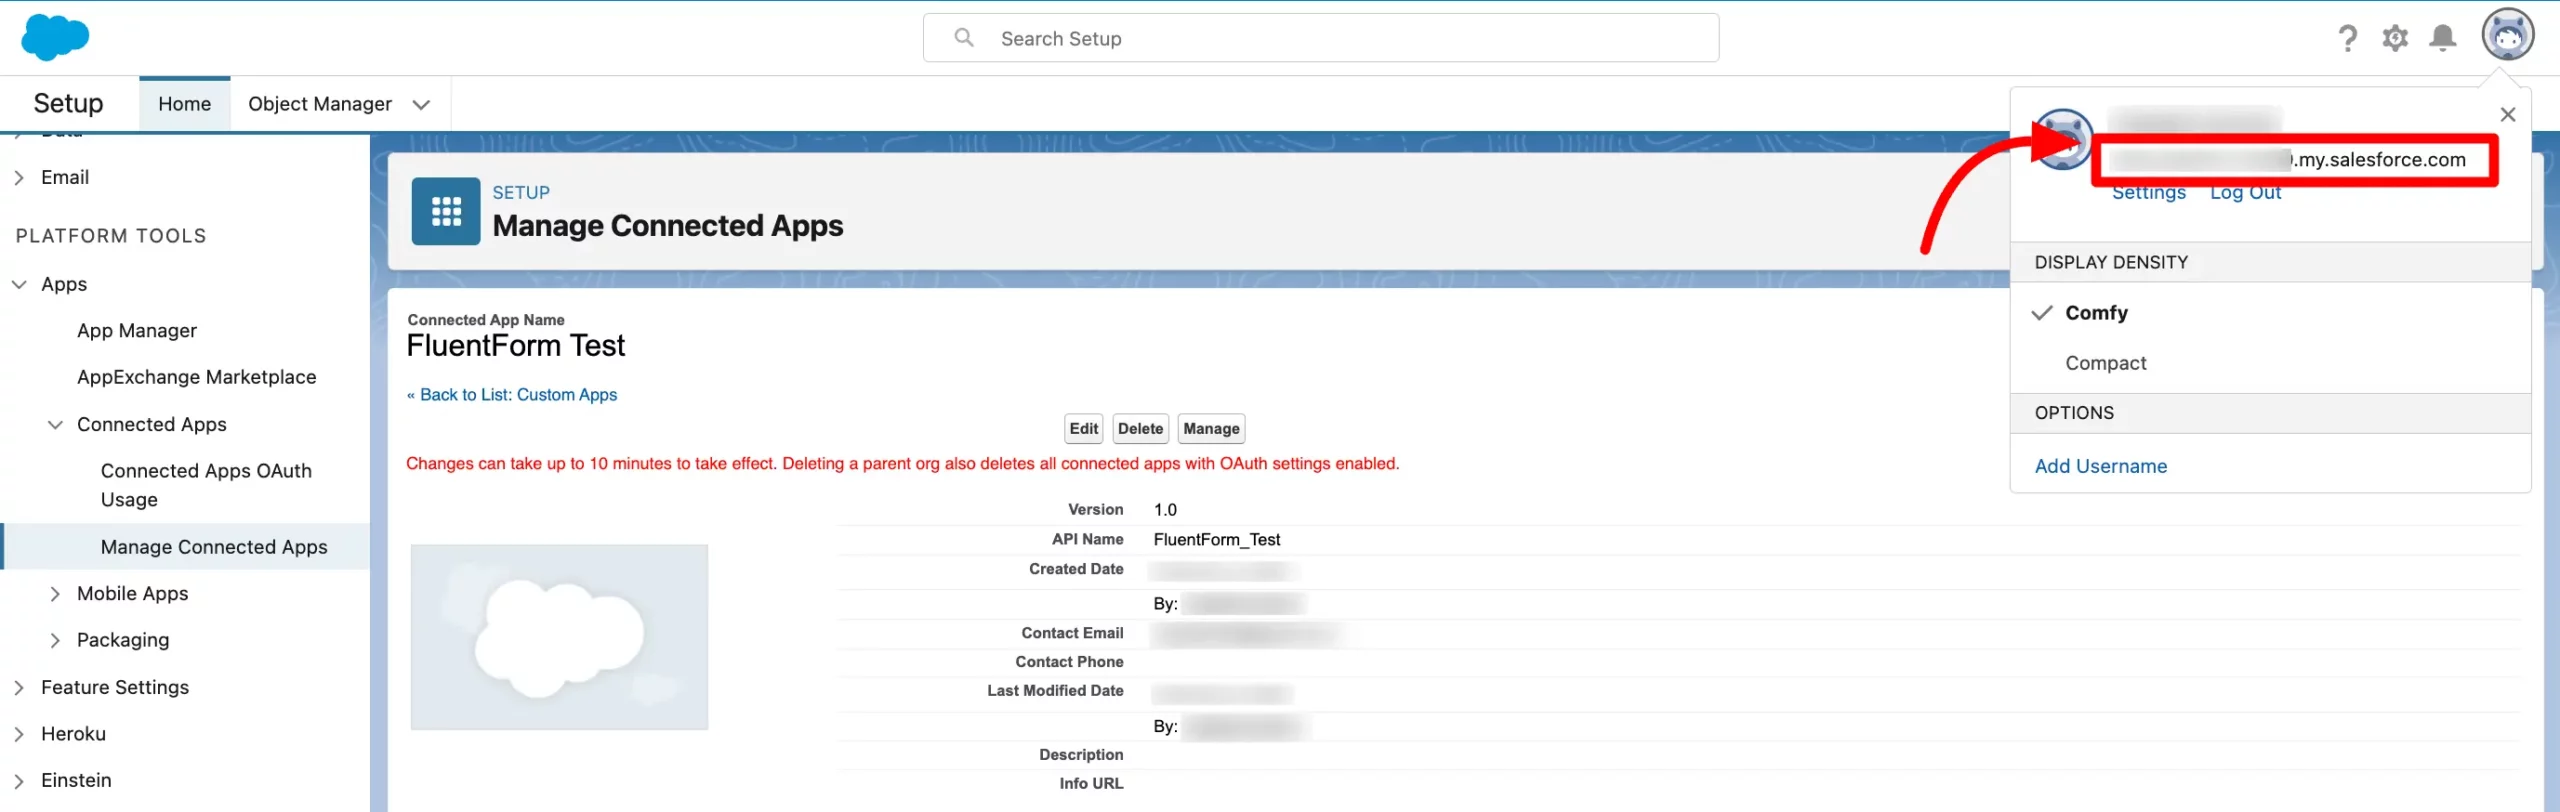
- Get your Domain URL by Clicking on your Profile icon on the top right.
- Copy the URL & please make sure you add ‘https://‘ before the domain URL.
- For more details, click here.
- Now go to the particular form’s settings for the entries you want to be listed in Salesforce. Go to Settings and Integration > Configure Integration then click on Add New Integration and select Salesforce Integration from the dropdown.

- Name the Feed & select the Salesforce services from the dropdown and create the Salesforce Feed.
- Configure the fields and map them to the Salesforce services’ corresponding rows.
- Enable Conditional Logic if required. Learn more about Fluent Forms Conditional logic here.
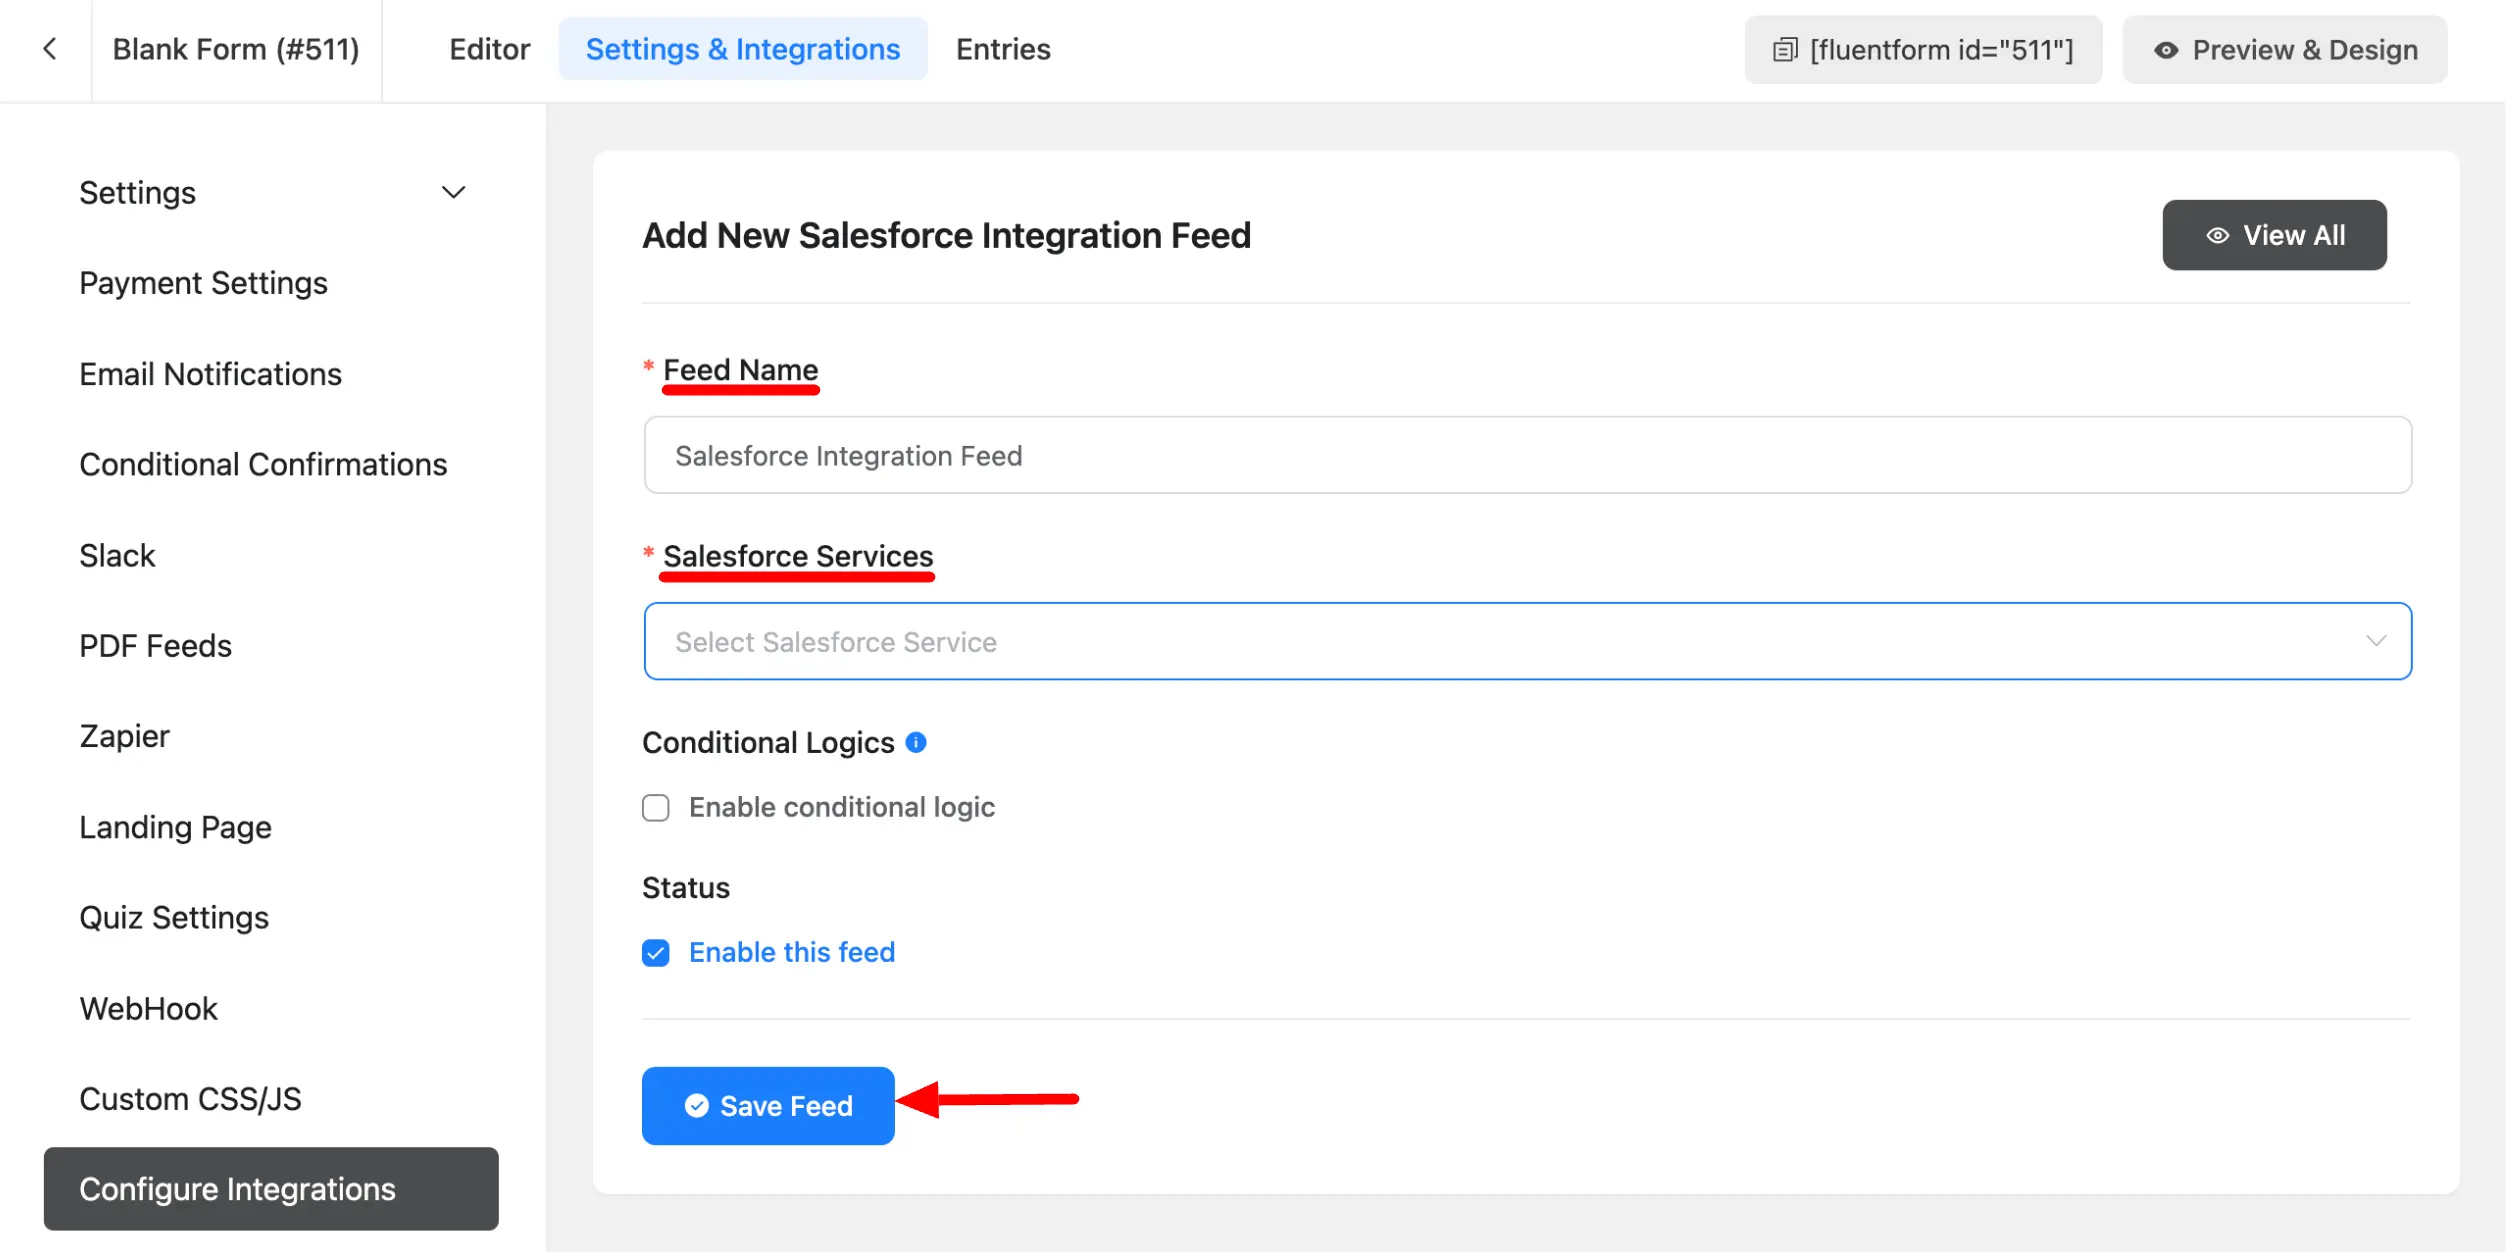
- Click on Save Feed when the configuration is done.