Connect Fluent Forms with CleverReach to grow your CleverReach subscriber list.
Integrate CleverReach easily with Fluent Forms Pro by following the steps mentioned below –
Steps to integrate CleverReach with Fluent Forms
- Activate the CleverReach Module
- Get your CleverReach Client ID & Client Secret
- Use the Client ID & Client Secret with the CleverReach Module
- Create/Use a Form with Fluent Forms
- Setup the integrations feed & Map the input fields
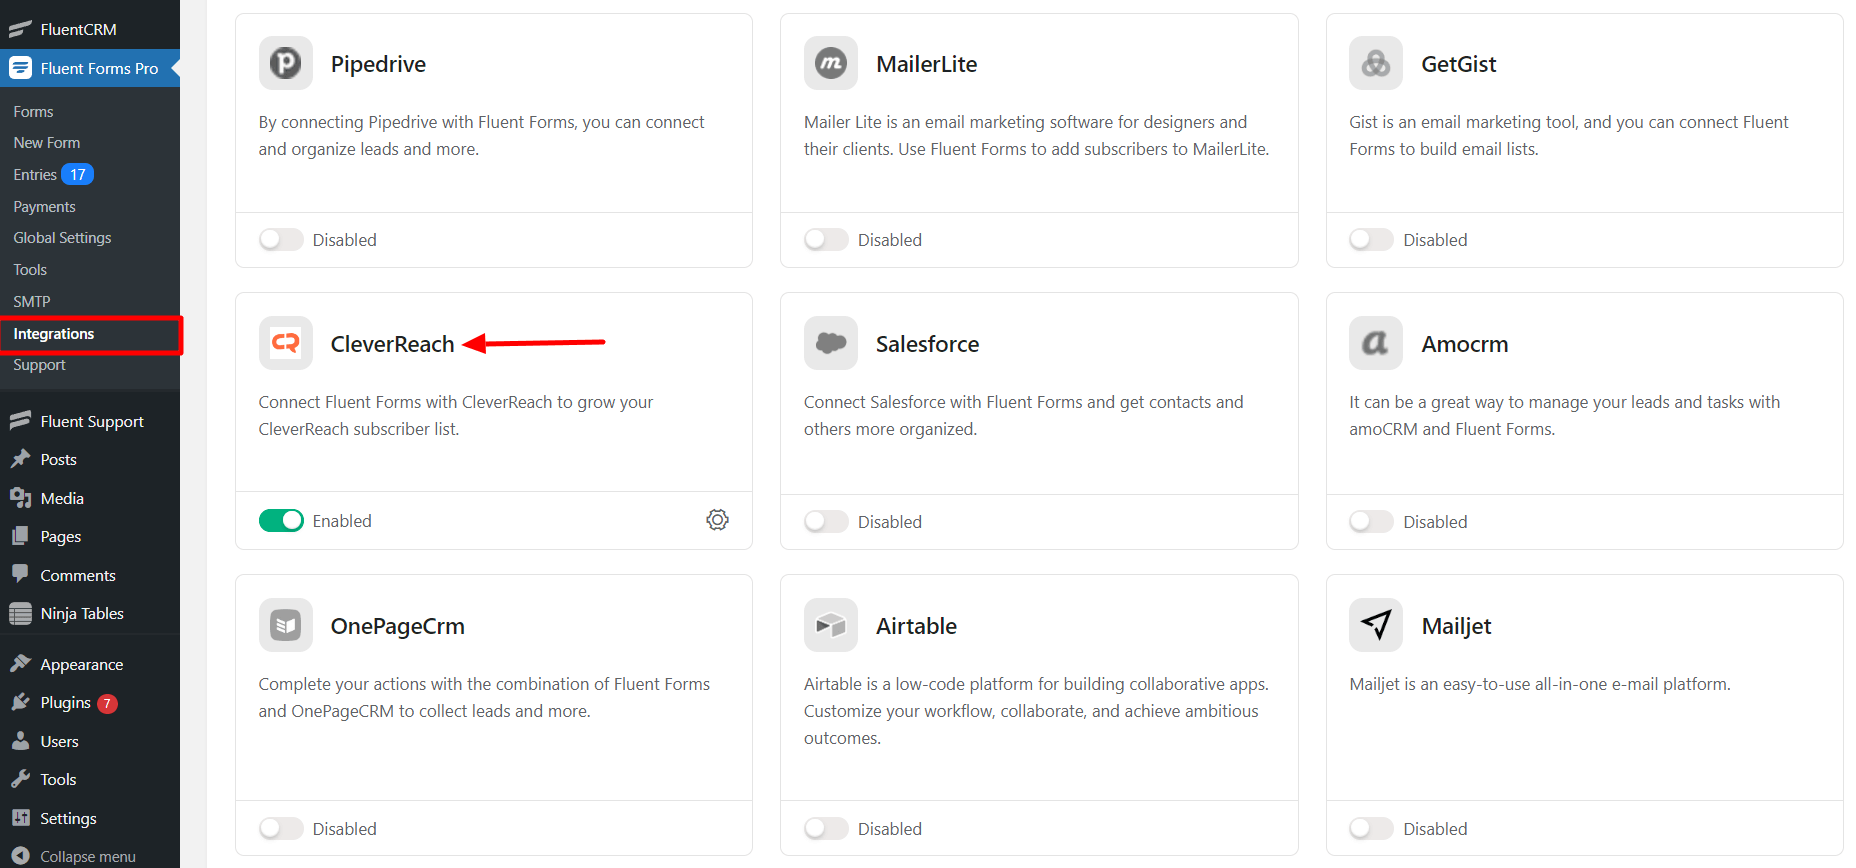
- Go to the Integrations Modules from Fluent Forms (WordPress admin panel sidebar) and turn on the CleverReach Module, as shown in the screenshot below–
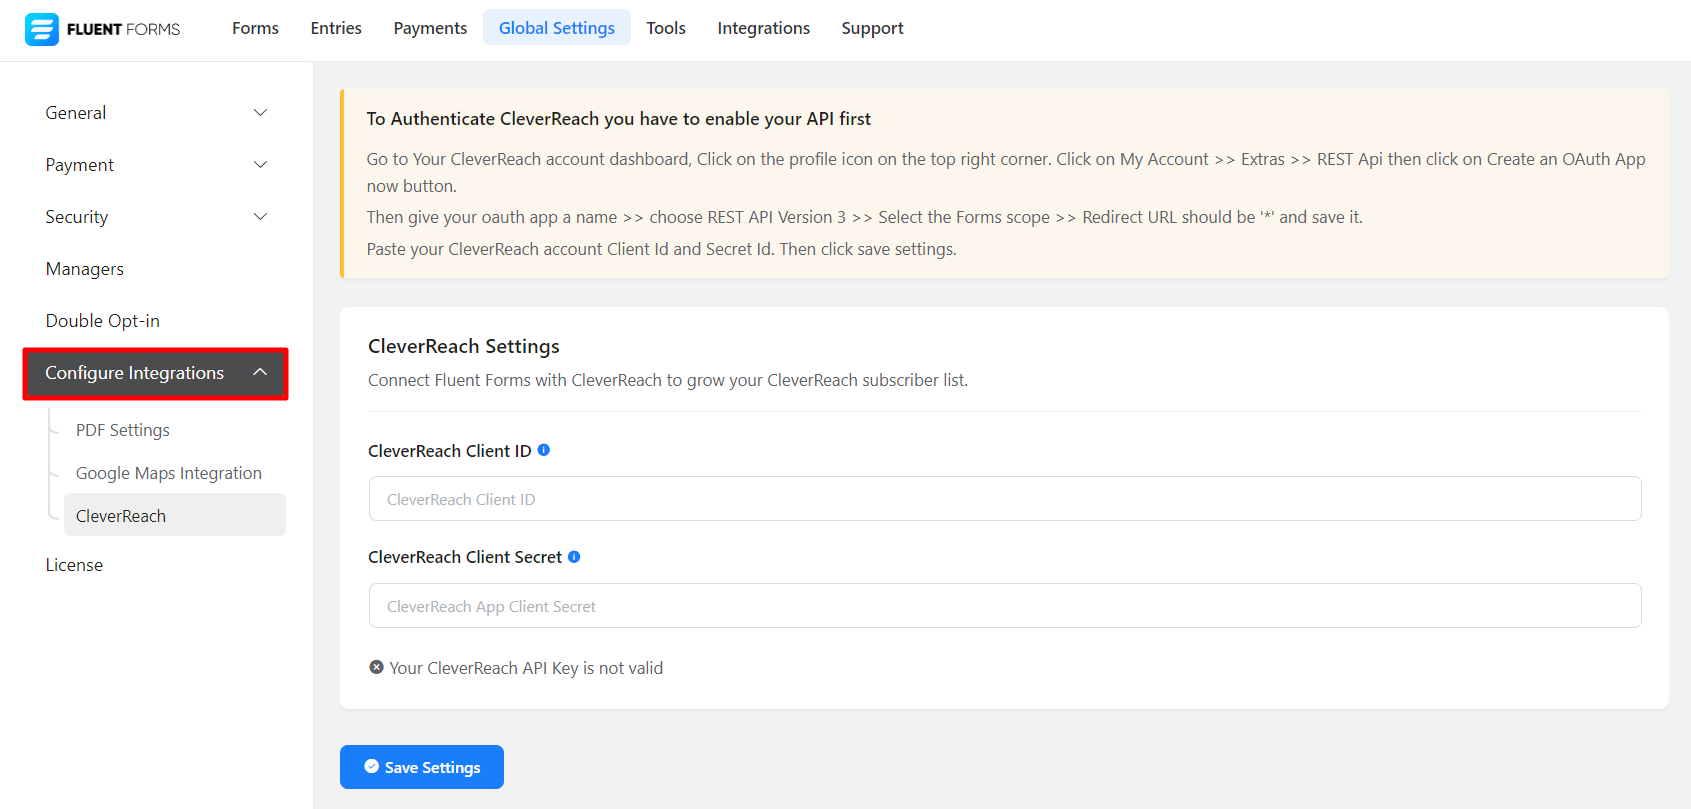
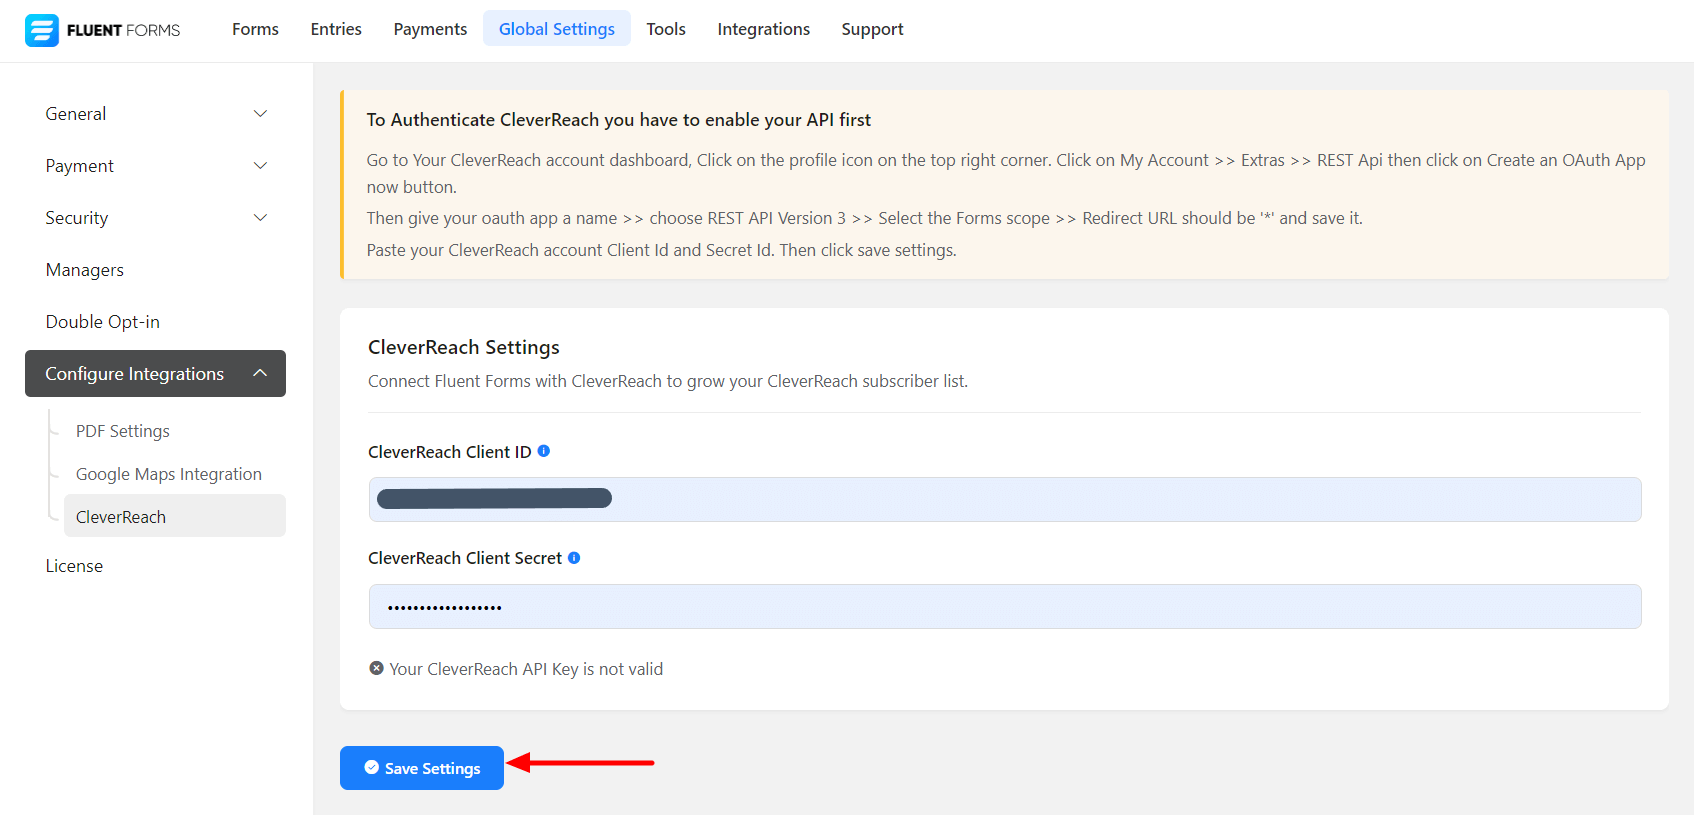
- Again hover over Fluent Forms Pro and go to Settings, as shown in the screenshot below. Select CleverReach, and you will be asked for the CleverReach Client ID and Client Secret.
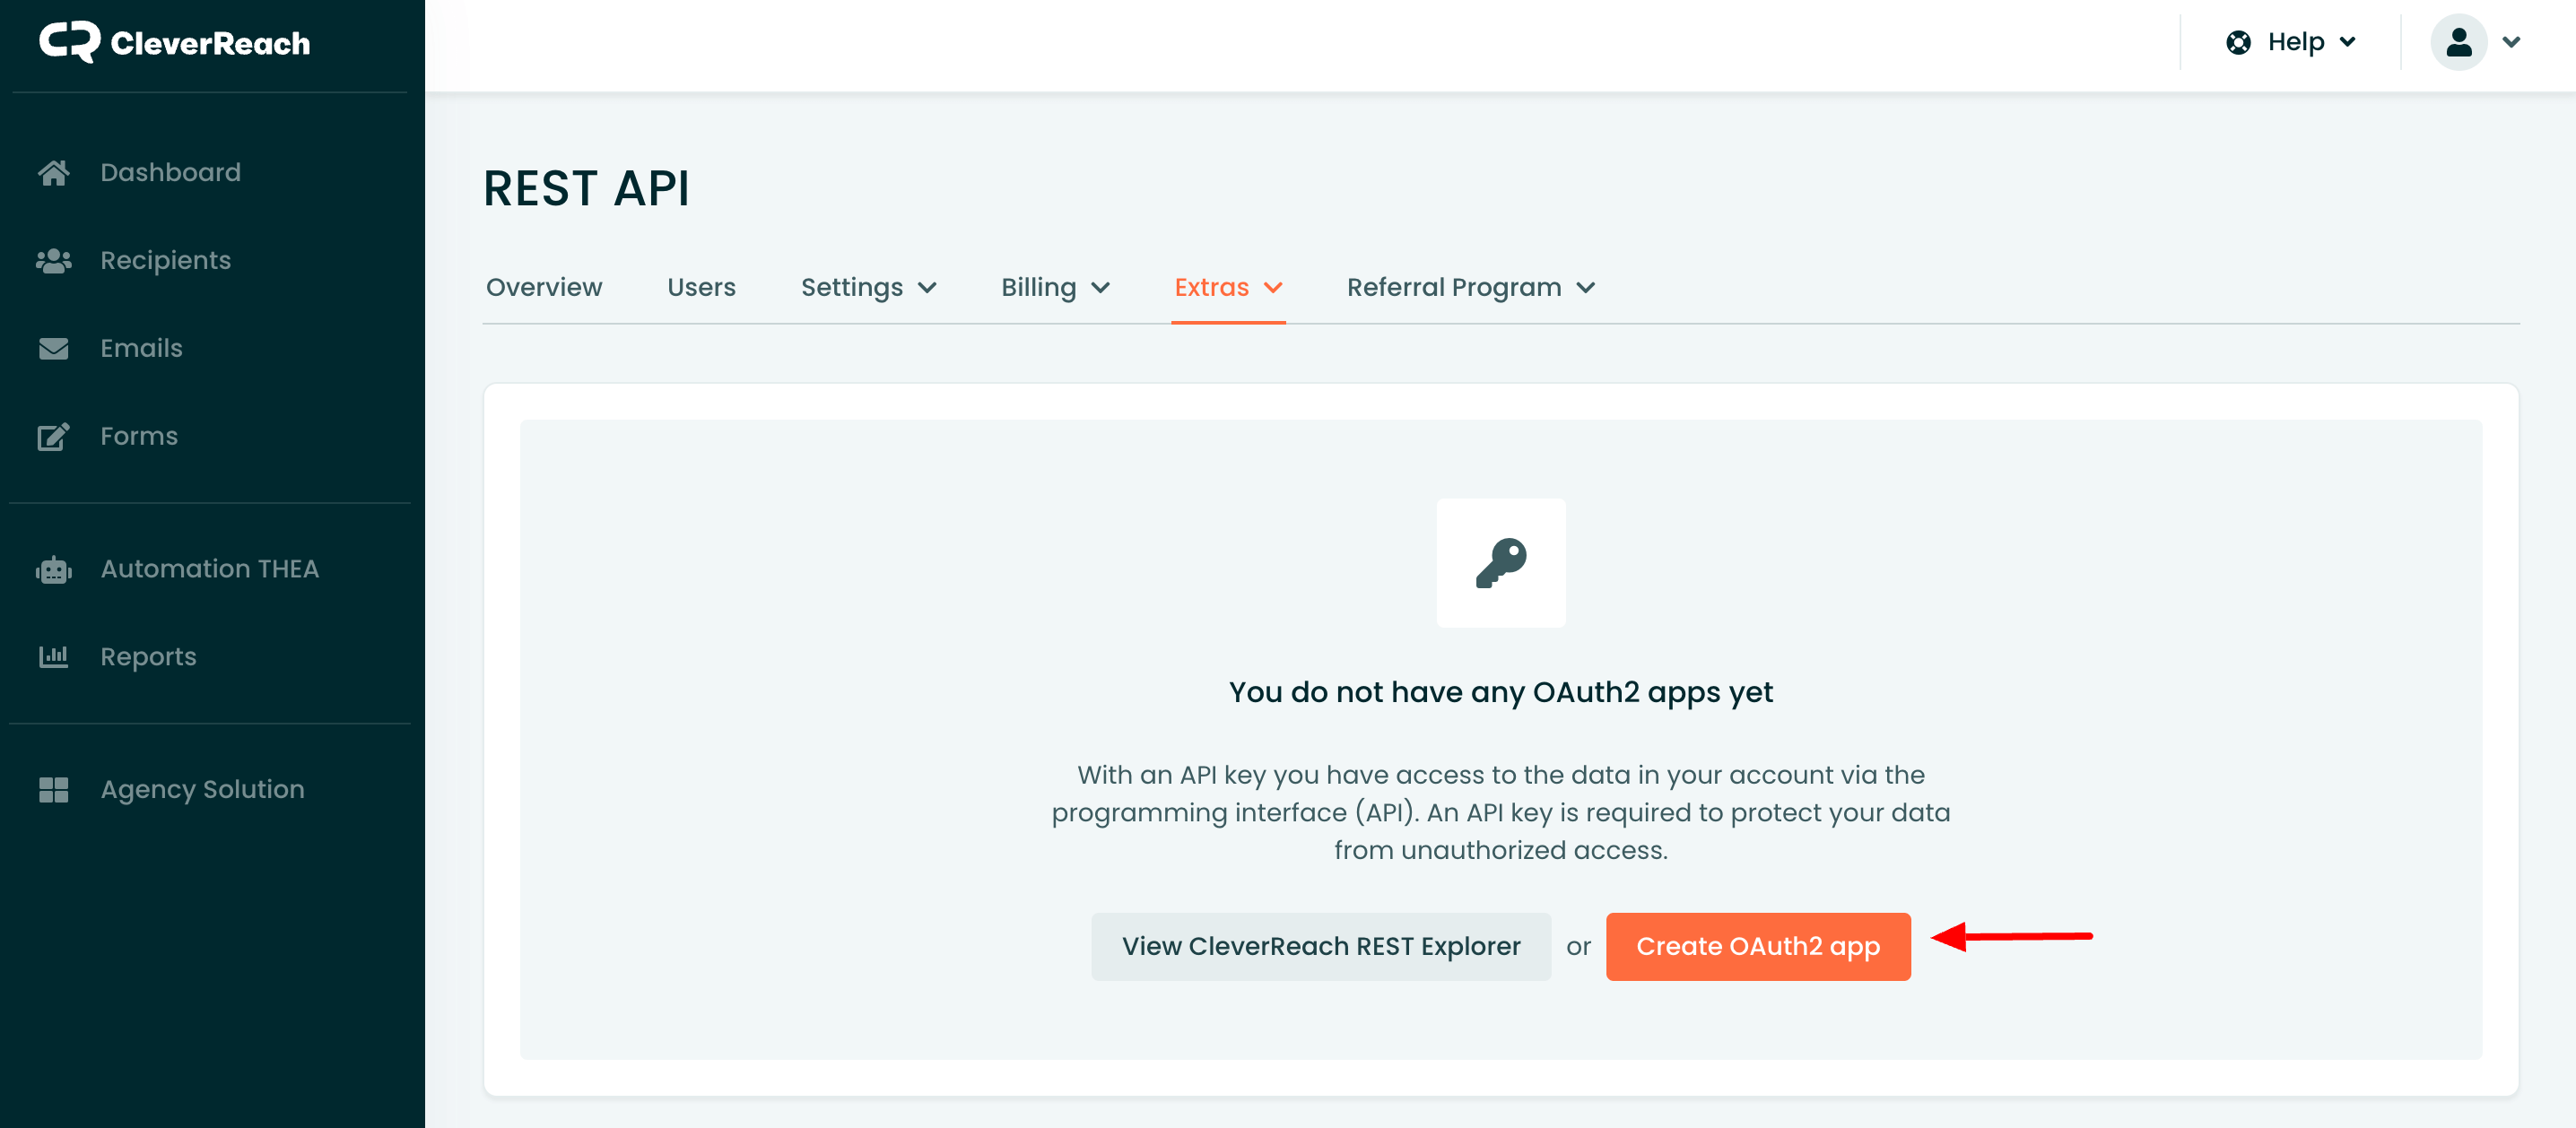
- Go to your Clever Reach account dashboard. Click on the profile icon in the top right corner. Click on My Account → Extras → REST API, then click on the Create OAuth App button.
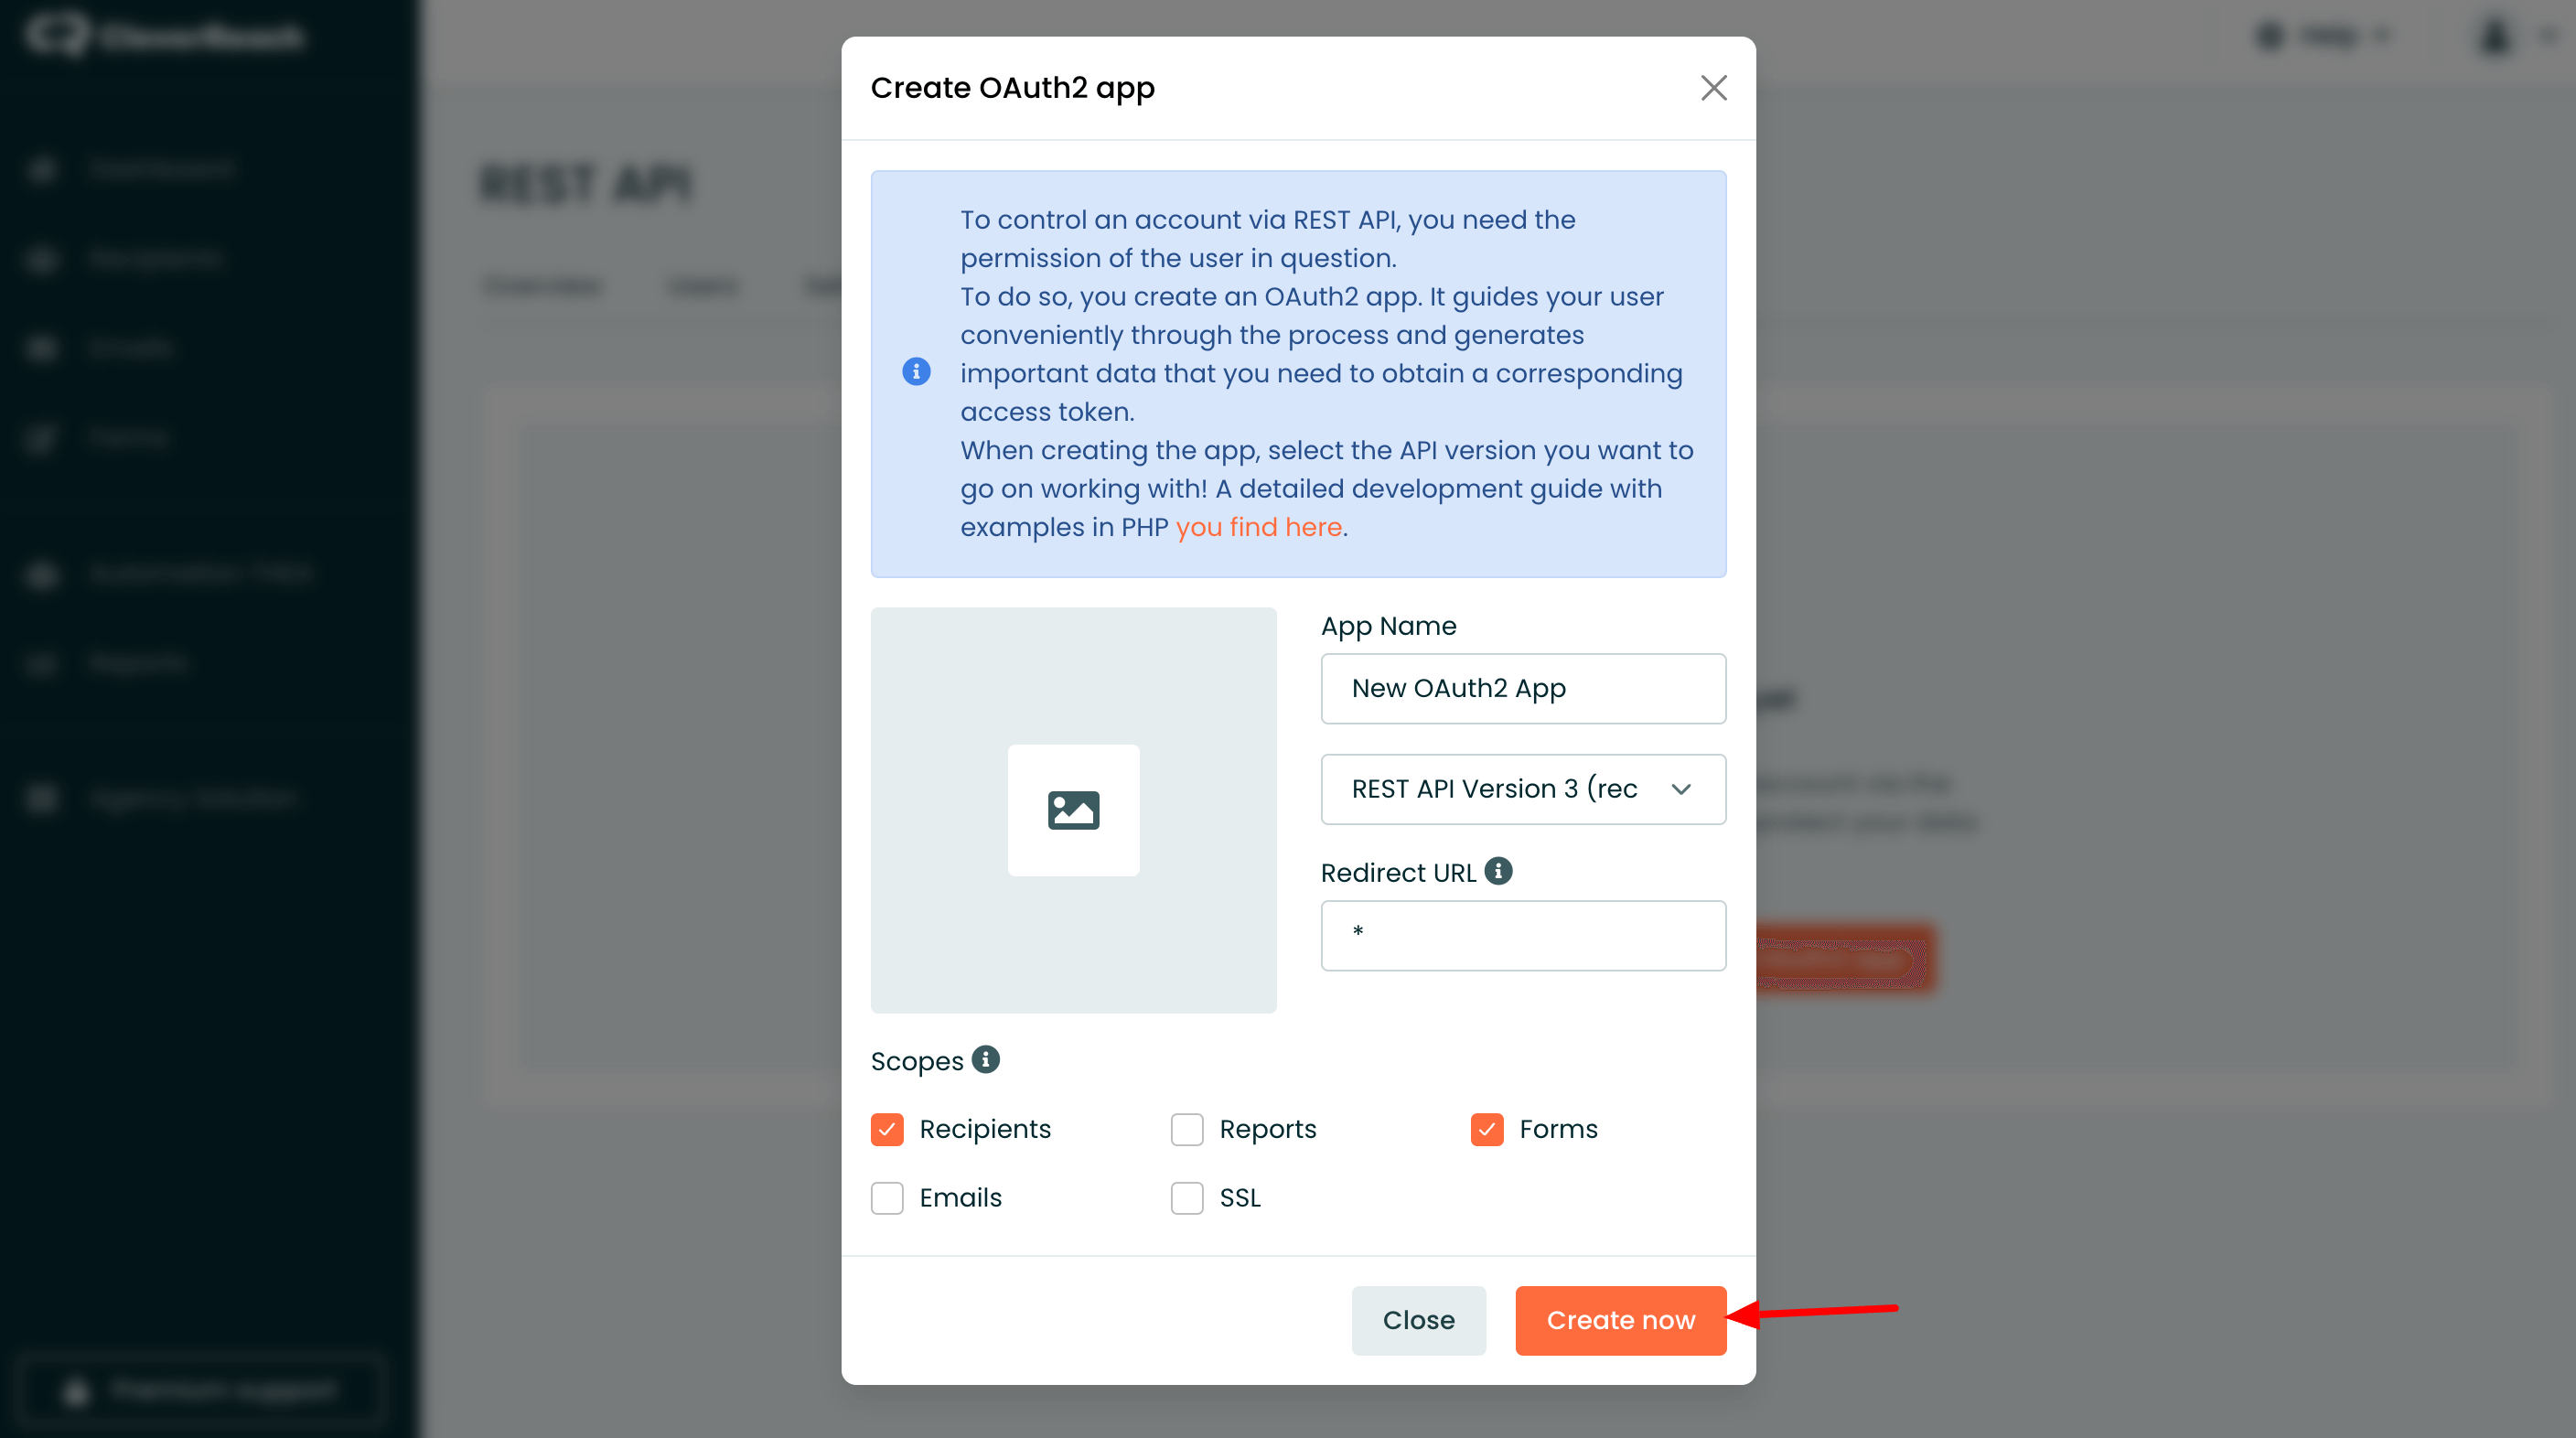
- Then give your OAuth app a name → choose REST API Version 3 → Select the Forms scope (Recipients, Forms) → Redirect URL should be ‘*’, and click the Create now button.
- You will get a Client ID and Client Secret from CleverReach.
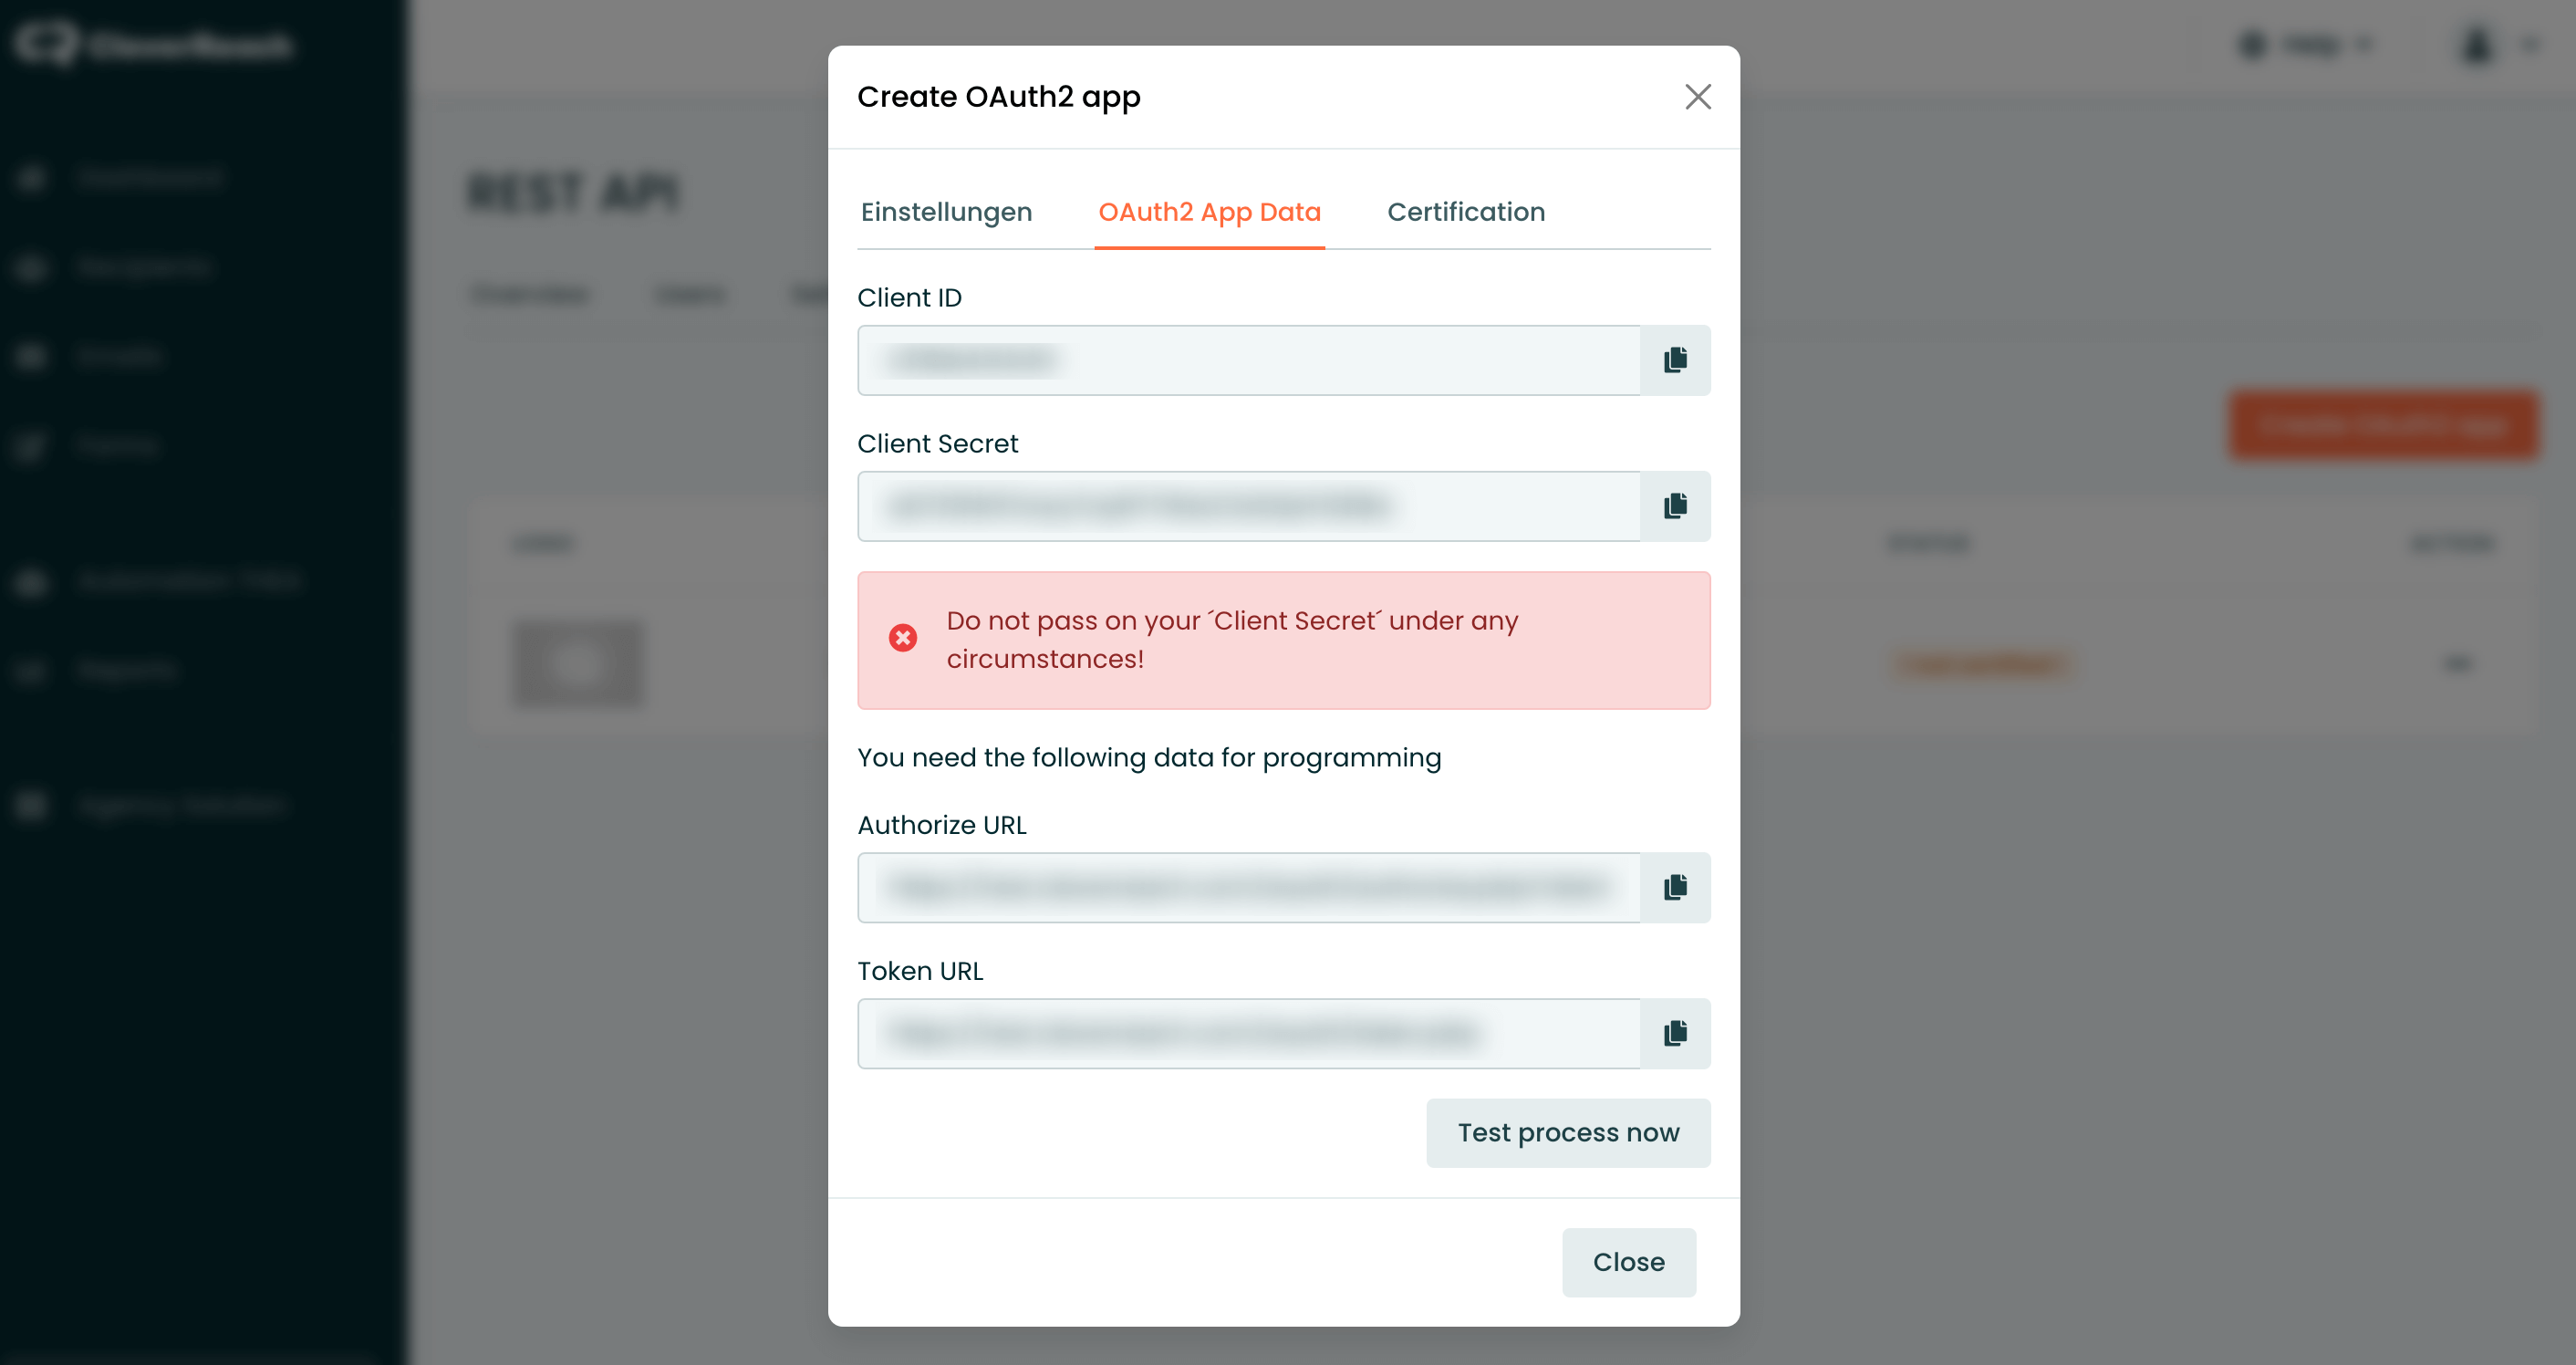
- Copy and paste the Client ID and Client Secret to CleverReach’s Global settings tab.
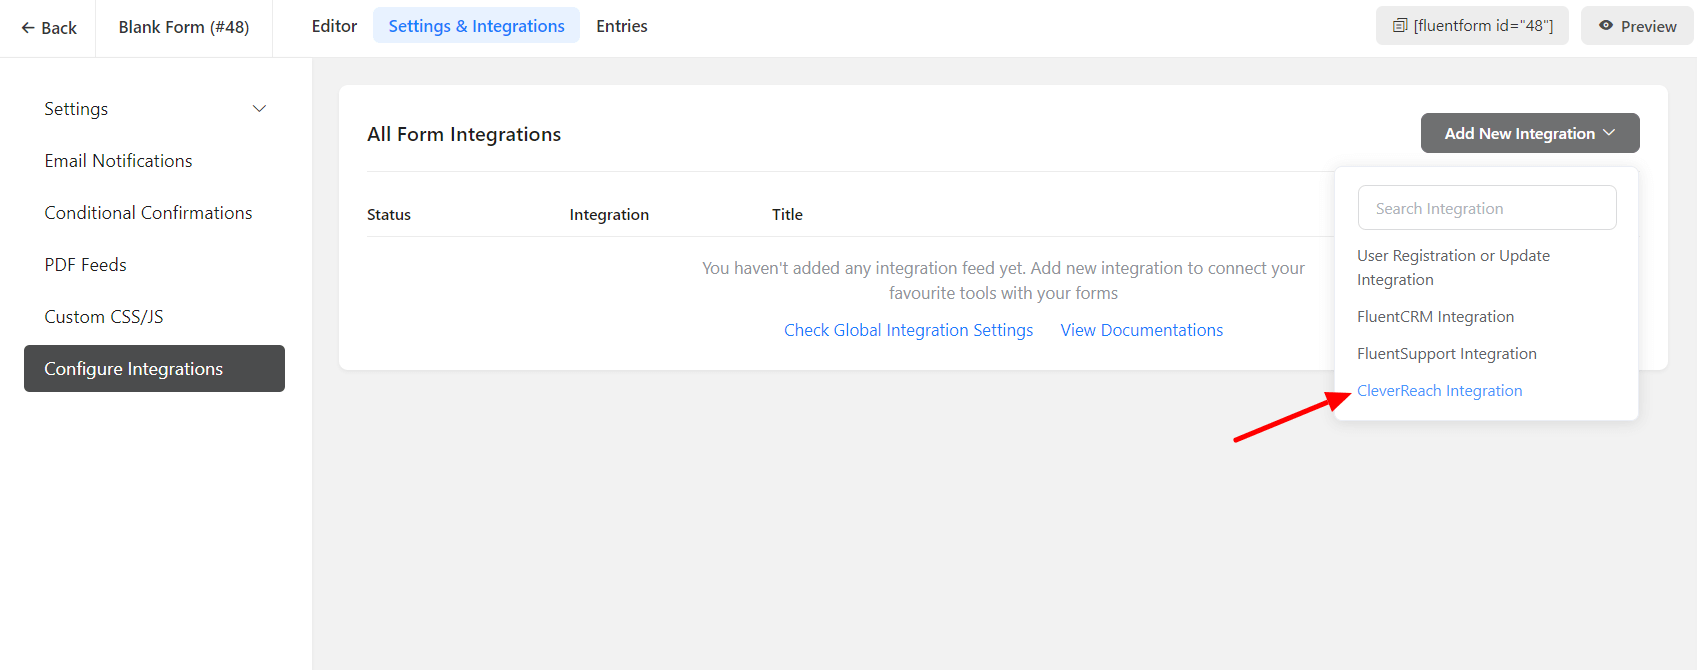
- Now go to the particular form’s settings for the entries you want to be listed in CleverReach. Click on Add New Integration and select CleverReach Integration from the dropdown.
- Name the feed and select from the dropdown the CleverReach List, where the form’s entries will be listed in.
- Configure the fields and map them to the CleverReach corresponding fields.
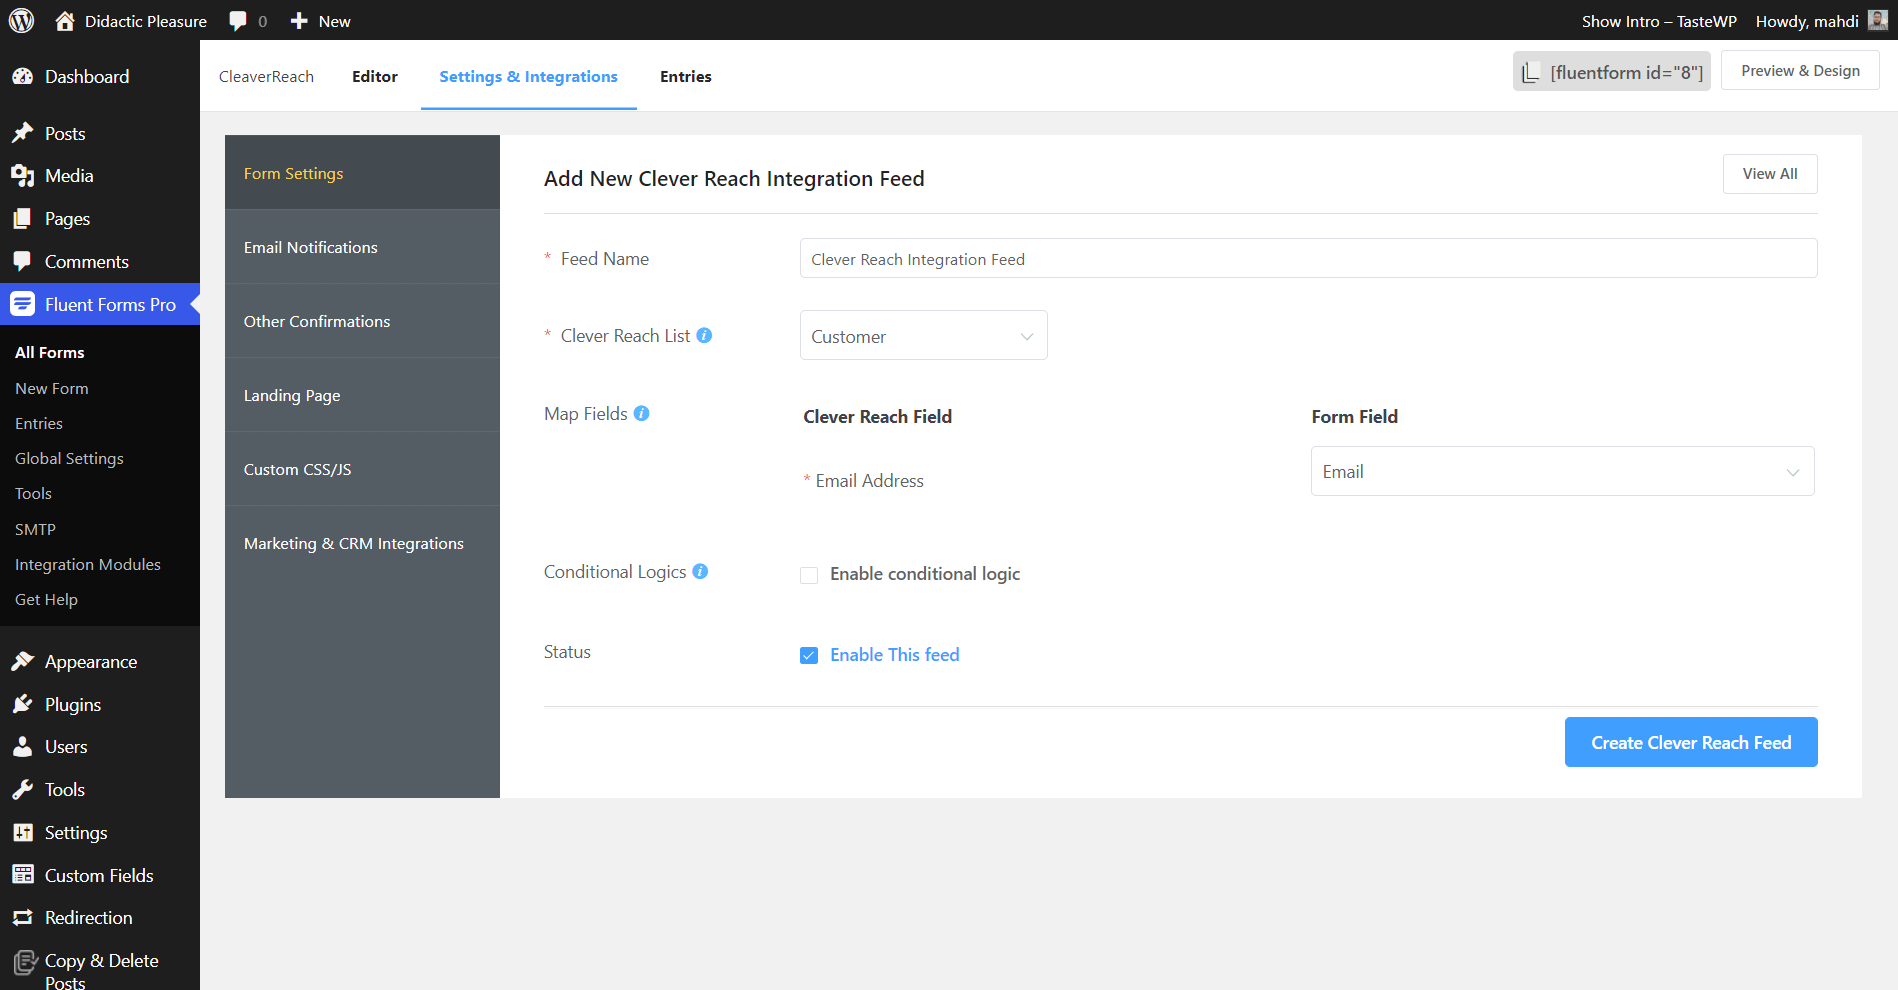
- Enable Conditional Logic if required. Learn more about Fluent Forms Conditional logic here.
- Click on Create CleverReach Feed when the configuration is done.


