amoCRM was designed to help you manage your leads, tasks, and sales team. You will fully control your team and pipeline as a manager with extremely rich analytics and monitoring tools.
Integrate your amoCRM account easily with Fluent Forms Pro by following the steps mentioned below –
Steps to integrate amoCRM with Fluent Forms
- Activate the amoCRM Module
- Get your amoCRM Integration ID & Secret Key
- Use the Integration ID & Secret Key with the amoCRM Module
- Create/Use a Form with Fluent Forms
- Setup the integrations feed & Map the input fields
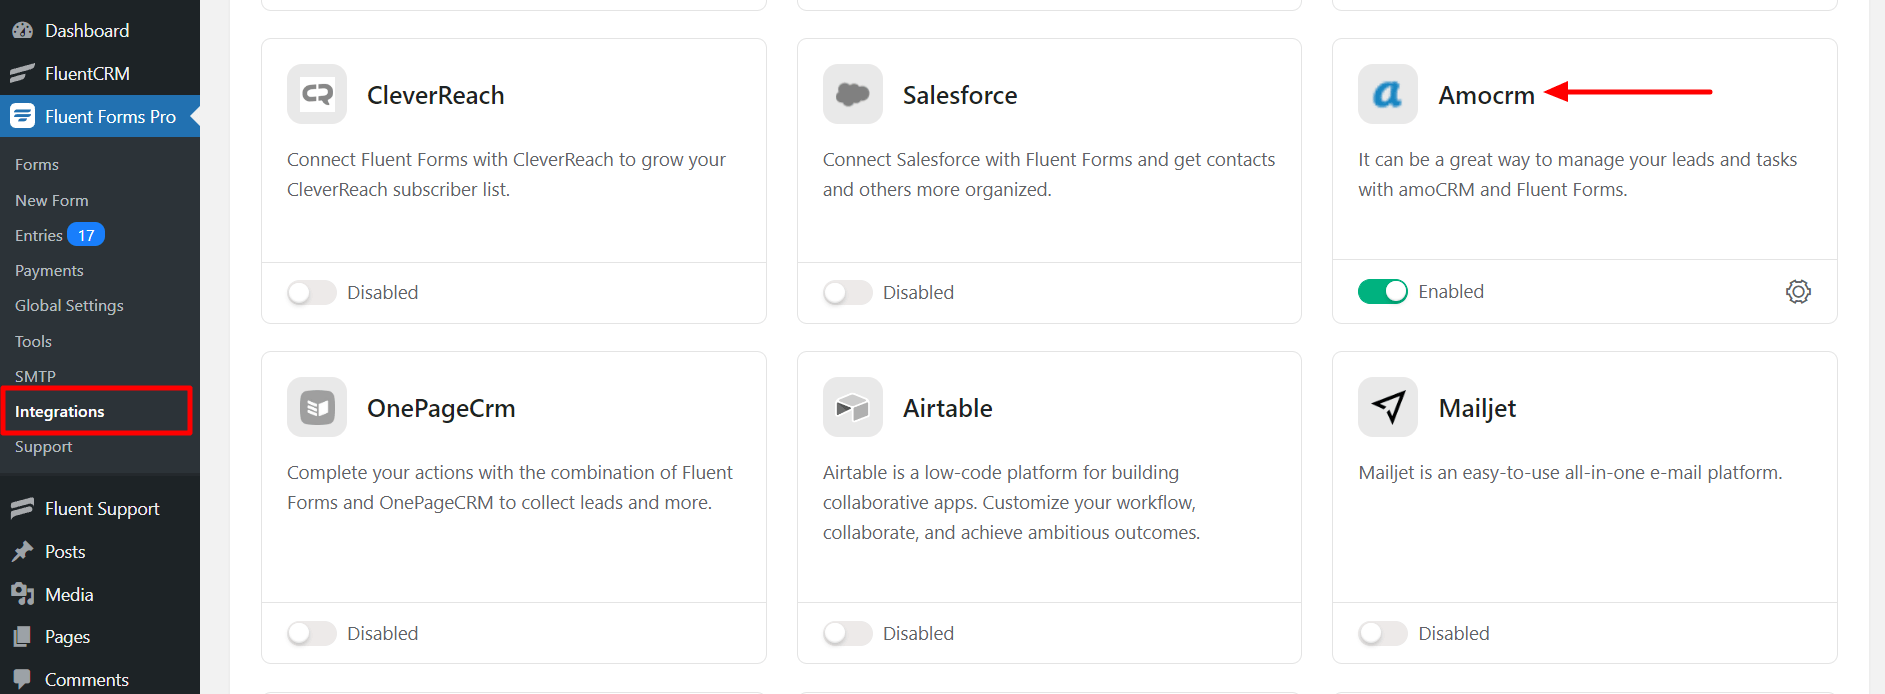
- Go to the Integration Modules from Fluent Forms (WordPress admin panel sidebar) and turn on the amoCRM Module, as shown in the screenshot below.
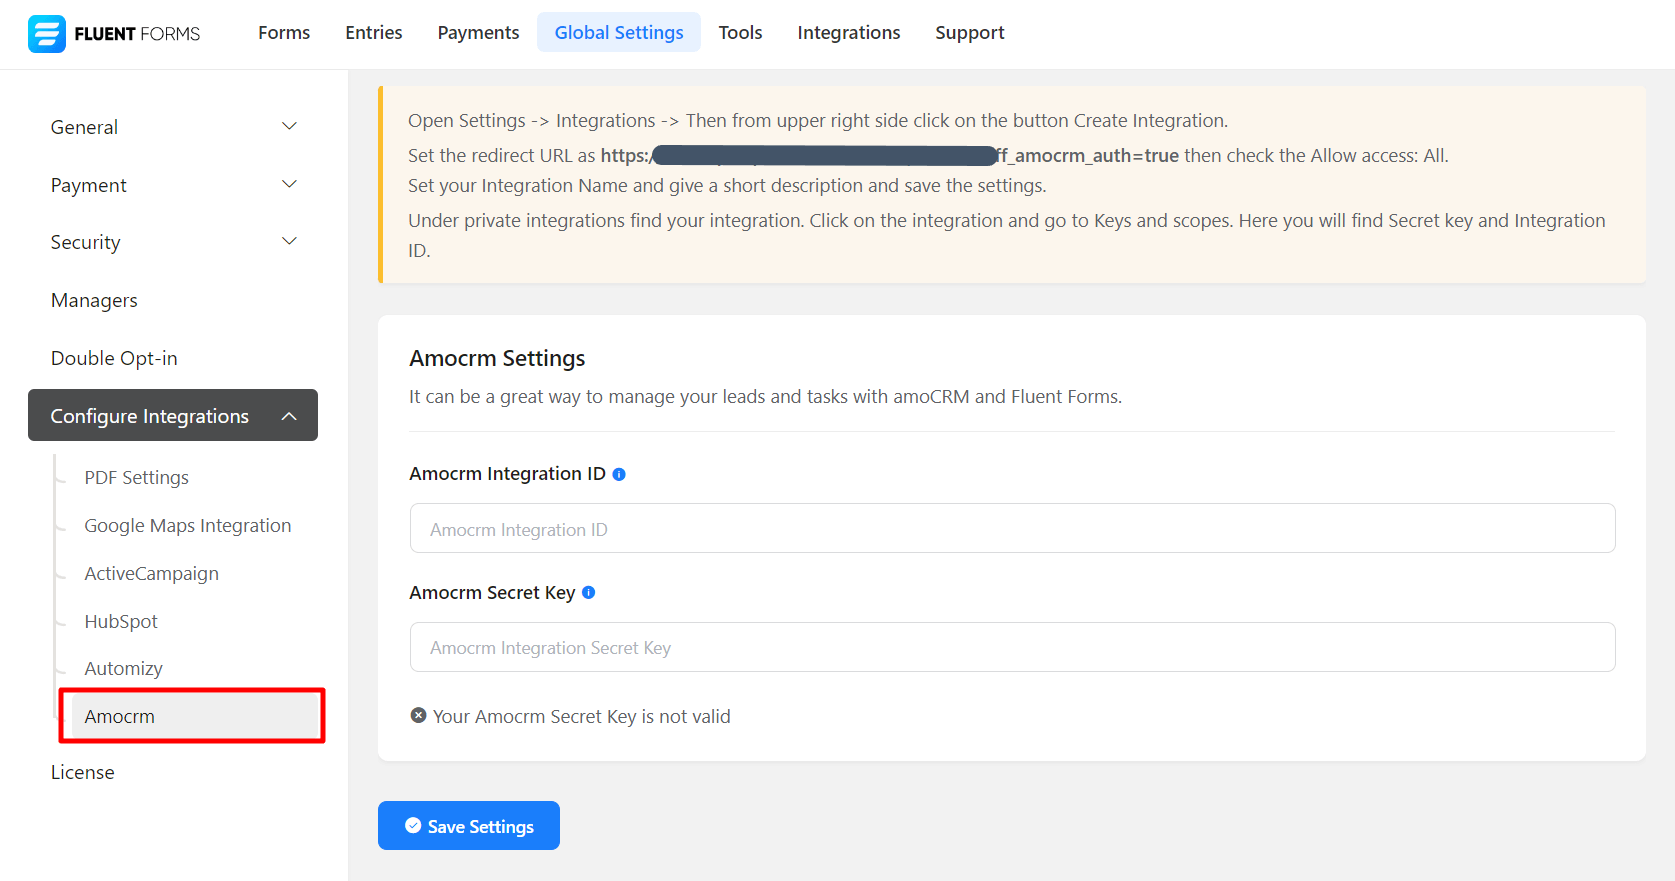
- Again hover over Fluent Forms Pro and go to Settings. Select amoCRM, and you will be asked for the amoCRM Integration ID & Secret Key here.
- To create your account on amocrm.com, go to the given link & Create your account.
- After that, Go to Settings → Integrations → Create Integration
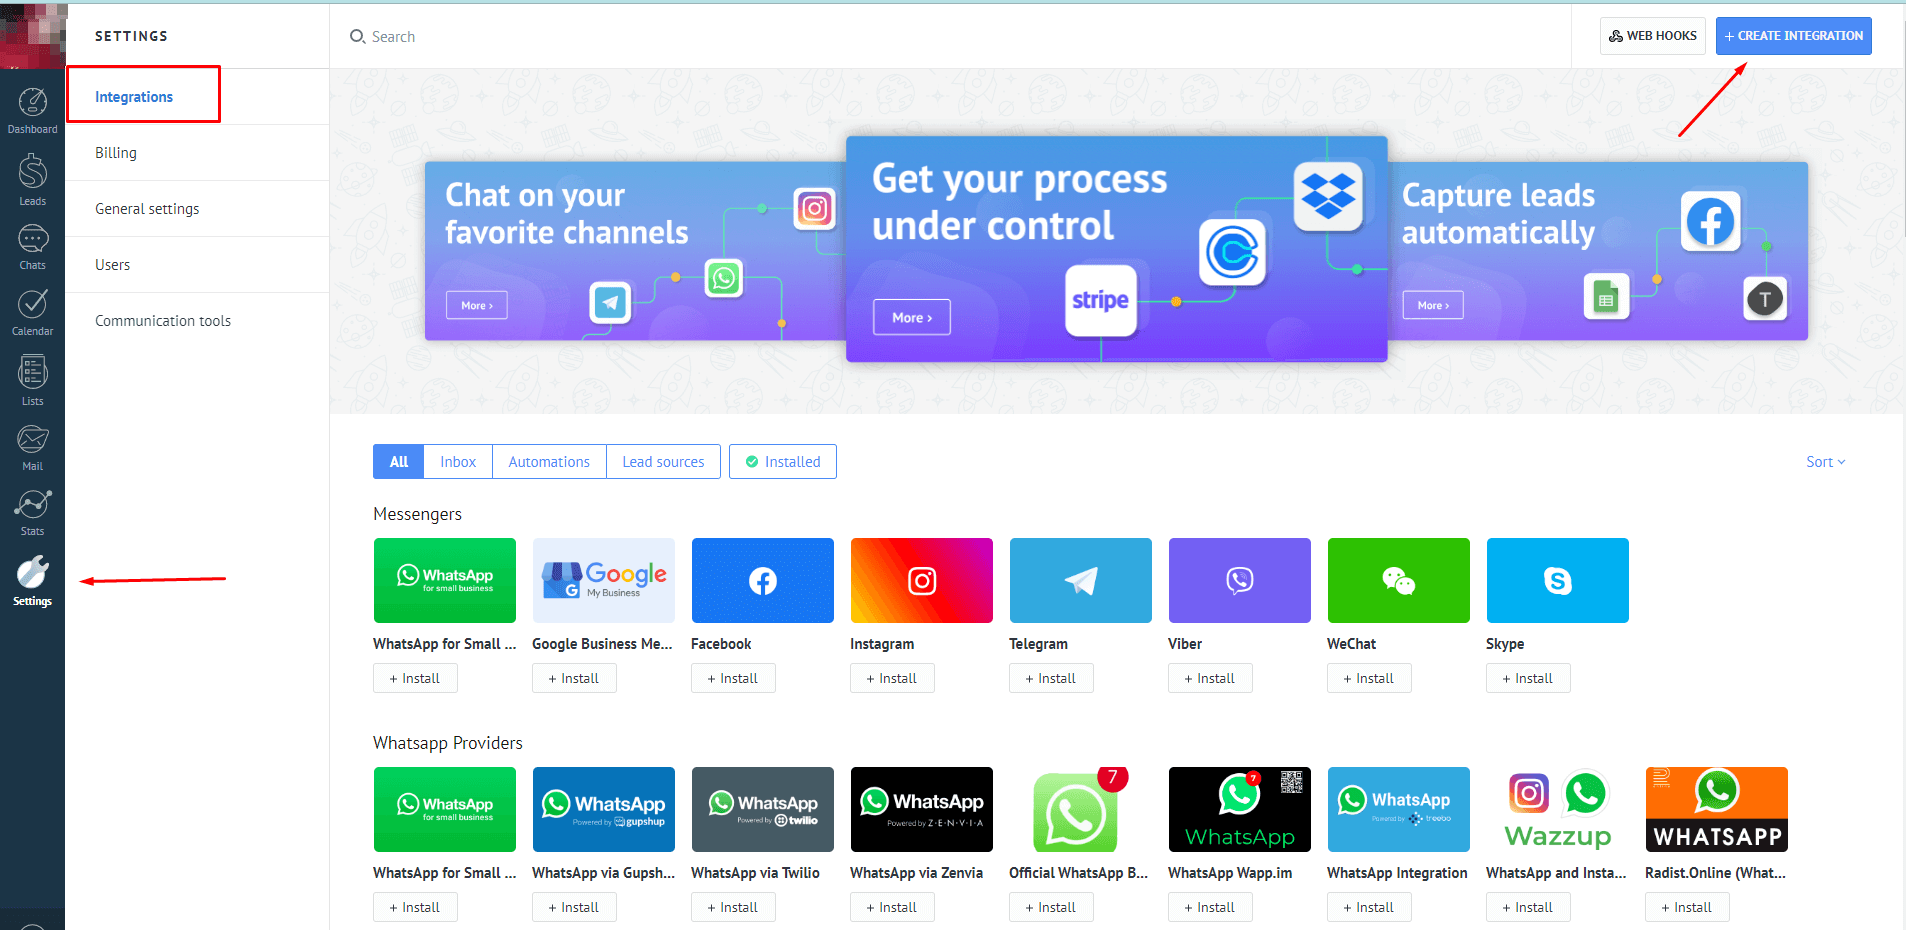
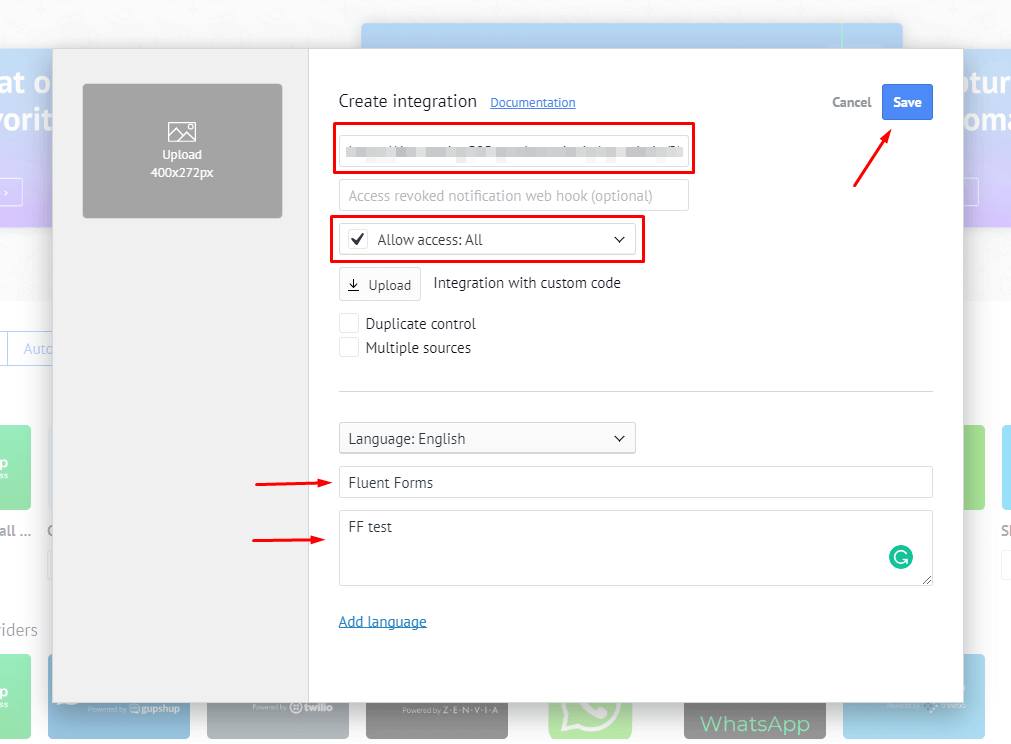
- After Creating Integration, a popup will appear.
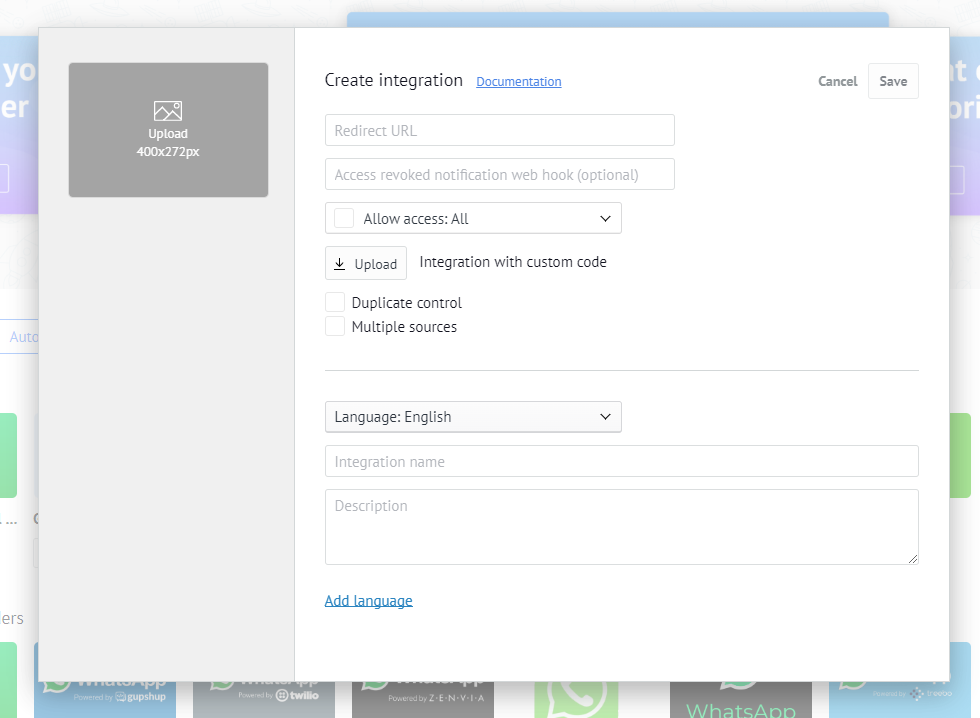
- Set the redirect URL as https://……….. & then check the Allow access: All (You will get your redirect URL from amoCRM Global Settings)
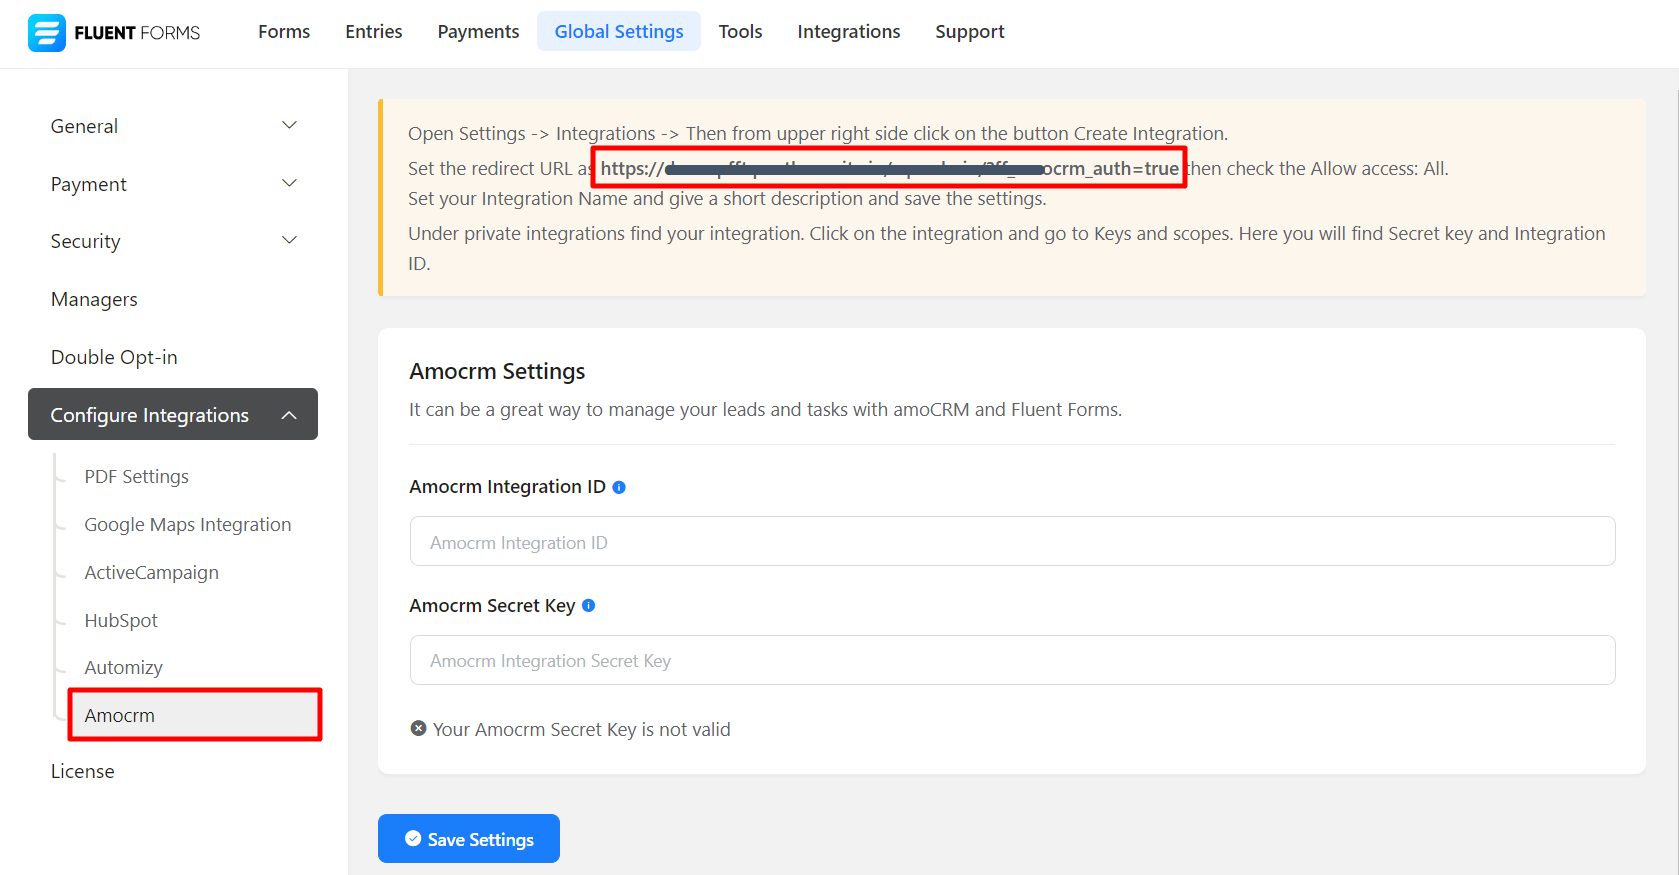
- Set your Integration Name, give a short description, and Save.
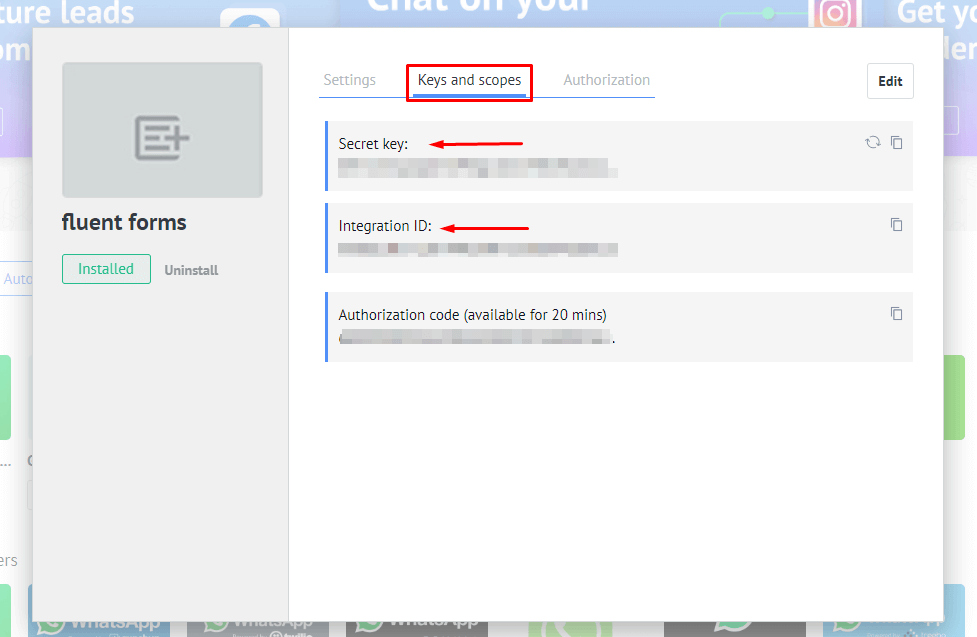
- You’ll be taken to another page after selecting the Save button, where you’ll find the Secret Key and Integration ID.
- Copy the Secret Key & Integration ID to use them in the next step.
- Paste your amoCRM Secret Key & Integration ID to amoCRM’s Global settings tab in Fluent Forms and Save settings.
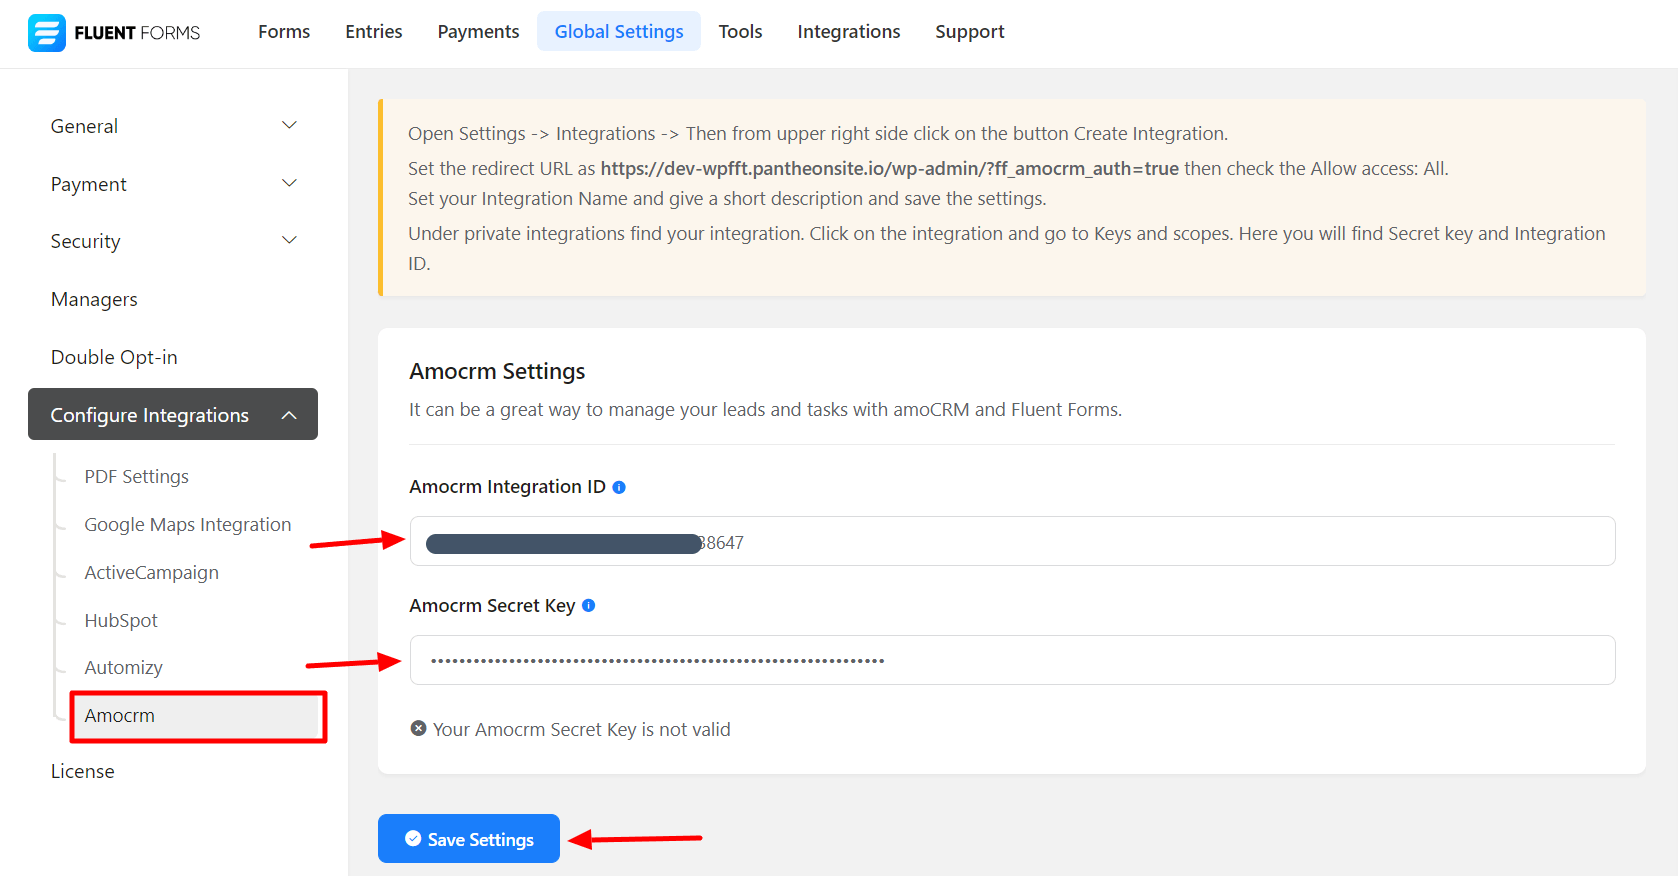
- You will be taken to a page after clicking Save Settings.
- Choose your account & click on the Allow button.
- And here, your amoCRM API integration is up and running.
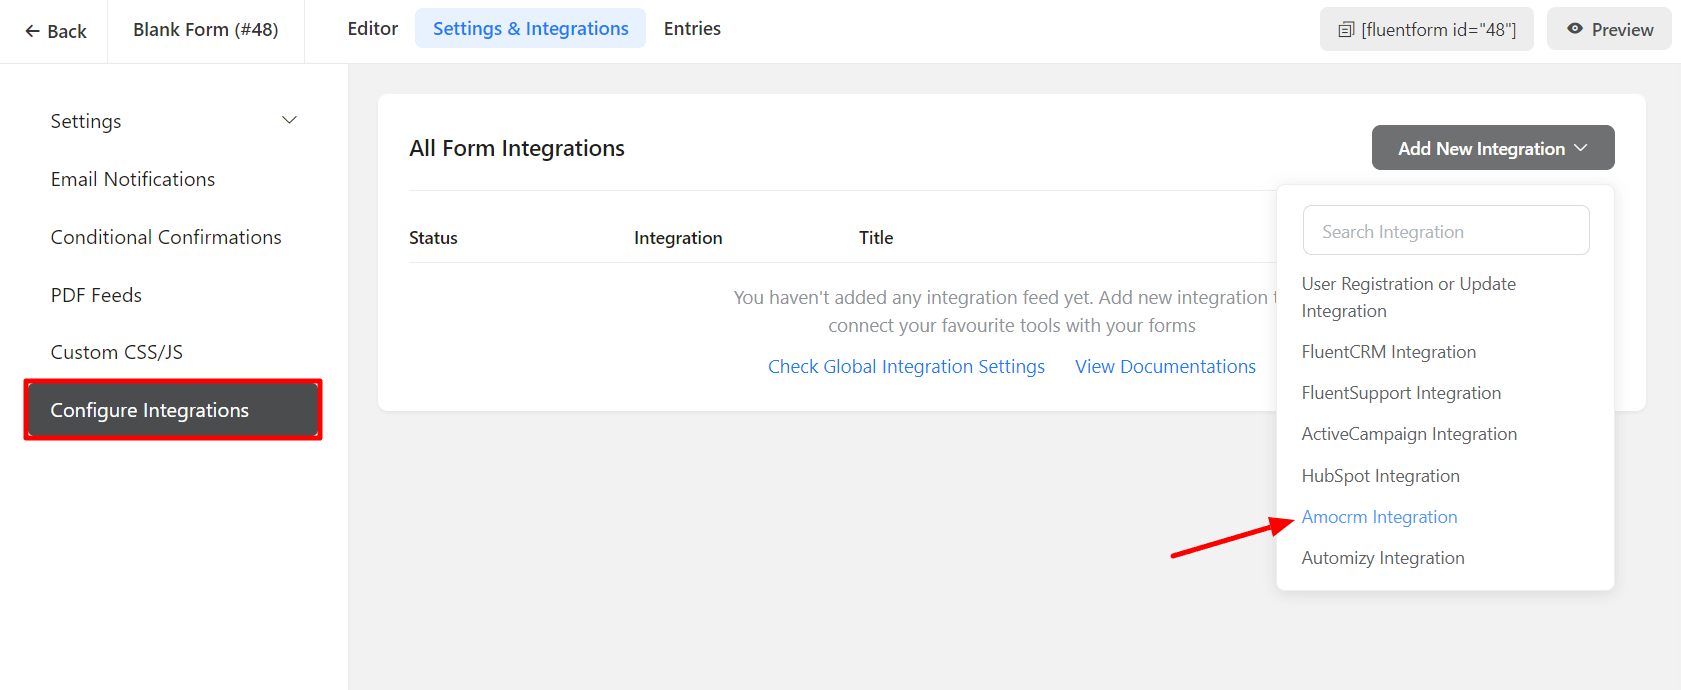
- Now go to the particular form’s settings for the entries you want to be listed in amoCRM. Click on Add New Integration and select amoCRM Integration from the dropdown.
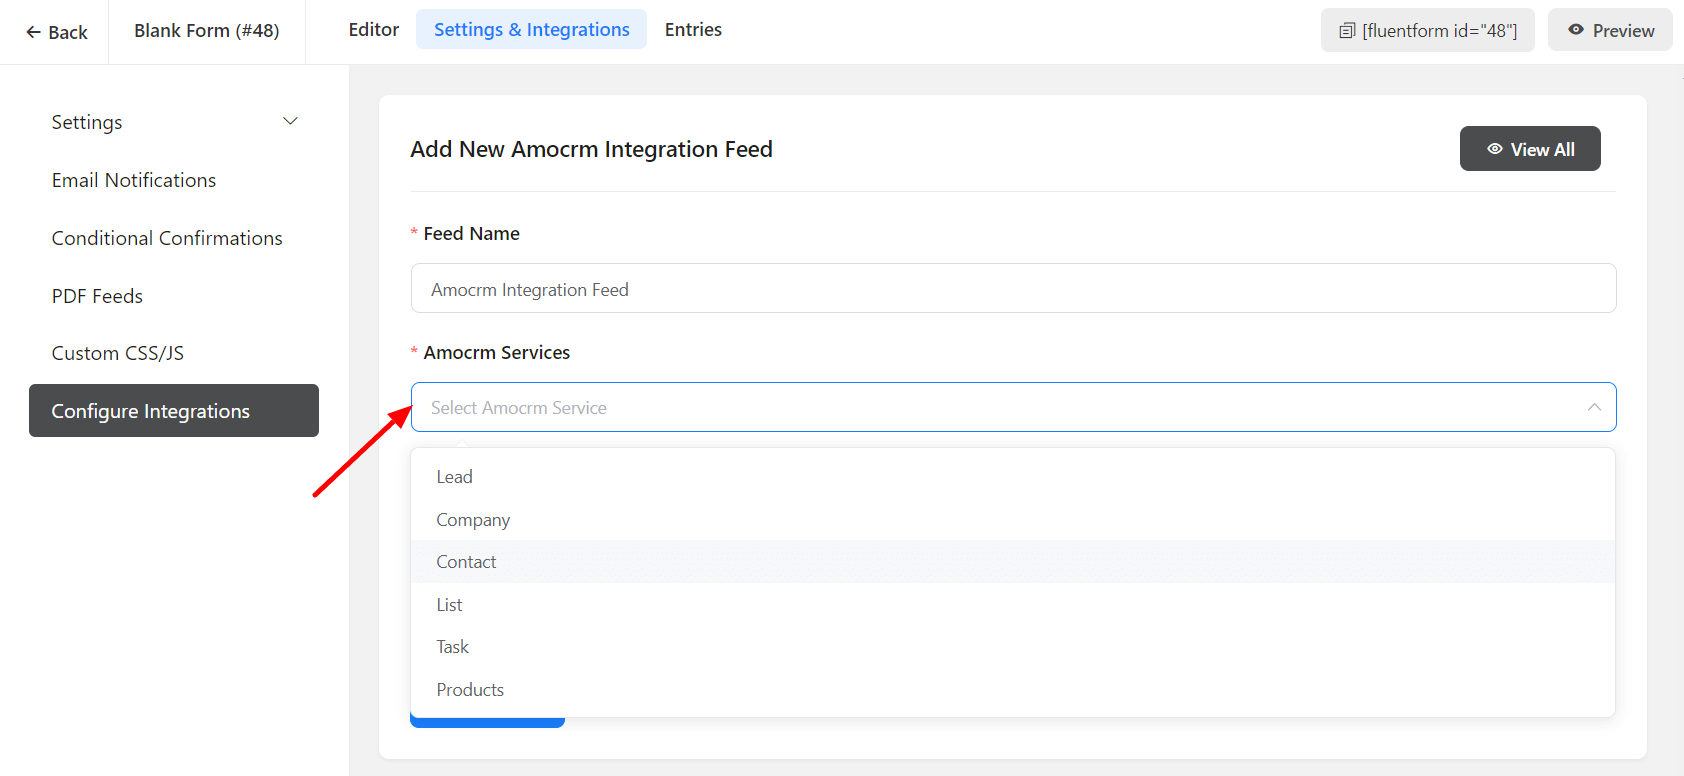
- Name the Feed & select the amoCRM services from the dropdown and create the amoCRM Feed.
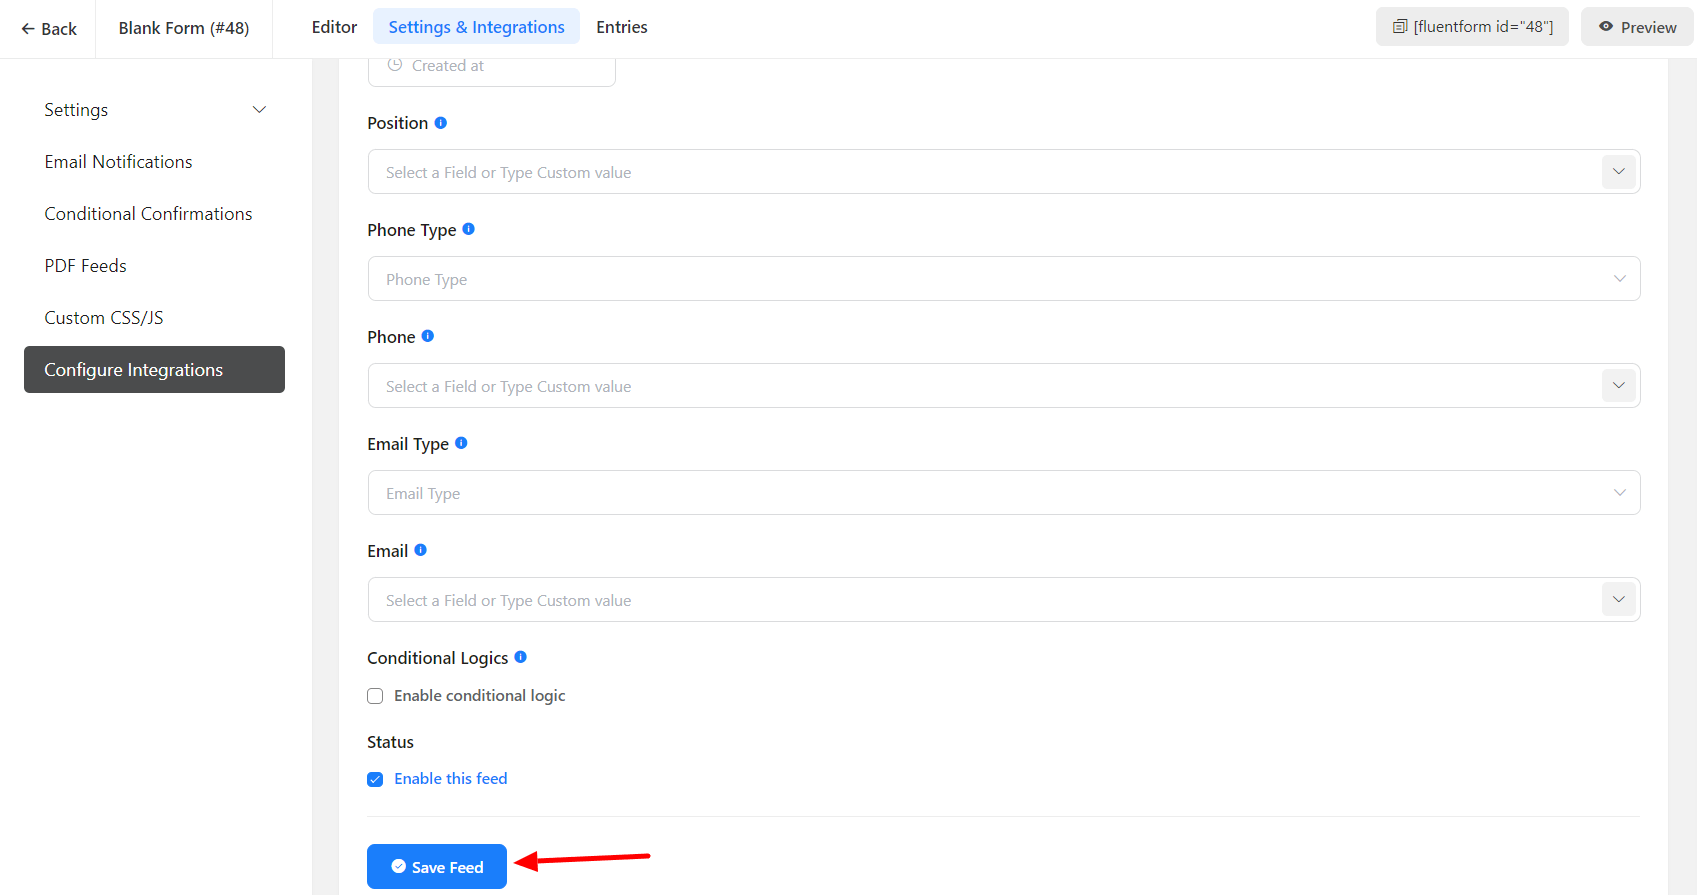
- Configure the fields and map them to the amoCRM corresponding fields.
- Enable Conditional Logic if required. Learn more about Fluent Forms Conditional logic here.
- Click on Save Feed when the configuration is done.