Fluent Forms offers the Conditional Logic feature inside Input Fields to Display/Hide them based on specific conditionals in your forms. This article will guide you through using Conditional Logic in any Input Fields with Fluent Forms.
Enable Conditional Logic in a Field
To learn how to use conditional logic in a specific form, follow the steps with the screenshots below –
First, go to the Forms from the Fluent Forms Navbar or WordPress Left Sidebar, and open the Editor page of your desired form by clicking the Edit button where you want to use the Conditional Logic feature.
If you do not have any existing forms, read Create a Form from Scratch or Create a Form using Templates documentation to create a new one.
For example, I choose an existing form to show the whole process.

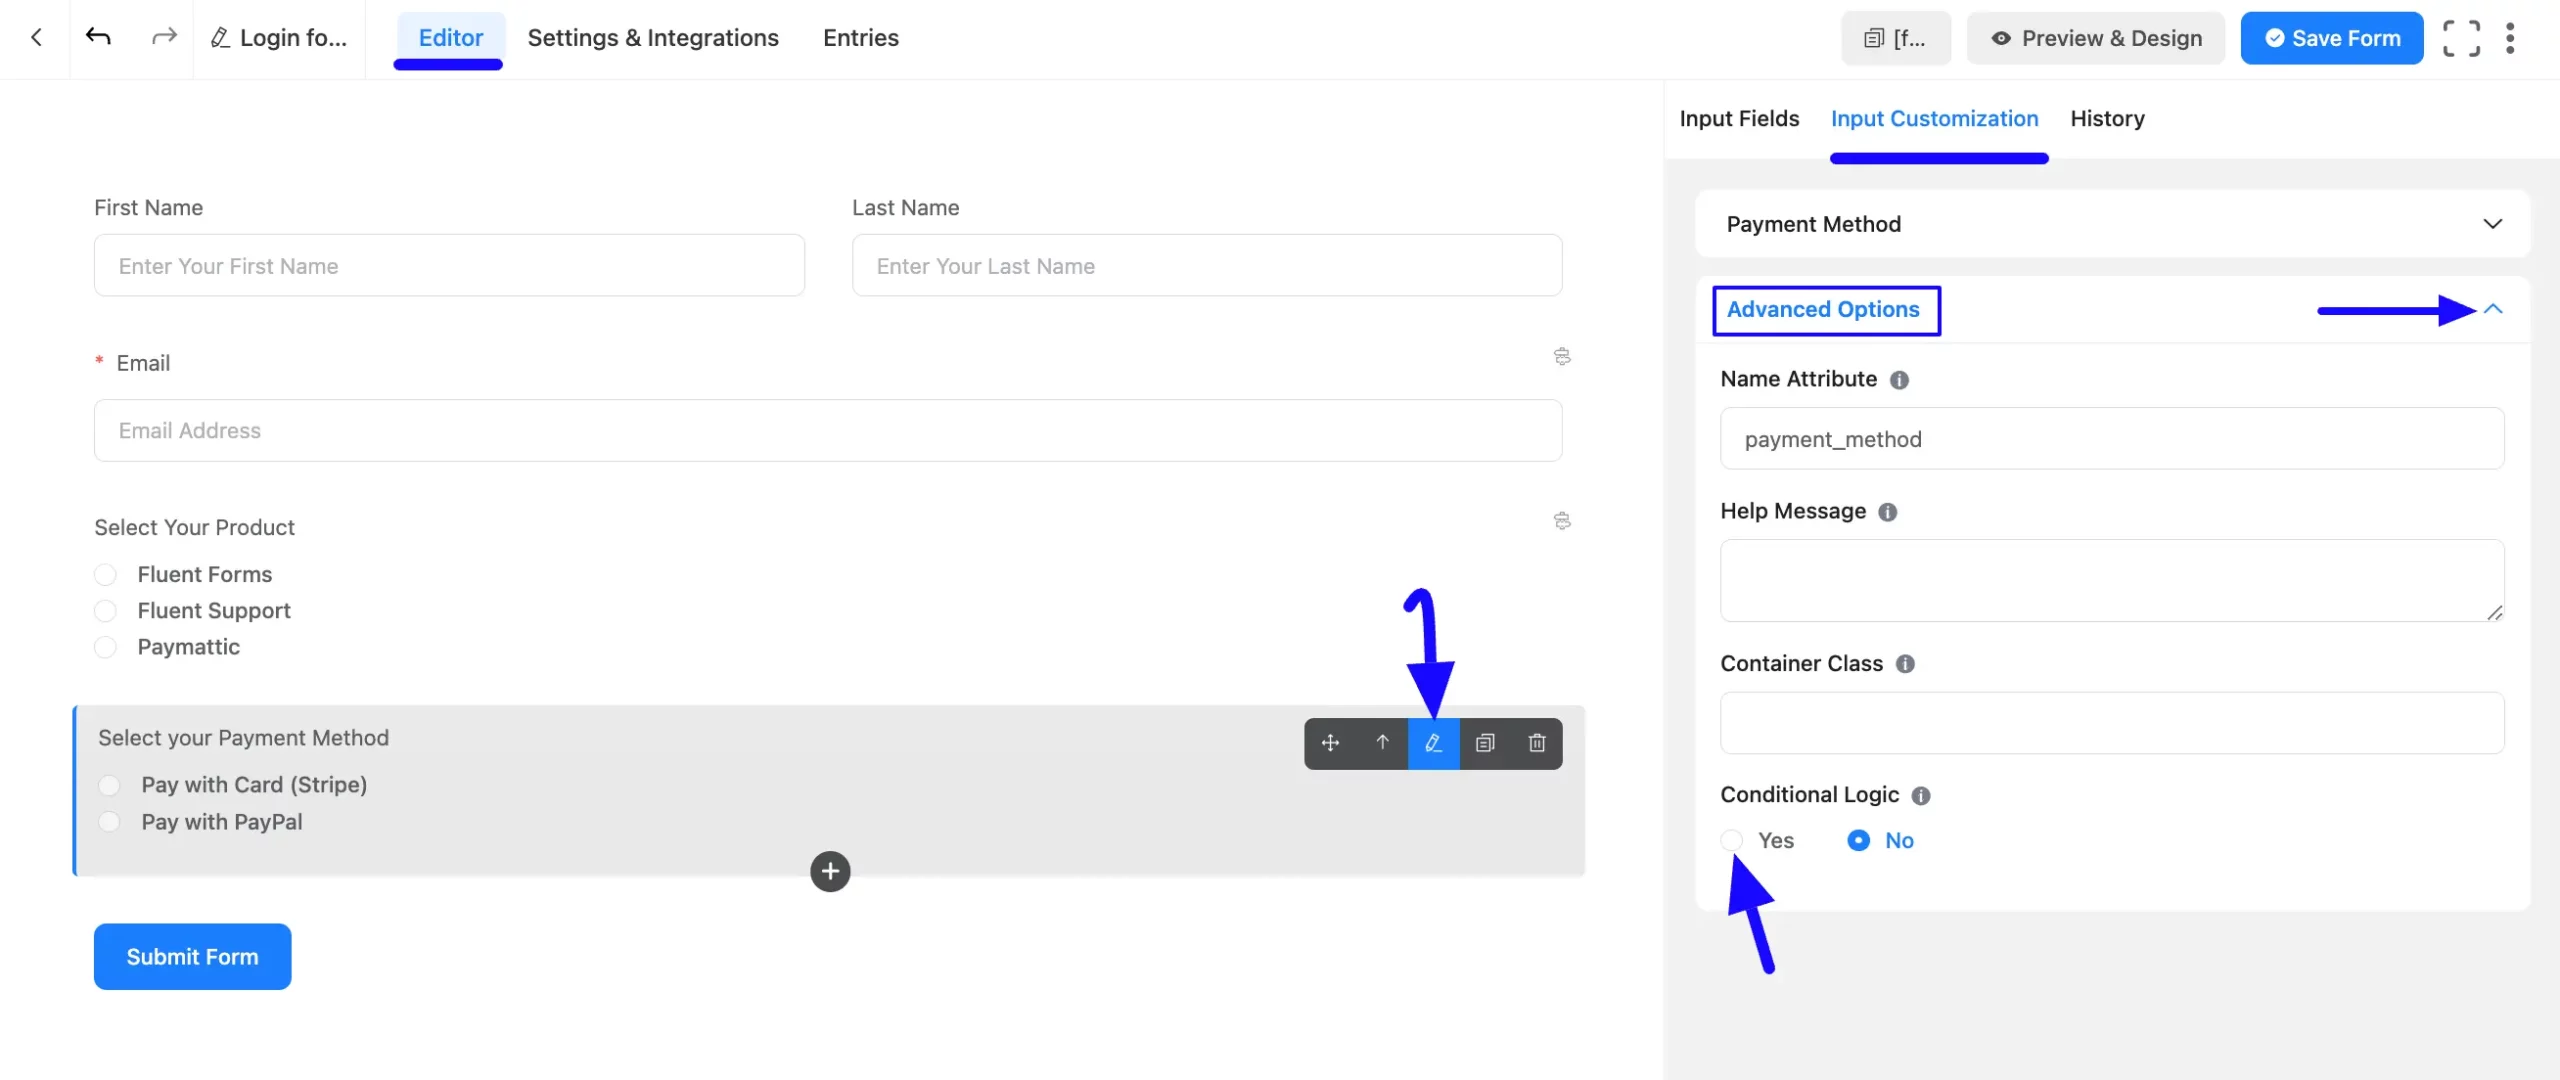
Once you open the Editor page, choose the desired Input Field that you want to Hide/Display based on the set condition/s. For example, I selected the Payment Method field to show you the process.
Now, hover over the chosen field, click the Pencil/Edit Icon, and you’ll be taken to the Input Customization tab on the left side.
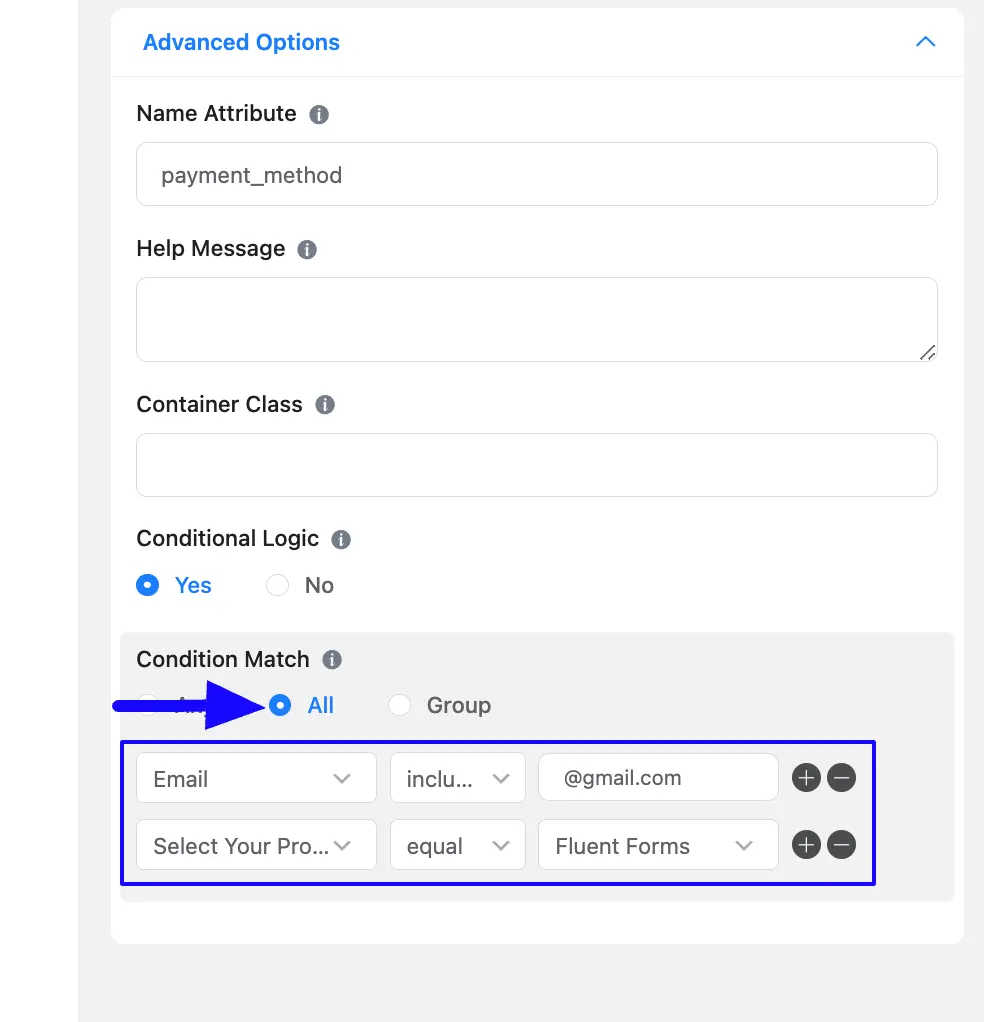
Then, open the Advanced Options by clicking the Arrow Icon, scroll down to Conditional Logic, and select the Yes button.
Conditional Match
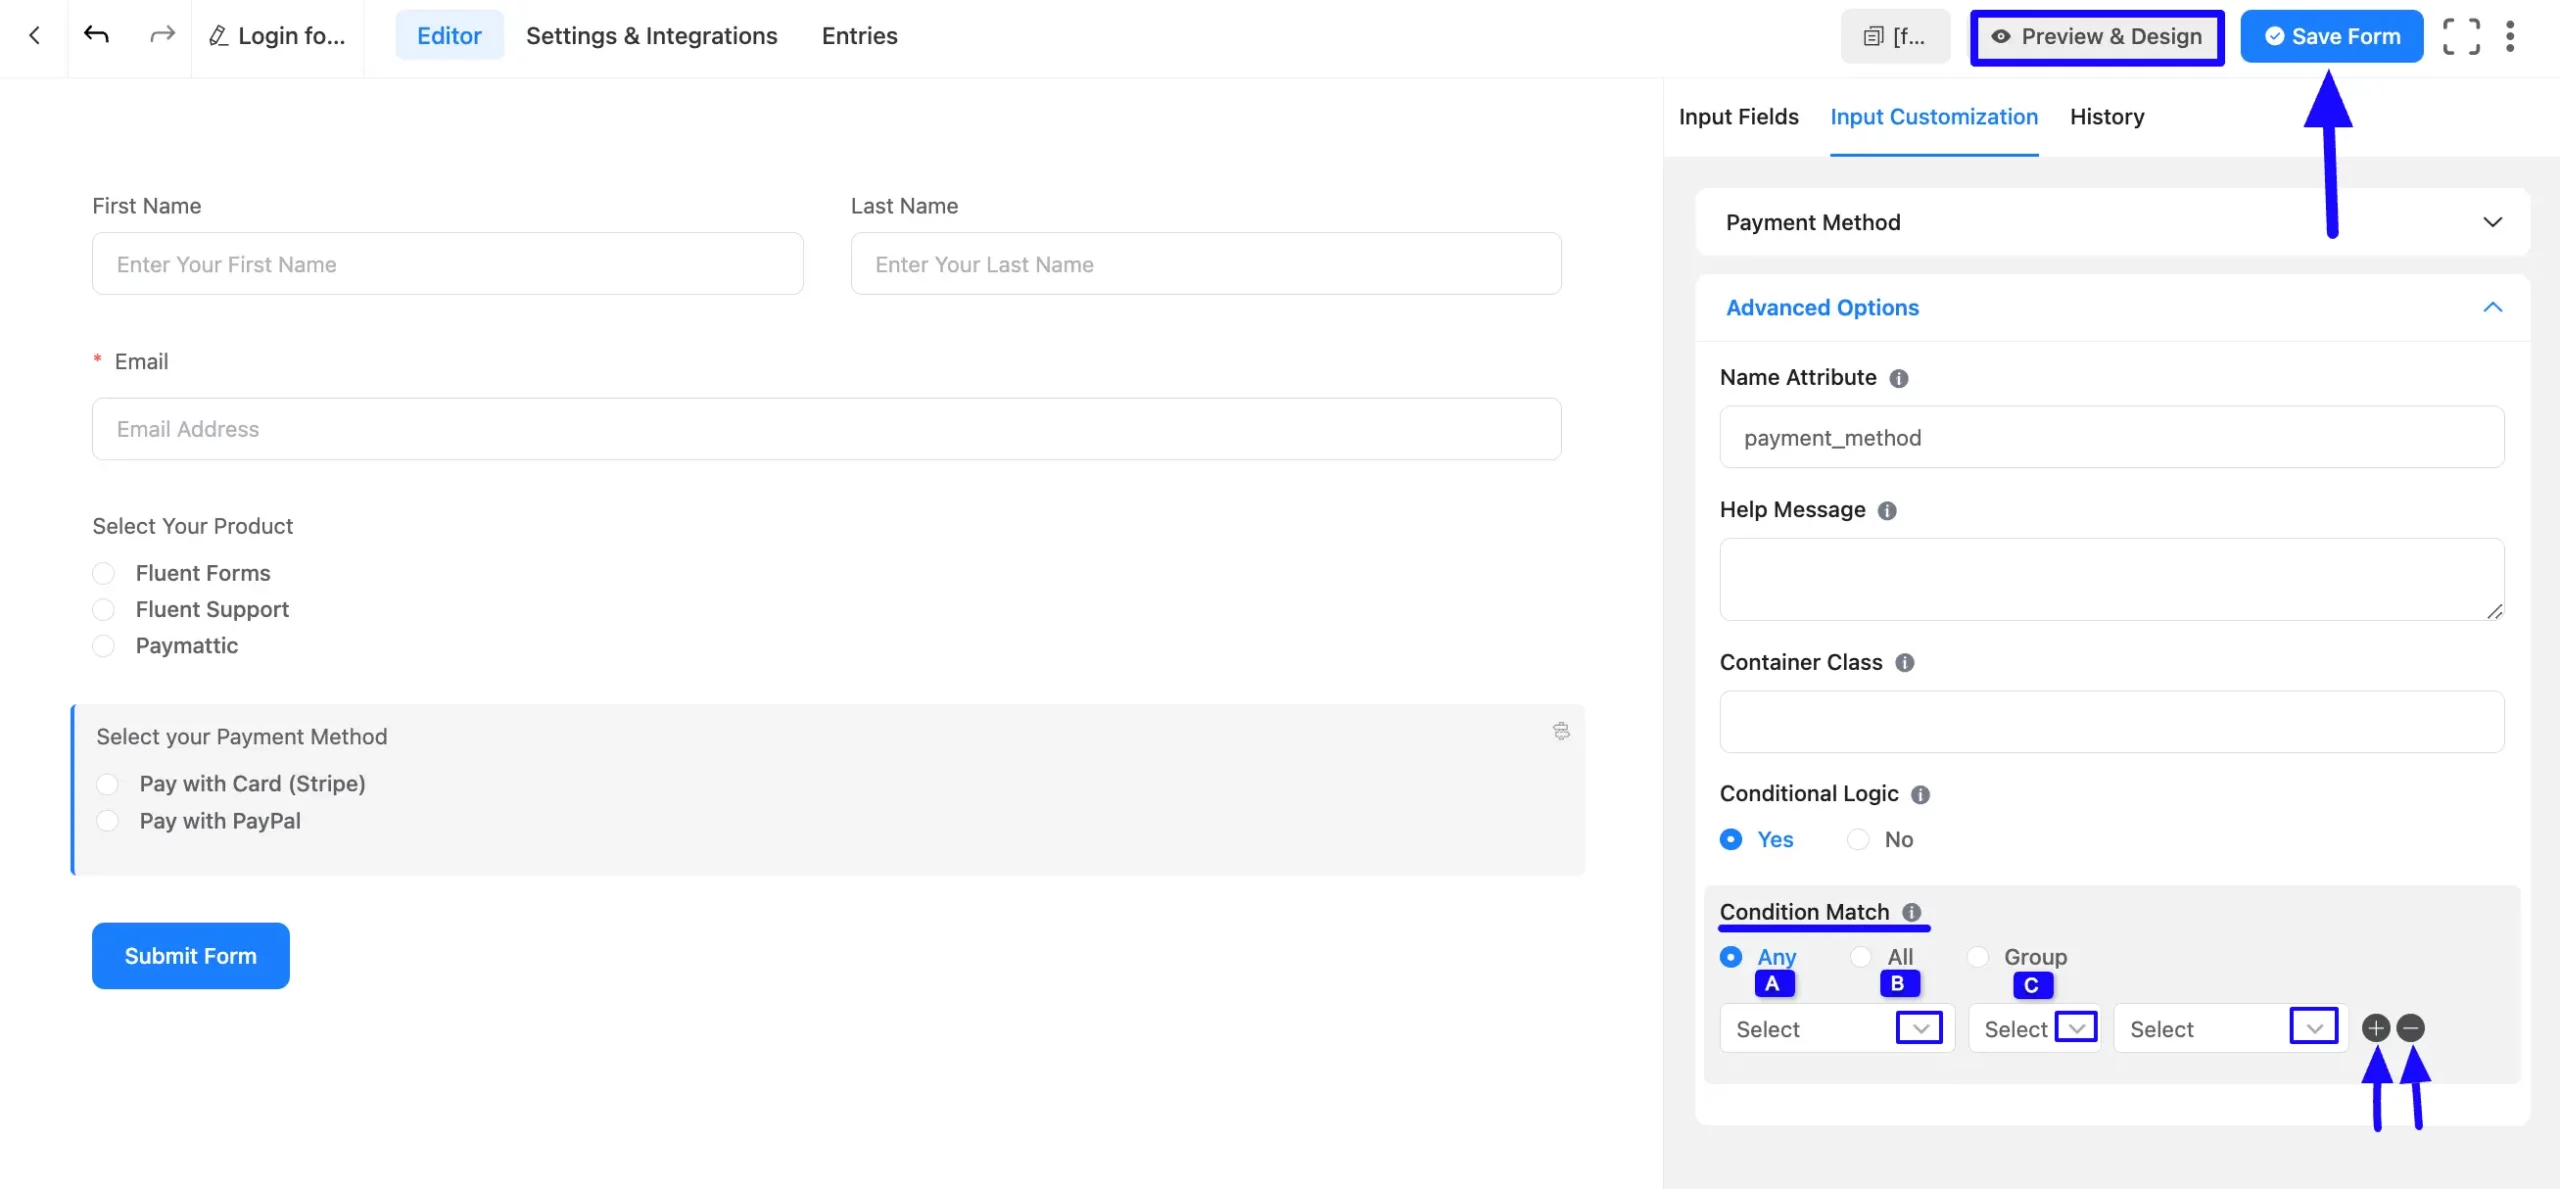
Once you enable the Conditional Logic option, a Conditional Match option will appear with Three major conditionals. These are:
A. Any: If you choose this option, the form user must meet at least one of the set conditions during form submission to trigger the specified actions.
B. All: If you choose this option, the form user must meet all the set conditions during form submission to trigger the specified actions.
C. Group: This advanced option allows you to create multiple conditions within groups. Unlike the “Any” or “All” options, which determine whether all or just one condition must be met, the “Group” option lets you set one group of conditions against another using the “OR” operator. This means that an action will be triggered if at least one group of conditions is met. “Also, you can Name your Groups according to your preference.
Fields to set Conditions
Once you select the Conditional Match, you can specify the Parameter, its Operator, and the corresponding Value to set condition/s.
In the “Parameter” field (first field), select an input field that needs to correspond with the value provided in the “Value” field (last field) and set an option in the “Operator” field (middle field). The parameter will trigger the action if the condition is met.
To add as many conditions as you need, click the Plus Icon, and to delete any conditions click the Minus Icon in the right corner.
Once you complete, click the Save Form button to make the condition/s functional. To see the preview, click the Preview & Design button.
Example of Each Conditional Match
To provide you an in-depth understanding, all three conditional matches are explained with detailed examples below –
A. Any Conditional Match
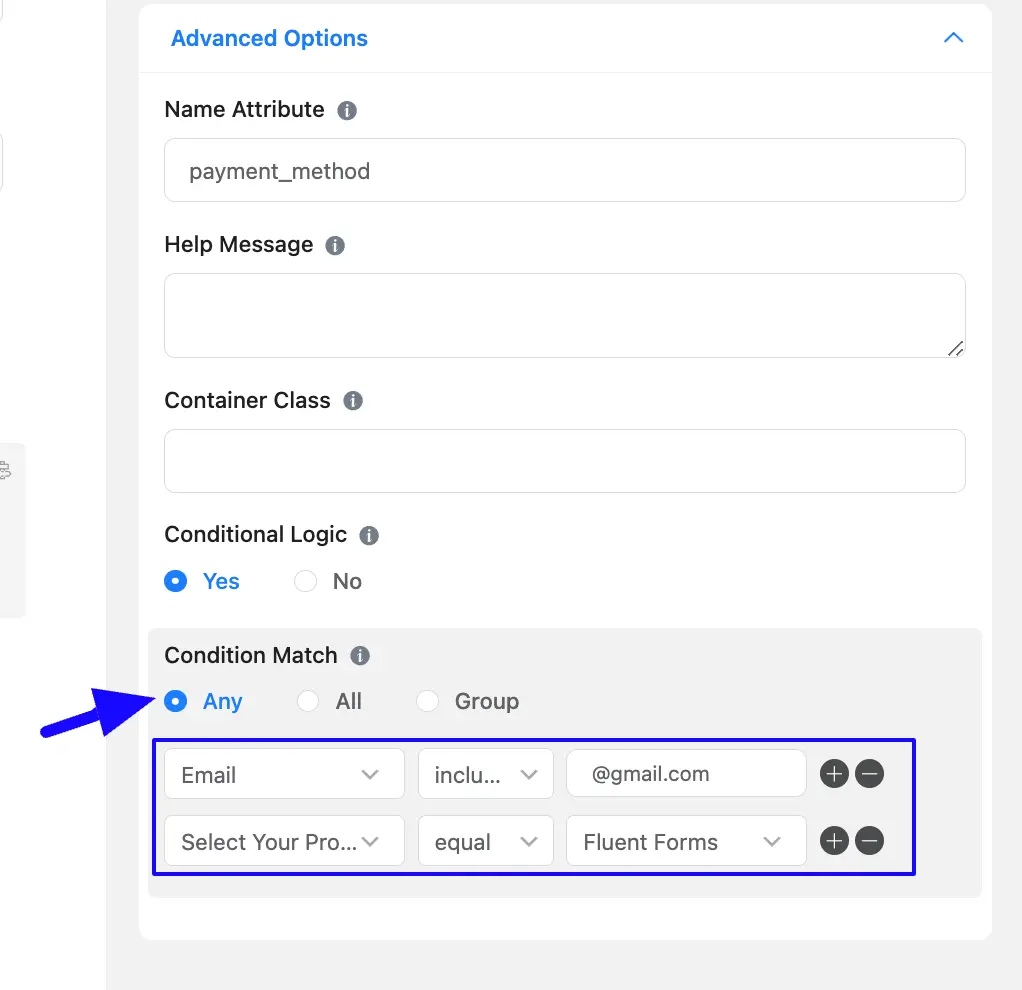
For example, I selected “Email” and “Payment Item” as the parameters, used “includes” and “equals” as the operators, and entered “@gmail.com” and “Fluent Forms” as the corresponding values.
As I have selected the “Any” conditional match here, when users either provide an email address containing “@gmail.com” or select the “Fluent Forms” product to submit the form, the Payment Method field will be visible to them. Otherwise, this field will remain hidden.
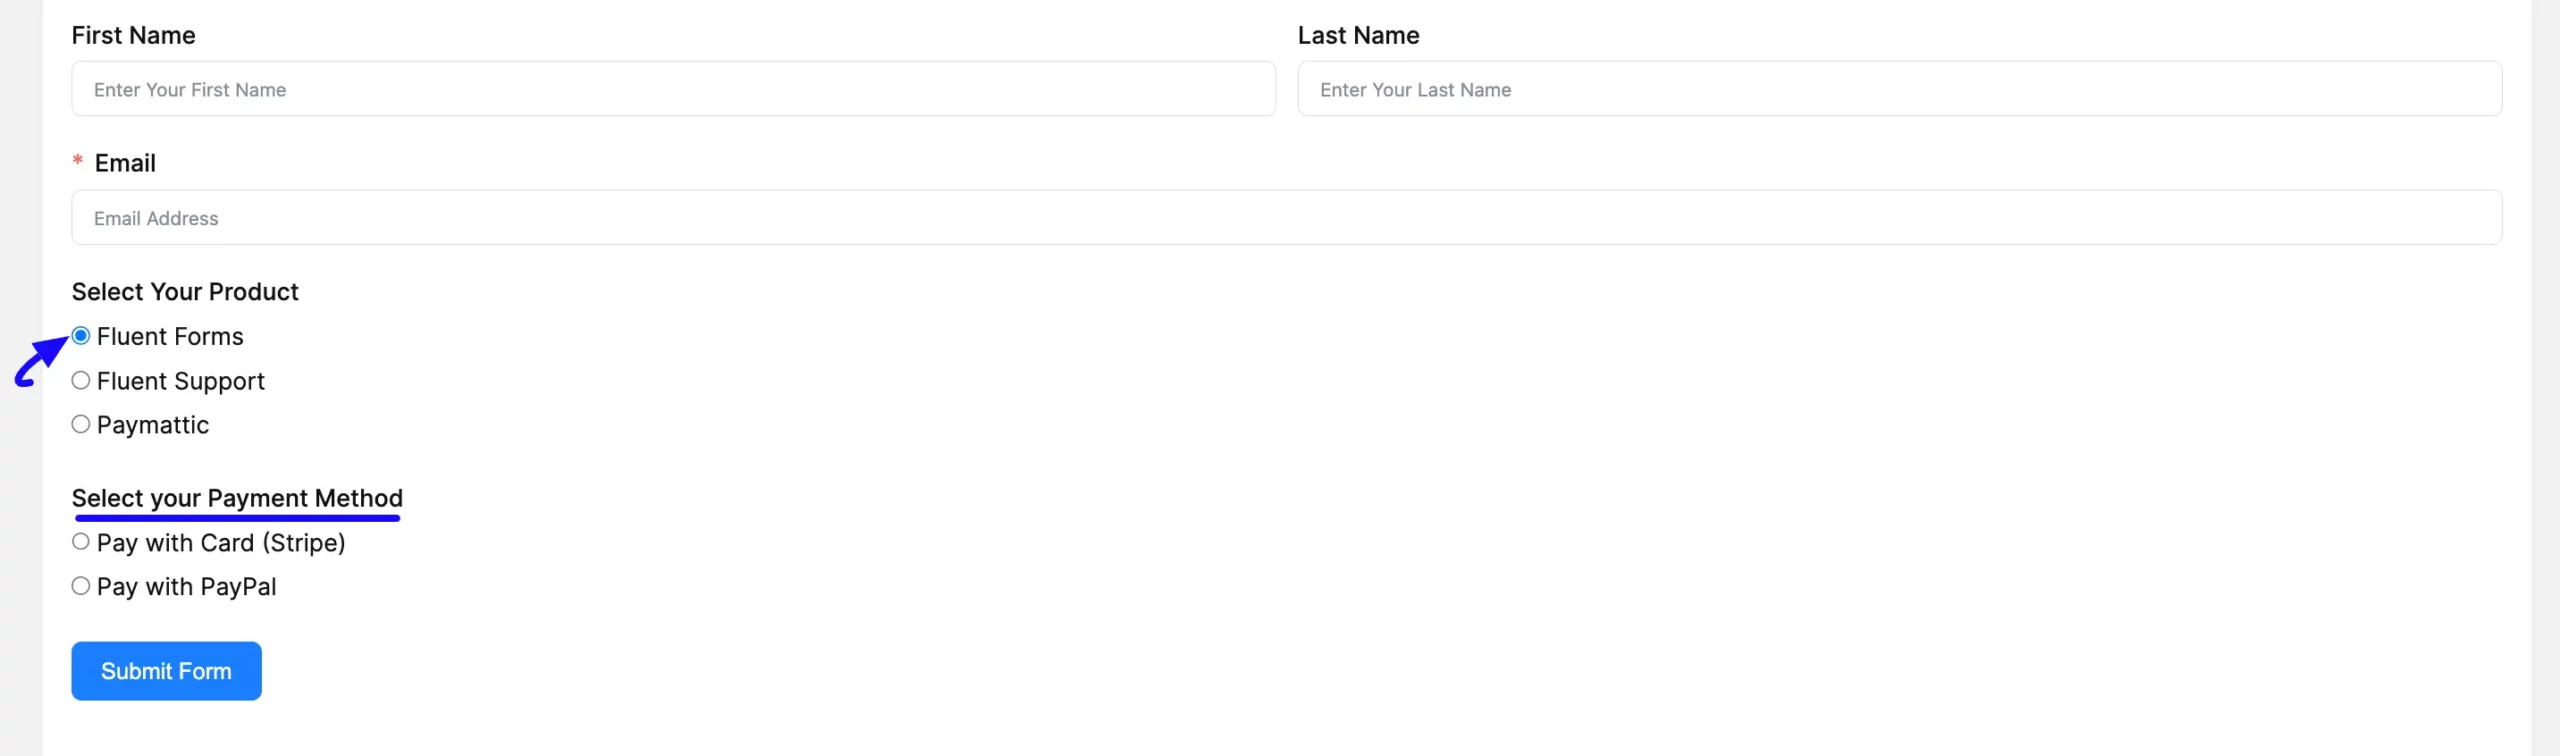
Here is a preview of a form where the user met one (selecting Fluent Forms product) condition. As a result, the Payment Method field is visible here.
B. All Conditional Match
For example, I selected “Email” and “Payment Item” as the parameters, used “includes” and “equals” as the operators, and entered “@gmail.com” and “Fluent Forms” as the corresponding values.
As I have selected the “All” conditional match here, when users both provide an email address containing “@gmail.com” and select the “Fluent Forms” product to submit the form, the Payment Method field will be visible to them. Otherwise, this field will remain hidden.
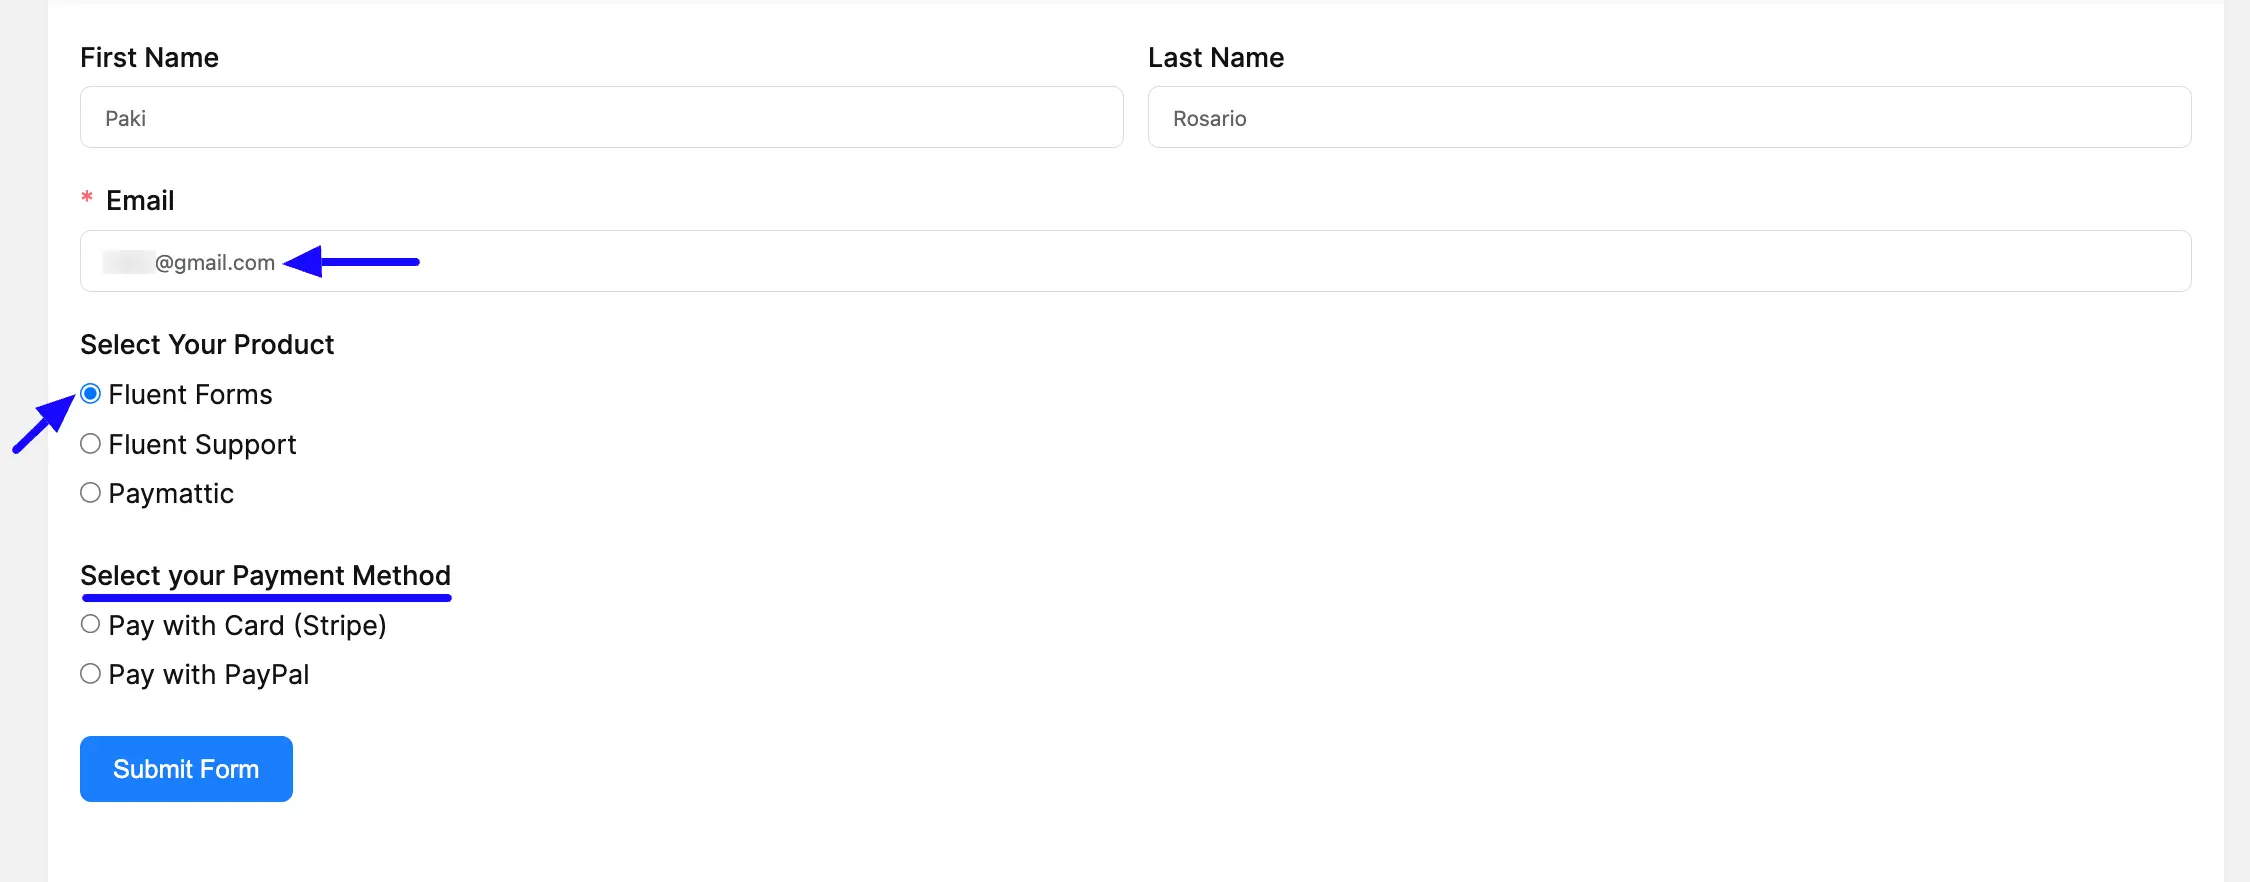
Here is a preview of a form where the user met all the ( providing email that includes @gmail.com and selecting Fluent Forms product) conditions. As a result, the Payment Method field is visible here.
C. Group Conditional Match
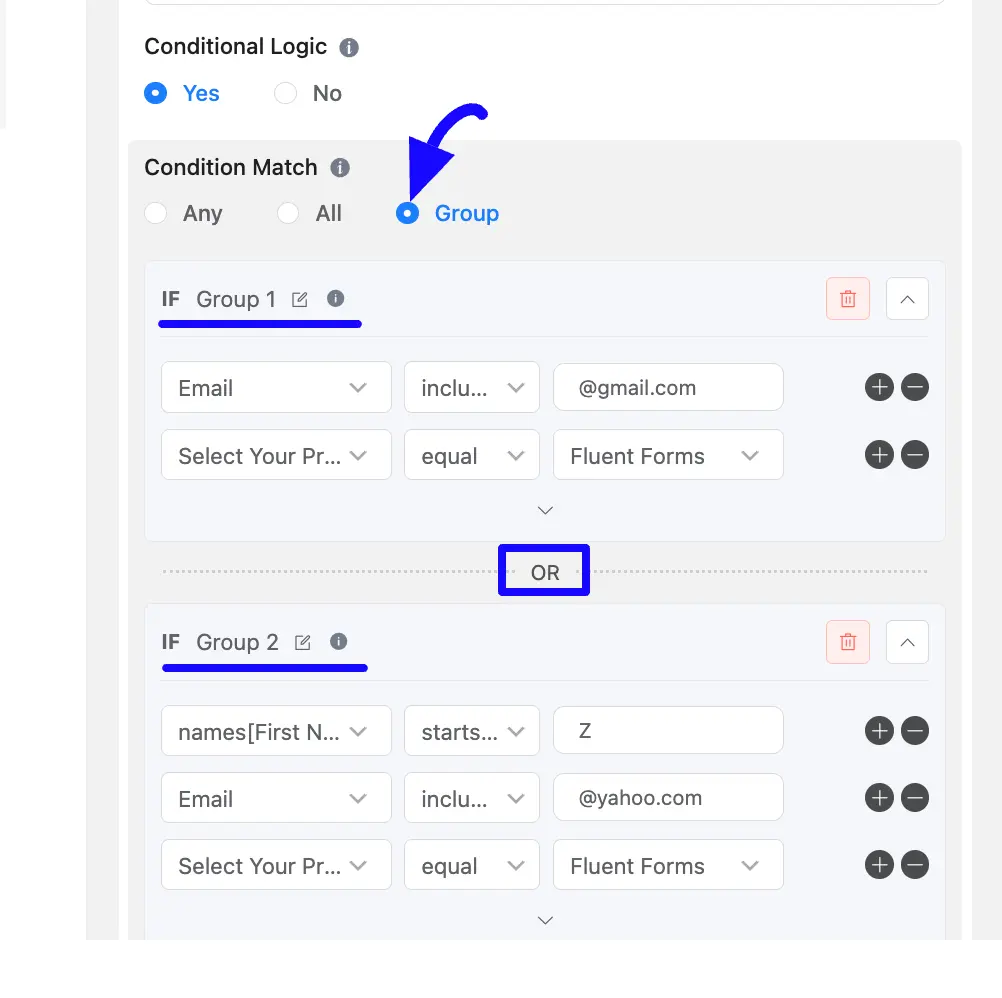
Here I selected the “Group” conditional match and set two different Groups of Conditions using the OR operator. So that, when users meet any one of the Group Conditions the field will be visible in the form.
For example, in Group 1, I selected “Email” and “Payment Item” as the parameters, used “includes” and “equals” as the operators, and entered “@gmail.com” and “Fluent Forms” as the corresponding values.
On the contrary, in Group 2, I selected “Name [First Name]”, “Email” and “Payment Item” as the parameters, used “starts with”, “includes” and “equals” as the operators, and entered “Z”, “@gmail.com” and “Fluent Forms” as the corresponding values.
As I have selected the “Group” conditional match here, when users meet either the conditions in Group 1 (i.e., provide an email address containing “@gmail.com” and select the “Fluent Forms” product) or the conditions in Group 2 (i.e., enter a first name starting with “Z,” provide an email address containing “@yahoo.com,” and select the “Fluent Forms” product), the Payment Method field will be visible to them. Otherwise, the field will remain hidden.
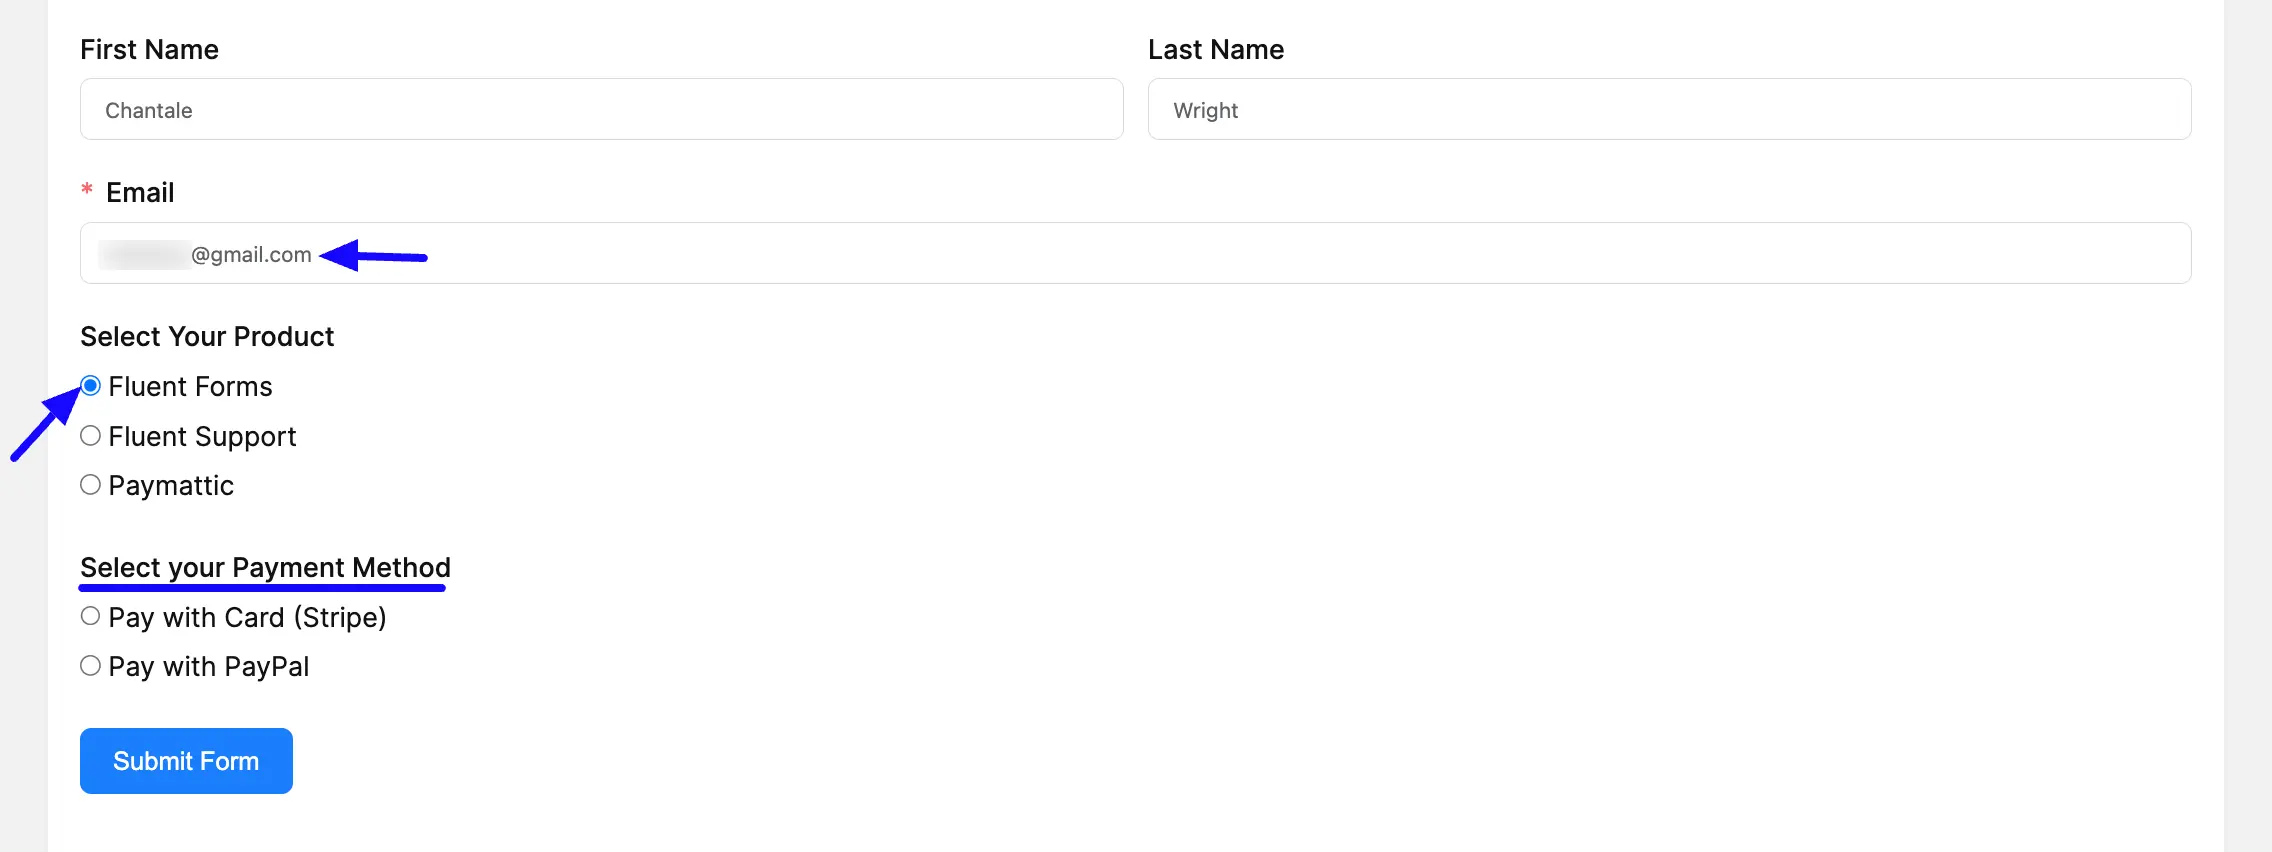
Here is a preview of a form where the user met All Conditions under Group 1 (providing an email address including “@gmail.com” and selecting the “Fluent Forms” product). As a result, the Payment Method field is visible here.
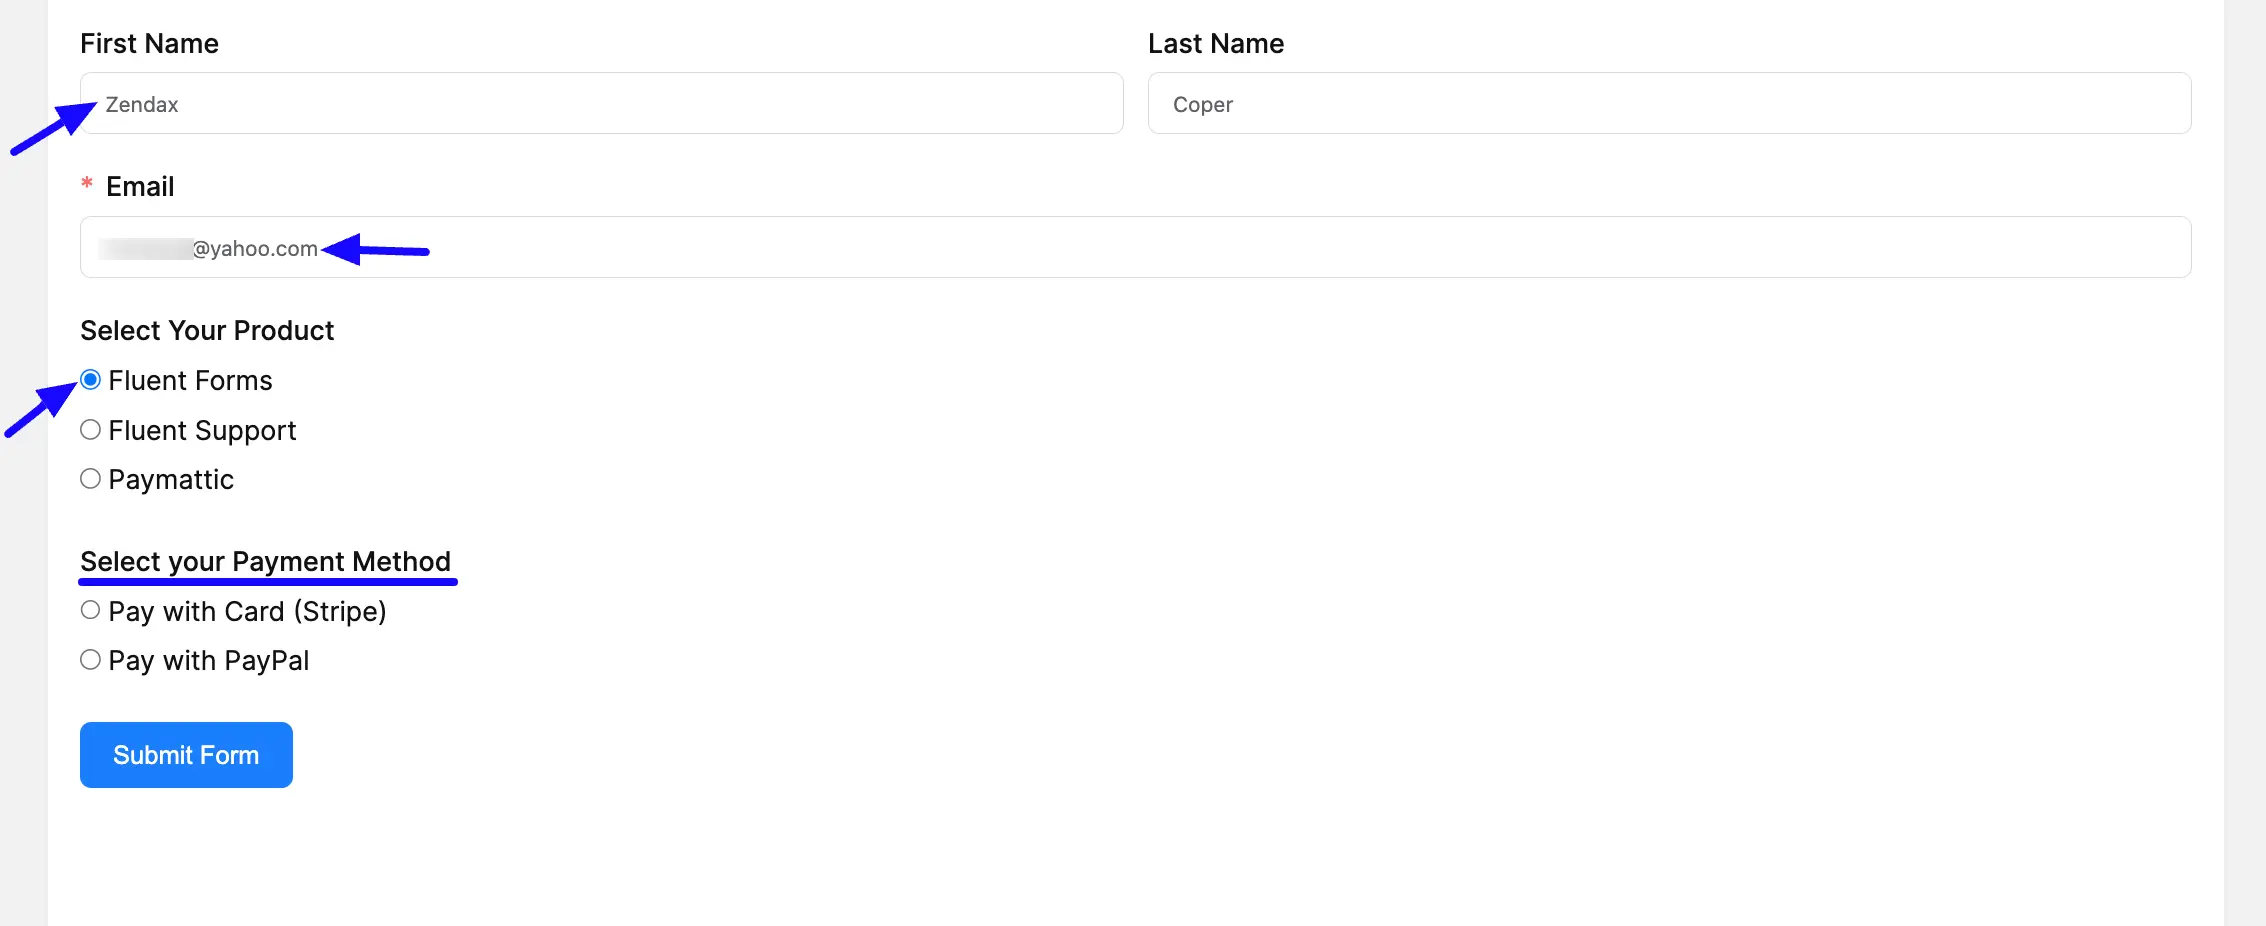
Here is a preview of a form where the user met All Conditions under Group 2 (entering first name starting with “Z”, providing an email address including “@gmail.com”, and selecting the “Fluent Forms” product) condition. As a result, the Payment Method field is visible here.
This way you can easily use Conditional Logic in any field of Fluent Forms!
If you have any further questions, concerns, or suggestions, please do not hesitate to contact our @support team. Thank you.