
We have developed a dedicated WordPress Plugin for Amazon Affiliates that enables you to create beautiful Product Listing Tables, Comparison Tables, Widgets and everything else you might need to boost up your affiliate revenue!
Check out AzonPress, the best WP plugin for Amazon Affiliates.


The above demo was created using Ninja Tables pro version. If You did not buy yet. You can buy and make nice responsive tables for your amazon products and boost your affiliate incomes.
[ninja_table_banner]
How to Create Amazon Product Listing Table:
Read this simple guide to learn how to make a responsive product listing table in detail.
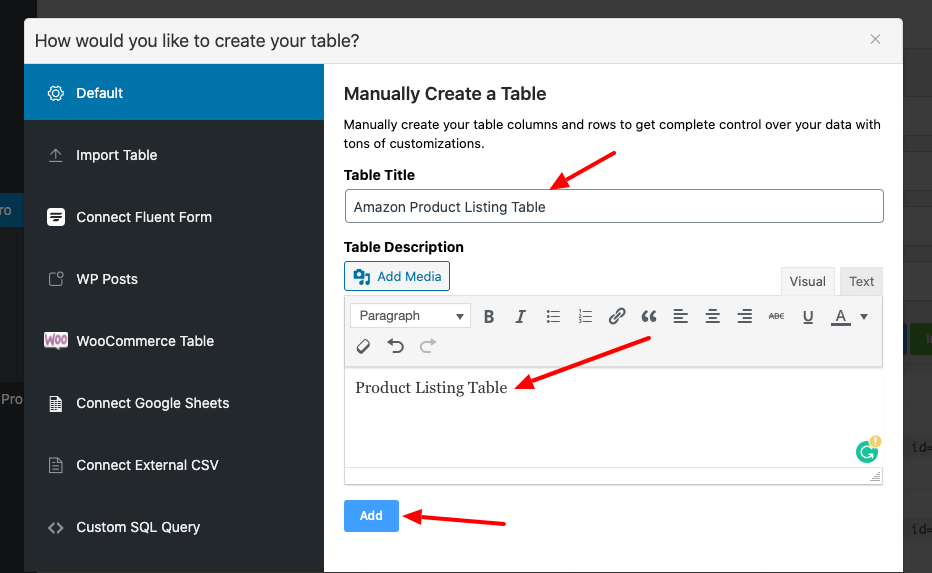
Step 1:
First, tap the Add Table button. Then a pop-up box will be displayed that has a form that needs to be filled in with data to create a table. Click the Add button after filling up the form. After that, a table will be created along with its column options.
Step 2:
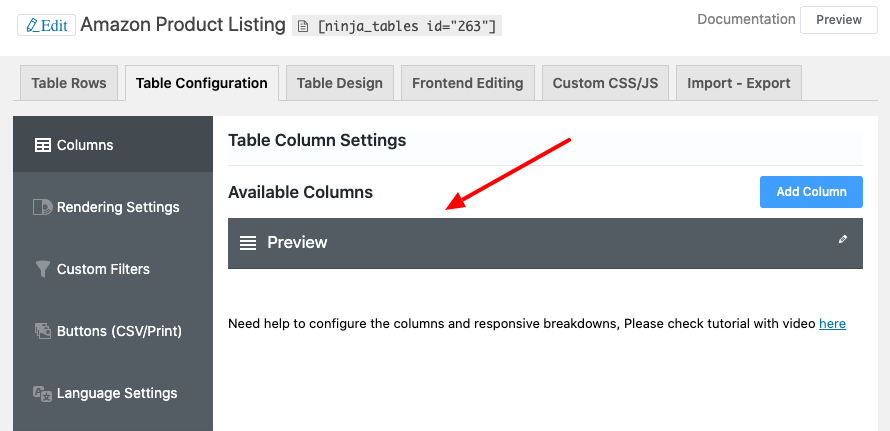
Start making columns after creating the table in the table configuration tab. And click the Add Column button.
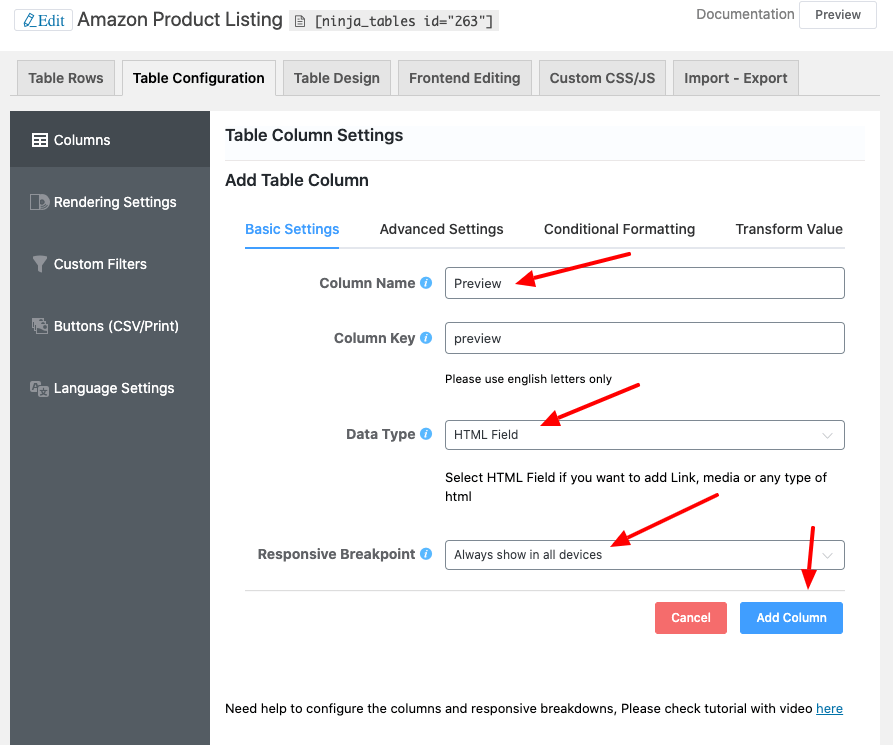
Now, the table has a new single-column named Preview. This is what the page looks like:
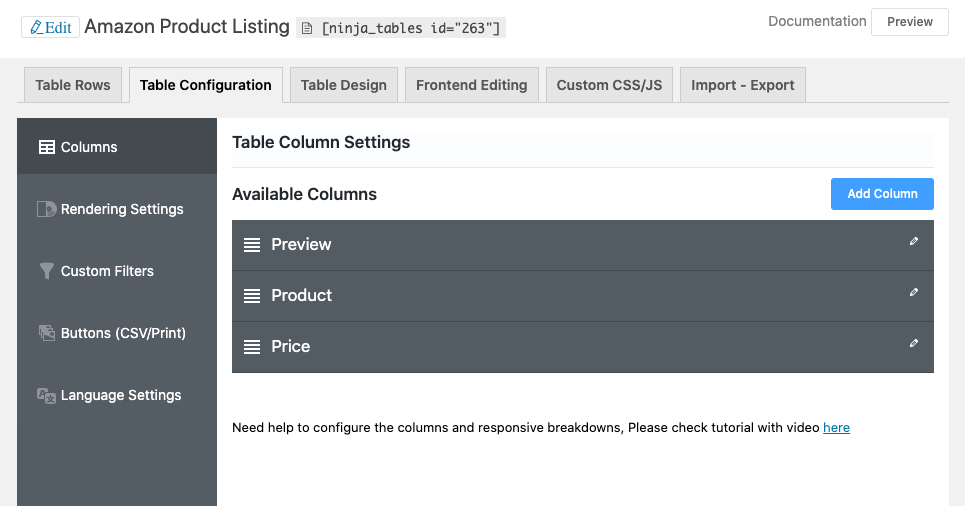
Step 3:
So in this way, make two more columns called Product & Price for that particular table.
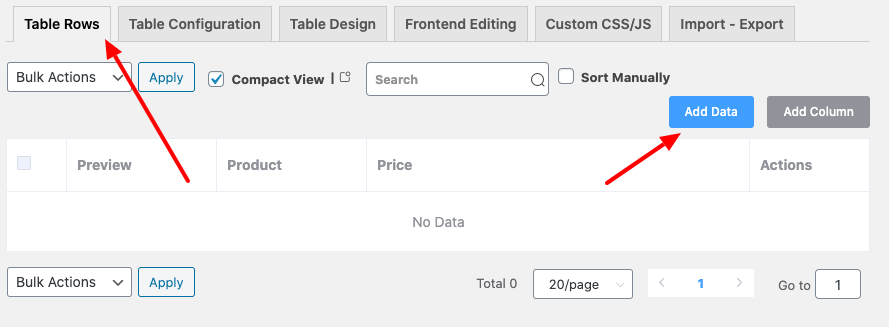
Step 4:
Then you need to input necessary info into the relative columns. In order to do that, click over Add Data on the Table Row segment.
Step 5:
A pop-up window for inputting data to the relevant column will appear with a given form. Fill in the form that provides the correct details and press the “Add” button.

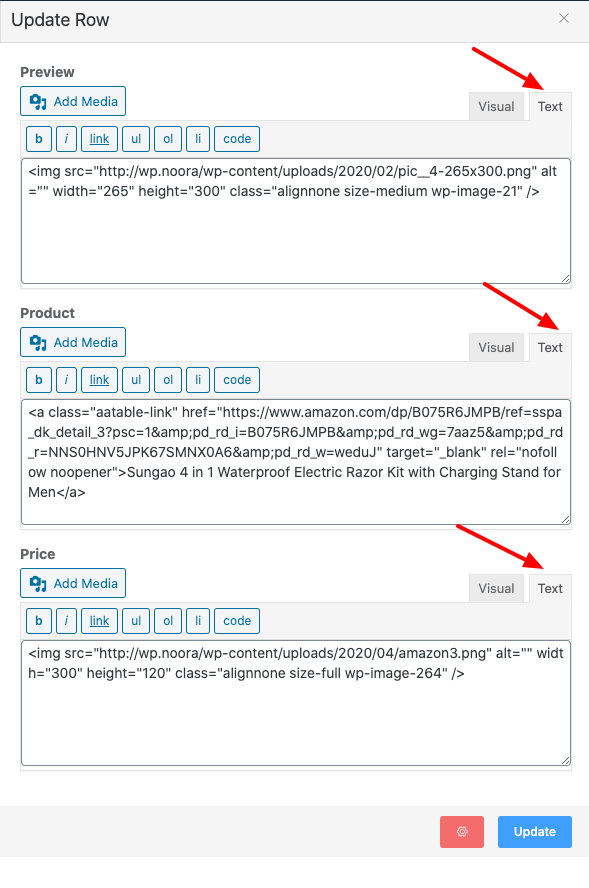
Data is added to the relevant table column. By clicking the “Add Media” button, we can insert an image. By visual / text editor, you can also connect to a text so that you can make affiliation with your desired affiliate site.
Three types of data are used in this example, including text and image. The first is a thumbnail image, the second is text with a link as the name of the product which will take you directly to the related page and the third is simply a button designed in the form of an image. Here is a button for the third picture, apply any other dimension as you wish. You can use a button image, or code directly to add a button to it.
Here is a text editorial preview of the added data:
And given below is a preview of the product table.
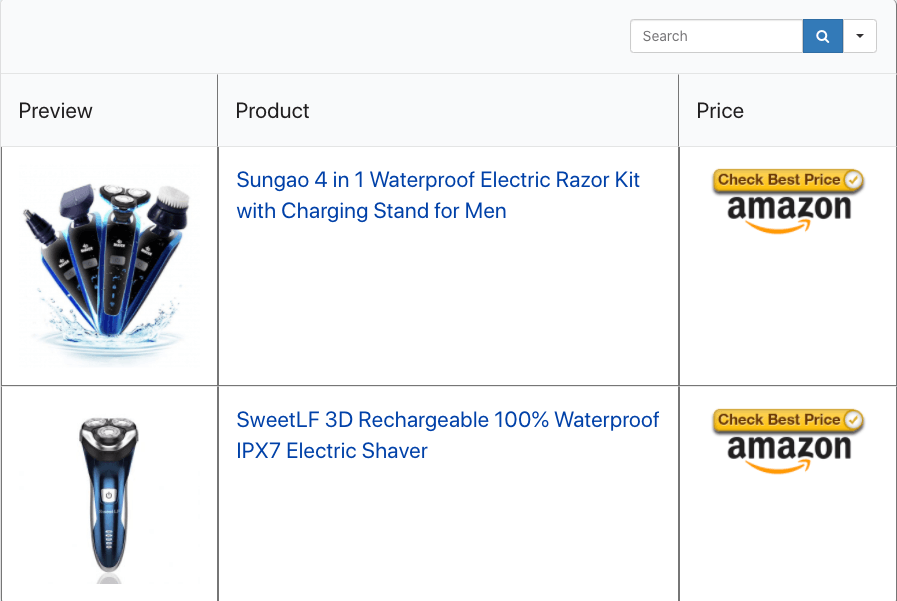
You can also add more columns and data as needed. Clicking a single button may also clear the border. In order to do this, go to “Table Configuration” at the top of the page and check the “Hide all border” option in the “Other Setting” section on the right sidebar.
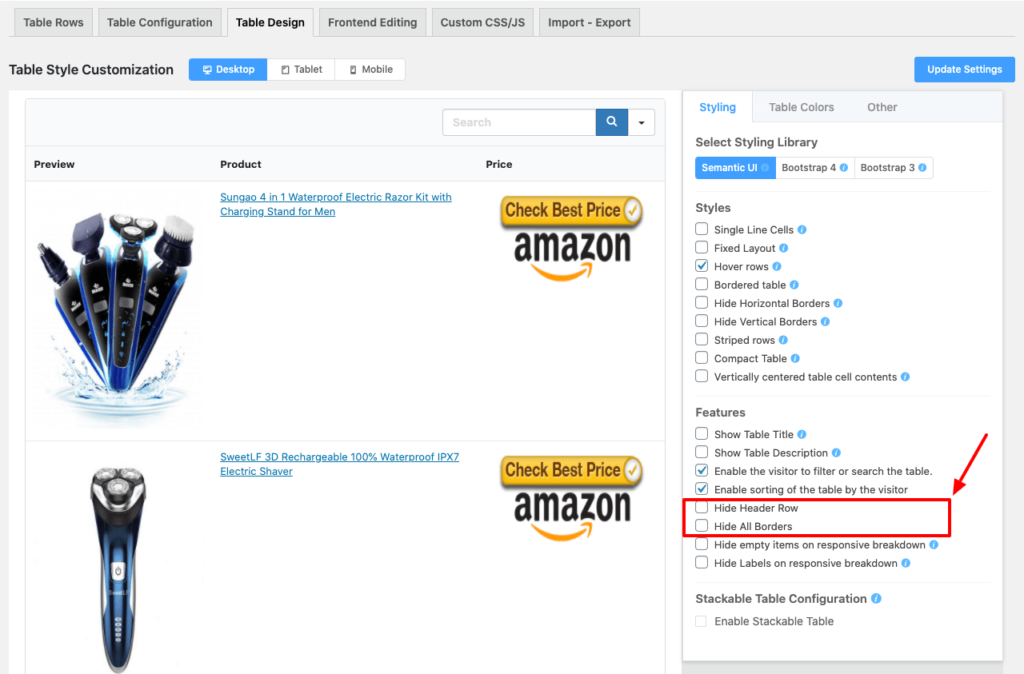
And then the preview will look like so:

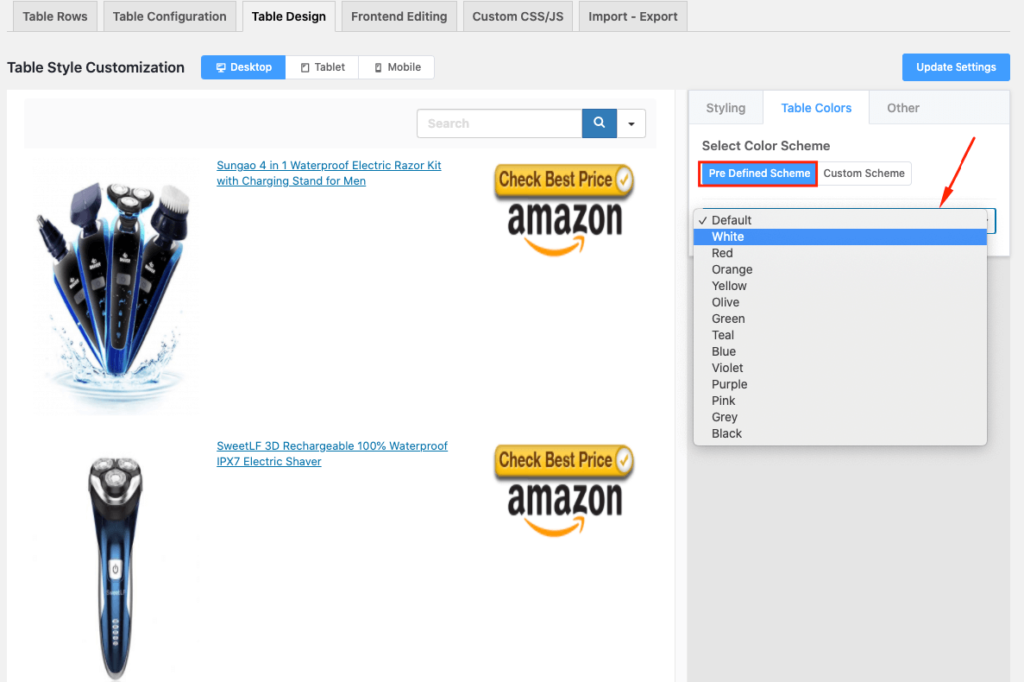
For example, you can change the color scheme & you can also change color by section “Table Colors” as you want. Click the “Predefined Schema” option to customize. So two color boxes appear for the background and text color respectively, with the name primary color and secondary color. These are the plugin’s additional functions.
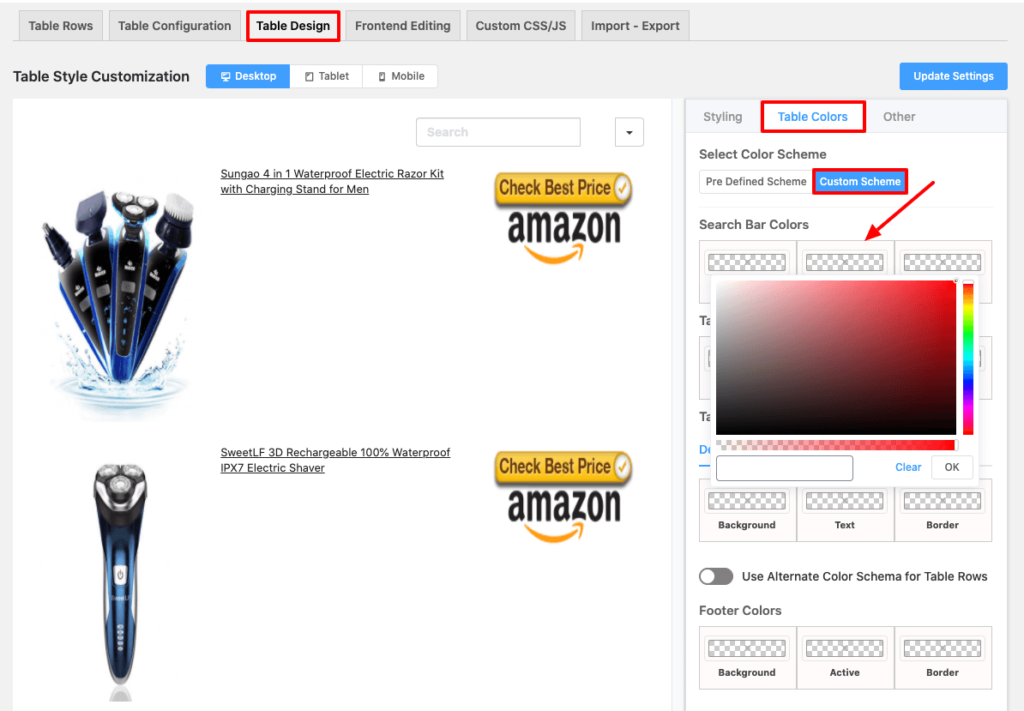
There are various ways to customize color, so go to the Custom Schema section of the Table Colors tab to make this possible. To get a clear idea the screenshot is provided here.
This plugin is the most versatile because it is user-friendly and responsive. This tutorial illustrates how easily we can build an interactive table appropriate for our business purposes.
❤️ See Ninja Tables Demos: ⤵️
➡️ Product Comparison Table by Ninja Tables
➡️ Product Specification Table by Ninja Tables
➡️ Cryptocurrency Table by Ninja Tables
➡️ IMDb Top Chart by Ninja Tables
[ninja_table_banner]