ACF Field is a versatile feature offered by Ninja Tables that improves the capacity of table creation. In this case, ACF means Advanced Custom Field which enables the table created to be more dynamic. This feature is available when the WP Post feature is used in the tables.
What is ACF
ACF refers to Advanced Custom fields that make it easier for users to get benefits from these custom fields. This feature helps to deal with users’ custom field data and then make it visible for your site’s visitors.
Technically, you can add customized information not only to posts and pages but as well as to categories, taxonomies, custom posts, custom taxonomies, users, attachments, comments, etc.
This guide demonstrates how to use this feature in Ninja Tables.
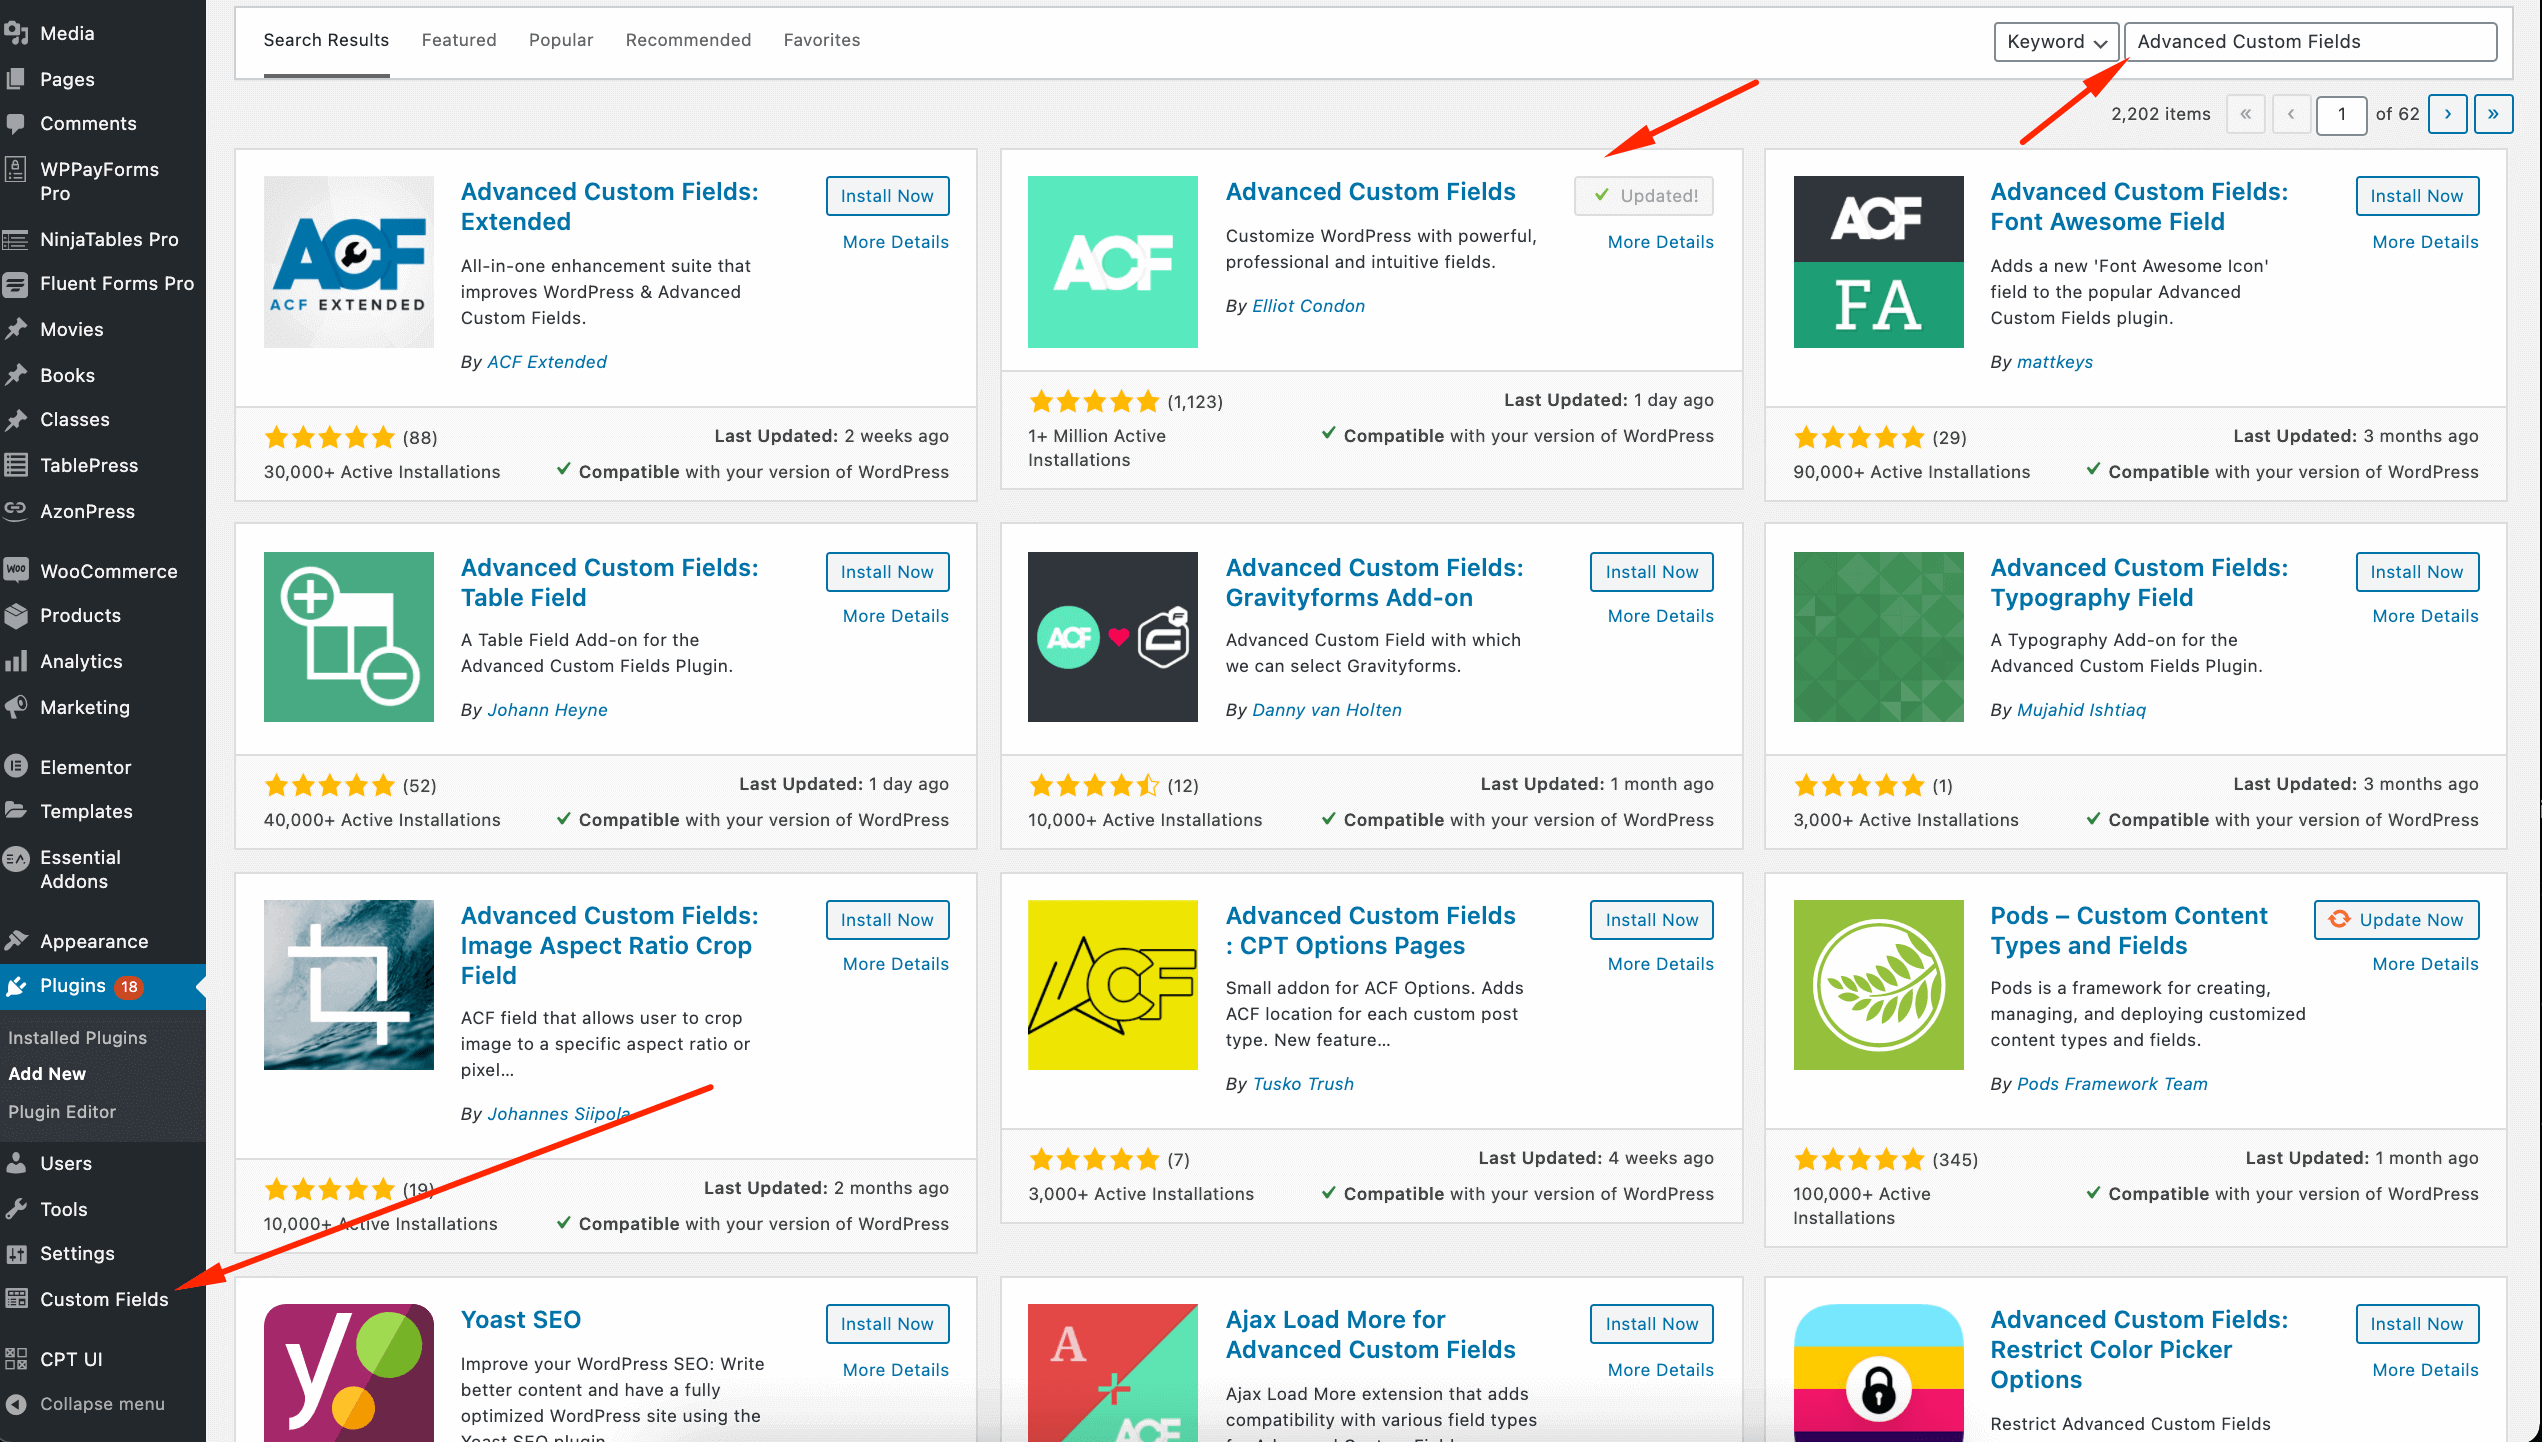
The first step is to install a plugin named Advanced Custom Field, from the WordPress plugin directory. Next, go to the plugin option located on the left sidebar on the dashboard.
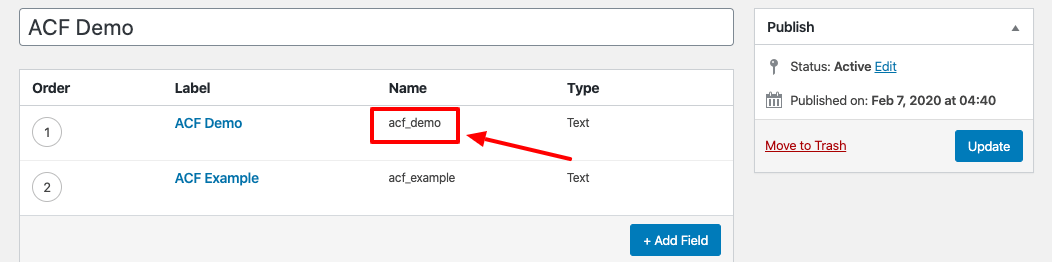
Click on the Add New button from the plugin’s dashboard. Then go to the Add Field button after giving the title of the new field group. In the input field, enter the Field Label & Field Name. After that click on the Publish/Update button in order to publish the post.
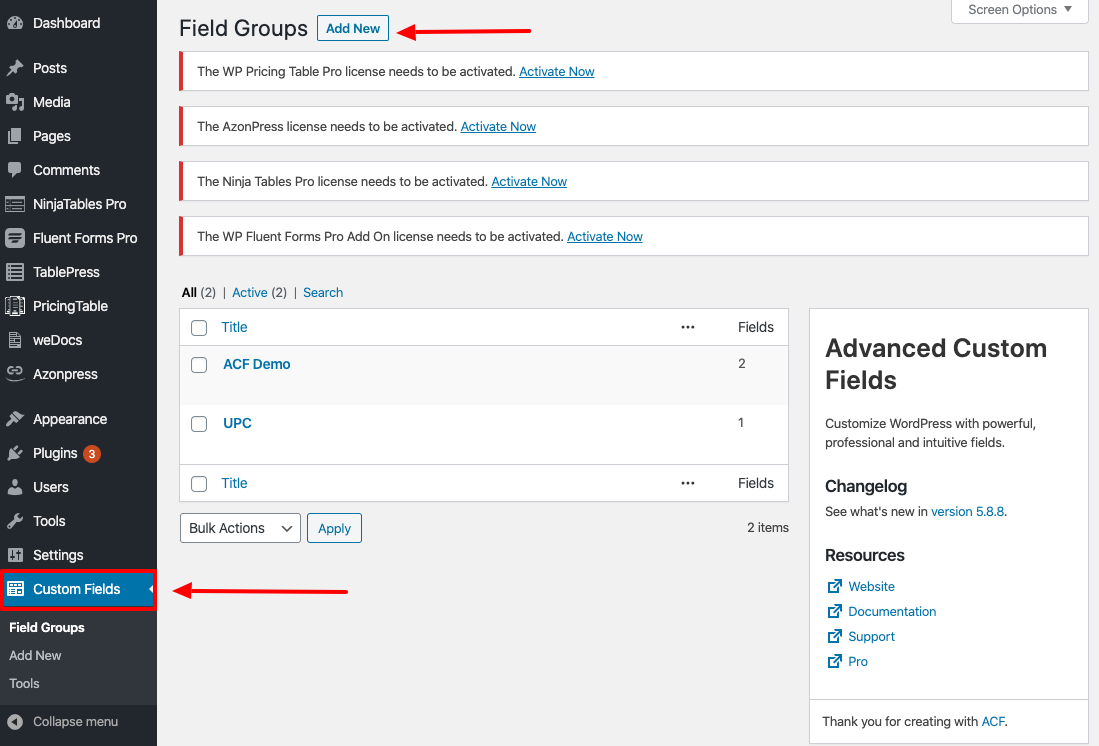
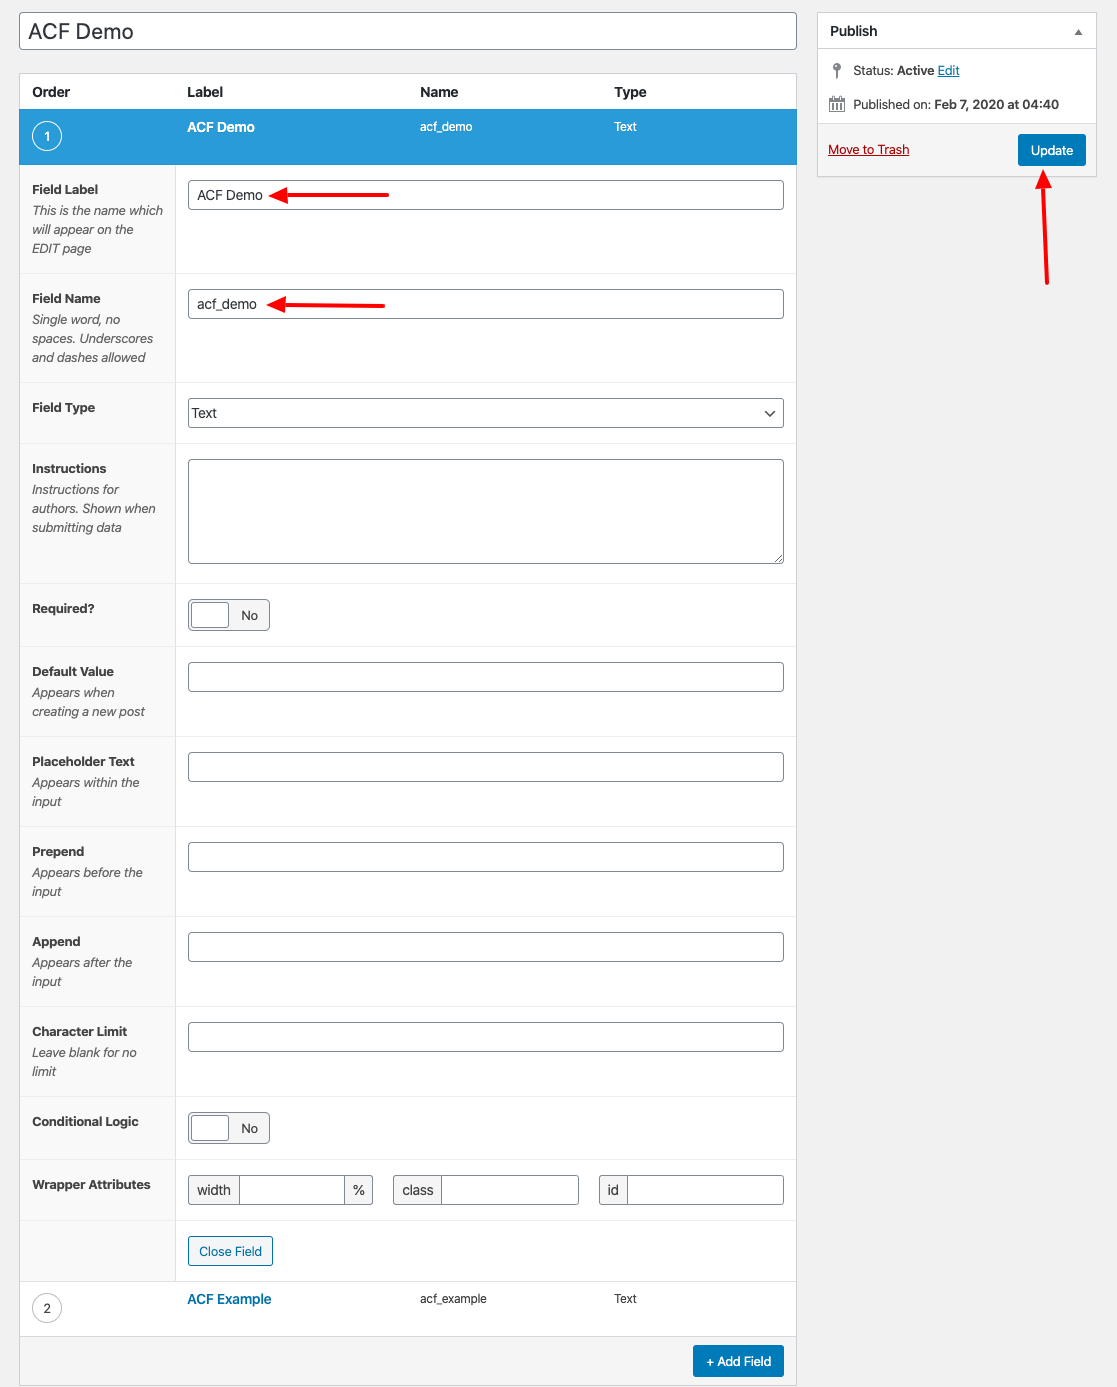
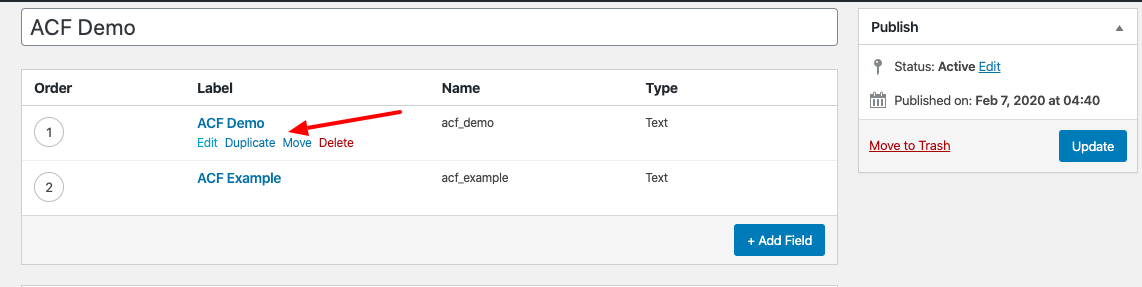
Then a field group gets created. You can add new, or edit, move, and delete the ACF fields from the Field Group.
Then you will notice a new field group has been added to the plugin dashboard.

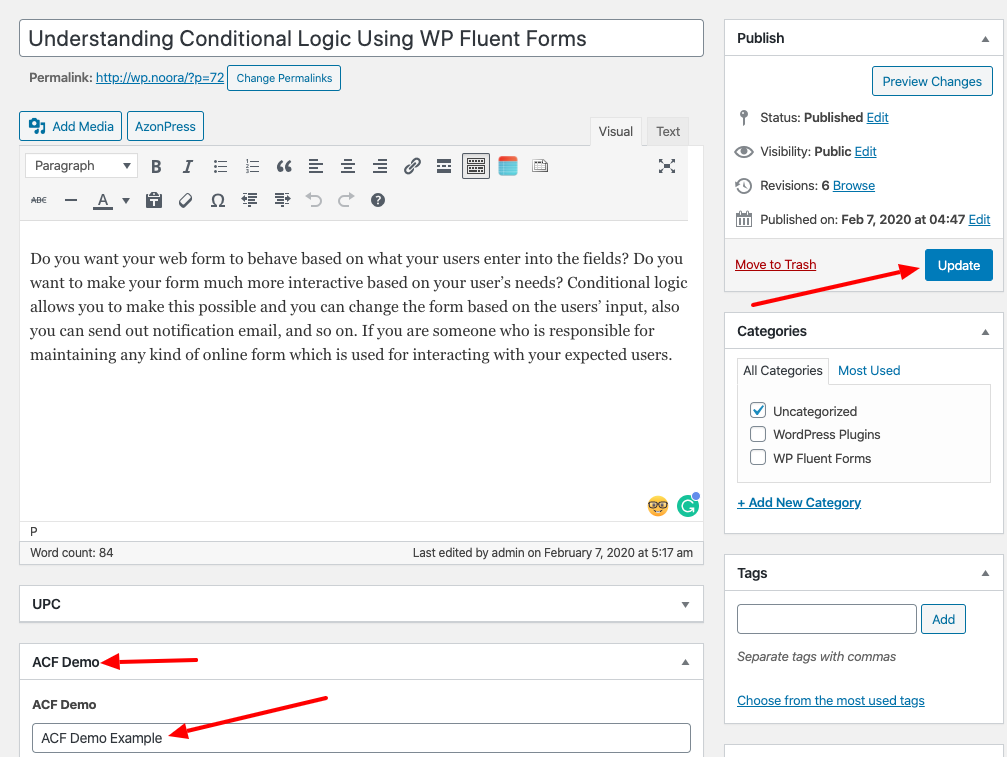
Afterward, move to the post where you want to show your custom field using ACF.
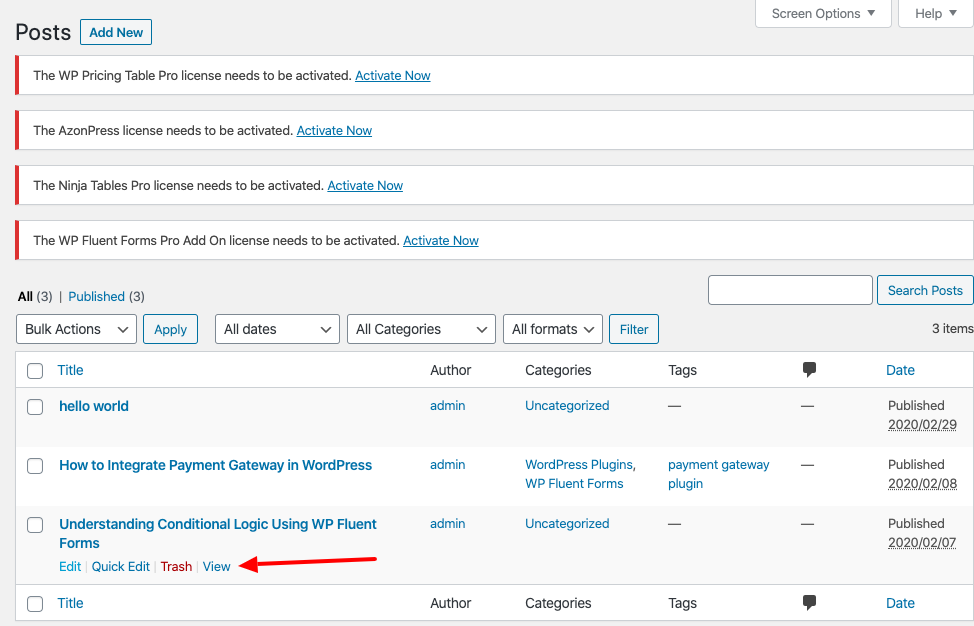
Then, right below the post section, you’ll notice the custom field with an input field from the post page. Add the value that you want to show on the input field on your table. Then, after the value has been added, click on the post page’s update button.
Then, go to the plugin Ninja Tables and click on the Post table generated using the WP Post feature. Select the post table edit icon from the plugin dashboard.

You’ll then be taken to the table interface, there press the Add Column icon.
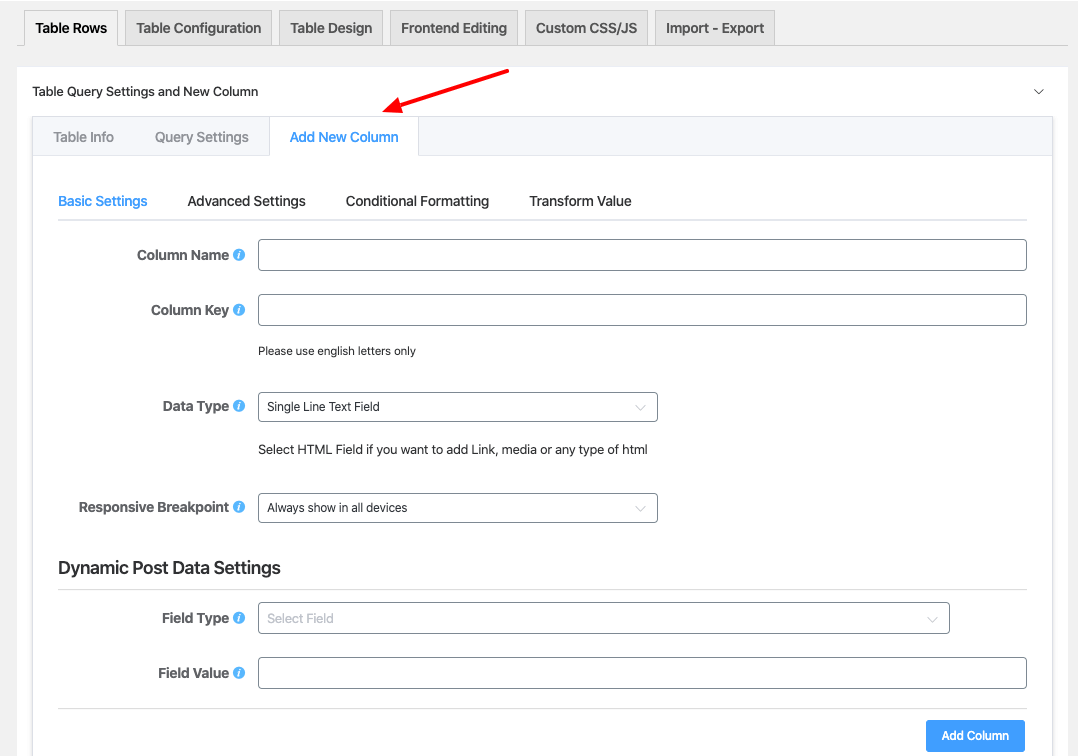
You will notice a section of the internal page expanding with its option. You have to add all the required details from there. You’ll then have the Dynamic Post Data Settings option.
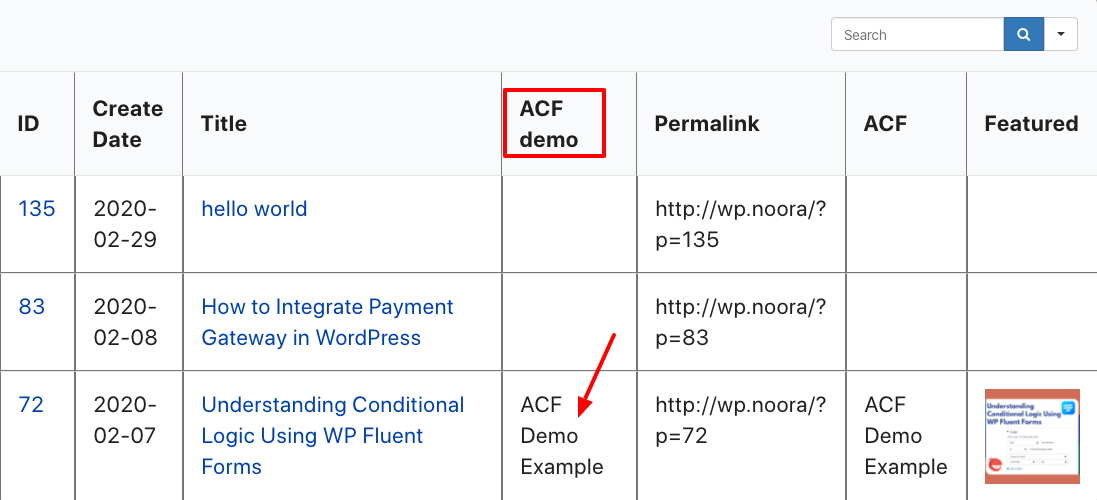
A drop-down menu will be visible, where you will see the Field Type Option. Here, select the Advanced Custom Fields(ACF) option & enter the respective value in that field. Next click on the Add Column button.
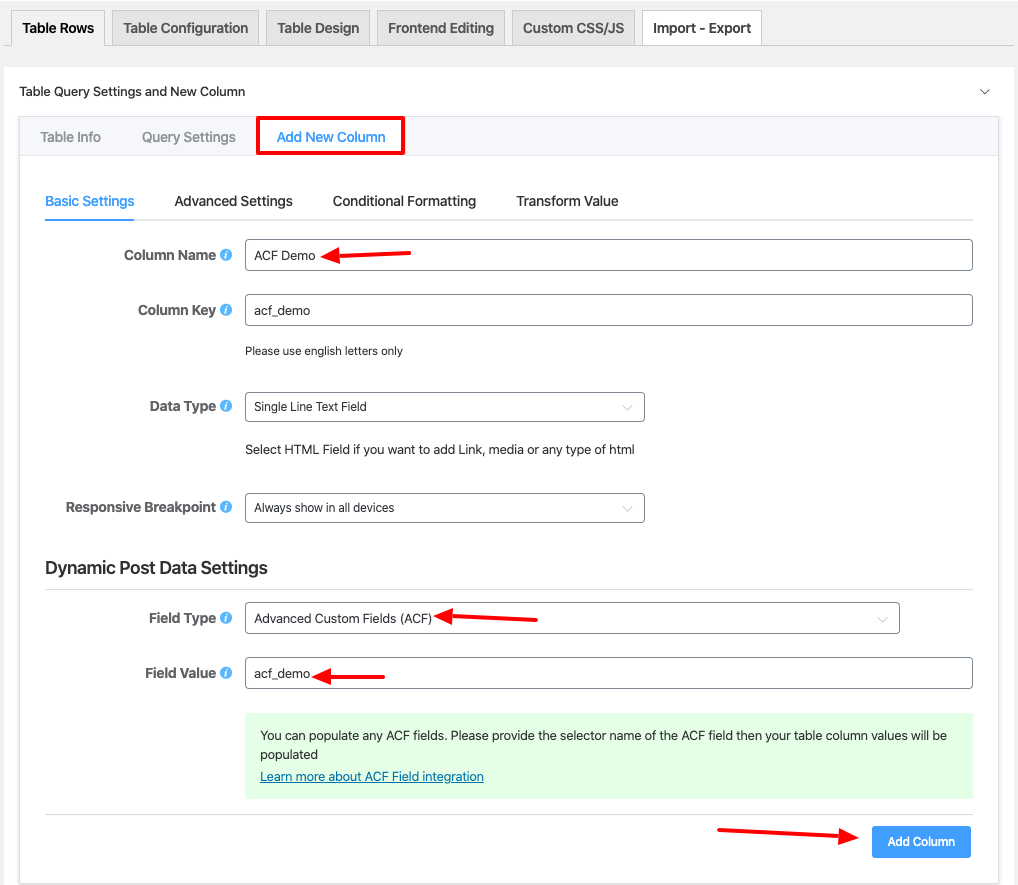
Remember that in the Field Value input area, enter the value from the Name column in the Advanced Custom Fields plugin dashboard according to your created Field Group.
You will notice a new custom column gets added to the table along with its value, after clicking the preview button.
This is how you can use the Advanced Custom Fields(ACF) option of Ninja Tables plugin.
[ninja_table_banner]