
[ninja_table_banner]
The Value Transformation option is a powerful feature. This has made Ninja Tables more versatile and dynamic for the users.
This is a simple guide that’ll teach you how to Transform Values easily in any specific table’s column.
Before you start using the value transformation, you need to have a table created with data. Given below is an example of a table made with Ninja Tables:
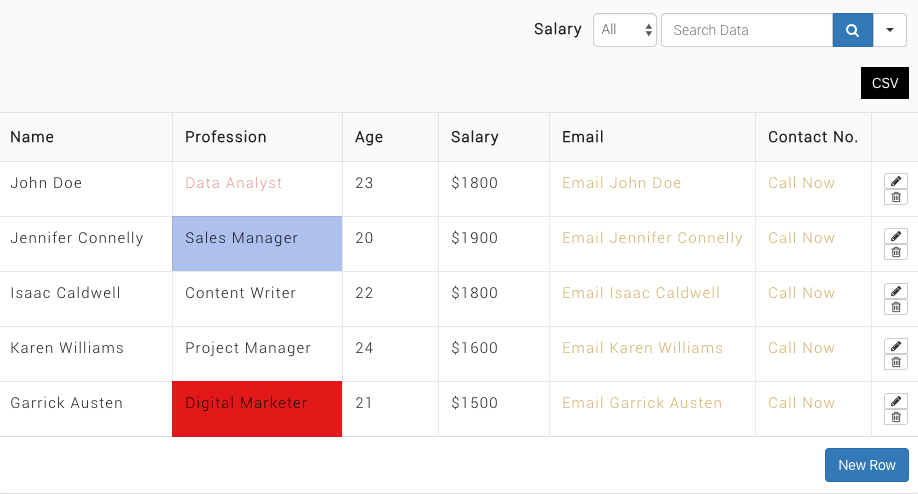
You will notice that the Email and Contact No. column is clickable. If you click on the email, then emails can be sent directly from there. And you can call people directly by clicking on the phone number.
So to do that, there are two methods you can follow. First, is hovering over the table’s column and clicking on the Transform Value tab.
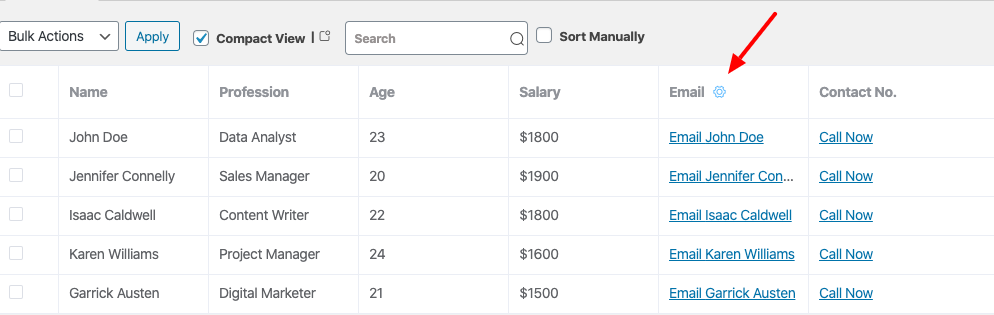
Another method is to select the Table Configuration tab & then click on the Edit icon of the column.
Anyhow the hovering method is used here since it is easier for the users. Let’s see how the email column is set up for value transformation. To do that, click on the email column’s edit icon & a pop-up box will be visible. Then go to the Transform Value tab.
Here, there are three steps to complete. Look at the example below to know about these steps.
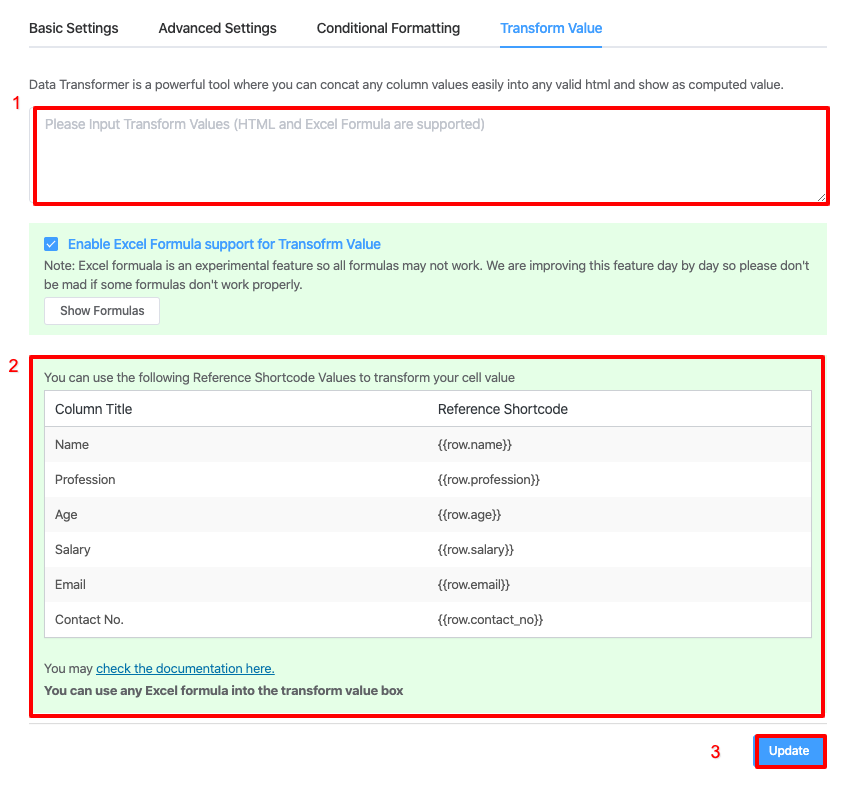
You must write the HTML code (< a href= ……….) on the transform value box. Now, I’ll explain here the framework for users only beginning to make their own custom code.
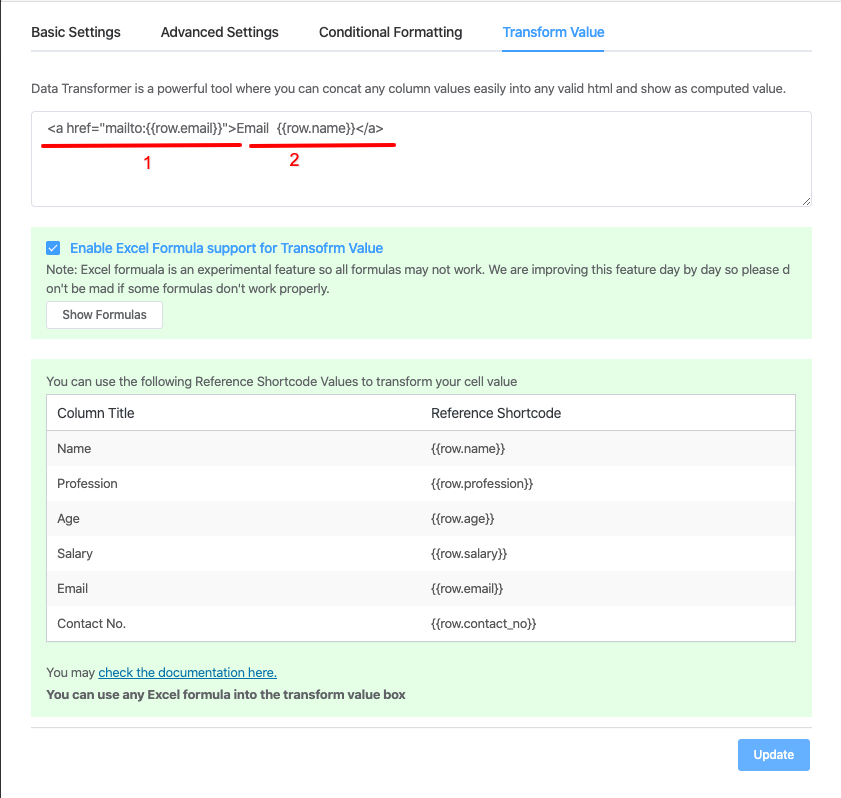
You don’t have to modify the first piece of the code. But the 2nd part can be changed to whatever suits your needs. Custom words can also be written for the second part. Copy & paste the email shortcode inside the anchor tag, and do the same for the email shortcode.
See the example below for viewing the output of the transform value:
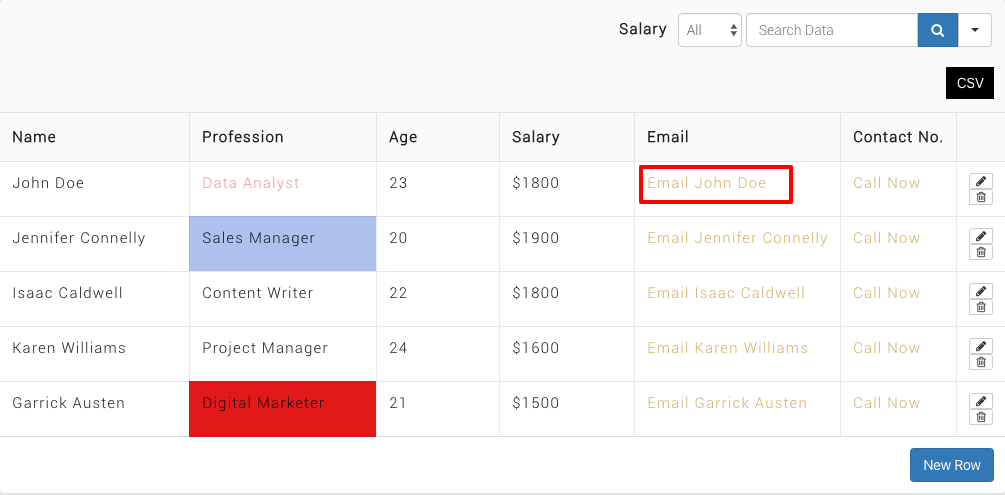
In this example, Email Name has been used before the closing tag of the HTML. You can transform values for all the other columns as well in the same way. In the example below, Contact No. is used to call the people directly by clicking on the link:
So, for contact no column, in the first step, you should write the HTML code for transforming value. Within the statement, the basic structure will stay the same. There, you just need to change a few words. The output of the table has already been given above.
You can also choose other table fields such as Name, Profession, and other fields.
[ninja_table_banner]