

This function allows for the integration of multiple neighboring cells into a single larger cell. To merge multiple cells in a row, you must give your cells a value as # colspan #, then the cell is merged with the subsequent cells.
Please note that this function will operate with Advanced Table (Legacy) only.
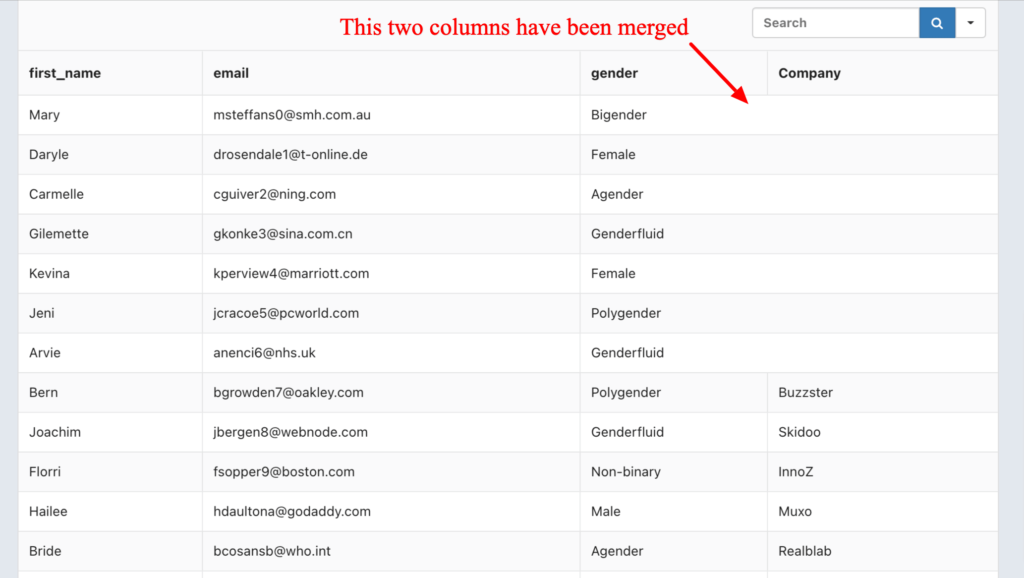
Look at the example below to see the output:
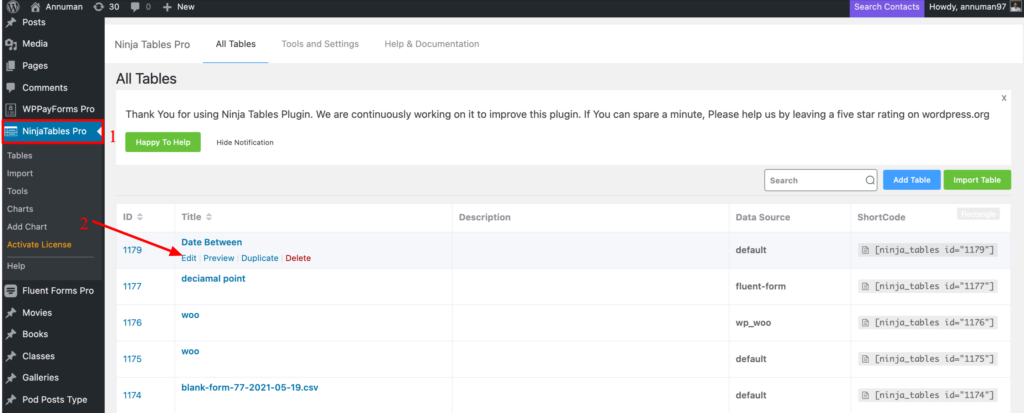
To apply this feature, you have to create a table. Or you can edit any of the existing tables. Once you have a table, just follow through this simple guide.
At first, click on the Edit button of that specific table.
Then click on the edit icon of the particular column you want to combine. Remember that when you merge columns, the cell merge option always takes corresponding cell value into one single row.
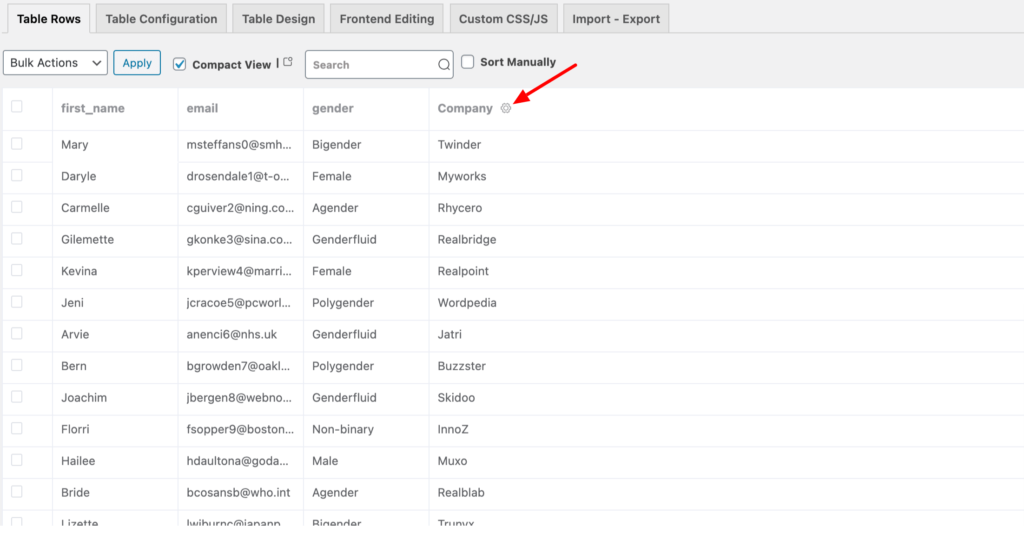
As you can see in the image above, we here want to merge Gender with Company. Then enter #colspan# in the Company input area.
Data Screenshot:

You will see the trick after you complete this step. Two columns will merge automatically in that particular row. Like the first table in the example given above.
Also, You can apply the #colspan# instead of the column title(Company) and the column header will be merged with its previous one.
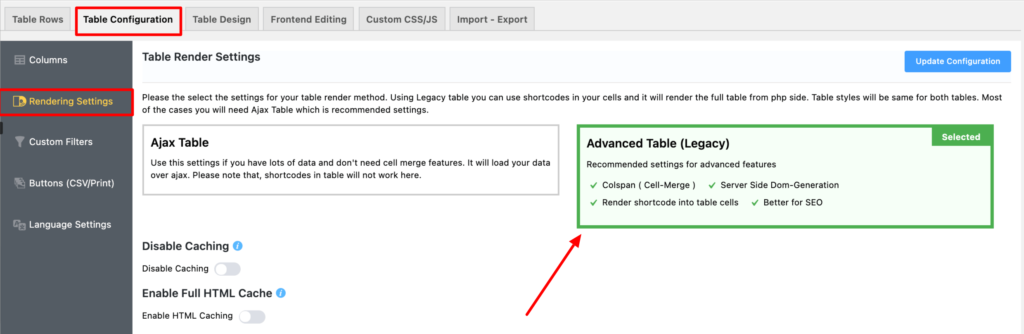
Set the render type of your Table as Advanced Table (Legacy)Go to Table Configuration-> Rendering Settings and set your table to Advanced Table (Legacy). This will enable you to apply the Cell Merge feature in your Ninja Table.
[ninja_table_banner]