
Ninja Tables have created a very special feature which is WP Post. With the help of this feature, any Post can be incorporated in your tables using Ninja Tables. This feature basically shows the posts on your page in a table format.
So, this simple guide will demonstrate how to implement this function in detail.
With the built-in WP Post feature of Ninja Tables, you can convert your WordPress pages, posts, woo-commerce items in a table format without installing any additional add-ons like other plugins.
For instance, there are some pages, blog posts, or customized posts in the WordPress dashboard. Then these items will be displayed in the form of a table. To do this, go to the Ninja Tables dashboard -> Add Table on the top right corner.

Then from the pop-up box click on the WP Posts and add a title to your table.
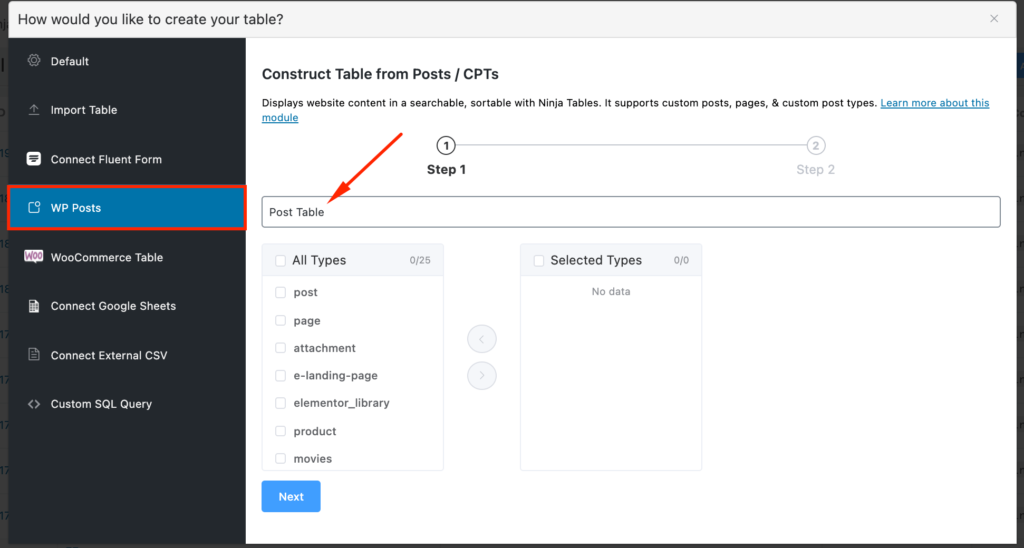
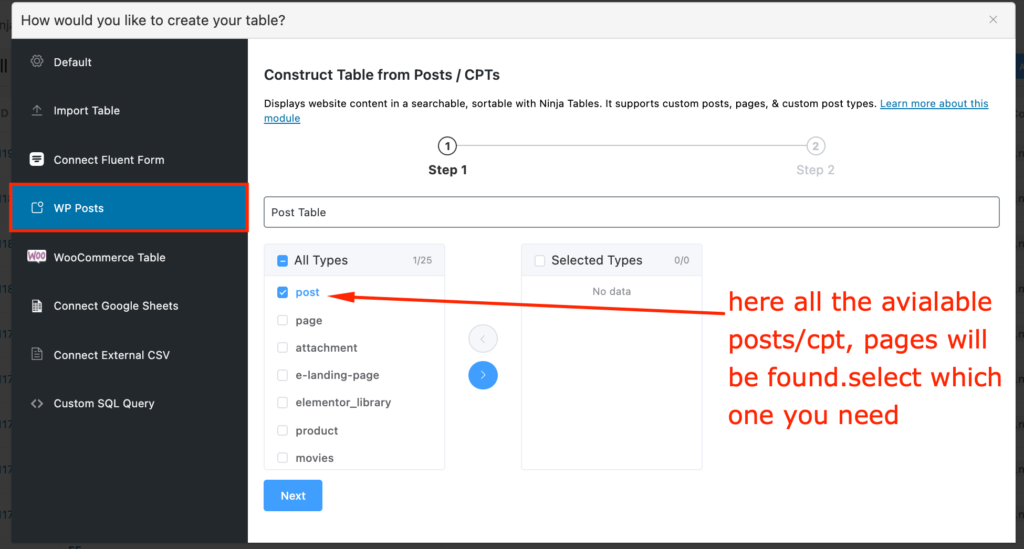
From the checkbox, fields select the Post Type. Keep in mind, choosing the post type correctly is important. If you are dealing with a post, then select a post. The case is similar when it comes to selecting a product.
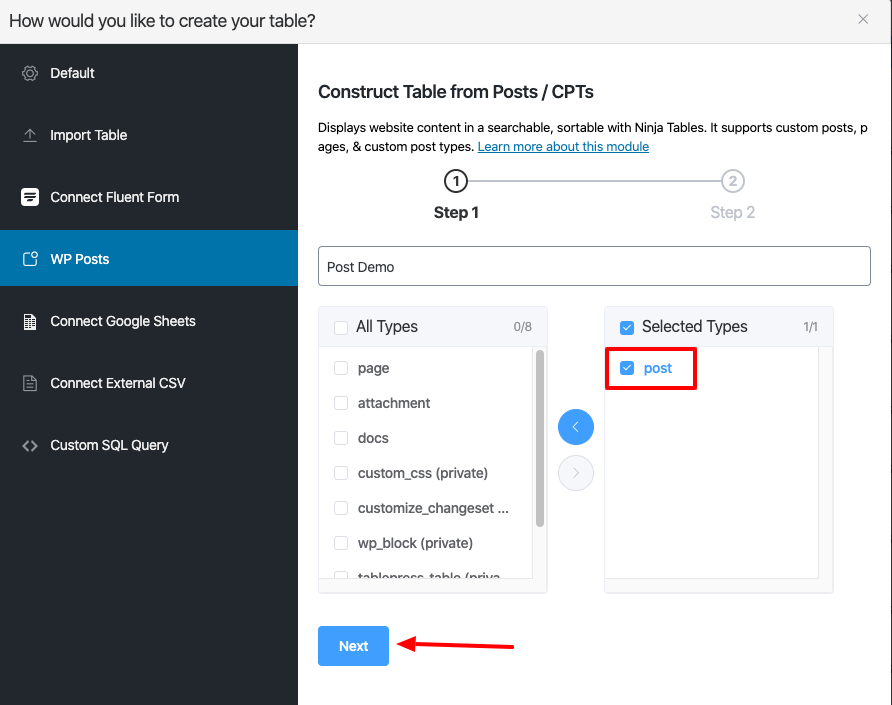
Only check your preferred field type first. You can select various field types that suit your needs. A single field type is chosen in this example:
Switch your selected post types from left to right, and move on to the next.
You’ll see that all the properties of the post that you chose are being displayed.
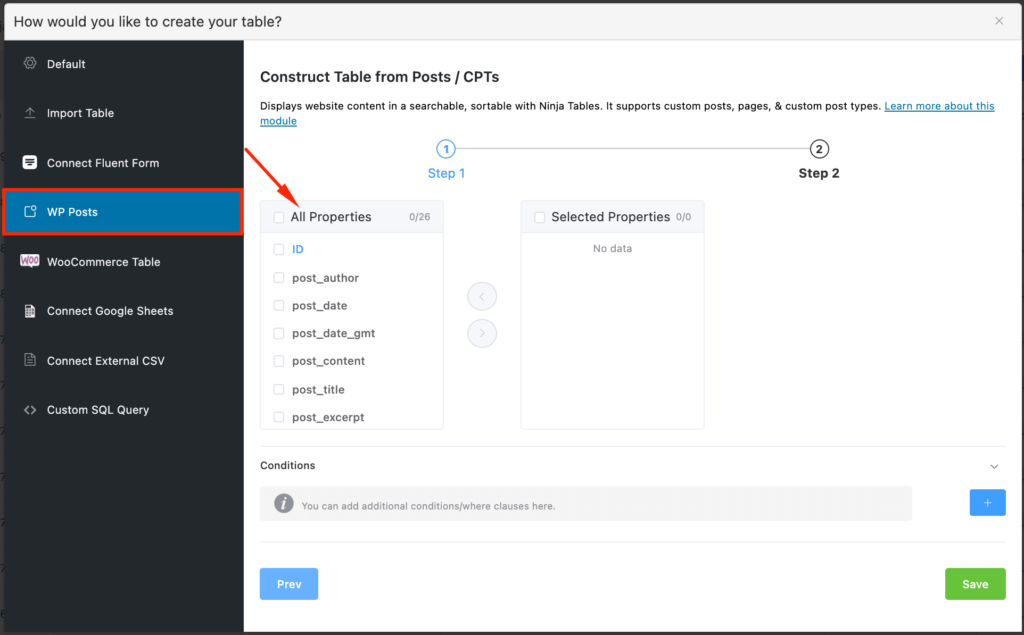
Those properties are like the columns in your table. Select the properties you want to show in your table, and transfer them from left to right. Then you can set multiple conditions for the properties of your post if you wish.
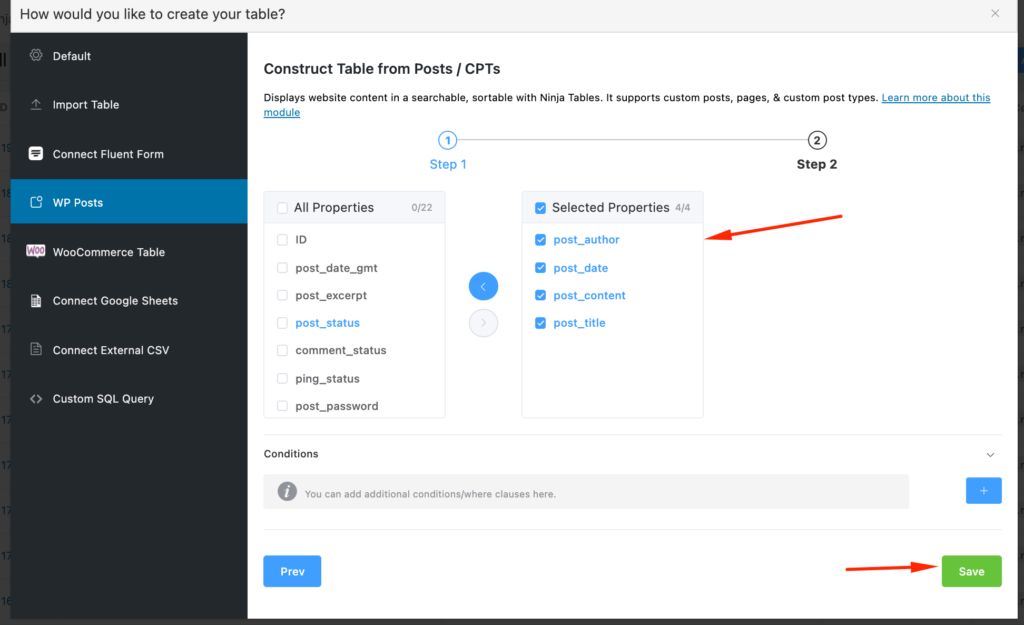
To learn more about how to configure conditions, you can take a look at our Conditional Column Formatting video.
Save the settings after all the configuration is set up. Then you can view the output of this setup.
Now, all the post items have been added here. The post table also has paginations & you can search for any posts from this table.
Though in this section, there is one more amazing feature available. If there are any permalinks like category or post tag in your table you can click on it to easily sort out that type of category or tag without using the search bar option for it.
You can get this option by clicking on the Edit icon of the particular column in the table configurations tab. The same can also be done by hovering over the setting icon of each row.
When editing your column in the table configuration section, you need to ensure that all the permalink actions are checked. When you choose the Link option for permalink, there will be another option to expand your table customization.
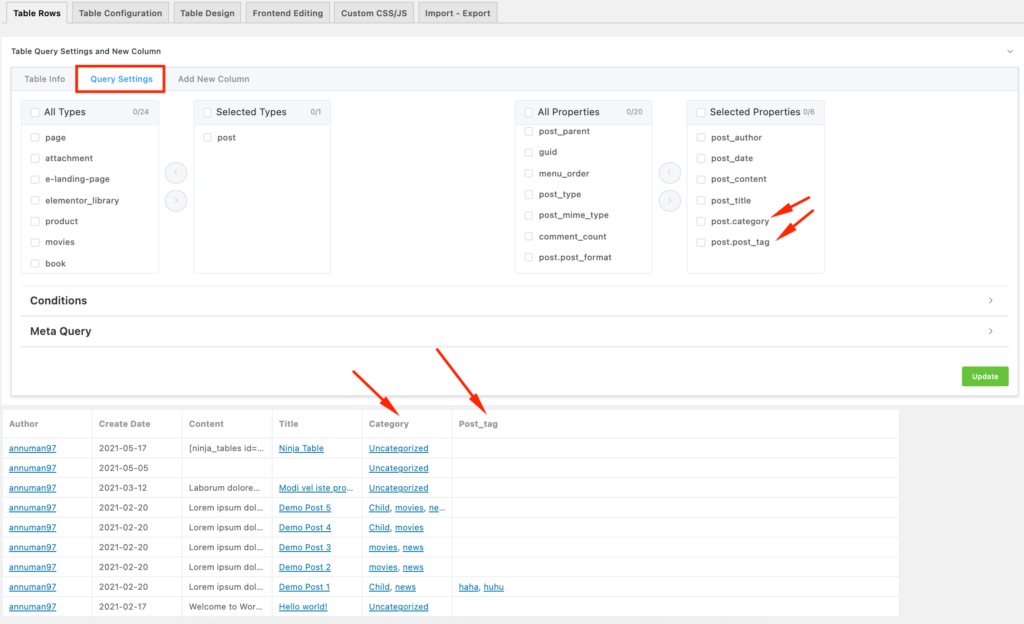
In case you want to add more field types or any extra columns on this post, the option is available on the top.
Click on the Query Settings tab to customize the post properties. You can find the types and properties of existing fields, modify them, and add more from the list.
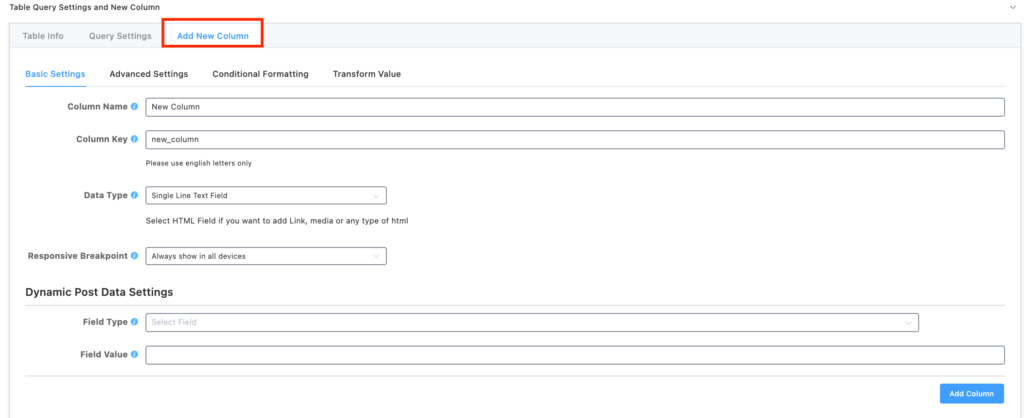
Furthermore, when you want to add more columns to your current table, you have to click the Add column button to the next Query Settings tab.

You will find the Dynamic Post Data Section in the Add New column tab. This will provide you with sophisticated configuration options for the table.
[ninja_table_banner]