| Component | Specification |
|---|---|
| CPU | 800 MHz 1 Core ARM v6 |
| GPU | Adreno 200 |
| Chipset | Qualcomm MSM7227 |
| Memory | 278.34 MB |
| ROM | 178.39 MB |
| Network Data | 2G/ 3G / HSDPA 7.2 |
| OS | Android 2.3.7 |
| Screen Size | 3.5 inch |
| Resolution | HVGA (480*320) ~165 ppi pixel density |
| Shot Mode | Single/ Smile / Continuous / Panorama |
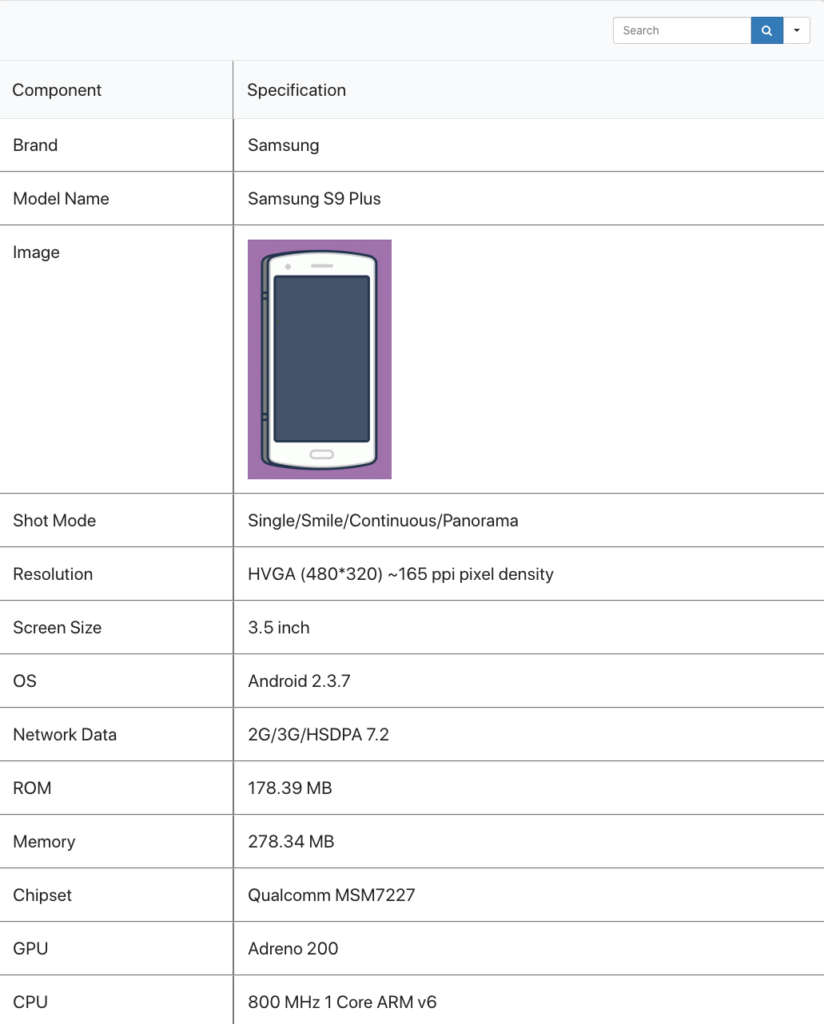
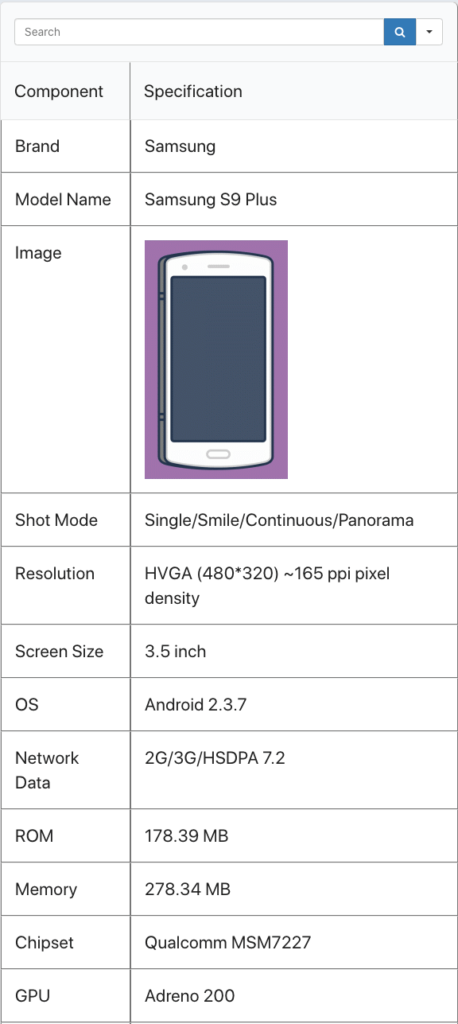
| Image |
|
| Mode Name | galaxy s9 plus |
| Brand Name | Samsung |

The above demo was created using Ninja Tables pro version. If You did not buy yet. You can buy and make nice responsive tables for your amazon products and boost your affiliate incomes.
[ninja_table_banner]
How to create a Product Specification Table:
A Product Specification Table is basically a demonstration which shows detailed information regarding any product. Along with the manufacturer’s credentials, it also contains details of the design, product illustrations & notes describing the products.
This tutorial will demonstrate how to make a Product Specification table using Ninja Tables. In this case, an android smartphone’s specification is created as an example.
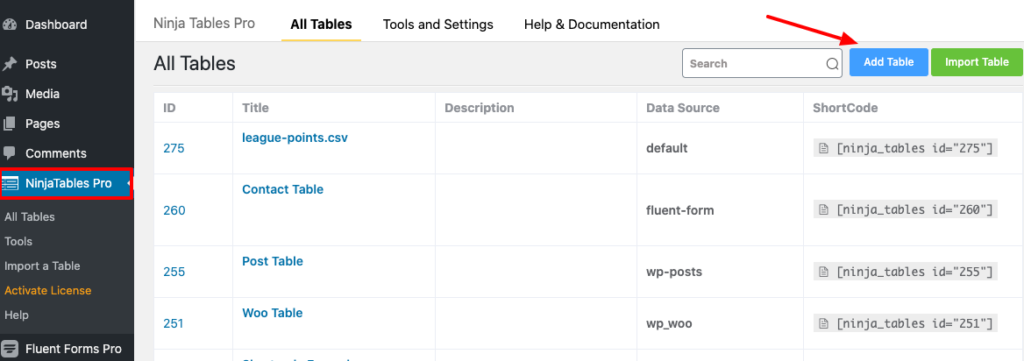
Firstly click on NinjaTables Pro which will take you to the plugin’s dashboard. Then click over the Add Table button to create a new table.
Here you will notice a pop-up window with forms to add the table title and description.
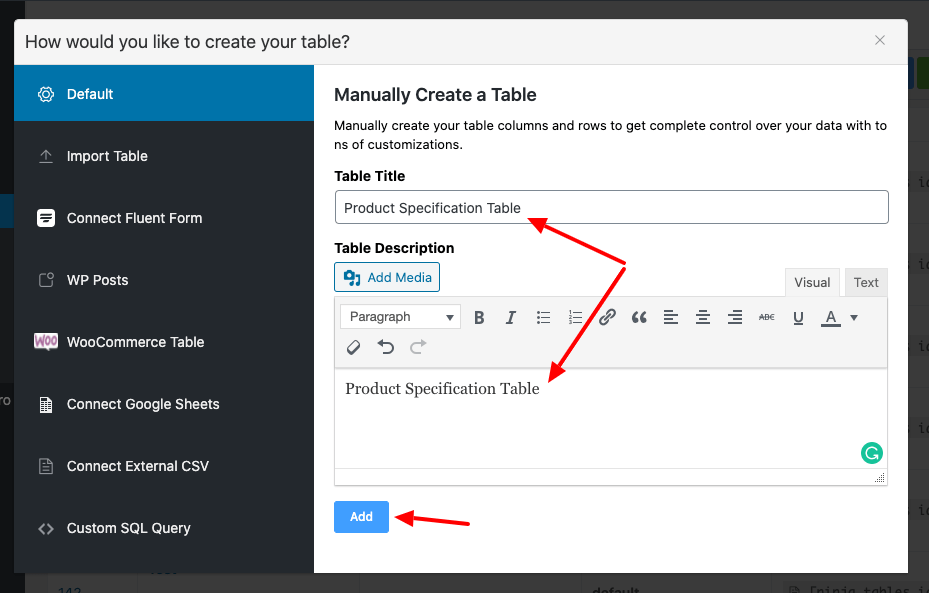
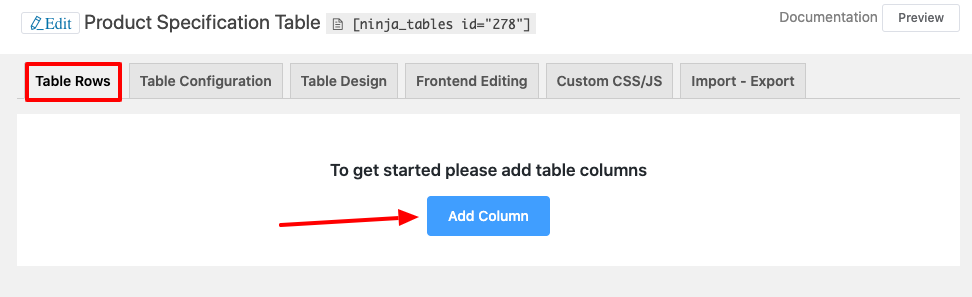
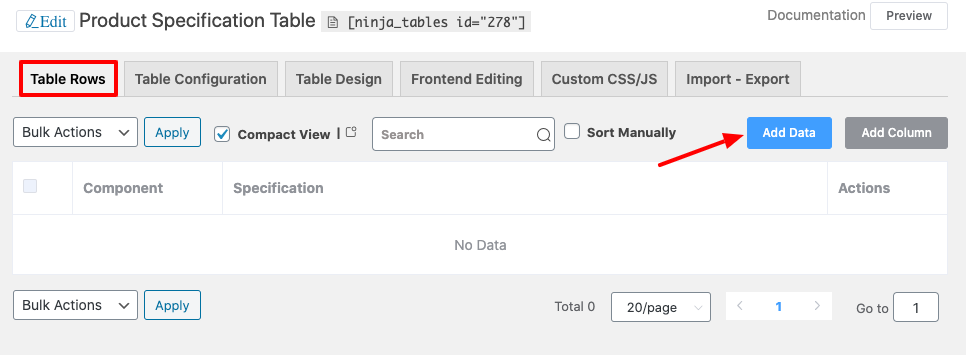
Click on the Add button to make a table after entering the required data. Next, an Add Column button will appear under the Table Rows tab. Click here to add new columns for your table.
Or you can go to the Table Configurations tab. Here the column title can be added & then a new column is created by clicking the Add Column button.
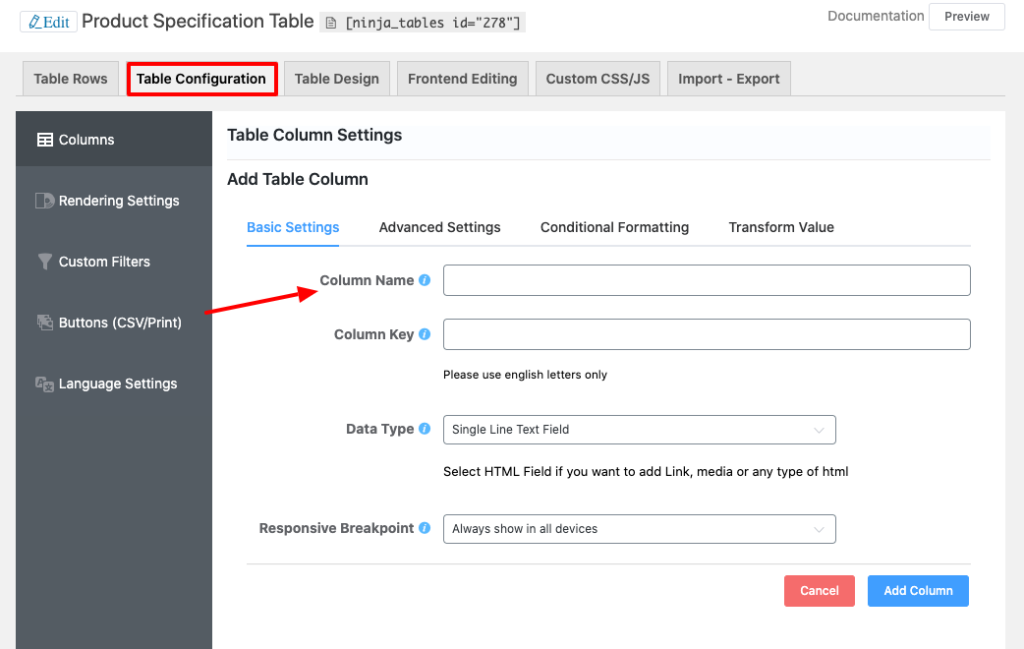
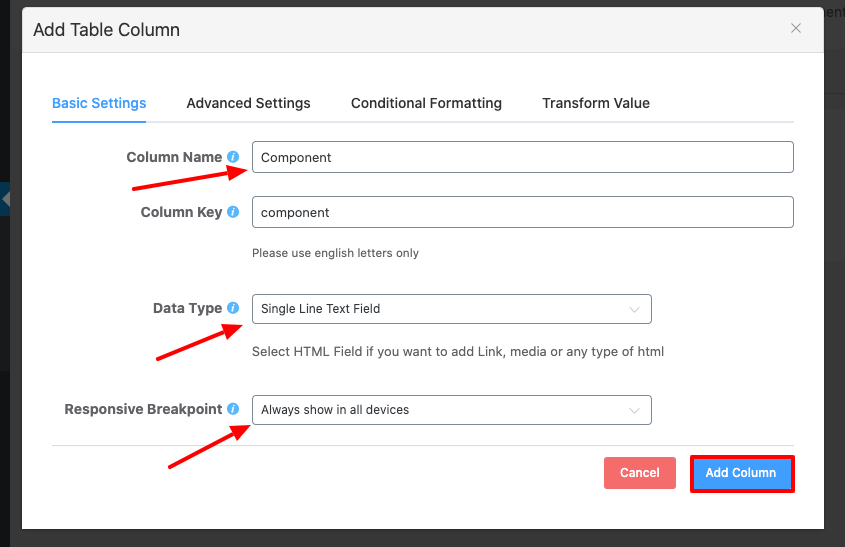
After clicking the Add Column button, a pop-up box will appear where there is a form to enter the required column details. In the same way, click on the Add Column button once all the column data has been added.
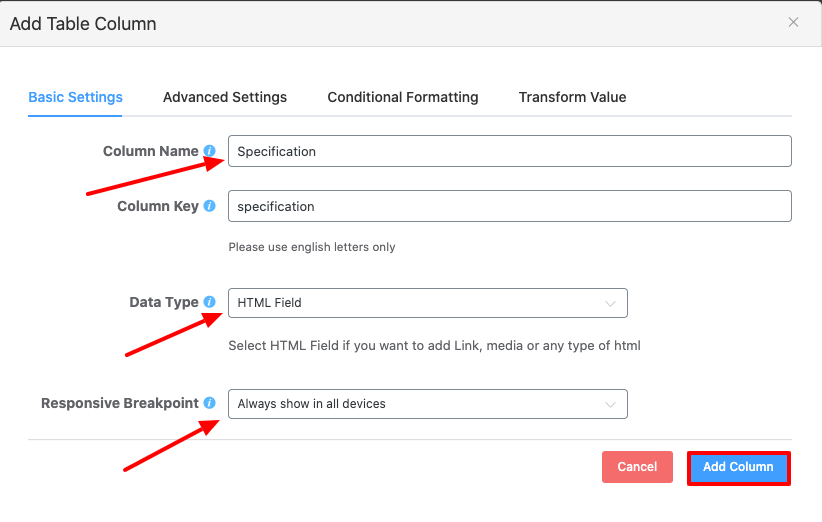
Similarly, you have to make another column called Specification but you need to assign the data type as HTML field this time.
Next, navigate to the Table Rows tab by clicking the Add Data button to enter the data in the column in a row by row format.
You’ll then have a pop-up window that allows you to add data that you want to place to the table. Lastly, to include data to the list click on the Add button.
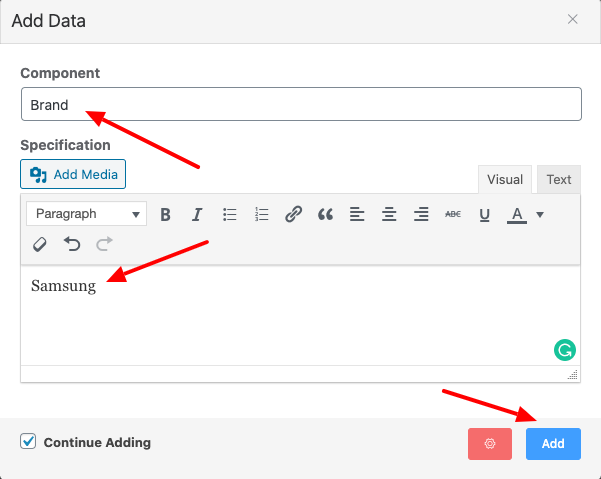
You can insert an image by clicking the Add Media button in the input field as well.
You can similarly place the data one by one in the table. The final result will be as the image below after placing the required details.
This specification table is completely responsive. The table is displayed suitably in the mobile view as the plugin is designed to be mobile-friendly.
So, using the Ninja Tables WordPress plugin, you can make a completely responsive mobile friendly specification table for any sort of product. This post, hopefully, helped you find the right option.
❤️ See Ninja Tables Demos: ⤵️
➡️ Product Comparison Table by Ninja Tables
➡️ Product Listing Table by Ninja Tables
➡️ Cryptocurrency Table by Ninja Tables
➡️ IMDb Top Chart by Ninja Tables
[ninja_table_banner]