

| Cryptocurrency | Image | Price | 24h % Change |
|---|---|---|---|
Litecoin |
|
$225.89 |
(-4.45%) |
Cardano |
|
$0.73 |
(-1173%) |
Ripple |
|
$1.59 |
(-15.5%) |
Ethereum |
|
$1222.75 |
(-4.79%) |
Bitcoin |
|
$13195.11 |
(-.318%) |


The above demo was created using Ninja Tables pro version. If You did not buy yet. You can buy and make nice responsive tables for your amazon products and boost your affiliate incomes.
[ninja_table_banner]
How to create Cryptocurrency Table Using Ninja Tables:
Read this simple guide to learn how to make a Cryptocurrency table using Ninja Tables:
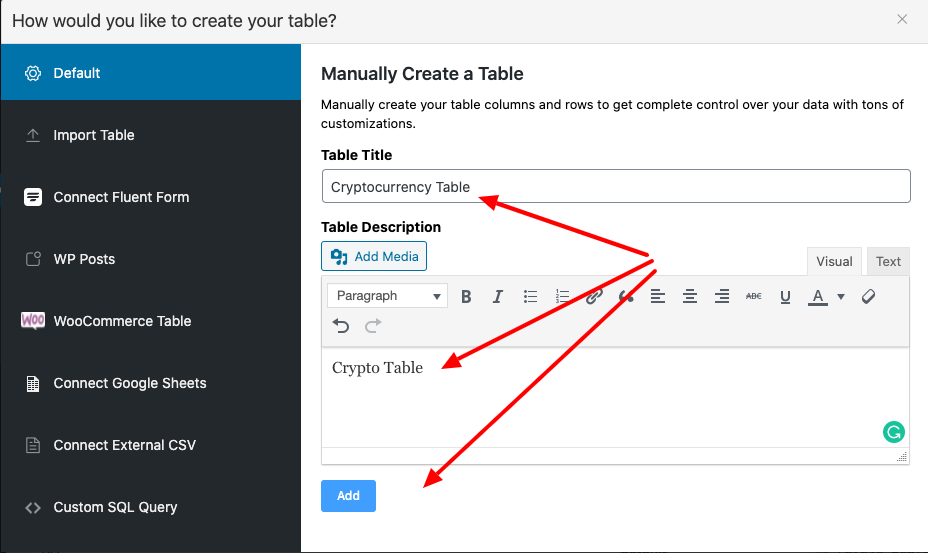
Step 1:
The first step is to click on the Add Table button. This will, in turn, display a pop-up window to enter the required data to make a table. Then click on the Add button after filling up the form. A table will be created with its column options.
Step 2:
After the table is created, you will find an Add Column button to make new columns for the tables.
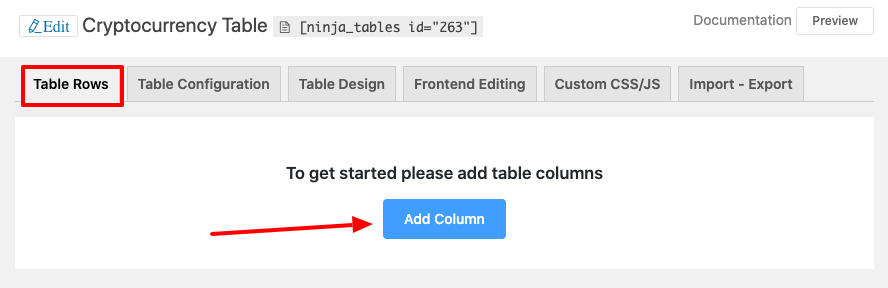
Click this button in order to enter the column data in the pop-up window.

The table has been created with its column, that looks like this:
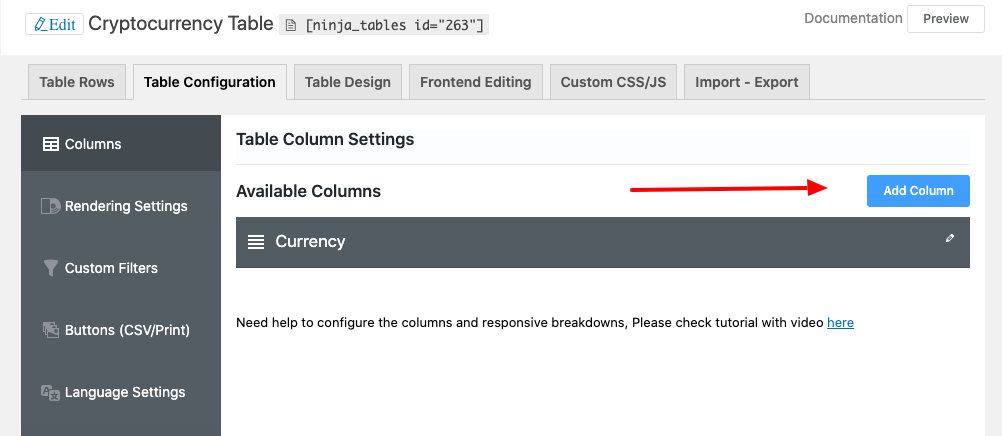
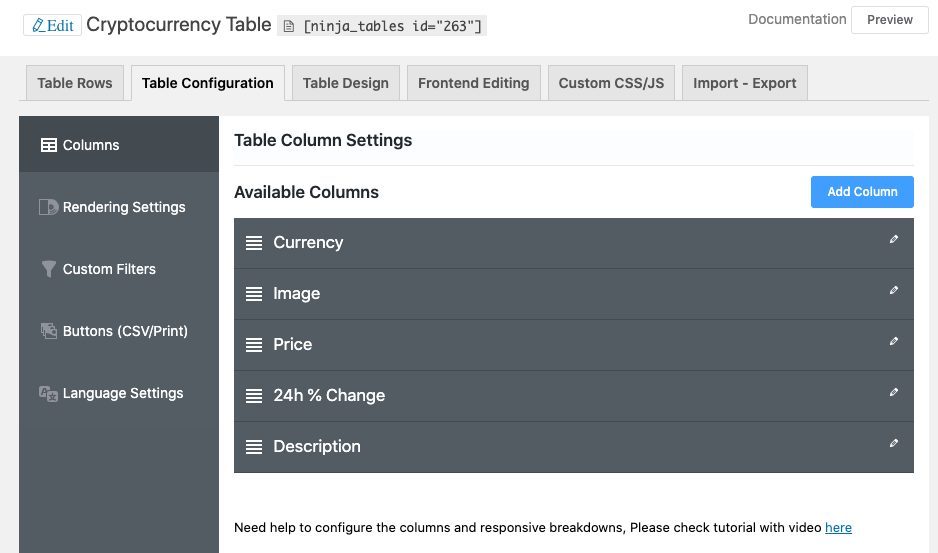
Step 3:
In the same way, four more columns have to be created. By clicking the Add Column button in that table.
Step 4:
Then you have to add relevant data to the specific column. So, go to the Table Row segment and click on the Add Data button.
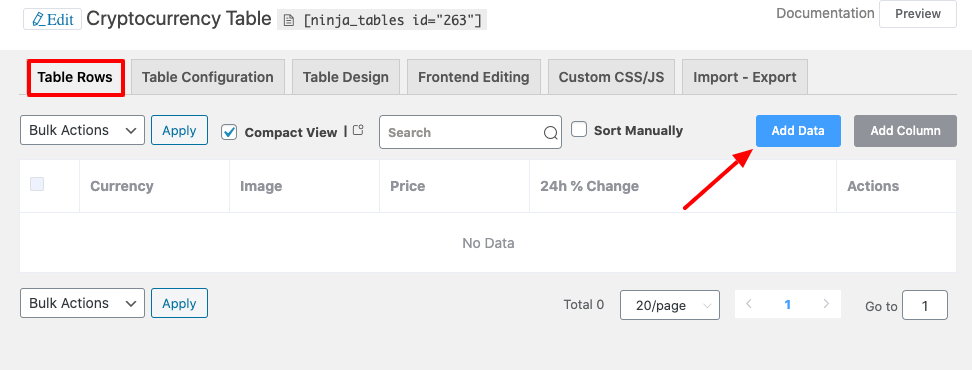
Step 5:
A pop-up window to input data to the relevant column will appear with a specific form. Fill in the form providing the appropriate info and press the “Add” button.
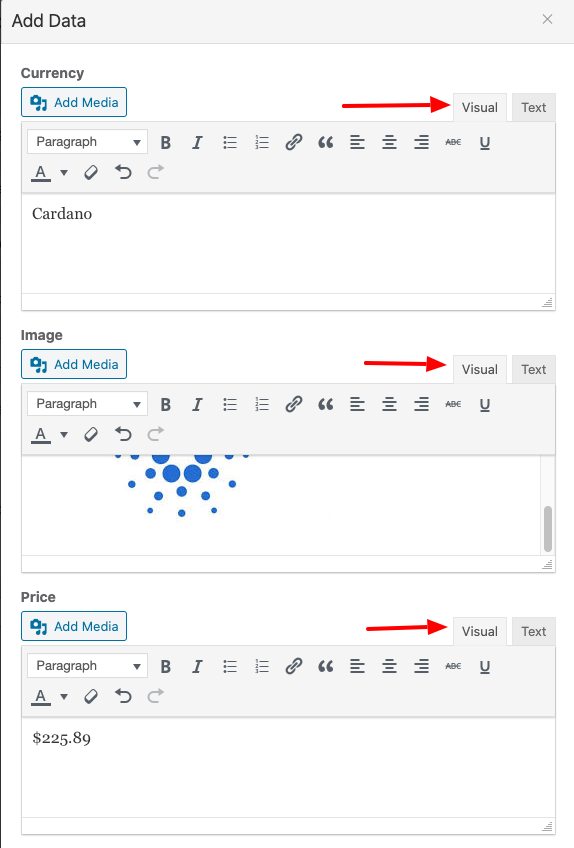
Data has been added to the appropriate table section. By clicking the “Add Media” button, you can add an image. You may also use a visual / text editor to link to a text.
Four data columns are added to the table in this tutorial, including text and image. The first is the currency name for preview, the second is an image with a link as a currency name that will take you directly to the respective page. The third is a price input and the fourth is simply a text with the name “24h % Change” displaying the currency’s changing state over 24 hours. You can add any additional items as you want. You can add an image button, or write code to directly add a button to it. Here is the full input view of the text editor.

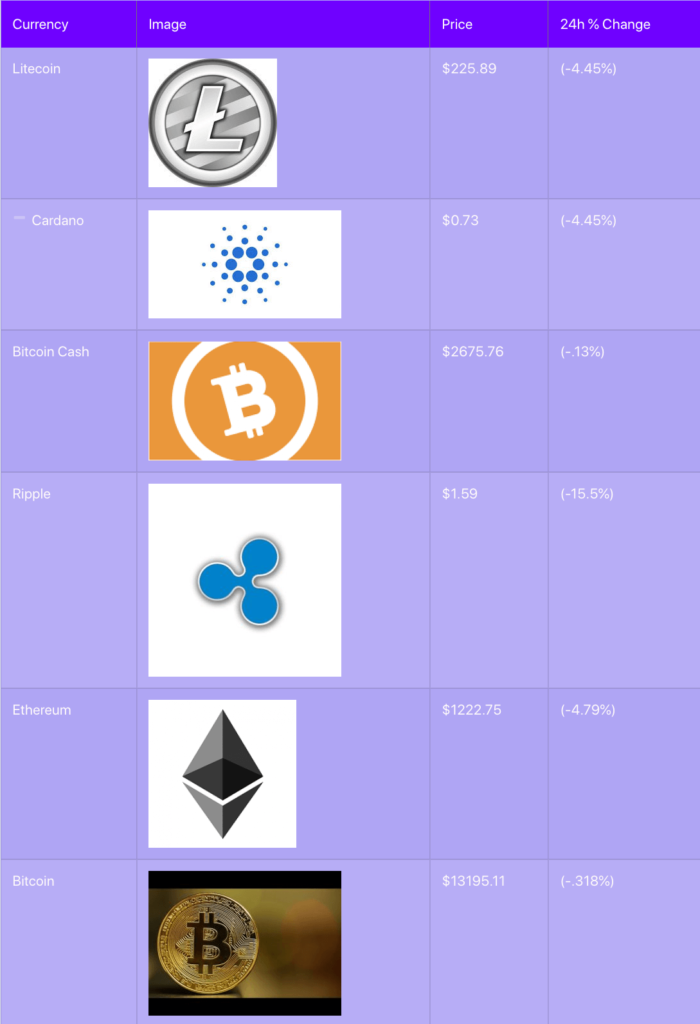
And finally, here is the overview of the interface above as it would look like
You can adjust the color by the default color scheme and the “Table Color Scheme” segment can also customize the color as you like. You have to select the “Custom” option to customize it. Then two color boxes appear for the background and text color respectively, with the name primary color and secondary color.
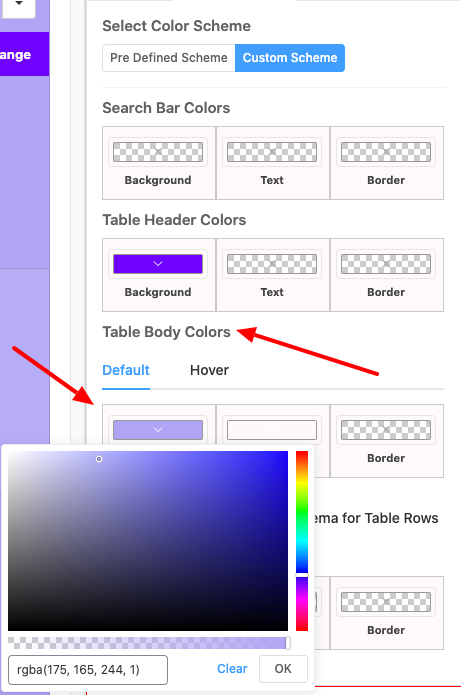
The user can change the table color the way they want it. Such as the example below, the table color in the preview can be changed:
❤️ See Ninja Tables Demos: ⤵️
➡️ Product Comparison Table by Ninja Tables
➡️ Product Listing Table by Ninja Tables
➡️ Product Specification Table by Ninja Tables
➡️ IMDb Top Chart by Ninja Tables
[ninja_table_banner]