

[ninja_table_banner]
There’s an awesome feature called Conditional Formatting that you will surely benefit from. Using Ninja Tables, you can structure all of your tables ‘ columns using conditions that match your needs.
With this feature, depending on the cell value of the table, you can configure the design of your table. Read this guide to learn how to apply this feature.
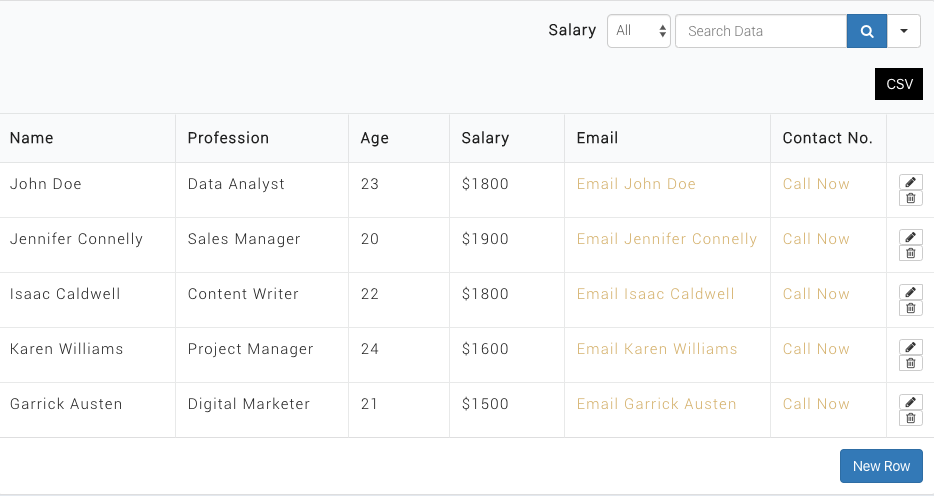
Firstly, you need to have a table designed beforehand. Given below is a table example that will be configured using Conditional Formatting:
So now we can begin allocating the conditional formatting in the table.At first, click on the Edit option under the table title in your NinjaTables dashboard.

There are two methods to configure Conditional Formatting. Either you can set it by changing columns one by one in the Table Configuration menu,
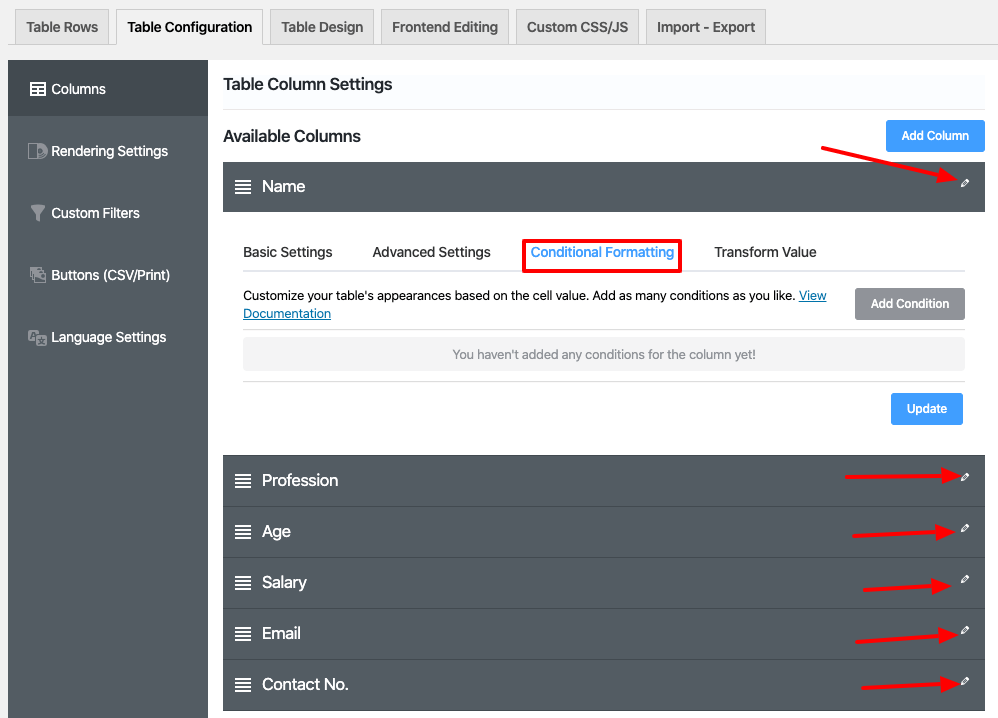
or you can do it by hovering over any column name and pressing the Edit icon from Table Rows.
After that, a pop-up window will appear with various interactive options. Go to the top bar for Conditional Formatting.
Click on the Conditional Formatting tab as the Basic Settings shows by default.

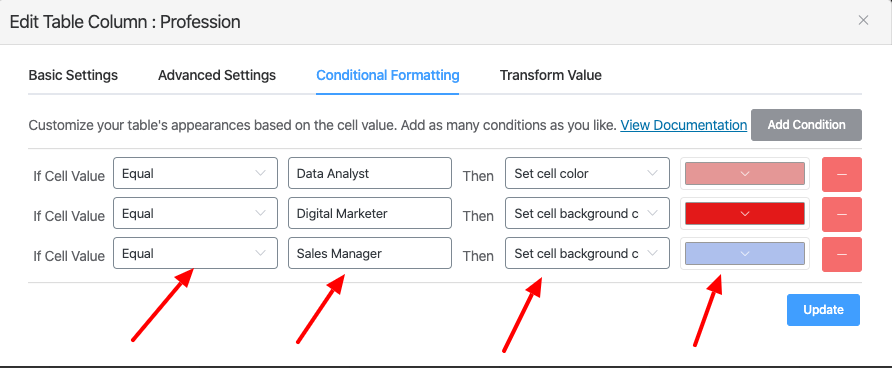
Then, you’ll find the options needed for that specific option. There will be no data by default, so click on the Add Condition button to give the condition. Right now it has one conditional field but simply clicking the Add Condition button can add more conditions.
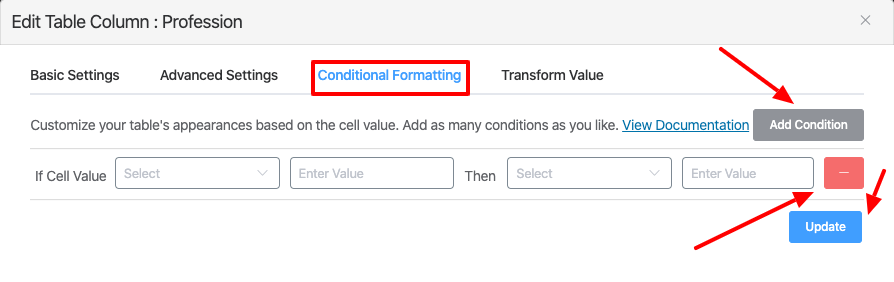
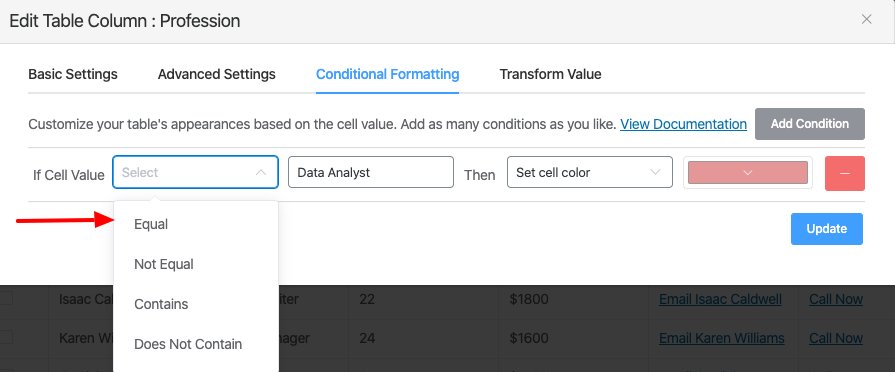
Let’s set the conditions in different ways as Equal, Not Equal, Includes, Doesn’t. Then, you need to set some trigger values and then set options for which conditions will be applied.
Cell Options, Row Options, and Column Options can be selected as well. Place new values, which will be displayed after conditions are applied. Make sure to enter values that always match with that particular row & column.
You can also remove conditions you just placed by clicking the Subtract button(-) given on the right side of the popup window. The image below shows a demonstration of how to put conditions. Here the background color of the Data Analyst & Sales Manager in the Profession will be added. Then the text color of Digital Marketer will be changed.
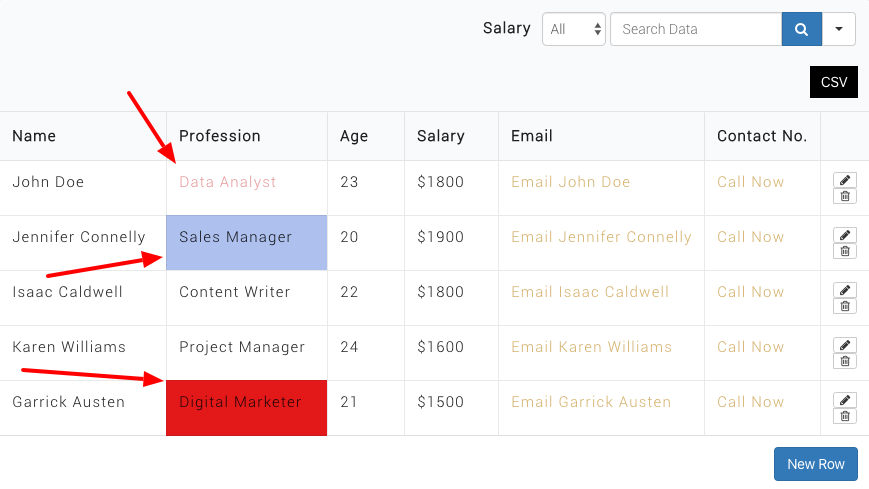
Update the setting after configuring it like this, and preview if needed. The final output is shown below. Check out the snap.
That’s how you can set up Conditional Column Formatting in Ninja Tables.
[ninja_table_banner]