
Ninja Tables offers a distinct feature that will increase the effectiveness of your table. This feature has helped to make Ninja Tables even more user-friendly & versatile. Stackable Table enables to convert each row of any table to be divided into separate tables. Which in turn, creates a stacked table layout that works on all types of devices.
This simple guide demonstrates how to easily set up Stackable Tables in just a few steps!
Note: Stackable Table and Responsive Breakpoint will not work together. Either you can use Stackable Feature or Responsive Breakpoint.
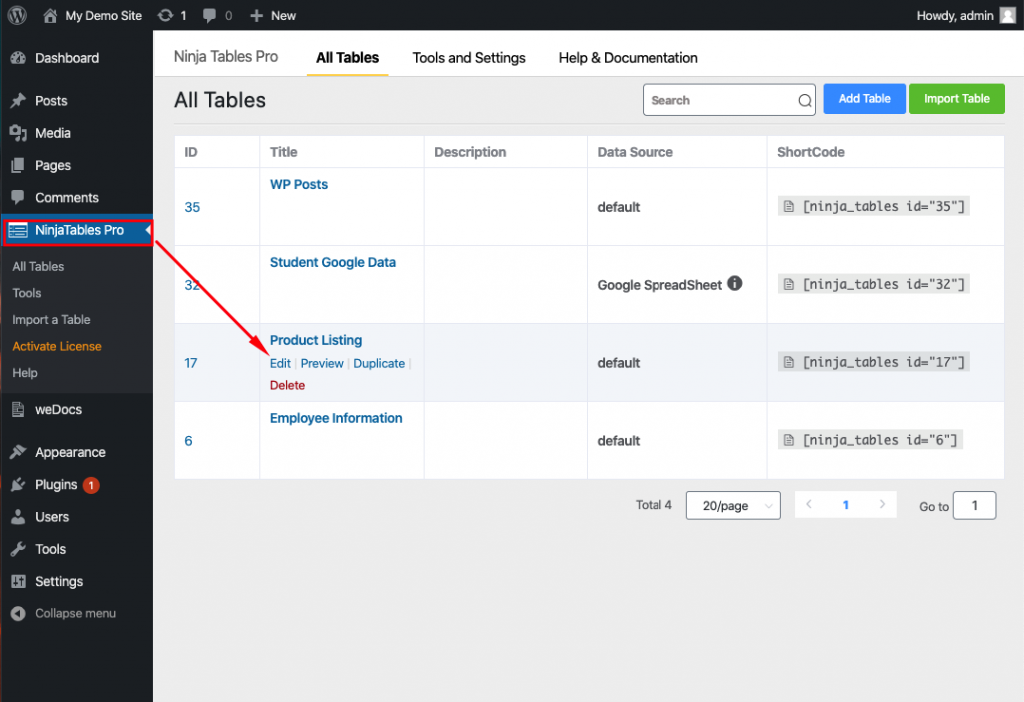
First of all, to go to the Stackable Table option. Click on the Ninja Tables dashboard & then go to the Edit option of the particular table.
Next, click over the Table Design tab placed at the top panel. Then at the bottom of the styling tab, you will notice the Stackable Table Configuration option.
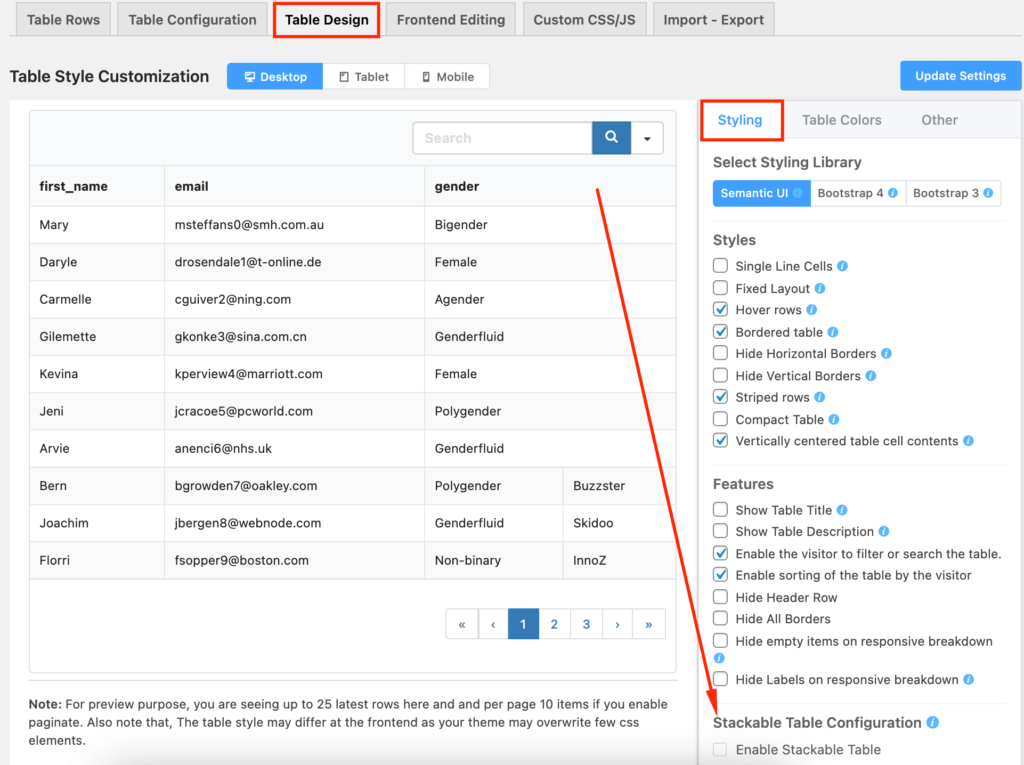
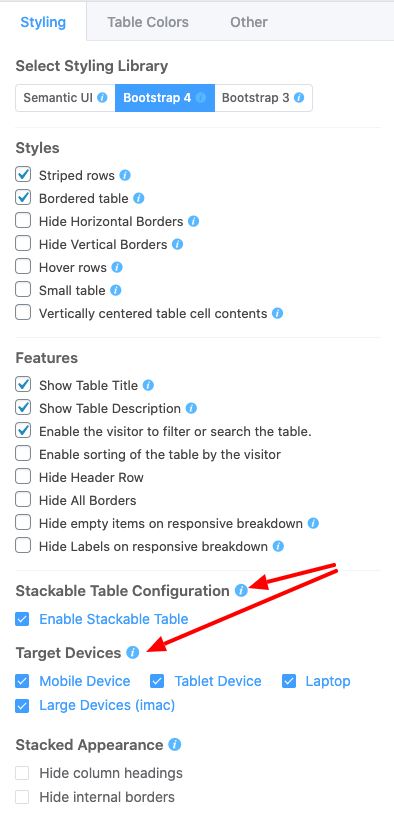
From the image above, select the Enable Stackable Table checkbox. Once this step is done the Target Devices option will appear. And make sure you click the Update Settings button to save the changes. Here you can choose your table to be displayed in a stacked format on various devices that suits your requirements, as shown below:
Given below, is an example of a Product Listing table after enabling stackable table on Tablet Device:
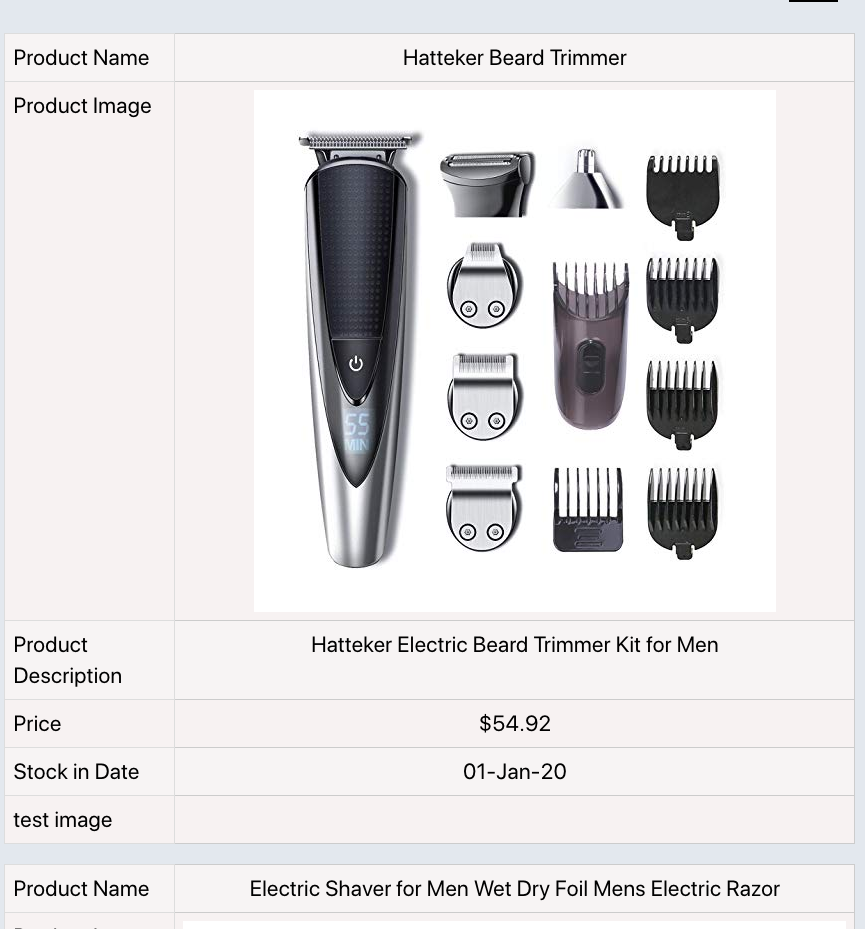
You will notice that separate tables have been generated in a stacked layout from individual rows. And in order to adjust the columns in this device-width, the row header & content is placed on the left & right side respectively. This step is similarly applicable to mobile, laptop and desktop devices.
Stackable Tables has another amazing feature, which allows you to customize the appearance in a stacked view of your table. Following the image below, click on the Hide Column Headings located under the Stacked Appearance option.
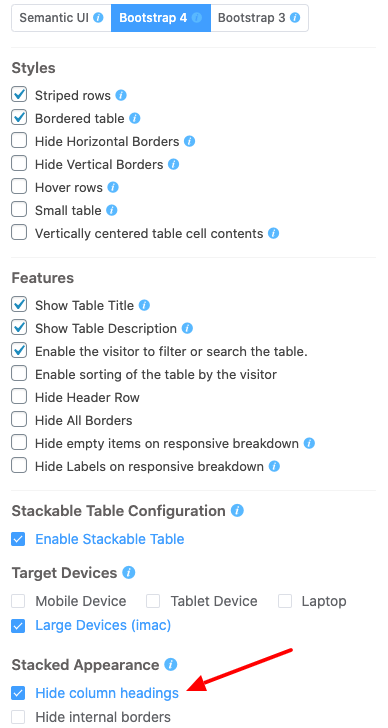
Then here comes the fun part, you will notice that the column on the left side is now hidden. And if you want to hide the internal borders of the table just select the Hide Internal Borders checkbox. Take a look at the example below to hide column headings:

As you can see, the left column heading is no longer visible. This is how easy it is to configure the stackable table format in your Ninja table!