It’s very easy to efficiently customize color with the help of Ninja Tables. This is an awesome feature that lets you control the design of the table.
[ninja_table_banner]
How to customize the color of a table:
Read this easy guide to learn how to customize an existing table’s color:
At first, you have to set up a table using Ninja Tables plugin.
Then go to the plugin’s dashboard. Here you will find a list of your current tables. To customize the color, select your preferred table that suits your needs. Click on the Edit button to view the table.
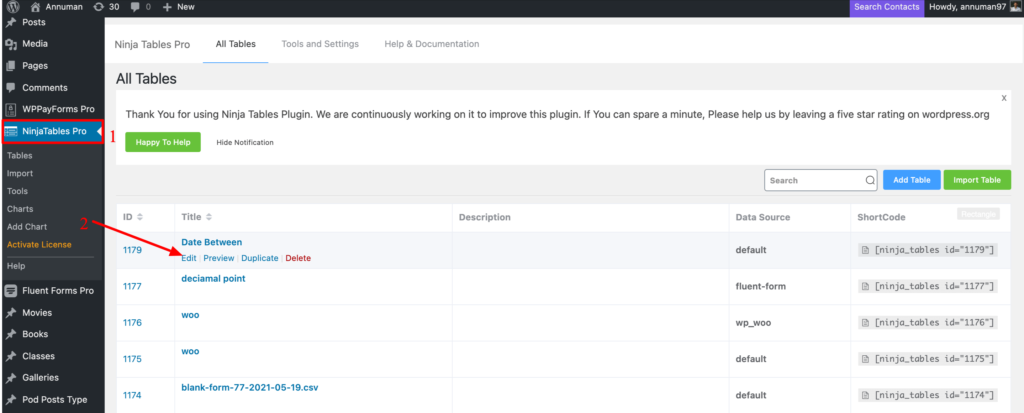
Next, click on the Table Design tab from the list of other Tabs. On the right side, a sidebar appears in the Table Design tab. Three separate segments are visible in this sidebar with specific functions. Select Table Colors from the 2nd segment. Like the example given below:
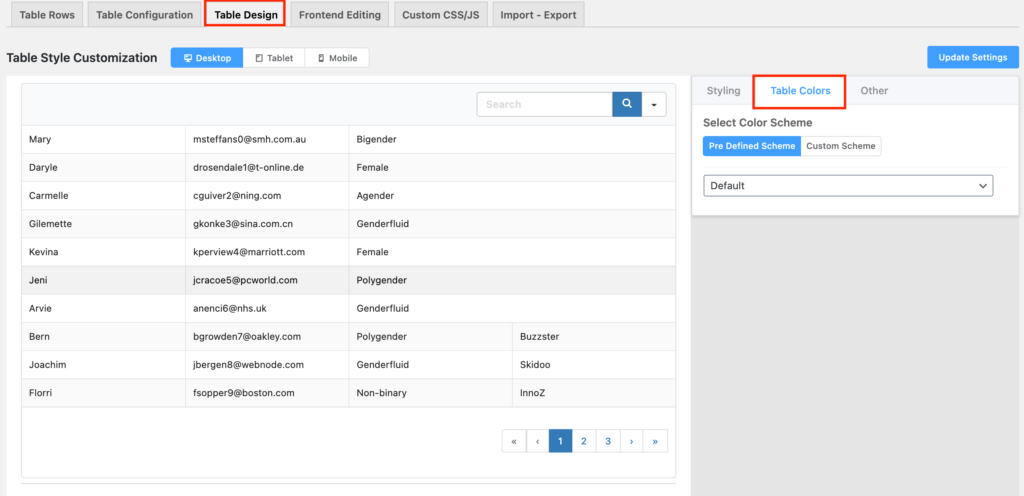
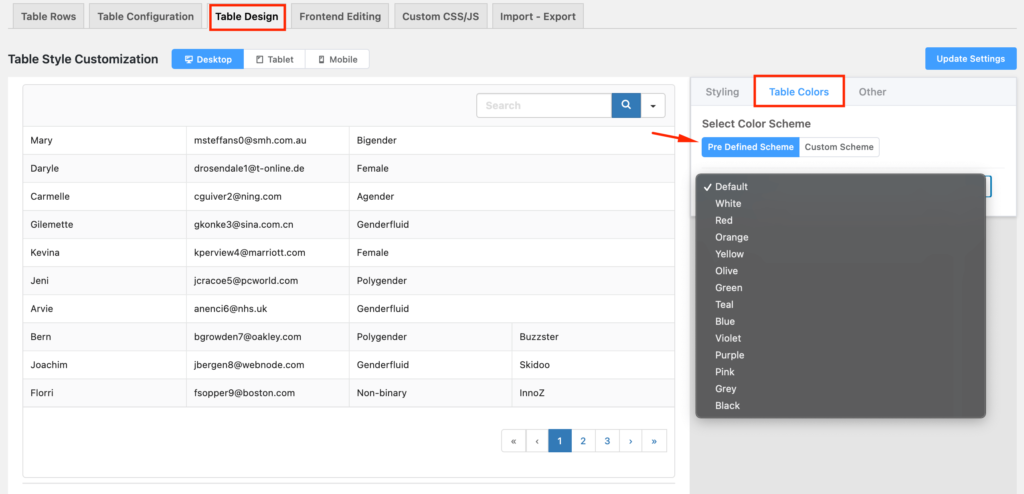
The Table Color tab appears with its functions. You will notice a dropdown list of various preset colors in the Pre-Defined Scheme option. The color of the tables changes according to the color you choose.
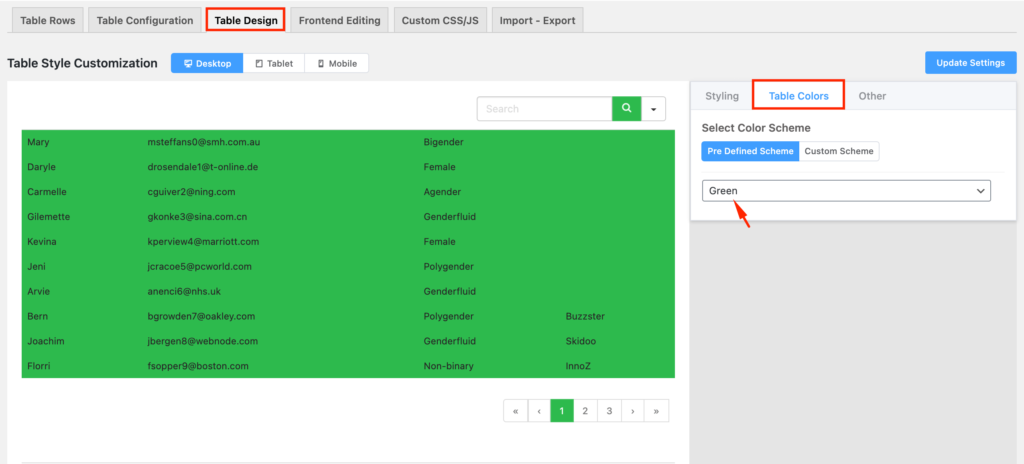
Now, let’s have a look at a few color examples. Like this preview of the green-colored table below:
Here’s another example of a red-colored table which is given below:
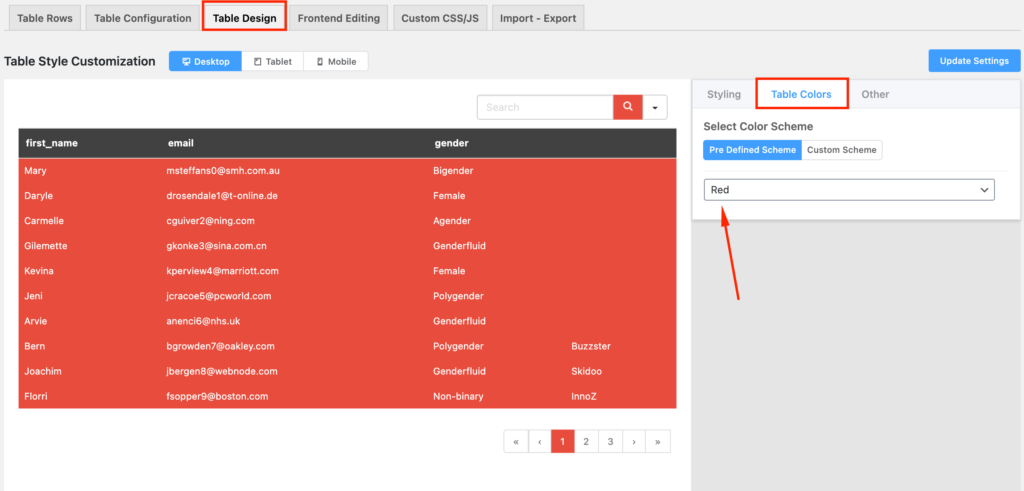
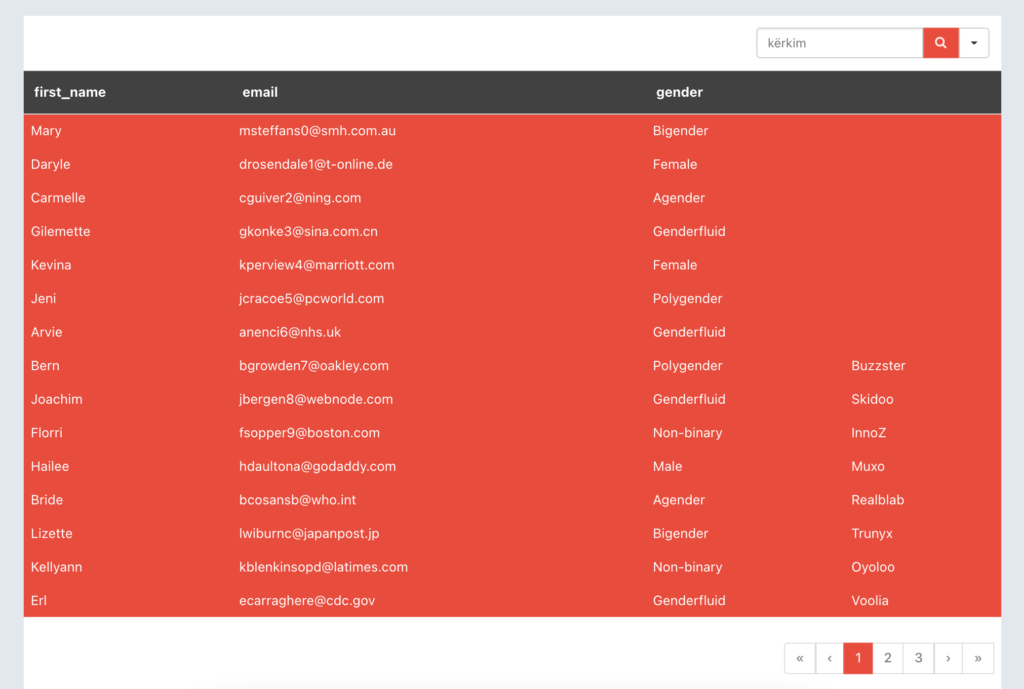
Here is the preview of this color.
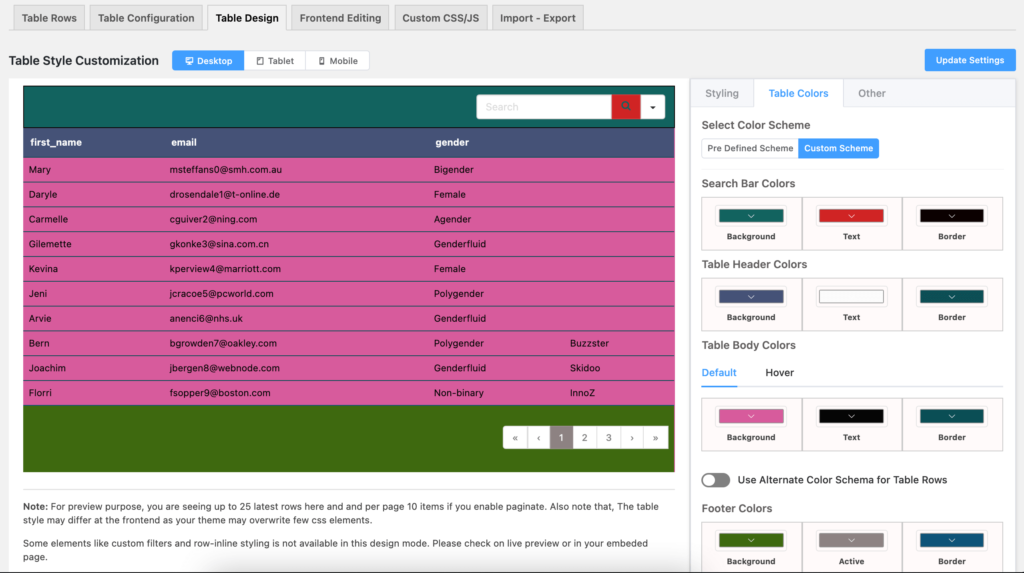
Custom colors can also be configured if the default colors do not meet your needs. To do so, click the Table Colors option situated in the middle section. Then choose your desired color.
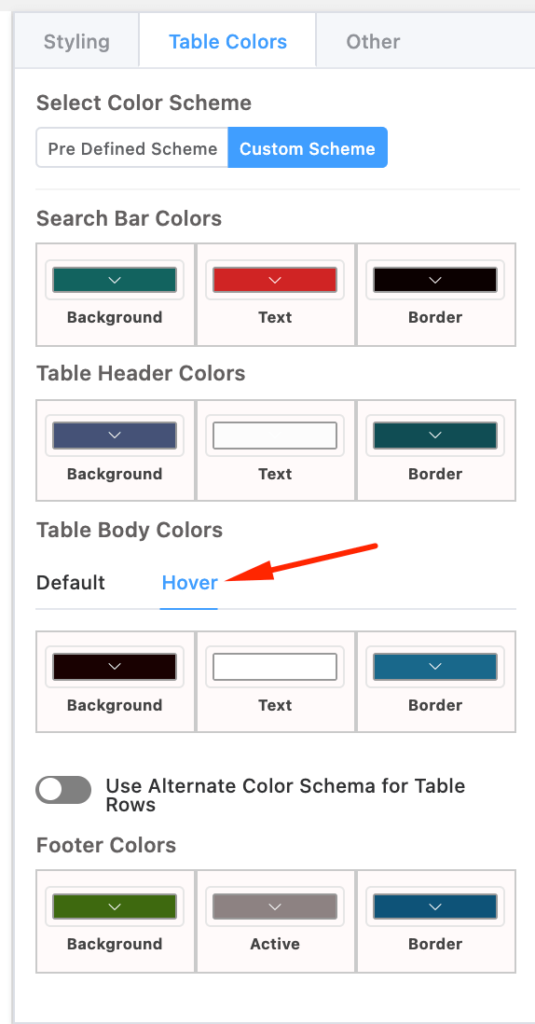
The table’s Hover color can also be changed. Go to the Custom Scheme section. Then in the Table Body Colors, you will find the Hover tab on the right side. Customize the hover color according to your needs.
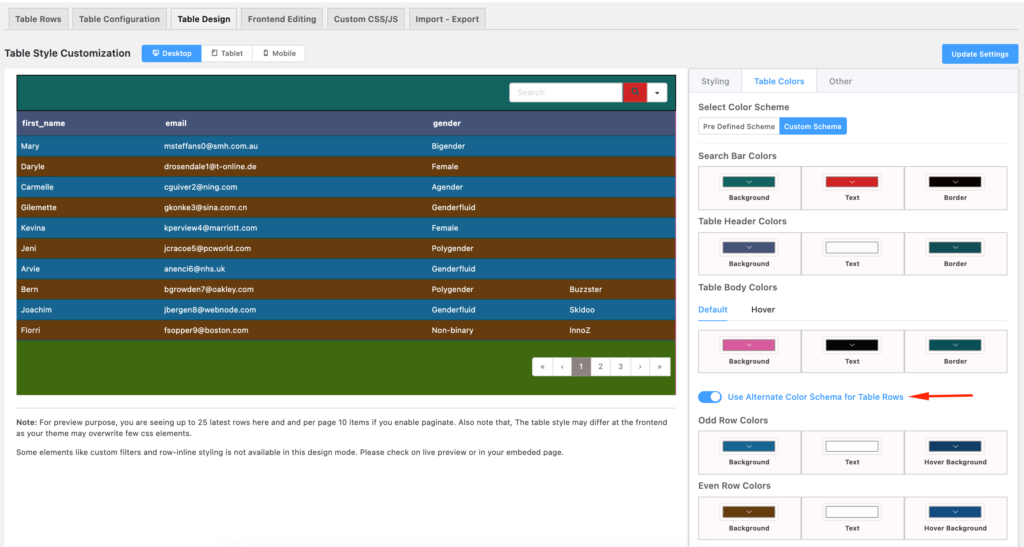
Another way to customize colors is by using Alternate Color Scheme for Table Rows. Under the Table Body Colors tab, select the Alternate Color Scheme for Table Rows option. Choose your preferred custom colors to display them over alternative rows.
[ninja_table_banner]

