We have developed a dedicated WordPress Plugin for Amazon Affiliates that enables you to create
Check out AzonPress, the best WP plugin for Amazon Affiliates.
| Speakers Name | Power Handling | Sensitivity | Our Rating | Price |
|---|---|---|---|---|
| 650W MAX | 93 dB |
|
|
|
RMS: 65W Peak: 130W |
90 dB |
|
|
|
RMS: 400W Peak: 800W |
92dB |
|
|
|
RMS: 100W Peak:300W |
94 dB |
|
|
|
RMS: 150W Peak: 450W |
92 dB |
|
|
|
420W MAX |
92 dB |
|
|
260W MAX |
94 dB |
|
|
[ninja_table_banner]
How to create Amazon Product Comparison Table:
Here is a simple demonstration of creating an Amazon Product Comparison table with the help of Ninja Tables.
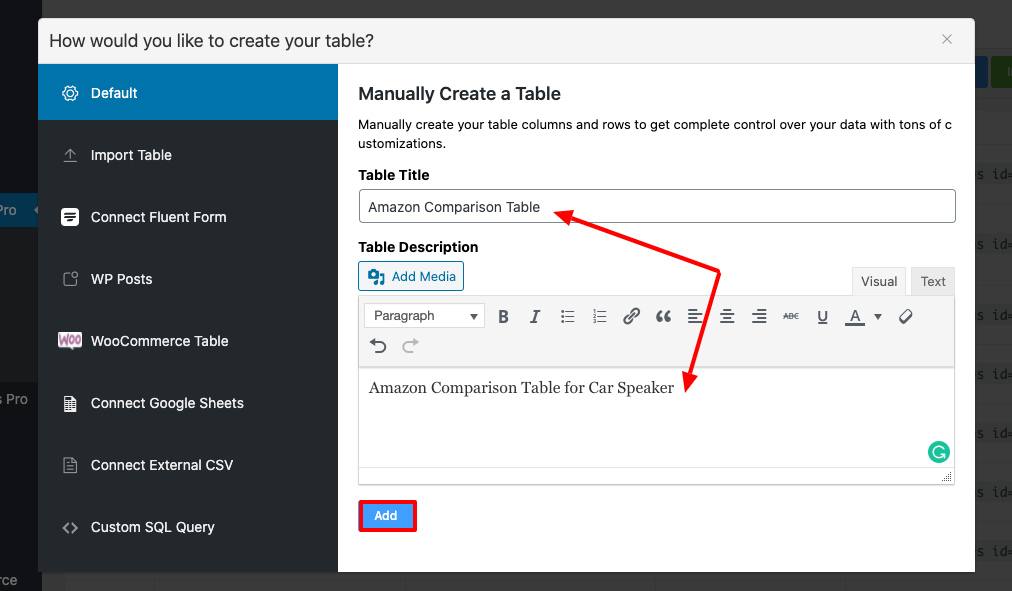
The first step is to click on the Add Table button. Then a pop-up window will appear that has a form to enter the required data for a table. Click the Add button after you are done filling up the form.
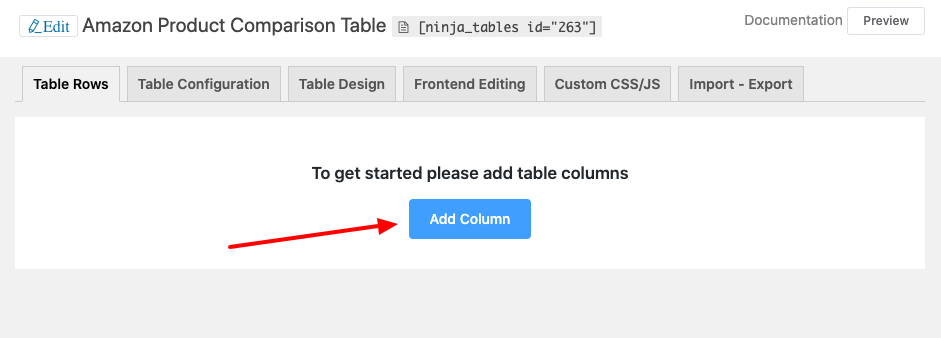
Next, a table will be made where an Add Column button will appear to create new columns.
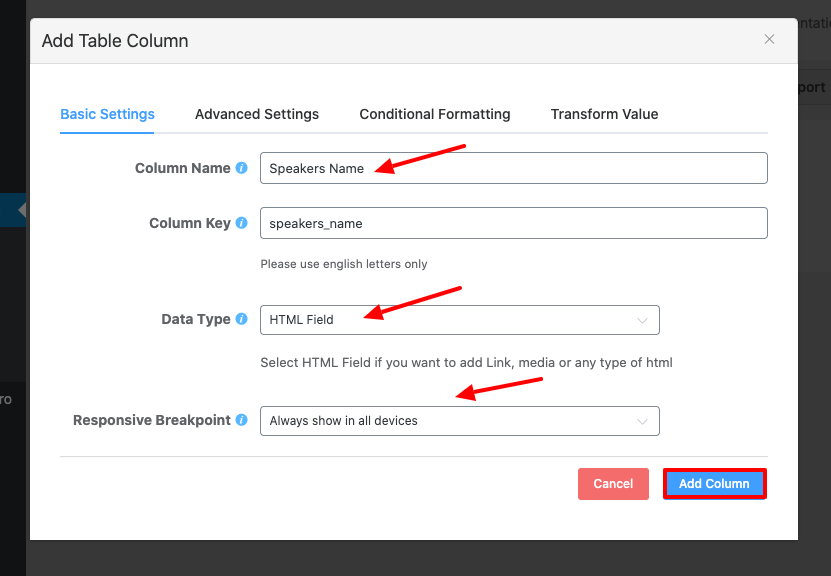
Then start creating columns in the pop-up window, where a form appears with its fields.
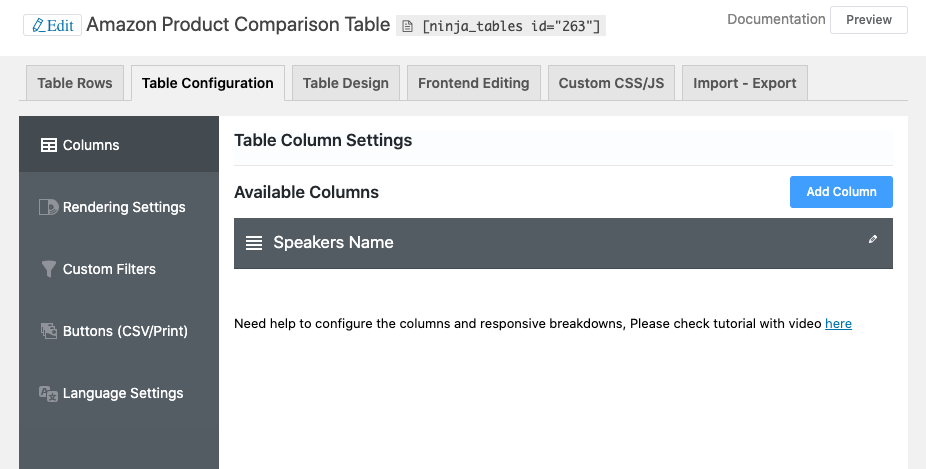
A table is made with the created single column. The outcome looks like this:
Following the same method, make four more columns just by clicking the Add Column button on the top right corner.
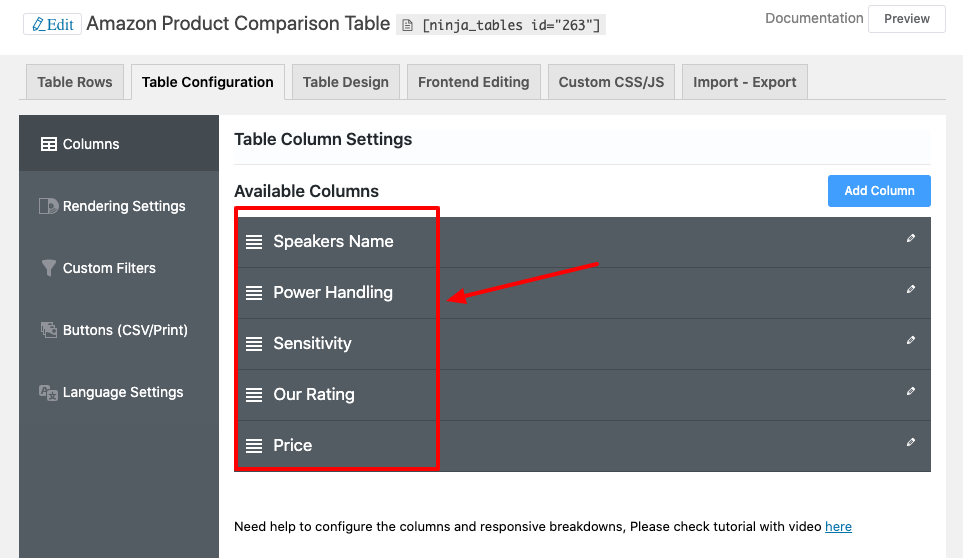
Now you need to add appropriate data to the relevant column. There are no data in the field. So, click on Add data in the section called Table Row.
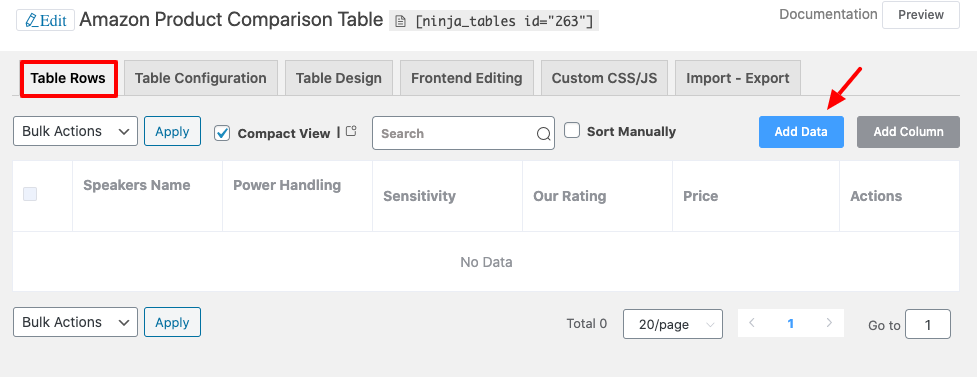
A pop-up window for entering data to the specific column will appear with a given form. Fill in the form and provide the appropriate information and press the “Add” button.
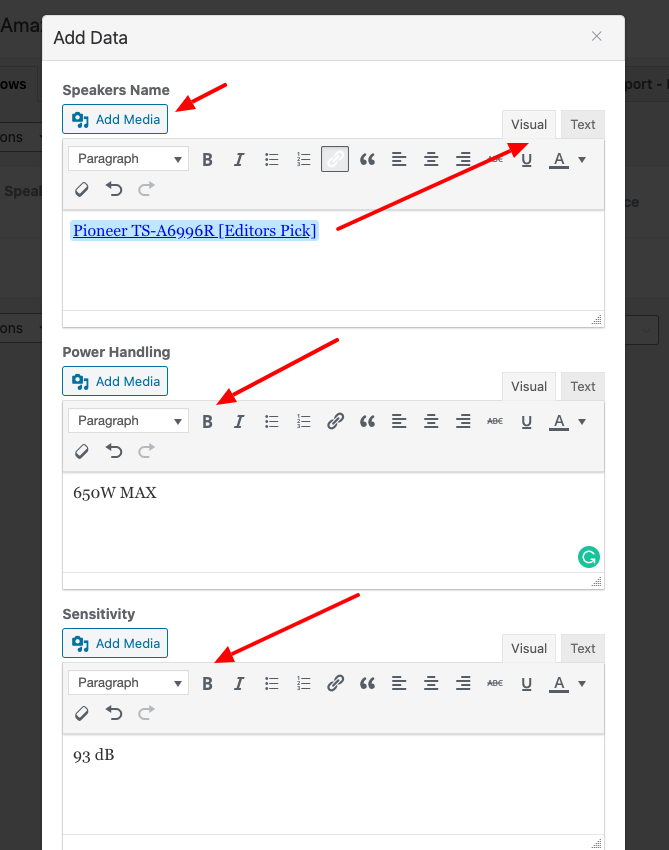
The image can also be added if you wish to
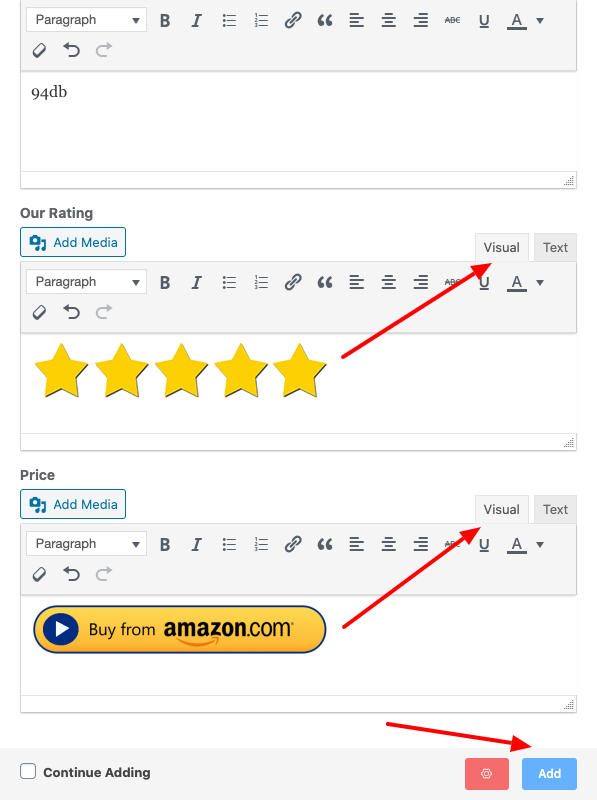
Now have a text editorial look at the image given above.
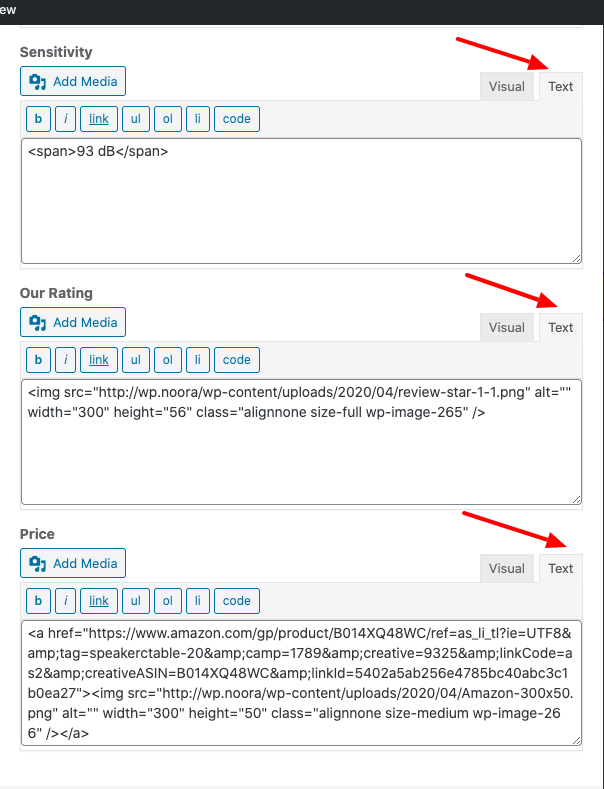
You can see in the above image a link has been set behind the image. The view of the text editor displays the link. After all the information has been entered, click on the Add button to add all the data.
Data has been included in the relevant table column. Click on the “Add Media” button to attach an image. By visual / text editor, you can also link to a text through which you can make affiliation with your desired affiliate program.

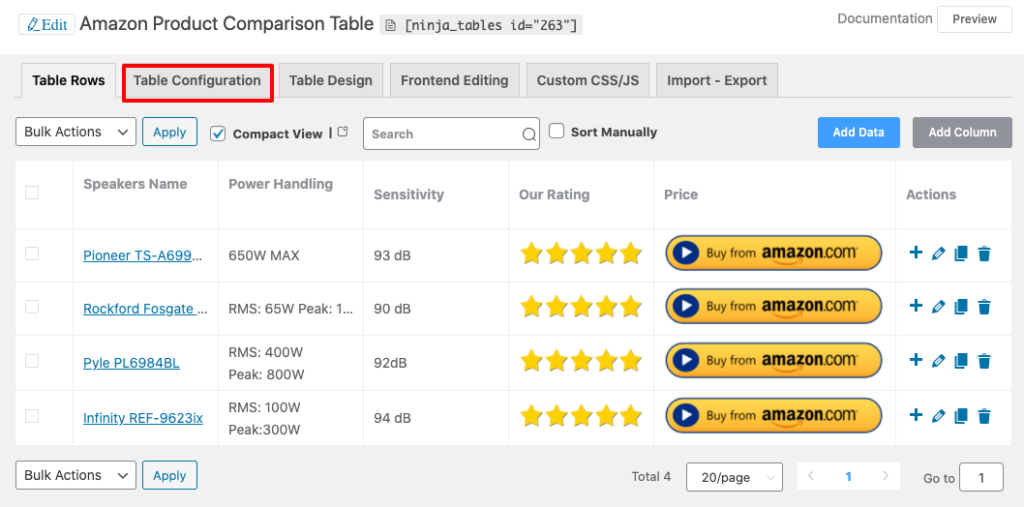
The above image shows the output of the table in preview mode.
That is how you can bring basic data to the table. Within this image, we see that a text link has been displayed at first, and finally an image link. You can place the required data into the table in this way.
You can then add more columns and data as required. You may also delete the border if you want, and even that with a few clicks. To do this, go to “Table Design” at the top of the page and then select the “Styling” option from the right panel and finally check the “Hide all border” option at the bottom of the “Features” section.
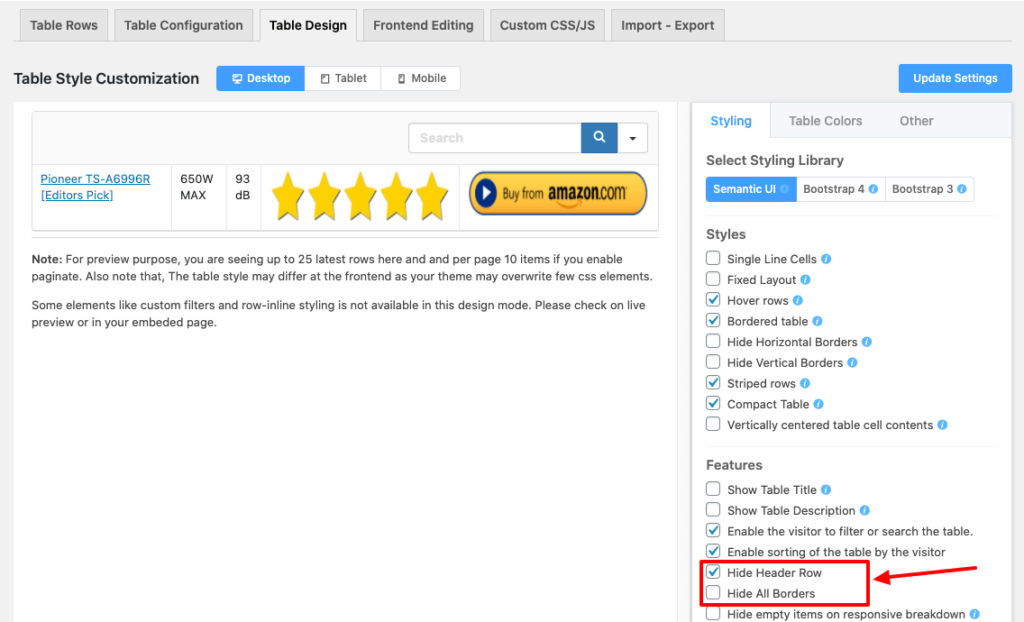
The preview of the border-less table is given below:

Complete the table as stated out above
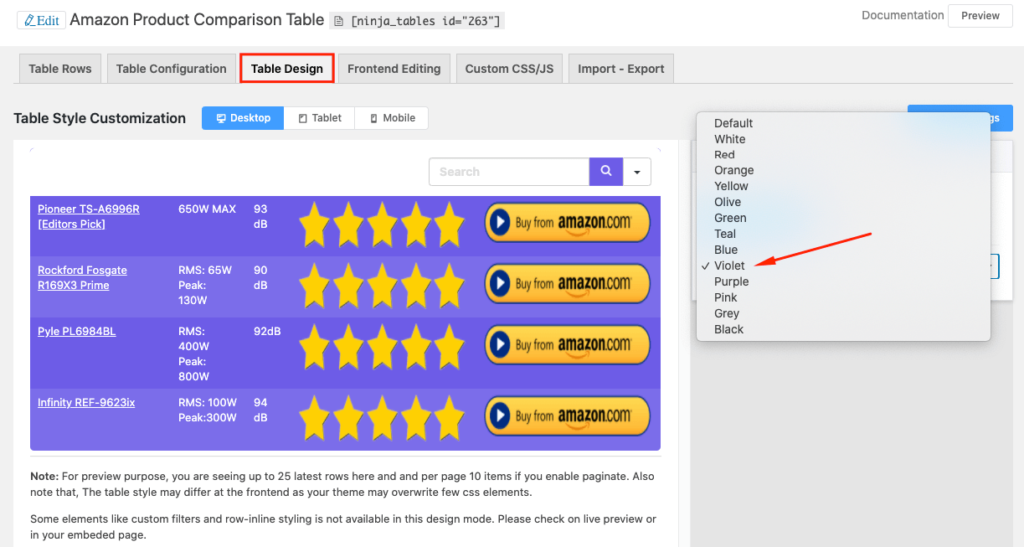
Now you can get your table configured as you like. You can change the color scheme and you can also customize color in the section “Table Color” as you want. 13 Basic colors are provided by default. Violet was selected from the drop-down list. If that doesn’t satisfy you can use the custom color.
To customize, go to the first section of Table Color located in the Table Design panel on the right. Then on the right side of the section, click on the option “Custom Scheme.” Then a four-color box appears to modify any component of the table. Those are the plugin’s additional features.
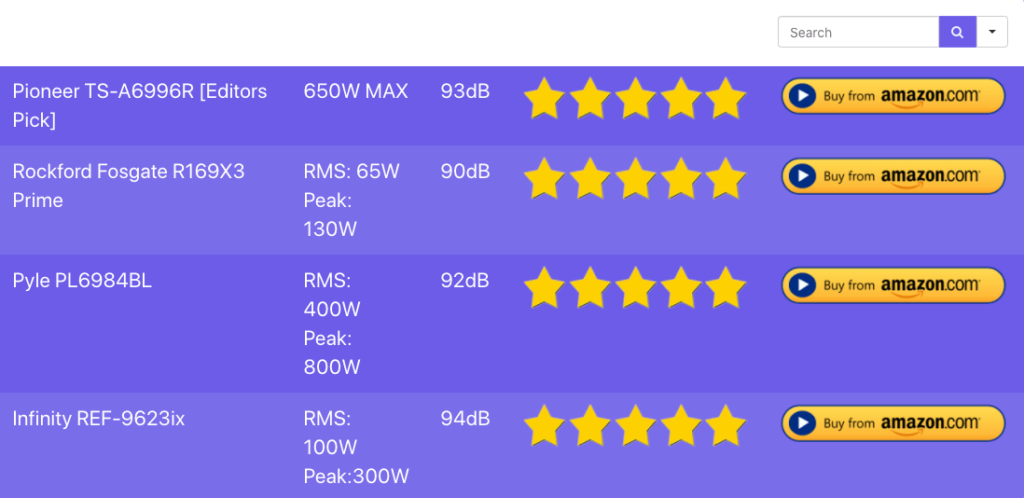
Given below is the final outcome of the table in the preview:
❤️ See Ninja Tables Demos: ⤵️
➡️ Product Listing Table by Ninja Tables
➡️ Product Specification Table by Ninja Tables
➡️ Cryptocurrency Table by Ninja Tables
➡️ IMDb Top Chart by Ninja Tables
[ninja_table_banner]


