

How to Create an Awesome Table with a Free WordPress Table Plugin

Organizing bulk data and presenting them in a beautiful way can be very easy if you use a free WordPress table plugin.
A simple WordPress table can help you out with saving your time and giving you an opportunity to organize your massive amount of data. Unlike other built-in functionalities, WordPress post editor doesn’t come with a table builder. Luckily, we can still build tables, as I mentioned above, with a free WordPress table plugin.
Free WordPress table plugins
In the world of WordPress, you’ll be amazed by the free available plugins to make a table for product listing and more. Whatever your purpose, you can fulfill it with one of these popular plugins. However, our goal is not here to provide a list but to show how you can make tables without any complications. Read this post to know about the best WordPress table builder plugins.
How to create tables with a WordPress plugin
It doesn’t require a painstaking effort to make a table with WP plugins. Different tables offer a different way of editing and organizing although the main idea remains the same. However, In this post, I’m going to show you how to create a table with Ninja Tables.
Ninja Tables: the plugin we chose to make amazing tables
Let us take you to an outstanding WordPress table plugin called Ninja Tables. Also, we’ll show you how to easily create tables in WordPress with no coding experience. Moreover, it has already 30k+ active installs and an overall 5-star rating although it’s not an old product.
Amazingly, Ninja Tables is a stunner if you look into other free WordPress table builder plugins. With the clean and user-friendly structure, Ninja Tables also adapts to any mobile screen. Not to mention that this table plugin is a mind-blowing, no-brainer solution for easy table generation.
UPDATE:
Ninja Tables has exceeded 70k+ active installs now!
Why Ninja Tables?
Well, Ninja Tables is way smarter than its competitors. First of all, you can easily create tables in WordPress with absolutely zero experience. Moreover, it has already 10k+ active installs and an overall 5-star rating although it’s got the entry in the market only one year ago.
Drag and drop:

This feature allows users to drag and drop the rows and rearrange them according to your need. For not-so-tech-savvy users, this option can be considered as a brilliant solution for making a great presentation.
Add media:

Moreover, Ninja Tables is there when you want to add media to your tables. You can now painlessly incorporate images and other files to your tables right from the WordPress dashboard.
Responsive layout:
Your tables will no more distort while users see it on mobile screens. The responsive structure helps it to fit beautifully on any screen without any loss. Not only that, Ninja Tables gives control to your hand so that you can decide which part to show on which device, and which one to hide.
Color changer:
Don’t love the color white? Okay, no worries. A color chart will help you to choose your favorite color from the palette. Right after choosing a color, you can instantly see the preview of the new color before saving it. And, if you don’t like any of the predefined colors, then you can make your own from the panel.
Table styles:

Change the look of the tables and improve it with several styles. By default, you’ll have a lot of options to click and implement. Want to see a bordered table? Or, make the rows striped? The solution is available there to pick and apply.
Settings permission:
If you want to control the access of your admins with Ninja Tables, you can easily do that as well. You can set up the parameter of who can change the table from the global permission settings. You can define the roles of other users besides their existing roles in WordPress.
Quick support:

Well, Ninja Tables support is more than “quick”, it’s enthralling! Anyone can fall into an unwanted situation, no matter how easy was the process. We ensure our customers get priority support while they can’t decipher the puzzle.
Regular updates:
We love to enhance the quality of our product and we have been developing Ninja Tables since the beginning. And, it goes on relentlessly. Users who buy the plugin now can also enjoy future updates without paying extra.
Export and import data:

You can export the data in multiple formats along with saving them wherever you want. Again, you can utilize it for further application. Similarly, you can import data from other sources to your table, as well.
Column builder:
Ninja Tables introduced an easy configuration process for a faster solution. You can re-arrange the columns like a pro with the column builder. Set the data type for particular columns as text or HTML field to initiate a more useful solution.
Fast and smooth:
You can see the changes inside Ninja Tables in the blink of an eye. Vue and other modern technologies made this possible along with a smart coding structure. Create a table, customize it, import and export data – everything will happen just in time. With minimal coding and clean structure, the table has no impact on your site’s page loading.
Importing tables:
If you’re using other table plugins, you can import them to Ninja Tables. Read this article to know how to import table from TablePress. We have addressed this issue so that our friends from other plugins can easily switch to Ninja Tables.
Learn More:
Ninja Tables VS TablePress, a Comparative Study | Which One is the Best Option?
How to create a table with Ninja Tables
Now, let’s take you to the wonderful world of creating a table in WordPress with Ninja Tables. I’m skipping the installation part for not making the post unnecessarily long. But, you can see the full documentation of Ninja Tables to know everything about customization.
I’ll discuss three options with Ninja Tables.
- Creating a New Table
- Importing a Table
- Exporting a Table
Creating a new table
Let’s create a fresh table from scratch. The easy and user-friendly interface of the Ninja Tables will guide
Installation & introduction
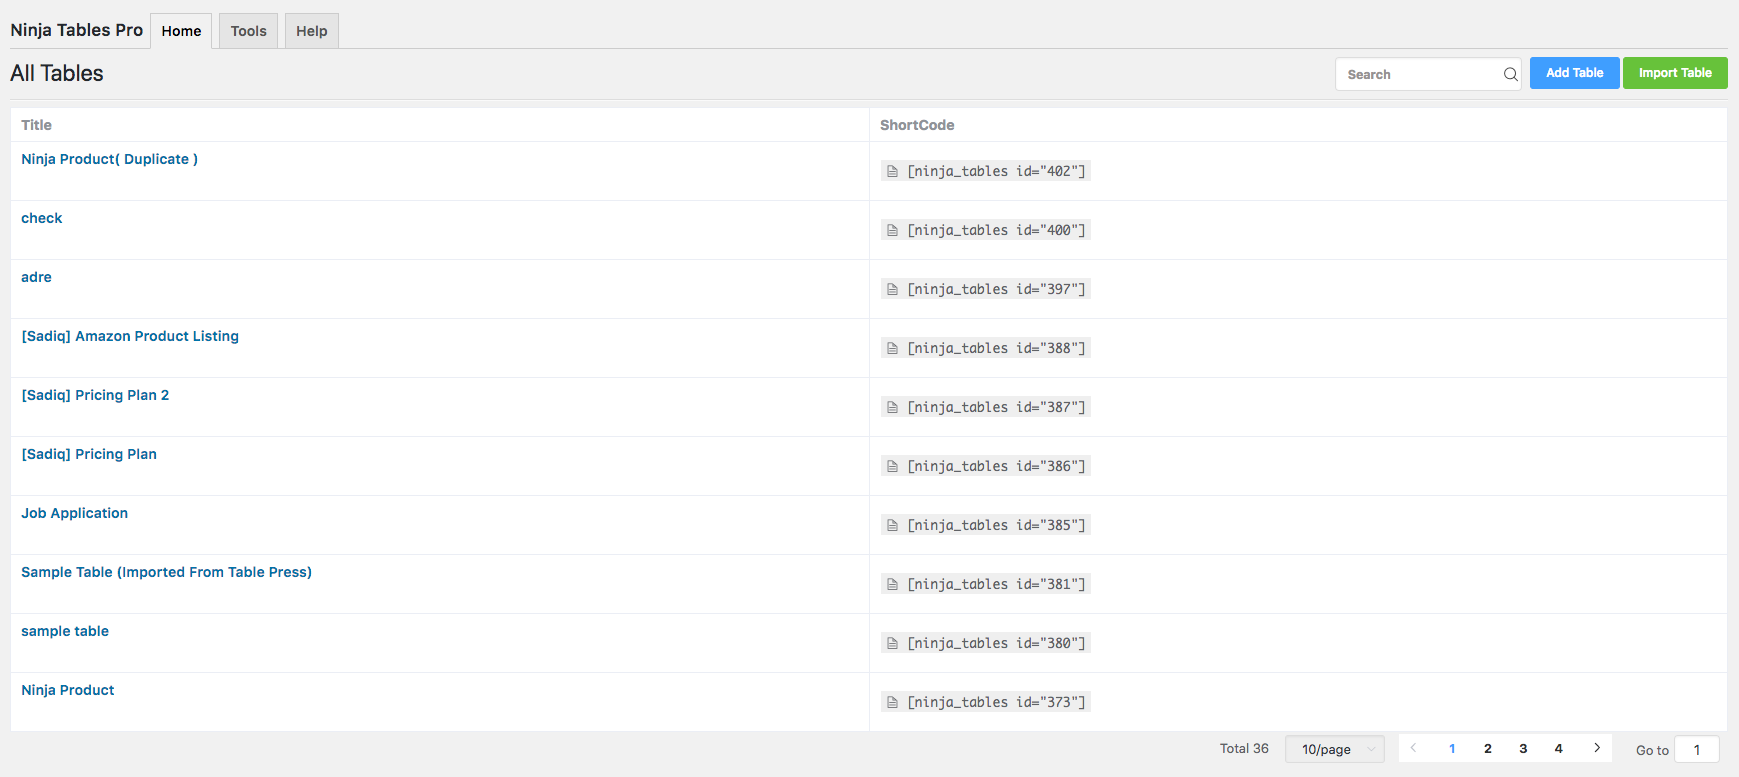
I assume you have installed and activated the plugin in the WordPress dashboard. Now head over to Ninja tables from the left sidebar of your admin panel. This is the place from where you are going to control the table to build awesome things. Whatever you want to do with the table, you have to start it here. The homepage will show you the tables you have already created (it will look empty at first though).
I’m not going to tell every detail of the first page here. There is a “Tools” tab where you can find options for importing data. And, “Help” option has things that can assist you when you’re stuck. We want to create a new table so click on the Add Table from the top right corner of the dashboard.
Adding new table
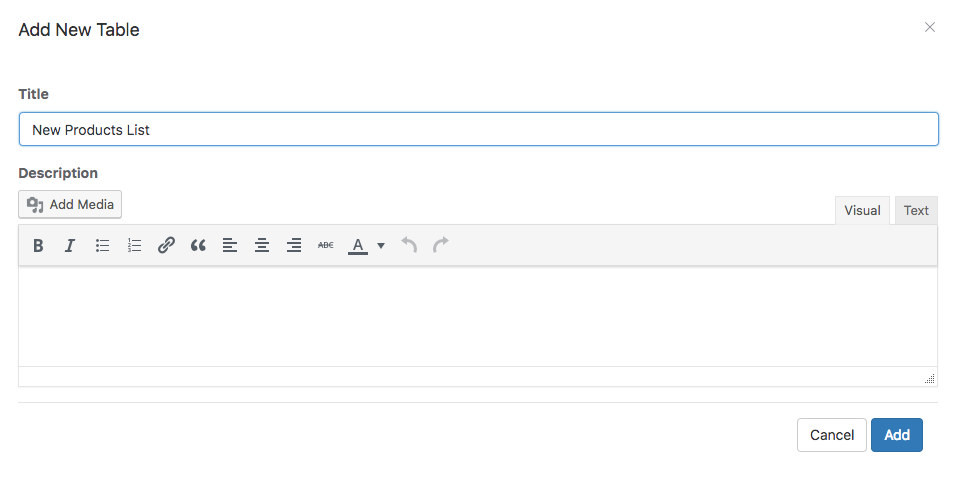
When you click the Add New page, a pop-up will appear like the image below. Give the table a name and you can add a description to it if you want. Now click on the Add button and congratulations, you have created your first table with Ninja Tables!
Configuring the columns
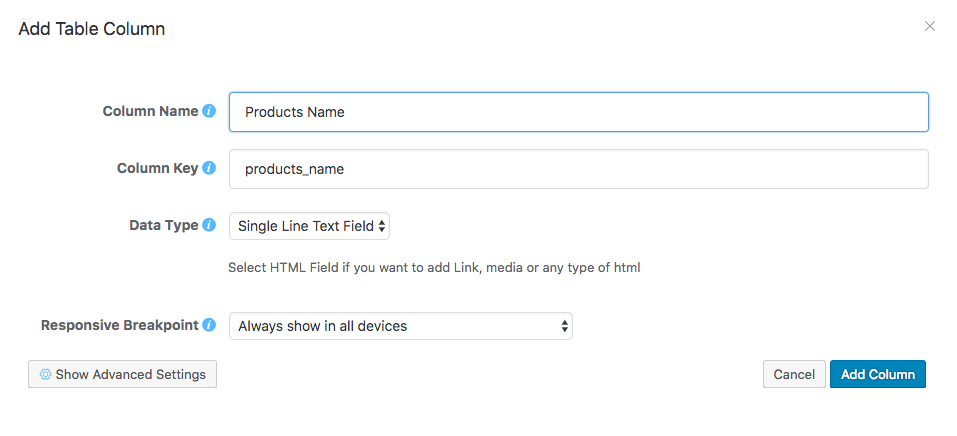
You’ll be directed to the “Edit table” mode and now the real works begin. Click on the Add Column and it will pop up with several fields. Give the column a name and leave the Column Key for now; it will generate automatically. Also, define the Data Type as required.
Do you see an option for Responsive Breakpoint there? Well, it will allow the breakdown of your table for different platforms. For instance, you can keep this column hidden for mobile or hidden in mobile and tab such other options. However, Ninja Tables seems to be the most user-friendly plugin in this regard.
When you try to add a new table in TablePress, it will initially let you choose how many columns and rows will be in the table. At first, it might look like a great solution. But, Ninja Tables is way better than TablePress because you have more control with columns in Ninja Tables. You can set different parameters for each column.
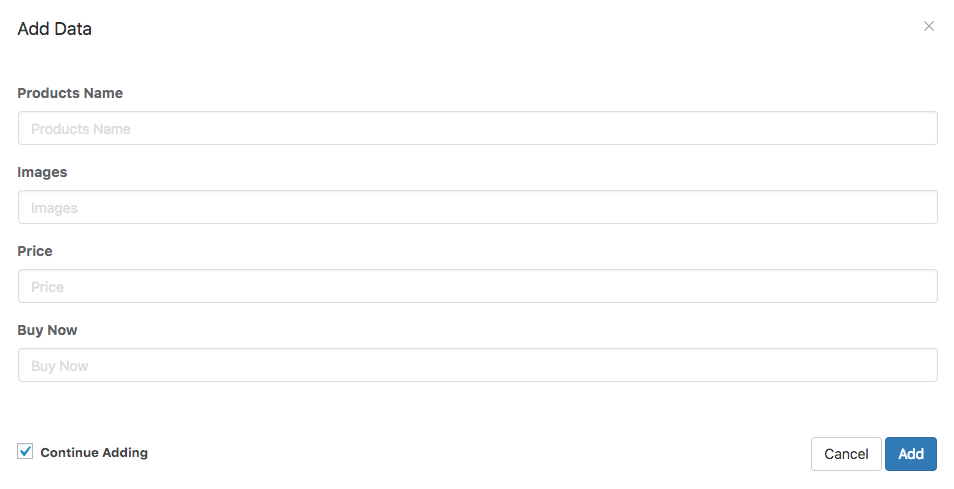
Adding data to the table
I’ve added three columns to the newly created table. Now, let’s add some data to it. If you will click on the Add Data button, a pop-up will appear like the image below. Additionally, if you checked the Continue Adding, it will be appearing until you close. Your worries for new rows are just gone.
Additional customization
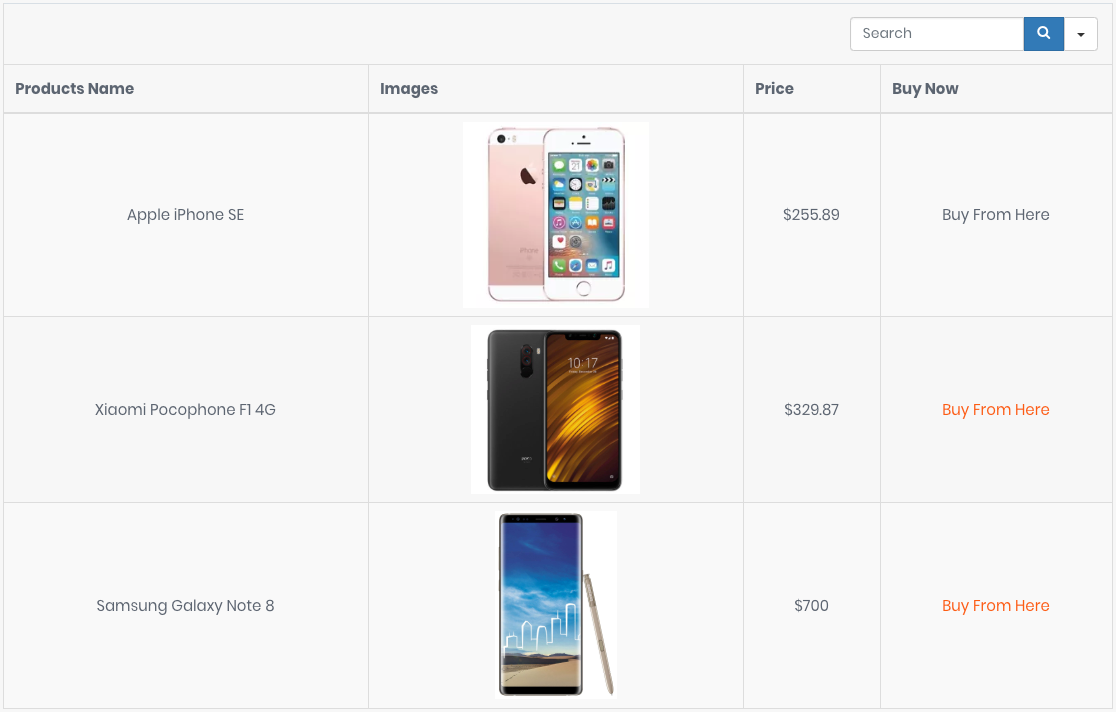
As you have created your first column and added some data to it, you can continue the process without any trouble. Furthermore, if you want to edit a particular column, just hover over it and you will see a small Edit icon; click on it. Suppose, you want to need to change the image column to an HTML field so go for it and select the data type as HTML Field.
You can see the output of my table with just one column from the image below. Let’s say, you need to make some changes to the added data. Yeah, it’s easy as pie. See the Action column on the top right where four icons are available. They will let you add, edit, duplicate, and delete the entire row. If you want more rows, click on the Add Data, and click on the Add Column for getting more columns.
More advanced functionalities
Besides making and editing a table, you can do a lot more other amazing things with Ninja Tables. Let’s talk about them briefly.
You see the image below? Styling the table is not only easy but you’re going to get a set of options to give your table an enticing look. Choose Striped rows if you want to see your table that way. Likewise, you can add the border, hover rows, and more.
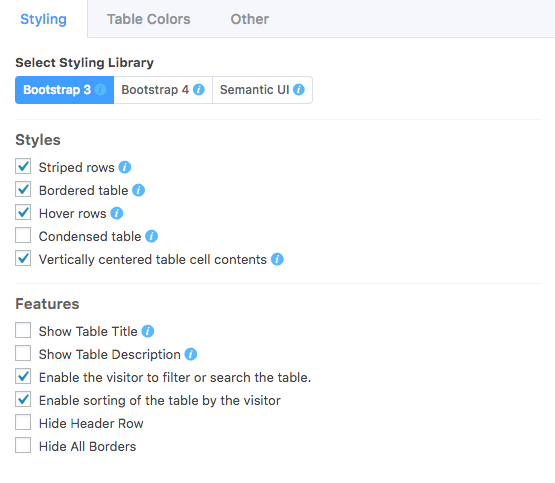
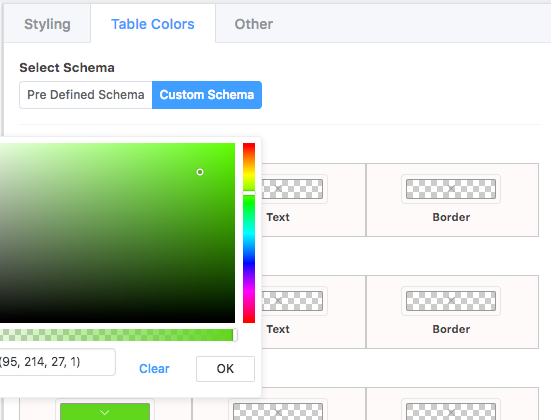
You may not like the default color and want to update it for different parts of the table: search bar, header, and rows. From 12 pre-defined colors, you can choose one for the whole table, alongside the default subtle color. What makes Ninja Tables more exceptional is the Custom Schema where you can set colors for the search bar, table header, and footer separately.
Achieve more control by setting the pagination items (if you have a large table). Set the pagination position and sorting method, etc. Still not happy? Add Custom CSS to get the design as you wish.
Let’s export a table
I’ve already mentioned that Ninja Tables comes with the feature that allows exporting your tables to multiple formats. And, you don’t need to know too many technical things — it’s amazingly a simple process.
Go to Ninja Tables and navigate to the table that you want to export. Like earlier, you will see multiple tabs on the top. Select Import – Export. Then go to the Export Table from the left sidebar. Now choose CSV or JSON and click the Export button. The file will be downloaded automatically and then you can use it and reuse it according to your necessity.
And, import one, as well
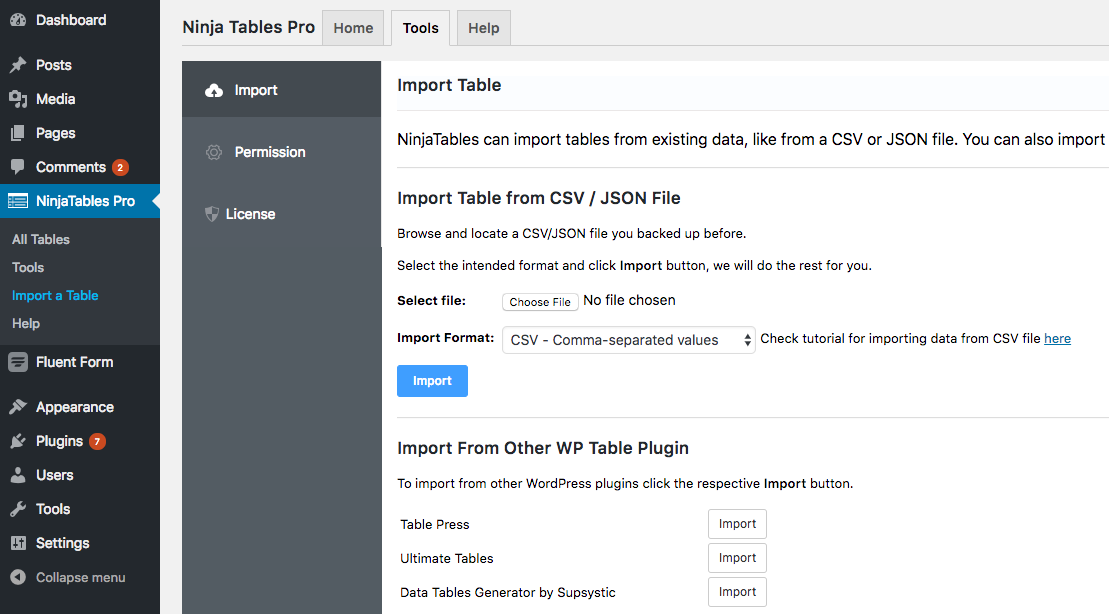
Importing a table from your locals or other platforms is fun with Ninja Tables. From the left sidebar click on the Import a Table or click on the Tools from the top. Select Choose File and take the file from your computer. Your file must be on CSV or JSON format. After choosing the file, click on the Import button.
You may need to import tables from other table builder plugins. Our Ninja Tables has the option to import tables from three plugins: TablePress, Ultimate Tables, Data Tables Generator by Supsystic.
On a quick note, to import a table to a particular table, go to the table>Import – Export>Import Table. Now choose the table from your computer which was already created with CSV format. Make sure, you follow the CSV data structure with your table and UTF-8 format with your content.
In the end
Before finishing, I’d like to say, Ninja Tables has an amazing user-centric interface and it stands out a mile from the other similar plugins. With the stunning features and mobile-ready layout, this free table builder plugin offers a better user experience. Let’s recap the highlighted features in a nutshell.
- Straightforward and intuitive look
- Easy advanced editing facility
- Many styling options
- Personalization with color
- Made for no-brainers
- Responsive breakdown for handheld devices
- Multiple formats support
- Full control over every single column
- Customizable search option
- Pagination for bigger tables
- Custom CSS can be added
Finally, I believe this article would help you to have an idea of how to create a WordPress table with Ninja Tables. I’m sure, now you have got a solid conception of creating and customizing a table for data presentation. We’re here to give you extended support. So, let’s know what questions you have in the comment section. Read the full documentation of Ninja Tables for more help.
Please don’t hesitate to get help from our support team if you ever face any problem with Ninja Tables or other WordPress plugins. WP Manage Ninja is growing every day with products to solve problems and resources to enrich your knowledge. If you have any experience related to Ninja Tables, be it good or bad, our comment section is open to sharing your opinion.
Looking for a Premium WordPress Form Builder Experience for FREE?
Try out Fluent Form now!
Do subscribe to our YouTube channel to get WordPress-related tips and tricks. Also, follow us on Twitter and Facebook.
-
10 Best TablePress Alternatives in 2026 (For Every Use Case)
TablePress works for simple tables. When you need a more -

Designing Big Data Tables: UI/UX Principles and Best Practices
Designing big data tables requires more than clean layouts. Insights -

Charts vs Tables in WordPress: When to Use Each (with Examples)
If your website handles lots of dynamic data, it’s best…
Comments
-
[…] Learn how to create a table in WordPress easily […]
-
[…] Want to know how to create a table easily? Read this post to learn more. […]
-
[…] What’s the best way to create a table in WordPress […]
-
[…] Make a table instantly with a WordPress table plugin […]
Leave a Reply
You must be logged in to post a comment.