
WooCommerce for Beginners | Kickstart Your Online Store the Right Way
After WooCommerce stepped into the market, it took all the spotlight, and it’s still shining with a promising future. This is a WooCommerce tutorial for people from all walks of life. No-brainers to creative nerds, this post is for everyone who is thriving for success.
The number of people who shop online is growing every day. And that helped to extend the idea of the eCommerce business. Whatever the options available, when it comes to choosing the right platforms, the best options are limited.
The world is revolving around WordPress. You can justify the statement if you see that WordPress is playing a role as the center of the web. For those who are curious, 43% of websites are powered by WordPress, whereas it contains a big part of the CMS market. (Source)
WooCommerce is a WordPress-based platform, and it becomes indispensable for making an online venture. From all the other competitors, WooCommerce holds the major share, and it’s becoming popular with an eccentric rate.
In this tutorial, we are going to discover all about WooCommerce: what is it, why you need it, and how you can proceed with it.
Before diving into the deep, we’ll warn you this is a long post, but it’ll be worth your time!
WooCommerce tutorial: Topics to cover

- What is WooCommerce?
- Why WooCommerce?
- What to consider
- What you can do
- Pros and Cons
- The future of WooCommerce
- Do you need it?
- How to get started?
- Adding and managing products
- Customize your store
- Improve checkout process
- Optimize user experience
- Write product descriptions
- Tools for your store
- Tips to get more attraction
- Summary
- Final Words
What is WooCommerce?
WooCommerce is a WordPress plugin for eCommerce. But it’s more than a plugin – a comprehensive platform that empowers merchants to kick-start their online ventures right away. Because of its simplicity and ease of use, the plugin gained quick popularity and made itself to the top of the industry.
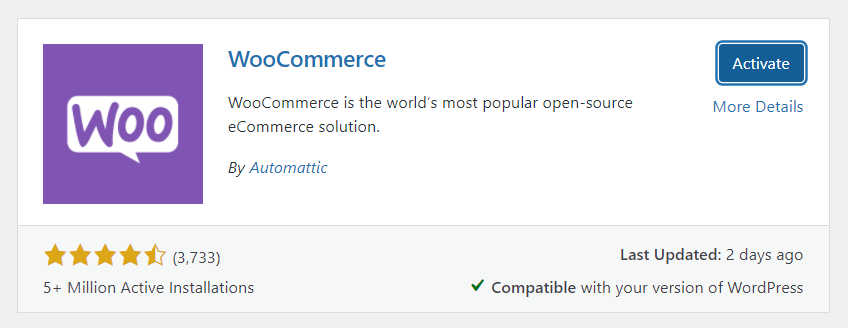
With 5+ million active installs, WooCommerce is one of the most popular plugins of all time. You can make this tool more efficient with the hundreds of plugins and add-ons made for it. The base of the software is also highly strong that covers all essential eCommerce features.
Likewise, WooCommerce is built on top of WordPress. Hence, it shares all the features that made the parent so famous. WooCommerce follows the easy customization options of WordPress. And, if you’re in search of the right opportunity to set up an online shop, WooCommerce is the ideal solution. ⬆️
Why WooCommerce?

This is a fundamental question, and although the answer is obvious, we’ll try to figure out some reasons which can fill up our rational needs. There is a ton of advantages, but we’re going to touch only the cardinal ones.
Let’s see why WooCommerce is so popular to build online ventures.
Free of Cost: The first and the most significant feature of WooCommerce is it’s free.
Open Source: WooCommerce is an open-source tool which means you can edit and modify the code at your will.
Highly Secure: Out of the question, WooCommerce is secure enough to keep your store safe and protected.
Trusted Brand: With over a million people’s trust, WooCommerce made itself one of the most trusted brands worldwide.
User-friendly: An ordinary guy can set up their store and manage it comfortably without needing a developer’s hand.
Plugins: A bunch of plugins made for WooCommerce will accompany you throughout the journey to extend the power of WooCommerce.
Custom Appearance: You can change the look of your store at any time as precisely the way you want it using a WordPress theme.
From the Popular Parent: Yes, WooCommerce is the child of the owner of WordPress — Automattic, which is a symbol of significance.
Mobile-adaptive: People love to browse from mobile devices, and WooCommerce is ready to view from any screen. ⬆️
What to consider before choosing an eCommerce platform
Many things can impact your decision when choosing a platform to build your online business. Whether it’s WordPress or not, you have to look out for the fundamental considerations mentioned below.
Cost: Learn how your plugin (or tool) costs. Different platforms have various plans based on many criteria.
Appearance: Does the plugin support your existing WordPress theme? If it acts differently, then your design may become a disaster.
Responsiveness: Is your platform mobile-friendly? Remember, a remarkable number of customers will come via mobile browsers.
Easy Customization: While managing your store, you might not be in the position of hiring a developer. Consider the ease of use of the plugin.
Search: One of the vital parts of an online store is its search option. Make sure the platform offers a robust built-in search for the shoppers.
Payment System: There are payment gateways and payment processors. Look out for maximum freedom with your chosen platform.
Shipping: Delivering the products to a customer’s address is equally important, and you have to keep a system for that with setting up the charges.
Integration: Throughout your journey, you might need to attach other services for a better customer experience. Can you integrate systems like CRM or booking?
Inventory: For physical products, this is a crucial point. If a product is out of stock, both the owner and the buyer need to know it.
Reporting: If you live in the dark about your sales and data, you can’t fix the issues and set up new plans for improvement.
Affiliate Management: To grow bigger with your business, you need to connect with affiliate marketers, and your plugin must support tracking sales and management.
Scalability: In the beginning, you might not guess the sales of products, but when it becomes enormous, can the platform handle it? ⬆️
What you can do

With WooCommerce, one can create an online store that is ready to sell products and receive payments. There’s no limitation to the range of products or services you want to sell. From clothing store to music audio, online photography course to headphone store – do whatever you want.
As you can sell anything via the online store built with WooCommerce, it’s mostly famous for selling physical products. Of course, you’ll see a lot of digital services are running on WooCommerce like reservations, appointments, subscriptions, etc. You need to configure the system, that’s it.
Above all, shops for clothes, shoes, jewelry, well WooCommerce is the shelter for these types of products. In short, we can say that the potentials of WooCommerce are unlimited. No matter you want to sell coffee or juice packs, web hosting, or digital arts, WooCommerce is the most diverse and reliable platform. ⬆️
Pros and Cons
Like any other product in the world, WooCommerce also has its advantages and disadvantages. You should at least have a quick look to know the platform you’re going to work with. The better you understand the software, the more benefits you will achieve.
Pros
- Free and open source
- Easy to manage
- No technical knowledge required
- Themes are available to modify the look
- Plugins to extend the functionality
- Analytics can help you understand your industry better
- The community is pretty big
- It updates regularly with new features
Cons
- Plugins cost money alongside annual license update
- It requires a WooCommerce-ready theme
- The official support is not enough
- Cannot use without WordPress
- Frequent updates create conflicts with other plugins
The future of WooCommerce
WooCommerce will continue to grow incessantly, and we don’t think this is just a mere prediction. The whole ecosystem tells us that this platform is the present and will be the future of the eCommerce industry. All those themes, plugins, experts, and other services prove how big the community is.
Bear in mind that, WooCommerce is the property of Automattic, the owner of WordPress. From there, we can expect more exciting changes will come in the future. Besides all, business owners can integrate WooCommerce into WordPress.com. If it happens, then a new market will open with significant potential.
On a bad day, the downloads of WooCommerce on wp.org gets down to 30-40k (which is an impossible dream for most of the plugins to achieve on their best of days!) It merely proves more people are joining the hub and the family’s getting wider. The open-source functionality welcomes the developers to contribute more.
We believe, after considering the growth and success, WooCommerce will come with more strength in the future. There’s no chance of vanishing it in recent years, at least we see none. ⬆️
Do you need it?
WooCommerce has its competitors, and they are not bad, after all. What we can say is you know your need. Based on your requirements, you can check out all the solutions and decide which one seems best for you.

As you have read the features of WooCommerce above, you know why we chose it. Now, look at everything explained here in this guide and see if they can give the answers to your question. Before doing that, note down what you want.
There are a lot of things to consider before choosing eCommerce software. It includes documentation, support, themes, add-ons, community, and resources. The more things are attached to a selected tool, the more comfortable you will feel.
Before coming to an end, keep in mind that WooCommerce holds the largest market share in WordPress reign. Surprisingly, in non-WordPress eCommerce solutions, WooCommerce also stood out of all. ⬆️
How to get started?
First off, go to your WordPress dashboard and hover over the Plugins. Click Add New from the dropdown list.
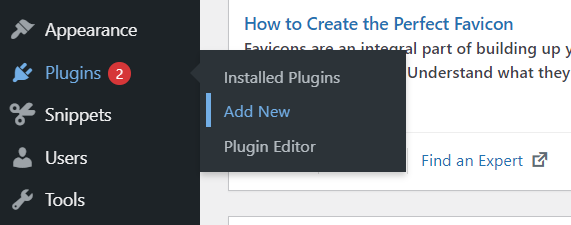
It will take you to the WordPress directory of plugins where all the amazing plugins are available for free.
Now type WooCommerce in the search box from the top right corner. By that time, you should notice that the WooCommerce plugin has appeared on the result down. Click the Install Now button.
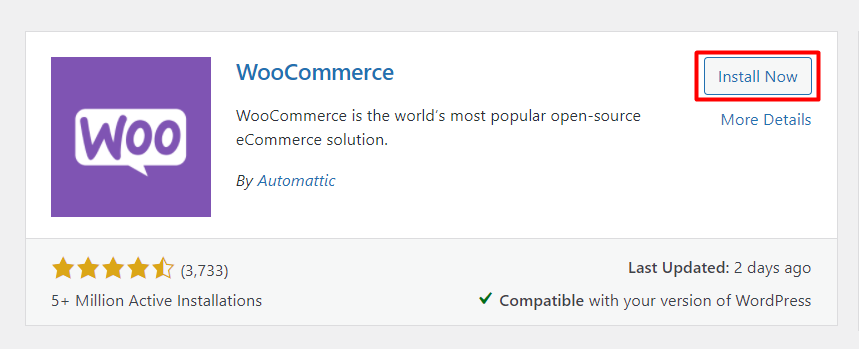
Keep patience, It may take a few seconds.
After the installation gets completed, there will be a new button that says Activate. The plugin won’t start working until the activation, so click the button, as well.
Now both the installation and activation have been completed, so move forward to the next step.
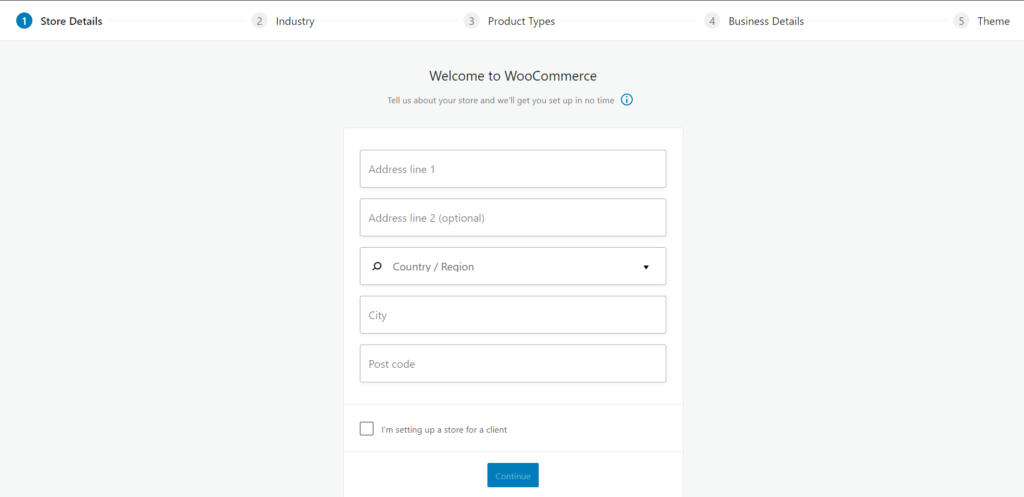
When the plugin is activated, you’ll see a form that has multiple steps, and you need to fill them out to complete the primary installation.
Start adding your store details first.
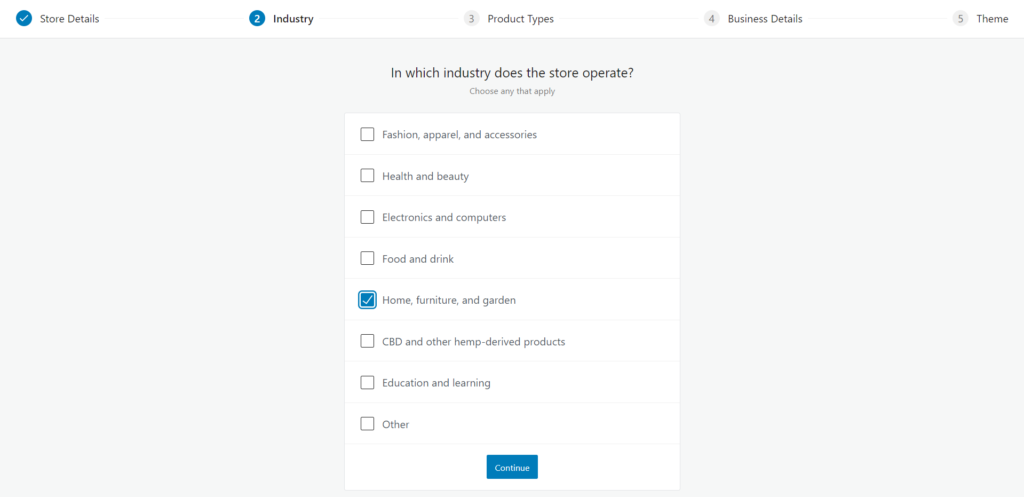
You’ll have to choose the industry then. You can select as many as you need.
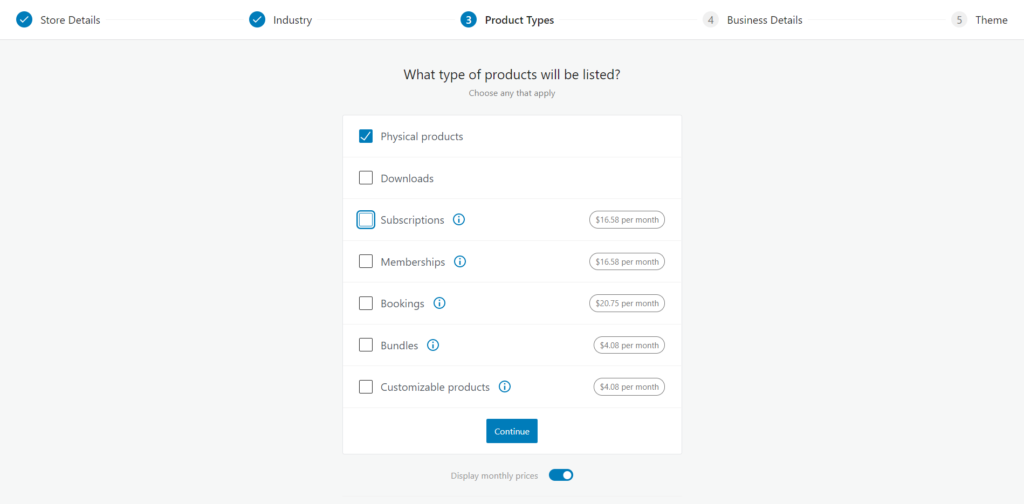
The third step for Product Types, meaning what type of products you’re going to sell in your store. For physical and digital downloads, you don’t have to pay. But if you want to sell subscriptions, memberships, and all those – you need to pay on monthly basis.
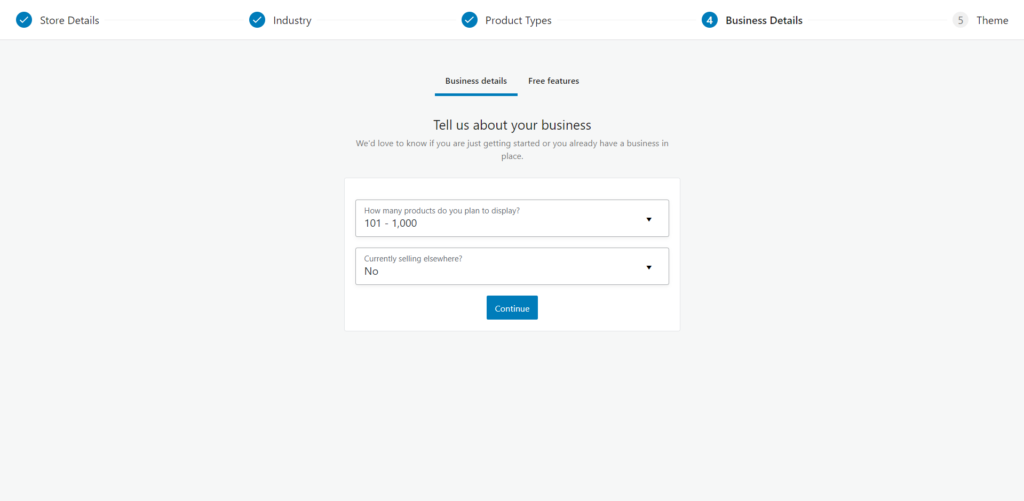
It’s time to choose your business details. Tell out things like how many products you’re going to display in your store and if you’re currently selling anywhere else.
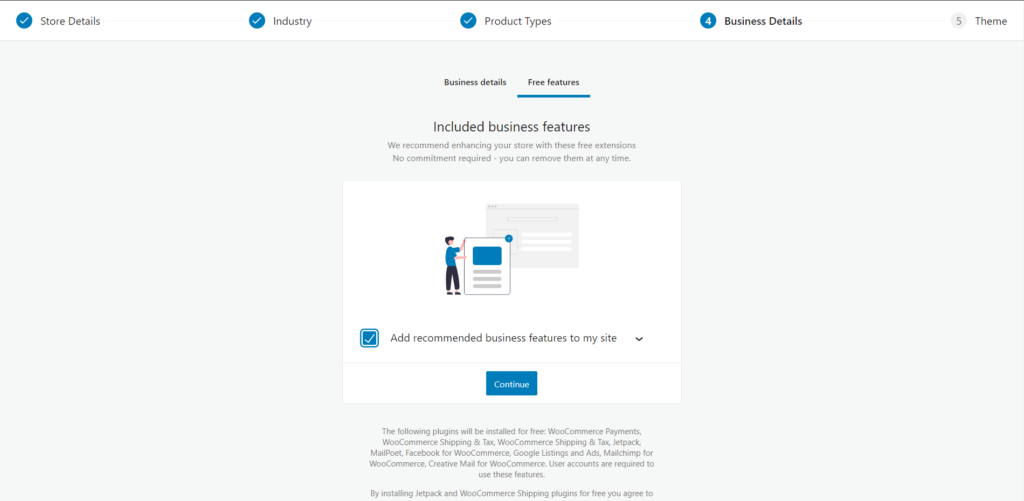
Next, there will be a free Recommended Feature addon. You can decide whether to keep it or not.
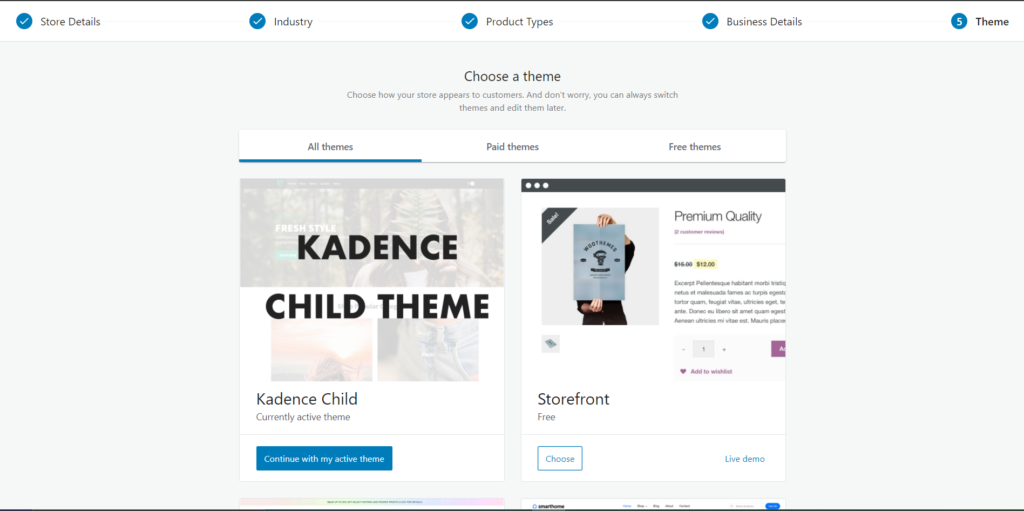
And the final step is choosing a theme. WooCommerce will show you a list of paid and free themes. You can choose one if you like, or click the Continue with my active theme button to keep your current theme.
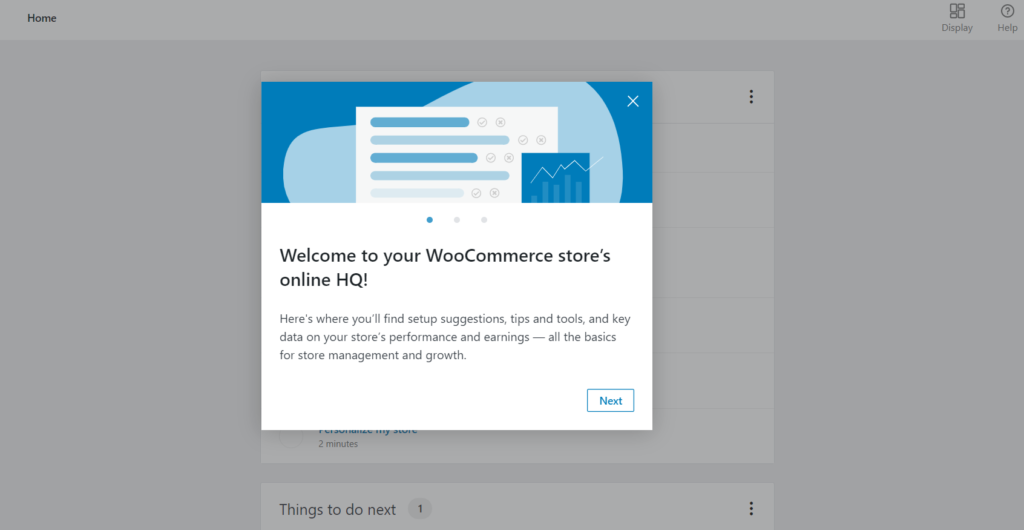
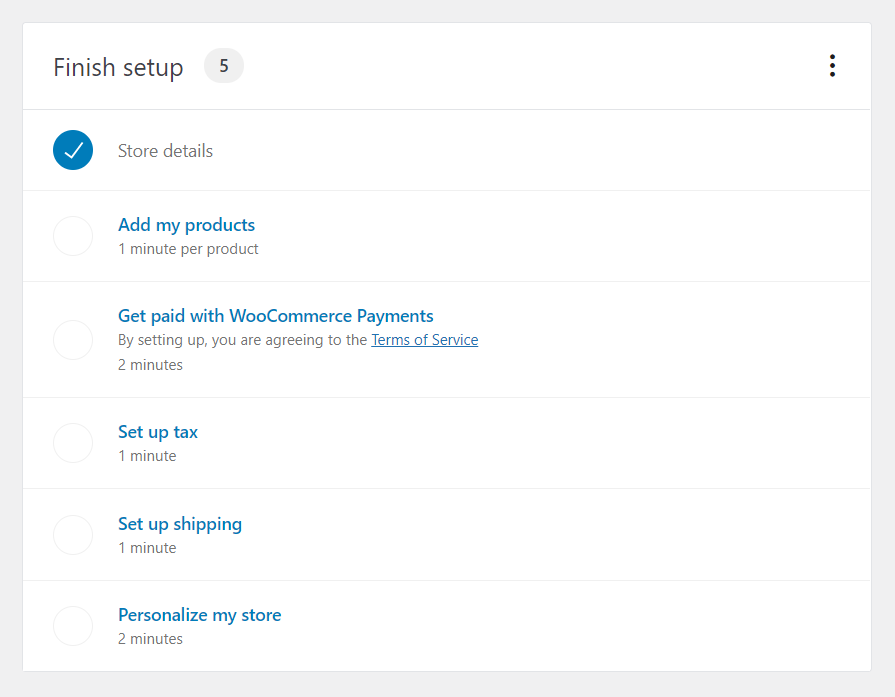
After that WooCommerce will try to connect Jetpack and pull you outside your website. Nothing to worry though. Come back to your WordPress dashboard and go to WooCommerce. You’ll be prompted to this screen.
Similarly, there will appear two new tabs on the WordPress dashboard: WooCommerce and Products. Technically speaking, WooCommerce is the place from where you’ll control everything – orders, payments, and all.
However, you can do a ton of other things on this tab, such as creating new coupons, monitoring the reports, and modifying the settings.
Now come to the second tab. Under the Products tab, you will add your products and organize them based on various categories.
To start with WooCommerce, fill out the form below with the information asked in six categories. Follow this post to know how to start a WooCommerce store from zero.
- Store setup
- Payment
- Shipping
- Recommended
- Activate
- Ready! ⬆️
Step 1 – Store setup: Store location, address, and currency
As you have completed the store details at the beginning, it shows as complete. Alternatively, you can update it anytime by clicking there.
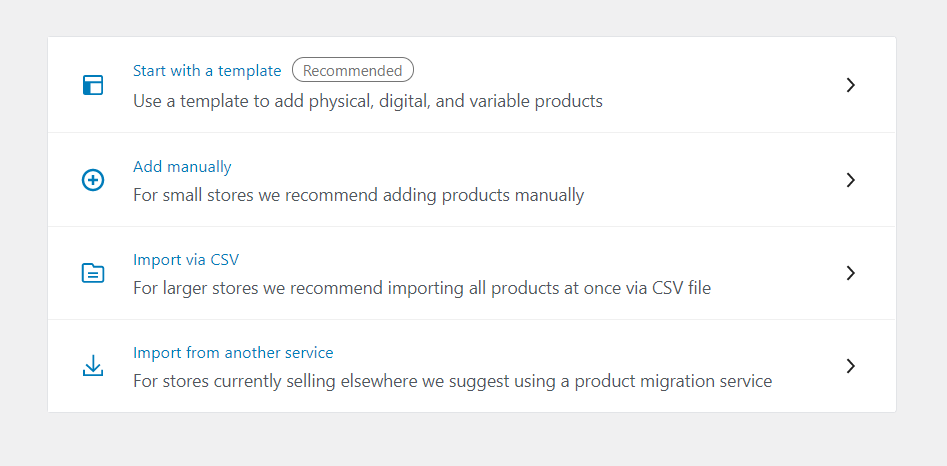
Add products
The next step is adding products. Click Add my products, and it will bring you here. Start with a template to add products easily.
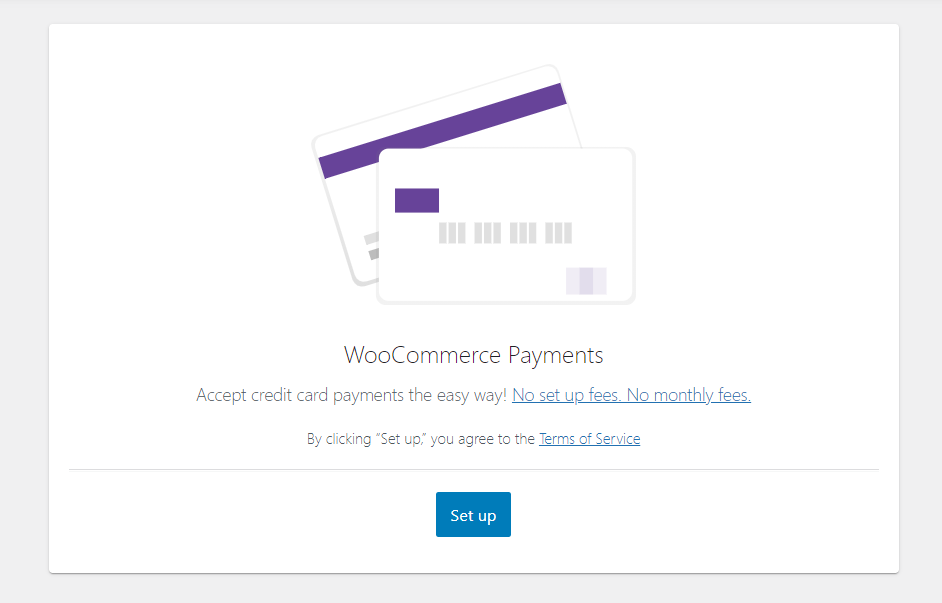
Step 2 – Setting up the payment methods
This is where you’re going to set up your favorite payment methods. Currently, there are three methods available for payment: Stripe, PayPal, and offline. Stripe and PayPal both have their separate benefits and minuses. Read our article to know more about Stripe vs. PayPal – who’s the winner?
If you plan to collect offline payments, activate this option, and it will come with multiple choices.
Cheque payments: Accept bank cheques as a method of payment while customers are choosing offline payments.
Bank Transfer (BACS) payments: You should activate this option for accepting BACS payments.
Cash on delivery: It’s a simple option that allows customers to pay after receiving the products.
After turning on one or more methods, click the Continue button to proceed to the next step. ⬆️
Step 3 – Setting up the shipping details
After deciding the payment methods, it’s time to jump into the next important part: configuring the way of delivering the products.
WooCommerce, by default, divided the Shipping Zones into two parts – one for the UK only and the other for the rest of the world.
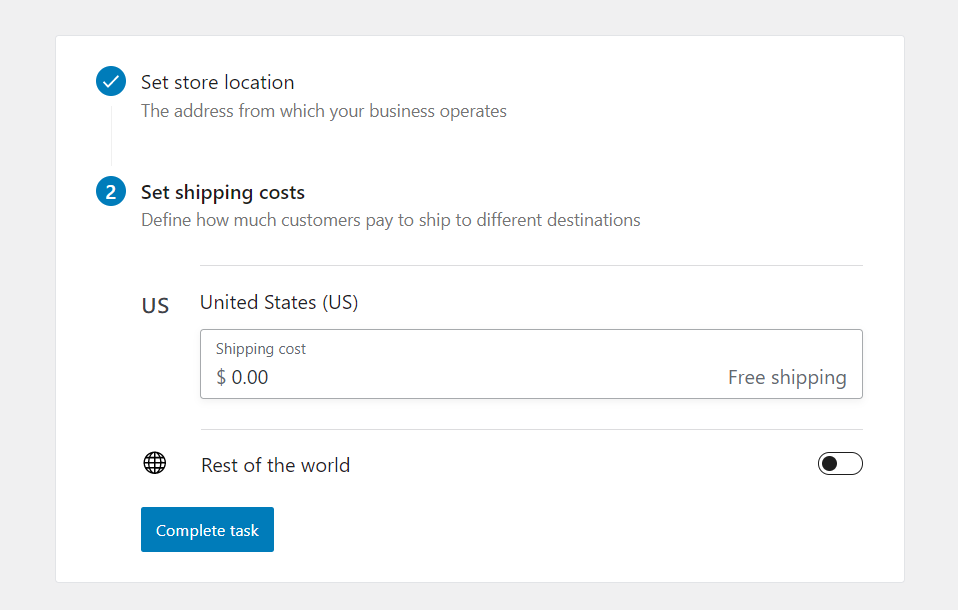
No matter which location you’re choosing, select Flat Rate with a fixed cost or Free Shipping.
You can also choose from Kilograms, Grams, Pounds, and Ounces for weight measurement. And select Meters, Centimeters, Millimeters, Inches, and Yards for product dimensions. ⬆️
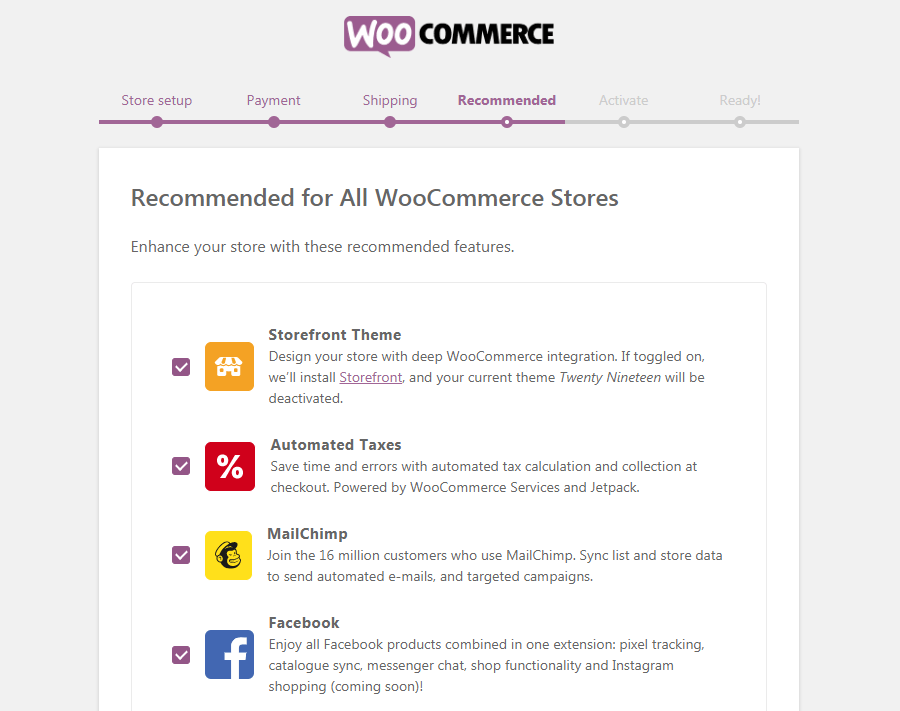
Step 4 – WooCommerce recommendations
The next step is optional, yet it might need your attention to follow through. These are the recommendations made by WooCommerce and the plugins and themes you find there can improve your user experience.
Step 5 – Activate Jetpack (optional)
In addition to the recommended products, this particular section will ask you to activate Jetpack, one of the most trusted plugins. Well, if you’re already a WordPress user, there’s a chance that you have this plugin installed on your website.
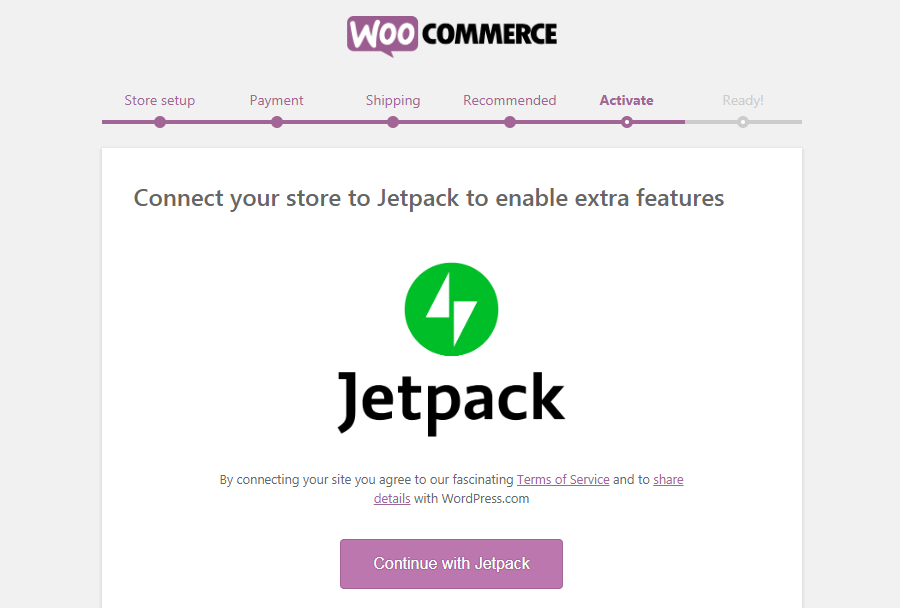
Jetpack has a variety of functions like providing security to your store, getting store stats, store monitoring, and promotions. You can skip this step anyway. ⬆️
Step 6 – You’re good to go!
If you followed the steps correctly, you’d be now on this page. Here you’ll see some of the additional links to learn and customize your store. You can also enter your email address in the top subscription box.
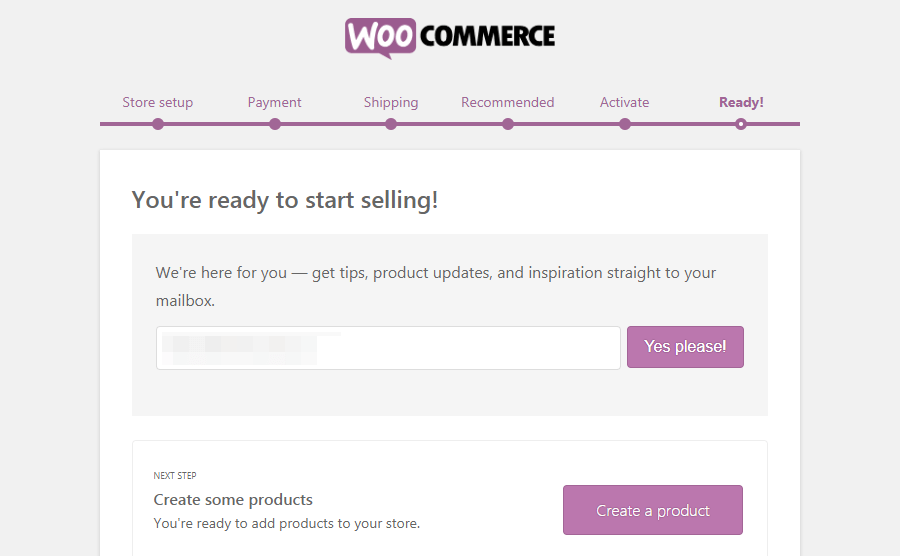
Here the basic WooCommerce plugin tutorial setup ends.
As you have embarked on the new journey, now you have to carry it on. What you need to do is start adding products to your shop so that it becomes a great place for the customers.
We’re not breaking down the cost of starting with WooCommerce and creating a new business. Here’s an article that discusses the estimation of the cost and you can get a basic idea from there.
To know how to add products read the next section. Hold tight! ⬆️
How to add and manage products
We hope you have already installed and configured the WooCommerce plugin successfully. Otherwise, if you didn’t complete the setup, nothing to worry about. You can always have a chance to fill out them later from the dashboard.
Now, look at the most significant part of the plugin: the presentation of your store. It’s evenly essential to beautify the store since customers can’t have a chance to check out the product physically.
You have to take the initiative to convince the customers of the feel of the product visually. To achieve that you need to provide some good product pictures along with a brief description that tells about the item. ⬆️
Step A – Add content for the products
We’ll now walk you through the process of adding your first product to your store. Go to the Products tab from your WP dashboard and click on the Add New button.
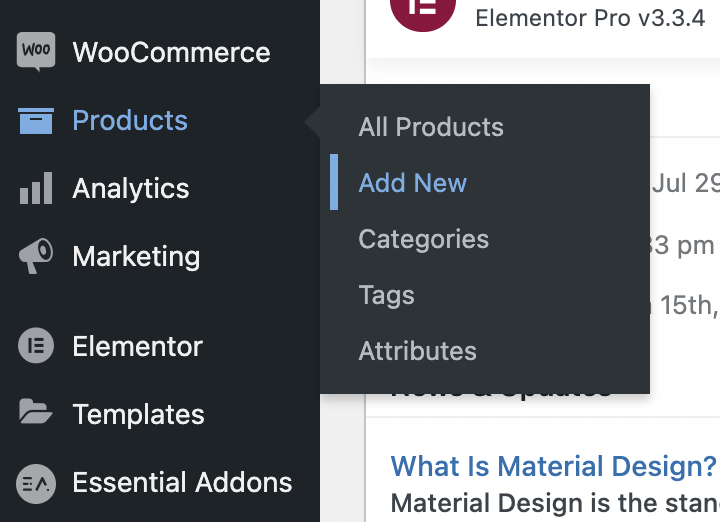
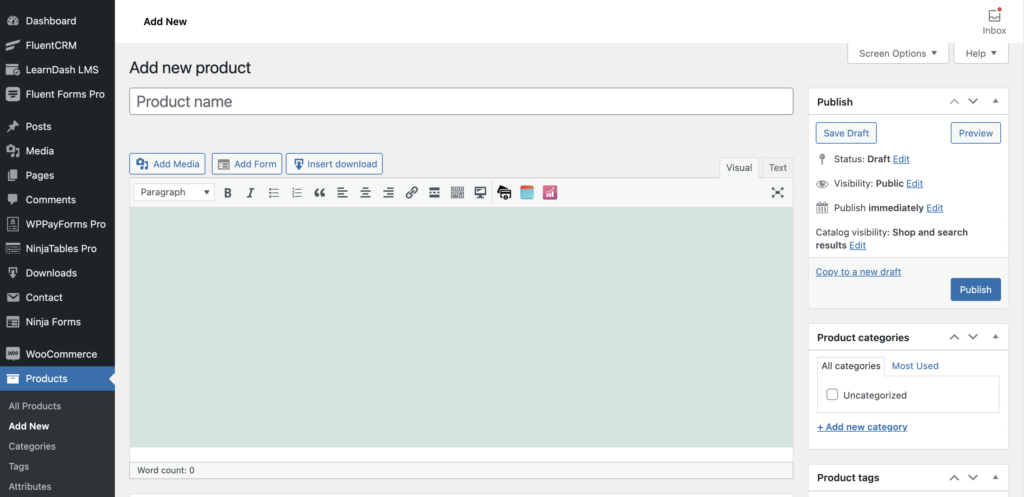
It will take you to the Add New Product page, a similar interface to the WordPress Post page.
This particular page has three distinct parts to add the contents.
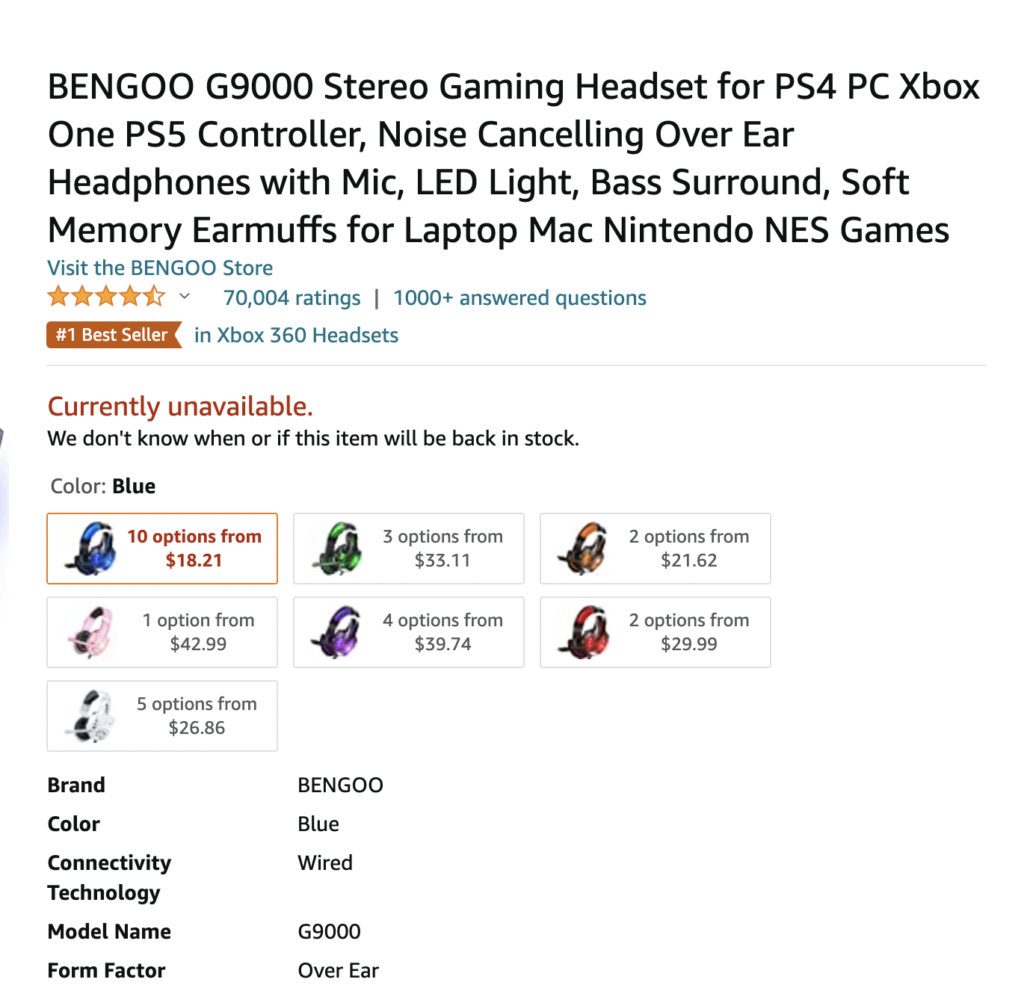
The first and crucial part is the product title. Don’t just leave it with the simple product name. You can add some short features to it, like size and color.
Have you noticed how Amazon displays the title?
Next comes the body where you’re going to put out the main attraction. When writing in this part, be clear and as descriptive as possible. People need to know more about the product’s features, such as its weight, structures, and other mentionable things.
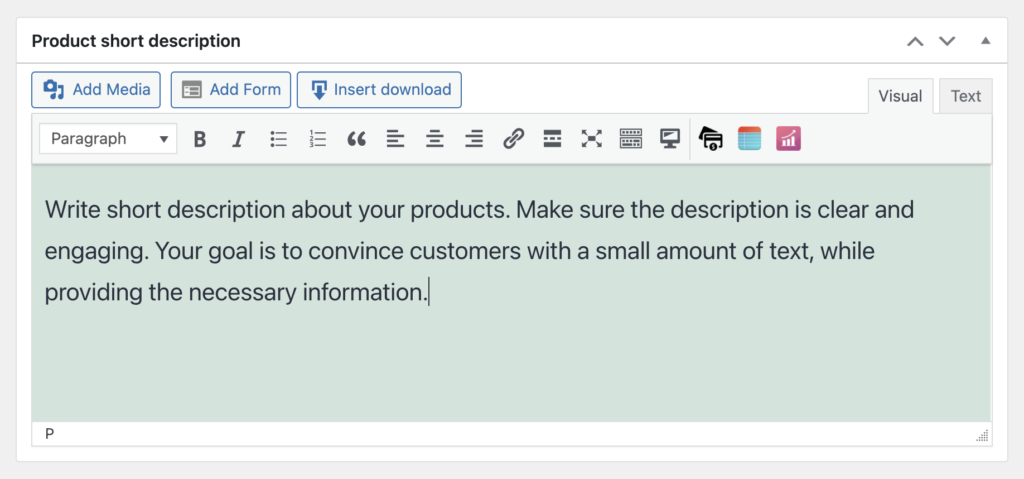
There’s a short description section at the bottom. You shouldn’t leave it blank because this text will appear after the title and it’s evenly important.
Now come to the section that exists in the middle. Here, you will provide all the information about the products. First, mention the price. Want to show it in your favorite currency? Go to the setting in WooCommerce and change the currency from Currency options under the General tab. ⬆️
Step B – How to setup product category
When you make plans for your eCommerce store, it’s the best practice to write down the product categories. This way, you can cover all the categories you intend to add to your shop and miss no one.
Go to the Products tab from the left panel and click Categories.
Name: Write the name of your category
Slug: The URL of the category (if you leave blank then the category name will be added as the slug)
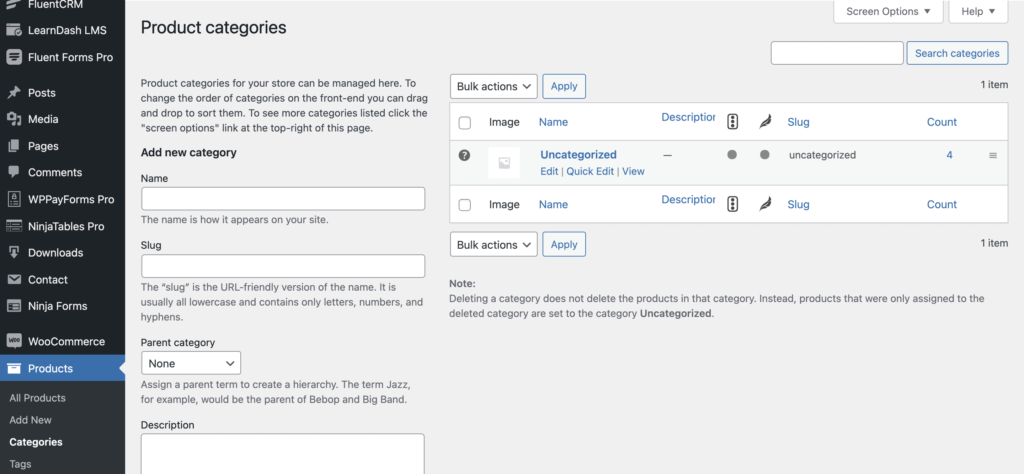
Parent category: If you want to create any sub-category, then choose a category first from the list. For instance, Men’s fashion is a category, and Men’s T-Shirt is a subcategory.
Description: Shortly describe what’s your category about (it’s usually for search engines)
Thumbnail: A small image that appears on the category list which reflects the nature of products (not necessary but it helps your managers)
Add new category: Click this button finally, and you’re done ⬆️
Step C – Add featured image and gallery
The best way to give your users the feel of the products is by showing them some visuals. In that case, adding high-quality and more explicit images is a fantastic thing to convince them.
While adding a product, click Set product image under Product image from the right sidebar. After adding the featured image, you can add more images to create a gallery that will look more convincing.
Step D – Customize product type and relevant information
In the previous steps, we have discussed how to add product-related content, how to add a new category and the process of adding images. It’s time to update product information that will help users find the right thing they’re looking for.
Right below the main body of the product description, you can add loads of information that mirror the original product.
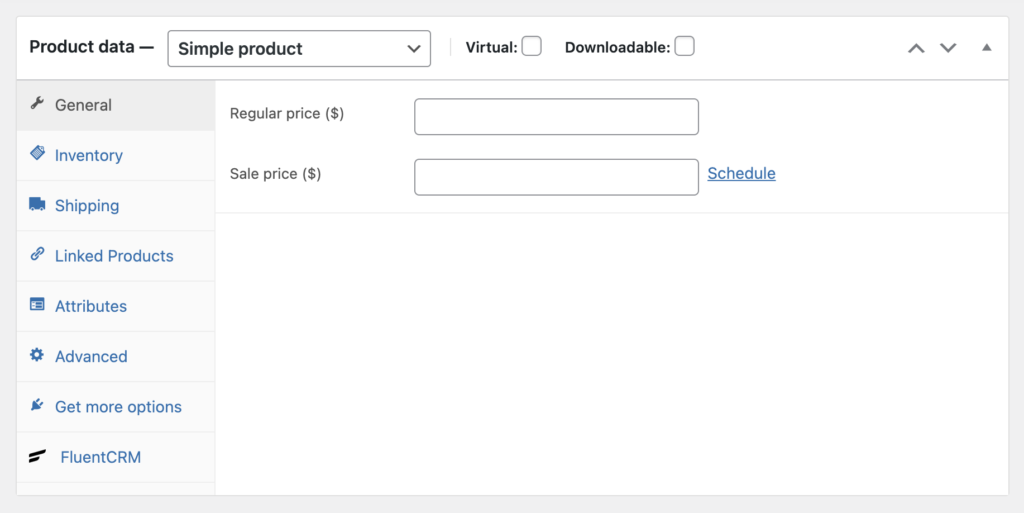
i. Simple product: It’s a product that you are going to sell in your store. In this section, you can add its price and stock information.
ii. Grouped product: This is a collection of simple products.
iii. External/Affiliate product: You will choose this option if you’re not the original creator of the product. In other words, you’re selling it as a third-party or affiliate. When people click on the relevant links, they will get redirected to the actual store.
iv: Variable product: If you sell other variations of a particular product like shoes of different sizes. However, a simple product is the right selection for beginners. You can always explore more in your journey. ⬆️
Step E – Setting price, stock, and shipping
In WooCommerce, you have two options while setting up the product price. The first one is the original price which can also be known as the regular or standard price. The other price is to set a discount price on a specific product.
Of course, you can set the sale price for a particular day(s). Once you set the main price, you can schedule a discount price for a limited time. Giving you an example, the regular price of a product is $100. You can set 20% off only for today.
To manage the inventory, first, define the SKU, which is a short form of Stock Keeping Unit. It’s a unique identifier that refers to the amount of stock for the products you keep in your store.
The next part is setting the status of the stock, which comes in three phases: In Stock, Out of Stock, and On Backorder.
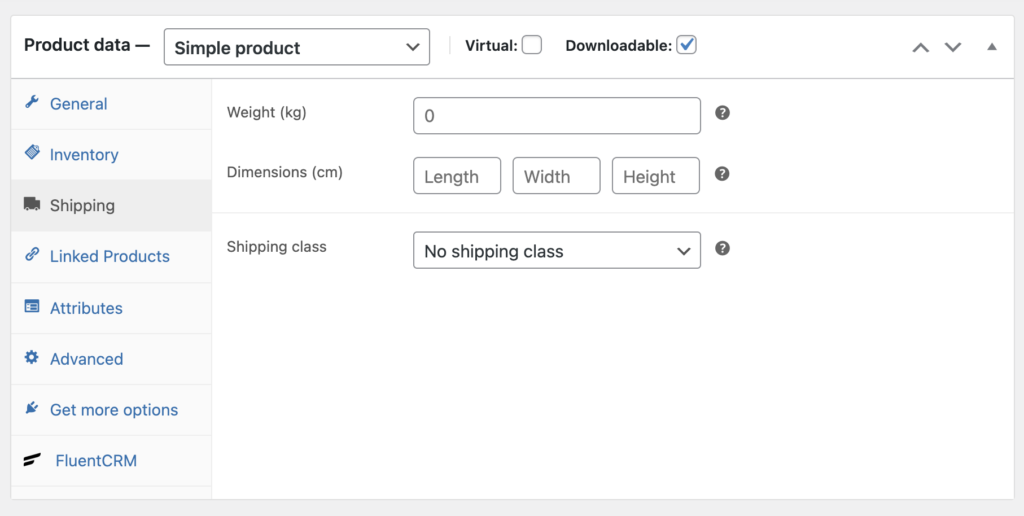
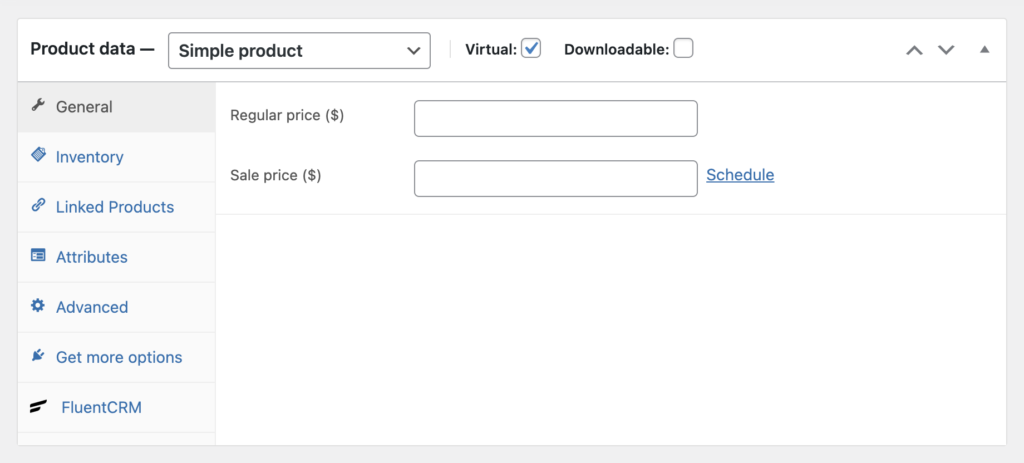
Let’s fill out the next section (Shipping) with the weight and dimensions of the product. If your product is intangible and has no physical attribute, then select the Virtual option from the top boxes. The shipping tab will disappear afterward. ⬆️
Step F – Setting upsells and cross-sells
WooCommerce will also allow you to set a product for upsells or cross-sells. What are they?
Upsell: This is an incredible sales technique to boost your revenue because you’re suggesting the related products via upsells. You can promote more profitable products to get attention from your customers.
Cross-sell: The objective of the Cross-sell is to offer complementary products during the checkout. You heard it right. When people go to the cart to check out the Cross-sell allows them to see more products to insert into the cart. ⬆️
How to customize the store

You have known earlier in this post how to configure a WooCommerce store. Although the discussion was elaborate, there are a ton of other options to personalize. And, you will get all of them in the WooCommerce tab.
Here, you can play with a myriad of features from viewing orders and reports to setting coupons and discounts. We’ll try not to reiterate the process we have explained before. Hence, we’ll focus only on those aspects left untouched. ⬆️
Orders
From all the dropdown items, Orders come first. It indicates how many purchases are occurring in your store.
If you sell digital products such as plugins or downloadable files, there’s nothing to do here. You can only view then how many copies have been downloaded and how much you have earned.
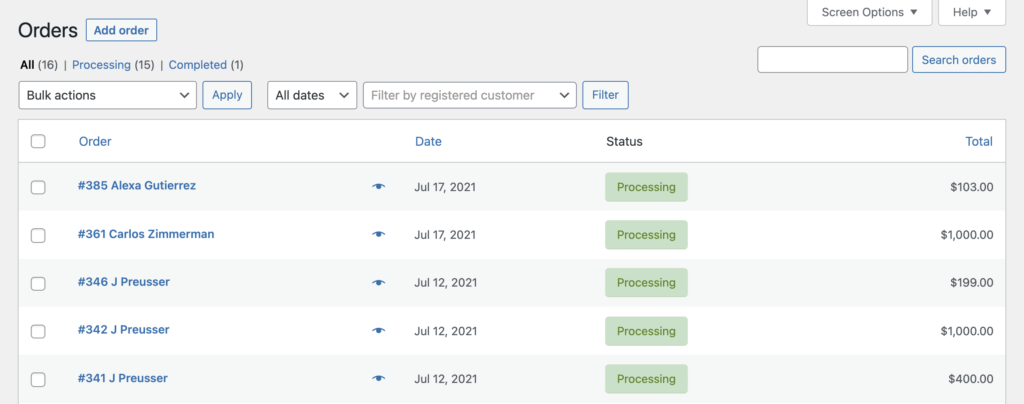
On the other hand, if your store offers physical goods, then you have things to do here. One important thing, first of all, you have to ship that product.
Also, you can see the status of your order as completed, processing, and many more. ⬆️
Coupons
You can add coupons to encourage your customers to purchase from your shop. WooCommerce has several useful options for adding new coupons. First, go to WooCommerce > Settings > General > Enable coupons. Now locate Marketing from the left-side panel and visit Coupons. Now click the tab that reads Create your first coupon to access the editing screen:
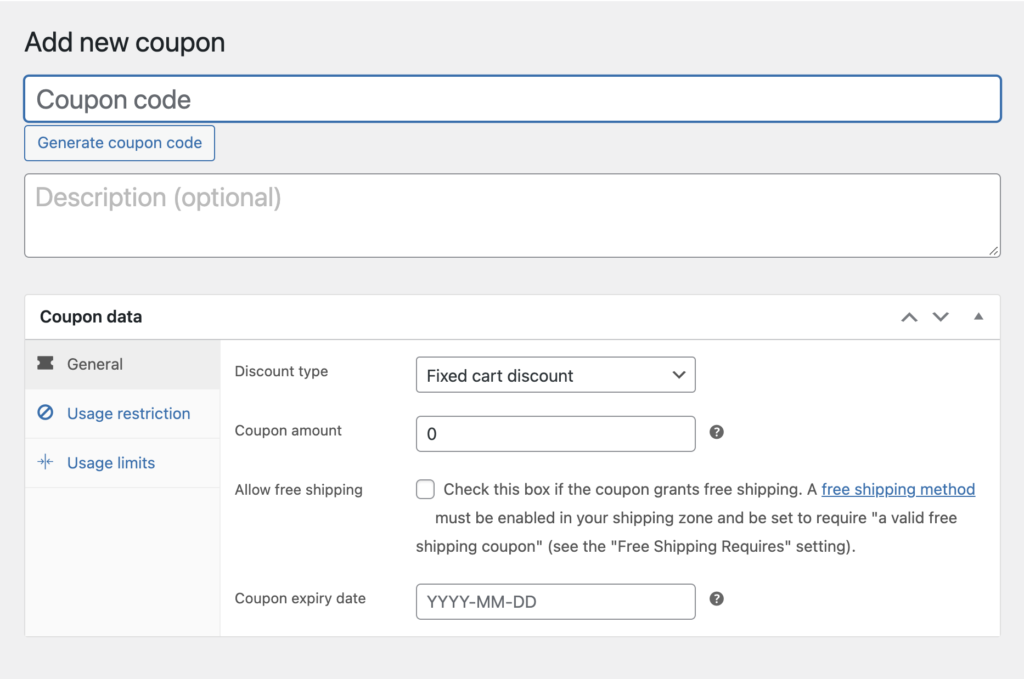
Add a discount code and description to activate the coupon. Next, you can edit the basic information of the coupons. First, select the Discount type, such as percentage discount, fixed cart discount, or fixed product discount.
What’s the coupon’s value, free shipping or not, coupon expiry date – you can also add this information here.
Usage Restrictions come next with other corresponding settings. You can bind your customers to spend a minimum or a maximum value to get the coupon validated. If you don’t want to make this coupon connected with others, check the box that reads Individual use only.
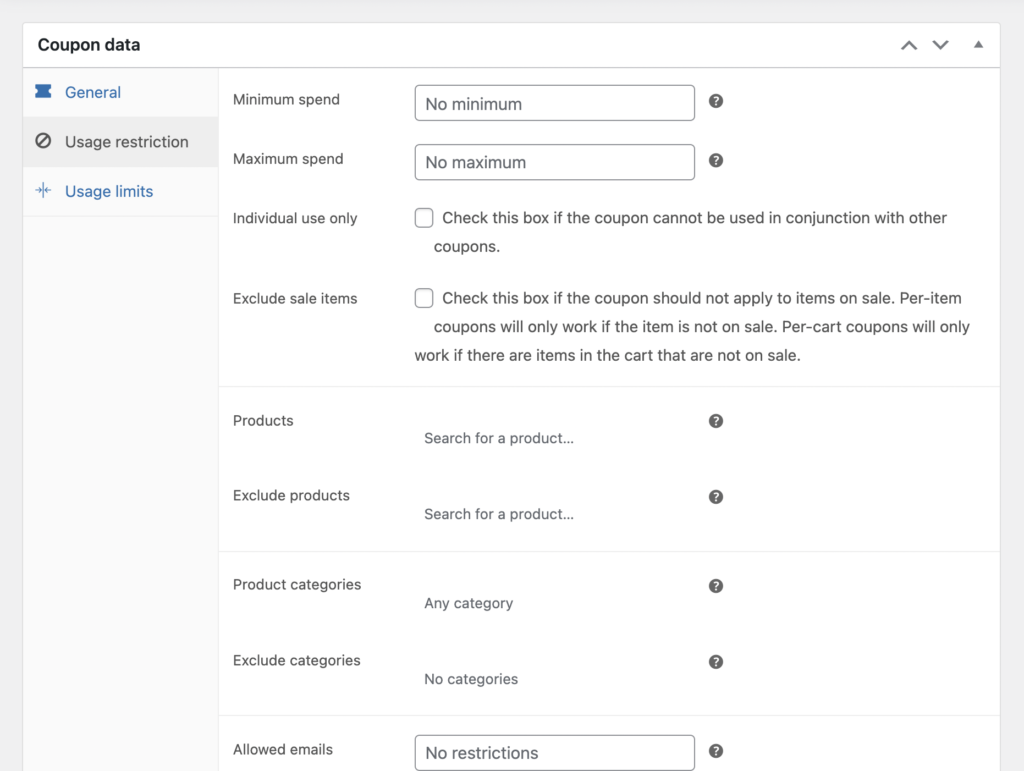
If you check Exclude sale items, then Coupon will not work on the items that are on sale. Coupons will work only if the items are not on sale.
Furthermore, you can apply coupons to particular products as well as you can eliminate some products from the list.
Additionally, you can rule out coupons to specific Product categories and exclude some categories, as well.
Lastly, you can proscribe some email addresses from using the coupon codes. Other than specifying the addresses, you are allowed to apply the extension, such as “gmail.com.”
Usage limits, the last tab of the Coupons section, allow you to set the usage limit per coupon and per customer. You can keep it as the default Unlimited usage if you don’t think otherwise.
Now, hit the publish button from the right side and make the coupon active. It’s time to let the customers know about the exciting offers they should try. Use a promotional strategy to spread the word. ⬆️
Reports
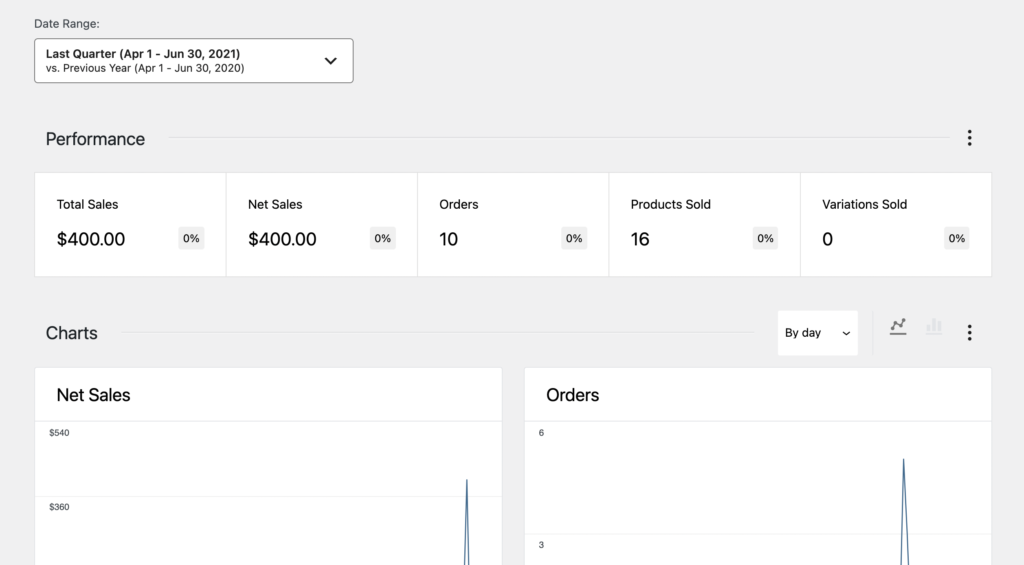
You can see a full-range report on your sales as WooCommerce enables you to do that. The built-in tracking system will organize the reports from different angles. Going in the Reports tab, you can view a lot of details presented with charts and graphs.
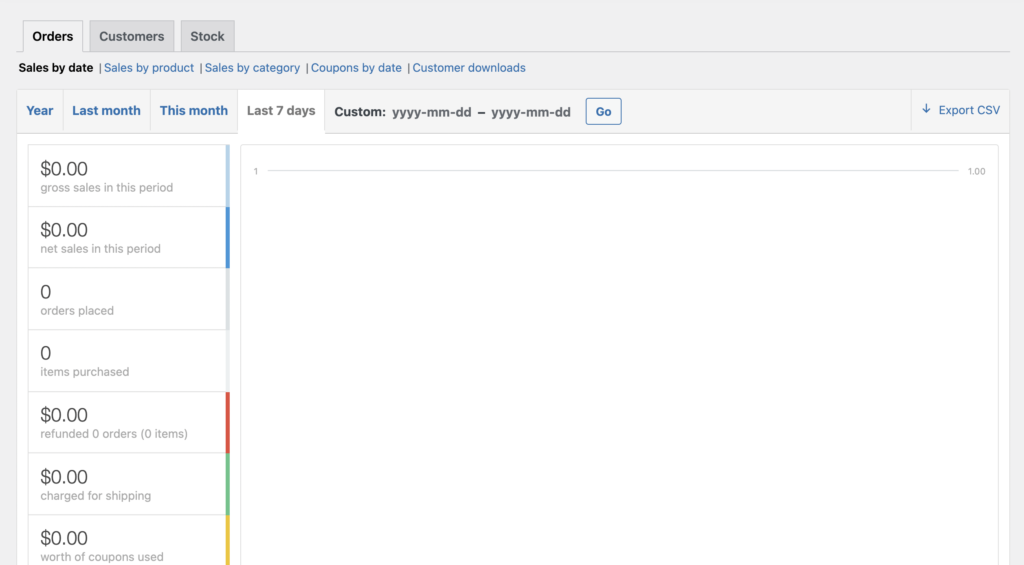
Besides seeing the reports for the last seven days, current month, last month, or the full year, you can also export the CSV file for further offline analysis. In addition to the time-wise segmentation, there are other categories based on sales. All the transactions are also divided by date, product, category, coupons, and downloads.
The Customers sub-tab is to help you understand customers’ behaviors over that particular time duration.
Finally, you can check out the inventory via the Stock report. This sub-tab will exhibit your products with three different signals: Low in stock, Out of stock, and Most stocked. ⬆️
Settings
The subsequent tab is in Settings, and we’re not going to talk about it here because we have already discussed it in the beginning. For your reference, you can follow this link to recap the settings once again.
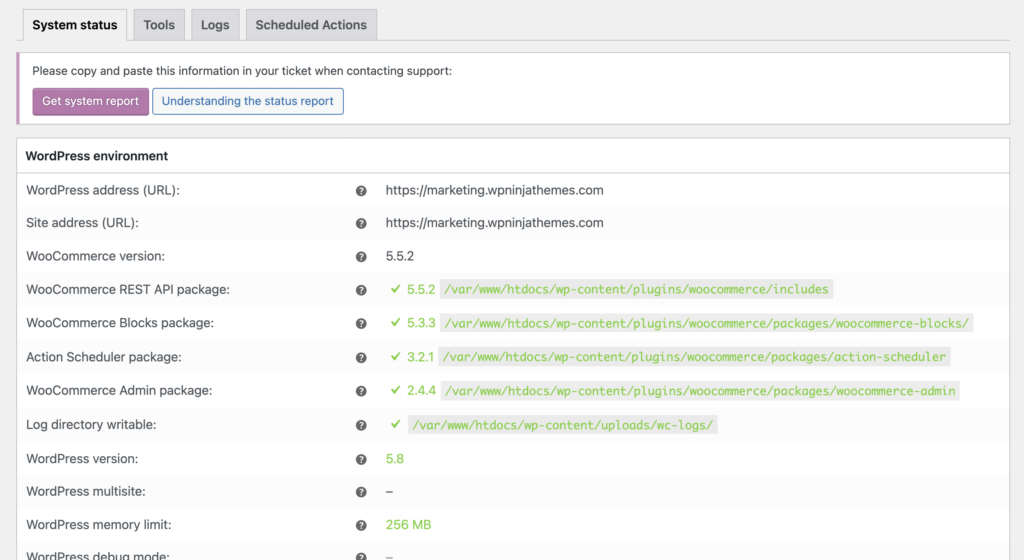
Status
We’re in the Status section now. Have a quick look at this part. It’s the place where you can see all the back-end information on your website: site address, WooCommerce version, language, server info, and lots more.
It is a developer thing and better if you ignore it for now. They need to know about this information if they’re ever entitled to make any change to your store.
The Tools button comes next with a lot of options that will clear your site. By clicking the respective buttons, you will be able to clear the caches based on different variables.
Similarly, you can create default WooCommerce pages, update the database, and reset everything.
Then comes the Logs tab which is responsible for keeping the records of all logs occurring in your store. Sometimes your site may experience a fatal error, and you can see the record in this tab. While debugging, developers can get help from the records.
Don’t worry about the next tab, which says Scheduled actions. It’s for developers and it provides background processing solutions. As there’s nothing to bother right now, we’re moving to the next step. ⬆️
Extensions
WordPress was able to build up its colossal reign because of the contribution made by the community involved with this famous CMS. You can add thousands of functionality to your website from tons of WordPress themes and plugins.
Most of these plugins and themes are user-generated, and you can access them whenever you need them. Both free and premium versions are available in the market. It depends on your need, whether to go for paid or free option.
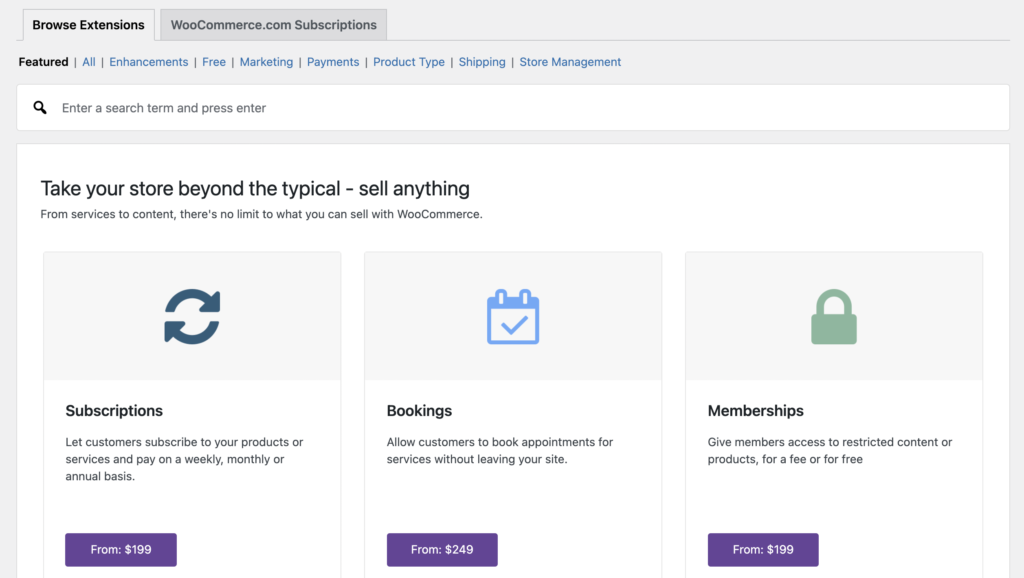
Since WooCommerce is based on WordPress, the benefits of plugins and themes can be applied here, as well. Although on a small scale, the tools built for WooCommerce have a significant impact on making the platform extendable.
In the Extensions tab, you can find tools suggested by WooCommerce to take your store to another level. By the way, there are no bindings to use only. You can install plugins at your will from the Plugins of your WordPress dashboard.
Paymattic is essentially a Stripe payment plugin that is ready to make the payment system smoother for your WordPress shops. With the free version, you can enjoy the Stripe service, whereas the premium option will allow you to integrate PayPal, Payrexx, Paystack, Razorpay, Mollie, etc. as well. ⬆️
Moreover, there is also advanced features like instant course enrollment on payment success, paid tickets, LMS integrations with powerful tools like LifterLMS, LearnDash, Tutor LMS.
Improve the checkout process to earn a better conversion
The checkout process is a vital part of any eCommerce shop, and it’s not easy to set it up for the maximum benefit. All customers don’t have the same expectation, so it requires time to figure out what they want. But wait, you’re not in the dark:
Based on data and stats, experts have their effective suggestions, and you can follow them as best practices. Later, you can optimize them to fulfill the needs of YOUR customer.
- Try to provide the best product in your industry
- Keep the process as short as possible
- Avoid anything unfavorable for customers
An excellent checkout process is simple
Customers spend their time inspecting the products, and then there you are to welcome them to accomplish the purchase. Wait. What? They just left! Yeah, we knew…
Creating a complicated way of making the payment has a significant impact on losing potential customers. A checkout system that constitutes multiple steps dissuades users not to making the payment. Thus, the rate of abandoned carts gets high.
Make the endeavor as painless as possible to ensure an excellent customer experience. Ask for the essential information that you genuinely require and eliminate what you don’t need. If the form is one step, finish it within a short page.
Similarly, don’t add too many stages if it’s multi-step. Don’t forget that you’ll need to present the form in a way that doesn’t irritate users. To understand the difference between multi-step and one-step forms, read the guide just linked. ⬆️
Are you forcing users to register or login?
Don’t do that. If users deter from purchasing because of the registration, then it’s really detrimental for your business. If you force people to register before buying anything then might go to another shop that allows shopping without compulsory registration.
During the checkout process, you’ll collect all related information from customers. Don’t bother them with a superfluous form to register with your site. Instead, keep an option for email opt-out so they can subscribe to get news from your site.
Multiple payment methods
Without being an expert, it’s easy to understand that the more options you can offer the more customer will convert. Therefore, multiple payment methods must appeal to more visitors as each one has their preferences.
They might want to pay with a card they love:
PayPal, credit card, MasterCard, Visa, or even an online payment method. WooCommerce allows a ton of payment options, and you need to activate them all. There are also payment plugins that have additional benefits alongside giving you the power of incorporating several options to pay.
We suggest you read our guide on how Stripe differentiates from PayPal. ⬆️
How to reduce shopping cart abandonment
In your eCommerce journey, you’ll find out once that people are leaving carts without paying after they have added their chosen product. You’ll get surprised why would people do that? Read our post on why the abandoned cart is happening and how to handle them. Honestly, there are many reasons behind the cart abandonment, and here, we’re describing them briefly:
Slow site: The loading speed of your website is a cardinal fact that directly impacts on user’s decision. Customers want to finish the purchase as fast as it’s possible. So, your slow website will prevent them from completing the shopping.
Long form: The easier, the better. Filling out pages after pages isn’t a pleasant experience for people. A big chance is they turn the page to save them from wasting their time.
Hidden cost: One price is placed beside the product. Customers know what to pay, but then they discovered an additional charge which wasn’t explicit before. It may annoy them enough not to proceed with the payment.
Insecurity: As a customer, it’s obvious to be concerned about the details they put in your form – their card details and personal information. If they doubt the security and see a weaker policy or no policy at all, they will go away.
Let’s check out how we can reduce shopping cart abandonment to increase sales. We won’t discuss it elaborately here as there’s a dedicated post on this topic only.
- Improve the quality of your site, especially the speed.
- Keep the checkout process as simple as possible with fewer steps.
- Multiple payment methods can hold some customers from going away.
- Plan and implement an excellent strategy for security.
- Add a policy that explains how your site reacts to your customer.
- If you want to include a registration page, keep it optional, and offer it after the checkout.
- Avoid keeping any price hidden. Display all of them as clearly as possible.
- Customers love incentives. So, offer a coupon or free shipping or a discount.
It’s impossible to stop cart abandonment completely. What you can do instead is reduce the rate by a considerable percentage. Understanding the reasons why people are leaving the cart in the middle can give you some hints to find the answer.
But since reducing cart abandonment is difficult, a plugin like CartFlows Cart Abandonment Recovery can help by automating the essential steps in recovering abandoned carts with little effort! From the tips stated above and using your knowledge, you can initiate an effective solution for your WooCommerce store. ⬆️
Think before offering a discount
Discount is tempting, so there’s a great chance of high conversion. Again, we’ll tell you to think about the discount before applying it. Your loyal customers will receive more reasons to stay while they get such lucrative offers. Then, there are downsides to this method, as well.
You have to consider before running a special offer: the size and age of your business alongside the conversion ratio. If the growth of your business is satisfactory, save the discount tactic for the future. Remember, lavishly offering a discount can cause you a negative attitude to your products.
But if you think of offering discounts in your store just make sure you choose the right discount plugin for WooCommerce that can help you offer multiple dynamic pricing discounts. Your loyal customers are crucial for your sales, so acknowledge their loyalty by offering rewards using the WooCommerce loyalty points plugin and watch them grow your customer base through WOM.
Try to focus on a growing customer base to get more natural sales as rewards. For new businesses, there are other techniques to follow. Make sure you have thorough communication with your customer. Next, high-end products and comparatively low prices will help attract more potential customers.
Improving user experience means a lot for a WooCommerce store
From the evolution of websites and industry trends, it’s imminent that the user experience of a website is the most significant matter. A great user experience ensures easy navigation as well as painless, smooth scrolling around your entire website.
Make it visible for the users of the place where they are. Let them choose the products and make the purchase with no hassle. Your competitors are continuously improving their websites while you’re sitting idle. If you want to beat them, closely look at what they’re doing and how they’re improving gradually.
To save your online store from disaster, focus on the UX, and thank us later. Here we’re suggesting a few takeaways that you can implement to achieve an incredible impact. ⬆️
Keep your site visually stunning
It’s simple. Let us give you a real-world example. There’s a shop which has a broken signboard, one or two lightbulbs are not working, from the outside the shop looks pale. Would you love to enter that shop? Even if it sells some extraordinary products it has failed to convince you to give it a try, at least.
Think about your eCommerce shop now which sells darn good products but you don’t want to optimize the look. Because you think people can’t resist. Well, my friend, you’re wrong. If they don’t love it at first sight, they will never love it at all.
Remember, people come here to buy things, so you need to impress them with all the possible ways. Who doesn’t agree that astonishing visuals have a powerful effect on the user’s mind? We’re not asking you to make the site unnecessarily colorful which might run users away.
While choosing product images, focus on the quality as if it can create visual appeal, customers can’t resist. Adding persuasive buttons and engaging colors can turn more audience into customers. Overall, users love to spend time on a site that looks enthralling and meets their needs. ⬆️
Let customers find products
You want to see an inundation in the sale at the end of the day. To persuade users to make the purchase, let them find products without any obstruction. That’s why when you make a decision on the store interface, keep the customer’s desire for flexibility in mind.
Utilize your designers’ and developers’ best knowledge to make your store easy to navigate. The ultimate goal is to find the product quickly. Organize the product pages, navigation, and filtering option in a way that determines the ease of access.
While building this design, put importance on the buyer’s persona. Think from a customer’s point of view and find the product you need and then click to purchase it. If you feel it’s not working as you want, optimize it. ⬆️
Irresistible Call to Action (buttons)
Whether you’re selling physical products or services, you want people to click the button that earns you money. Isn’t that correct? We don’t think there should be more explanation for this. It’s kind of self-explanatory of how important it is!
Your Call to Action button will be:
- clear
- highly visible
- compelling
The CTA buttons come with some standard text: Add to Cart, Buy Now, Purchase, and Checkout. Some variations are also seen but Add to Cart is the most popular in the eCommerce store. Place the button on each product page so that users can click and go for paying for it.
Make the CTA buttons clear not to mention that they must stand out from all the other links and buttons. Placing buttons on multiple places boosts more sales as users can click from anywhere on the page anytime. ⬆️
Store layout: one size doesn’t fit all
In WooCommerce, what we see most people keep the default layout for their store organization. If you follow the same notion, it will be difficult for you to be unique and different. Which way you can display your products for more attraction depends on the product category.
It’s crucial to experiment with different layouts to obtain the perfect structure for your shop. For selling products that have visual appeal, you need to focus on the images. In that case, a grid layout (built-in) is sufficient. Where the information or text is important, you may need to find out a different layout for that.
A WooCommerce Product Table also can help a website owner to list all the products in an integrated order. Many stores preferred to exhibit the products that way, and they have got rewarded with augmented sales. You can check out the demo page of NinjaTables to get an idea of what a WooCommerce product list looks like. ⬆️
Write compelling and useful product descriptions
Content has the real power to pull your website from the lower position and keep it on apex. This statement has the same implication with eCommerce websites too. It’s crucial for your WooCommerce site that it has content that is persuasive as well as informative.
Creating unique content will give many benefits, including appreciation from Google. On the contrary, if you copy content from your competitor’s site and post it on your pages, you’ll get penalized. Also, save your descriptions from ‘one size fits all.’ Write a new description for every single product.
SEO is the most telling part of the description
To get noticed by search engines, you have to consider SEO with a sincere command. Your customers will look for the products on the search engine, first. Optimize your product descriptions in a way that people can find your products on the search results.
Content: Google loves fresh, valuable content. If you want to win people’s hearts and SERPs – focus on creating high-quality content.
SEO Title: Optimize your title with your focus keyword and make it enjoyable. Don’t make it for search engines only — keep users in mind, too. Add your website name in the title for branding and starts with the most important keyword.
Images and videos: Use relevant alt text with pictures and videos. Include a keyword in the title and reduce the size before uploading.
Load time: Make sure your site loads within three seconds. Optimizing images and embedding videos from external sources can help you a lot. Minify HTML, CSS, JS, and HTTP requests. Remove extra plugins and most importantly get better hosting. ⬆️
Meta description: A well-written and customer-focused meta description is responsible for increasing CTR. Although it has little impact on SEO, it might induce users to click the link.
AMP: There’s no question when it comes to making the site mobile-friendly. Having your site fully optimized for smartphones will give you more customer engagement. Try to meet all the requirements set by Google’s AMP.
HTTPS: As an eCommerce store owner, you need to ensure maximum security for your website. Since customers will pay with cards, their data must be encrypted between server and website – and, that’s what HTTPS does.
Backlinks: When you’re fighting in a saturated competition, only backlinks can help you big time alongside other factors. Backlinks are still relevant and have the power to pass link juice and help place a website on top of its contenders. Like your content, backlinks also should be high-quality.
Write descriptions that add value
Product descriptions are such important things that directly impact conversion. As people can’t touch and see the products, the only way to convince them is to write compelling descriptions. Focus on buyer persona — think about the persons who are going to buy it.
Outline the benefits so well as customers can feel them. Mention the highlighted features to get the buyer’s best attention. Moreover, in your writing, try to cover what users might ask and what they need to know. Rather than describing all tiny features, focus on the highlighted ones. ⬆️
Research before write
Undertaking research can be highly beneficial, and it’s essential to stay ahead of the competition. See how your competitors are doing in this regard. Look through their content and presentation to find out things to implement on your website. Always try to produce better content and stand out from others.
Offer your product listings in a unique way — don’t imitate your competitors. Additionally, don’t forget to run a quick research on your content: there might be typos, grammatical errors, and other silly issues. These minor things may affect your customer’s decision.
Don’t push hard
Getting sales is the last thing everyone wanted. To drive more sales, proceed with a subtle approach. Don’t be overly sales-oriented. A professional copywriter can help you achieve that goal: getting sales without being pushy. Don’t make people feel disgusted with pretentious orientation only to make the purchase.
Working on product descriptions seems time-consuming but rest assured, It will be worth your money and time. Valuable content has a direct effect on increasing organic web traffic and driving more sales. Keep the text natural and make it impressive without adding anything forceful or aggressive. ⬆️
Tools for your store
To level up your store you need to integrate some tools. Budgets and preferences are different for every person. Some might invest in the early phase of the business whereas others would want to see the flow.
A lot of tools are available in the market that has all the power to make your store more dynamic and multi-verse. Those who can’t afford to purchase all tools right away can go for the basic option.
Ninja Tables – WooCommerce Product Table

Ninja Tables is a WordPress table builder plugin and it has a plethora of amazing features for bloggers and entrepreneurs. You can create beautiful product tables with Ninja Tables. But if you are a WooCommerce user, you can easily display products in enticing customizable tables.
You can add colors to the product tables and even get Fluent Forms or Google Sheets entries. Conditional formatting, value transformation, drag and drop options, import-export, and many more features make this table plugin unmissable for your WooCommerce store. ⬆️
Live Chat
Your customers should feel at home while they’re in your shop. Through Live Chat, you’re making sure they can get help right when it’s needed. WP Live Chat Support is the best plugin out there if you don’t want to pay for any paid chat program. Eventually, you have to switch to a paid option.
FluentCRM
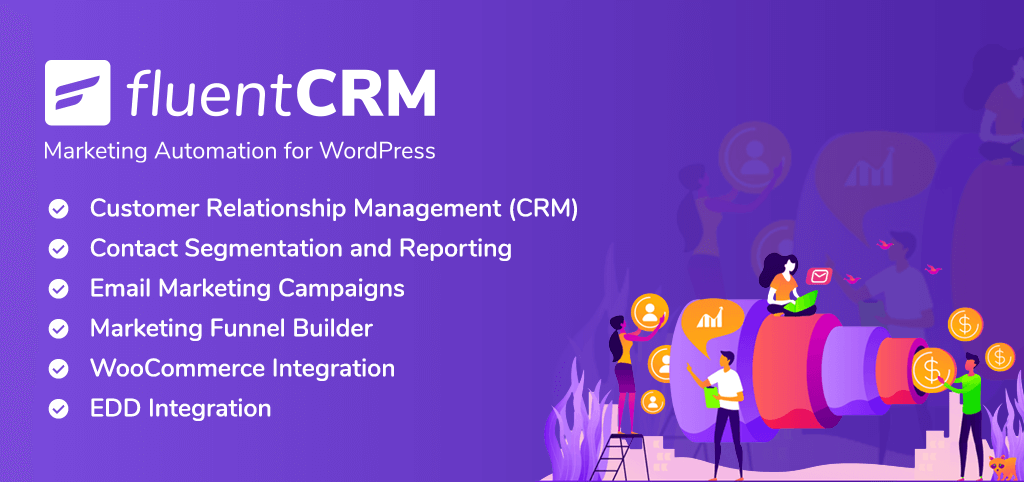
Reaching more people can increase the chance of getting more sales. Connecting the targeted people, without any doubt, brings benefits and you can crack that thing very easily. For email marketing, there are many options available but we suggest FluentCRM because it is a self-hosted marketing automation plugin for WordPress.
This plugin automatically integrates with WooCommerce and allows you to connect with your audience through automated emails so that you can convert more people, sell and upsell products and maximize your revenue!
Paymattic
A shop can’t be completed without a robust payment system. Paymattic allows you to set up the payment system in a way that it can accomplish all your needs. You can accept credit cards, Visa, MasterCard, and more.
Moving forward, the premium version offers PayPal, Payrexx, Paystack and 5 more payment gateways and better features.
Tips to get more attraction
Well, this is a WooCommerce 101 tutorial. We don’t want to discuss all things in detail instead of giving some hints. But we’ll break down the topics and make new blog posts around those ideas. Therefore, here are some quick tips we’d like to mention for your head start.
Read: 18 marketing tips to optimize the WooCommerce store.
Blogging: Nothing could be sweeter than getting organic search traffic. Blogging can perform that task efficiently. Keep a dedicated blog section on your eCommerce website and write blog posts regularly. No need to penetrate for longer blog posts. Choose a useful topic and write it down.
Social media marketing: Overlooking social media for marketing can be the biggest imprudence you have ever taken. Although Facebook Ads are more profitable, we suggest going for organic posting. When you’ll be able to spend there are many ways to spend and get benefited from social channels.
Guest posting: It’s not near enough to open up a store and do nothing. People need to know about your shop. One of the great options to attract more customers is guest blogging. When you will write other blogs about your shop, you’re opening doors for the readers of that blog.
List building: Having more (interested) people in your email list means you can send them offers every now and then. Whenever you start a new deal you have got the chance to reach out to those people who subscribed to get the update from your site. Leveraging email marketing is a smart decision.
Other channels: Unorthodox methods can be beneficial as well if you try them correctly. You can participate in marketing forums to talk about your products. There are many Facebook groups where you can share your promotions, deals, and special services. Think out of the box and you can achieve a great amount of profit from your shop.
Collaboration: In many ways, you can build relationships with other business owners and expand your venture. Let the bloggers know about your awesome store and give them lucrative offers (affiliate or discount). They will then mention you in their blog posts for their readers. Also, you can collaborate with other store owners to help each other. ⬆️
To summarize
First of all, you know now what WooCommerce is. Here’s the recap:

WooCommerce is the most famous and most reliable eCommerce solution to build an online store. It’s built on WordPress so you can infuse the power of plugins and themes to strengthen the tool.
We have intentionally escaped some of the fundamentals with WooCommerce because they are rudimentary tasks. However, we’re simply going to mention the steps here.
- Buy a domain for your store and a hosting package to run the site
- Install WordPress and select a WooCommerce-friendly theme
- Install WooCommerce and customize it with your information
- You can increase the power of WooCommerce with extensions
Wrapping Up
We hope, this WooCommerce tutorial helps you to kick-start your business what you have been dreaming for. Now you know it’s not rocket science and you can start right away without asking anybody’s help.
WooCommerce, without any doubt, is the most beneficial eCommerce platform on the earth. To reveal the actual strength of this phenomenal plugin, you have to dig deeper into the plugin’s inside.
By the bolster of WooCommerce, you can establish from a small to a giant company. Don’t ever underestimate the hidden power of WooCommerce. It only needs to be discovered what exciting options it holds.
From here, your next step would be setting up a store following this guide. Besides, you have to keep exploring the platform and what it can do with your business. Tons of tutorials are available out there to make your journey more meaningful.
Get back to top ⬆️
-
How to Build a WordPress Marketing Technology Stack in 2026
A practical guide to building a lean, connected WordPress marketing -

Top 7 Video Marketing Examples to Inspire Your 2026 Strategy
Explore 7 successful video marketing examples and learn how to -
Email Deliverability Hacks: Complete WordPress Guide With Free Tools
Improve WordPress email deliverability with FluentSMTP, SPF, DKIM, DMARC, list
Comments
-
[…] our guide on how to start with WooCommerce, here we’re trying to infuse you with some practical tips to make your store better. […]
-
[…] our WooCommerc guide for beginners, we have discussed everything from beginning to end. We’ll try to limit this post around the […]
-
[…] have previously created a tutorial on WooCommerce for beginners. If you have followed that guide you got the idea that anyone can get himself involved with the […]
-
[…] Although there are dozens of ways to alleviate this hazard, I’m presenting only the most significant ones here. Read these and try to implement on your eCommerce store to get the best output. If you want to get started with WordPress, read this WooCommerce tutorial. […]
-
[…] work for others and will definitely work for you. If you haven’t started yet, follow this WooCommerce tutorial to learn the process in detail and […]
-
[…] If you’re looking for the right way to start with an online business, you can follow a step-by-step WooCommerce guide. […]
-
[…] you may have seen, WooCommerce comes complete with several basic core shipping methods for offering Flat Rates, Local Pickup, and […]
-
[…] fill out your needs accurately. If you want to establish your online business, you can follow this WooCommerce tutorial to start from […]
-
[…] For a more explanation, you can try out a tutorial on WooCommerce for Beginners. […]
-
[…] post WooCommerce for Beginners | Kickstart Your Online Store the Right Way appeared first on WP Manage […]
-
بديل تروكولر
[…]below youll obtain the link to some web-sites that we assume you need to visit[…]
-
free download for pc windows
[…]here are some hyperlinks to web pages that we link to simply because we assume they are worth visiting[…]
-
free download for windows 10
[…]Every after in a even though we decide on blogs that we study. Listed below are the latest web pages that we select […]
-
free download for windows 10
[…]we prefer to honor quite a few other net sites around the net, even when they arent linked to us, by linking to them. Below are some webpages worth checking out[…]
-
games for laptop download
[…]Every once inside a although we select blogs that we read. Listed beneath would be the latest internet sites that we opt for […]
-
apps download for windows 10
[…]we prefer to honor a lot of other internet internet sites around the web, even when they arent linked to us, by linking to them. Below are some webpages worth checking out[…]
-
free download for windows 7
[…]here are some links to sites that we link to for the reason that we assume they’re really worth visiting[…]
-
mp3juice
[…]we came across a cool web site that you may possibly delight in. Take a appear for those who want[…]
-
pc apk free download for windows
[…]Sites of interest we’ve a link to[…]
-
THC Vape Oil
[…]the time to read or pay a visit to the material or websites we have linked to below the[…]
-
Freelance communication
[…]Every once inside a when we pick out blogs that we read. Listed below would be the newest sites that we pick out […]
-
Sig Sauer Pistols For Sale
[…]one of our visitors just lately encouraged the following website[…]
-
IT Services Somerset
[…]Every as soon as inside a whilst we decide on blogs that we study. Listed beneath would be the most recent web-sites that we pick […]
-
Mac air akku ersetzen
[…]we came across a cool web-site that you just may well delight in. Take a look when you want[…]
-
[…] may not need to set up WooCommerce from scratch but rather a simple form for a recurring subscription, one-time payment, or even a donation. For […]
-
[…] have a detailed guide on how to get started with WooCommerce from […]
Leave a Reply
You must be logged in to post a comment.