

In our WooCommerce guide for beginners, we have discussed everything from beginning to end. We’ll try to limit this post around the initial WooCommerce setup so that users can get the right start.
After configuring the store, you shouldn’t be perplexed about how to promote your online store. That’s why marketing tips for WooCommerce will help you big time and you must feel confident after learning the secret sauce.
How to start a WooCommerce store
Every time you try to set up WooCommerce, an installation wizard will guide you throughout the way. It’s pretty straightforward and asks you only basic questions. Before diving into that process, let’s get started with installing WooCommerce.
Step 1: Install the plugin
You have to install WooCommerce first on your website. To do that you can download the plugin from WP repository and then upload it to your website. But this is a lengthy process. We’ll show you an even shorter method to get started easily.
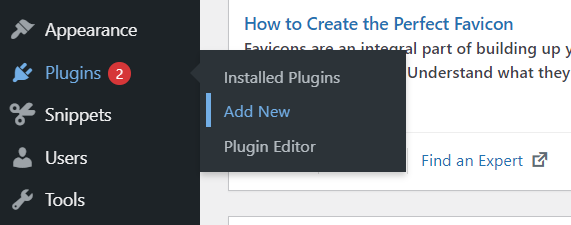
Right from your WordPress dashboard, you can install the plugin and start building the store. Go to your dashboard and click Add New from Plugins (as seen below).
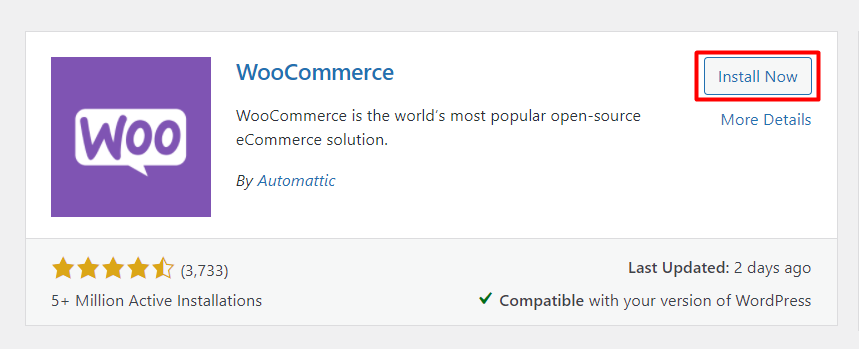
Write WooCommerce in the search box and you can see the plugin appears on top. Click the Install Now button and it will start getting installed.
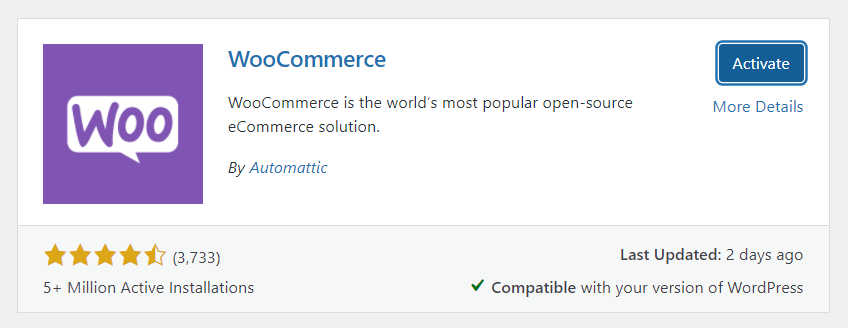
The plugin needs a few moments to install. After that, there will appear a new button called Activate. Click this button to start its action.
Now, WooCommerce is successfully installed on your website. But wait, there are other settings to fill out with the right information. As you know WooCommerce is full of tons of captivating features you should try to utilize all the power completely.
Step 2: Begin the store setup
Right after installing the plugin, a setup wizard will appear, and you have to walk through all the steps one by one. Bear in mind that it’s not mandatory. You can always change things from WooCommerce>Settings at the left sidebar of your WP dashboard.
However, we suggest filling out the information right now as it will reduce your hassle later. Let’s start configuring with us. We’ll walk you through from the first step to the last. Follow the screenshots below which you can also see during the WooCommerce setup.
At this point, you should see this page of the WooCommerce setup wizard. From the first look, you can understand that these are pretty basic requirements as well as easy to perceive without any direction.
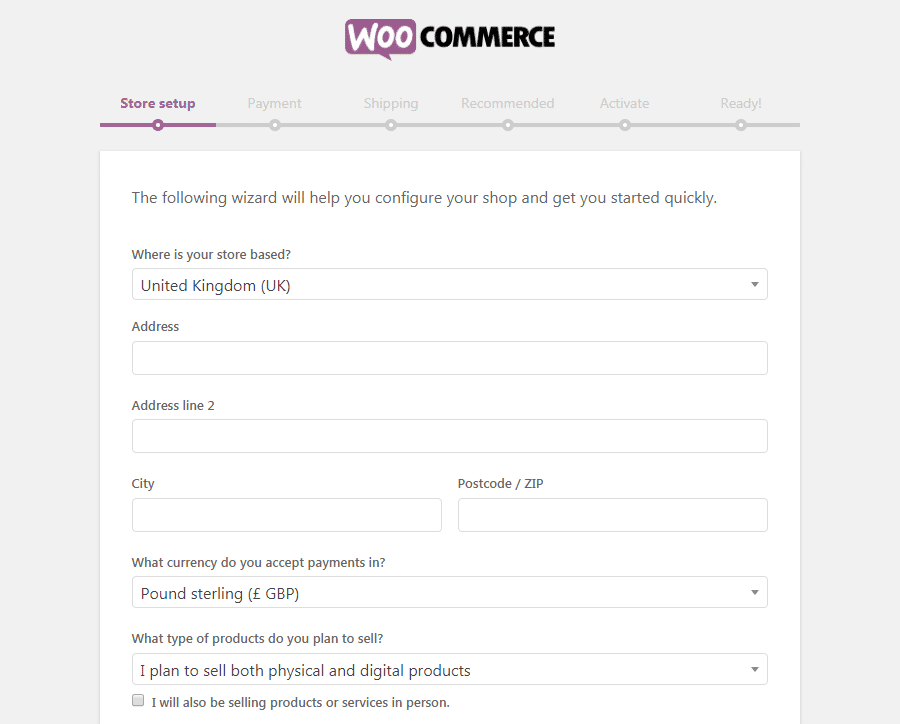
Start by including your store location and then give the address on the following two lines. Add your city and postcode. What currency you would accept in your store — mention it. The next option is to choose for selling physical products or digital products or both.
We’re telling you again that nothing to worry about this setup. Whatever you’re mentioning here or you’ll write on the next steps, you can change them later. From the settings – as we mentioned before – you can update the information any time you want.
Click Let’s Go and proceed!
Step 3: Setup the payment system
You’re on the verge of setting up the payment processor for your online store. Luckily, with WooCommerce, you can allow myriad of payment methods for your shop. Even many local systems are approved in WooCommerce in addition to the major brands.
By default, Stripe and PayPal are available to get paid through your store. On top of that, you can also choose checks and cash as offline methods.
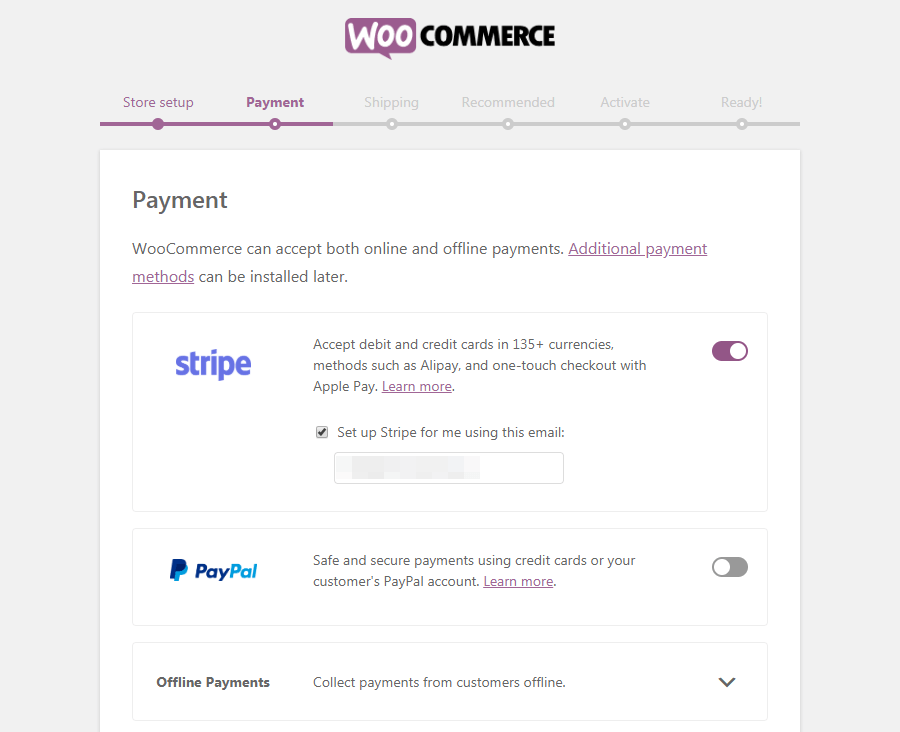
Choose your favorite options, and it will be set up automatically. Beyond Stripe and PayPal, there are other payment methods available with WooCommerce. You can use them later if you need.
By the way, we like the Stripe payment processor for its flexibility and a plethora of advanced features. You can check out our Stripe payment plugin for WordPress.
Step 4: Fix the shipping methods
The shipping option comes next where you’ll set up how to deliver the products to the customer’s destination.
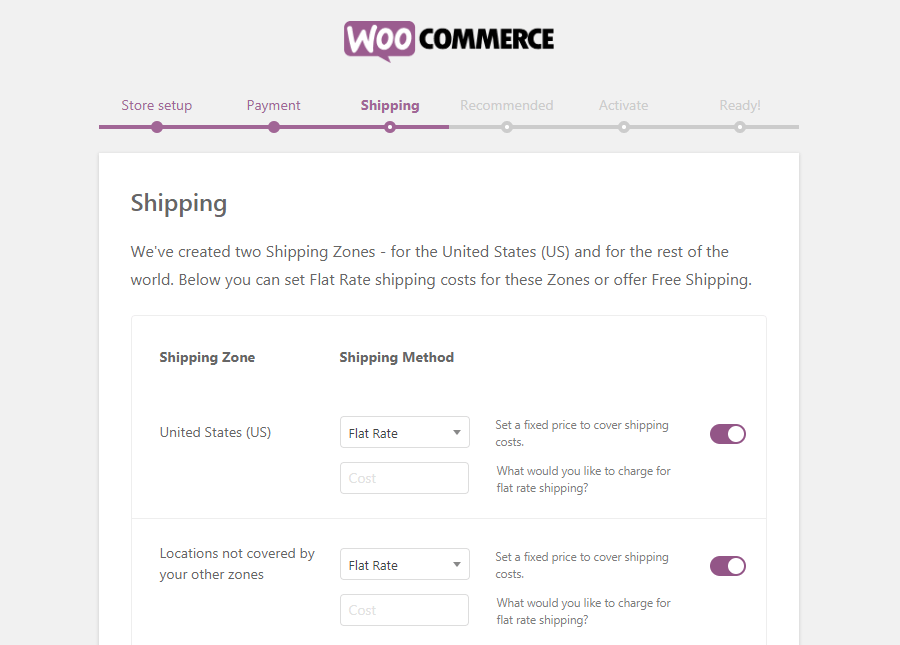
If you look at the options, you can see that there are multiple shipping zones available there. You can select one price based on your preferred area and then another rate for customers outside your selected zone. Moreover, you can give free shipping to both zones if you want.
Step 5: Check add-ons recommended by WooCommerce
The basic configuration is done by now. Your store is almost ready. WooCommerce will offer you some additional features at this stage.
At this point, you’ve configured all the basics for your online WooCommerce store. The next page of the setup wizard presents you with a few optional add-ons:
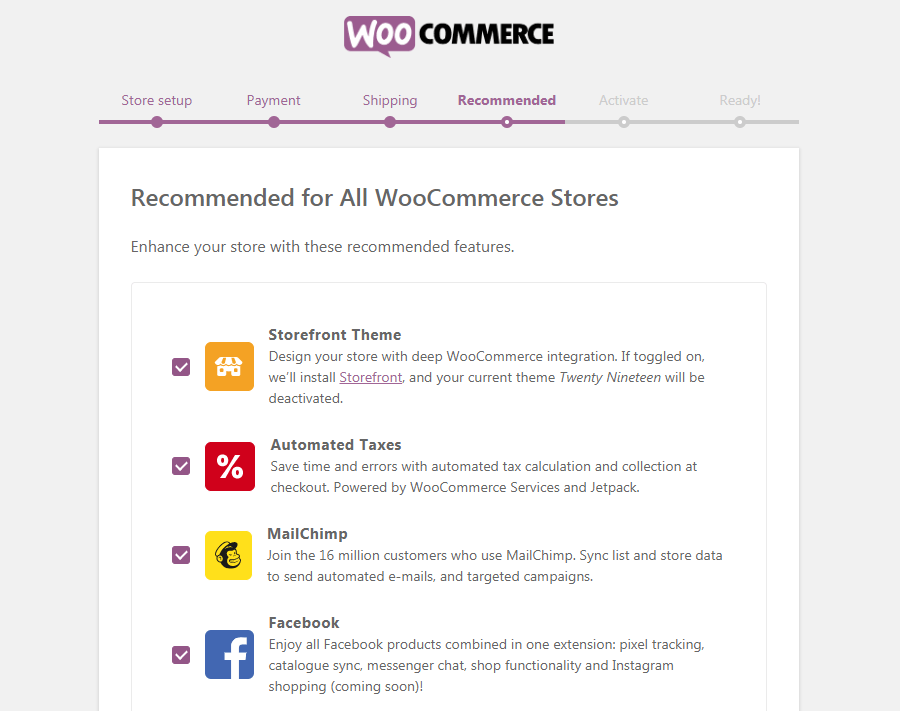
If you don’t uncheck the options, the selected plugins will be installed. WooCommerce recommends WooCommerce Services, Jetpack, MailChimp for WooCommerce, and Facebook for WooCommerce.
Although these tools are beneficial you don’t require them to run your store. Still, give them a try to see how handy they can be for making your store more engaging. More plugins and themes are out there to alleviate your pain during store-building time.
Step 6: Install Jetpack WP plugin
JetPack is also a plugin recommended by WooCommerce which will come on the next screen. It’s optional. You can install it or ignore it.
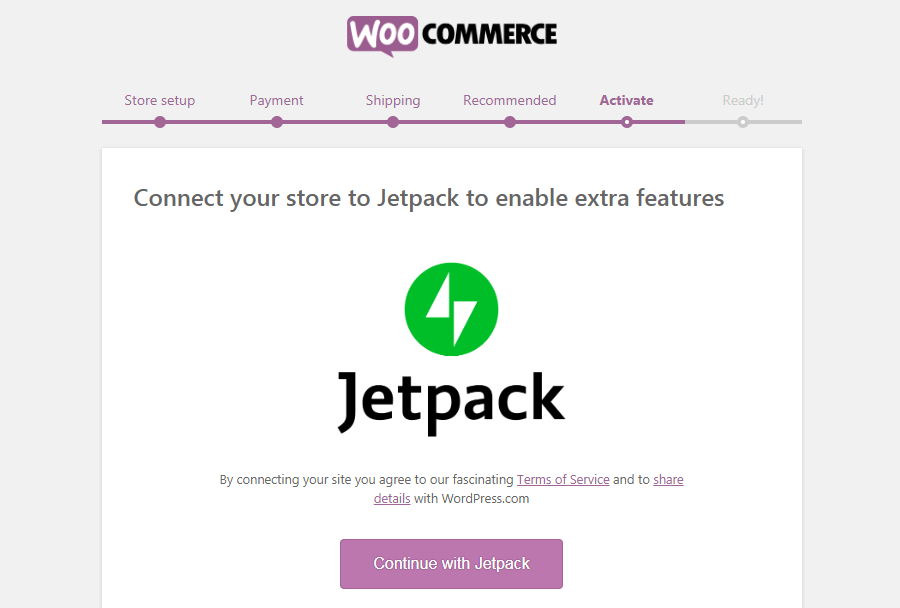
Jetpack is a powerful tool that comes up with a myriad of features that will help you from different aspects. For security, boosting performance, and marketing, Jetpack works like a true ninja.
In addition to the premium features, you will get benefited even from the free options. Especially, we like the auto-publishing feature which is used to publish posts across multiple social channels.
Step 7: Finish the setup process
That’s the end. You’re about to complete the WooCommerce setup.

In the end, you can put your email to get tips and updates from WooCommerce. Apart from that, there are additional links to navigate – create a product or go to the dashboard.
Next, we’ll talk about how to add new products to your online store. We’ll show you the process step by step.
Last words
We hope, you found this tutorial easy to follow. We have tried to cover everything as simply as possible. However, WooCommerce is a wonderful way to start your online venture in no time.
-

15 eCommerce Content Marketing Strategies for 2026
Learn 15 proven content marketing strategies for eCommerce, from content -

How to Create eCommerce Order Bumps: Copy, Tips & Best Practices
Learn how to create order bump with copy tips and -
How to Secure a WordPress Site: Hygiene Guide for WordPress & eCommerce
Discover How to Secure a WordPress Site. Secure your eCommerce
Leave a Reply
You must be logged in to post a comment.