


Online stores have become more nifty mediums for this contemporary time, and it is likely. Since individuals avoid to visit shop physically, so online purchasing has become a regular behavior.
Why not? Consumers have much flexibility in online purchasing. For instance, a consumer could find out his desired product within just one click. Moreover, he has the opportunity to analyse and compare a product with other available products.
That is why online stores are considered a unique source for earning money. It is feasible because you no need to go door to door for advertising products. More preciously, you can target your consumers and reach there easily by following robust digital marketing strategies.
However, the main point is, though it is considered as a significant source of earning money. Still, you can not stimulate consumers purchasing products from your store unless you arrange your shop and exhibit available goods with proper illustrations.
If you maintain your online store asymmetrically, it would bring more impediments for you and ultimately, it would make you disappointed. Moreover, it would become more sophisticated, and at the end of the day, you will decide to desert this profitable business.
For example, one of your customers has claimed you shipped the wrong product. In that case, if you could not arrange your existing product with a suitable code and title, it would be hard to discover which product did you shipped. However, you could solve this problem quickly by using product code.
Moreover, if you could demonstrate products using a list, it could allure customers to go for purchasing because a customer could attain the ins and outs regarding the product without scrolling even his mouse.
In this content, I will show you how to create a WooCommerce product list easily. I will illustrate here step by step so that you could create your list easily.
For creating WooCommerce product list, you need to install Ninja tables WordPress table builder plugin. I have selected this table plugin for this tutorial as maximum features are entirely free as well as a responsive table design can be created by utilising this WordPress plugin.
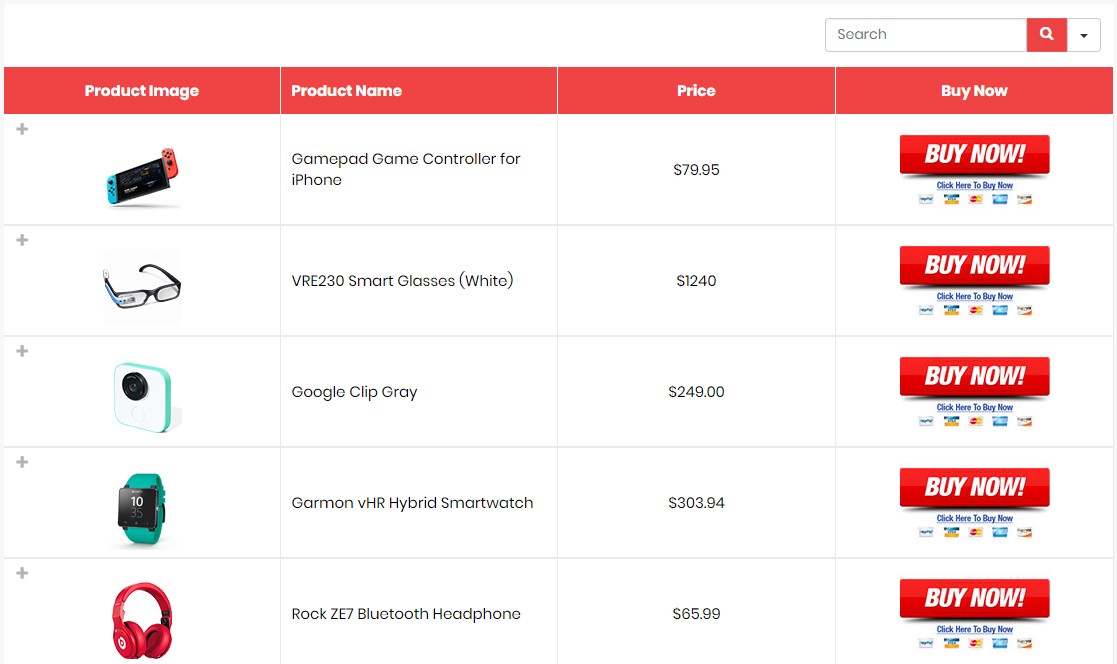
First, I would like to exhibit a sample WooCommerce product list using Ninja tables, and after that, you can watch the video by which you could conceive in-depth sense regarding various fields and features of this plugin.
Remember that, you can create two different types of the product list. One list is for all multiple products where consumers will see all available products and another type list is for an individual product, where a customer could read the whole description regarding a product for removing cognitive vulnerabilities.
I will show you these two type of product lists. But, First I start with multiple products list so that next one you could create easily.
WooCommerce Multiple Products List
For creating a multiple products list, first, open ninja tables plugin. First, I would like to describe abbreviate about the plugin so that you can use it conveniently.
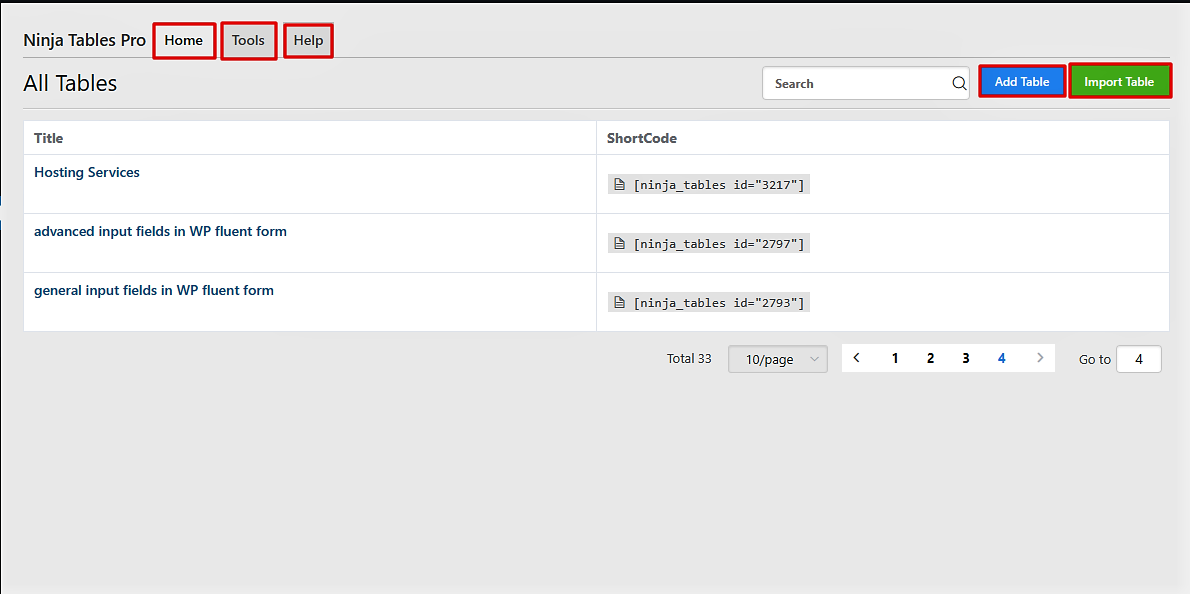
In the “Home“, you can see all existing tables on the plugin, and you could use those any table or all tables by copying “shortcode” and paste on the desired place where you want to exhibit.
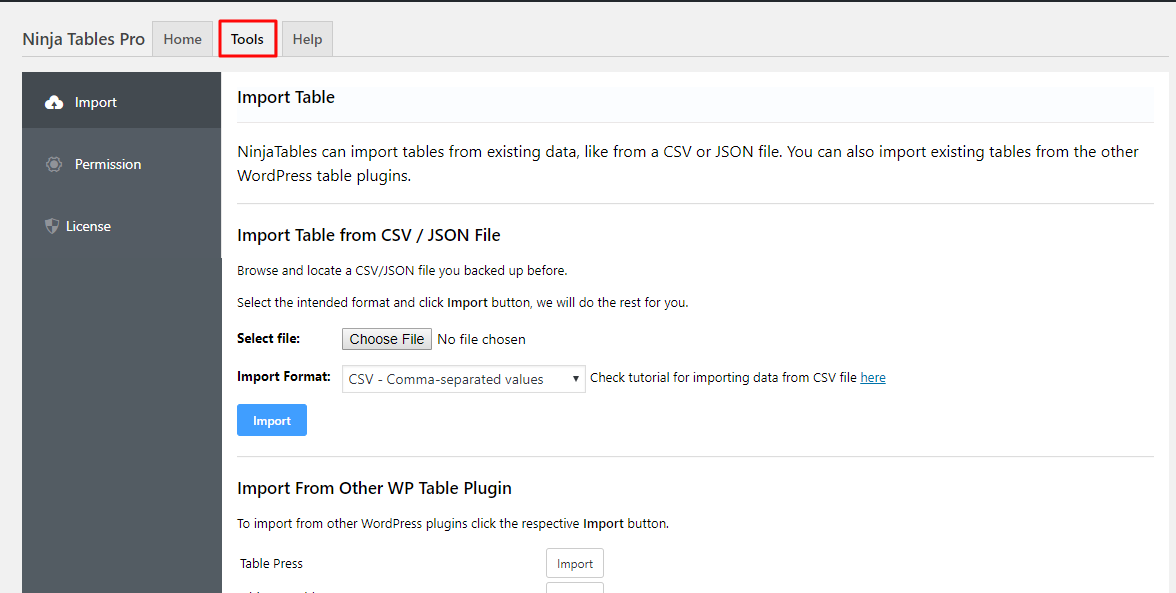
By selecting “Tools“, you can import any ready table as well as you can set up permissions and other settings.
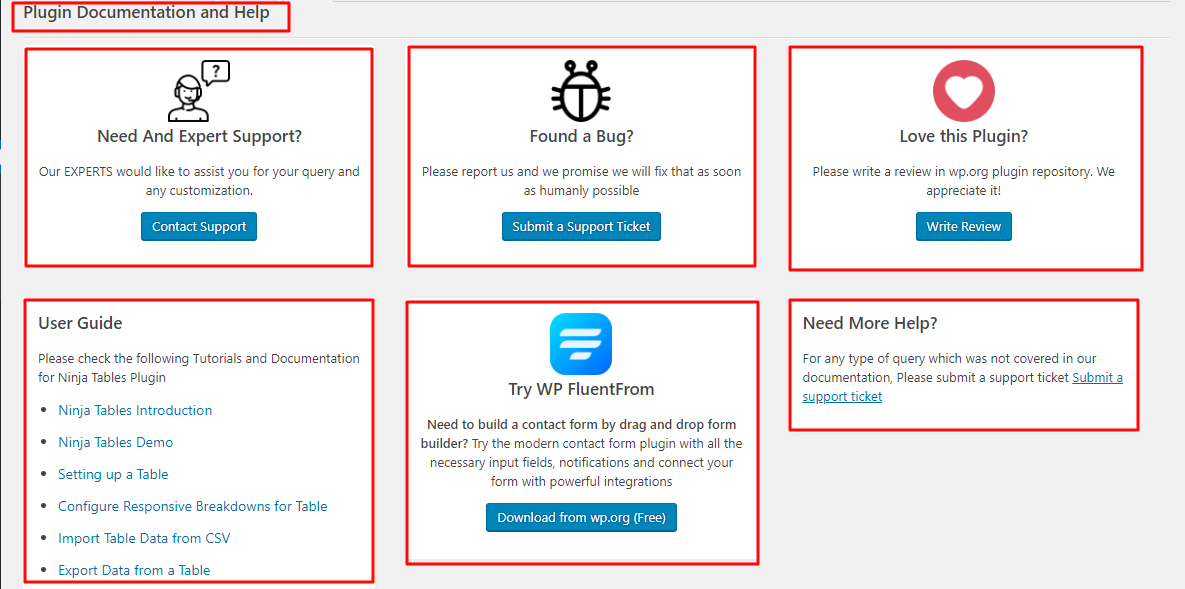
By clicking on the “Help” page, you can get the instantaneous reply from the support team of Ninja tables plugin. Even, you can browse the “Documentation” page for a better understanding of all fields and features.
Now, lets start to create a product view list for WooCommerce.

Click on the “Add Table” button.
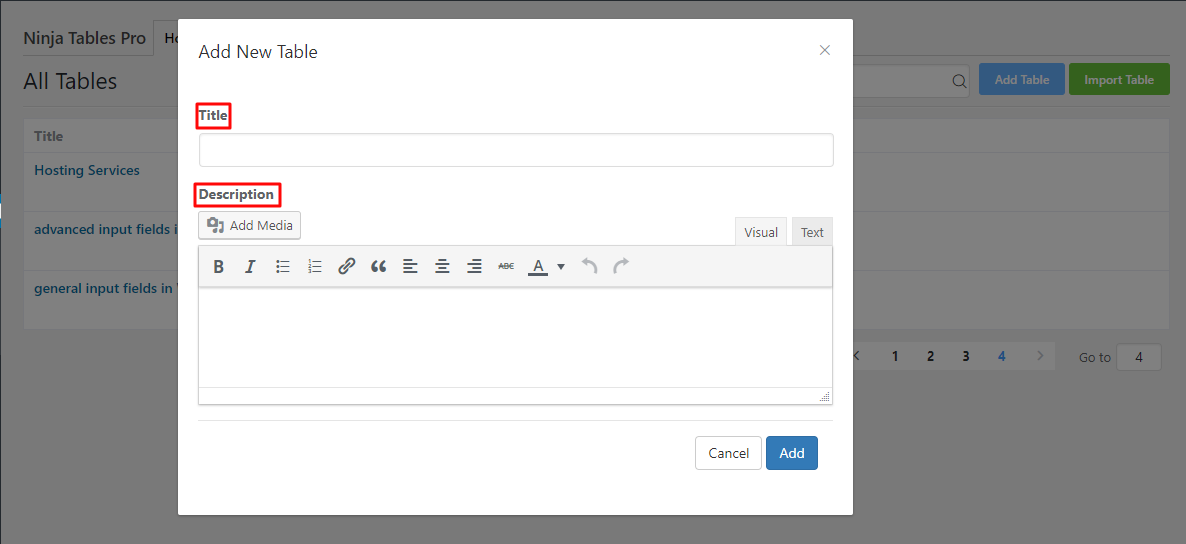
A new window will open on the screen. Write your desired table name and give some description so that if you need to change any part of the table, you can dictate it easily.
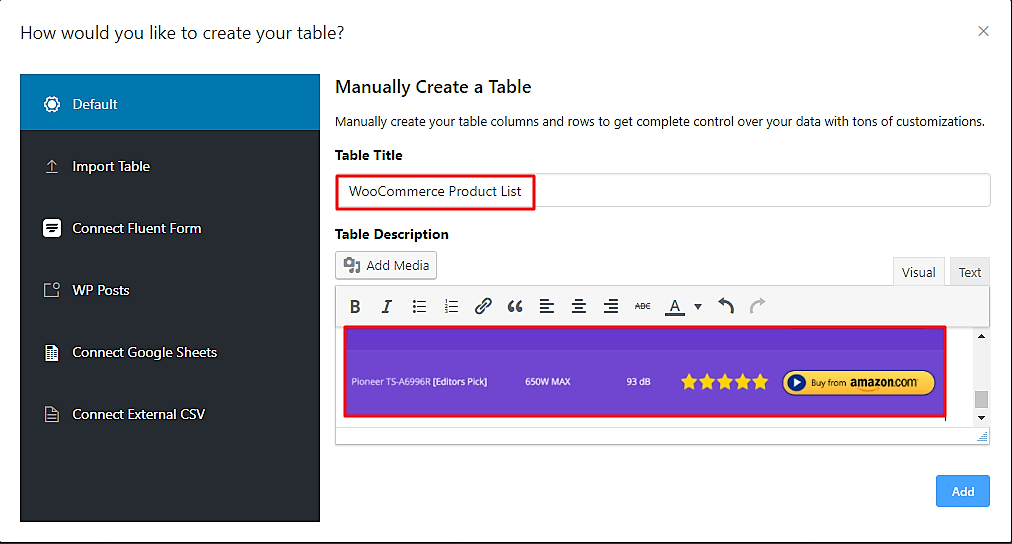
In this way, you can set the table name, and you can even add an image if you want to so. After that, click on the “Add” button.
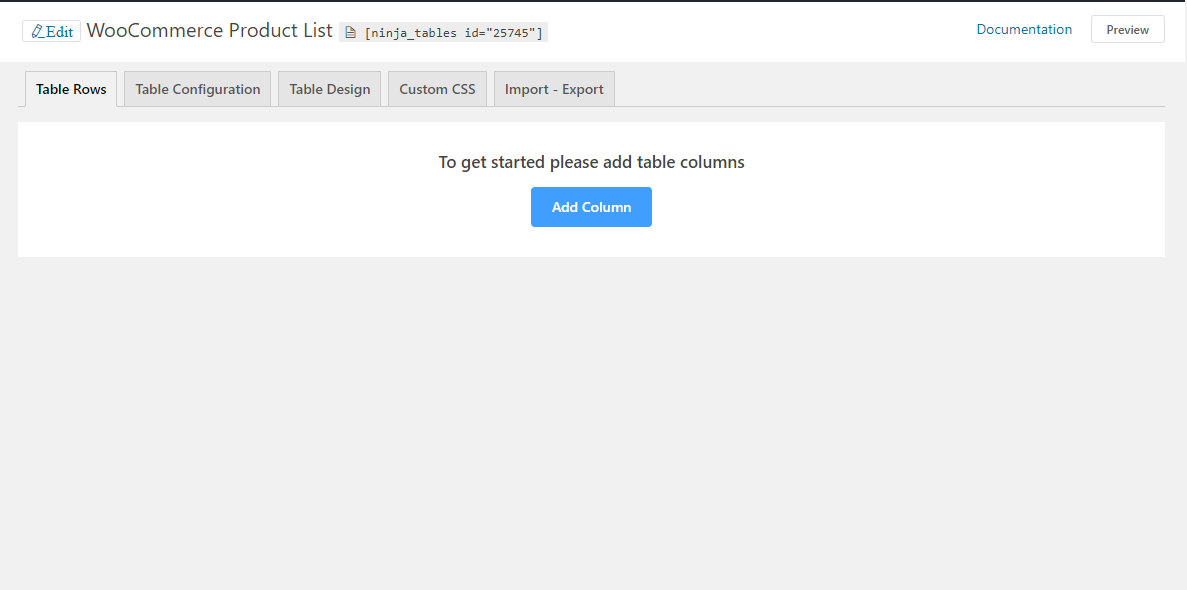
It is the main dashboard of the Ninja tables. You can see five boxes on the top of the panel, and you can customize the whole table by using those boxes.
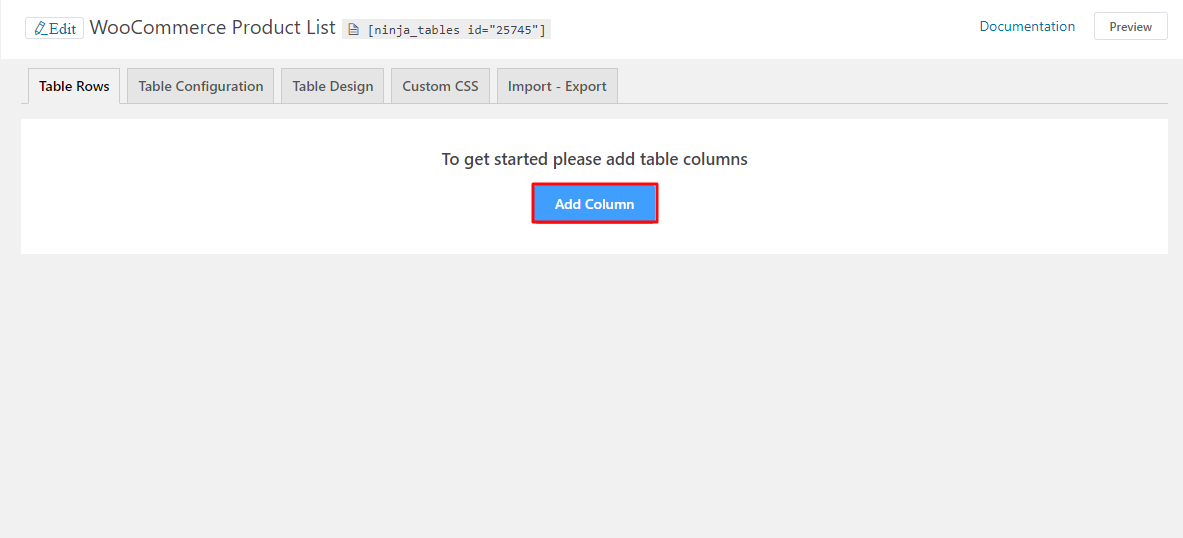
Now, Click on the “Add Column” button. A new box will appear on the screen.
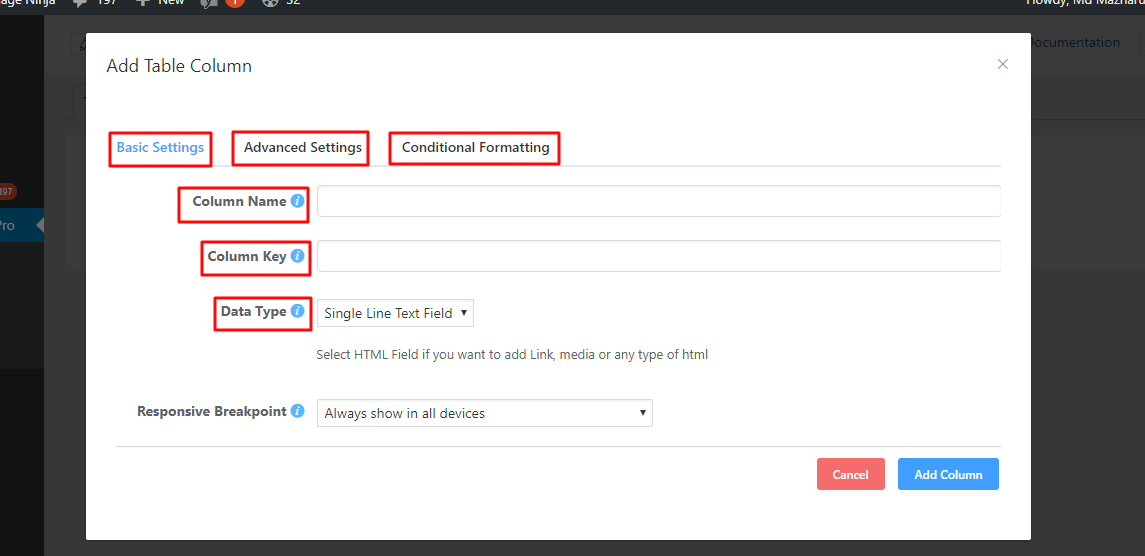
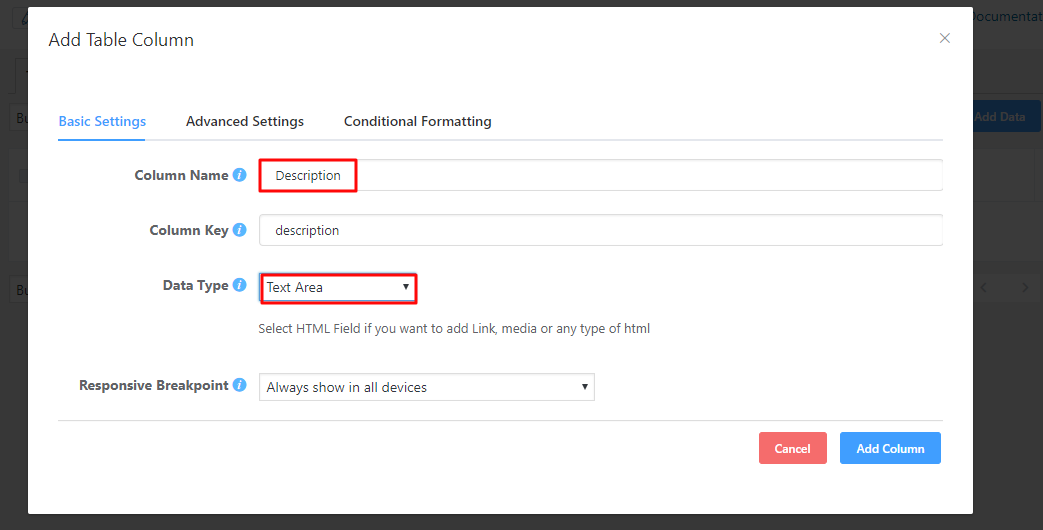
Now, you can see three essential fields such as “Column Name“, “Column Key” and “Data Type” fields. You can write the first column name on the “ Column Name” field. “Column Key” will set automatically based on your “Column Name“.
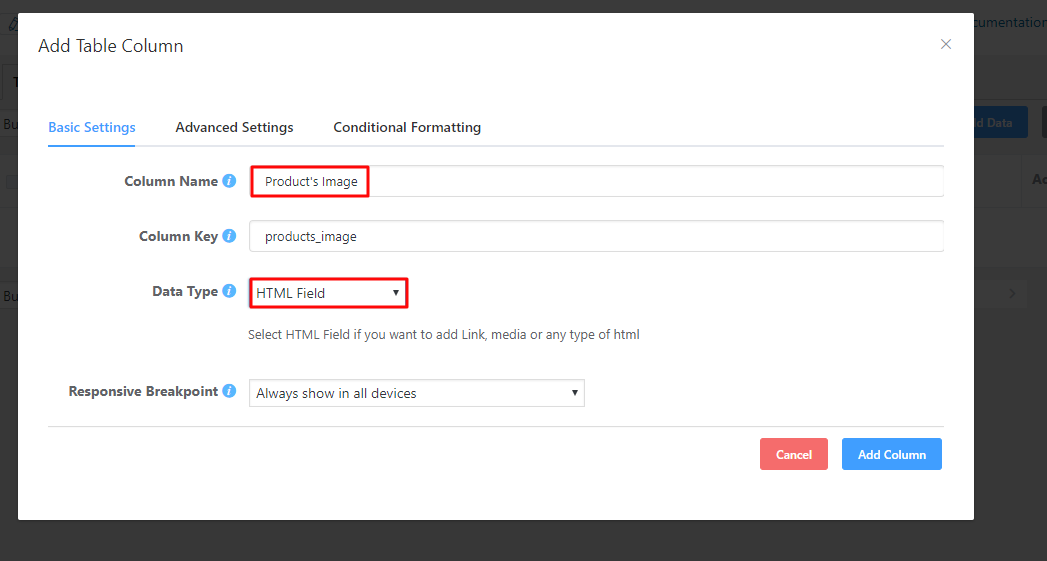
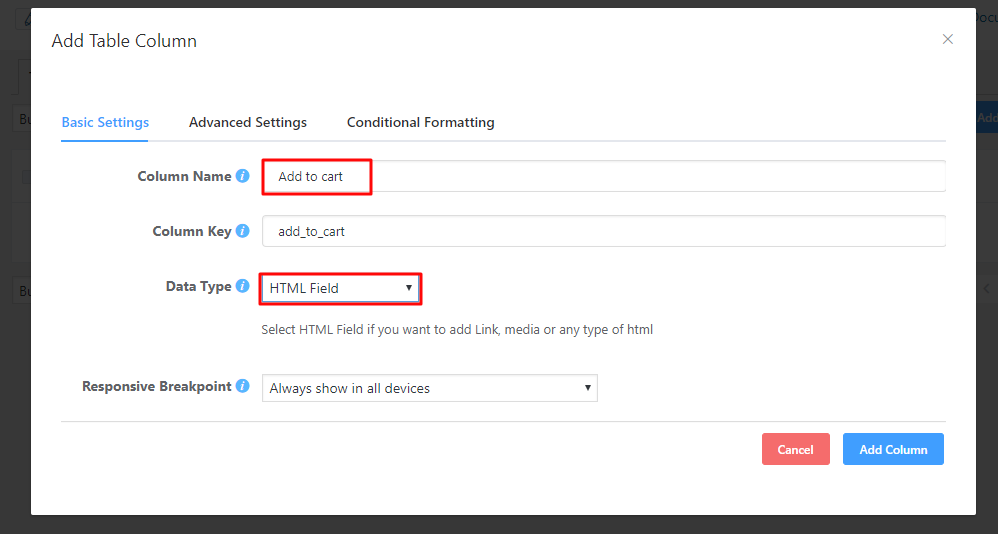
You can change the “Data Type” field according to the nature of the data you will input there. Suppose, You can to add an image on that field. You could choose “HTML Field” from the “Data Type Box“.
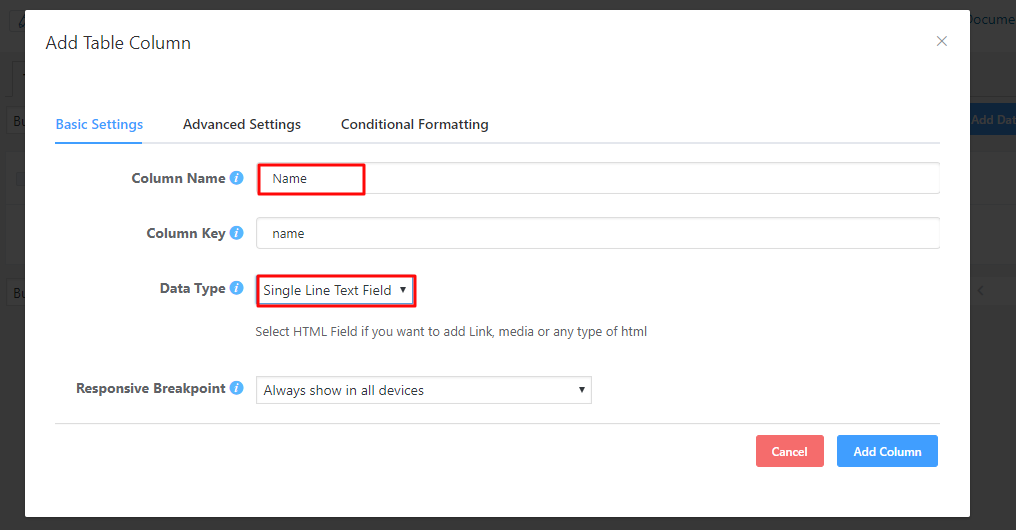
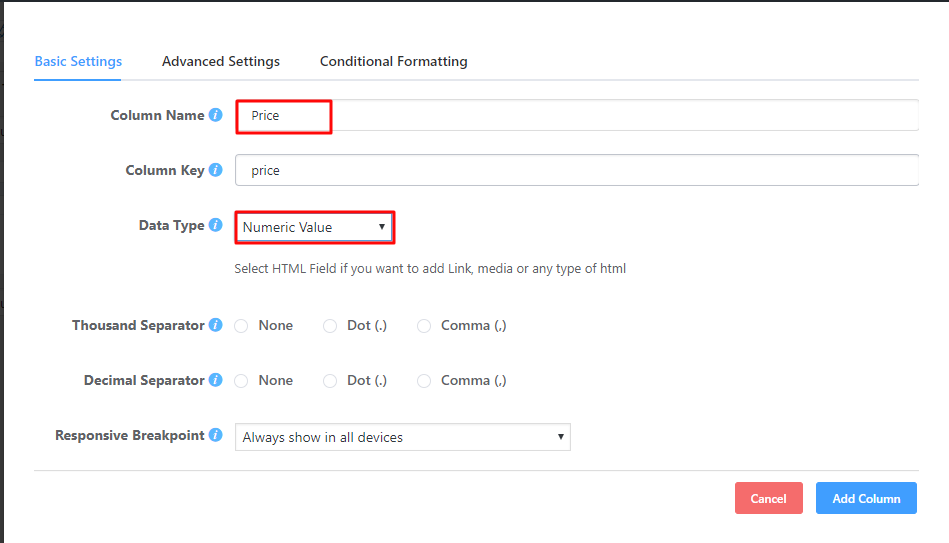
For this tutorial, I will create six columns where the first column will be for the product code, the second column will be for the product’s image, the third one will be named, and then description, price and cart image again. So, for that purpose, I will have to use two HTML data fields, two numeric fields and two single line text fields. Let’s create the table then.
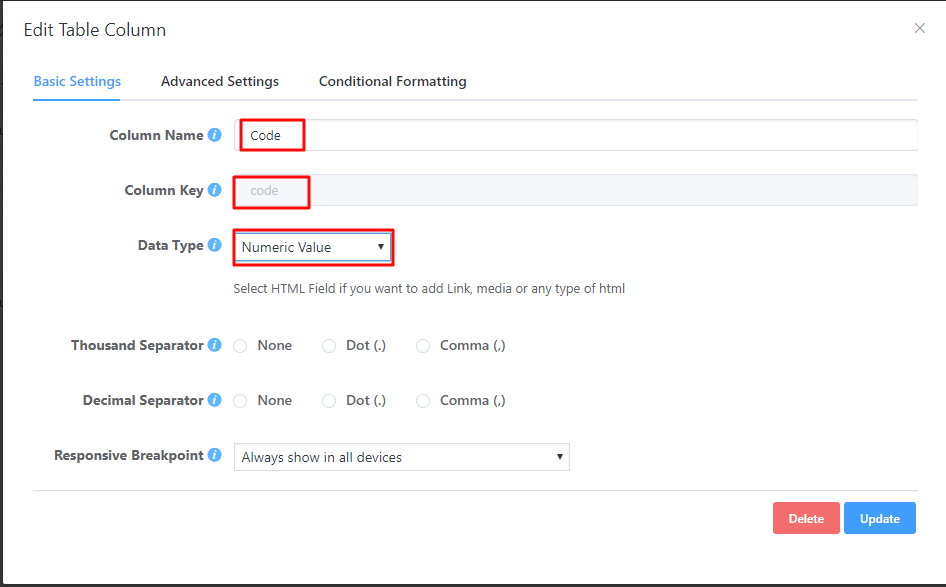
Create the first column for the “Code“. Write “Code” first on the “Column Name“. Select “Numeric Value” from the Data type option. Let me explain briefly about two other fields “Advanced Settings” and “Conditional Formatting” so that you could use near future for creating an advanced level product list.
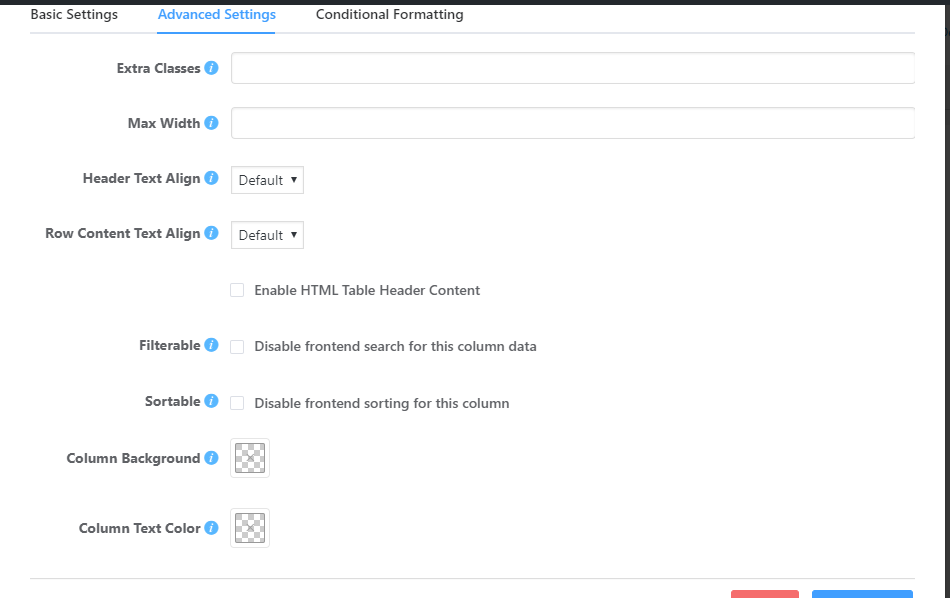
You can set table’s other outlooks such as classes, Width, align, color and etc. Follow the below’s pictures and do it accordingly.
Our all columns have been ready. You can change any column position from its existing position by doing drag and drop as below picture.
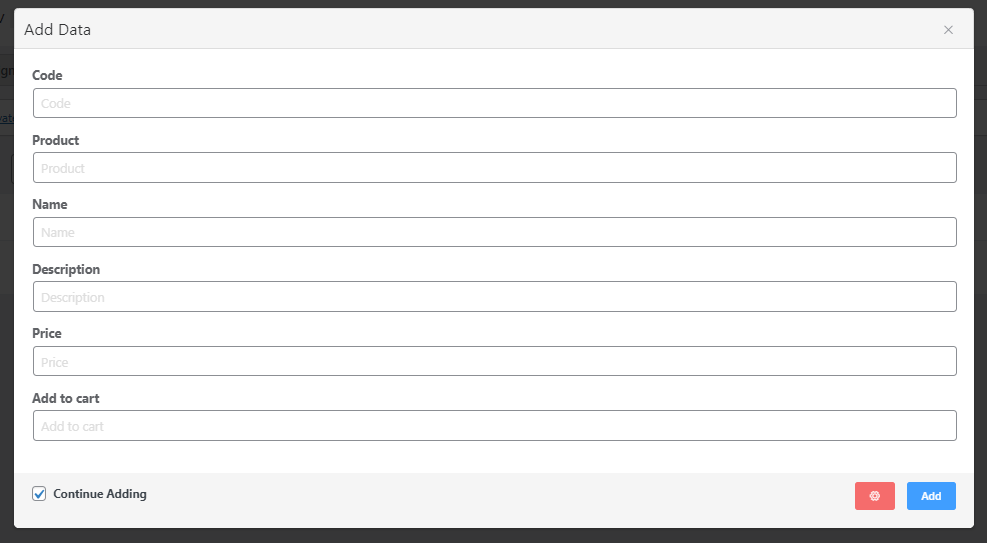
Now, let’s give input on each column according to column requirements. For that, click on “Add data“.
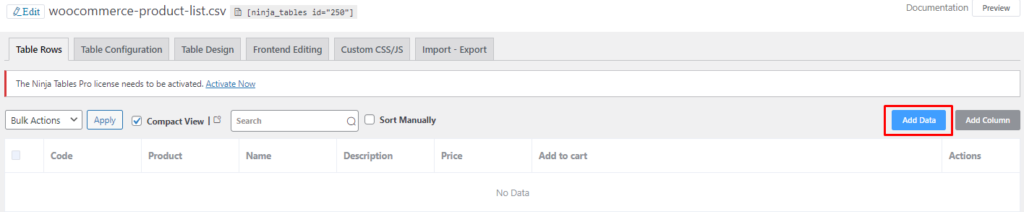
You can see a new window will open on the screen, and you can put data according to columns. Suppose, First I will write the product code on the “Code” box. Then, I will click on the “Add Media” of “Product’s Image“. Then, put the name of the product on the “Name” box. Write some description of the required box. Give the price of your product and add the cart image from the gallery on “Add to Cart” column.
Now, copy the shortcode of the table and post it on the required page and see what happens.
Your customer could search for any particular product by using code, name or image. It was the all about the WooCommerce multiple product list view.
WooCommerce Single Product List
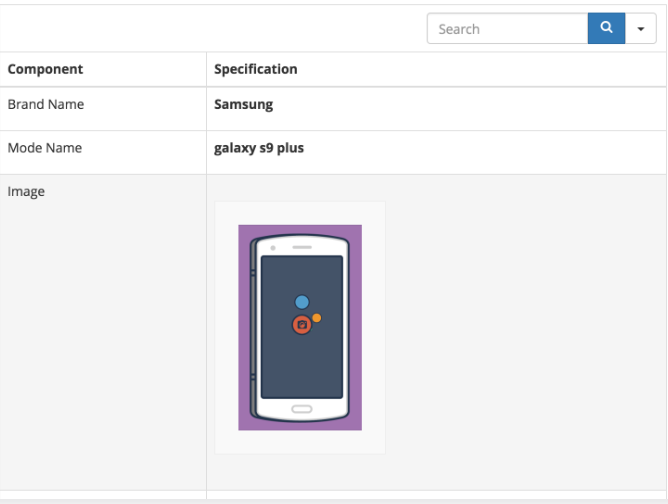
WooCommerce single product list creating procedure is almost same as multiple product list. Still, for better understand, I am going to show the whole process here.
Suppose, you want to create a table for a cellular. In that case, you can divide the whole segment into two columns. First one would be for “Component” part and the second one will be about ” Specification“.
So, I have already created two columns for my single product list. Now, click on the “Table Raw” and click on “Add Data” and give necessary inputs there. After that, copy the code of the table and paste on the page where you want to exhibit.
| Component | Specification |
|---|---|
| CPU | 800 MHz 1 Core ARM v6 |
| GPU | Adreno 200 |
| Chipset | Qualcomm MSM7227 |
| Memory | 278.34 MB |
| ROM | 178.39 MB |
| Network Data | 2G/ 3G / HSDPA 7.2 |
| OS | Android 2.3.7 |
| Screen Size | 3.5 inch |
| Resolution | HVGA (480*320) ~165 ppi pixel density |
| Shot Mode | Single/ Smile / Continuous / Panorama |
| Image |
|
| Mode Name | galaxy s9 plus |
| Brand Name | Samsung |

You can see that the second table is different from the first table. You can customize your table color from the “Table Design” and then click on one “Table Color” and select the desired color.
In conclusion, the product list is significant for alluring your consumers effortlessly because they could purchase the desired product by clicking “Add To Cart” button. Moreover, Ninja Table is also a crucial table plugin, and since it is a free table plugin, so you can exhaust it easily.
-

How to Add Code Snippets in WordPress: 100% Free Guide
Learn how to add code snippets in WordPress safely and -

FluentHub MCP: Run Your WordPress Business Right From Your AI Chat
Use FluentHub MCP to connect WPManageNinja products with AI agents -

How to Embed Social Media Feeds on WordPress Websites (No Code)
Learn how to embed Instagram, Facebook, TikTok, and YouTube feeds
Comments
-
Could you tell me what theme are you using on your site?
It looks good.-
It’s a custom theme made by our team
-
-
Hello there, just became alert to your blog through Google, and found that it’s really informative. I’m going to watch out for brussels. I’ll be grateful if you continue this in future. Numerous people will be benefited from your writing. Cheers!
-
Thank you, Rueben. Stay with us for more awesome posts.
-
-
You made some decent points there. I looked on the web to the issue and discovered most people goes as well as with your web site.
Leave a Reply
You must be logged in to post a comment.