

How to Configure Data Types On Your Online Data Tables

Creating a data table with Ninja Tables is one of the easiest things to do. On top of that, users can configure the data type of a table and set it as plain text, HTML, numbers, button, etc. This customization format is a next-level feature and helps the user organize the table data accurately.
For example, if you want to insert a date, you don’t need to type it as texts. Simply select the “Date Field” and choose a preferred date format.
An input field in data tables can be numerical characters, texts, an image, and even links. The “Text” data type can show numerical data too. However, a numeric data type can only show numbers, not text or other types. When you’re inserting data in your table cells of Ninja Tables, setting the type depends on you.
How to configure the data type in Ninja Tables
While creating a table for product release information, you might want to store release dates and times. So, you set the field as Date/Time data type. Similarly, to add a product name or an address, you can use the Text data type.
All data types in a database have a specific purpose. If you select the numeric type for the product’s price, you can’t insert a product image or name in that table cell.
Here are some ways to configure the data type in Ninja Tables and make it more user-friendly.
- Single-Line Text Field
- Text Area
- HTML Field
- Numeric Field
- Date Field
- Select Field
- Image/File/Lightbox
- Button/Link

These eight default data types in Ninja Tables are for varieties of data inputs. Each of them has a distinct format according to the type.
If you initiate creating a table, the “Add Column” button will take you to the “Add Table Column” panel that you can see in the image above.
Now, let’s get into the details of how to set data types in WordPress tables.
1. Single-Line Text Field
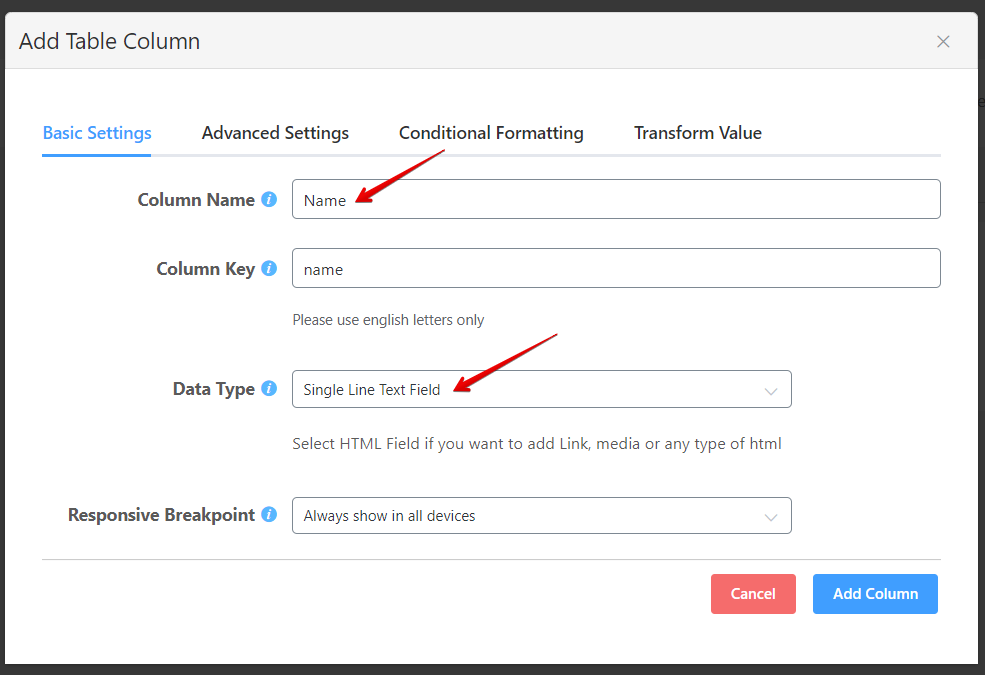
The first one from the dropdown list is for a single-line text format. This column style can show any data you add. We went with “Name”.
Select the column name, data type, and proceed to add the column. The single-line text field will show up with one-line text. It can be numbers or characters, but not any attachment.
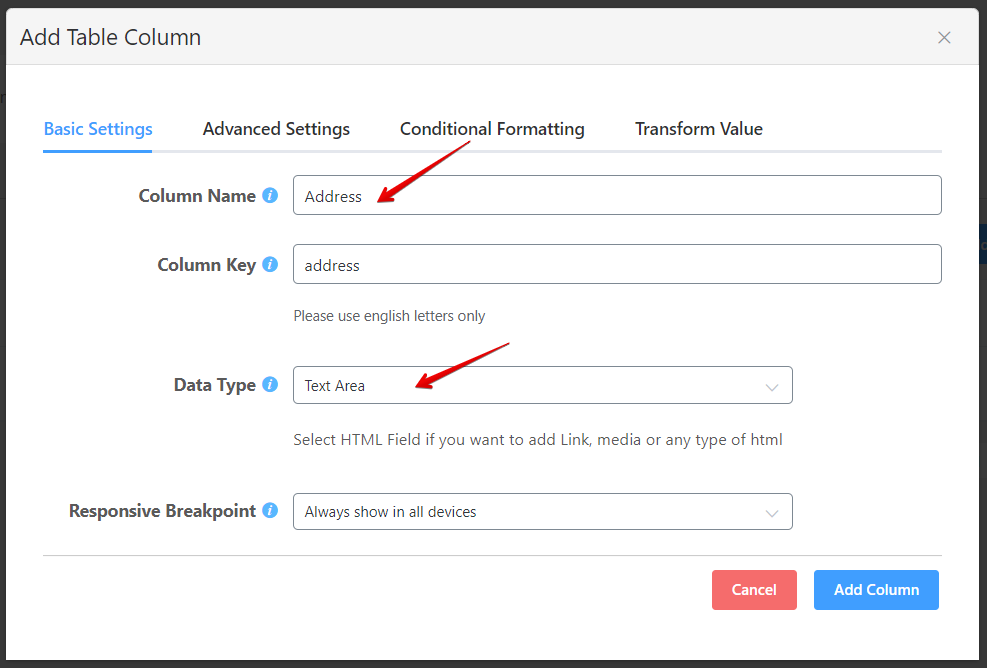
2. Text Area
After adding the column and setting the data type as a text area, we have decided to assign it for addresses.
Now, we can add as many lines as we want because this input type supports multiple lines. This panel will render an area with long strings of texts with line breaks.
Put the address in the popup window for adding data. Doesn’t matter how long the address is, it will appear as you put it.

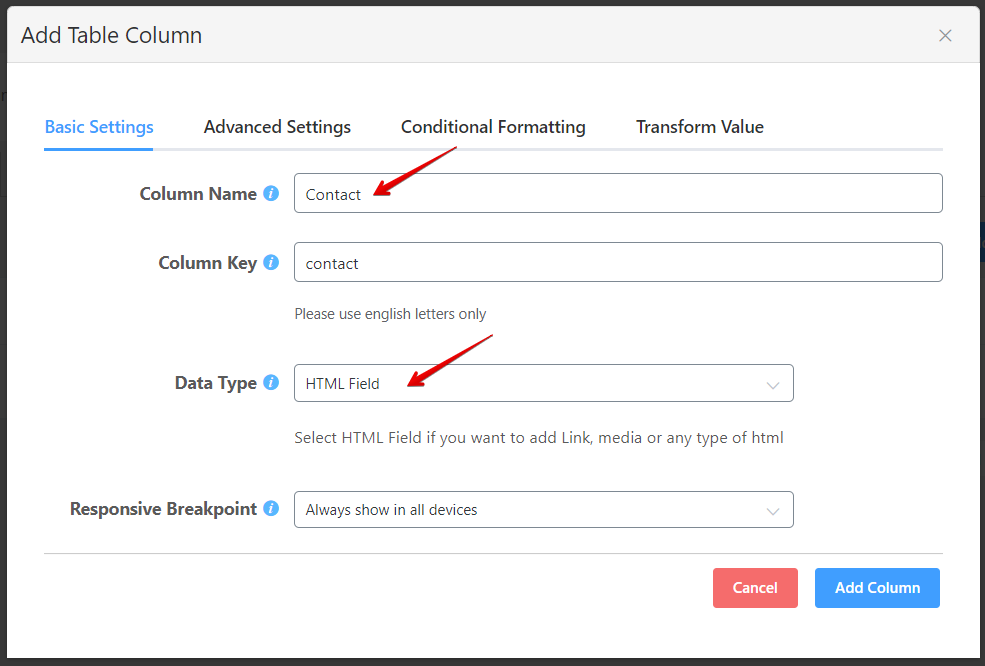
3. HTML Field
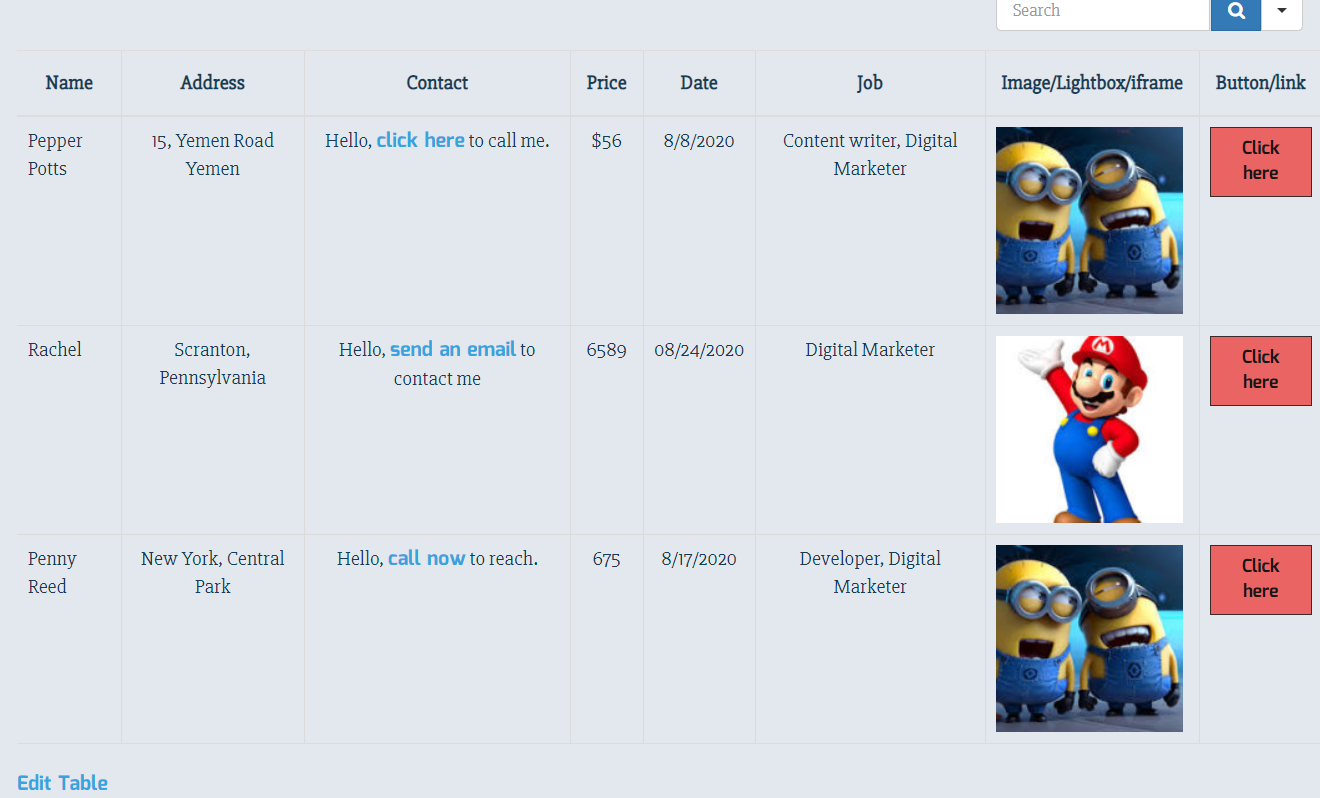
This one is the most versatile because it can show text, link, image, bullet points, and almost everything a post contains.
We have named the column “Contact” for our demo table and selected the “HTML Field” as the data type.
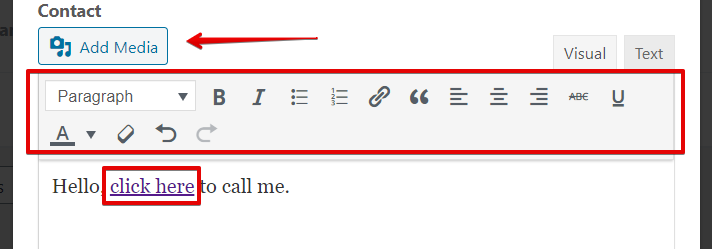
The data adding area will appear with lots of options for users. You can add media, change text style, insert a link, underline, and even color the text.
We have only inserted a link on the “click here” to turn it into an anchor text for this example. Users can customize all they want.
4. Numeric Field
For a product pricing table, this data input type comes in handy. Of course, the single-line text field can also work. But the Numeric Value input field has options to select the Separator Style.
It can also be used to add any number because the input is restricted to numeric data.
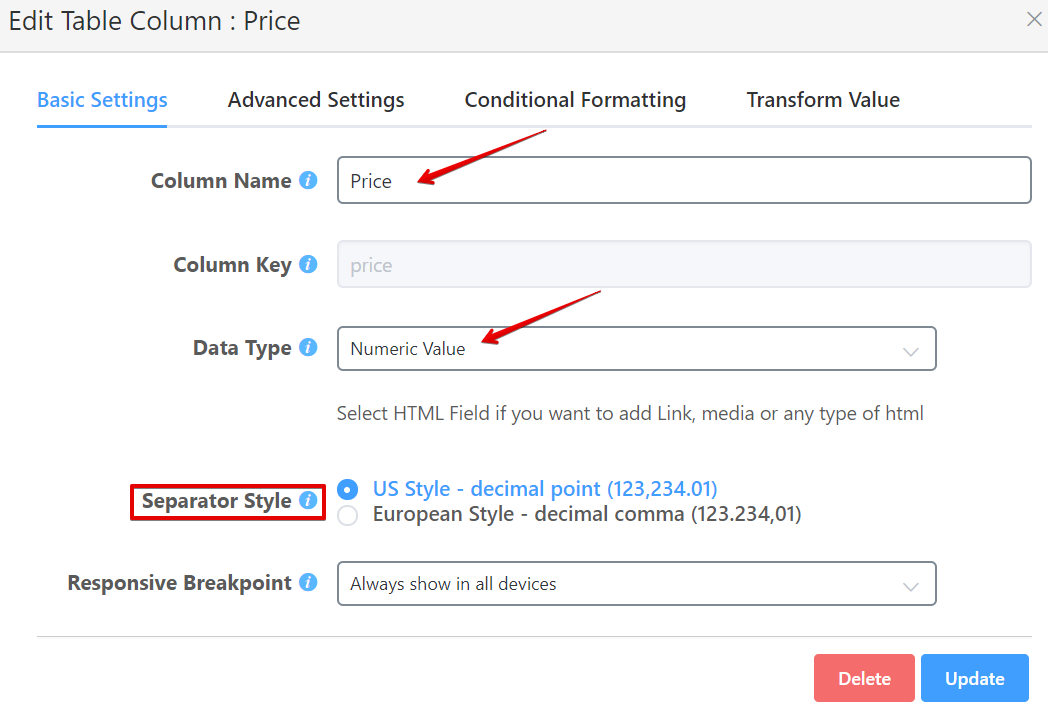
You can see a new block appear after selecting Numeric Value from the data type dropdown. Choose the US style – decimal point or European style – decimal comma digit separator.
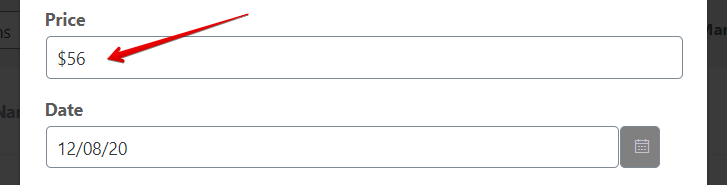
As for us, we went with the simple dollar sign for the first data.
5. Date Field
Suppose you want to mention a date in your table, you can restrict the data to Date Field and make it accept only selected date format. Choose from a total of eight standard formats or create a custom format.
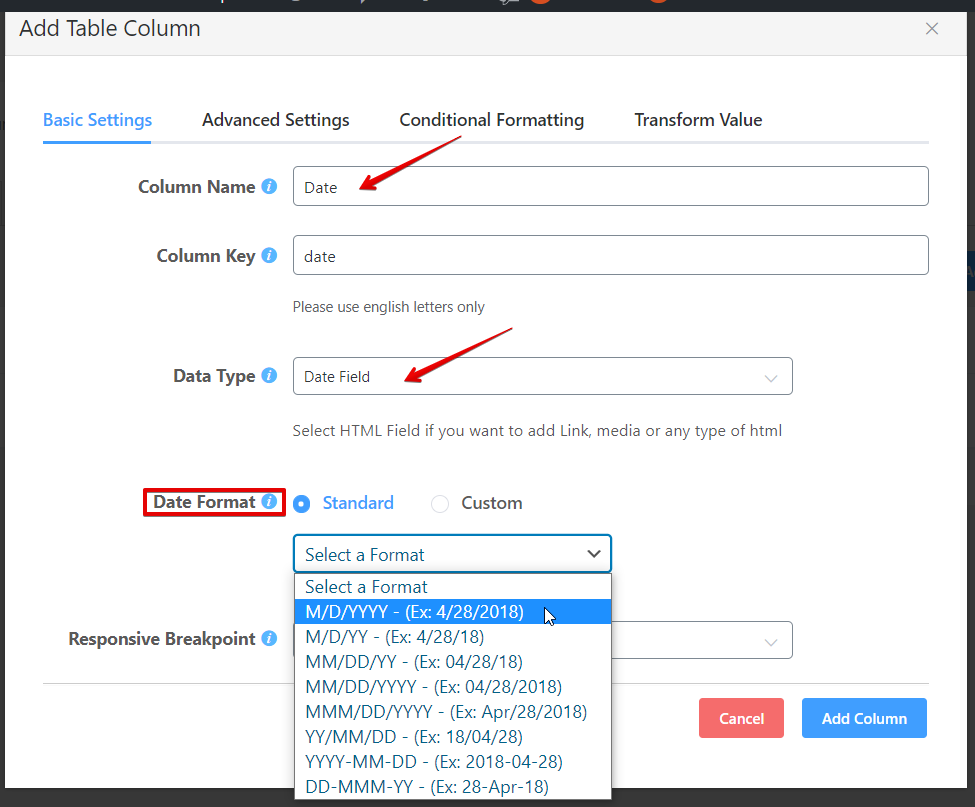
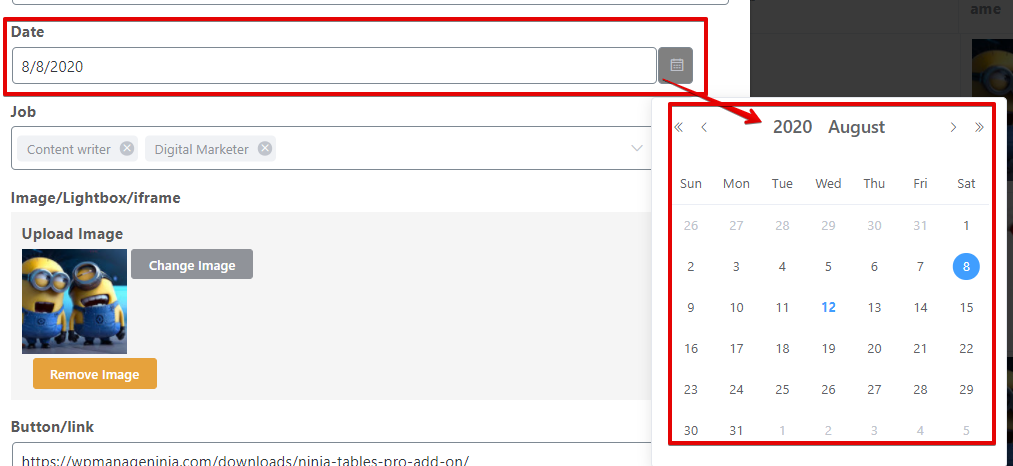
We have selected M/D/YYYY format from the standard options. When you add data in the popup window, open the calendar icon to the right and insert a custom format.
6. Select Field
Apart from the Text Area input field, you can use the Select Field to add multiple options. In the screenshot below, we have only added three options and toggled “Enable Multi-Selection”.
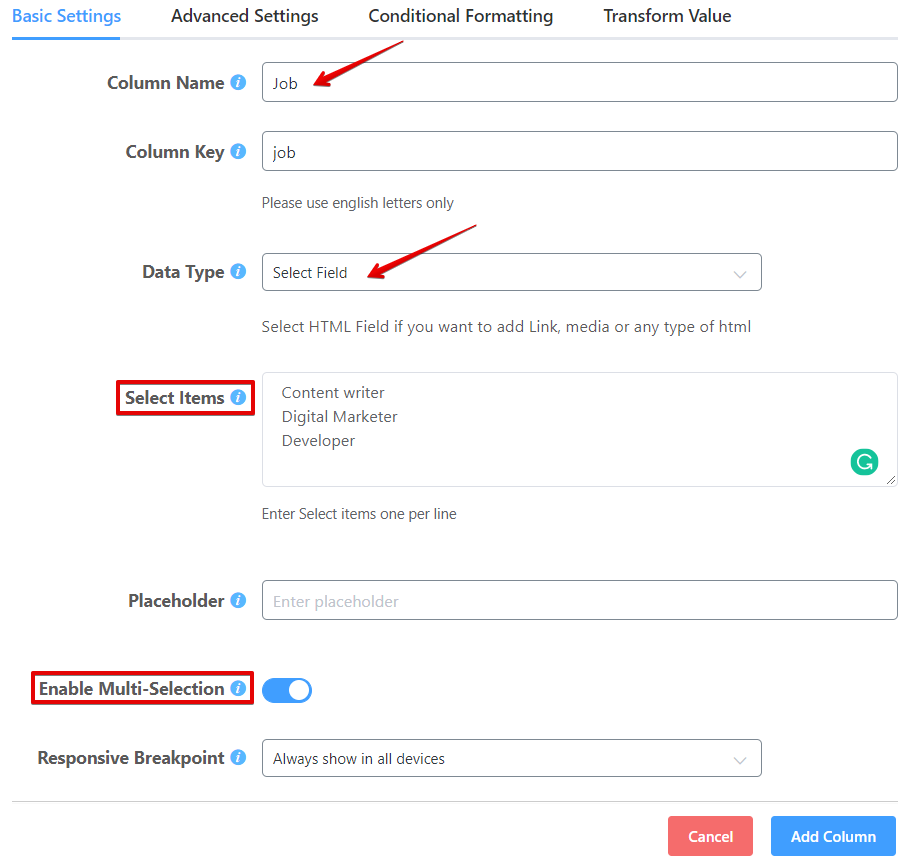
Users can add more than one option in the “Select Items” field. Since multi-select is on, we can select more than one item.
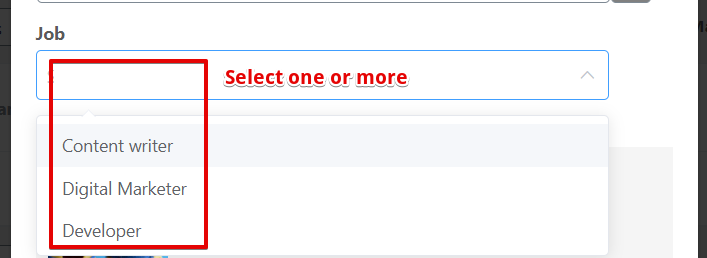
While adding data to columns, simply click on the items from the dropdown you want to show in your table.
7. Image/File/Lightbox
Unlike the HTML Field, this input box is only for images. For instance, users can add an image, image lightbox, or Iframe lightbox. The Link to URL option also lets the users insert a link for the image.
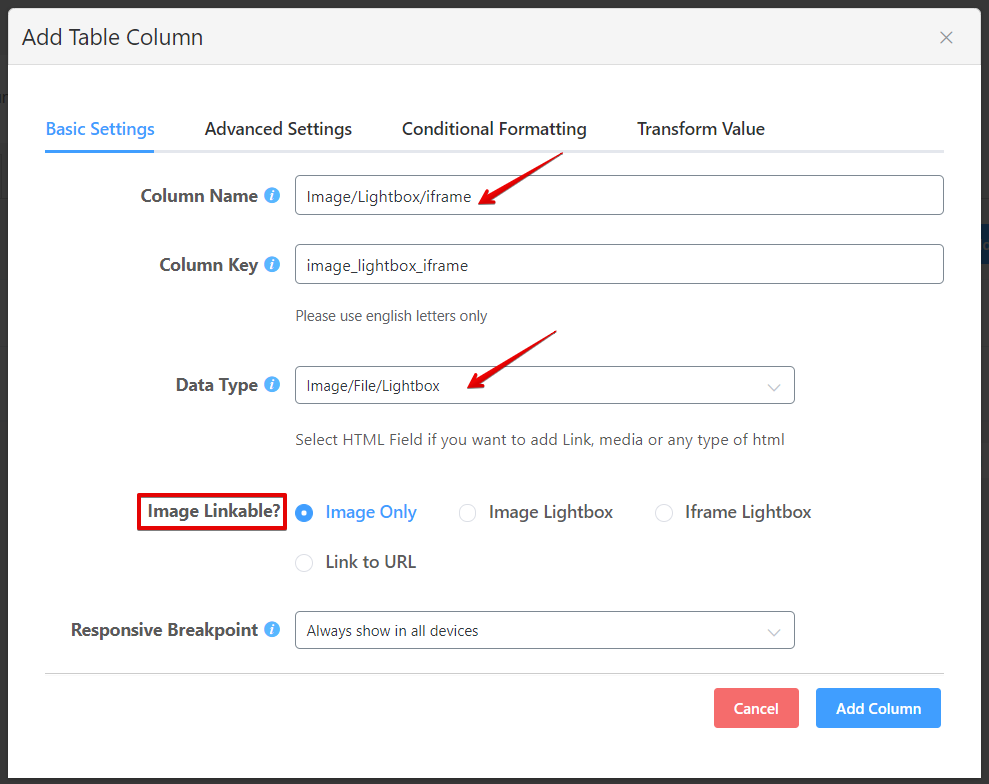
- Image Only: This option supports JPG and PNG both file formats.
- Image Lightbox: An uploaded image will appear with a dark-hued background.
- Iframe Lightbox: Upload an image with an Iframe URL.
- Link to URL: Link the uploaded image to a target URL.
Here column name is Image/Lightbox/iframe for our table. It’s “Image Only” so it won’t appear in a lightbox or in other forms.
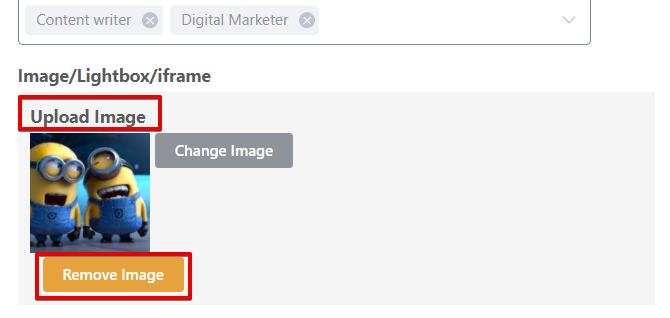
Click on the “Upload Image” to attach an image from your media library.
8. Button/Link
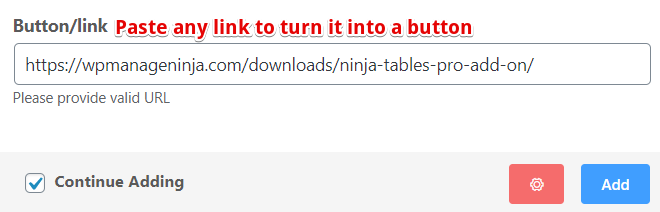
Finally, here’s the last one where users don’t need to put in much effort, except for pasting a valid button URL that they want to turn into a button.
The button can be customized as well. You can change the button style and text and make it more prominent. Write an anchor text like click here or buy now, and add the URL.
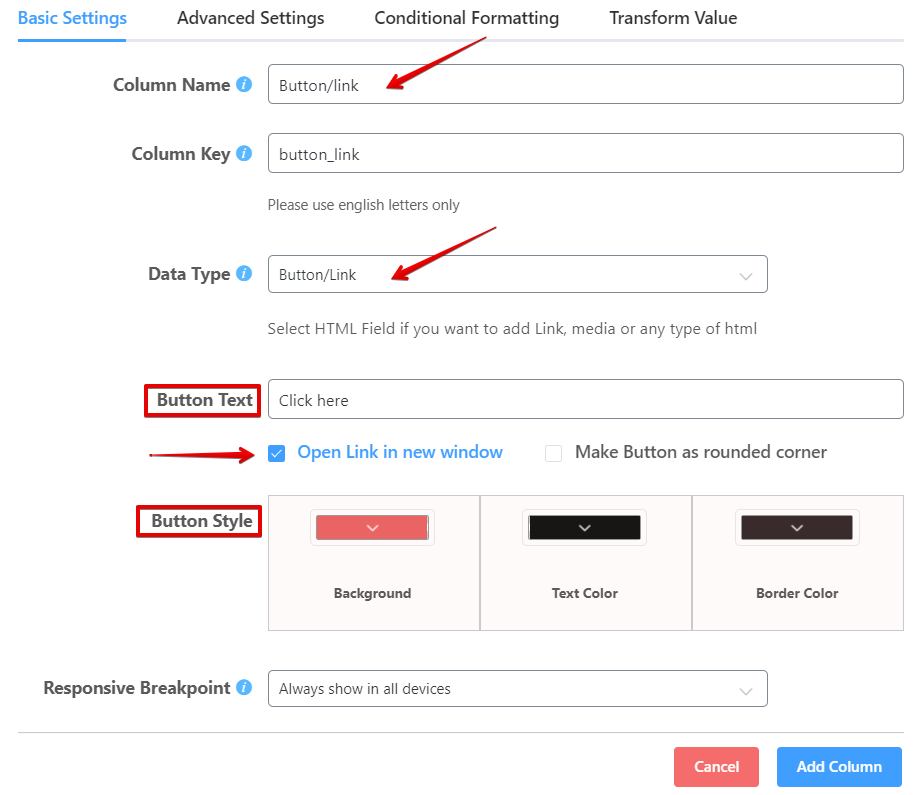
Our Button Text is “Click here” (text is optional), and we have also clicked on “Open link in new window” so that when someone clicks the button, it redirects to the link. Buttons can also have rounded corners if you select.
You can see how to add data for this Button/Link input field.
Summary
All of these eight data types are for the table columns in our example.
- The Single-Line Text Field shows texts in one line
- Text area can show long texts with two lines separated by commas
- Anchor texts, media, and text styles can be changed in the HTML Field
- Numeric values for the numeric field
- Eight different formats for Date Field
- The Select Field can show one or multiple items
- Image/File/Lightbox is for different formats of image attachments
- A customizable button with a link for the Button/Link input field
Open the preview window to see how the table looks. You can copy the Ninja Tables Shortcode and paste it anywhere in your post.
Final words
That will be all for this article. We have shown you how to change the data type for Ninja Tables columns. By restricting columns to links, attachments, texts, HTML, buttons, or multiple-choices, users can customize and configure the data type their way.
A cell with plain text might work for you. However, there’s no denying that bringing variety in the input fields makes for excellent user experience.
We’re sure now you won’t face any problem with this feature. You can still check out the documentation just to be extra sure of what you’re doing.
-

How to Add Code Snippets in WordPress: 100% Free Guide
Learn how to add code snippets in WordPress safely and -

FluentHub MCP: Run Your WordPress Business Right From Your AI Chat
Use FluentHub MCP to connect WPManageNinja products with AI agents -

How to Embed Social Media Feeds on WordPress Websites (No Code)
Learn how to embed Instagram, Facebook, TikTok, and YouTube feeds
Comments
-
I need to calculate the number of days between two date fields.
Field #1 – Date Filed: Date product received
Field #2 – Date Field: Date product updated
Field #3 – Numeric Field: Difference in number of days between field #1 & #2.
Leave a Reply
You must be logged in to post a comment.