


Recurring payment has been replacing the regular payment model for several reasons. It helps businesses increase conversion, save time and money, avoid payment conversations with the customers, and predict revenue. On the other hand, customers get a flexible payment experience that’s also seamless, helping them avoid late fees and save time.
Hence, recurring billing is a win-win for both customers and businesses, and we recommend it to any businesses that can overcome the challenges involved.
Now, if you’re using your WordPress site for accepting payments and want to implement recurring billing, you need to set up recurring payments on WordPress.
Meet Paymattic (previously known as WPPayForm); it’s the fastest WordPress payment form plugin that comes with recurring payment functionality. It enables WordPress users to accept payments via Stripe, PayPal, and 11 other payment gateways. You can also use Paymattic to collect multiple payments, donations, and many more. The plugin has a wide range of payment features, including multiple currencies, tax calculations, and automatic payment receipts. With that being said, let’s find out how you can set up recurring payments on WordPress using Paymattic.
Note: Recurring payment is a Pro feature in Paymattic. So you need to buy Paymattic before you can use this feature.
Setting up recurring payments on WordPress
You can set up recurring payments on WordPress with Stripe and PayPal with Paymattic. You can use Stripe for free, and if you want to enjoy subscription payment with PayPal, you can upgrade to a premium license. For demonstration purposes, we will illustrate how to set up recurring payments on WordPress using Stripe. So before we begin, you might want to create a Stripe account. Here’s how to create one:
Creating a Stripe account
Creating a Stripe account is as easy as creating an email account. All you have to do is to get your information ready and start creating your account.
Here’s what you need to create a Stripe account:
- Your Email address
- A strong password
- Your Social Security Number
- Your bank routing number
- Bank account number
Here’s a step-by-step guide to creating a stripe account:
- Go to https://dashboard.stripe.com/register to register your account on Stripe.
- Next, enter your email address, full name, and password and click the Get Started button. It will take you to the stripe dashboard.
- Your test API keys will be available instantly, and you’ll be prompted to explore the docs. But for now, you can move on to confirm your email address. Go to your email address and find the Stripe confirmation email. Click or copy-paste the link on your browser to verify your email address.
- Now, it’s time to activate your Stripe account. Click Activate Your Account from the right sidebar to get started. This is where Stripe requires your business and personal details, EIN/SSN, website address, credit card statement, phone number, bank routing number, and account number. Fill them up correctly because Stripe will use this information for the transactions.
- Note that you can set up a two-step verification via SMS or an authenticator app. Submit Application when you are happy with everything.
After you have submitted your Stripe account application successfully, you have to wait a little while so that the Stripe authority can confirm your account. Most of the time, the process is completed almost instantly.
Once you’ve got a confirmation email about your application, you can access your Stripe live API keys. You must keep this code secret.
Installing and activating WPPayForm Pro (now Paymattic)
Now that you’ve configured Stripe, you need to buy and install Paymattic Pro into your WordPress site. To do so:
- Purchase Paymattic from here. After the purchase is completed, you will be given a file named wppayform.zip, and you’ll also get a license key to activate the license.
- Now sign in to your WordPress dashboard and go to Sidebar>Plugins. You’ll find a button to Add New plugins on WordPress.
- Upon clicking the Add New button, you’ll be taken to the WordPress plugin repository. You can upload the plugin by clicking the Upload button.
- Once the upload completes, click the Activate Plugin button to activate Paymattic.
- To activate your plugin license, access WPPPayForm from the sidebar and go to Settings>Licensing. Here you can insert your license key and click Activate License.
Congratulations! You’ve unlocked all features of the best WordPress payment plugin!
Setting up payment methods
Once you’ve installed and activated Paymattic Pro, you need to set up payment methods for accepting payments.
Here’s how to set up a Stripe payment method on Paymattic:
- Open your Paymattic Settings tab and switch to Stripe Settings. You’ll find two modes, Test Mode and Live Mode. You can use the test mode for testing payment method configuration and switch to live mode once you’re satisfied with the test mode configuration.
- Remember the Stripe API keys? You need them to set up Stripe with Paymattic! You can find the Stripe API keys on the Developer section of your Stripe Dashboard. Copy the Test Keys for testing configuration. You can use the Live Keys later for activating transactions.
- After acquiring the test key, go back to your Paymattic Settings page and paste them into the Stripe Settings fields.
- Next, you need to insert your business name and provide a checkout logo in the relevant fields.
- Click Save Settings to save your configuration. Done!
If you’ve completed the above steps correctly, your stripe account will be configured with Paymattic, and you’ll be ready to accept payments via Stripe.
Creating a subscription-based payment form
At this point, you will have sorted everything related to the setup and configuration of Paymattic. Now it comes down to creating a payment form for accepting payments from your customers.
In order to create your recurring payment form:
Go to sidebar>Paymattic Pro and select Add New Form. Paymattic will present you with some built-in form templates to create your desired payment form.
- You can either select a predefined template or customize a built-in payment form template. Of course, there is an option to build one from scratch by choosing a New Blank Form.
To illustrate, we will start from a blank form.
- Once you’ve created a blank form, you can edit the form’s title by clicking the top left’s Edit button. To make the title and description displayable, configure the title and description. Then you can start dragging the required form fields.
- At first, click or drag the necessary General Fields on your form. Name, Email, and Address are some essential details that you may need for tracking subscription payments. You can also add a Textarea Field to collect more data, such as their age, occupation, etc.
- Next, click or drag the Subscription Payment field into your form builder (located under the Donation & Product Field elements). This is where you customize subscription payment. We’ll discuss it in a while.
- Finally, you need to drag a payment method field, which is Stripe. So click or drag Card Elements (Stripe) on your payment form. This will enable users to input their card information via a Stripe checkout page.
The recurring payment form skeleton will be ready, but it requires a bit of customization before you can ask for recurring payments using the payment form.
Customizing recurring payment form fields
The recurring payment form is ready for receiving payments repeatedly. However, the form field is generic, and it’s essential to learn customization for changing field labels, checkout display styles, button styles, and many more!
Here are some tips to customize your recurring payment form fields:
- The General Fields allow you to change the Field Label and Placeholder. You can choose a Default Value for the general form fields and mark them as required by toggling the Required option.
- Some General Fields, such as an Address Field, offer more customization options. So you need to choose them according to your requirements.

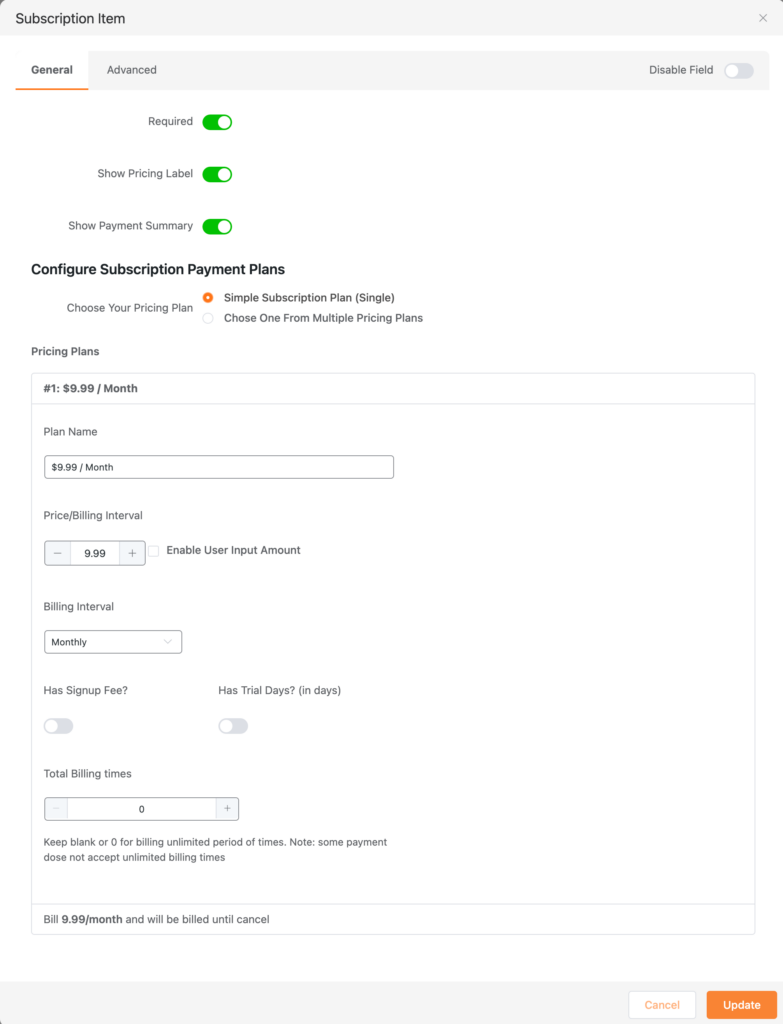
- The Subscription Item form field allows you to set your selling Item Name, Subscription Plan Name, Price, Signup Fee, Trial days, Billing Interval, and Billing Times.
- You can choose to show or hide Pricing Label and Payment Summary and set a Simple or Multiple Recurring Payment Plan.
- The Subscription Item form field needs to be set as a Required Field.
- You can allow users to customize their subscription payments by enabling the Enable User Input Amount. In order to avoid unrealistic plans, you can also set a minimum payment amount by inputting a Minimal Amount.
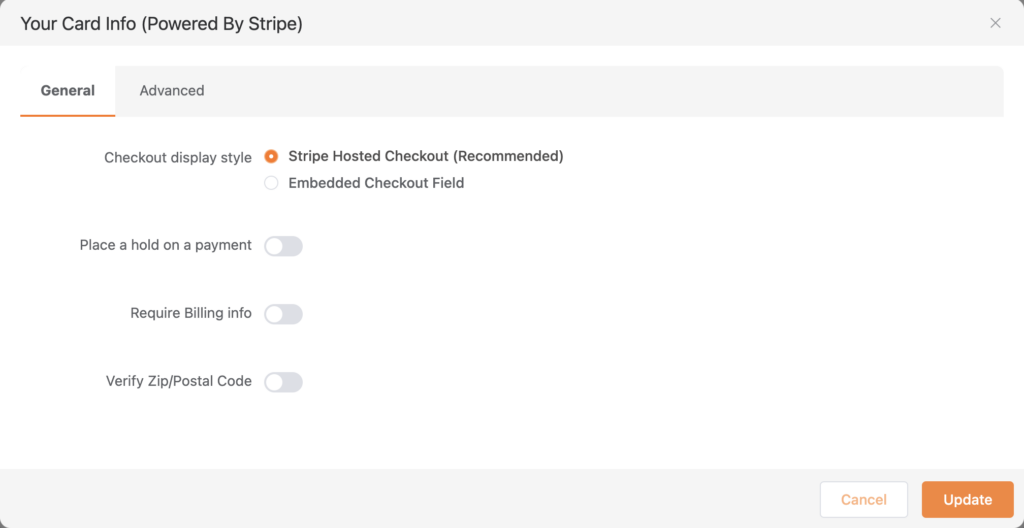
- The Card Elements (powered by Stripe) allows you to display Embedded Checkout Field or Stripe Hosted Checkout field. You can ask for Billing Info and instruct Stripe to Verify ZIP/Postal code.
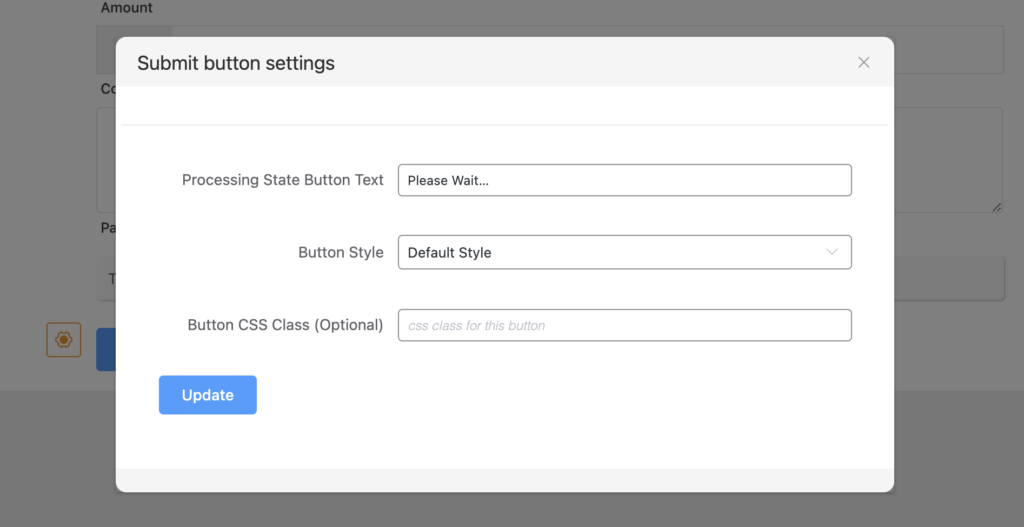
- Finally, you can customize the Submit Button or keep it as it is.
Displaying the payment form
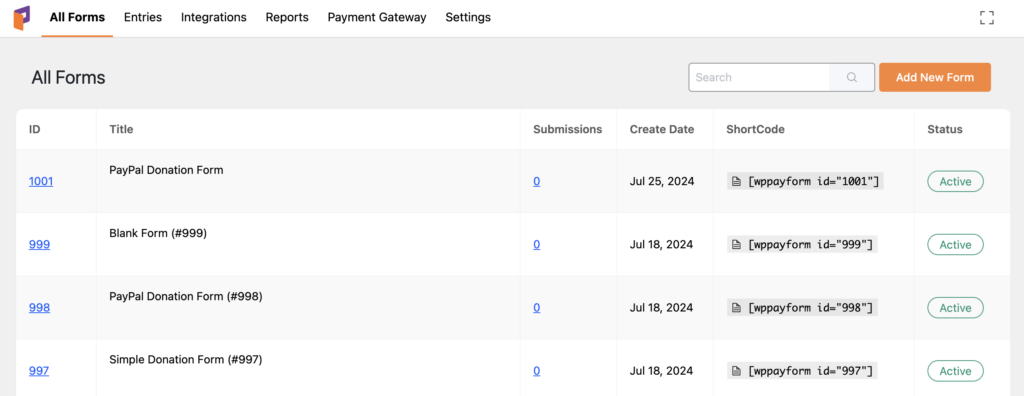
Once you are done creating your recurring payment form, you will need to display it on your site. Paymattic forms are shortcode-enabled. This means that you don’t have to go through the extra hassle to show your site’s payment forms.
To find your created forms, head over to Sidebar>Paymattic>All forms. You’ll find the form shortcodes on the right-hand side of every form; just copy and paste the shortcode to display a form and start accepting recurring payments!
Do more with Paymattic
We know it has been a long read. But now that you’ve learned to set up recurring payments on WordPress, you might want to do more with Paymattic. We have a wide range of topics covered related to payments. Check out our other articles to learn about creating nonprofit donation forms in WordPress or read how to use forms for enhancing UX in WordPress. Do more than simply accept payments!
Also, do subscribe to our YouTube channel to get similar WordPress-related tips and tricks and follow us on Twitter and Facebook to get regular updates.
-

6 GiveWP Alternatives: Get the Best WordPress Donation Plugin
Find out GiveWP Alternatives from the expert listed WordPress donation -
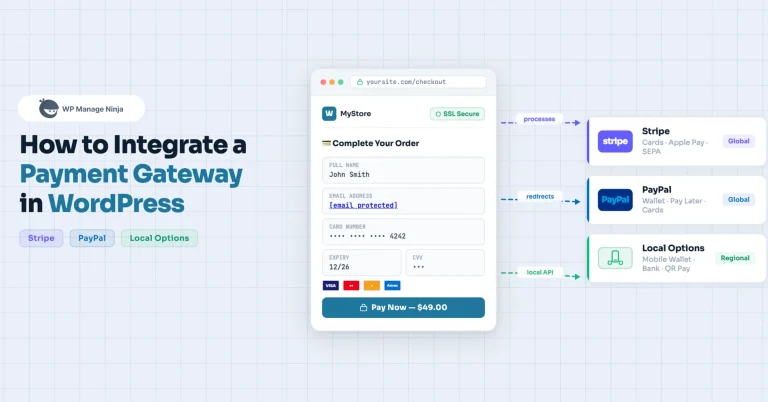
How to Integrate a Payment Gateway in WordPress (Stripe, PayPal + Local Options)
You search “how to add payments to WordPress,” and within… -

Enable Auto-Enrollment on Payment Success with Tutor LMS
Are you tired of manually assigning courses to every student…
Leave a Reply
You must be logged in to post a comment.