
To add Stripe to WPPayForms, you’ll need an API key. If you do not already have an account with Stripe, you should sign up for one now.
This tutorial shows you how to integrate Stripe into your WPPayForms.
In order to do this, go to the Global Settings from your dashboard. Then choose Stripe Settings from the left sidebar.
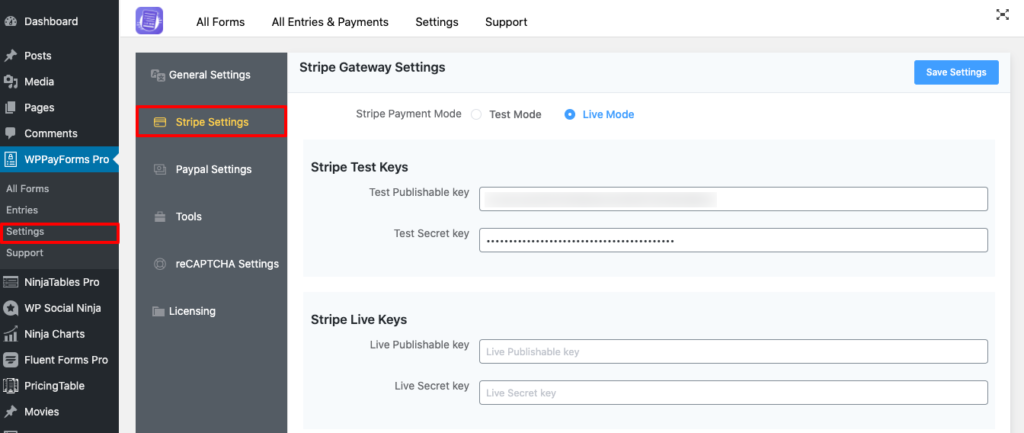
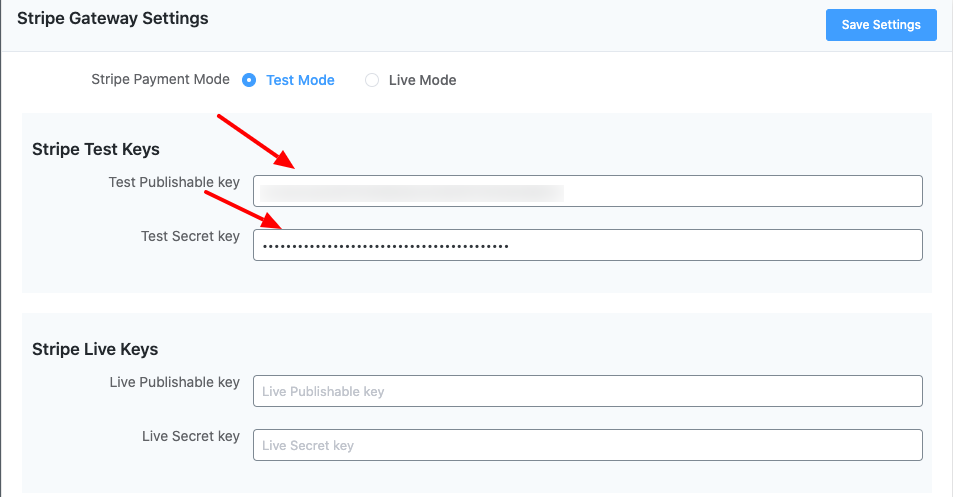
In the Stripe Gateway Settings, you can choose the Stripe Payment mode. It can either be Test Mode or Live Mode. In this example, the Test Mode has been used.
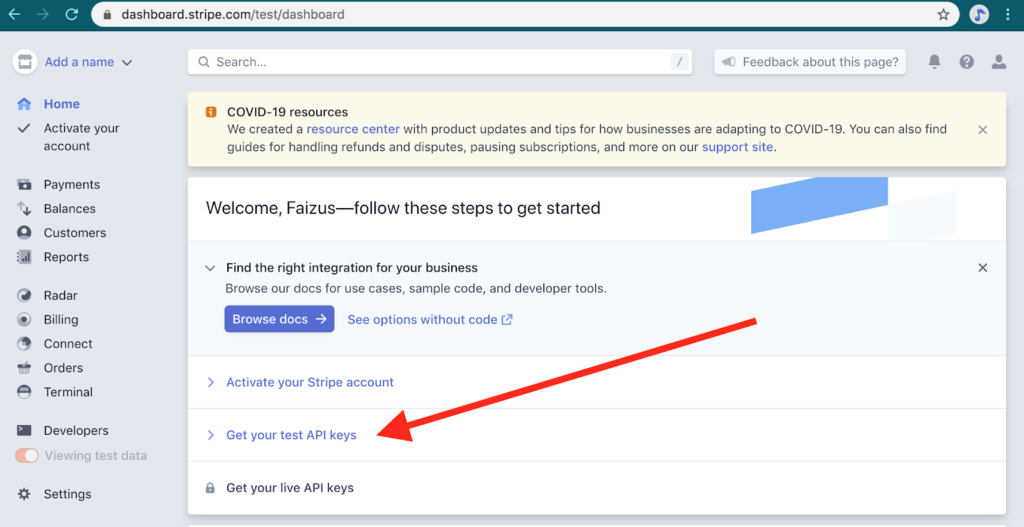
Then you will have to provide the test API keys. So login to your Stripe account to fetch these keys. Click over Get your test API keys.
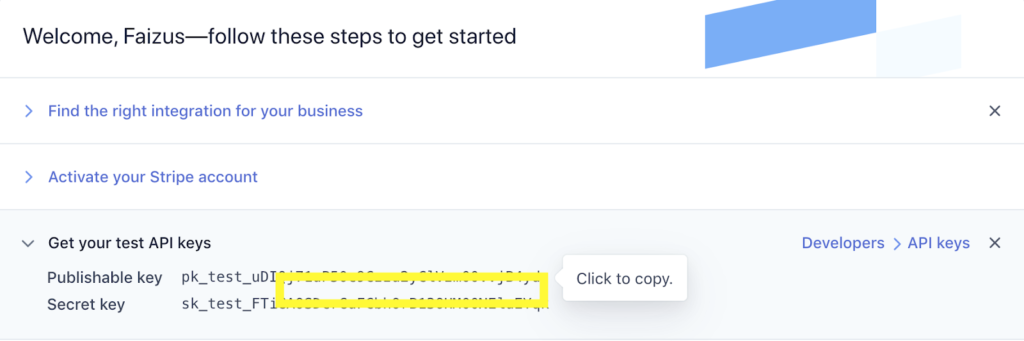
A selection of keys will come up when you click on the button. There will be a Secret key and a Publishable key. Just click to copy. Head back to the dashboard of WPPayForms, and paste the keys into their respective fields. After you include the test API keys, live API keys will be prompted for you. Head back to your Stripe account, and copy from there the live API keys. Paste these in their fields respectively.
You can also set the Company/Business Name & Checkout Logo if you want. This will be applied while checking out. Enabling Stripe Meta Data makes form input data be sent to stripe as metadata. Lastly, click the Save Settings button.
For Stripe to completely work for subscription / recurring payments, you need to configure your Stripe webhooks. Visit your account dashboard to configure them. Please add a webhook endpoint for the URL below.
Webhook URL: https://sandbox.wpninjathemes.com/?wpf_stripe_listener=1