
Now, you’ve installed WPPayForm Pro, activated your license and connected your Stripe, and or PayPal account. Now, it’s time to create your first payment form using WPPayForm plugin.
Here, we are using Test Mode for Stripe and Sandbox Mode for PayPal in order to demonstrate all the guidelines using the plugin. Make sure that you have your payment confirmation pages excluded from being cached.
In this post example, you will see how to create a simple one-time payment form that collects a few fields in addition to credit card payment information. To know more about what types of form configurations are available, please visit our demo site.
Log in to your WordPress admin panel, then go to WPPayForm Pro. WPPayForm Pro → Add New Form.
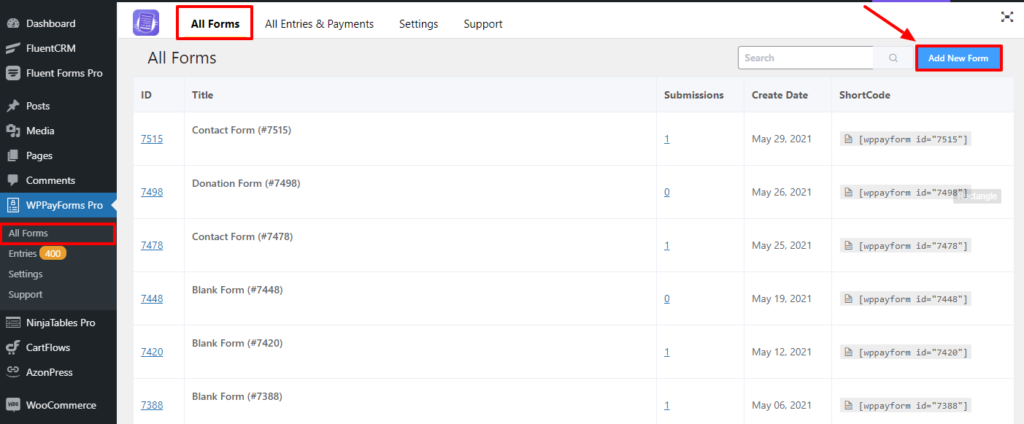
Click on the Add New Form button located on the top right corner of the plugin dashboard.
A pop-up will appear with some predefined forms, you can clone any predefined form and customize it as much as you need.
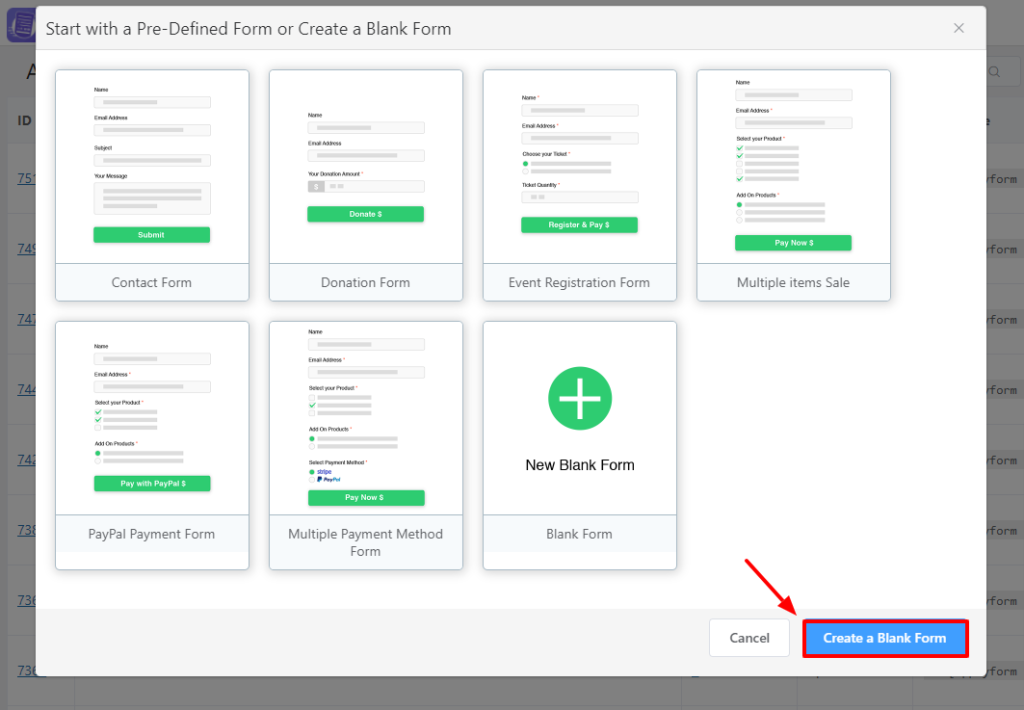
For demonstration purpose, we are going to start from the very beginning. Let’s create a blank form. Click in the New Blank Form box.
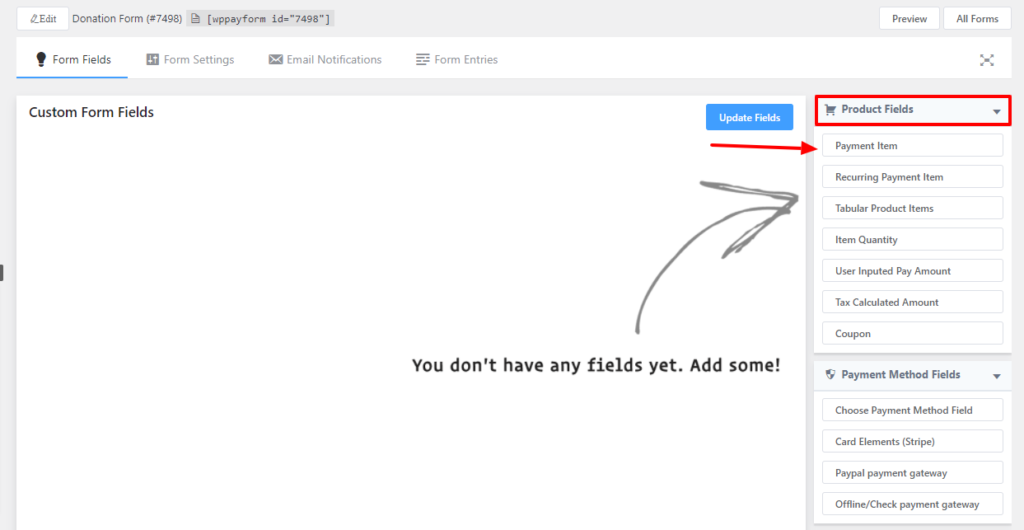
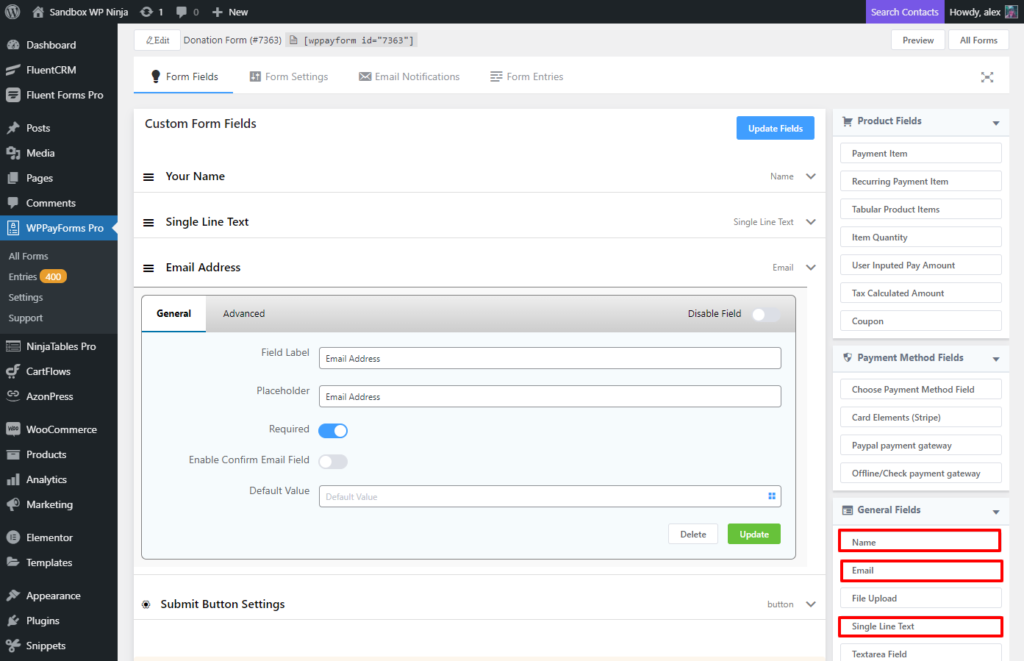
After clicking the New Blank Form box, you will be taken to the Form Fields tab of the plugin. While you are here, you will find 3 different sections named Product Fields, Payment Method Fields, and General Fields.
Product Fields Section
Now, select the Product Fields section in the right sidebar panel. Click on the Payment Item option, then it will open up with a bunch of options for payment item and submit button to set up and specify the product you want to sell.
Here, you will get options to set the product label, name, price of the product. You can add multiple items to your list as well or enable the image if required.
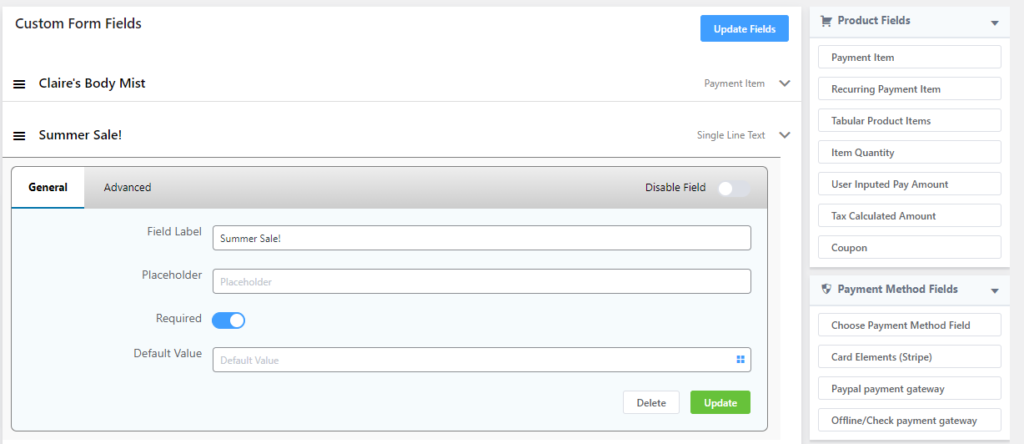
At first, you need to provide the Field Label with the text (for Ex: Football), then you can enable or disable the required field.
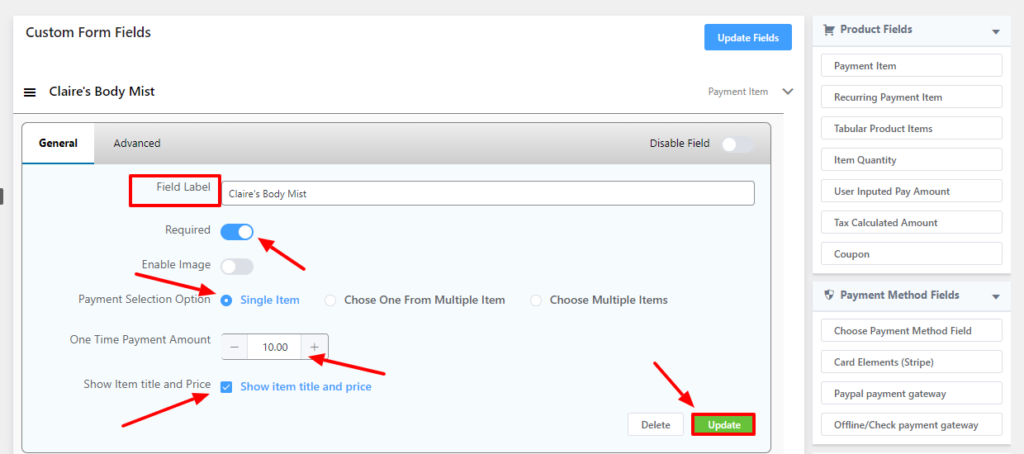
Next, choose the Single Item from the Payment Selection Option.
Now, you can change the price, by default the price shown 10.00, you can set it according to your product. Then you will have the option to show the product name with the price on top of the form. You can enable or disable the option with a single click. Then click on the Update button.
General fields section
Next, go to the General Fields section and click on the Customer Name, Single Line Text, and Customer Email input fields. You can just click or use drag & drop for adding these input fields.
Now, customize the Single Line Text input field, to do so, click on the down arrow icon located on the right side of the field.
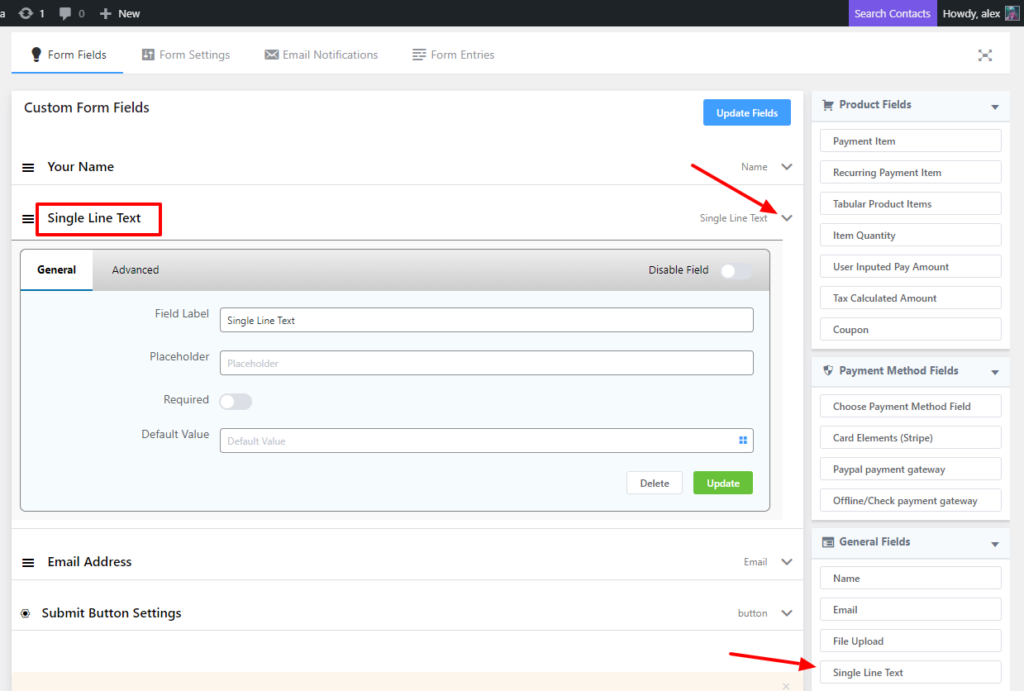
Then, you will see that a panel will expand with a set of options. Type some text in the Field Label and the placeholder, make this field required if you want. You can also provide a default value for the input field. Click on the Update button to finalize the customization.
After adding and customizing all the fields, you need to click on the Update Fields button.
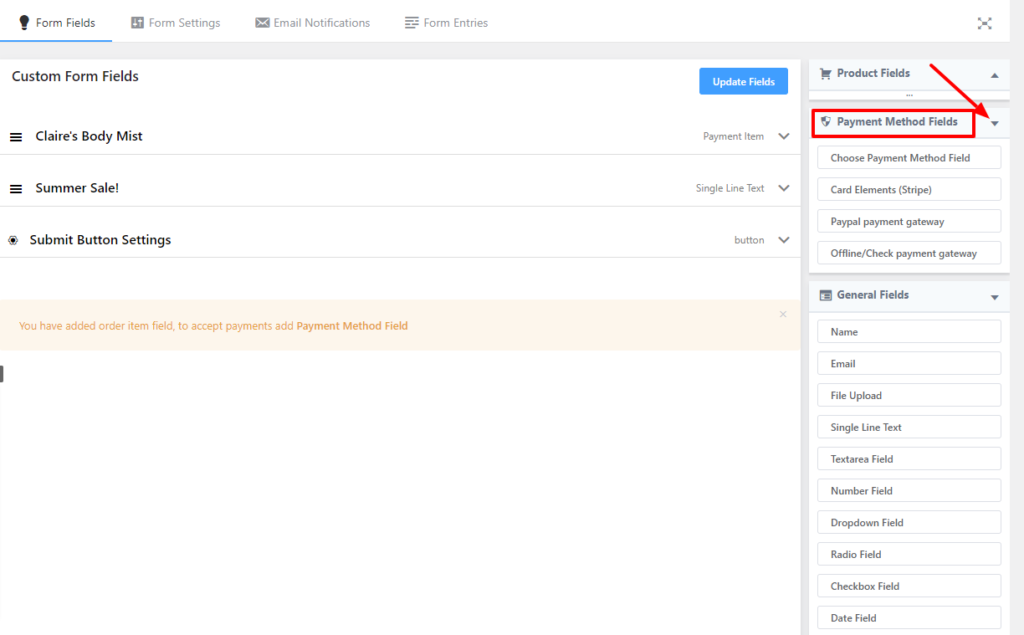
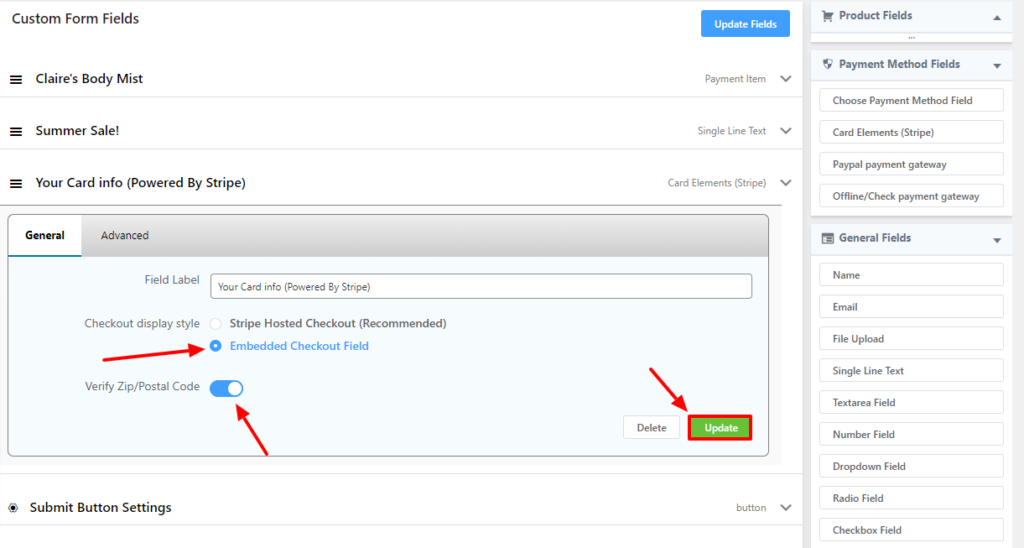
Payment method fields
Now, you need to add the payment method for this form. To do so, go to the Payment Method Fields section located in the right sidebar. Then click on the Card Elements Stripe option. You can transact with any credit card or debit card through Stripe. after clicking it, a payment panel section will be added to the form.
Next, click on the down arrow icon to expand the payment panel section. You will find several options out there, you can provide new field label or can keep the existing one.
Next, click on the Embedded Checkout Field from the radio button from the Checkout display style option. You can also enable Zip/Postal code verification. Now click on the Update button.
Remember clicking the update button will only update the field. To save the whole form along with the fields, you have to click on the Update Fields button.
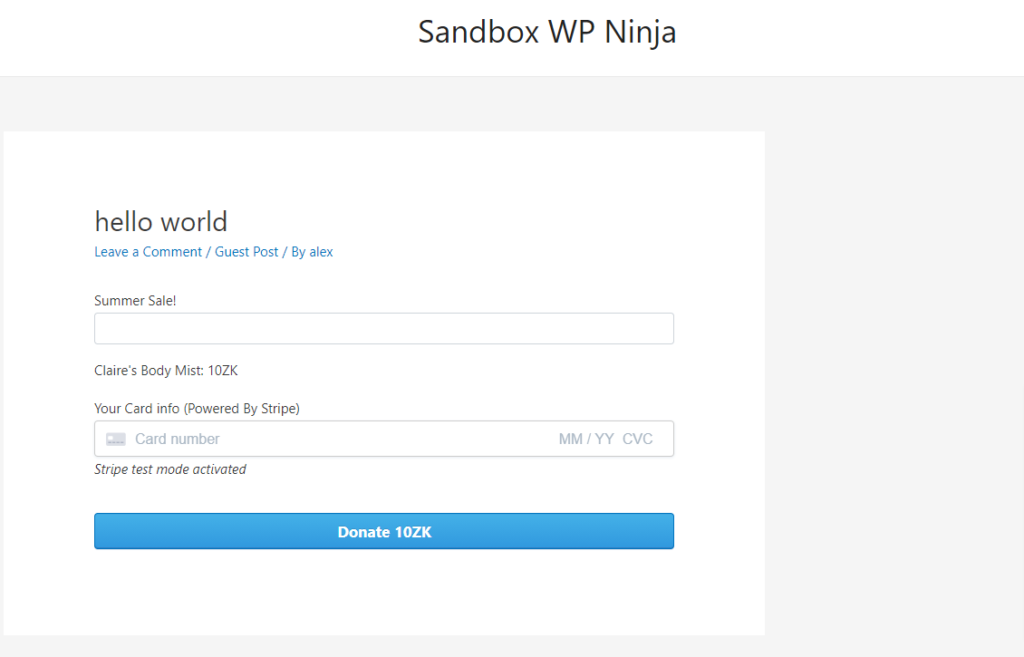
Now, look at the preview of the payment form you have created on your site.
Once you have created your first payment form, you need to publish it on your website so that your clients can pay you for your respective products or services you offer.
Adding Payment Form on Your Website
To add the payment form on your site, you need to add your created payment form on a certain page. To do so, you require to embed the shortcode (of that particular form) on the respective page.
You can find the form list along with there shortcodes in your plugin dashboard.

Copy the shortcode, open your page editor and paste the shortcode. You can use this shortcode in any Textarea of your page.
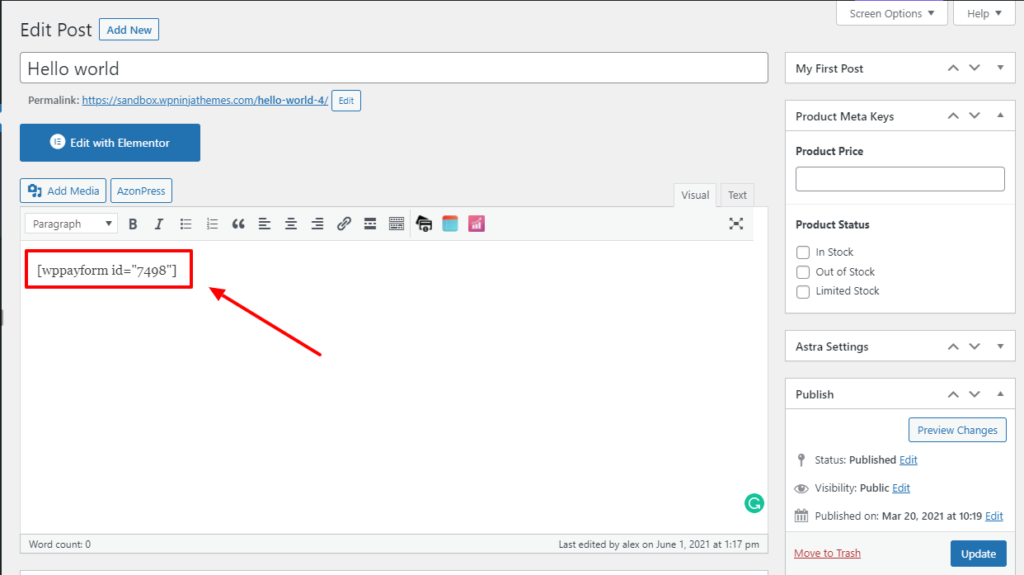
After embedding the short-code to a certain page, you will see the payment form will be displayed on that page.
Now, you can use the form to get paid from your clients for the products and services.
This is how you can create your first payment form using WPPayForm plugin that is pretty easy and comfortable.