
WPPayForm brings you another brilliant Product Field which is Recurring Payment Item. With this field, you can make payments on a pre-arranged schedule. Follow this simple guide to learn how to apply this feature in your Pay form.
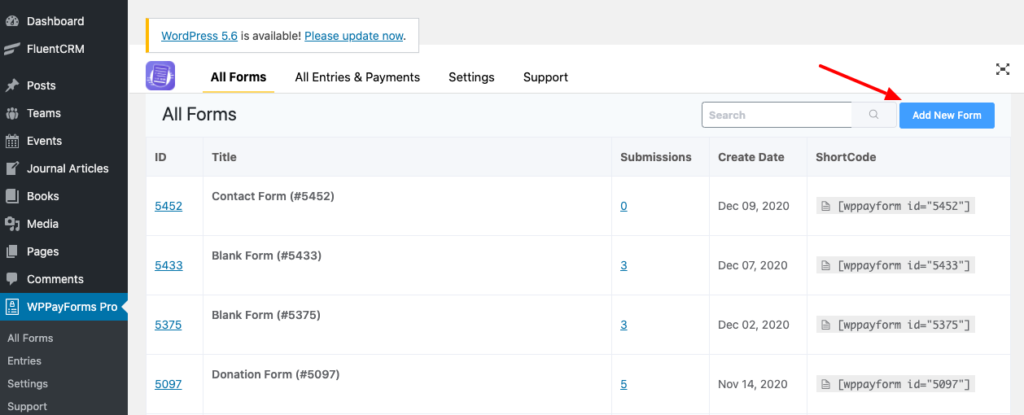
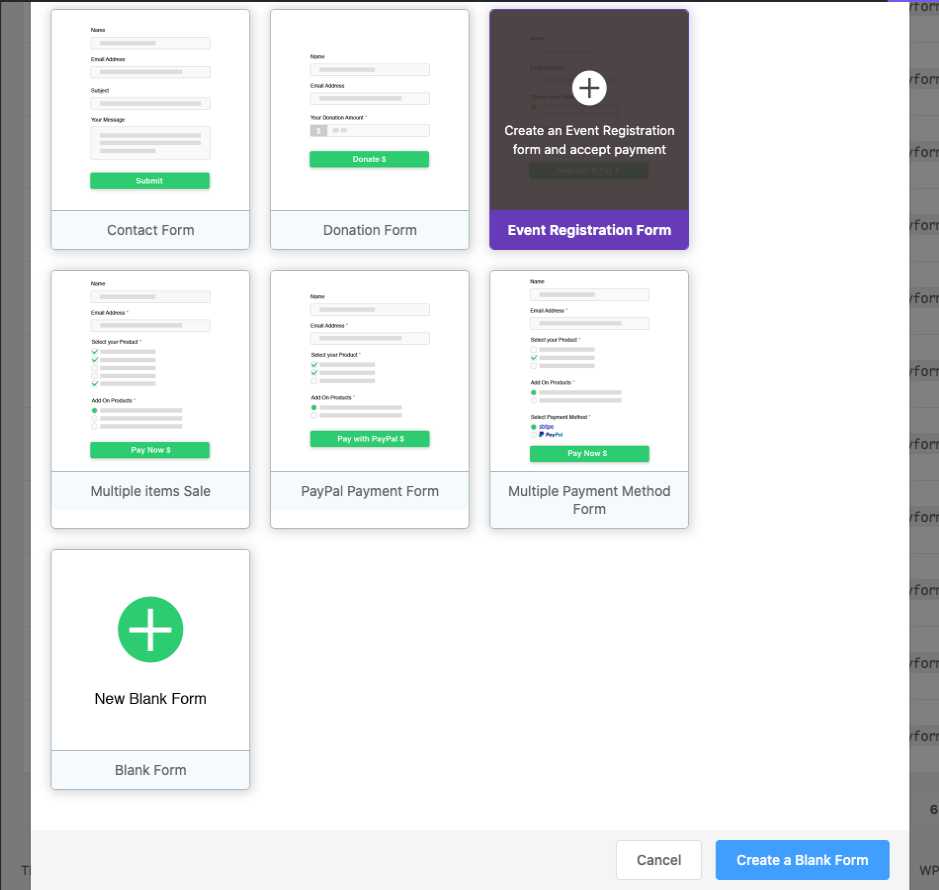
First, go to the WPPayForm dashboard and create a new form by clicking on Add New Form. When you add a new form, you will notice some default forms where you can select the suitable form. Or you can simply click on Create Blank Form if you want to make it from scratch.
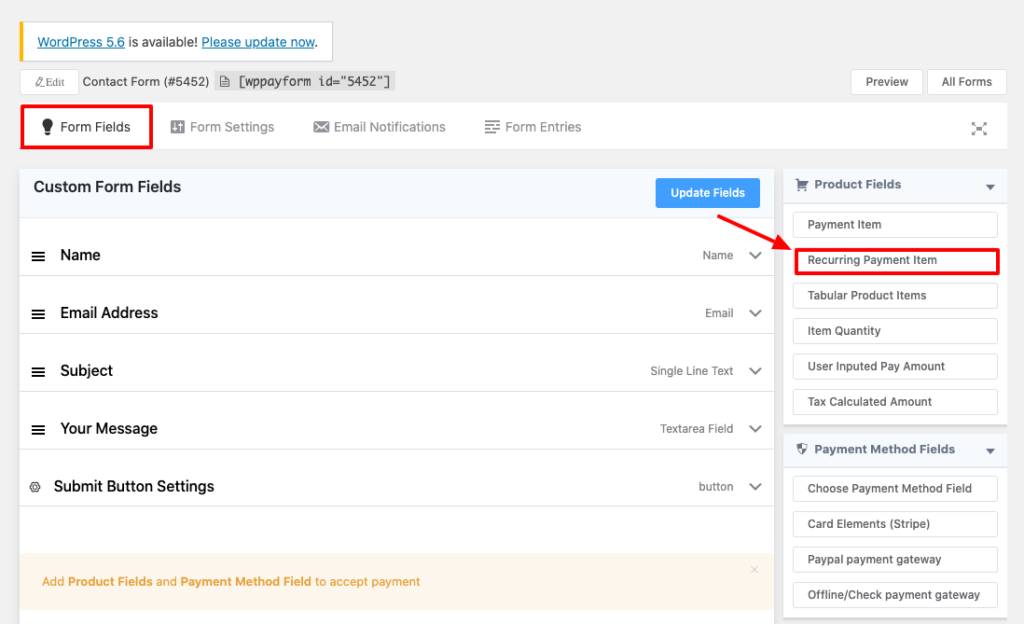
In this example, a Contact Form has been used. When the form’s Edit button is clicked, several types of fields will appear on the edit page. Then go to the Product Fields and click on Recurring Payment Item.
Once you select this field, you will find some field options in the General Tab. These are as follows:
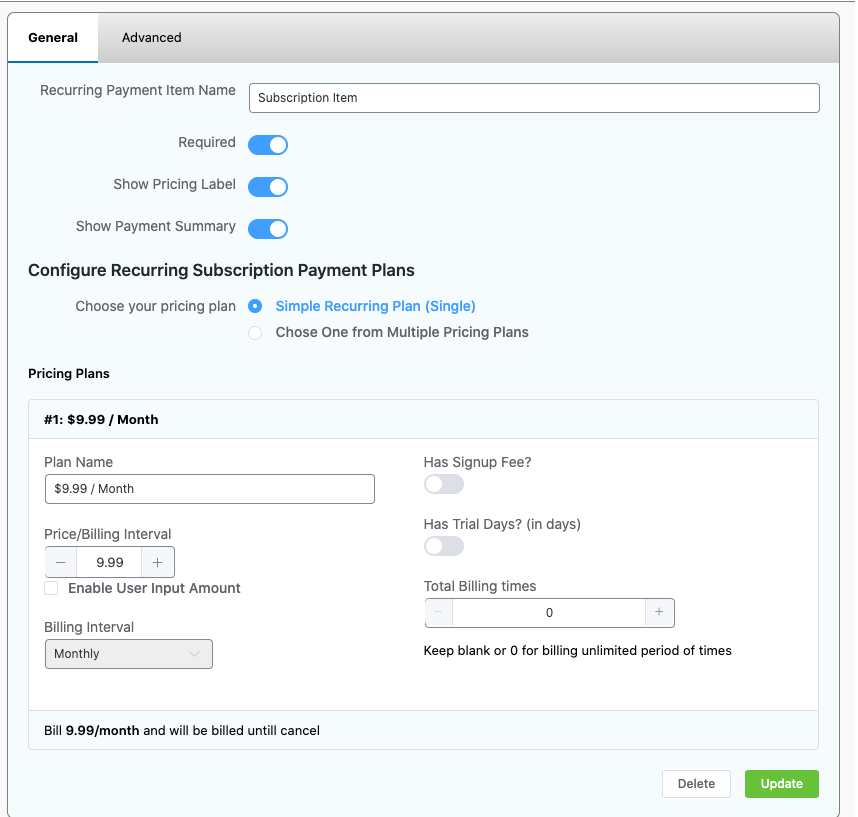
Recurring Payment Item Name: The name of the Recurring Payment Item. For example, When you are selling a course you might want to give a name like “The Masterclass”
Required: This option allows the field to be turned on and off as necessary. The choice required option states that the input area must be filled out before submitting the form.
Show Price Label: This option allows you to display the item’s price label in the frontend.
Show Payment Summary: This will show the overall summary of the item’s payment in the frontend.
Choose your Pricing Plan: This option configures Recurring Payment Plans for Subscription. Options include Simple Recurring Plan(Single) & Choose One from Multiple Pricing Plans. If you have two or more recurring payment options to choose from then select the multiple pricing plans and if you have one single recurring payment plan then choose the single pricing plan.
Plan Name: This lets you choose the name for the item’s pricing plan. Define the name of your subscription plan.
Price/Billing Interval: The amount of price that must be paid after every certain amount of time. You can also enable the user input amount to add the amount of your custom price. User input payment amount is very useful when you are accepting donations.
Billing Interval: The time period required for the item to be paid for. It can be on a Daily, Weekly, Monthly, and Yearly basis.
Has Signup Fee: This option allows the item to have a one-time payment amount while signing up.
Has Trail Days(in days): If the Signup Fee is disabled, this option allows you to add a number of Free Trial days to the item. After the trial period ends, the user will be charged automatically. Note that the user will be required to enter the card details when submitting the form but the card will not be charged instantly. It will be charged after the trial days ends.
Total Billing Times: This is the total number of times the user will be charged until canceled. Define zero to charge continuously until canceled.
Here are the field options from the Advanced tab:
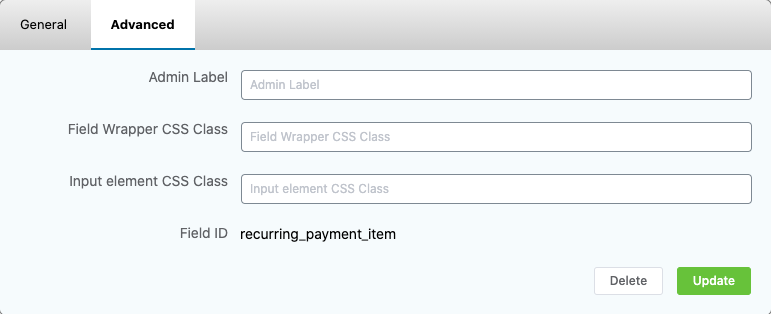
Admin Label: This label is used if the admin wants to see the field’s label from the back-end. For subscription items, it doesn’t have any use but for other fields, the admin label can be customized as you want.
Field Wrapper CSS Class: This is a field used for adding a class for the field wrapper which means the parent element (div) of all the DOM elements related to these subscription items.
Input Element CSS Class: This is a field used for adding a class for the input element. For recurring payment item, this field can be ignored.