WPPayForm brings you another exciting feature that is, RazorPay Payment Gateway support. RazorPay offers fast, affordable & Secure ways for users to accept and disburse payments online & own a fully functional current account.
Just go through this simple guide to learn how to integrate RazorPay with WPPayForm.
At first, for the integration to work you need to have an API key. And if you don’t have a RazorPay account, then you should sign up for one now. In order to set up RazorPay with the plugin, go to the Global Settings from your dashboard & select Payments from the sidebar. Next, go to Razorpay Settings.
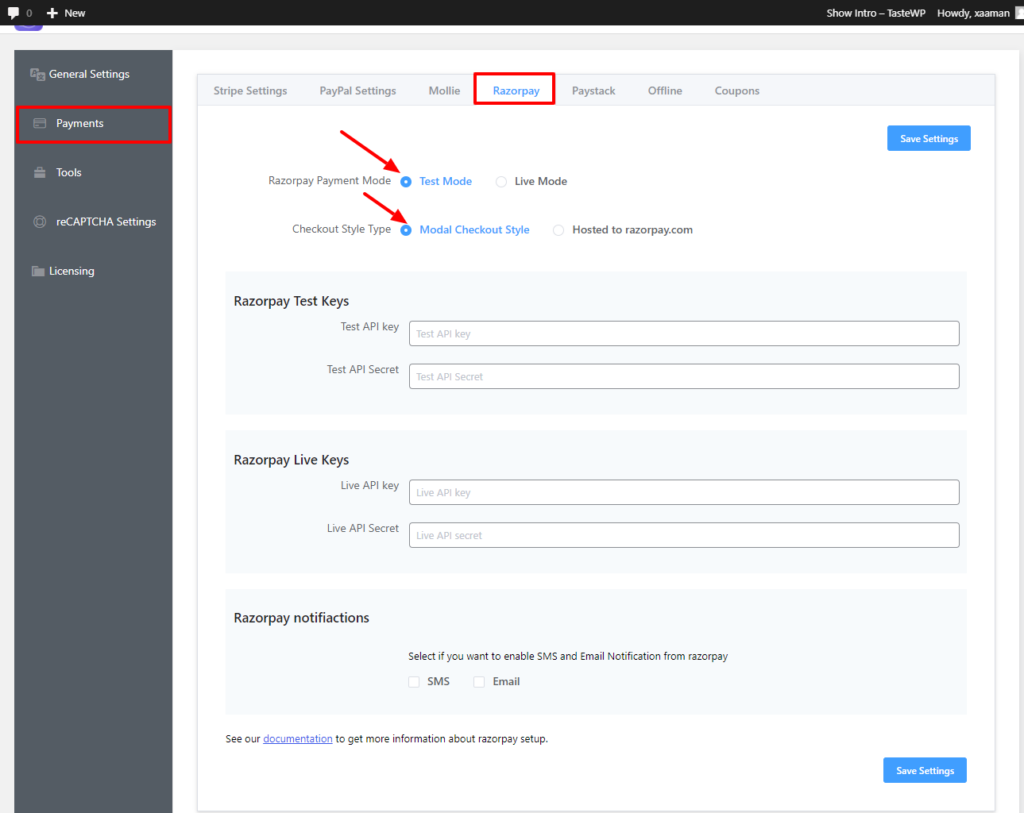
After enabling the RazorPay Payment Method, some options will show up. Here, you have to choose a Payment Mode. There’s a Test Mode and a Live Mode. Let’s set up the Test Mode for Razorpay. Keep in that the Live Mode can be enabled in the same way as the Test Mode was set up. Now you can also choose the Checkout Style Type according to your choice. If you choose the Modal Checkout Style, the checkout page will be displayed in a pop-up format. Selecting the Hosted to razorpay.com will display the checkout page in the default Razorpay style.
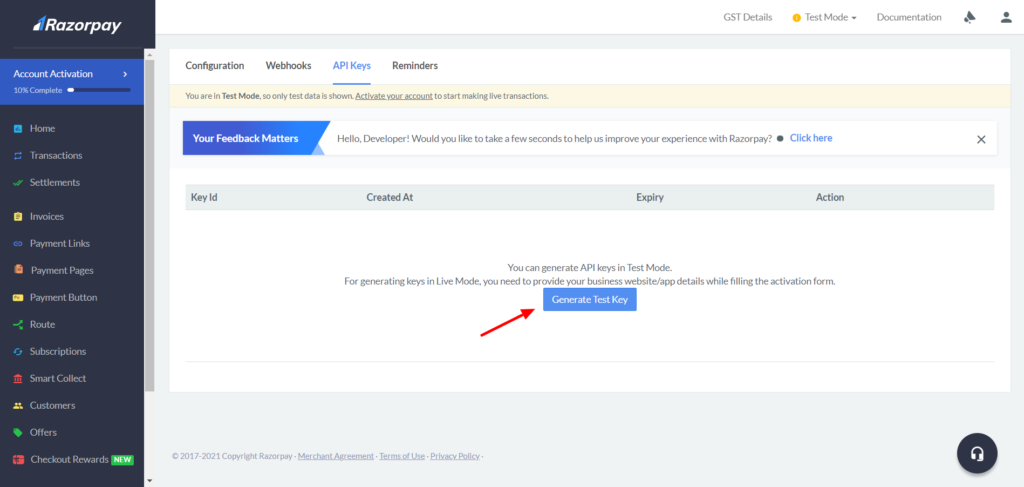
Next, you will need to provide some test API Keys first. Login to your RazorPay account to obtain these keys. Click on Generate Test Keys.
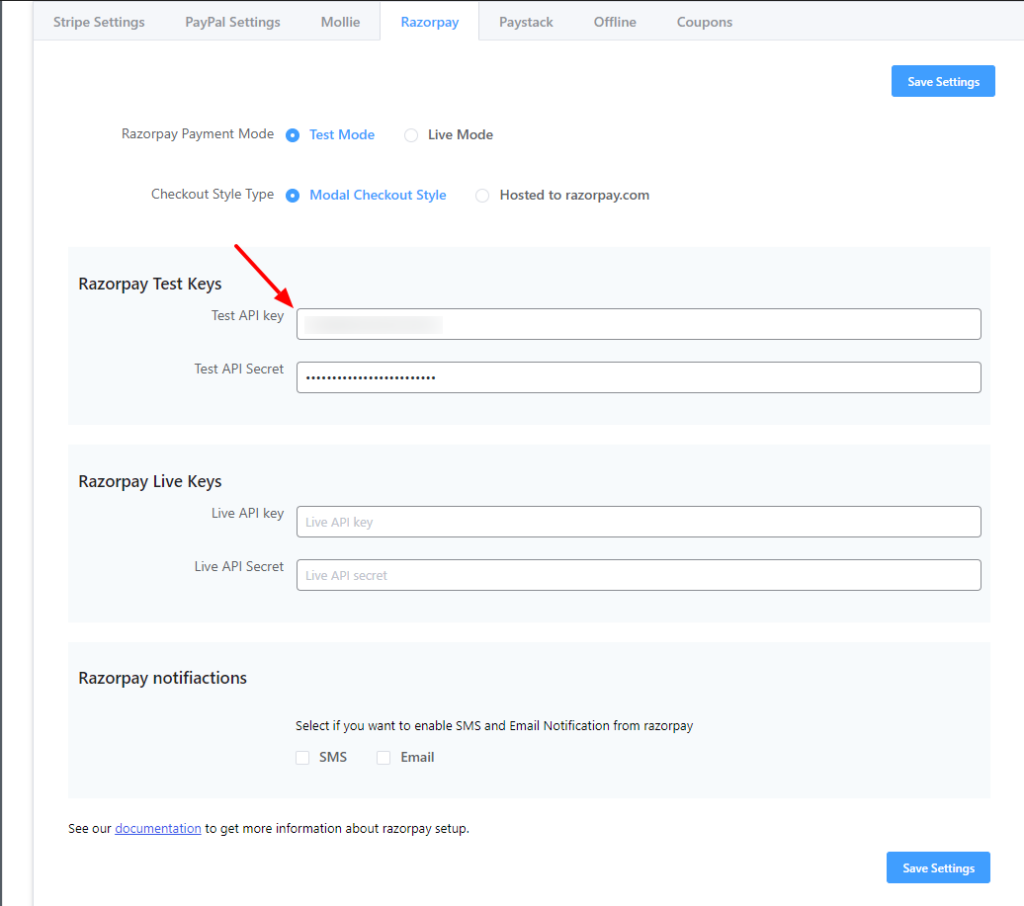
Once you click on the button, a set of keys will appear. There will be a Key Id and a Key Secret. Simply click to copy. Then go back to the WPPayForms dashboard, and paste the keys in their respective fields. And click on Save Settings.

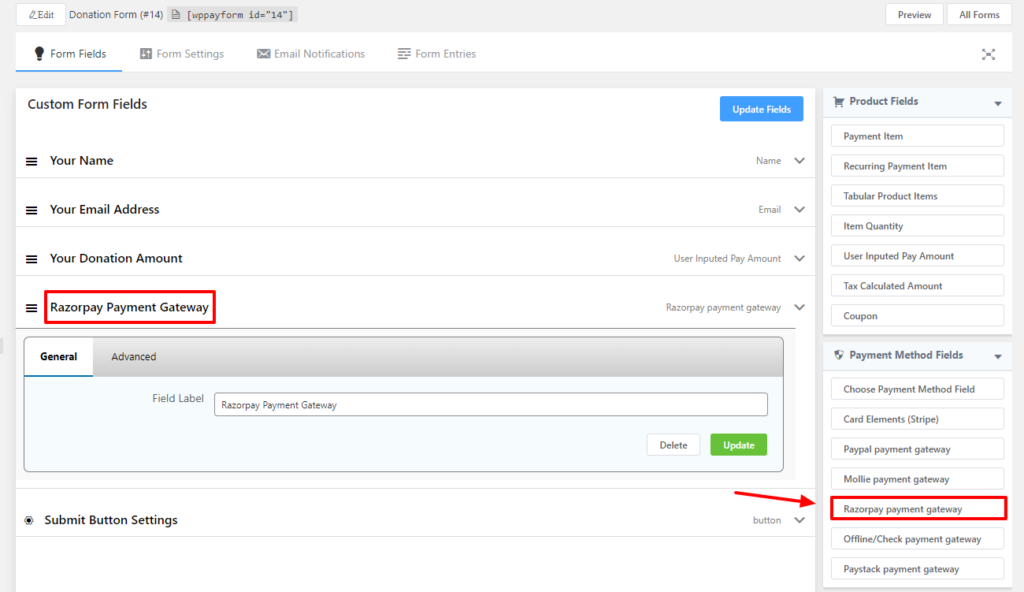
Now you have to create a form & add your required fields. And add your desired labels for them. On the Payment Method field, click on the Razorpay gateway payment option to let your users pay through this Payment method.