
To use the AzonPress plugin on your WordPress site, you need to configure the Amazon API settings. This ensures the plugin can fetch real-time product data and correctly track your affiliate links. This guide will walk you through the configuration process.
Amazon API Configuration In AzonPress
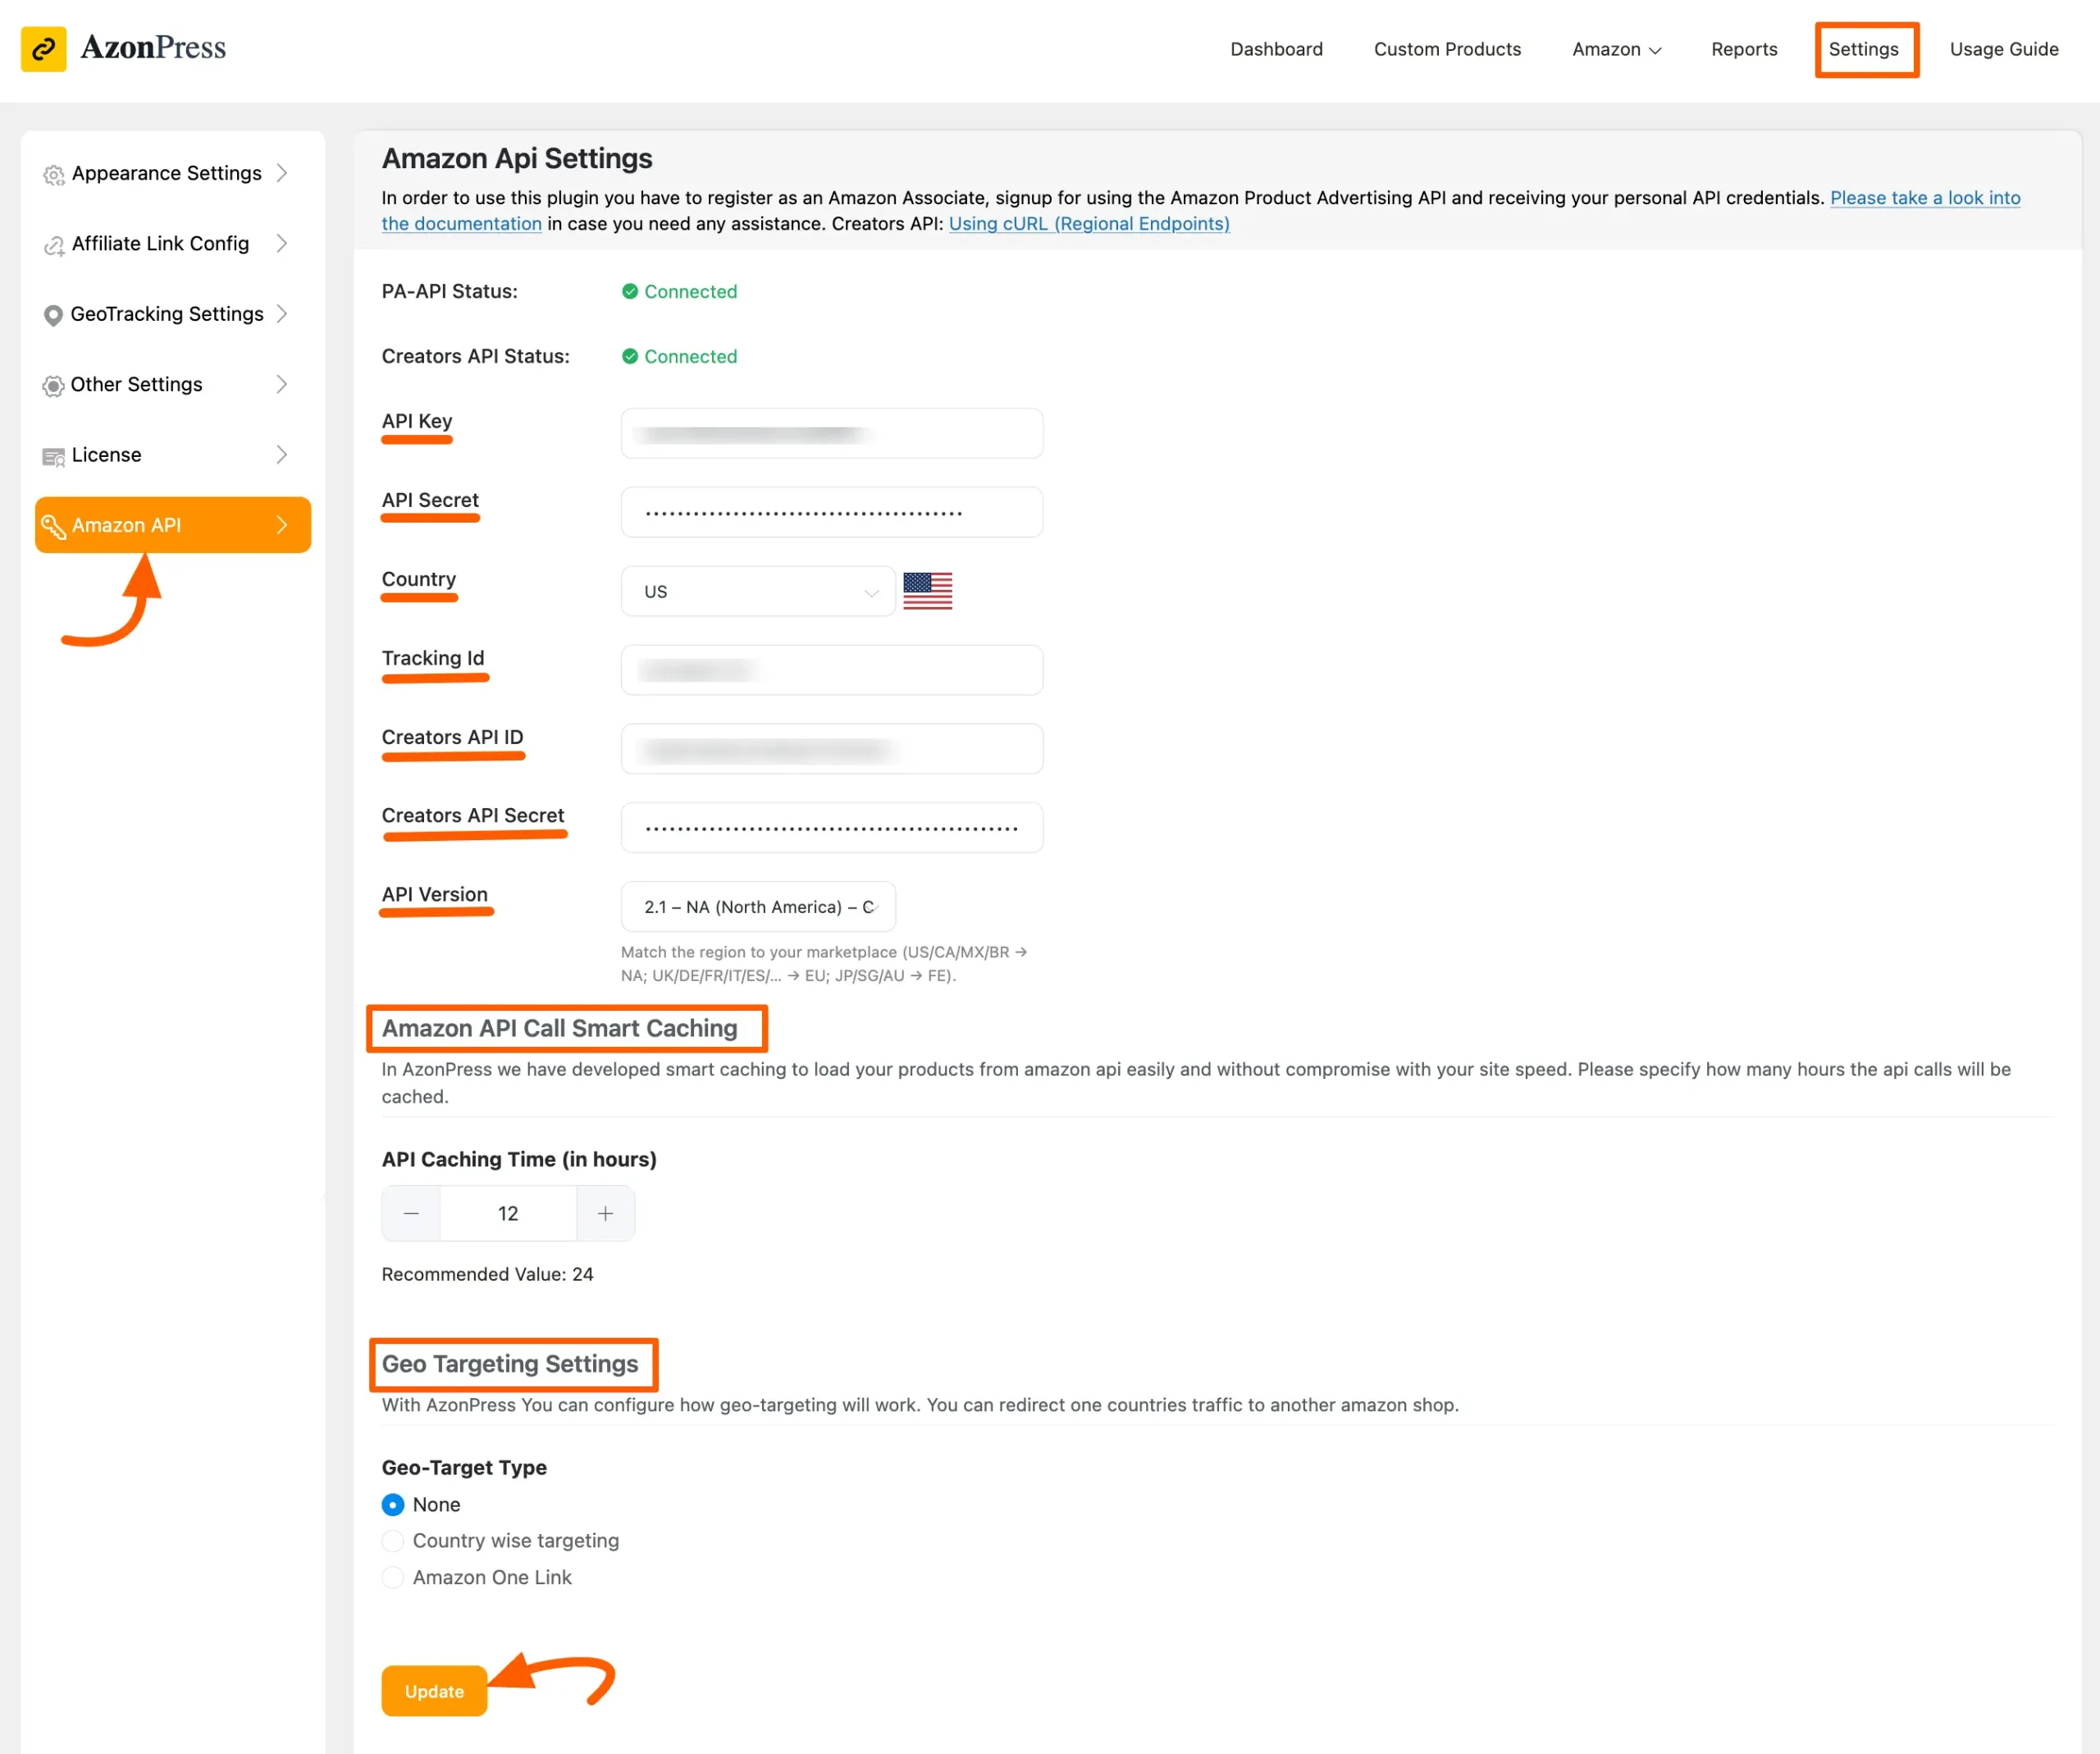
To learn how to configure Amazon API in AzonPress, follow the steps in the screenshot below –
Remember, before configuring Amazon API with AzonPress, you must create credentials for Amazon Product Advertising API. After creating Amazon API from your Amazon Site successfully, go to your WordPress Site and install the AzonPress plugin.
Access Settings: From your WordPress Sidebar or the AzonPress Navbar, navigate to Settings and select the Amazon API option from the left sidebar.
Enter Credentials: Input the following details generated from your Amazon Associate Account:
- API Key & API Secret: Enter your primary PA-API credentials.
- Country: Select your primary Amazon marketplace (e.g., US, UK, CA).
- Tracking Id: Enter your unique Amazon Associate Tracking ID.
- Creators API ID & Secret: If you use the Amazon Creators API, enter those specific credentials here to enable advanced features.
- API Version: Choose the appropriate version for your region (e.g., 2.1 – North America).
Additional Optimization Settings
Besides the credential fields, you can configure two powerful features to improve site performance and global reach:
Amazon API Call Smart Caching: To prevent your site from slowing down due to frequent API requests, AzonPress uses smart caching. You can set the API Caching Time (in hours) to specify how long product data should be stored. The recommended value is 24 hours.
Geo-Targeting Settings: Under Geo-Target Type, you can choose how to handle international traffic:
- None: No redirection.
- Country wise targeting: Automatically redirects visitors to their local Amazon store based on their location.
- Amazon One Link: Integrates with Amazon’s official global linking service.
Once you have filled in all the required information, click the Update button to save your changes. Your Amazon API configuration is now complete!
This is how you can set up your API key and other relevant issues using the AzonPress plugin!
If you have any further questions, concerns, or suggestions, please do not hesitate to contact our support team. Thank you.