
AzonPress is a standard Amazon Associate plugin for WordPress. This plugin offers an advanced feature that enables you to display Amazon Products using Classic Editor. This article will guide you through the process of using AzonPress with Classic Editor of WordPress.
Use AzonPress With Classic Editor
To learn how to use AzonPress with Classic WordPress Editor, follow the steps with the screenshots below –
From your WordPress Dashboard, go to the desired Posts/Pages where you want to display your Amazon Products. Or, you can create a new Post/Page for showcasing the products on that specific post/page.
For example, here, I am creating a new Post to display the Amazon Products using Classic Editor.
First, go to the Posts from WordPress Dashboard & click on the Add New Post.
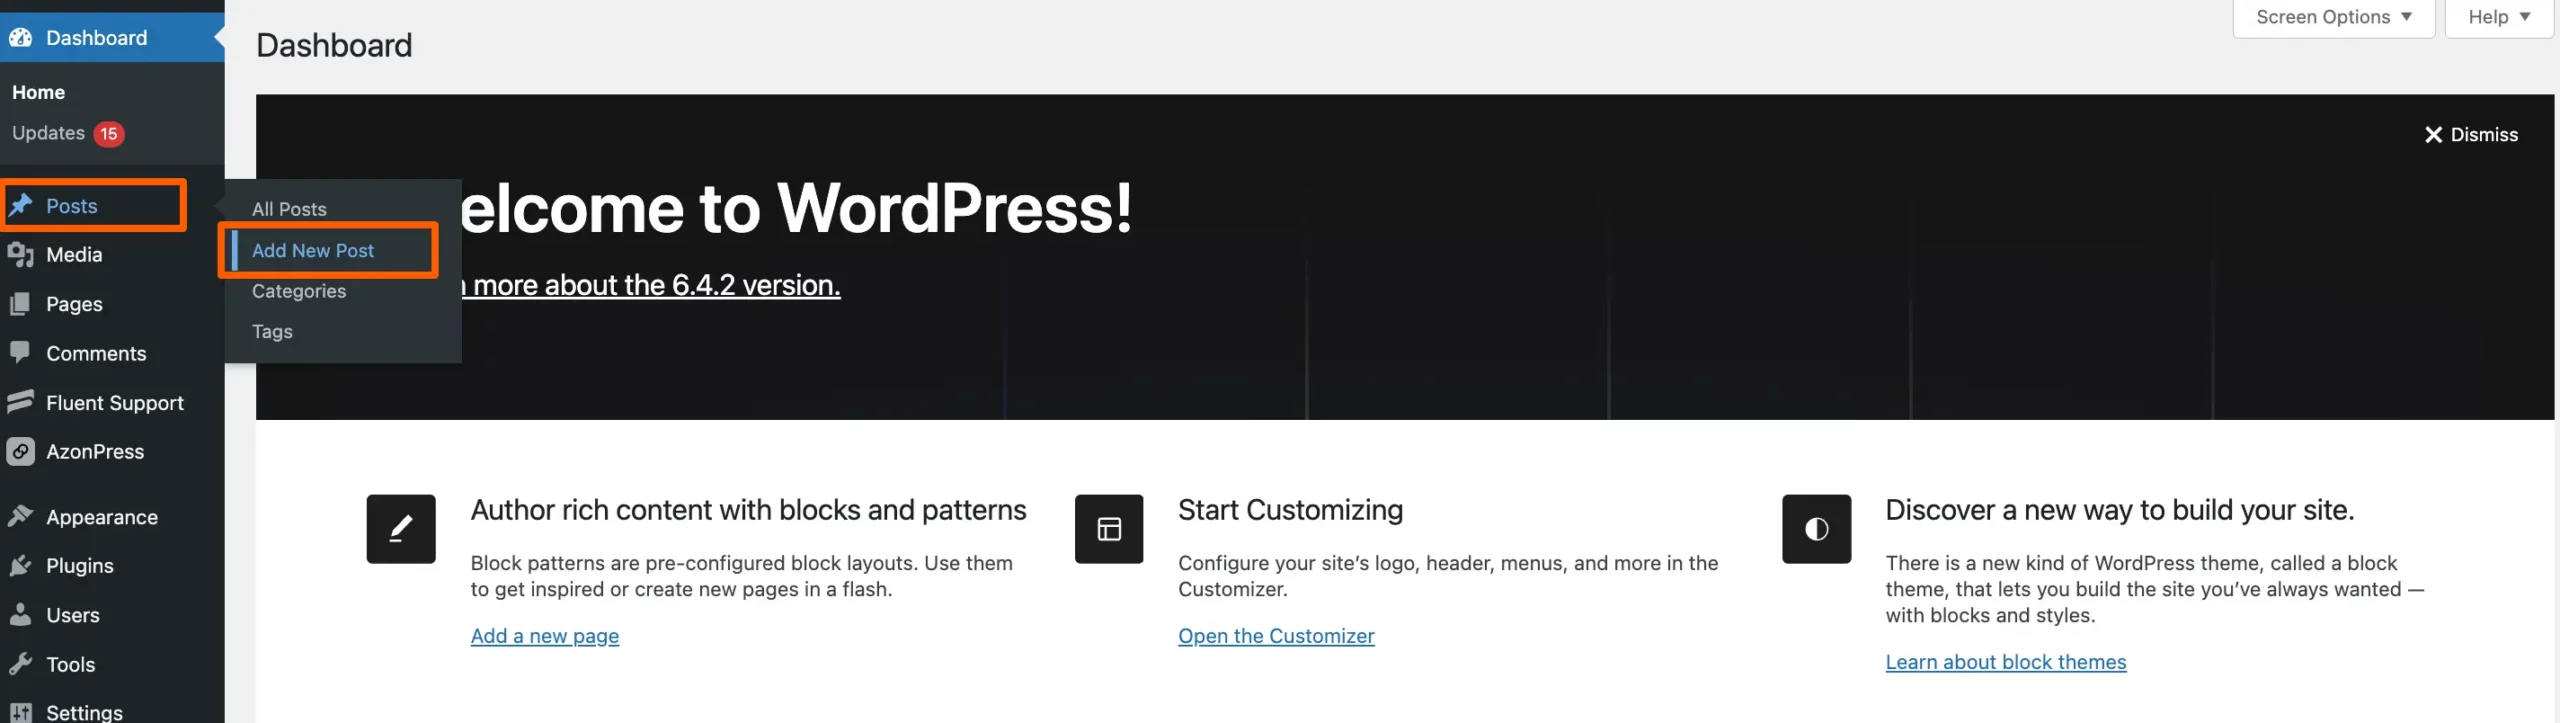
Then, add a suitable title for the post you want to work on and click over the Plus (+) icon of the Gutenberg editor & select the Classic WordPress editor.
Next, click the Add Media option from the classic editor bar, and a pop-up window appears with a couple of options.

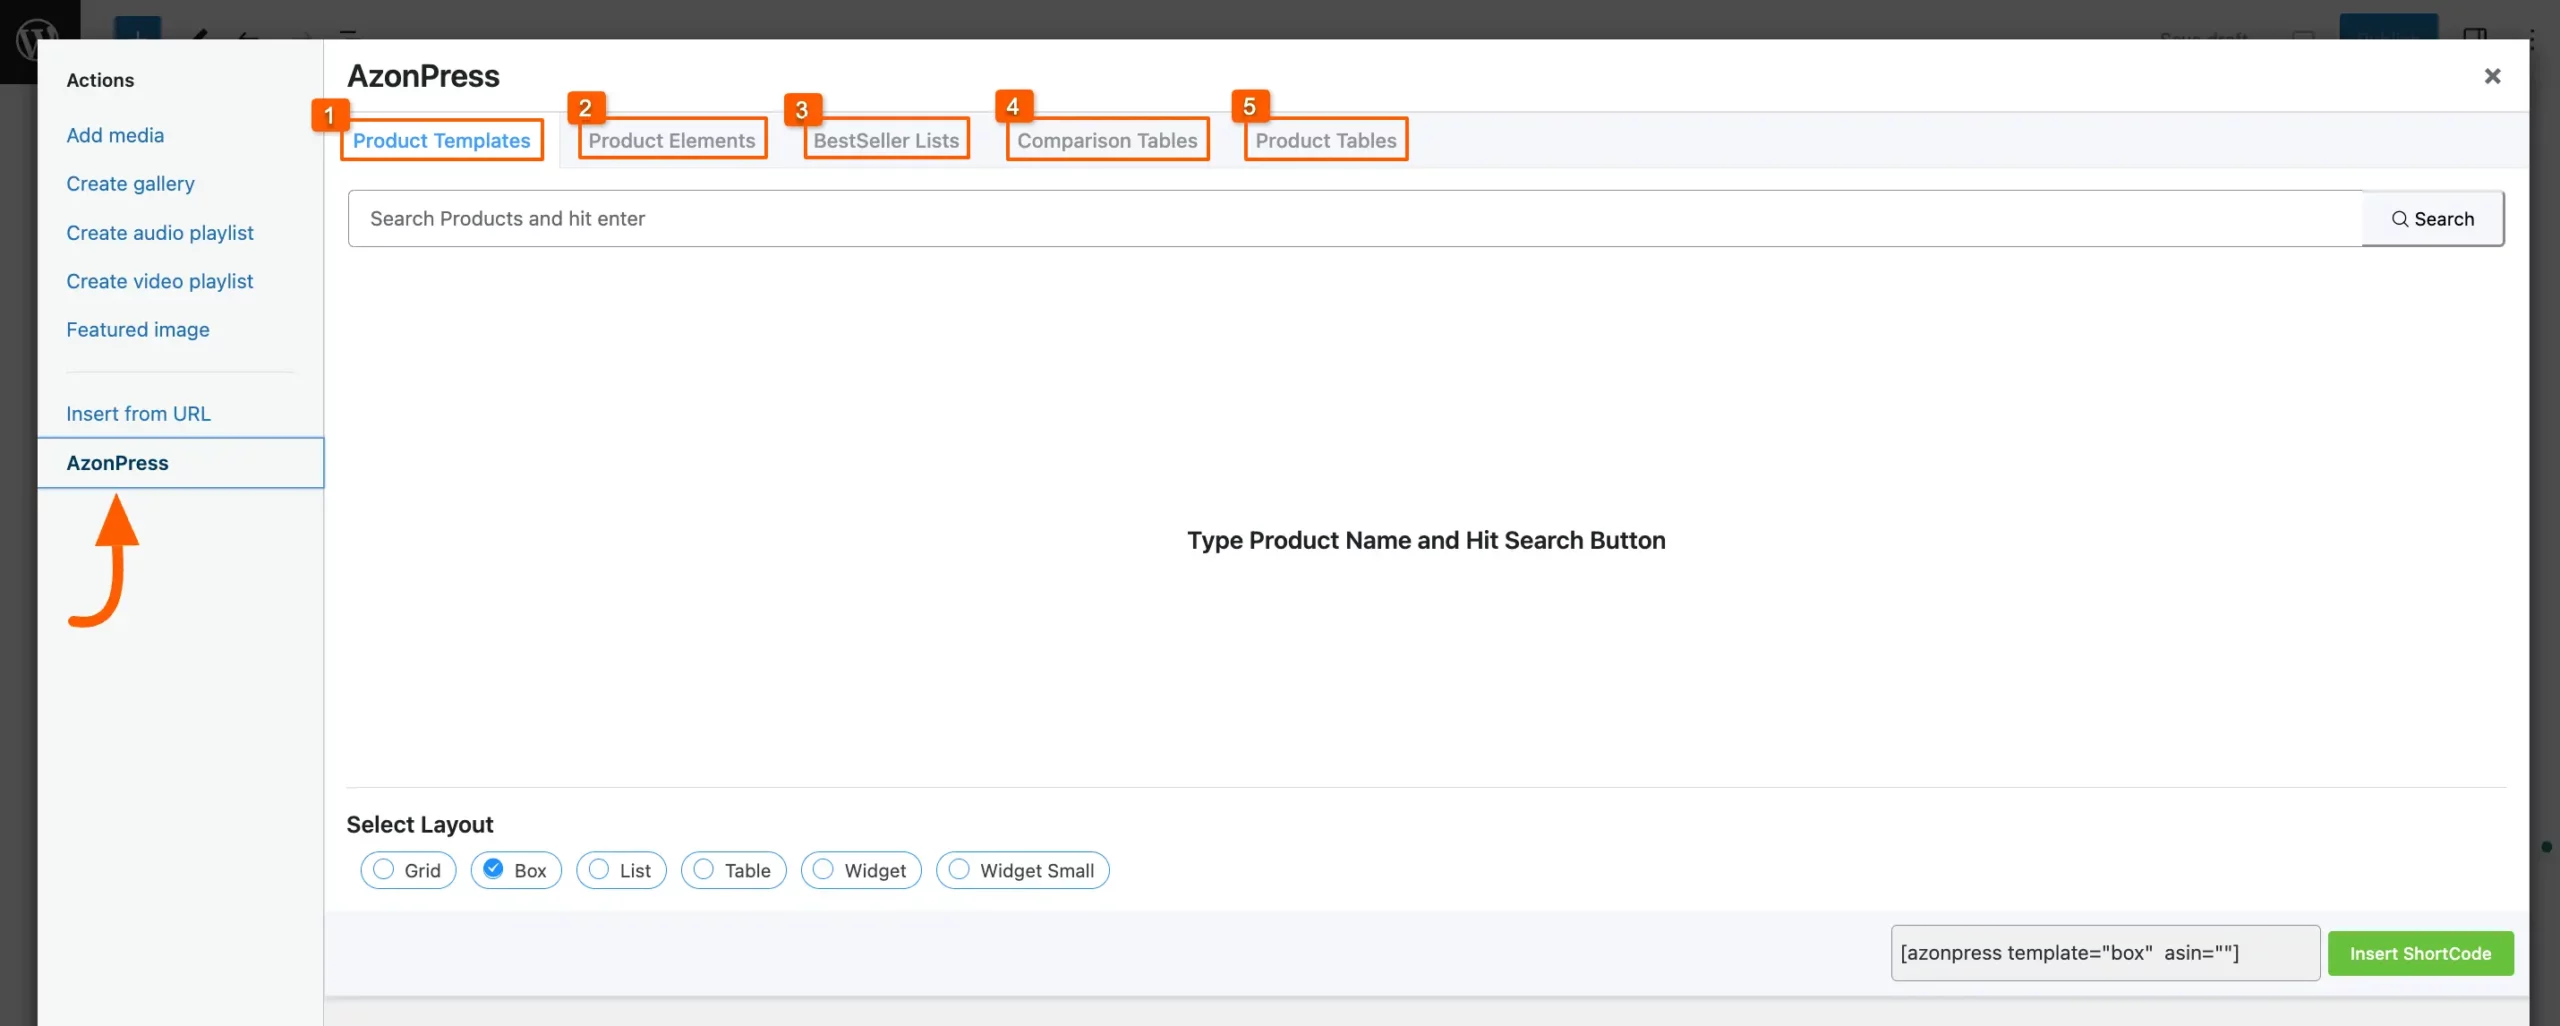
Press AzonPres from the left sidebar and you will get Five different Tabs with various settings options for showcasing your Amazon products. These are –
- Product Templates
- Product Elements
- Bestseller Lists
- Comparison Tables
- Product Tables
But, to get all these tabs, you need to configure the Amazon API key into the AzonPress plugin first. To learn how you can do it, click here.
A detailed explanation of these five settings options mentioned above is given below:
Product Templates
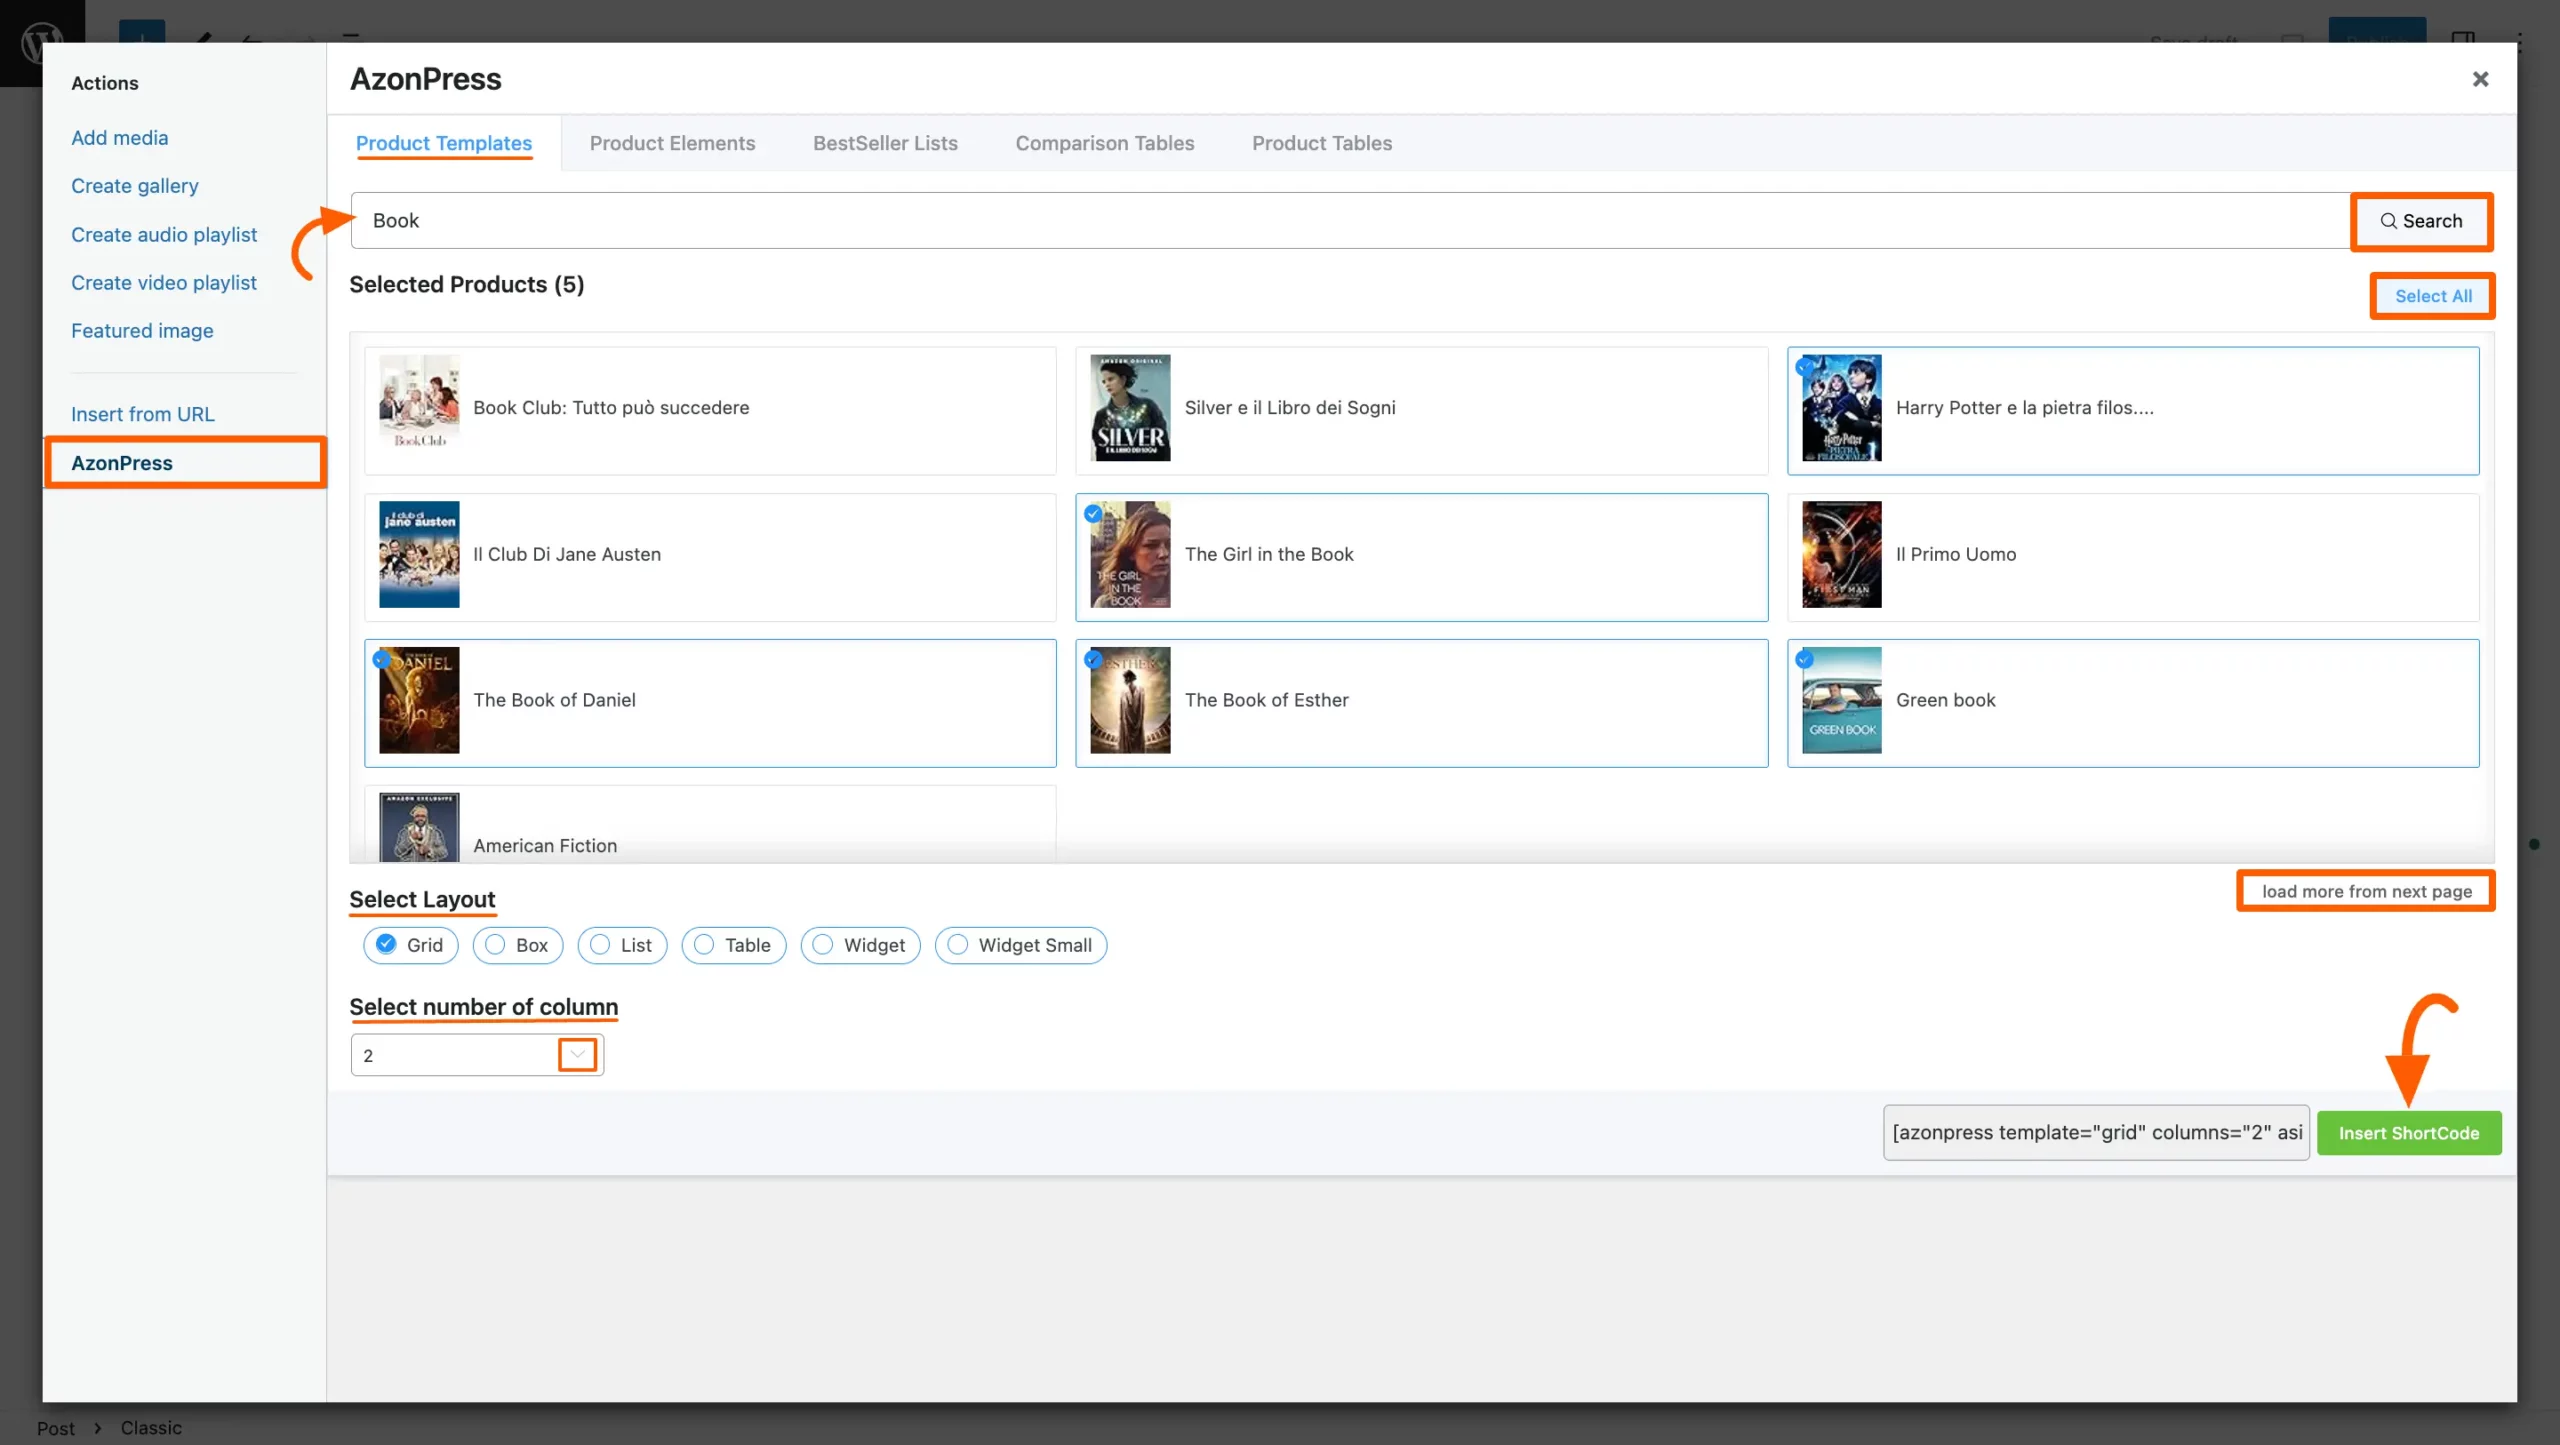
Under the Product Templates tab, you will find various types of settings options which are briefly explained with the screenshot below –
Search Bar: Now you can look for any kind of product you want in the search box of the Product Templates tab. These products will be displayed right below the search box.
Select All: You can choose what products you wish to show on your page by clicking the specific product or you can show all of them by just clicking the Select All button.
Load more from next page: If you want to see more products related to your search just press the load more from next page button.
Select Layout: It offers six types of layouts for presenting your products. These are Grid, Box, List, Table, Widget, and Widget Small. Select any layout by clicking the checkbox that suits your needs.
Select number of column: This option appears only under Grid Layout where you need to select from 1 to 4 how many columns you want for showcasing your products. And, you can select this easily from the dropdown list by clicking the arrow icon.
Insert Shortcode: Once you are done, you can click the Insert Shortcode button and the shortcode will be automatically embedded in your post. Then, publish it and your Amazon Products will appear on your site under that post.
If you want to showcase the same products in another post/s, you can also do it simply by copying the Shortcode visible right before the Insert Shortcode button and pasting it into the desired post/s.
Product Elements
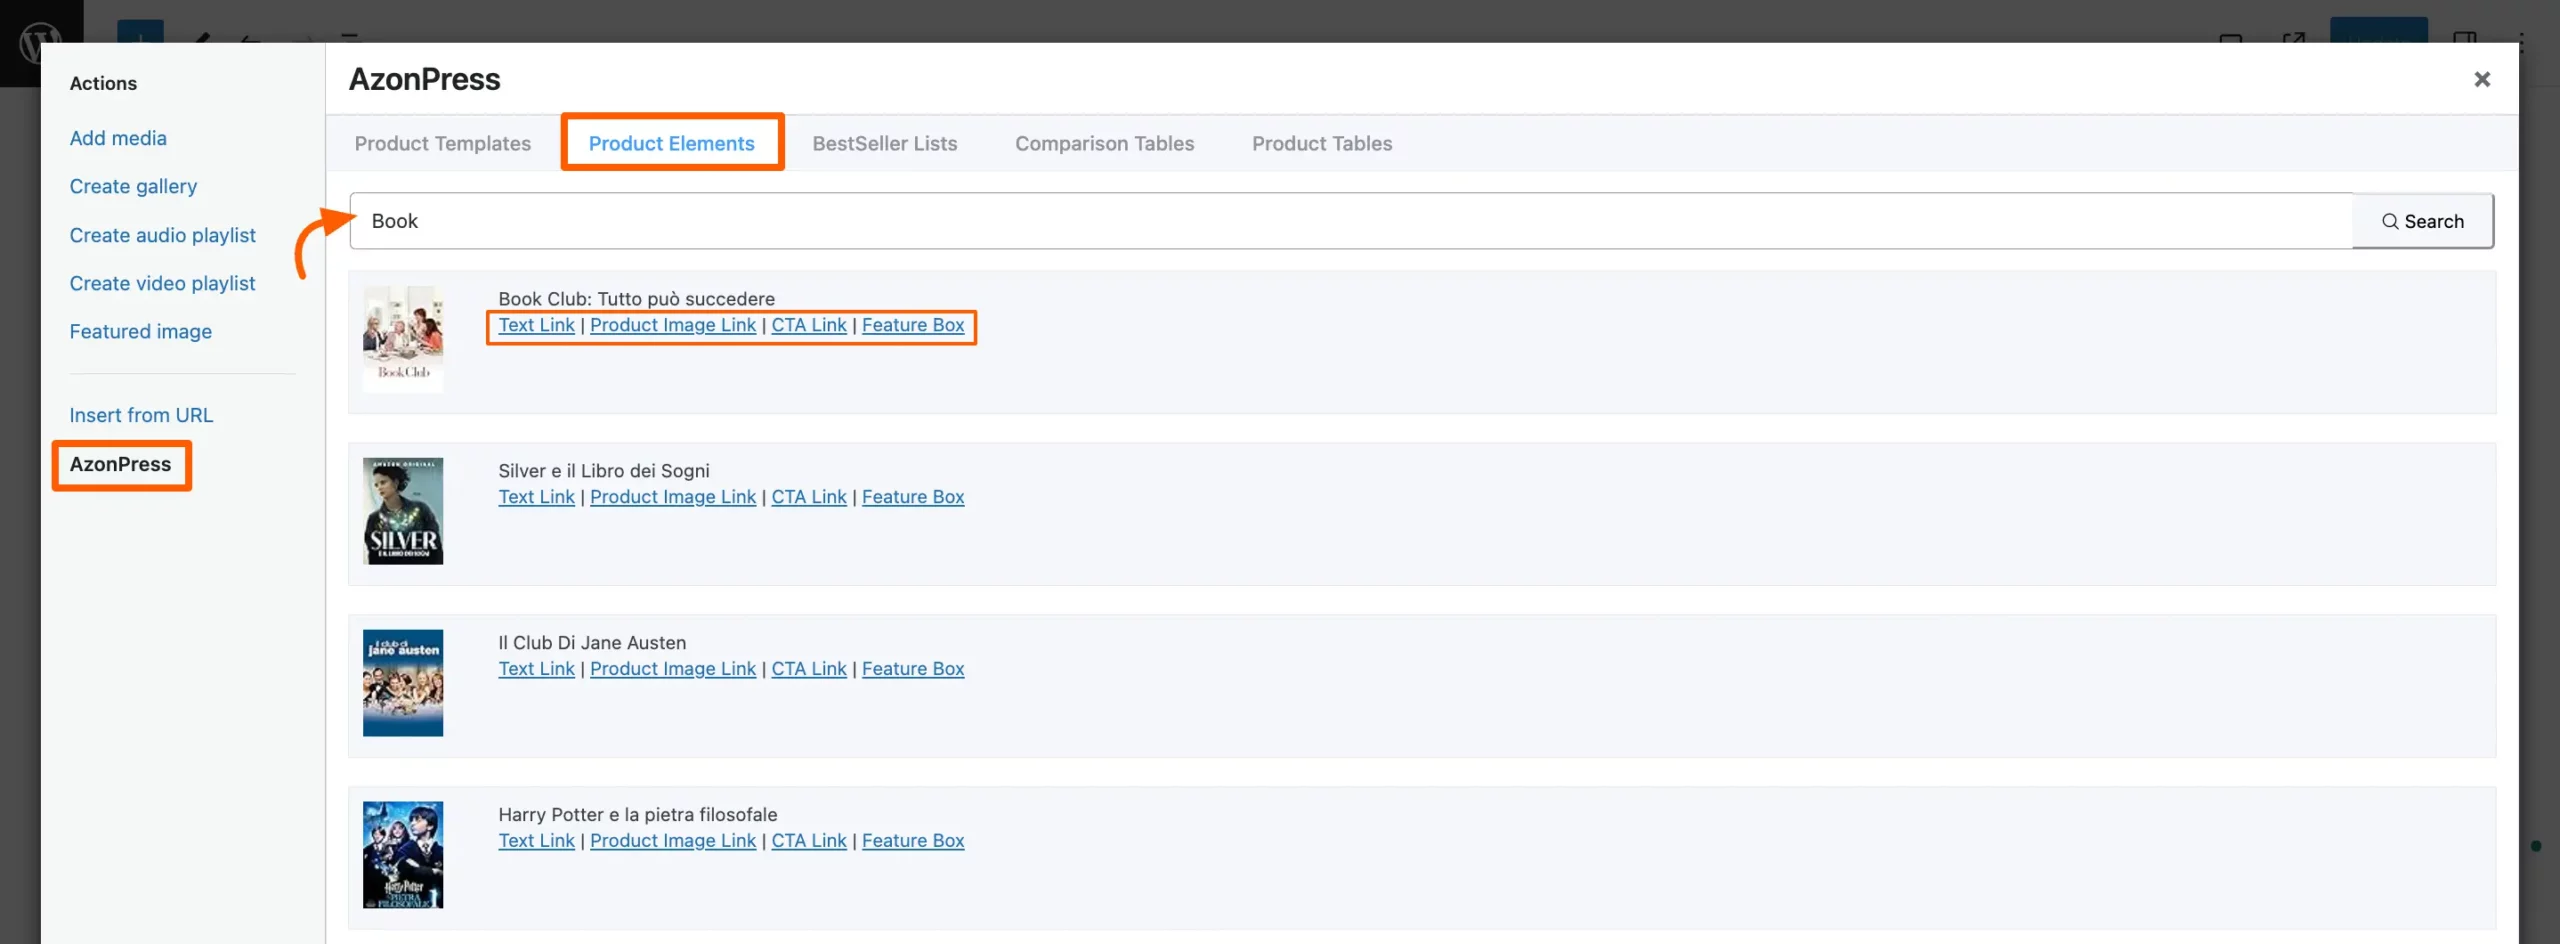
Product Elements will give you the Text Link, Product Image Link, CTA Link, and Feature Box about some products that you have searched through the search bar.
To learn about the Product Elements in detail, read this Documentation.
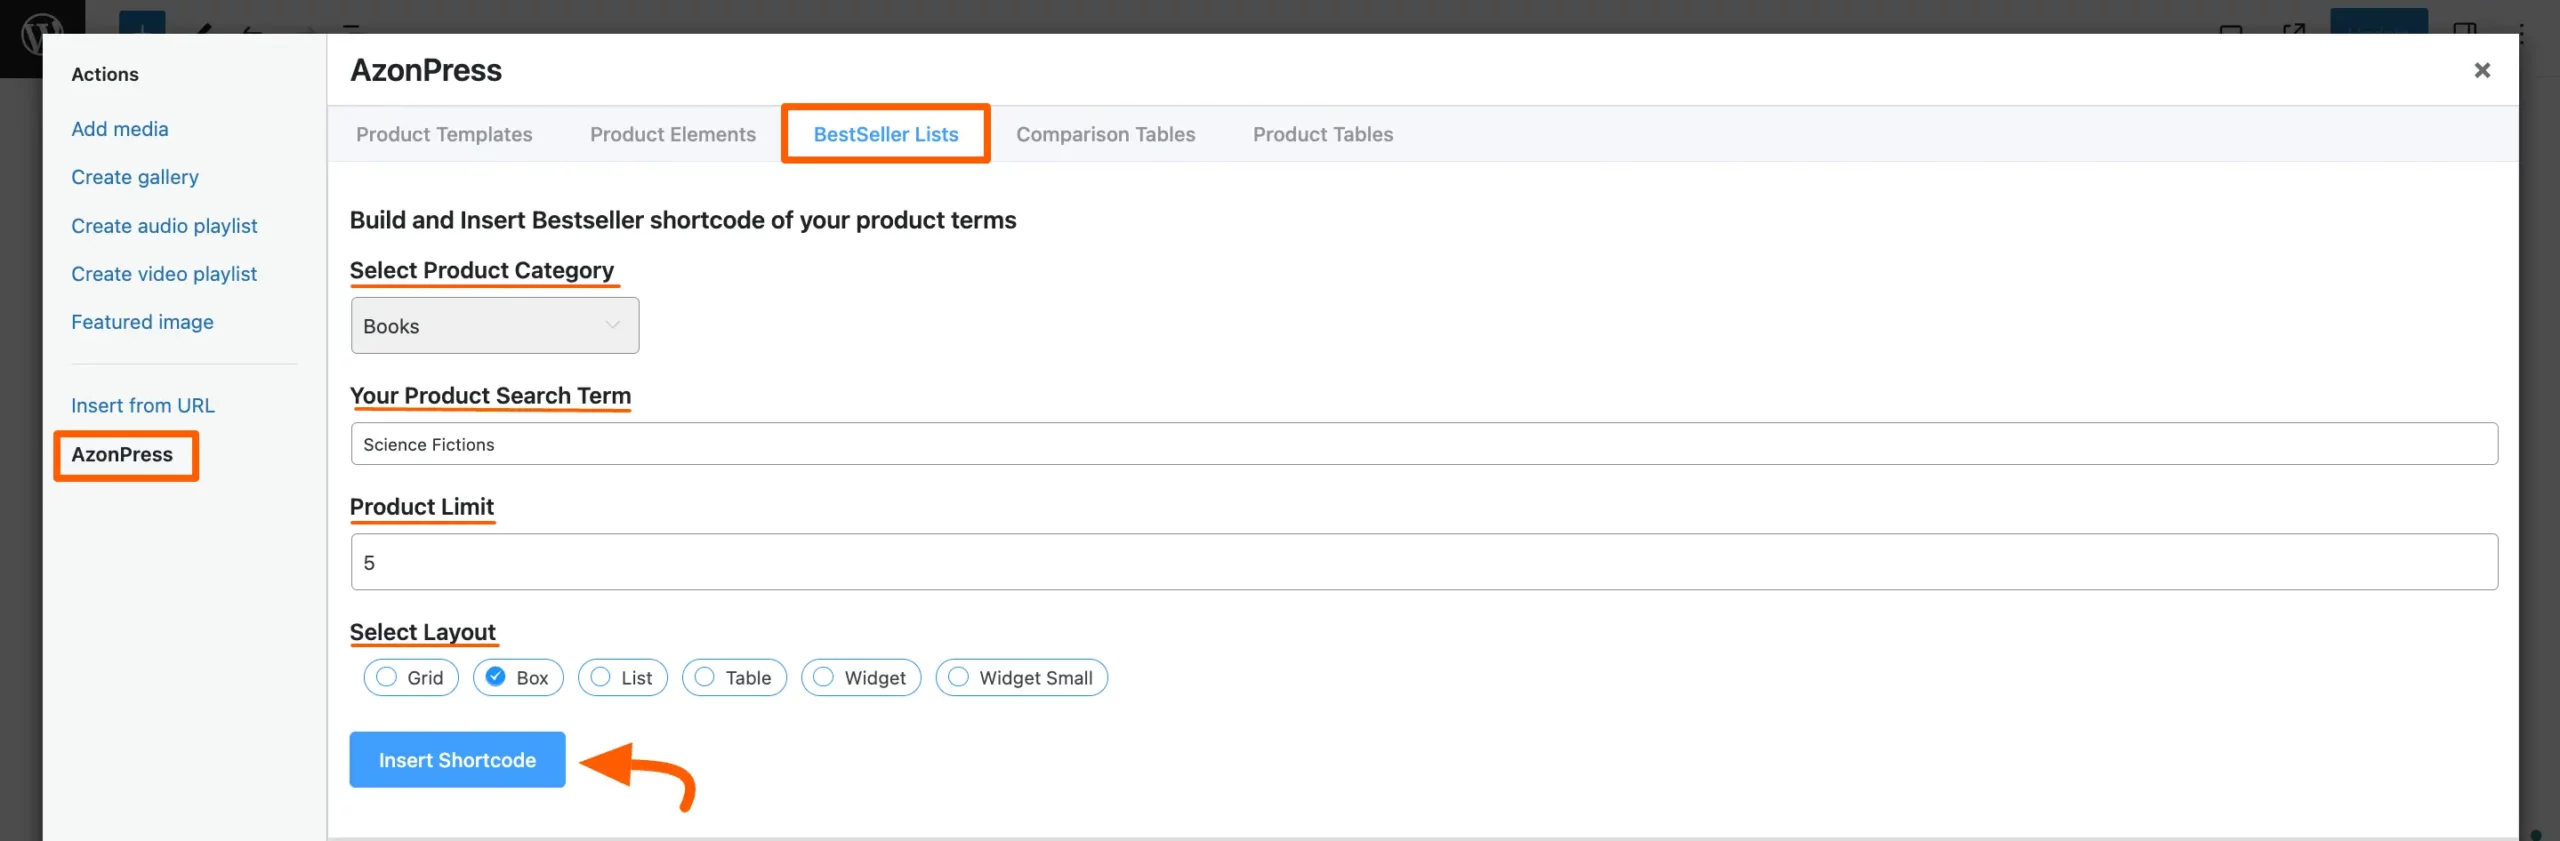
BestSeller Lists
In this Bestseller Lists option, you will find different settings options. These are:
- Select BestSeller Category: Here, you just need to select the Category of the bestseller product.
- Your Product Search Term: In this field, give the search term to make your search more specific.
- Product Limit: You can also set the limit here on how many products you want to show on your product page.
- Select Layout: Under this option, you will get some templates for your product showing. These are Grid, Box, List, Table, Widget, and Widget Small.
- Insert Shortcode: Finally, hit the Insert Shortcode button to showcase the BestSeller Amazon Products in your post.
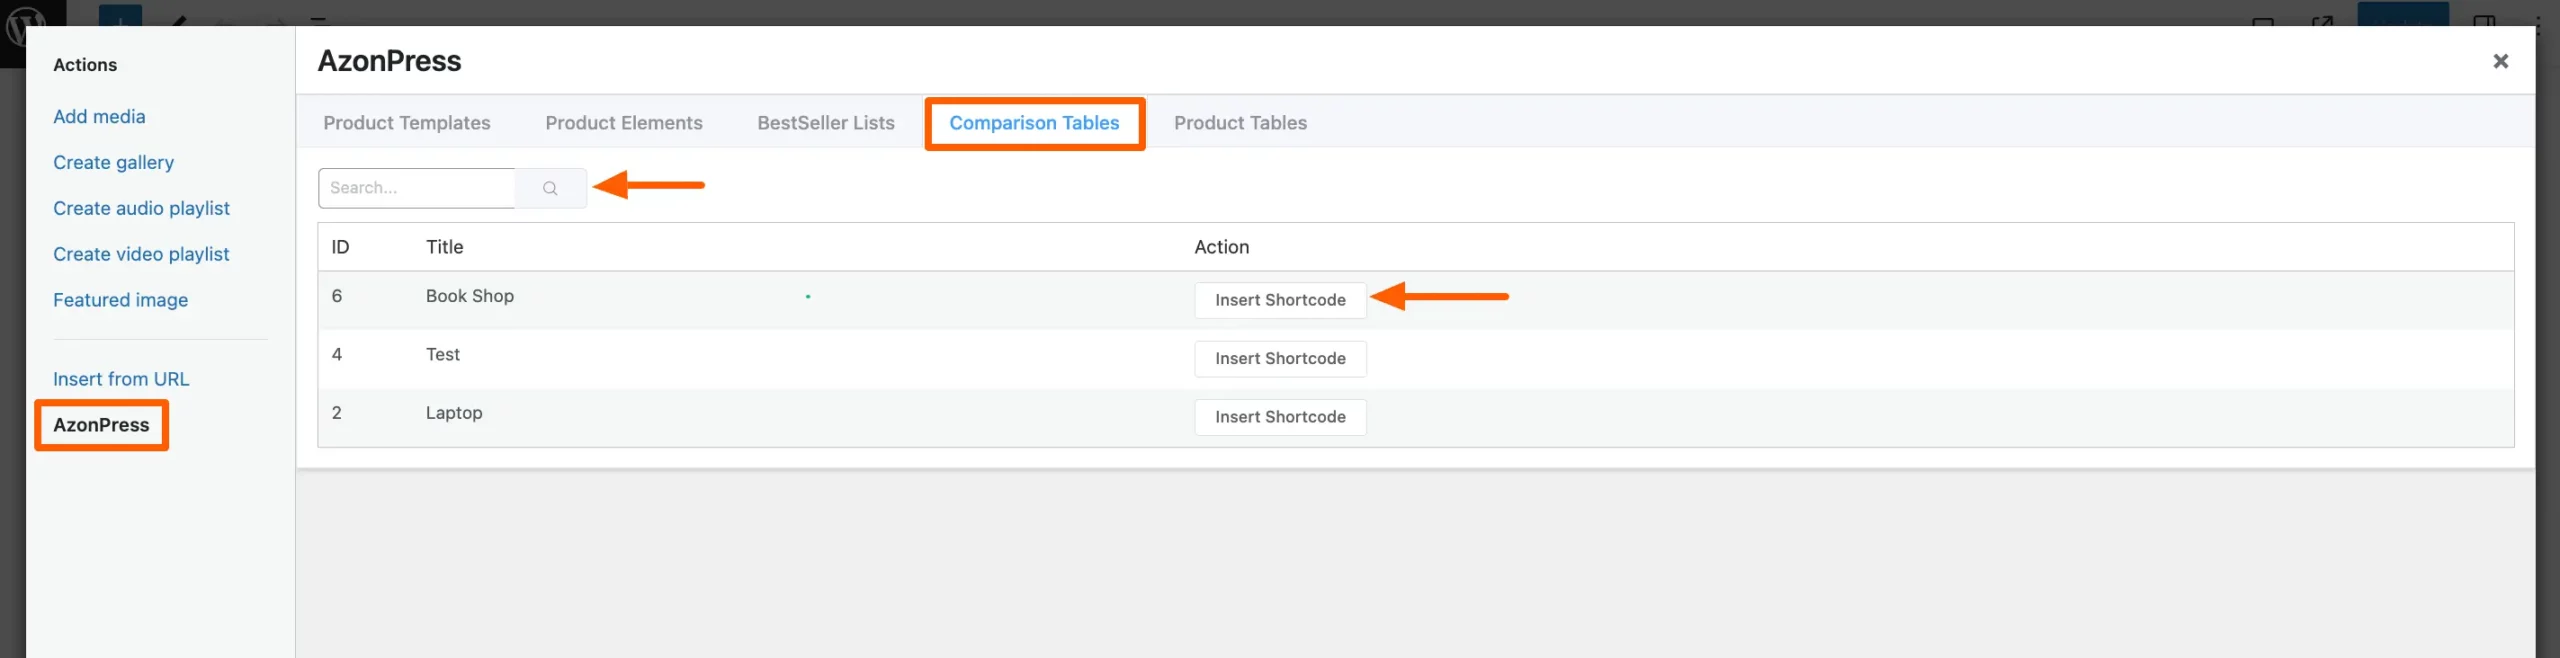
Comparison Table
On this tab, you can add your existing comparison tables by clicking the Insert Shortcode button and searching for tables using the search bar.
If you don’t have any existing comparison tables, click here to learn how to create comparison tables.
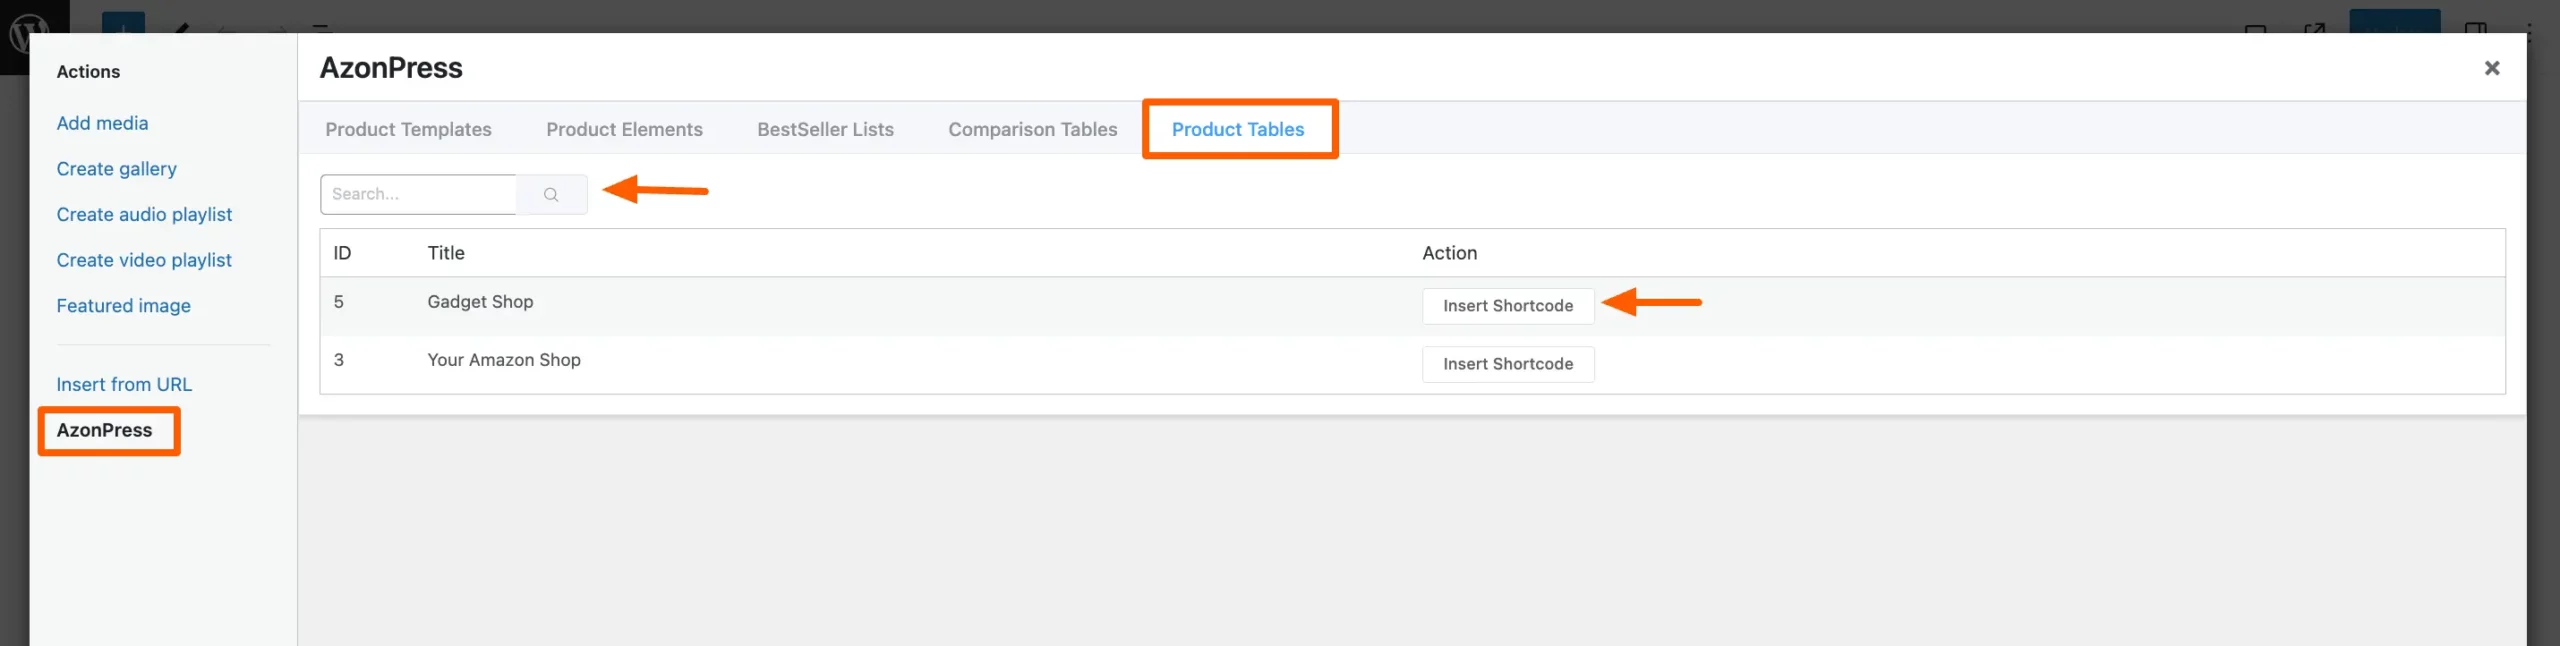
Product Table
The last tab will allow you to add your existing product tables by clicking the Insert Shortcode button and searching for tables using the search bar.
If you don’t have any existing product tables, click here to learn how to create product tables.
If you have any further questions, concerns, or suggestions, please do not hesitate to contact our @support team. Thank you.