Confirmation Settings functionality of
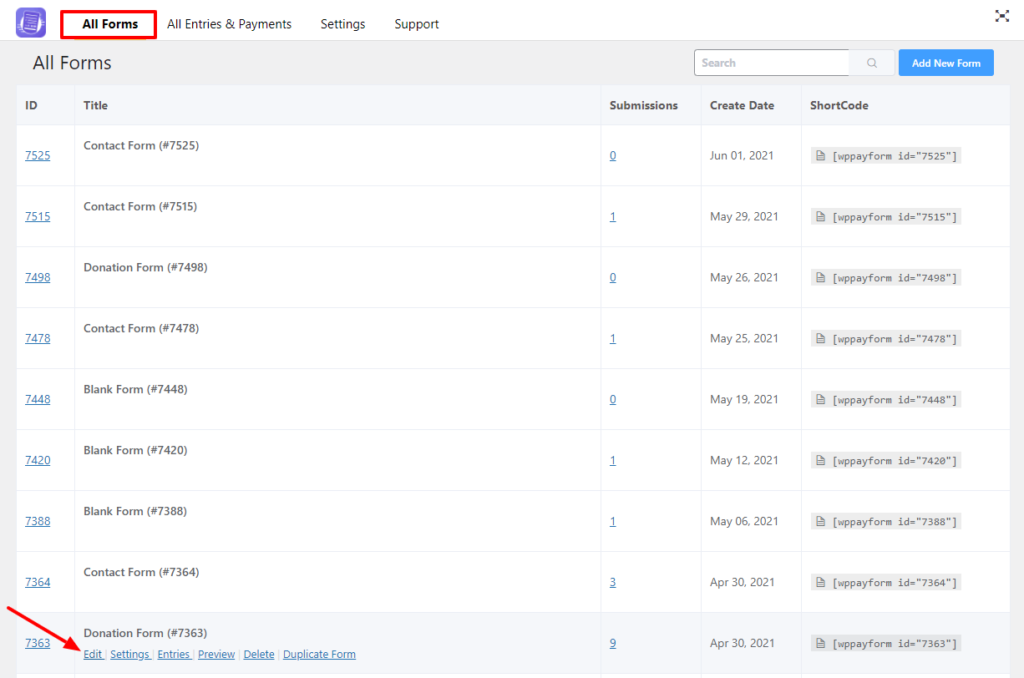
If you have payment forms created earlier click on the edit icon, then you will find the Form Settings tab located on top of the respective form interface.

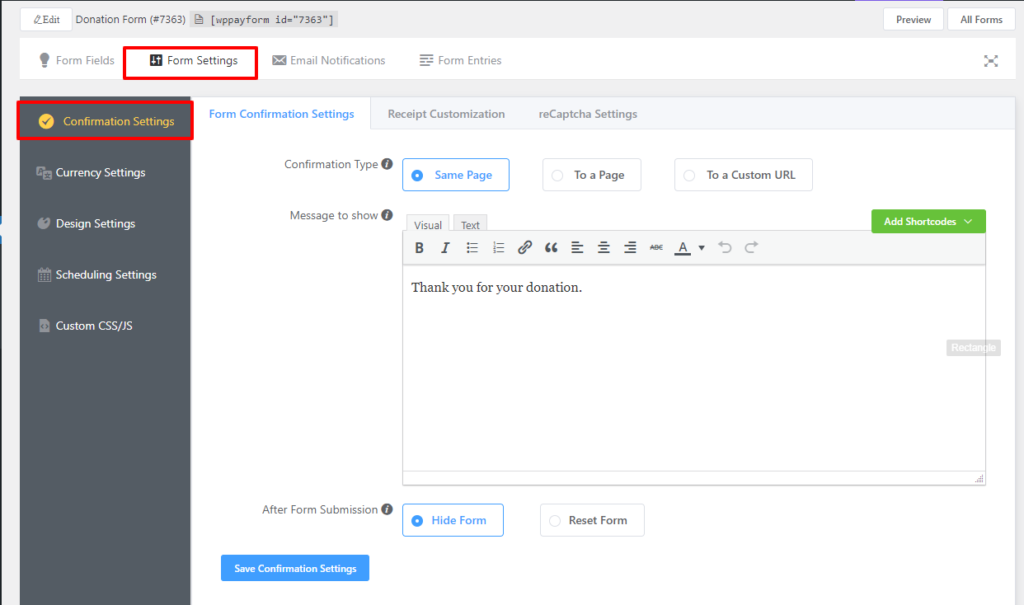
Then the Form Confirmation Settings page will open.

This functionality allows you to set the confirmation type. In the first place, you will find the Confirmation Type option. This option allows you to determine when a payment form will be submitted, the confirmation message will be shown in a form of a report and you can show that report on the same page, you also can redirect the confirmation report page to another page, or you can create a custom URL to show the confirmation message.
If you choose Same Page button, the confirmation message will be shown
You can define a confirmation message here using the Message to show option.
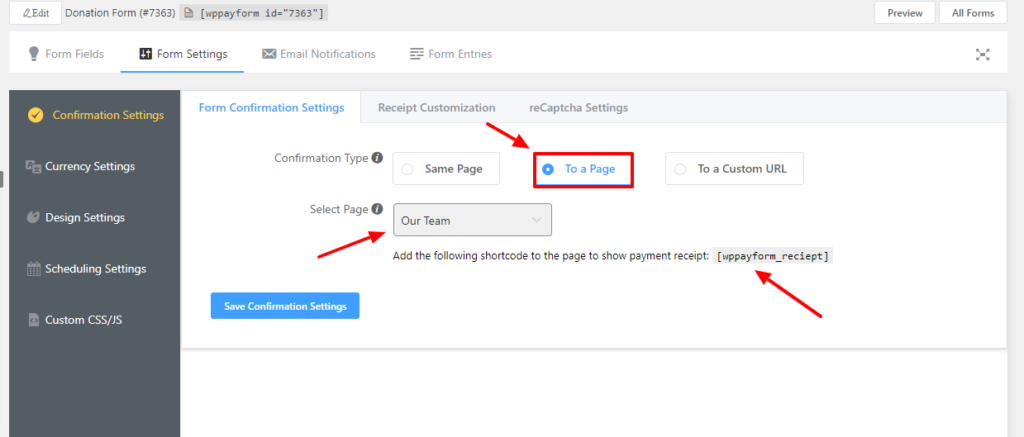
If you select To a Page button, then you will be asked to select the page where you want to show the confirmation report using Select Page option and add the following short-code provided in the below the option.

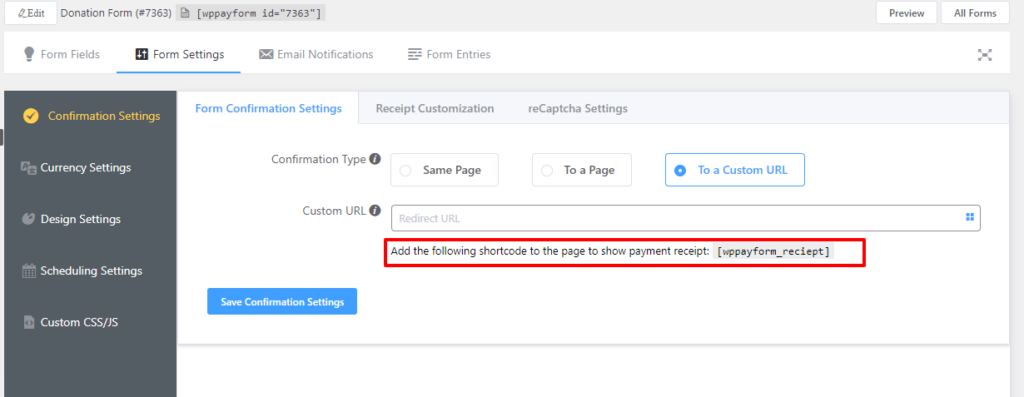
If you select To a Custom URL button, you will be given a Custom URL option for creating the custom URL for displaying the confirmation message/report. Custom URL option offers you to show the report according to your Custom Input Items, Payment Items, and Submission Fields option.
To show the confirmation report, you need to put the short-code[wppayform_reciept] in the custom input field located in the below under the Custom URL option.

Once all the customizations and configurations are done, don’t forget to click on the Save Configuration Settings button. That’s all about the Form Confirmation Settings functionality.

