
How to Integrate a Payment Gateway in WordPress (Stripe, PayPal + Local Options)
You search “how to add payments to WordPress,” and within 30 seconds, you’re drowning in plugin recommendations, conflicting tutorials, and the vague suspicion that you’re about to install something you’ll regret.
Here’s the thing: the technical part is actually straightforward. What trips people up is making a decision too early, without enough context.
Get that wrong, and you’re rebuilding your entire payment flow three months later.
This guide covers what you need before you touch a single plugin setting, and walks you through a step-by-step tutorial on how to integrate a payment gateway in WordPress to accept real payments, obviously with a “safety first” test run.
Key Takeaways
- SSL first, always. No certificate means no payment processor will touch your site — enable it before anything else.
- Prepare before you install. Have your merchant accounts, API keys, and admin email ready. Jumping in without these turns a one-hour setup into a frustrating back-and-forth.
- Test every scenario before going live. A broken webhook or failed confirmation email is a problem you want to catch in sandbox mode, not after a real customer has paid.
- Skip WooCommerce if you don’t need a full store. For services, donations, or digital products, a lightweight plugin like Paymattic gets you live faster with less complexity.
What you need before you start
Don’t skip this section. This is an important part before installing a WordPress plugin and starting to create payment forms. Having these ready before you install anything saves a lot of back-and-forth.
1. An SSL certificate (HTTPS)
This is non-negotiable. Modern payment processors (including Stripe and PayPal) require your site to be on HTTPS before they’ll process live transactions.
Most hosting providers now include free SSL certificates these days via Let’s Encrypt. Check your hosting dashboard; it’s usually one click.
Not sure if you have SSL? Look for the padlock in your browser’s address bar when visiting your site.
2. A Stripe and/or PayPal account
- Stripe: If you want to set up Stripe as your payment gateway, first, you’ll need to have a Stripe merchant account. If you don’t have one, simply sign up at stripe.com.
After creating your account, you’ll find your API keys here. Both the Publishable key and the Secret key are needed to integrate the Stripe payment gateway in WordPress.
- PayPal: To accept PayPal payments, it’s recommended to have a PayPal business account. While a personal account works, it has some limitations, and you won’t get access to some important features.
- Other payment gateway: If you want to integrate any other payment gateway, you’ll need their business or merchant account for professional use.
3. A test mode plan
Both Stripe and PayPal have sandbox/test environments. You should always run test transactions before going live.
4. An admin email you check
Payment confirmations, webhook errors, and plugin update notices all go to your admin email. Make sure it’s the one you actually read.
How to integrate payment gateways in WordPress
Sometimes users don’t want to set up a full-fledged shopping cart in their payment processing system.
This makes sense if you’re selling a limited amount of products, or this can be applied to accepting payment for small to mid-level businesses and consulting/services.
To easily integrate a payment gateway, we’ll use a WordPress payment gateway plugin named Paymattic. Paymattic is a perfect plugin to accept donations and payments for small to mid-level businesses, nonprofit organizations, or membership sites.
One of the key reasons for choosing this plugin is that it integrates with more than 14 region-based payment gateways.
It’s a free WordPress payment plugin with a pro version offering more advanced features.
We’ll talk about this later. But first things first, let’s integrate a payment gateway to your WordPress website in just 2 steps:
Step 1: Install Paymattic in your WordPress website
Step 2: Payment gateway integration
Let’s get to the process.
Step 1: Install Paymattic in your WordPress website
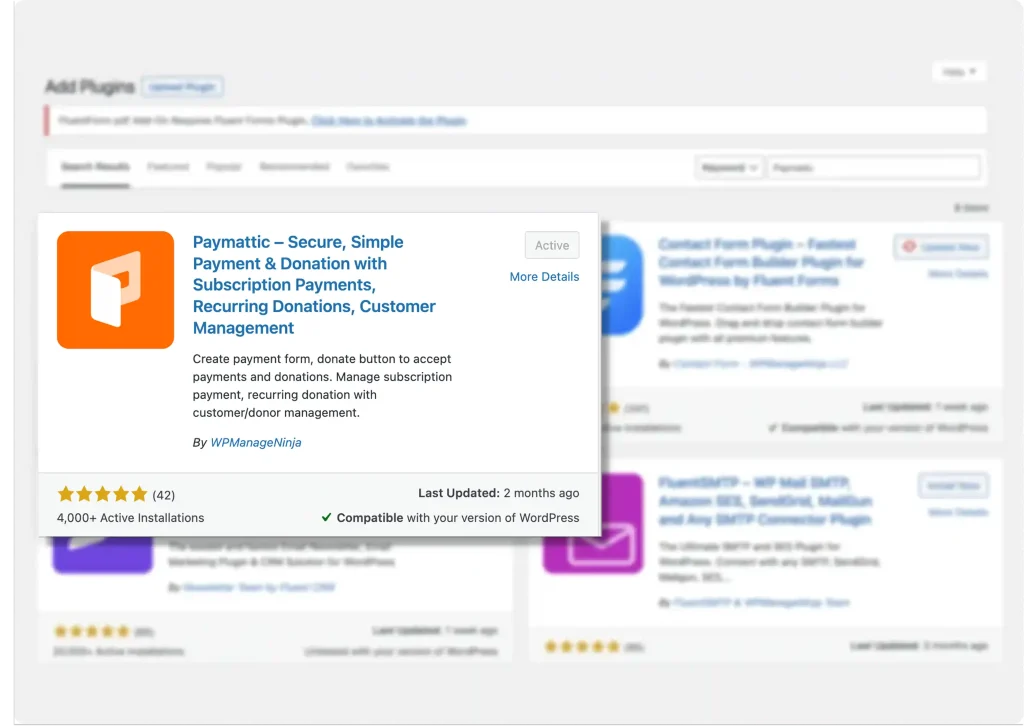
Install Paymattic from your WordPress dashboard,
- Go to Plugins → Add New Plugin
- Search for “Paymattic“
Click Install Now, then Activate the plugin
Step 2: Payment gateway integration
After setting up the Paymattic plugin, you’ll get a setup wizard like this. You can explore the admin panel if you want. It’s super easy to navigate.
Paymattic free version comes with Stripe payment gateway and other essential features, and a Pro version that unlocks advanced capabilities like 13 other region-focused payment gateways, including PayPal, Square, Authorize.net, Xendit, Mollie, etc.
For now, we’ll take you through the Stripe payment gateway integration with Paymattic.
To configure the Stripe payment gateway,
- Navigate to Paymattic > Payment Gateways.
- You can find all the available payment gateways here.
- Choose Stripe and make sure the test mode is on.
- Paste the Public Key and Secret Key here.
Hit Save Settings.

Confused about where to find the Stripe API credentials (Public Key and Secret Key)? Check out the latest guide here: Stripe API Keys: Configure and Accept Your First Payment
You’re almost done with the payment gateway integration. Just need to run a test transaction to see if everything is working perfectly.
To run a test transaction, you need to create a simple payment form with Paymattic.
How to create a payment form for testing transactions
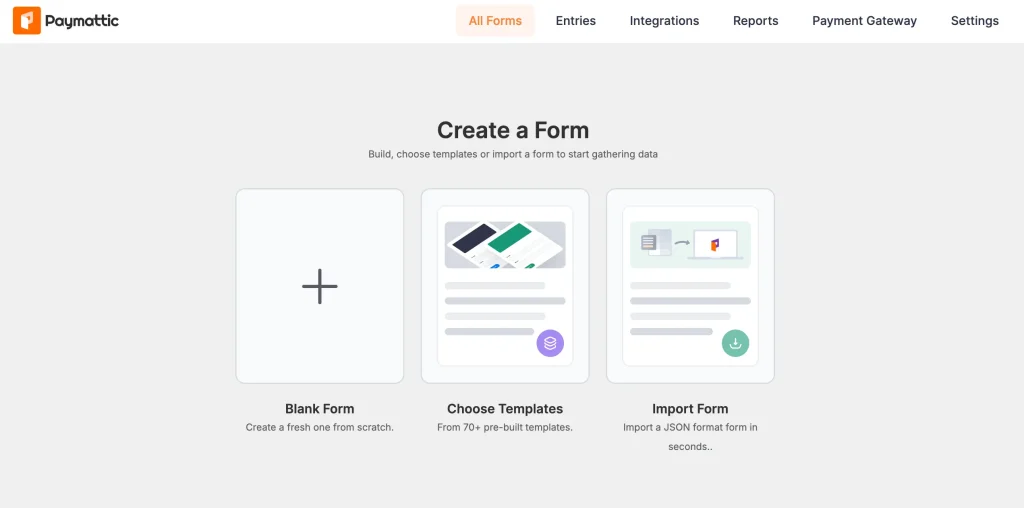
- Go to Paymattic > Create Form from your dashboard.
- You’ll see three options. Blank Form, Choose Templates, and Import From
- Choose a template that matches your use case (Product Payment, Donation, Service Payment, etc.) or select Blank Form to start fresh.
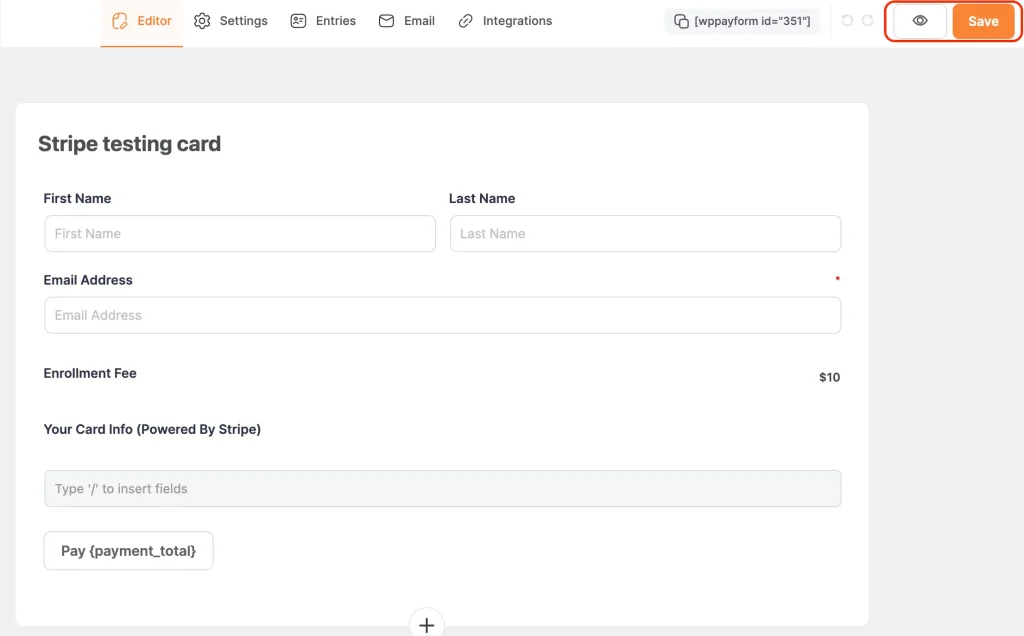
- The form builder opens with a drag-and-drop interface.
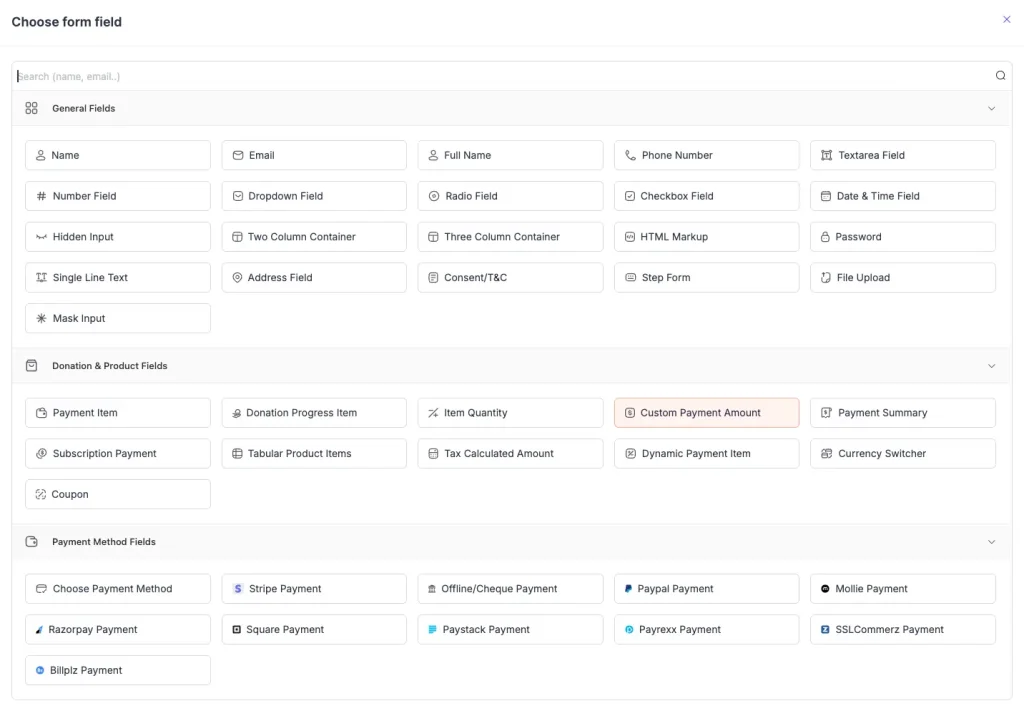
To put input fields on your form, click on the (+) icon.
General Fields: Paymattic offers 20+ general form fields, allowing you to design a complete and professional payment form for your website.
Donation and Products Fields: It offers 10+ specialized fields to help you customize your donation and payment forms.
Payment Method Fields: It also offers 14+ payment methods to accept payments worldwide, and even supports offline payment options.
Add essential fields:
- Customer Name (First and Last Name fields)
- Email Address (required for payment receipts)
- Payment Item field for product selection or custom amounts
- Select Stripe from Payment Method Fields
- Preview and Save your form
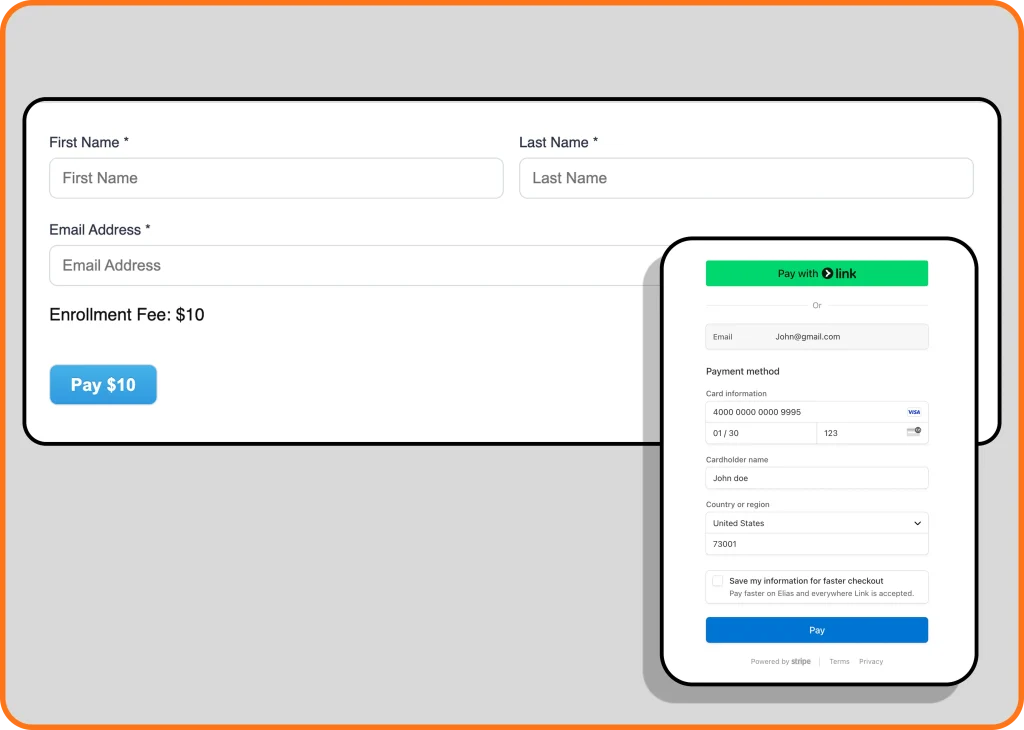
Fill out the form and proceed to payment. Here, Paymattic provides a direct checkout option so you won’t be redirected to the Stripe dashboard to test your transactions.
Test your payment form for every scenario, like successful payment, card declined, insufficient funds, expired card, etc.
The good thing is, Stripe offers region-based card numbers for testing before publishing a payment form.
Keep a note of the numbers. Here is a full list of Stripe test card numbers for different testing scenarios.
If you see everything is working perfectly, that means you’ve successfully integrated the payment gateway, and you’re ready to live your first payment form with Paymattic.
Following the same process, you can integrate multiple payment gateways in WordPress with Paymattic.
Wrapping up
If you’re accepting simple payments (services, donations, registrations, or digital products), a WordPress payment gateway plugin is always a cleaner solution than a full WooCommerce store.
Integrating multiple payment gateways into your website gives customers more flexibility to pay with their preferred payment method.
Start with Paymattic Free: includes Stripe, no cost.
Upgrade to Paymattic Pro: adds PayPal, Mollie, Razorpay, SSLCOMMERZ, Square, Paystack, Payrexx, etc.
Get SSL sorted, grab your API keys, run a test transaction, and you’ll be live in under an hour.
FAQs
Can I accept recurring payments?
Yes, with Paymattic Pro, you can accept subscription-style recurring payments with Stripe, PayPal, Square, Authorize.Net. Xendit, Moneris.
Can I use local payment gateways?
Yes. Paymattic Pro supports SSLCOMMERZ (Bangladesh), Razorpay (India), Paystack (Africa), Payrexx (Europe), Moneris (Canada), Xendit (Philippines & Indonesia ), among others.
Do I absolutely need SSL?
Yes. Full stop. Modern browsers will show security warnings on HTTP pages that contain payment forms, and most gateway SDKs (including Stripe’s) enforce HTTPS. Your host likely offers free SSL; enable it before doing anything else.
Why should I test before going live?
Because live mode uses real money. A misconfigured webhook, a form that redirects to the wrong page, or a confirmation email that never sends: these are all problems you’d much rather catch in test mode than after real customers have paid.
What if I want to use multiple payment gateways?
Paymattic offers multiple payment gateway integrations. You enable multiple gateways and offer buyers a choice at checkout. For example, you can let someone pay via Stripe (card) PayPal, or BillPlz, whichever they prefer.
Does Paymattic work with WooCommerce?
Paymattic is designed as an independent payment gateway plugin, not as a WooCommerce gateway. If you’re running a WooCommerce store, use the native WooCommerce payment integrations (Stripe for WooCommerce, PayPal Payments, etc.). Paymattic is the better fit when you don’t need a full store.

Hey! Tipu here, working as a Marketing Strategist at Paymattic & AzonPress. A nature lover who is addicted to exploring history. In my leisure, you’ll find me playing with different musical instruments.
-

How to Embed Social Media Feeds on WordPress Websites (No Code)
Learn how to embed Instagram, Facebook, TikTok, and YouTube feeds -

Contact Form 7 vs Fluent Forms: Which one should you go for?
Learn the comparison between Fluent Forms vs Contact Form 7. -

WPForms vs Fluent Forms: An Honest Feature-by-Feature Comparison
Discover the Comparisons between WPForms vs Fluent Forms. See how
Leave a Reply
You must be logged in to post a comment.