
How to Add Email Subscription to WordPress (4 Easy Steps)

Email marketing is surely one of the most effective channels for promoting your brand. It helps you grow a subscriber base and send personalized messages to nurture your leads effectively –letting you turn prospects into customers and customers into brand advocates by building a relationship with them.
It all starts with collecting emails from your subscribers. If you’re using WordPress and don’t know how to add email subscriptions to WordPress for collecting email leads, you’re in the right place.
This article demonstrates how to add email subscriptions to WordPress. You’ll also learn how to send email campaigns or automate some emails depending on your needs.
Why should you add email subscription to WordPress?
Having an email subscription form on your website means you’re actively generating email leads. By doing so, you’ll be able to find prospects interested in buying your products and learning about your brand. Other than that, there are several other benefits of adding email subscriptions to WordPress.
- Know your target audience: Email subscribers willingly share their email addresses with you, unlike casual website visitors. So you can easily assume that these people are your target audience.
- Ability to connect with your audience: If you have an email marketing tool, you can import your email list and send personalized emails to connect with your audience through email broadcasts and automated emails.
- Build a relationship: Businesses that actively build relationships with their audience perform better than those that don’t. With email marketing, you’ll get to build a relationship with your audience.
- Boost income: As you collect emails and nurture leads with emails, people will start trusting your business and make more purchases. Thus, your income will increase significantly.
What to consider before adding email subscription to WordPress?
Since growing an email list is a vital part of your marketing strategy, it’s vital to streamline the process before you place email subscription forms throughout your website. So before you add an email subscription form to your website, ask the following questions:
- How will you generate leads?
In order to comply with email marketing regulations and ensure maximum email deliverability, you may need to verify emails or implement double opt-in confirmation. You need to choose a form tool that offers this feature.
- How will the leads join your email list?
Importing and exporting your email list into your email marketing platform isn’t ideal. It’s best to automate the whole process. You should choose a form plugin that integrates with your email marketing platform.
- How will you send the emails?
While most email marketing platforms allow email sending, they may not offer good email deliverability. So you need an email marketing platform that offers excellent email deliverability.
Fortunately, several email subscription plugins have all the required features for an efficient email subscription mechanism. You can also have an excellent email marketing system within your WordPress dashboard. So let’s get to adding an email subscription plugin within WordPress.
Steps to adding email subscription to WordPress
It is relatively easy to add and run a complete email subscription mechanism on WordPress with the right tools. For this tutorial, we’ll use FluentCRM.
FluentCRM is a marketing automation plugin with all the necessary features for effective email marketing automation. This plugin lets you store and segment leads, send email campaigns, and set up email series and marketing automation funnels –while letting you track your efforts through a granular reporting system!
Follow the below steps to add email subscriptions to WordPress using FluentCRM:
Step 1: Install, Activate, and Set up FluentCRM
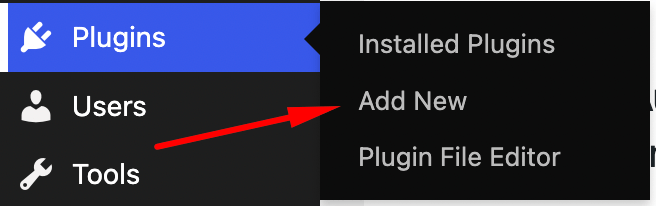
From your WordPress dashboard, hover over Plugins, and click Add New.
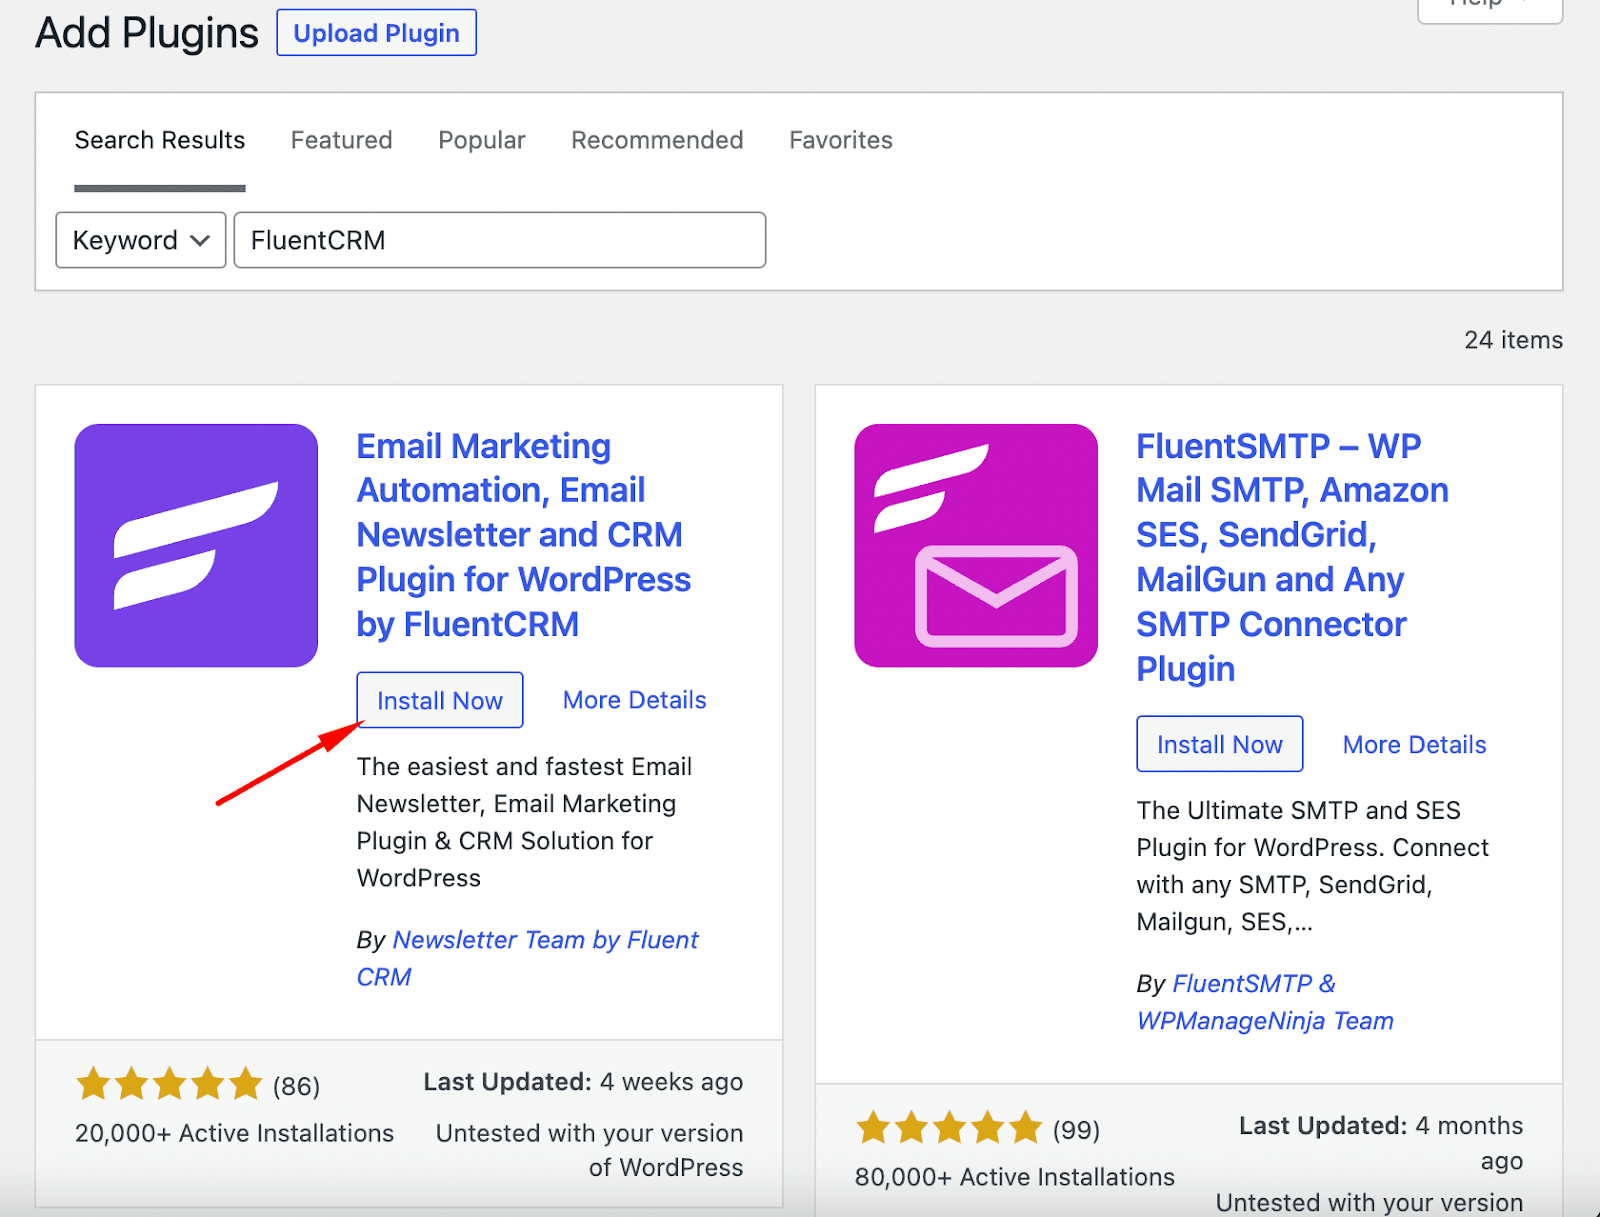
When the plugin repository is displayed, search for FluentCRM and click Install. Once installed, click Activate to get started with FluentCRM.
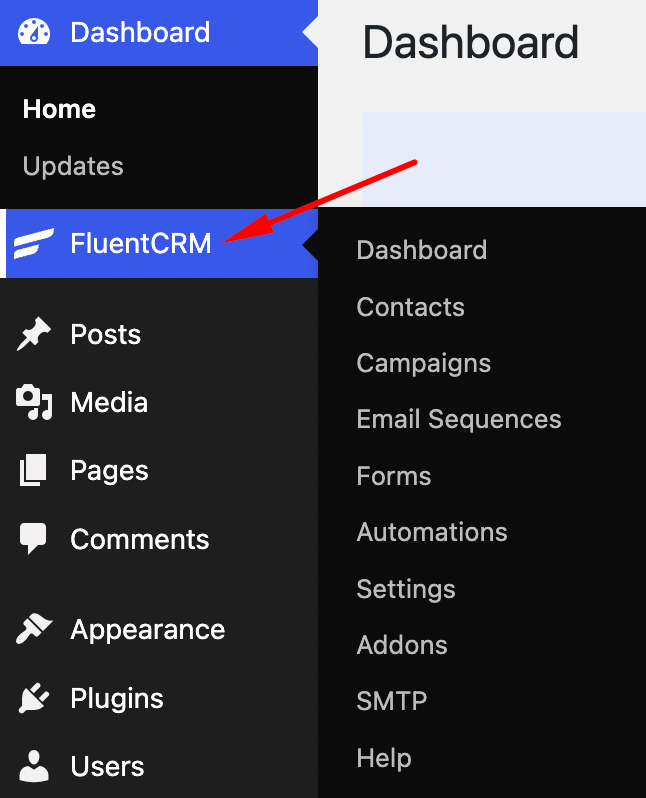
Once installed and activated, click on it to open the setup wizard.
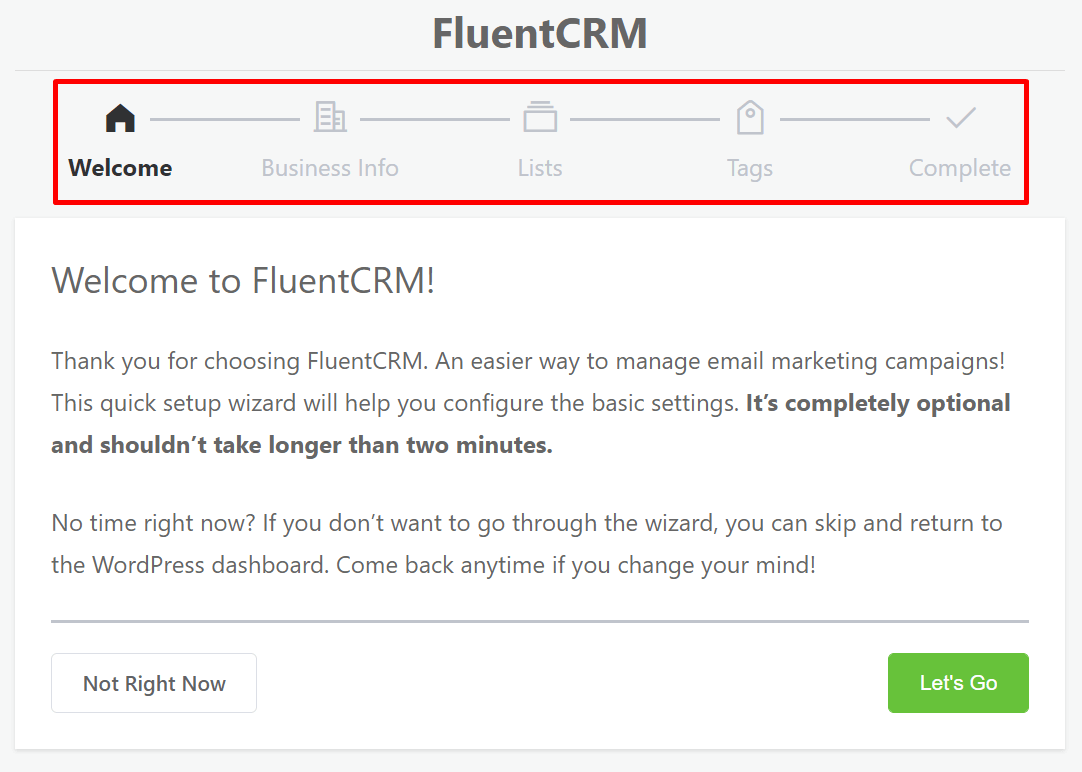
Inside the FluentCRM setup wizard, you’ll have to provide your business name, address, and logo and create lists and tags.
Since it is mandatory to include your business details within your emails, you must provide this information when setting up FluentCRM for the first time. On the other hand, Lists and Tags are necessary for segmenting your audience. You can create as many lists and tags as you want.
After you’re done setting up the essentials, you’ll be prompted to install Fluent Forms. Fluent Forms is the ultimate form plugin for WordPress with all the necessary features for effective lead generation. You’ll get a ton of input fields, security options, and a lot of integrations. The best part?
Fluent Forms has a very powerful integration with FluentCRM. You’ll be amazed by the flexibility this combination offers. So make sure to keep the checkbox enabled to install and activate Fluent Forms automatically.
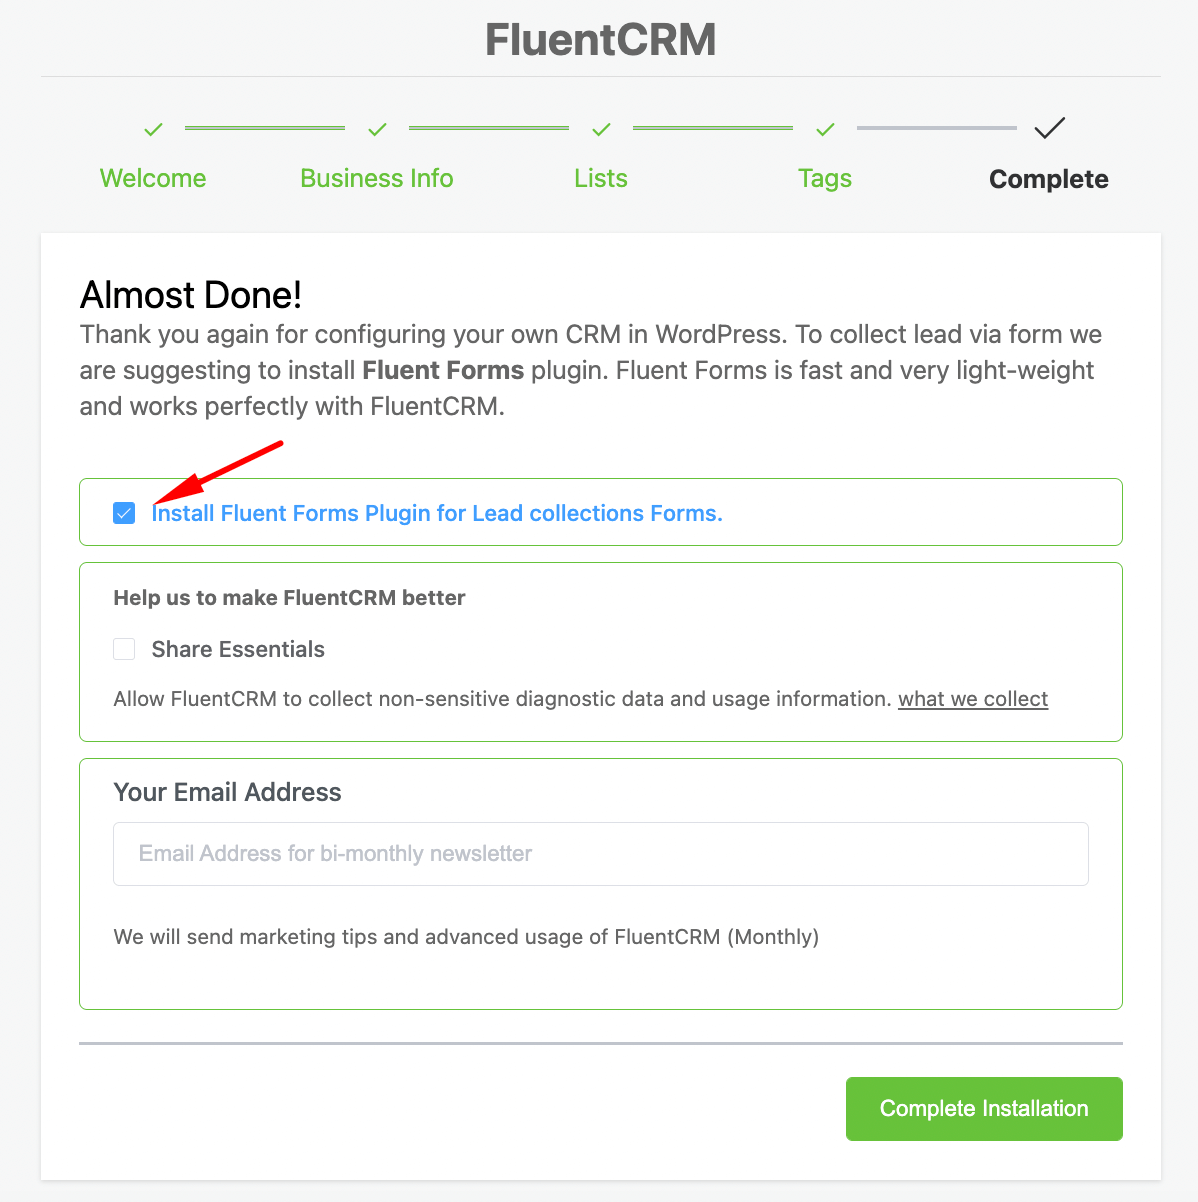
Then, you can import contacts or go to the dashboard. Since we don’t have any contacts, we’ll go to the dashboard.
Step 2: Configure email sending service
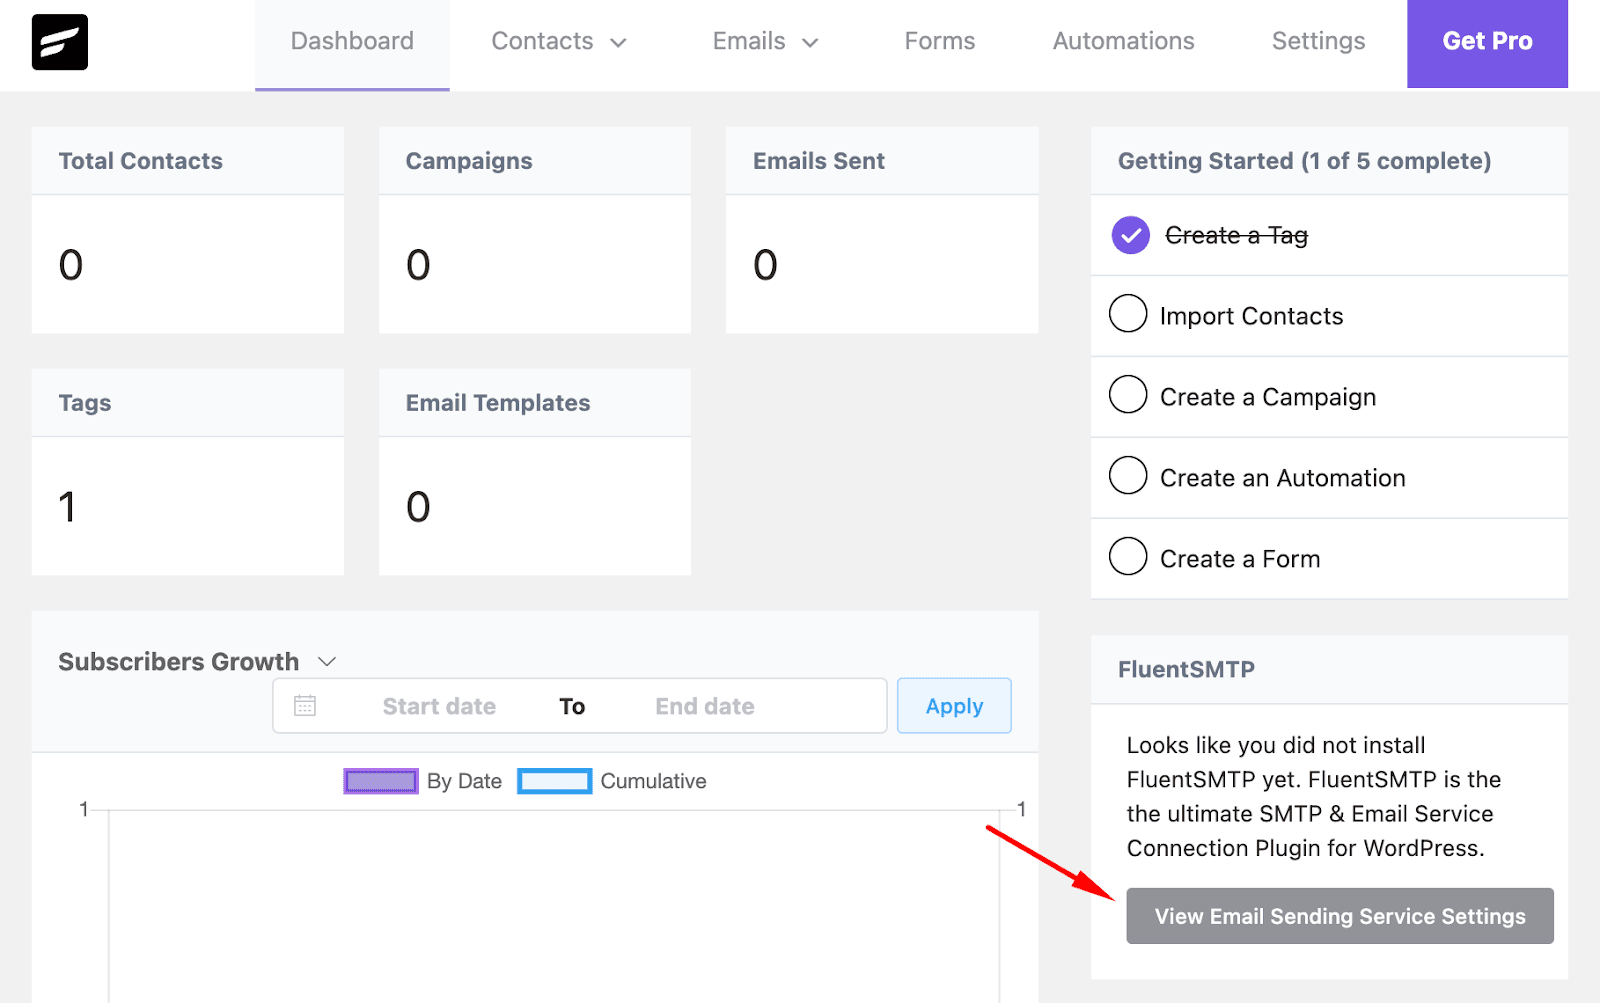
FluentCRM is a WordPress plugin. So it doesn’t have an email service and utilizes the default mailing system of WordPress. Since WordPress isn’t reliable for email sending, it’s best to configure an email sending service for reliable email deliverability.
In order to configure an email sending service, click View Email Sending Service Settings from the FluentCRM dashboard.
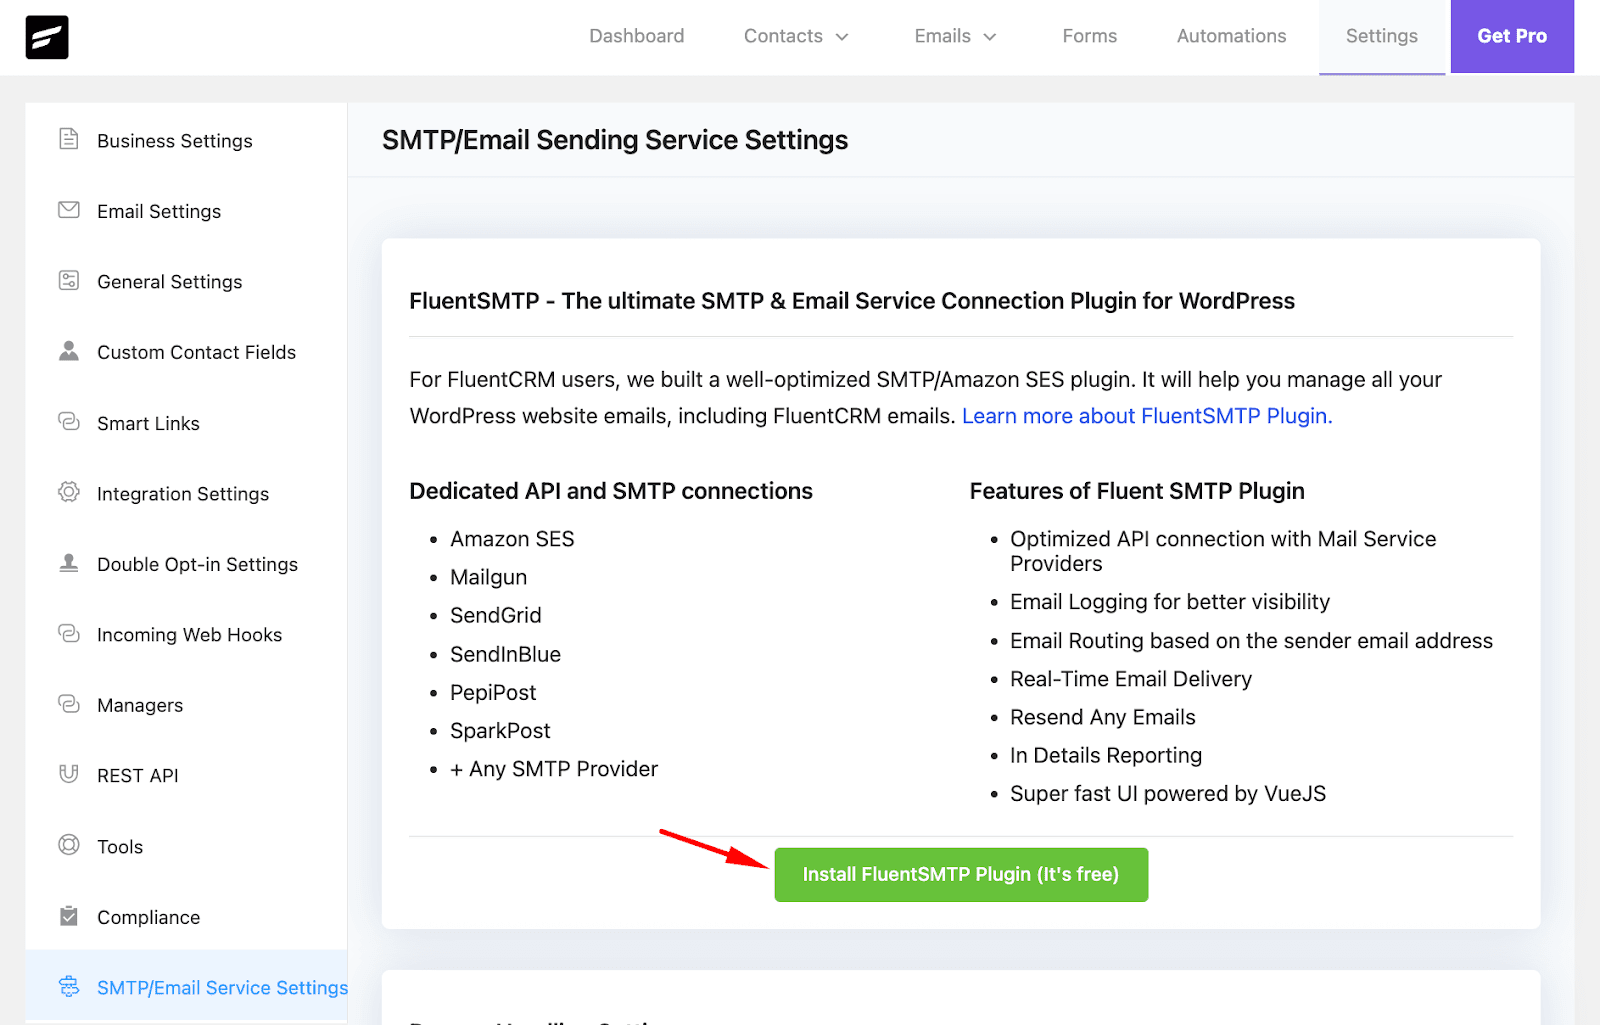
Here, you’ll be asked to install FluentSMTP, a free, feature-rich SMTP plugin. It’s the perfect SMTP plugin to use with FluentCRM because it supports cost-effective email sending services such as Amazon SES, MailGun, SendGrid, PepiPost, SparkPost, etc.
FluentSMTP also enables users to use multiple email services simultaneously. So if you want to use two or more email addresses for different purposes, such as marketing and transactional emails, you can do that using this plugin!
To get started, click Install FluentSMTP.
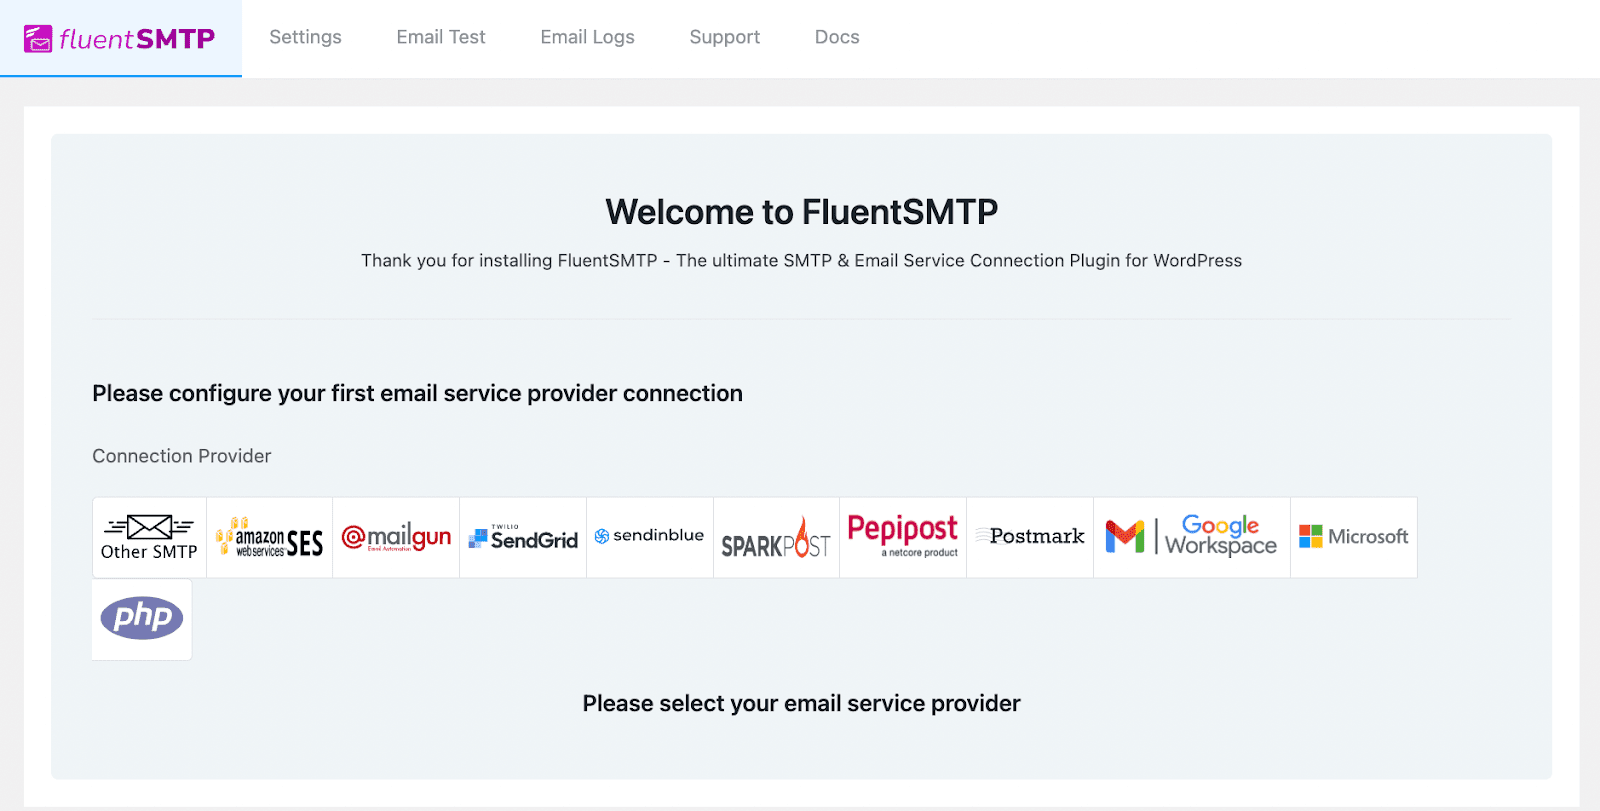
Once FluentSMTP is installed, you’ll be asked to Configure Email Service. Get to the FluentSMTP setup wizard by clicking on it.
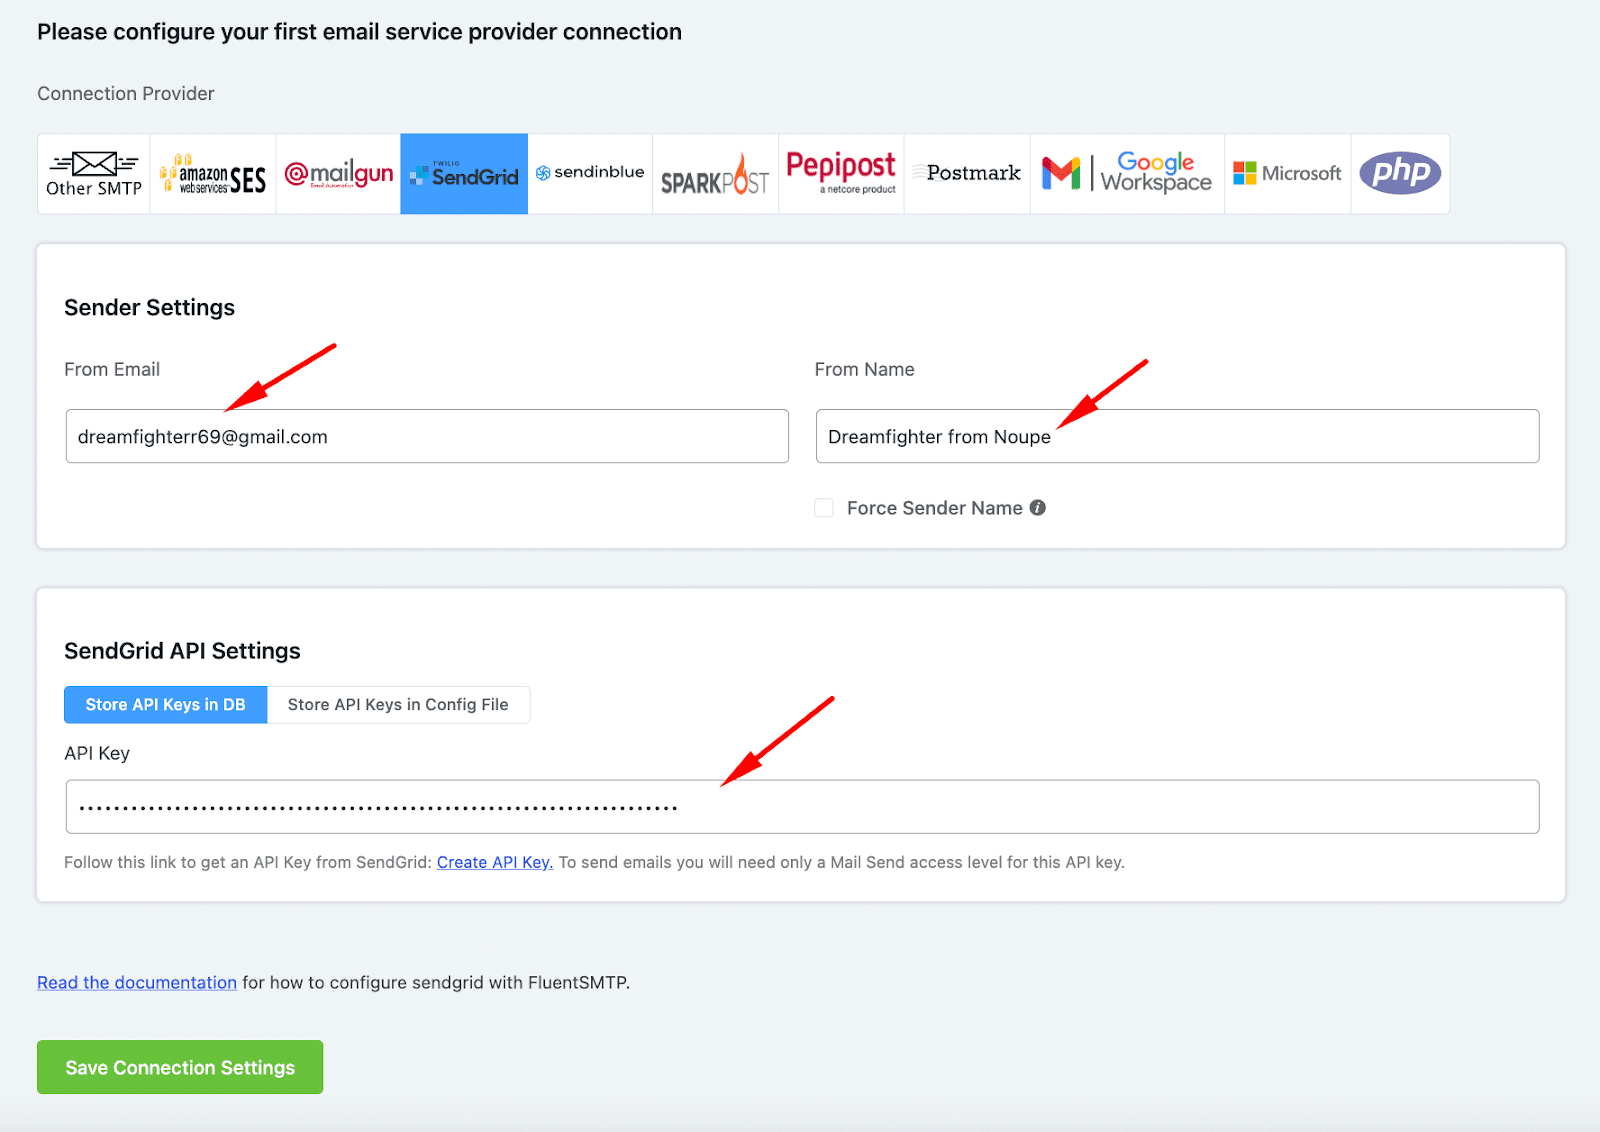
The FluentSMTP email service setup wizard lets you configure any email service of your choice. For sending marketing emails, we recommend using an email sending service among Amazon SES, MailGun, SendGrid, PostMark, SparkPost, or PepiPost.
Amazon SES is the most affordable and reliable email service among these –costing only $0.10 per 1000 emails. However, setting up Amazon SES can be a bit daunting. Other email services will cost you around $10-25 per month, depending on how many emails you want to send. For example, Sendgrid costs $14.95/month for 50,000 emails.
Here are the prices for the other email services:
| Service | Free Limit | Price |
| Amazon SES | None | 1000 emails $0.10 |
| MailGun | 5000 emails/mo(3 months) | $35/month(50K emails) |
| PostMark | 100 emails/mo | $10(10K emails) |
| SendGrid | 100 emails/day | $14.95/mo(50K emails) |
| Sendinblue | 300 emails/day | $25/mo(10K emails) |
For now, we’ll use SendGrid as our email sending service. In order to do that, all you have to do is sign up for SendGrid and provide the necessary details in the relevant fields as shown below. Finally, click Save Connection Setting to save your email service configuration.
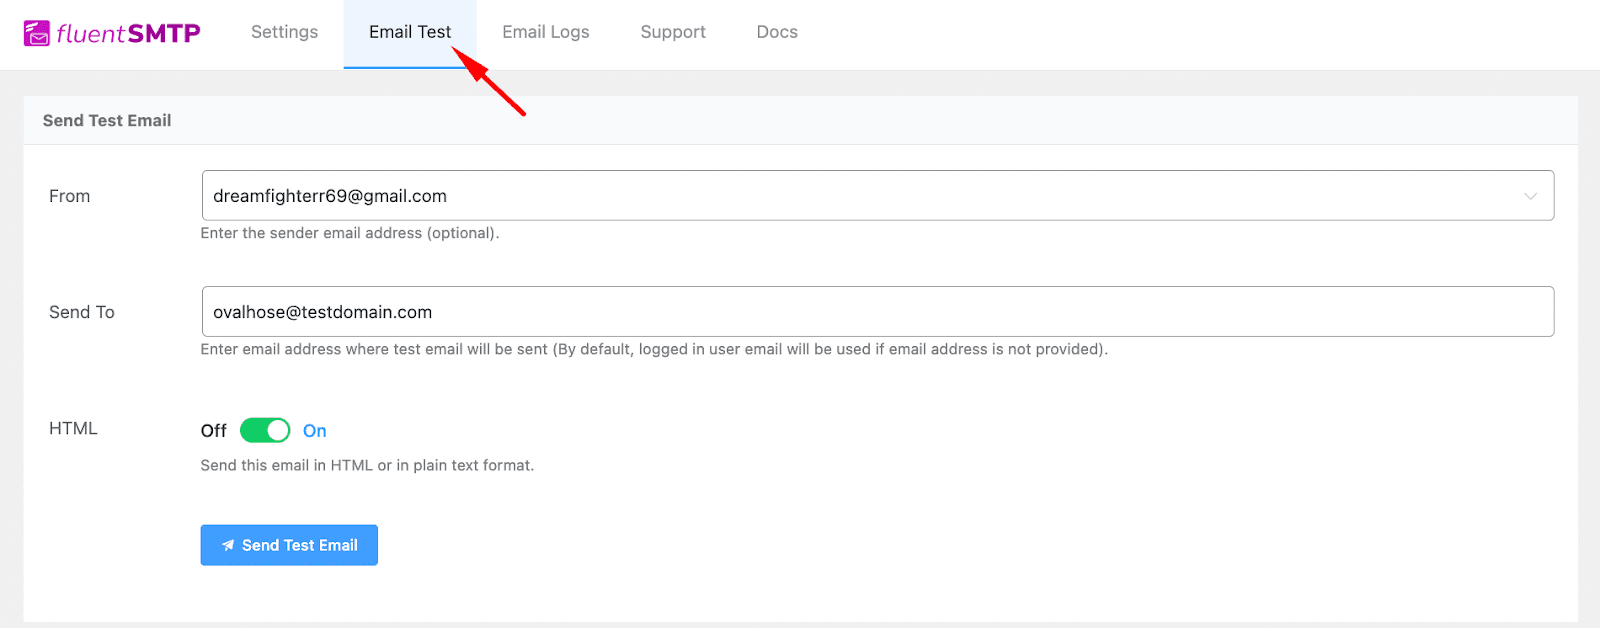
Once you’ve finished setting up an email sending service, it’s wise to check email deliverability by sending a testing email. So switch to the Email Test tab and send a test email to an email address of your choice.
If you get a success message, you’ve successfully configured an email service in FluentSMTP. The last step is to set this email as the default mailer in FluentCRM. To do so, go to FluentCRM>Settings>Email Settings and set the email address as the From Email in FluentCRM.
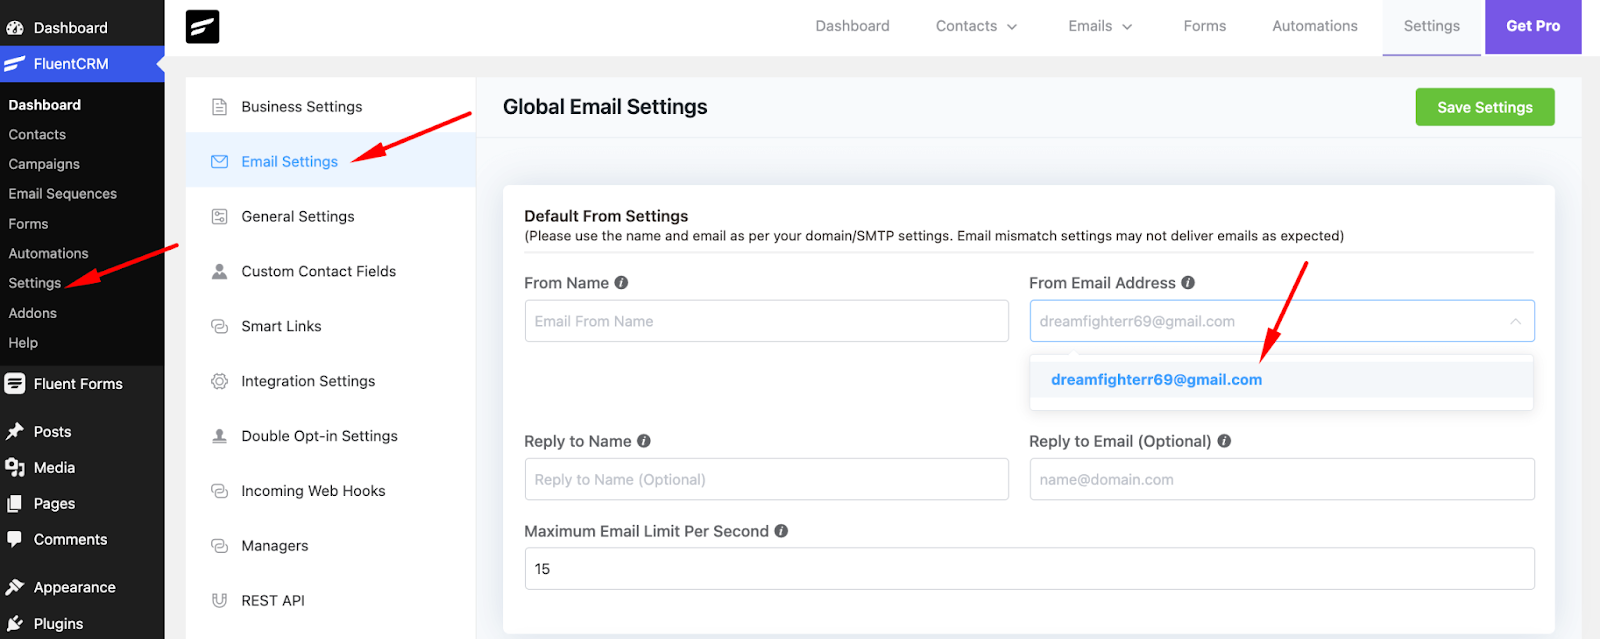
Finally, click Save Settings to finalize the email service configuration in FluentCRM.
Step 3: Create and add email subscription form
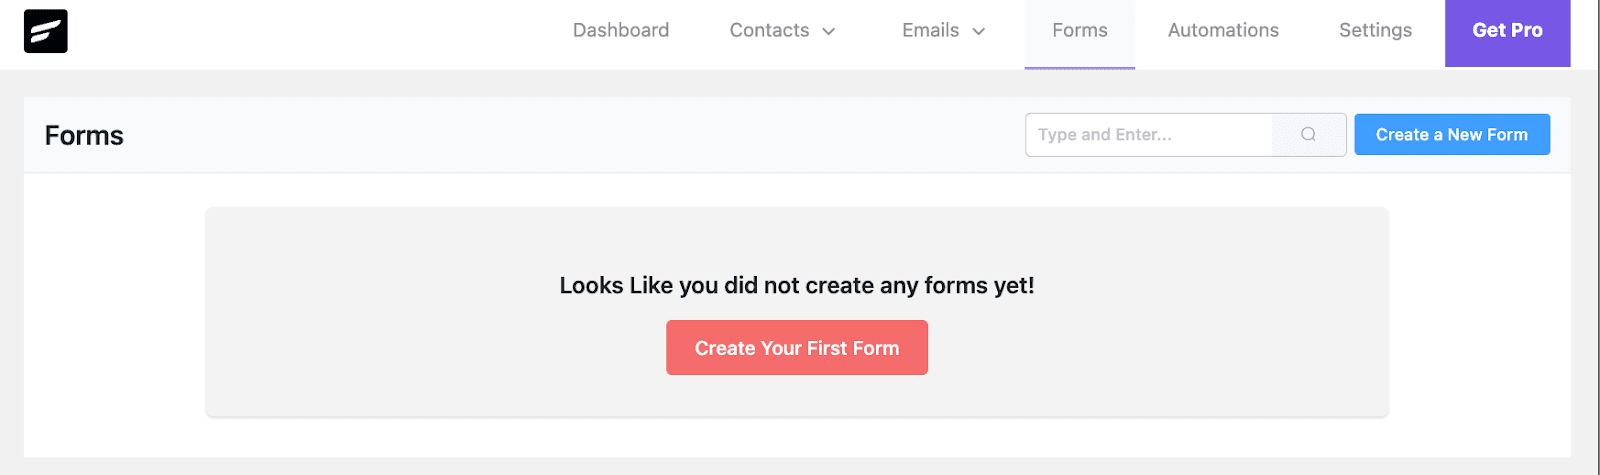
Just as we mentioned, it’s easy to create and add an email subscription form to WordPress with the FluentCRM-Fluent Forms combo. All you have to do is go to the Forms tab and hit Create Your First Form.
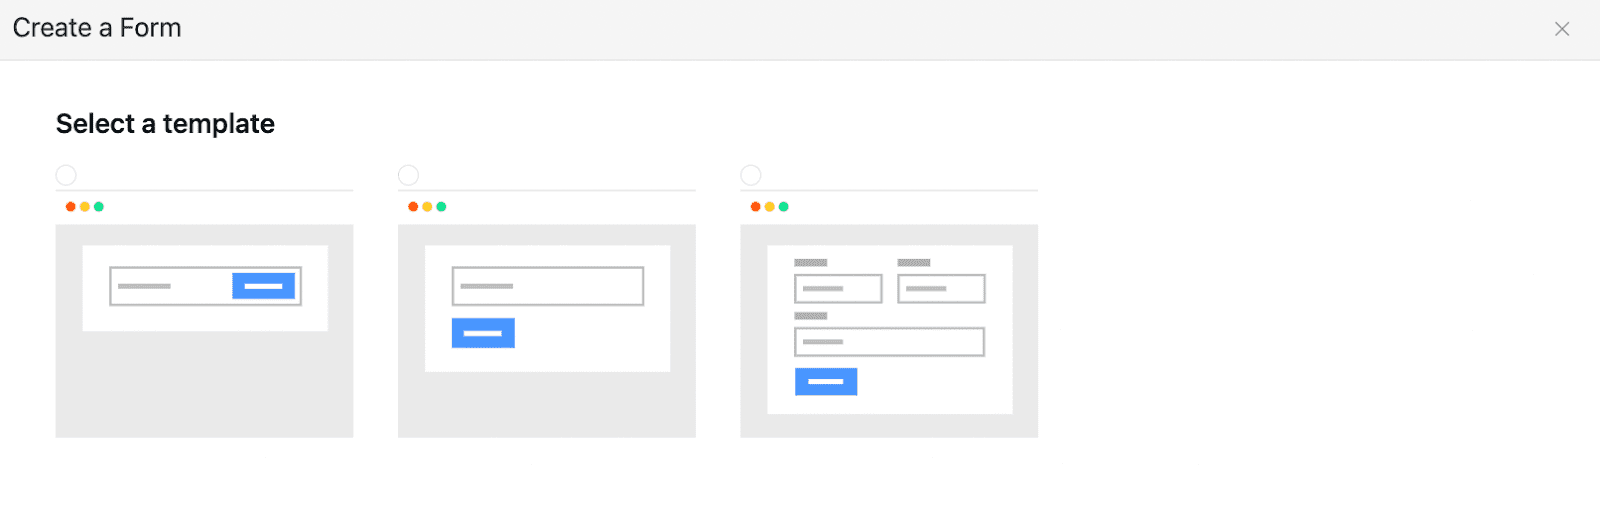
Then, choose a subscription form template.
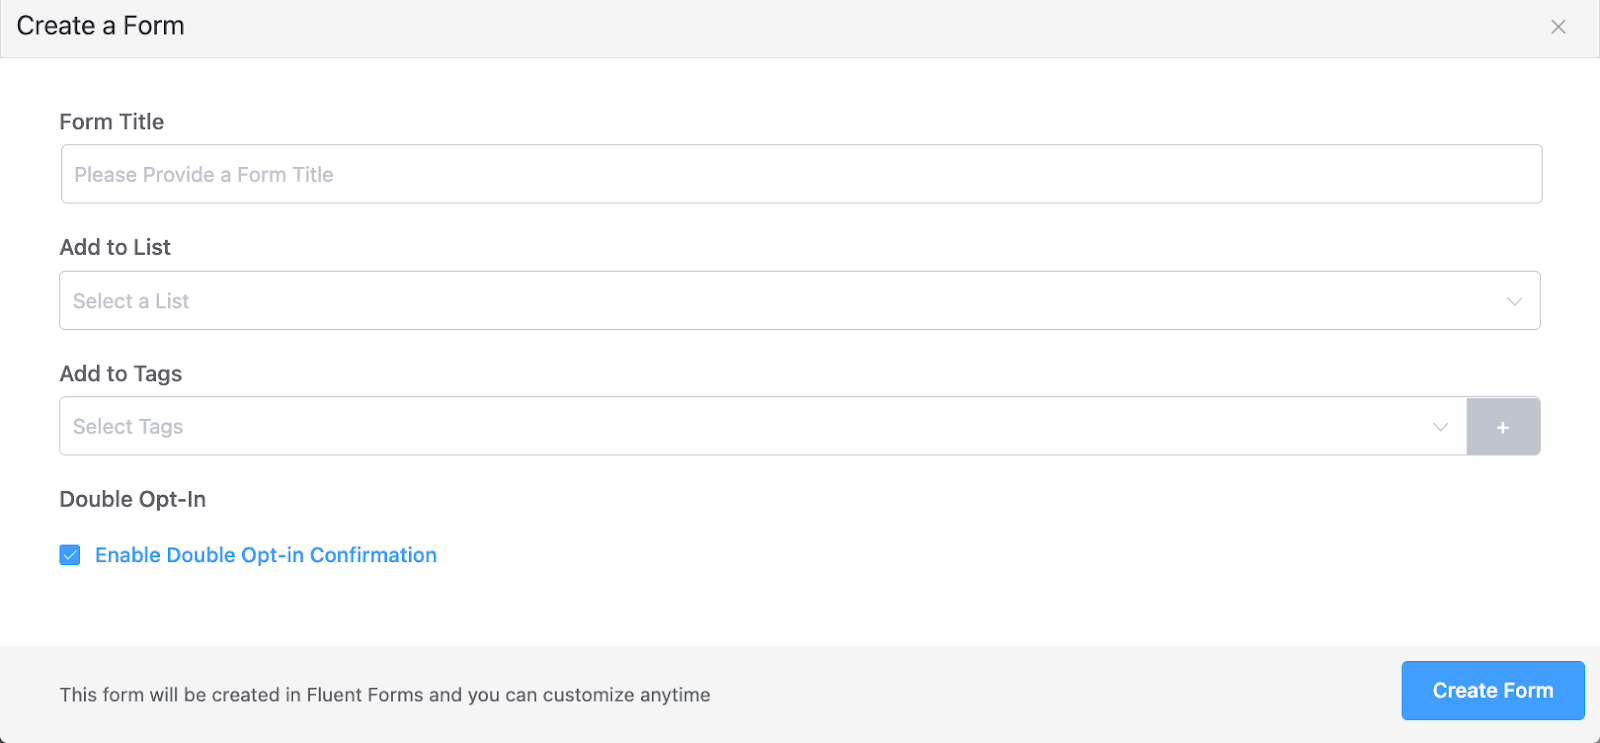
Next, give a Title, choose the List and Tags to assign, and click Create Form. You can also Enable Double Opt-in Confirmation if you want. This will send a verification email to confirm the user’s email subscription.
Once you’ve created the form, you’ll get a shortcode to place on your website. Simply go ahead and place it wherever you like.
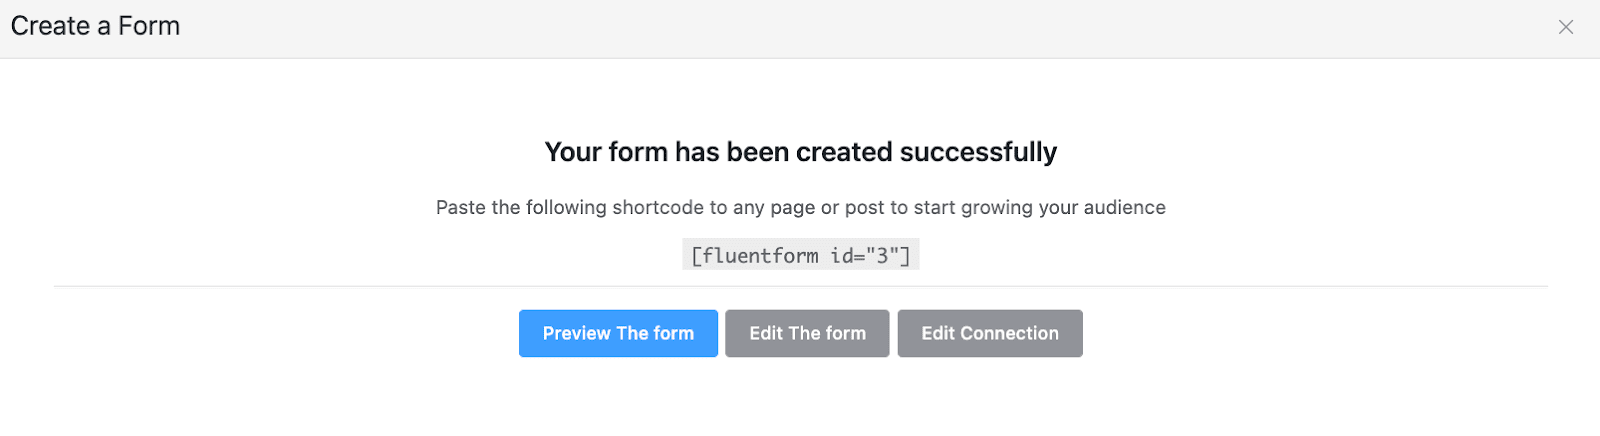
Single blog posts, landing pages, footer, and sidebars are some great places to add an email subscription form!
Step 4: Create a welcome email
So, you’ve added an email subscription form to WordPress. How about greeting your subscribers with a welcome email?
FluentCRM makes it as easy as a cakewalk! For this, you’ll have to create a welcome email automation.
- An automation is like a workflow in which you can set certain rules to automate several email marketing tasks. It’s like asking the software to do email marketing on behalf of you while you’re away!
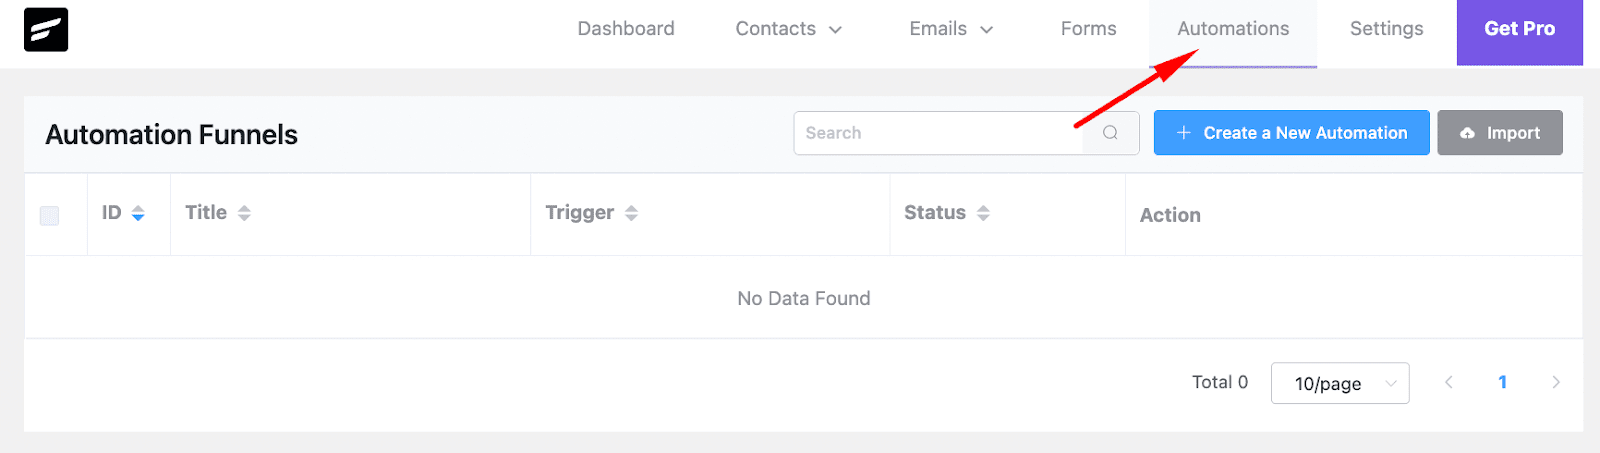
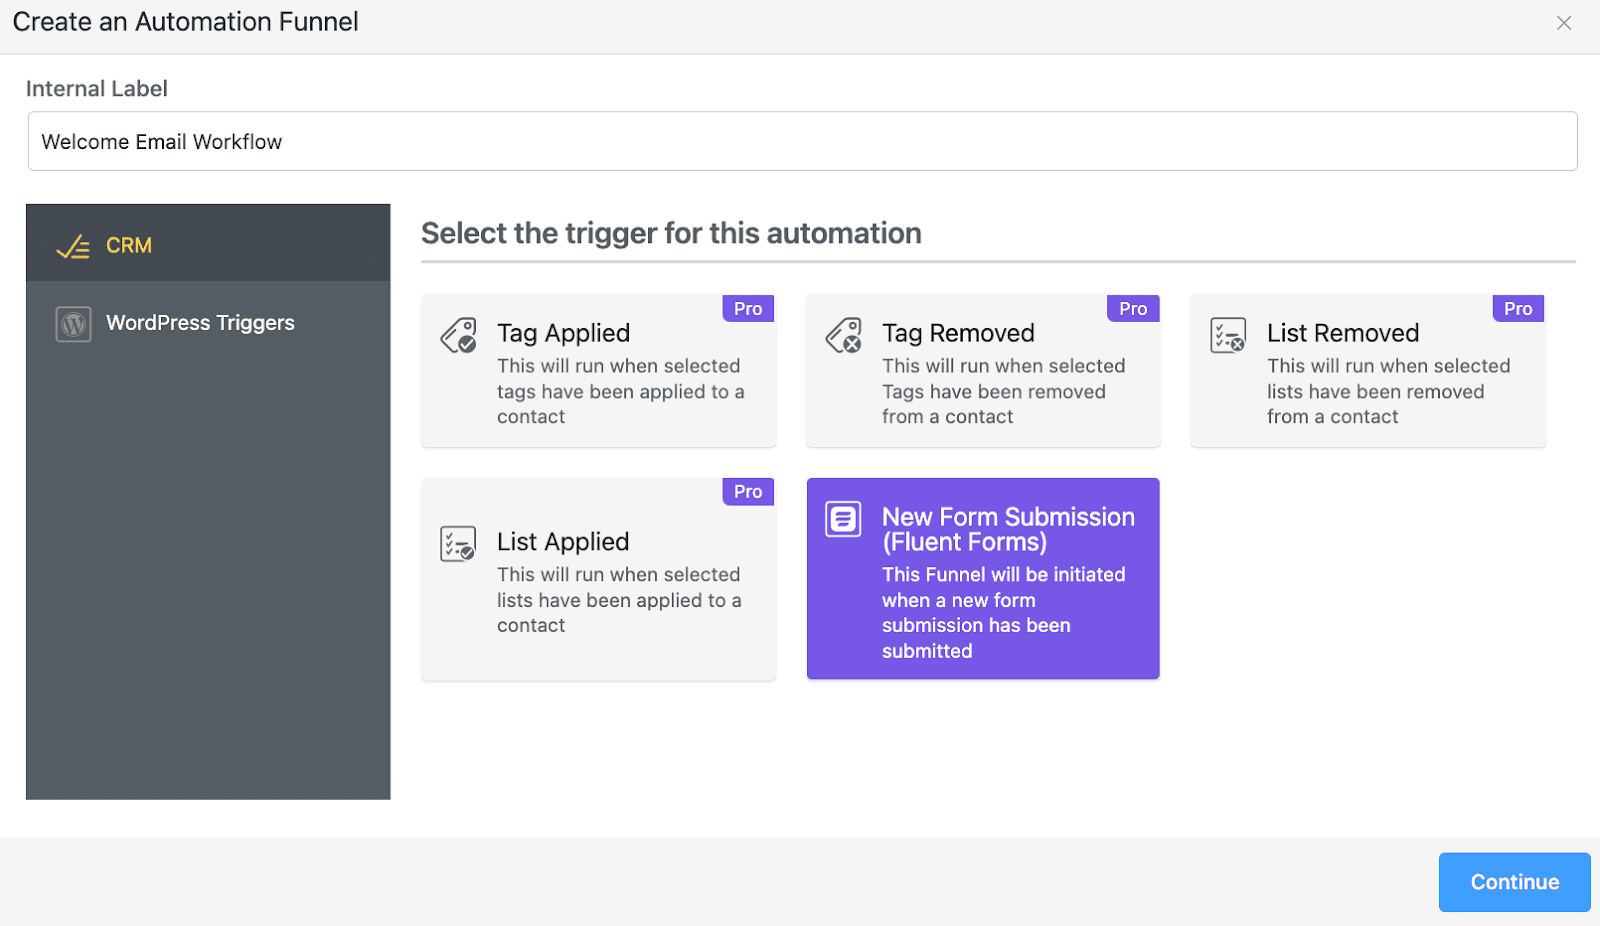
To create a welcome email automation, go to the Automations tab and click Create New Automation.
In the pop-up, give a Title, select New Form Submission(Fluent Forms), and click Continue.
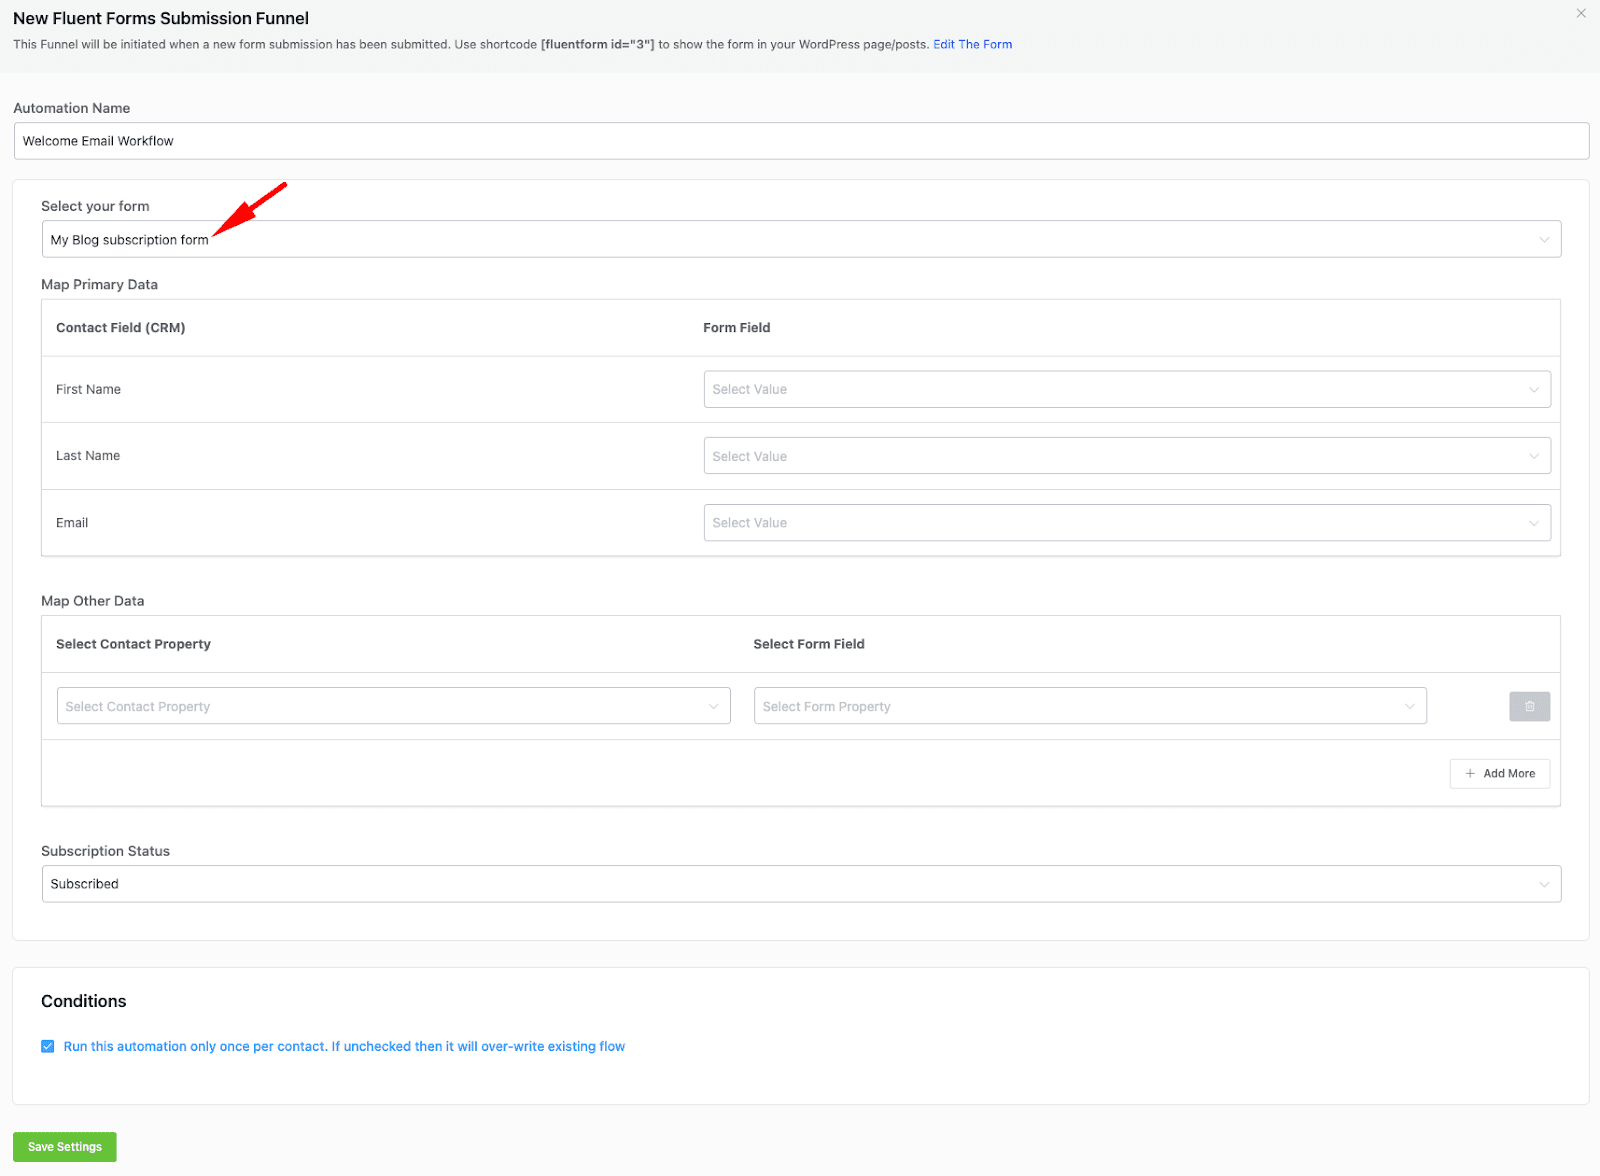
This will take you inside the visual workflow builder, where you have to configure the trigger. There are multiple options. However, you can select the form and click Save Settings.
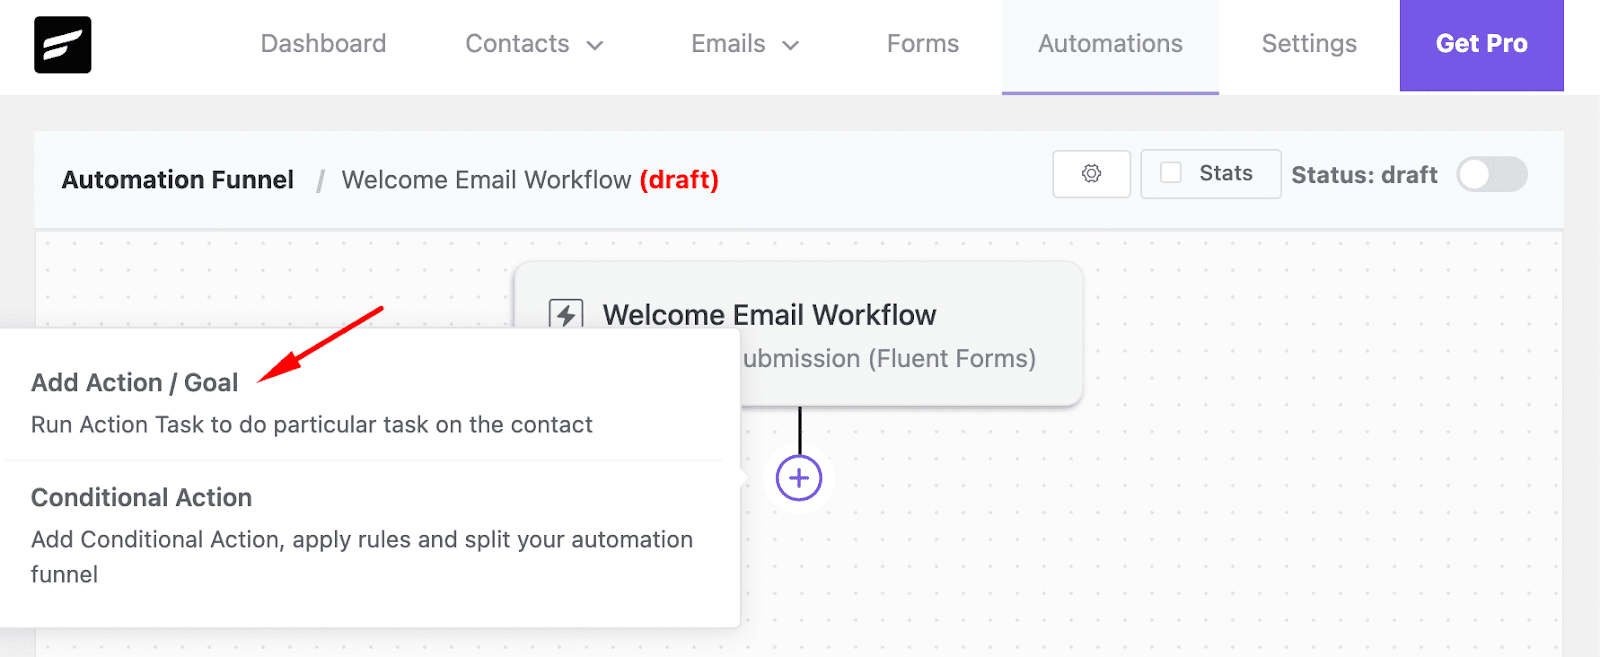
Next, hover over the plus icon(+) and click Add Action/Goal.
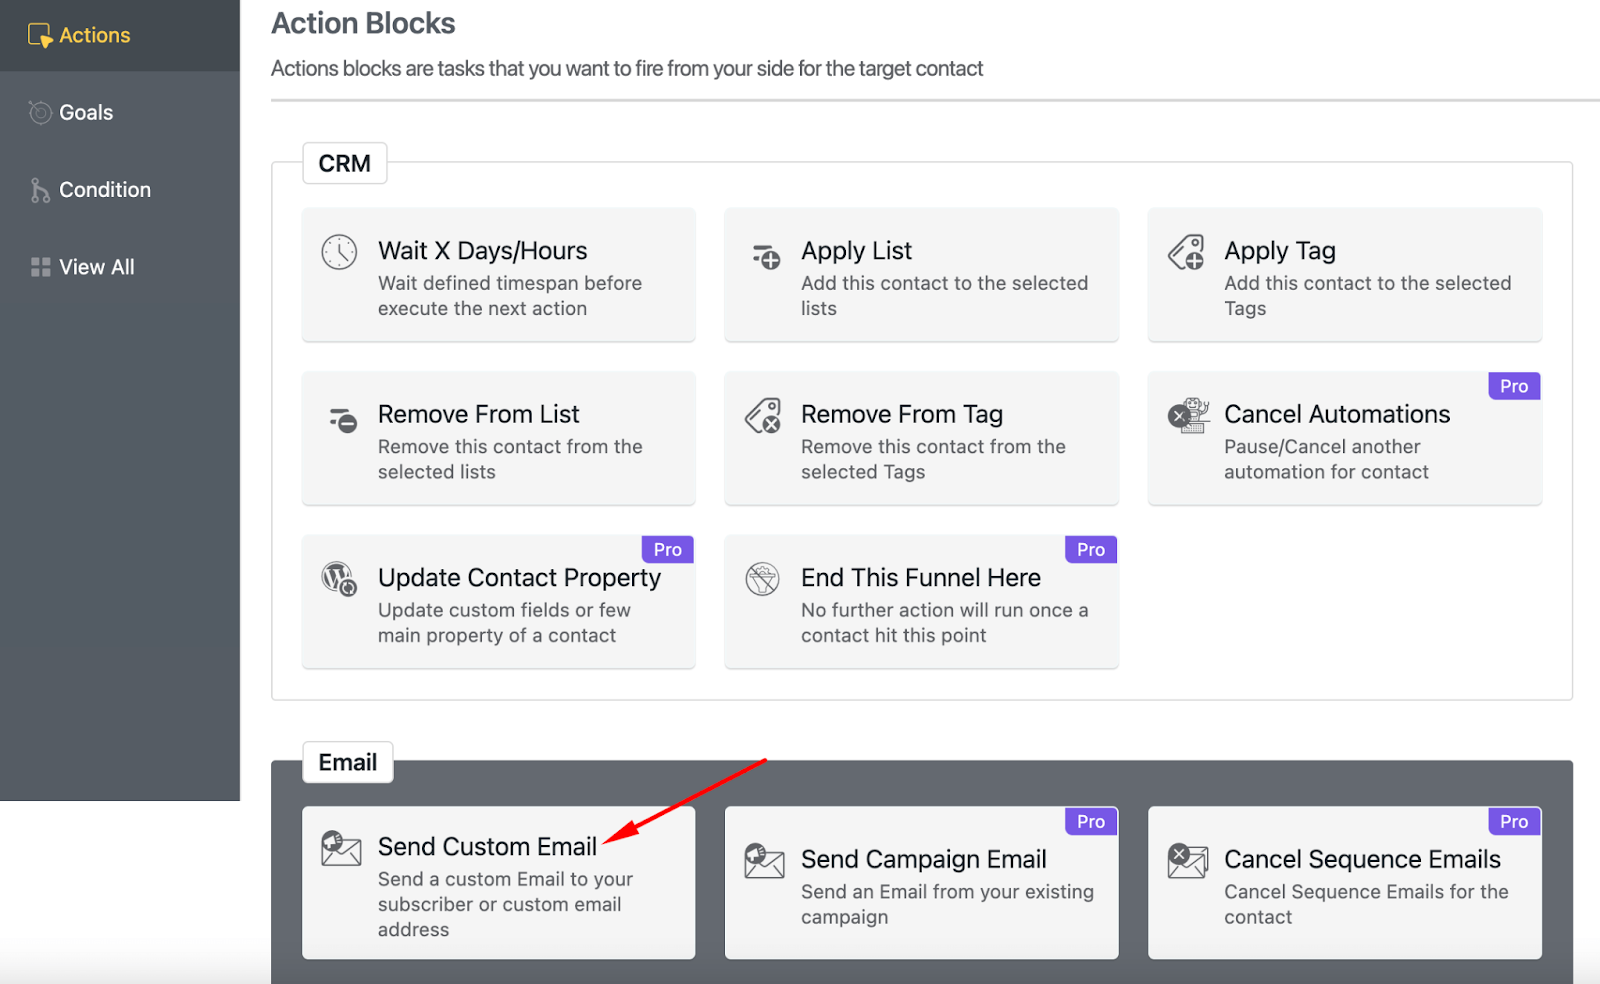
Now you’ll see the actions you can automate. Since we want to automate a welcome email, we’ll select Send Custom Email.
Now all you have to do is compose your email. FluentCRM offers a block-based email composer, so it’s just as easy as writing a blog post. You can also compose HTML emails quite comfortably.
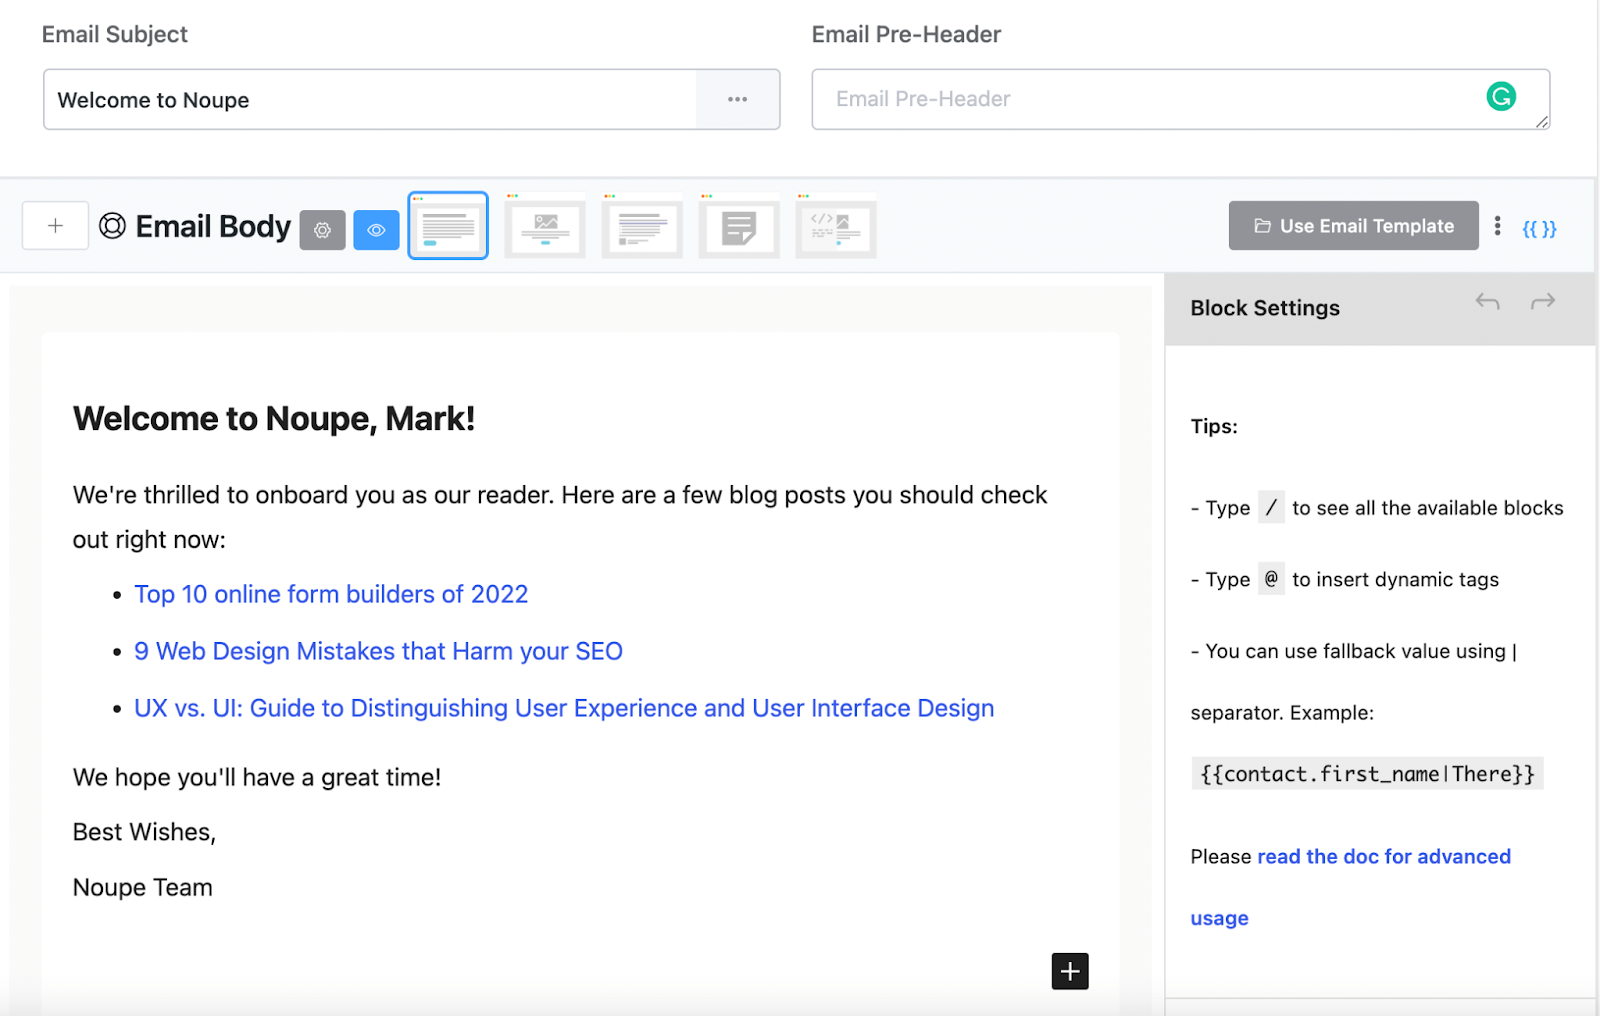
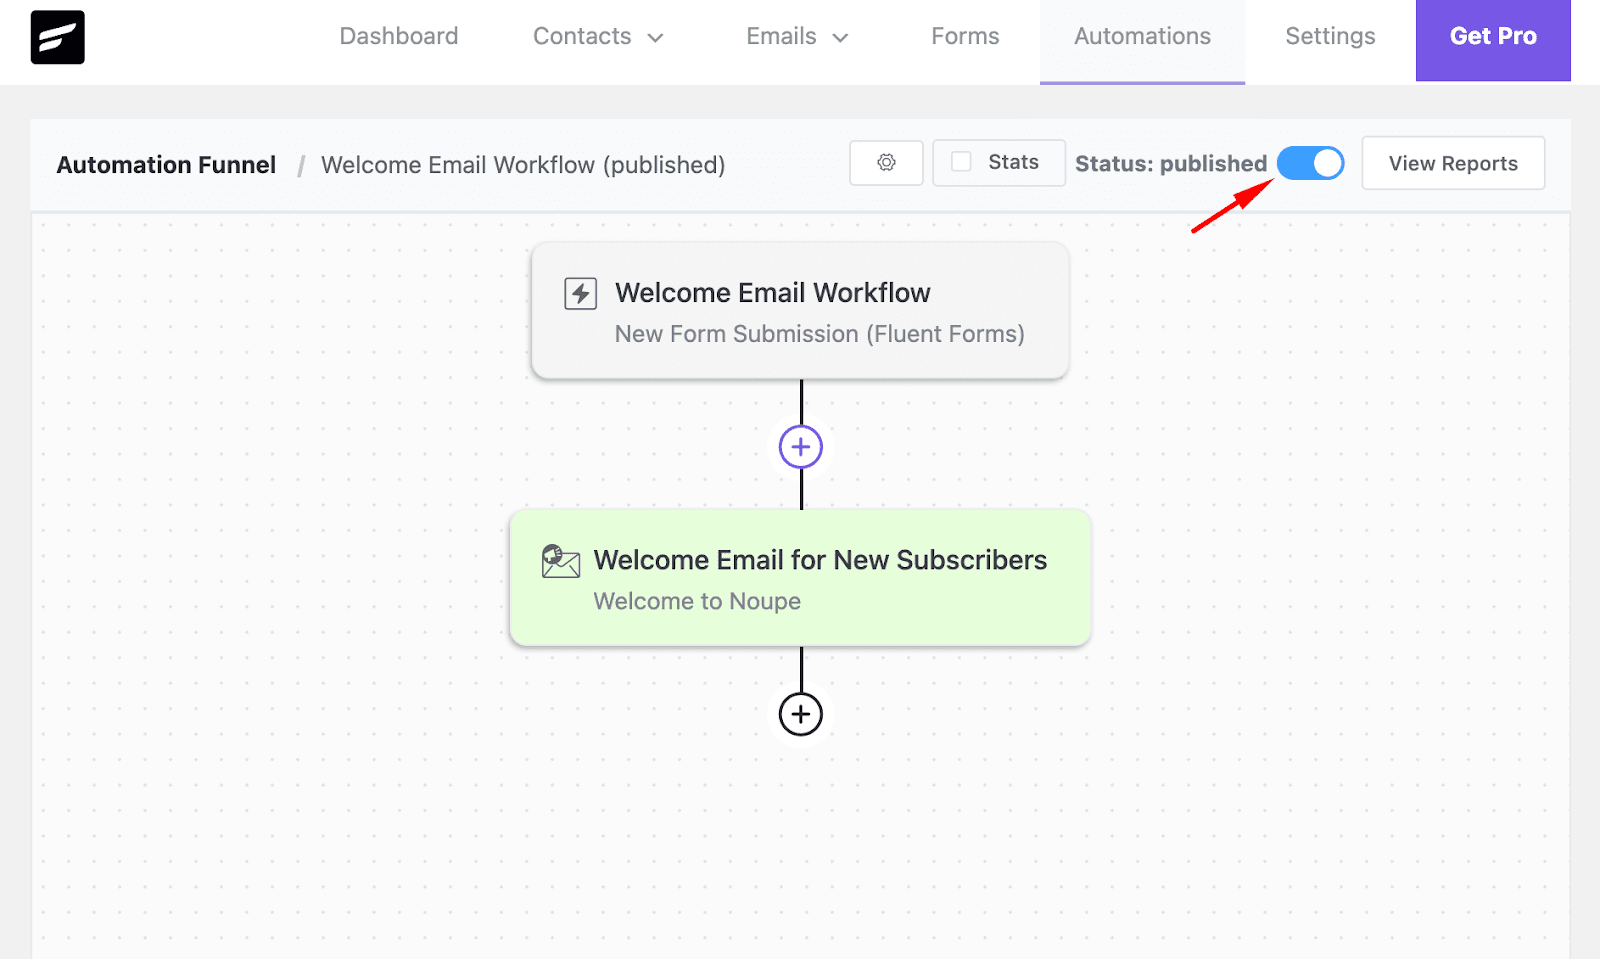
Once you’re done composing the email, click Save Settings. And finally, toggle the button on the top right to activate your welcome email campaign!
That completes the tutorial for adding email subscriptions to WordPress! If you want, you can automate many other tasks with this email subscription mechanism. And if you decide to get FluentCRM Pro, the possibilities are limitless!
If you have an e-commerce, LMS, or Membership website, FluentCRM can make your email marketing a breeze while saving you thousands of dollars!
Start email marketing from WordPress!
Email subscription is a crucial element to have in any WordPress website. But the method we’ve shown above can pull off much more than an email subscription mechanism. So start playing with the tools and utilize this combo for growing your business effectively. We wish you all the best.
Cheers!
-

Kanban vs Scrum vs Agile vs Waterfall: What’s the Difference?
Get a clear, no-jargon breakdown of Kanban vs Scrum vs -
Email Deliverability Hacks: Complete WordPress Guide With Free Tools
Improve WordPress email deliverability with FluentSMTP, SPF, DKIM, DMARC, list -

How to Embed Social Media Feeds on WordPress Websites (No Code)
Learn how to embed Instagram, Facebook, TikTok, and YouTube feeds
Leave a Reply
You must be logged in to post a comment.