

Best WooCommerce Shipping Calculator to Generate Labels and Tracking Links
Shipping cost is one of the most important factors that influence customers’ purchase decisions. Higher shipping cost is one of the main reasons for cart abandonment. But significantly reducing shipping charges will affect the long term sustainability of your business since it can reduce profits. So, an optimal pricing strategy must be considered while setting up shipping charges in your store.
Shipping costs and online stores
Customers always prefer to spend the minimum amount on shipping costs, and moreover, they will be happy if you provide free shipping. In order to encourage customers to buy more products from your store, you can even set a minimum threshold price to offer free shipping. If a customer purchases products worth more than that amount, you can ship them free of cost.
You can set the shipping cost in different ways as per your convenience and customer satisfaction. Some store owners prefer to set the fixed shipping costs for all orders in their store. And, some owners calculate it based on the distance to the shipping address, weight of the products, and so on. You can also use a plugin to provide real time shipping rates of specific shipping carriers such as FedEx, UPS, USPS, etc.
If you provide real-time rates of the specific shipping carrier(s), they will calculate the shipping cost based on their specific calculation formula. Also, based on the delivery address and the weight and dimensions of packages, customers will get a list of shipping services from which they can choose one based on the rate and estimated days for delivery.
Hence, many store owners and eCommerce organizations join hands with shipping carriers for better shipping rates. When it comes to small to medium eCommerce store owners and retailers, they might not be integrated with any shipping carriers. They often depend on third party integrations for getting the best shipping rates, printing labels, and tracking links.
This write-up focuses on a shipping calculator plugin that allows you to configure a portal or a platform for the sellers and customers to calculate shipping rates, print labels, and get the tracking links using your EasyPost API.
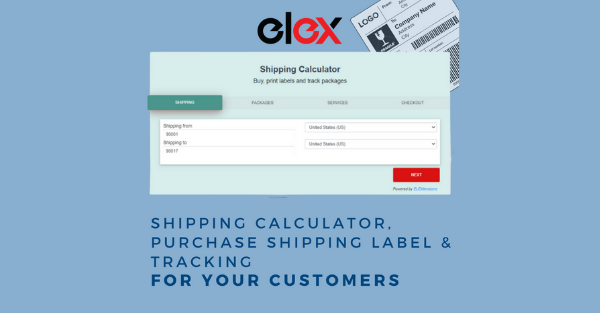
ELEX WooCommerce Shipping Calculator, Purchase Shipping Label & Tracking for Customers
ELEX WooCommerce Shipping Calculator is very useful for retailers as they can even generate labels and get the tracking links for shipping bulk numbers of packages together. The shipping cost will be calculated based on the source and destination address entered by the sellers or customers. And, they can choose a default package for shipping or, manually enter the weight and dimensions of items to generate packages.

You can provide shipping services of FedEx, UPS, USPS, and Canada Post through your EasyPost API.
How does it work?
If you integrate this plugin into your WooCommerce store and enable the required carriers, the activated shipping services of those carriers will be added as products in your store. You can place the shipping calculator on a new page in your store using a shortcode – [multilabel].
The customers or sellers will be purchasing the required ‘services’ from your store for generating shipping labels and tracking links. So, they are paying the shipping cost of the selected services to you. But, how does it benefit your business?
Well, that is why this plugin comes with an option to set a handling fee from the admin side. This handling fee will be added along with the subtotal amount, which needs to be paid by the customers. Also, you can add a fixed or percentage price adjustment for each shipping service in the plugin dashboard.
After calculating the shipping rates based on the locations and packages, customers will get a list of available services with their cost and expected delivery days. Sellers can choose the most reasonable cost considering the number of days it would take to deliver. Then, they can proceed to print the label and get the tracking link after initiating the payment. The generated label and tracking link will also be triggered in a mail to the sender as well as the receiver.
This is how it works!
To know more details to configure the shipping calculator on your store, have a look at its detailed product documentation.
Let us take a quick tour of the plugin dashboard.
You need to add your EasyPost API key to integrate the shipping services of FedEx, UPS, USPS and Canada Post with the shipping calculator. Also, add the shipping calculator homepage URL for allowing customers to go back to the calculator page for editing the label details when needed.

In the next tab, you can choose between two options – Shipping from all countries or Ship from specific countries only. The first option allows the customers to choose any country in the ‘Shipping from’ field while generating labels. The second option allows customers to choose only those countries that you make available. When you select this option, a new field will be displayed to add the countries. Similarly, you can choose the options for destination addresses as per your requirements.

If you need to present the shipping calculator only for selected user roles, you can select those roles in this tab, and also prevent guest users from using the shipping calculator platform if required.
Enabling debug mode will help you to rectify any issues by checking them in the WooCommerce log file.
Rates and Services settings
In the Rates & Services tab, you can configure the format of printing labels by choosing an option from PNG, PDF, ZPL, or EPL2. And, you can enter a handling fee which must be added along with the subtotal of the shipping cost chosen by the customers.

Under the Configure Order Status section, you can choose an order status for ‘successful label creation’ and ‘failed label creation’. These configured statuses will be assigned to the order in accordance with the result of label generation by the customers. Also, there are options to set custom messages which must be displayed when the label generation fails or succeeds.
You can select the required shipping carriers (FedEx, UPS, USPS, and Canada Post), which must be available for the customers to calculate shipping rates and print labels in the shipping calculator. After choosing the carriers, all available services will be listed from which you can enable the required ones and enter a percentage or fixed price adjustment as per your requirements.

Email Settings
You can configure to trigger the generated label and tracking links through an email to the customers and their buyers after the labels are generated. For that, you can choose the recipients of the email from the drop down pick up list accordingly. Also, there are options to add a custom email subject and email content. In the email content, you need to add the shortcodes – [SHIPPING_LABEL] and [TRACKING_LINK] on the email template. The label and the tracking link will be dynamically replaced in place of shortcodes when it is sent to the customers.

Customize template
In this tab, the plugin allows you to enter a custom heading for the shipping calculator, its description, and checkout button text. Also, you can add the link of a page or documentation to be linked from the homepage for customers to get an idea of using the shipping calculator. In addition to these, the template colors can be customized as per your preferences.

To know more about the plugin and how it calculates the rates and generates labels, check a demonstration with an example.
Example of calculating shipping cost, printing label and getting the tracking links with ELEX WooCommerce Shipping Calculator Plugin
In this example, the source location is in New York, and the destination location is in California.
So, the customer has entered the addresses and the contact information (email address and phone number) of both the seller and the receiver.

In the next step, customers can choose a default package option as per the volume of the items they need to ship by choosing the Carrier Packaging option. They can enter the weight of the products manually.

If they need to generate custom packages, they can choose the Custom Packaging option and enter the weight and dimensions of the items manually.

If they need to generate packages for multiple products, there is an option to add multiple packages by clicking the +ADD ANOTHER PARCEL button available on the same tab.
If they are required to generate packages for a large number of products, they can download the sample template of a CSV file and add the weight and dimensions of all products one by one to upload it on the shipping calculator. This will help you to easily generate packages for bulk amounts of items together.


In the next step, customers will get a complete list of all available shipping services with their cost and delivery days as per the addresses and the packages they have entered into the calculator.

After choosing an option, they can proceed to the checkout process.

Here, the rate of the selected shipping service will be the subtotal amount. In addition to that, a handling charge of $5 has been added along with the subtotal. The customer can edit the previous changes if required by clicking the Edit Label Details button before generating the label.
By clicking the Place Order button, the label and tracking link will be generated and displayed on the same tab. The labels and tracking link can also be accessed from the My Account page by the customers at any time.

Customers can download the label from this tab or from the My Account page. The tracking link will redirect to the EasyPost tracking page of the order.
Both details will be sent in an email to the sender, receiver, or both at the time the labels are generated.
Check an example of the generated label:

To sum up,
This plugin will help you to feature a shipping calculator for the sellers to seamlessly calculate the shipping rates, print labels, and get the tracking. With all its advanced features, you can provide the best shipping experience to your clients!
Boost your sales with email marketing automation
Everything you do for your online store is driven towards one single goal, generating more sales and revenue. And there’s nothing as effective as email marketing automation when it comes to driving people into your online store and generating sales.

With FluentCRM, now you can do it directly from your WordPress dashboard! FluentCRM is an email marketing automation plugin that integrates with WooCommerce and allows you to generate leads, and automate any kind of email marketing activity. So give the plugin a try and keep the eCommerce revenue flowing!
Before you leave, do subscribe to our YouTube channel to get WordPress-related tips and tricks. Also, follow us on Twitter and Facebook.
-

9 SMS Marketing Automation Strategies for eCommerce
Discover 9 SMS marketing automation strategies for eCommerce to recover -

How to Build an Affiliate Program for Retailers: WordPress Guide
Build an affiliate program for retailers step by step. Margin-safe -

Types of Online Communities to Help Scale Your eCommerce Store
Discover the 7 types of online communities that boost customer
Leave a Reply
You must be logged in to post a comment.