

Google Analytics is the most popular tool to track a website’s traffic and understand user behavior.
In this post, I’ll show you every step of configuring Google Analytics and setting it up for WooCommerce with a plugin.
The steps are easy to follow, but you have to do it carefully.
Part one – How to get started with Google Analytics
I’ll start by showing how to configure Google Analytics. If you already know how to do that, then you can skip this part and jump into the next part.
Step 1: Go to Analytics
Search Google with Google Analytics and go to the link that appears first. Or, simply follow this link.
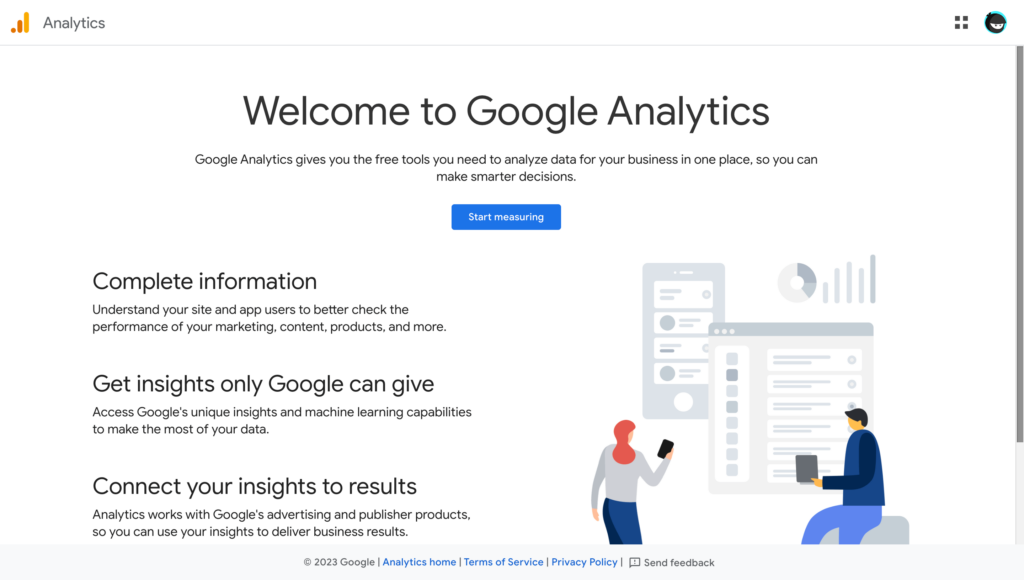
You need to sign up (or sign in) first with your Google account. Now click the blue button that says Start measuring.
Step 2: Create an account
It’s time to create a Google Analytics account. A simple but mandatory step.
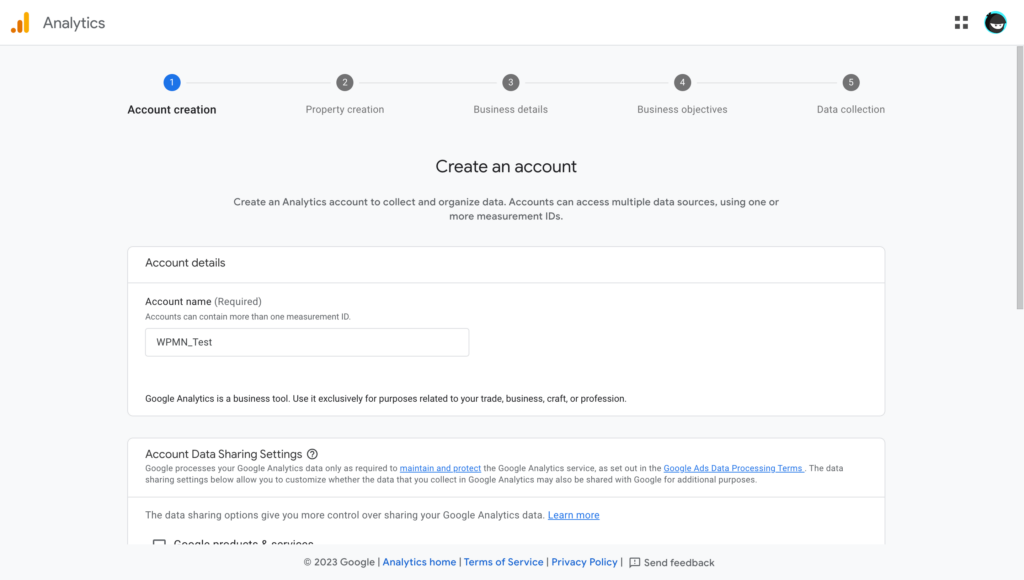
First, give an account name. It might be your business name or personal name.
The second section is for account data sharing. Tick all or whichever seems right for you. Click Next.
Step 3: Create a property
Here you’re about to create your first property for Analytics. A property means a website or an app, whichever you want Analytics to track for.
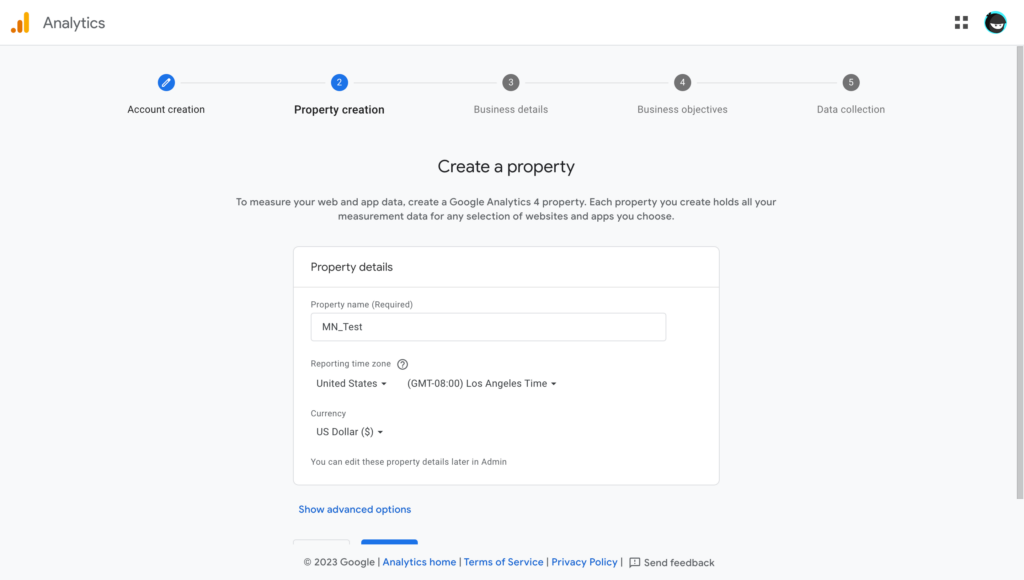
Give your property a name. Keep in mind that, under one account, you may create multiple properties. You can also set up your reporting time zone and currency here. After setting up here, click Next again.
Step 4: Give your business details
After property creation, you need to provide your business information.

Describe your business with the category your business belongs to. Since we’re doing it for WooCommerce it replicates better if we choose Shopping. However, you can select any category that’s your business suited for.
After that, select the business size. I’m choosing the lowest option here (1-10). You can decide based on your employee counts. Then, click the Next button.
Step 4: Select your business objectives
What do you want Analytics to do for your business? You want it to track your lead collection? You want to analyze your online sales?
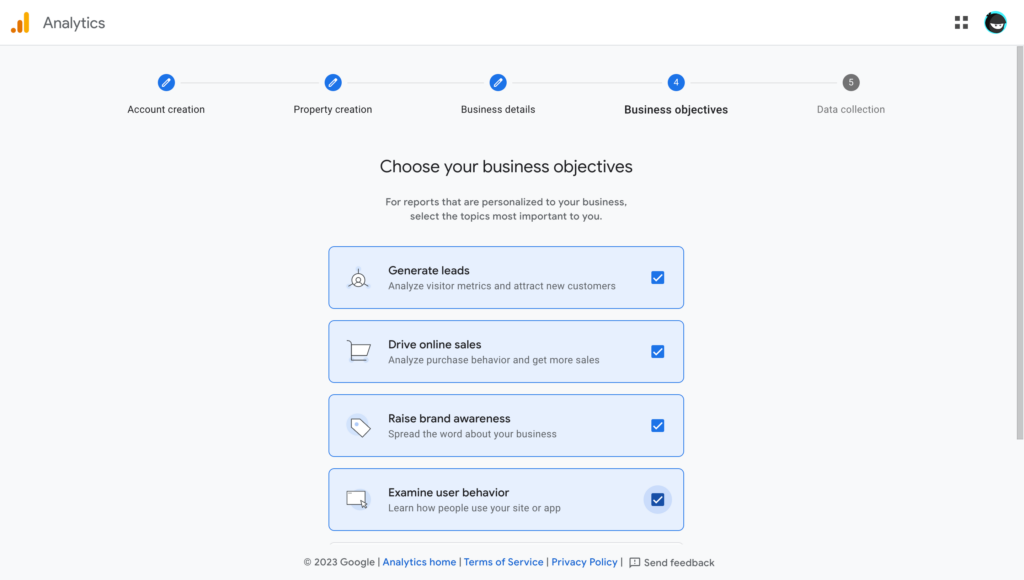
Choose the best topics you want the report for. You can select the top four or the last one (which is for baseline reports combined with multiple topics.)
After selection, press the Create button.
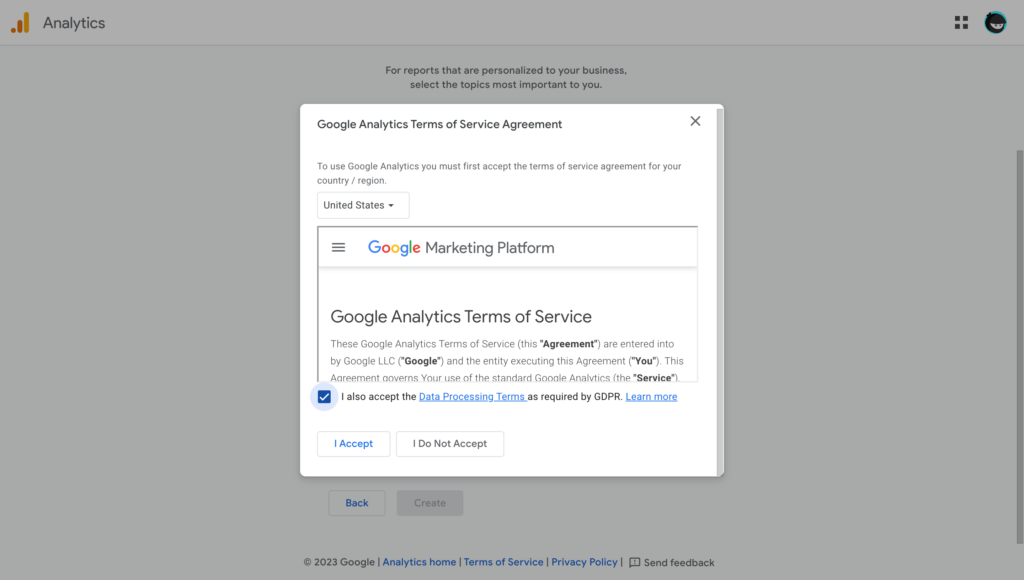
Now accept the terms of the service agreement. It will take you to the data collection stage.
Step 5: Data collection
Data collection stage is the most significant part of Google Analytics. You have to give your information correctly to get your data tracked.
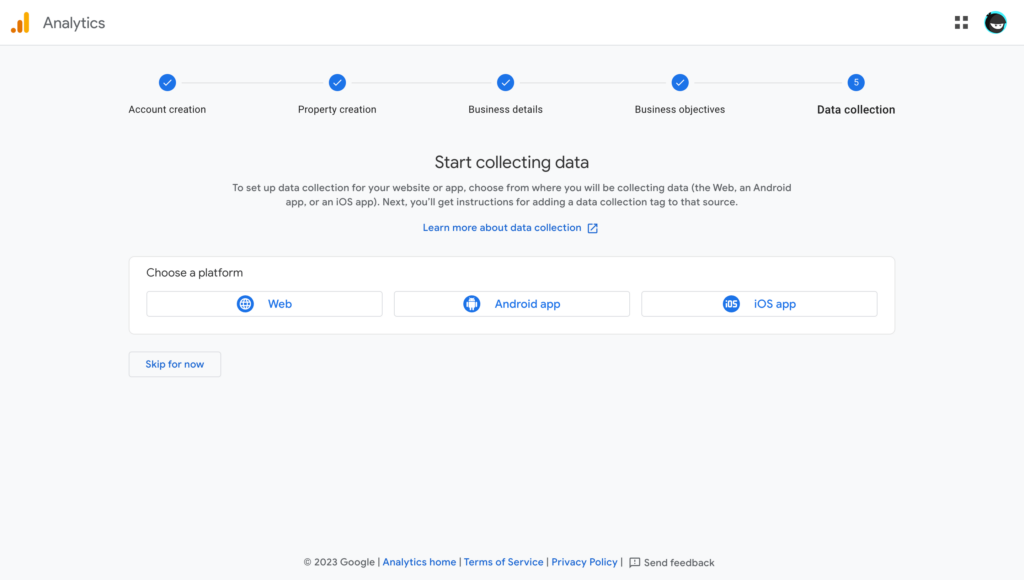
Which platform do you want to collect the data for? Web or app? If it’s for the web, then mention your website. Alternatively, you must select Android or iOS if you choose the app and give your app details.
Well, you can skip this step for now. But I’d suggest not to skip this part since you have to go back here and give your site information.
Step 6: Almost done!
You’re about to finish your Google Analytics setup.
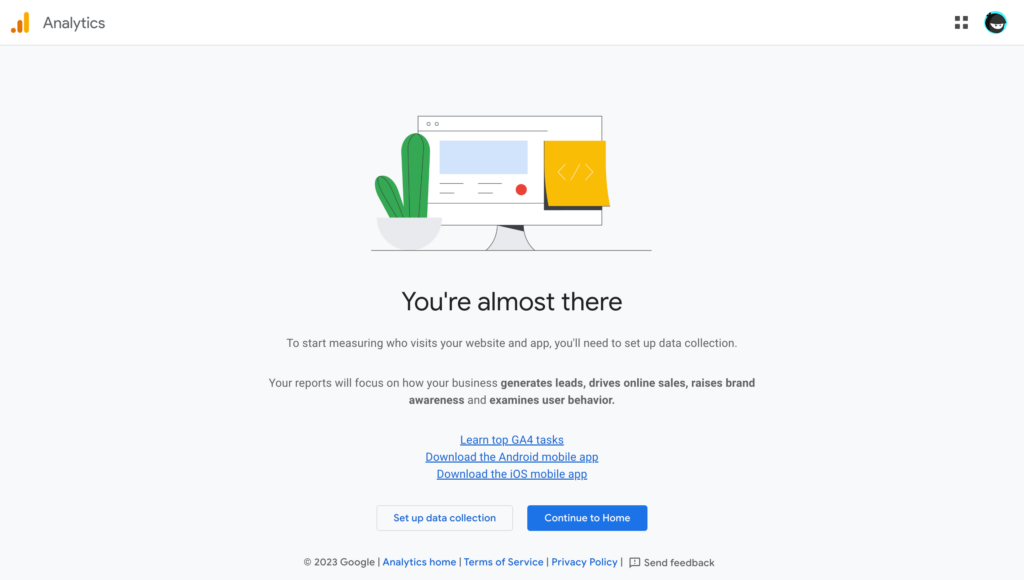
You can now either Set up data collection or Continue to Home.
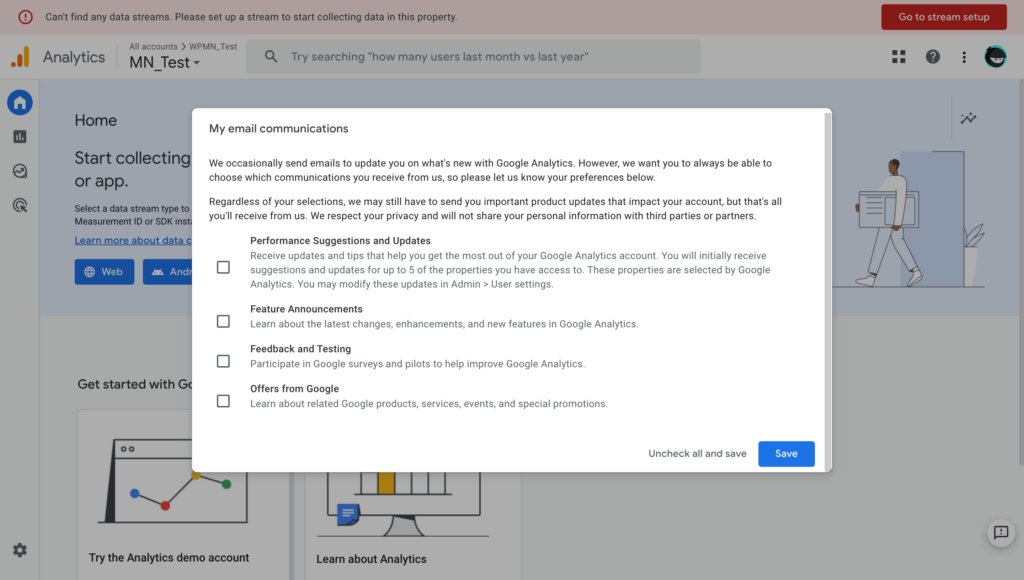
If you press the Continue to Home button, you’ll be taken to the home page, and the app will ask you for email preferences. Select whichever you want or uncheck all and click the Save button.
If you click the other button, you’ll be landed on the data collection page, the one you skipped earlier. If you haven’t skipped previously, then you can see your site here.
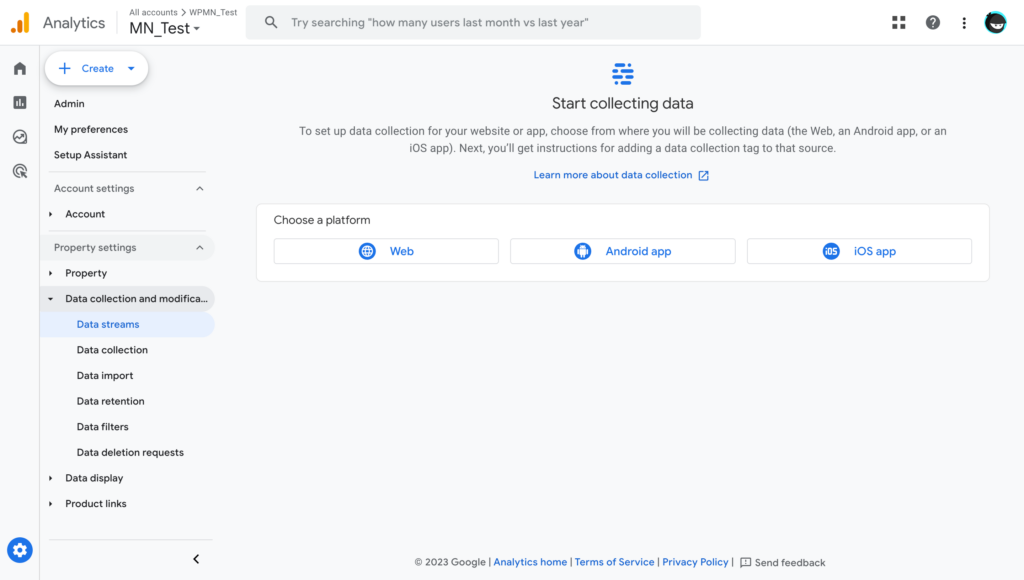
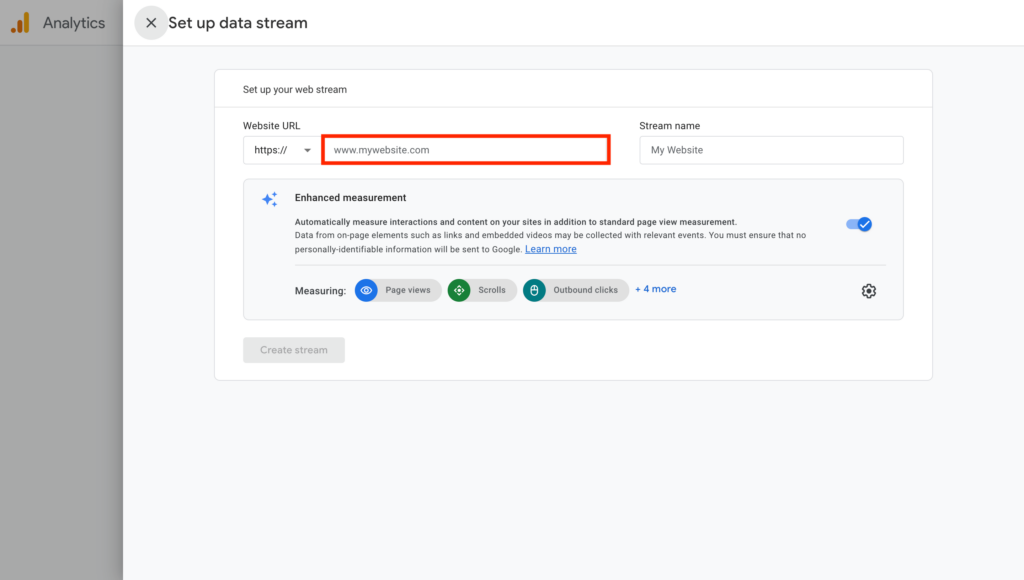
Anyways, you need to provide your site details to get all the information. Input your site address and then give it a name. Let’s press the Create stream button.
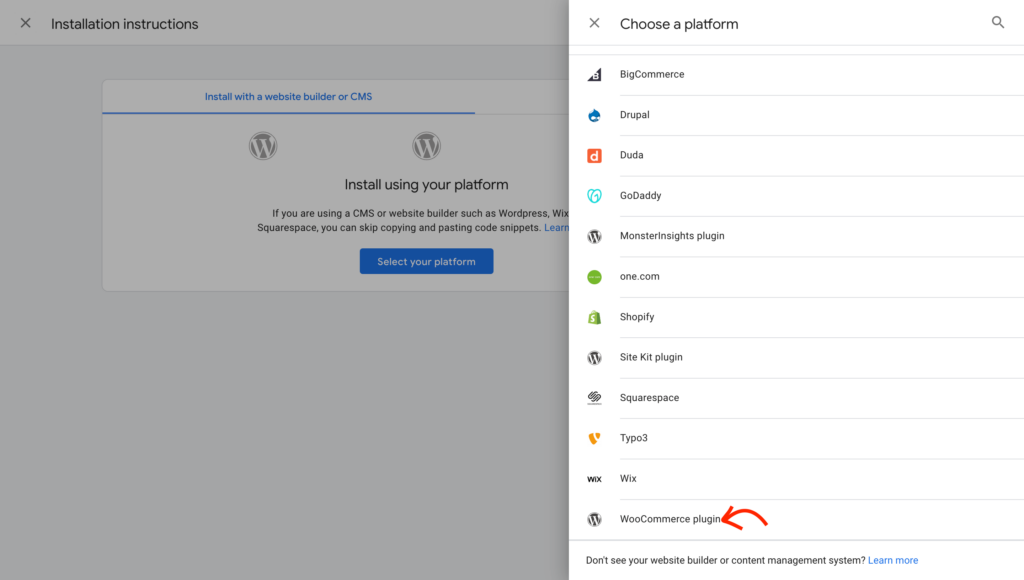
It’s time to connect the Analytics to your site. You can install Analytics on your site manually by copying and pasting codes or install it using your platform (WordPress, Squarespace, Wix.)

I’m choosing the WooCommerce plugin since we want it for WooCommerce.
Part 2: How to setup Google Analytics for WooCommerce
This is an easy task. I’ll tell you the step-by-step process of how to set up Analytics correctly for WooCommerce. Follow the steps below and do the job yourself.
Step 1: Add a new plugin
First, you have to log in to your WordPress dashboard and go to Plugins from the page menu on the left.
From there, click Add New Plugin.
Enter WooCommerce Google Analytics under Search Results on the Plugins page.
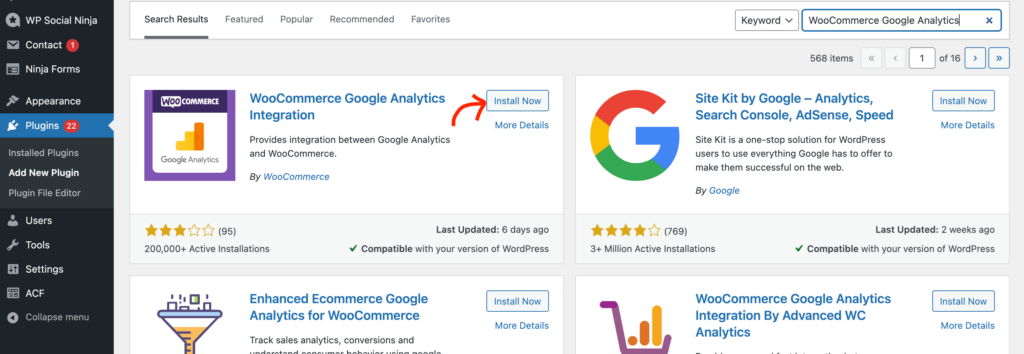
Step 2: Install and activate
Now click the Install Now button and then Activate. Your plugin will be installed first and activated after.
Step 3: Go to the Settings
After the plugin is activated, go to the Plugins page and find the WooCommerce Google Analytics Integration plugin. Click Settings under the plugin.

It will take you to the Integration page. You can also find this setting anytime under this section.
You need the box under Google Analytics Tracking ID. Provide the tag ID from your Analytics and make sure that the Use Global Site Tag is checked.
Now, click Save changes.
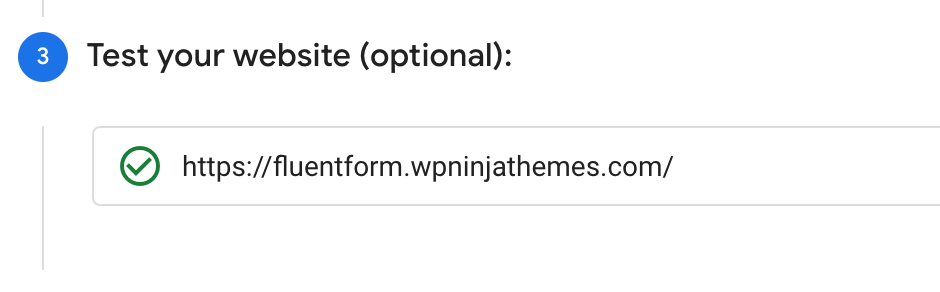
Step 4: Test your site
You can test your site from Google Analytics. After providing your tag key to the plugin and saving it, you can go back to your Analytics and test your site from the same page where you got the ID. You can see a green tick if your Analytics is connected properly.
Last words
Congratulations! Now you know how to configure Google Analytics for WooCommerce. It doesn’t seem complicated anymore. Right?
I also assure you that, if the setup goes wrong, don’t worry. You can start it over at any time.
After configuring Analytics properly, it’s necessary to check the report every day. At first, you find it not interesting since there is a low amount of data to deliver. But over time, Analytics will give you insights for understanding your store’s visitors and purchases.
That’s why it’s really important to check the tool very often after setting it up correctly.
-

15 eCommerce Content Marketing Strategies for 2026
Learn 15 proven content marketing strategies for eCommerce, from content -

How to Create eCommerce Order Bumps: Copy, Tips & Best Practices
Learn how to create order bump with copy tips and -

How to Secure a WordPress Site: Hygiene Guide for WordPress & eCommerce
Discover How to Secure a WordPress Site. Secure your eCommerce
Comments
-
I purchased fluent crm pro but I didn’t got license because of error. I’ve been waiting about 2 days after I had submitted support ticket, support chatting etc. still didn’t got any answer. would you please check my message?
-
Our support team has responded to your ticket. Our response is usually quick. In your case, it was an exception, I guess.
-
Leave a Reply
You must be logged in to post a comment.